- Welcome to the Kancolle Wiki!
- If you have any questions regarding site content, account registration, etc., please visit the KanColle Wiki Discord
Difference between revisions of "Equipment"
Jigaraphale (talk | contribs) |
Jigaraphale (talk | contribs) |
||
| (46 intermediate revisions by 2 users not shown) | |||
| Line 1: | Line 1: | ||
{{PortMechanicsPortal}} | {{PortMechanicsPortal}} | ||
'''"Equipment"''' are gears meant to be fitted on girls to enhance their combat capacity, adding several sets of [[Stats]] and unlocking certain [[Mechanic]]s. | '''"Equipment"''' are gears meant to be fitted on girls to enhance their combat capacity, adding several sets of [[Stats]] and unlocking certain [[Mechanic]]s. | ||
| − | *There are ''' | + | *There are '''552 equipent''' as of the {{GameUpdates|2025/03/23}}, with only 442 being genuinely obtainable. |
Equipment come in multiple categories & types using different icons (sometimes overlapping between categories), and bringing most mechanics, each with its own behaviors and [[Equipment/Equipability|equipability]]. | Equipment come in multiple categories & types using different icons (sometimes overlapping between categories), and bringing most mechanics, each with its own behaviors and [[Equipment/Equipability|equipability]]. | ||
| Line 37: | Line 37: | ||
|rowspan=2|{{Category:Carrier-Based Fighters}} | |rowspan=2|{{Category:Carrier-Based Fighters}} | ||
|- | |- | ||
| − | |colspan=2|{{Night Fighter | + | |colspan=2|{{Night Fighter}} [[Night Fighter]]s |
|- | |- | ||
| − | |rowspan= | + | |rowspan=3|{{Dive Bomber}} [[Dive Bomber]]s |
|colspan=2|{{Dive Bomber}} Dive Bombers | |colspan=2|{{Dive Bomber}} Dive Bombers | ||
| − | |{{Category:Carrier-based Dive Bombers}} | + | |rowspan=2|{{Category:Carrier-based Dive Bombers}} |
|- | |- | ||
| − | |colspan=2|{{ | + | |colspan=2|{{Night Dive Bomber}} [[Night Dive Bomber]]s |
| + | |- | ||
| + | |colspan=2|{{Dive Bomber}} [[Fighter-Bomber]]s | ||
|{{Category:Fighter-Bombers}} | |{{Category:Fighter-Bombers}} | ||
|- | |- | ||
| Line 52: | Line 54: | ||
|colspan=2|{{Night Torpedo Bomber}} [[Night Torpedo Bomber]]s | |colspan=2|{{Night Torpedo Bomber}} [[Night Torpedo Bomber]]s | ||
|- | |- | ||
| − | |colspan=3|{{ | + | |colspan=3|{{Jet Kikka}}{{Jet Keiun}} [[Jet-powered Fighter-Bomber]]s |
|{{Category:Jet-powered Fighter-Bombers}} | |{{Category:Jet-powered Fighter-Bombers}} | ||
|- | |- | ||
| Line 66: | Line 68: | ||
|rowspan=5|[[Land Based Bomber|Bombers]] | |rowspan=5|[[Land Based Bomber|Bombers]] | ||
|rowspan=4|[[LB Attacker|Attackers]] | |rowspan=4|[[LB Attacker|Attackers]] | ||
| − | |{{LB Attacker}} [[ | + | |{{LB Attacker}} [[LB Attacker|Attackers]] |
|rowspan=3|{{Category:Land-based Attack Aircraft}} | |rowspan=3|{{Category:Land-based Attack Aircraft}} | ||
|- | |- | ||
| Line 80: | Line 82: | ||
|{{Category:Land-based Heavy Bombers}} | |{{Category:Land-based Heavy Bombers}} | ||
|- | |- | ||
| − | |rowspan= | + | |rowspan=5|[[Interceptor|Interceptors/Fighters]] |
|colspan=2|{{LB Fighter Jet}} Fighter Jet | |colspan=2|{{LB Fighter Jet}} Fighter Jet | ||
| − | |rowspan= | + | |rowspan=4|{{Category:Land-based Fighters}} |
| + | |- | ||
| + | |colspan=2|{{LB Shinden}} Canard Fighters | ||
|- | |- | ||
|colspan=2|{{LB Fighter 2}} Army Fighters | |colspan=2|{{LB Fighter 2}} Army Fighters | ||
| Line 131: | Line 135: | ||
|colspan=2|[[Helicopter]]s | |colspan=2|[[Helicopter]]s | ||
|- | |- | ||
| − | |colspan=3|{{ | + | |colspan=3|{{Liaison}} [[Liaison Aircraft]] |
|{{Category:Anti-submarine Patrol Aircraft}} | |{{Category:Anti-submarine Patrol Aircraft}} | ||
|- | |- | ||
| Line 150: | Line 154: | ||
|rowspan=3|[[Night Plane]]s | |rowspan=3|[[Night Plane]]s | ||
|colspan=2|{{NightBomberEn}} = {{Night Torpedo Bomber}} [[Night Torpedo Bomber]]s | |colspan=2|{{NightBomberEn}} = {{Night Torpedo Bomber}} [[Night Torpedo Bomber]]s | ||
| − | |rowspan=3|{{Category:Night Aircraft}} | + | |rowspan=3|{{Category:Carrier-based Night Aircraft}} |
|- | |- | ||
| − | |colspan=2|{{NightDivebomberEn}} = {{ | + | |colspan=2|{{NightDivebomberEn}} = {{Night Dive Bomber}} [[Night Dive Bomber]]s |
|- | |- | ||
|colspan=2|{{NightFighterEn}} = {{Night Fighter Aircraft}} [[Night Fighter]]s | |colspan=2|{{NightFighterEn}} = {{Night Fighter Aircraft}} [[Night Fighter]]s | ||
| Line 168: | Line 172: | ||
|- | |- | ||
|rowspan=6|[[Main Gun]]s | |rowspan=6|[[Main Gun]]s | ||
| − | |rowspan=2|{{Light Gun}}{{Small | + | |rowspan=2|{{Light Gun}}{{Small HA Gun}} [[Small Caliber Main Gun]]s |
|{{Light Gun}} Small Caliber Main Guns | |{{Light Gun}} Small Caliber Main Guns | ||
|rowspan=2|[[Small Caliber Main Gun]]s are mostly used on smaller ships like Destroyers. | |rowspan=2|[[Small Caliber Main Gun]]s are mostly used on smaller ships like Destroyers. | ||
*They bring some accuracy bonus against [[PT Imp]]. | *They bring some accuracy bonus against [[PT Imp]]. | ||
|- | |- | ||
| − | |{{Small | + | |{{Small HA Gun}} [[:Category:Small Caliber Main High-Angle Guns|Small Caliber Main High-Angle Guns]] |
|- | |- | ||
| − | |rowspan=2|{{ | + | |rowspan=2|{{Med Gun}}{{Medium HA Gun}} [[Medium Caliber Main Gun]]s |
|{{Med Gun}} Medium Caliber Main Guns | |{{Med Gun}} Medium Caliber Main Guns | ||
|rowspan=2| [[Medium Caliber Main Gun]]s are mostly used on medium ships like Cruisers. | |rowspan=2| [[Medium Caliber Main Gun]]s are mostly used on medium ships like Cruisers. | ||
| Line 181: | Line 185: | ||
|{{Med Gun}} [[:Category:Medium Main High-Angle Guns|Medium Main High-Angle Guns]] | |{{Med Gun}} [[:Category:Medium Main High-Angle Guns|Medium Main High-Angle Guns]] | ||
|- | |- | ||
| − | |rowspan=2|{{ | + | |rowspan=2|{{Large Gun}} Large Caliber Main Guns |
|{{Large Gun}} [[Large Caliber Main Gun]]s | |{{Large Gun}} [[Large Caliber Main Gun]]s | ||
|rowspan=2|[[Large Caliber Main Gun]]s are used on Battleships. | |rowspan=2|[[Large Caliber Main Gun]]s are used on Battleships. | ||
| Line 188: | Line 192: | ||
|- | |- | ||
|rowspan=3|[[Secondary Gun]]s | |rowspan=3|[[Secondary Gun]]s | ||
| − | |rowspan=2|{{Sec Gun}}{{Sec | + | |rowspan=2|{{Sec Gun}}{{Sec HA Gun}} Secondary Guns |
|{{Sec Gun}} Secondary Guns (surface) | |{{Sec Gun}} Secondary Guns (surface) | ||
|rowspan=3|{{Category:Secondary Guns}} | |rowspan=3|{{Category:Secondary Guns}} | ||
|- | |- | ||
| − | |{{Sec | + | |{{Sec HA Gun}} [[:Category:Secondary High-Angle Guns|Secondary High-Angle Guns]] |
|- | |- | ||
| − | |colspan=2|{{Large Sec | + | |colspan=2|{{Large Sec HA Gun}} [[:Category:Large Secondary Guns|Large Secondary (High-Angle) Guns]] |
|- | |- | ||
| − | |rowspan=4|{{ | + | |rowspan=4|{{HA Gun}} [[High-Angle Gun]]s (dual-purpose) |
| − | |rowspan=2|{{Main | + | |rowspan=2|{{Main HA Gun}} [[:Category:Main High-Angle Guns|Main High-Angle Guns]] |
| − | |{{Small | + | |{{Small HA Gun}} [[:Category:Small Caliber Main High-Angle Guns|Small Caliber Main High-Angle Guns]] |
|rowspan=4|{{Category:High-angle Guns}} | |rowspan=4|{{Category:High-angle Guns}} | ||
|- | |- | ||
| − | |{{Medium | + | |{{Medium HA Gun}} [[:Category:Medium Main High-Angle Guns|Medium Main High-Angle Guns]] |
|- | |- | ||
| − | |rowspan=2|{{Sec | + | |rowspan=2|{{Sec HA Gun}} [[:Category:Secondary High-Angle Guns|Secondary High-Angle Guns]] |
| − | |{{Sec | + | |{{Sec HA Gun}} Secondary High-Angle Guns |
|- | |- | ||
| − | |{{Large Sec | + | |{{Large Sec HA Gun}} [[:Category:Large Secondary Guns|Large Secondary (High-Angle) Guns]] |
|- | |- | ||
|colspan=3|{{AA Gun}} [[Anti-Aircraft Gun]]s | |colspan=3|{{AA Gun}} [[Anti-Aircraft Gun]]s | ||
| Line 214: | Line 218: | ||
|Equipment with "torpedo" {{Torpedo}} as their primary stat. | |Equipment with "torpedo" {{Torpedo}} as their primary stat. | ||
|- | |- | ||
| − | |rowspan=3|{{ | + | |rowspan=3|{{Torpedo Weapon}} [[Torpedo]]es |
| − | |colspan=2|{{ | + | |colspan=2|{{Torpedo Weapon}} Torpedoes (surface) |
|rowspan=2|{{Category:Torpedoes}} | |rowspan=2|{{Category:Torpedoes}} | ||
|- | |- | ||
| Line 236: | Line 240: | ||
|colspan=2|{{Large Sonar}} [[Large Sonar]]s | |colspan=2|{{Large Sonar}} [[Large Sonar]]s | ||
|- | |- | ||
| − | |rowspan=3|{{ | + | |rowspan=3|{{Depth Charge}} [[Depth Charge]]s |
|colspan=2|{{DCP}} [[Depth Charge Projector]]s | |colspan=2|{{DCP}} [[Depth Charge Projector]]s | ||
|rowspan=2|{{Category:Depth Charges}} | |rowspan=2|{{Category:Depth Charges}} | ||
| Line 266: | Line 270: | ||
|colspan=3|{{Air Radar}} [[Air Radar]]s | |colspan=3|{{Air Radar}} [[Air Radar]]s | ||
|- | |- | ||
| − | |colspan=3|{{ | + | |colspan=3|{{Submarine Radar}} [[:Category:Submarine Equipment|Submarine Equipment]] |
|[[:Category:Submarine Equipment|Submarine Equipment]] are mainly used to trigger special [[Night Cut-In]]s exlusiv to submarines. | |[[:Category:Submarine Equipment|Submarine Equipment]] are mainly used to trigger special [[Night Cut-In]]s exlusiv to submarines. | ||
*Can be equipped in the [[RE]]. | *Can be equipped in the [[RE]]. | ||
|- | |- | ||
| − | |rowspan=2|{{Searchlight}} [[ | + | |rowspan=2|{{Searchlight}} [[Searchlights]] |
|colspan=2|{{Small Searchlight}} {{EquipmentLink|Searchlight|text=Small Searchlight|link_category=Small Searchlights}} | |colspan=2|{{Small Searchlight}} {{EquipmentLink|Searchlight|text=Small Searchlight|link_category=Small Searchlights}} | ||
| − | |rowspan=2|{{Category: | + | |rowspan=2|{{Category:Searchlights|tips=1}} |
|- | |- | ||
|colspan=2|{{Large Searchlight}} {{EquipmentLink|Type 96 150cm Searchlight|text=Large Searchlight|link_category=Large Searchlights}} | |colspan=2|{{Large Searchlight}} {{EquipmentLink|Type 96 150cm Searchlight|text=Large Searchlight|link_category=Large Searchlights}} | ||
|- | |- | ||
| − | |colspan=3|{{ | + | |colspan=3|{{Lookout}} {{EquipmentLink|Skilled Lookouts|Torpedo Squadron Skilled Lookouts|text=Skilled Lookouts|link_category=Surface Ship Personnel}} |
| − | |||
| − | |||
| − | |||
|{{Category:Surface Ship Personnel}} | |{{Category:Surface Ship Personnel}} | ||
|- | |- | ||
| Line 299: | Line 300: | ||
|{{Category:Supply Transport Containers}} | |{{Category:Supply Transport Containers}} | ||
|- | |- | ||
| − | |colspan=3|{{ | + | |colspan=3|{{AAFD}} [[Anti-Aircraft Fire Director]]s |
|{{Category:Anti-Aircraft Fire Directors}} | |{{Category:Anti-Aircraft Fire Directors}} | ||
|- | |- | ||
| − | |rowspan= | + | |rowspan=3|[[Shell]]s |
| − | |colspan=2|{{ | + | |colspan=2|{{AA Shell}} [[Anti-Aircraft Shell]]s |
|{{Category:Anti-Aircraft Shells}} | |{{Category:Anti-Aircraft Shells}} | ||
|- | |- | ||
| − | |colspan=2|{{ | + | |colspan=2|{{AP Shell}} [[Armor Piercing Shell]]s |
|{{Category:Armor Piercing Shells}} | |{{Category:Armor Piercing Shells}} | ||
|- | |- | ||
| − | |colspan=3|{{ | + | |colspan=2|{{Star Shell}} {{EquipmentLink|Star Shell}} |
| + | |{{Category:Star Shells}} | ||
| + | |- | ||
| + | |colspan=3|{{Anti-Ground Rocket}} [[Anti-Ground Rocket]]s | ||
|{{Category:Anti-Ground Artilleries}} | |{{Category:Anti-Ground Artilleries}} | ||
|- | |- | ||
| − | |rowspan=2|{{ | + | |rowspan=2|{{Extra Armor}} [[Extra Armor]]s |
|colspan=2|{{Medium Armor}} [[Medium Extra Armor]]s | |colspan=2|{{Medium Armor}} [[Medium Extra Armor]]s | ||
|rowspan=2|{{Category:Extra Armor}} | |rowspan=2|{{Category:Extra Armor}} | ||
| Line 335: | Line 339: | ||
|colspan=2|{{IconText|{{Aviation Personnel}}|SDP}} {{Equipment/Link|Skilled Deck Personnel|Skilled Deck Personnel + Aviation Maintenance Hands|text=SDP}} | |colspan=2|{{IconText|{{Aviation Personnel}}|SDP}} {{Equipment/Link|Skilled Deck Personnel|Skilled Deck Personnel + Aviation Maintenance Hands|text=SDP}} | ||
|- | |- | ||
| − | |colspan=3|{{ | + | |colspan=3|{{Command Facility}} [[Command Facilities]] |
|{{Category:Command Facilities}} | |{{Category:Command Facilities}} | ||
|- | |- | ||
| Line 345: | Line 349: | ||
|{{Category:Barrage Balloons}} | |{{Category:Barrage Balloons}} | ||
|- | |- | ||
| − | |colspan=3|{{ | + | |colspan=3|{{Transportation Material}} {{EquipmentLink|Saiun (Disassembled for Transport)}} |
|A removed legacy equipment. | |A removed legacy equipment. | ||
|- | |- | ||
| Line 352: | Line 356: | ||
|{{Category:Supplies}} | |{{Category:Supplies}} | ||
|- | |- | ||
| − | |colspan=2|{{ | + | |colspan=2|{{Emergency Repair}} {{EquipmentLink|Emergency Repair Personnel|Emergency Repair Goddess|text=Emergency Repair Personnel|link_category=Emergency Repair Personnel}} |
|{{Category:Emergency Repair Personnel}} | |{{Category:Emergency Repair Personnel}} | ||
|- | |- | ||
| Line 372: | Line 376: | ||
*{{WildCard}} = WildCard | *{{WildCard}} = WildCard | ||
*{{ZuiunPlane}} = [[:Category:Zuiun|Zuiuns]] | *{{ZuiunPlane}} = [[:Category:Zuiun|Zuiuns]] | ||
| − | *{{AnyBomber}} = Either {{ | + | *{{AnyBomber}} = Either {{Dive Bomber}} or {{Torpedo Bomber}} |
*[[Night Plane]]s: | *[[Night Plane]]s: | ||
**{{NightBomberEn}} = {{Night Torpedo Bomber}} [[Night Torpedo Bomber]]s | **{{NightBomberEn}} = {{Night Torpedo Bomber}} [[Night Torpedo Bomber]]s | ||
| − | **{{NightDivebomberEn}} = {{ | + | **{{NightDivebomberEn}} = {{Dive Bomber}} {{Equipment/Link|Suisei Model 12 (w/ Type 31 Photoelectric Fuze Bombs)}} |
**{{NightFighterEn}} = {{Night Fighter Aircraft}} [[Night Fighter]]s | **{{NightFighterEn}} = {{Night Fighter Aircraft}} [[Night Fighter]]s | ||
* Depreciated Icon: | * Depreciated Icon: | ||
| Line 402: | Line 406: | ||
|rowspan=3|Main Gun | |rowspan=3|Main Gun | ||
|{{Light Gun}}Small Caliber | |{{Light Gun}}Small Caliber | ||
| − | |[[12.7cm Twin Gun Mount Model B Kai 2]]{{·}}[[12.7cm Twin High-angle Gun Mount (Late Model)]]{{·}}'''[[10cm Twin High-angle Gun Mount + Anti-Aircraft Fire Director]]'''{{·}}[[12.7cm Twin Gun Mount Model C Kai 2]]{{·}}[[12.7cm Twin Gun Mount Model D Kai 2]]{{·}}'''[[130mm B-13 Twin Gun Mount]]'''{{·}}'''[[QF 4.7inch Gun Mk.XII Kai]]'''{{·}}[[12.7cm Single High-angle Gun Mount (Late Model)]]{{·}}'''[[5inch Single Gun Mount Mk.30]]'''{{·}}'''[[5inch Single Gun Mount Mk.30 Kai]]'''{{·}}[[12.7cm Single High-angle Gun Mount Kai 2]]{{·}}[[Locally Modified 12.7cm Twin High-angle Gun Mount]]{{·}}[[Locally Modified 10cm Twin High-angle Gun Mount]]{{·}}[[12.7cm Twin Gun Mount Model A Kai 2]]{{·}}'''[[12cm Single High-angle Gun Mount Model E Kai]]'''{{·}}'''[[13.8cm Twin Gun Mount]]'''{{·}}'''[[13.8cm Twin Gun Mount Kai]]''' | + | |[[12.7cm Twin Gun Mount Model B Kai 2]]{{·}}[[12.7cm Twin High-angle Gun Mount (Late Model)]]{{·}}'''[[10cm Twin High-angle Gun Mount + Anti-Aircraft Fire Director]]'''{{·}}[[12.7cm Twin Gun Mount Model C Kai 2]]{{·}}[[12.7cm Twin Gun Mount Model D Kai 2]]{{·}}'''[[130mm B-13 Twin Gun Mount]]'''{{·}}'''[[QF 4.7inch Gun Mk.XII Kai]]'''{{·}}[[12.7cm Single High-angle Gun Mount (Late Model)]]{{·}}'''[[5inch Single Gun Mount Mk.30]]'''{{·}}'''[[5inch Single Gun Mount Mk.30 Kai]]'''{{·}}[[12.7cm Single High-angle Gun Mount Kai 2]]{{·}}[[Locally Modified 12.7cm Twin High-angle Gun Mount]]{{·}}[[Locally Modified 10cm Twin High-angle Gun Mount]]{{·}}[[12.7cm Twin Gun Mount Model A Kai 2]]{{·}}'''[[12cm Single High-angle Gun Mount Model E Kai]]'''{{·}}'''[[13.8cm Twin Gun Mount]]'''{{·}}'''[[13.8cm Twin Gun Mount Kai]]'''{{·}}[[10cm Twin High-angle Gun Mount Kai]] |
|- | |- | ||
|{{Med Gun}}Medium Caliber | |{{Med Gun}}Medium Caliber | ||
| − | |[[20.3cm (No.3) Twin Gun Mount]]{{·}}[[14cm Twin Gun Mount]]{{·}}'''[[SKC34 20.3cm Twin Gun Mount]]'''{{·}}[[203mm/53 Twin Gun Mount]]{{·}}'''[[Bofors 15.2cm Twin Gun Mount Model 1930]]'''{{·}}'''[[14cm Twin Gun Mount Kai]]'''{{·}}'''[[152mm/55 Triple Rapid Fire Gun Mount]]'''{{·}}'''[[152mm/55 Triple Rapid Fire Gun Mount Kai]]'''{{·}}'''[[6inch Mk.XXIII Triple Gun Mount]]'''{{·}}'''[[6inch Triple Rapid Fire Gun Mount Mk.16]]'''{{·}}'''[[6inch Triple Rapid Fire Gun Mount Mk.16 mod.2]]'''{{·}}'''[[6inch Twin Rapid Fire Gun Mount Mk.XXI]]'''{{·}}'''[[Bofors 15cm Twin Rapid Fire Gun Mount Mk.9 Kai + Single Rapid Fire Gun Mount Mk.10 Kai Model 1938]]'''{{·}}'''[[Bofors 15cm Twin Rapid Fire Gun Mount Mk.9 Model 1938]]'''{{·}}'''[[5inch Twin Dual-purpose Gun Mount (Concentrated Deployment)]]'''{{·}}[[15.2cm Twin Gun Mount Kai]]{{·}}'''[[8inch Triple Gun Mount Mk.9]]'''{{·}}'''[[15.2cm Triple Main Gun Mount]]''' | + | |[[20.3cm (No.3) Twin Gun Mount]]{{·}}[[14cm Twin Gun Mount]]{{·}}'''[[SKC34 20.3cm Twin Gun Mount]]'''{{·}}[[203mm/53 Twin Gun Mount]]{{·}}'''[[Bofors 15.2cm Twin Gun Mount Model 1930]]'''{{·}}'''[[14cm Twin Gun Mount Kai]]'''{{·}}'''[[152mm/55 Triple Rapid Fire Gun Mount]]'''{{·}}'''[[152mm/55 Triple Rapid Fire Gun Mount Kai]]'''{{·}}'''[[6inch Mk.XXIII Triple Gun Mount]]'''{{·}}'''[[6inch Triple Rapid Fire Gun Mount Mk.16]]'''{{·}}'''[[6inch Triple Rapid Fire Gun Mount Mk.16 mod.2]]'''{{·}}'''[[6inch Twin Rapid Fire Gun Mount Mk.XXI]]'''{{·}}'''[[Bofors 15cm Twin Rapid Fire Gun Mount Mk.9 Kai + Single Rapid Fire Gun Mount Mk.10 Kai Model 1938]]'''{{·}}'''[[Bofors 15cm Twin Rapid Fire Gun Mount Mk.9 Model 1938]]'''{{·}}'''[[5inch Twin Dual-purpose Gun Mount (Concentrated Deployment)]]'''{{·}}[[15.2cm Twin Gun Mount Kai]]{{·}}'''[[8inch Triple Gun Mount Mk.9]]'''{{·}}'''[[15.2cm Triple Main Gun Mount]]'''{{·}}'''[[18cm/57 Triple Main Gun Mount]]''' |
|- | |- | ||
|{{Large Gun}}Large Caliber | |{{Large Gun}}Large Caliber | ||
| Line 411: | Line 415: | ||
|- | |- | ||
|colspan=2|{{Sec Gun}}Secondary Gun | |colspan=2|{{Sec Gun}}Secondary Gun | ||
| − | |[[10cm Twin High-angle Gun Mount (Carriage)]]{{·}}[[15cm Twin Secondary Gun Mount]]{{·}}'''[[10.5cm Twin Gun Mount]]'''{{·}}'''[[90mm Single High-angle Gun Mount]]'''{{·}}'''[[OTO 152mm Triple Rapid Fire Gun Mount]]'''{{·}}'''[[5inch Twin Gun Mount Mk.28 mod.2]]'''{{·}}'''[[15.2cm Triple Gun Mount]]'''{{·}}[[10cm Twin High-angle Gun Mount Kai + Additional Machine Guns]]{{·}}'''[[5inch Single High-angle Gun Mount Battery]]'''{{·}}'''[[65mm/64 Single Rapid Fire Gun Mount Kai]]''' | + | |[[10cm Twin High-angle Gun Mount (Carriage)]]{{·}}[[15cm Twin Secondary Gun Mount]]{{·}}'''[[10.5cm Twin Gun Mount]]'''{{·}}'''[[90mm Single High-angle Gun Mount]]'''{{·}}'''[[OTO 152mm Triple Rapid Fire Gun Mount]]'''{{·}}'''[[5inch Twin Gun Mount Mk.28 mod.2]]'''{{·}}'''[[15.2cm Triple Gun Mount]]'''{{·}}[[10cm Twin High-angle Gun Mount Kai + Additional Machine Guns]]{{·}}'''[[5inch Single High-angle Gun Mount Battery]]'''{{·}}'''[[65mm/64 Single Rapid Fire Gun Mount Kai]]'''{{·}}'''[[10cm/56 Single High-angle Gun Mount (Concentrated Deployment)]]''' |
|- | |- | ||
|colspan=2|{{AA Gun}}Anti-Air Gun | |colspan=2|{{AA Gun}}Anti-Air Gun | ||
| − | |[[2cm Flakvierling 38]]{{·}}[[3.7cm FlaK M42]]{{·}}[[Bi Type 40mm Twin Autocannon Mount]]{{·}}[[25mm Triple Autocannon Mount | + | |[[2cm Flakvierling 38]]{{·}}[[3.7cm FlaK M42]]{{·}}[[Bi Type 40mm Twin Autocannon Mount]]{{·}}[[25mm Triple Autocannon Mount Concentrated Deployment]]{{·}}'''[[Bofors 40mm Quadruple Autocannon Mount]]'''{{·}}[[QF 2-pounder Octuple Pom-pom Gun Mount]]{{·}}[[25mm Anti-aircraft Autocannon Mount & Machine Guns]] |
|- | |- | ||
|colspan=2|{{AAFD}} AA Fire Director | |colspan=2|{{AAFD}} AA Fire Director | ||
|[[Type 94 Anti-Aircraft Fire Director]] | |[[Type 94 Anti-Aircraft Fire Director]] | ||
|- | |- | ||
| − | |colspan=2|{{ | + | |colspan=2|{{Torpedo Weapon}}Torpedoes |
|[[61cm Quintuple (Oxygen) Torpedo Mount]]{{·}}[[61cm Triple (Oxygen) Torpedo Mount]]{{·}}'''[[Prototype FaT Type 95 Oxygen Torpedo Kai]]'''{{·}}[[53cm Twin Torpedo Mount]]{{·}}'''[[533mm Triple Torpedo Mount]]'''{{·}}'''[[533mm Quintuple Torpedo Mount (Initial Model)]]'''{{·}}[[21inch 4-tube Bow Torpedo Launcher (Late Model)]] | |[[61cm Quintuple (Oxygen) Torpedo Mount]]{{·}}[[61cm Triple (Oxygen) Torpedo Mount]]{{·}}'''[[Prototype FaT Type 95 Oxygen Torpedo Kai]]'''{{·}}[[53cm Twin Torpedo Mount]]{{·}}'''[[533mm Triple Torpedo Mount]]'''{{·}}'''[[533mm Quintuple Torpedo Mount (Initial Model)]]'''{{·}}[[21inch 4-tube Bow Torpedo Launcher (Late Model)]] | ||
|- | |- | ||
| − | |rowspan= | + | |rowspan=4|Carrier-based Plane |
|{{Fighter}}Fighters | |{{Fighter}}Fighters | ||
|[[Type 0 Fighter Model 21 (Skilled)]]{{·}}[[Zero Fighter Model 52C (601 Air Group)]]{{·}}'''[[Bf 109T Kai]]'''{{·}}'''[[Fw 190T Kai]]'''{{·}}'''[[Type 96 Fighter Kai]]'''{{·}}'''[[Re.2001 OR Kai]]'''{{·}}[[F4F-4]]{{·}}'''[[F6F-3]]'''{{·}}'''[[F6F-3N]]'''{{·}}'''[[Corsair Mk.II]]''' | |[[Type 0 Fighter Model 21 (Skilled)]]{{·}}[[Zero Fighter Model 52C (601 Air Group)]]{{·}}'''[[Bf 109T Kai]]'''{{·}}'''[[Fw 190T Kai]]'''{{·}}'''[[Type 96 Fighter Kai]]'''{{·}}'''[[Re.2001 OR Kai]]'''{{·}}[[F4F-4]]{{·}}'''[[F6F-3]]'''{{·}}'''[[F6F-3N]]'''{{·}}'''[[Corsair Mk.II]]''' | ||
| Line 430: | Line 434: | ||
|- | |- | ||
|{{Dive Bomber}}Dive Bombers | |{{Dive Bomber}}Dive Bombers | ||
| − | |'''[[Ju 87C Kai]]'''{{·}}[[Type 99 Dive Bomber (Skilled)]]{{·}}[[Type 99 Dive Bomber (Egusa Squadron)]]{{·}}[[Suisei (601 Air Group)]]{{·}}'''[[F4U-1D]]'''{{·}}[[Skua]]{{·}}'''[[FM-2]]'''{{·}}[[Suisei Model 22 (634 Air Group)]]{{·}}'''[[Ju 87C Kai 2 (w/ KMX)]]'''{{·}}[[Type 0 Fighter Model 64 (Two-seat w/ KMX)]]{{·}}'''[[SBD-5]]''' | + | |'''[[Ju 87C Kai]]'''{{·}}[[Type 99 Dive Bomber (Skilled)]]{{·}}[[Type 99 Dive Bomber (Egusa Squadron)]]{{·}}[[Suisei (601 Air Group)]]{{·}}'''[[F4U-1D]]'''{{·}}[[Skua]]{{·}}'''[[FM-2]]'''{{·}}[[Suisei Model 22 (634 Air Group)]]{{·}}'''[[Ju 87C Kai 2 (w/ KMX)]]'''{{·}}[[Type 0 Fighter Model 64 (Two-seat w/ KMX)]]{{·}}'''[[SBD-5]]'''{{·}}'''[[SBD VB-2 (Bomber Squadron)]]''' |
| + | |- | ||
| + | |{{Carrier Recon}}Reconnaissance | ||
| + | |'''[[SBD VS-2 (Reconnaissance Squadron)]]''' | ||
|- | |- | ||
|rowspan=4|Seaplane | |rowspan=4|Seaplane | ||
| Line 453: | Line 460: | ||
|- | |- | ||
|Large | |Large | ||
| − | |[[Type 21 Air Radar Kai]]{{·}}'''[[FuMO25 Radar]]'''{{·}}[[15m Duplex Rangefinder + Type 21 Radar Kai 2]]{{·}}'''[[SK Radar]]''' | + | |[[Type 21 Air Radar Kai]]{{·}}'''[[FuMO25 Radar]]'''{{·}}[[15m Duplex Rangefinder + Type 21 Radar Kai 2]]{{·}}'''[[SK Radar]]'''{{·}}[[Type 42 Air Radar Kai 2]] |
|- | |- | ||
| − | |{{ | + | |{{Submarine Radar}}Submarine |
|'''[[Submarine Radar & Passive Radiolocator (E27)]]''' | |'''[[Submarine Radar & Passive Radiolocator (E27)]]''' | ||
|- | |- | ||
| − | |colspan=2|{{ | + | |colspan=2|{{Depth Charge}}Depth Charge |
|[[Type 2 12cm Mortar Kai]] | |[[Type 2 12cm Mortar Kai]] | ||
|- | |- | ||
| Line 484: | Line 491: | ||
|rowspan=3|Main Gun | |rowspan=3|Main Gun | ||
|{{Light Gun}}Small Caliber | |{{Light Gun}}Small Caliber | ||
| − | |[[12.7cm Twin Gun Mount Model B Kai 2]]{{·}}[[12.7cm Twin High-angle Gun Mount (Late Model)]]{{·}}'''[[12.7cm Twin Gun Mount Model C Kai 2]]'''<ref>Obtained at +3</ref>{{·}}[[12.7cm Twin Gun Mount Model D Kai 2]]{{·}}[[12.7cm Single High-angle Gun Mount (Late Model)]]{{·}}'''[[12.7cm Twin Gun Mount Model A Kai 3 (Wartime Modification) + Anti-Aircraft Fire Director]]'''{{·}}[[12.7cm Twin Gun Mount Model B Kai 4 (Wartime Modification) + Anti-Aircraft Fire Director]]{{·}}[[12.7cm Twin High-angle Gun Mount Kai 2]]{{·}}[[5inch Single Gun Mount Mk.30 Kai]]{{·}}[[Locally Modified 12.7cm Twin High-angle Gun Mount]]{{·}}[[Locally Modified 10cm Twin High-angle Gun Mount]]{{·}}[[Prototype Long-barrel 12.7cm Twin Gun Mount Model A Kai 4]]{{·}}'''[[12.7cm Twin Gun Mount Model A Kai 2]]'''{{·}}'''[[12.7cm Twin Gun Mount Model C Kai 3]]'''{{·}}[[12.7cm Twin Gun Mount Model D Kai 3]]{{·}}[[12.7cm Twin Gun Mount Model C Kai 3 H]]{{·}}[[12cm Single High-angle Gun Mount Model E Kai]]{{·}}[[10cm Twin High-angle Gun Mount Kai + Anti-Aircraft Fire Director Kai]]{{·}}'''[[13.8cm Twin Gun Mount]]''' | + | |[[12.7cm Twin Gun Mount Model B Kai 2]]{{·}}[[12.7cm Twin High-angle Gun Mount (Late Model)]]{{·}}'''[[12.7cm Twin Gun Mount Model C Kai 2]]'''<ref>Obtained at +3</ref>{{·}}[[12.7cm Twin Gun Mount Model D Kai 2]]{{·}}[[12.7cm Single High-angle Gun Mount (Late Model)]]{{·}}'''[[12.7cm Twin Gun Mount Model A Kai 3 (Wartime Modification) + Anti-Aircraft Fire Director]]'''{{·}}[[12.7cm Twin Gun Mount Model B Kai 4 (Wartime Modification) + Anti-Aircraft Fire Director]]{{·}}[[12.7cm Twin High-angle Gun Mount Kai 2]]{{·}}[[5inch Single Gun Mount Mk.30 Kai]]{{·}}[[Locally Modified 12.7cm Twin High-angle Gun Mount]]{{·}}[[Locally Modified 10cm Twin High-angle Gun Mount]]{{·}}[[Prototype Long-barrel 12.7cm Twin Gun Mount Model A Kai 4]]{{·}}'''[[12.7cm Twin Gun Mount Model A Kai 2]]'''{{·}}'''[[12.7cm Twin Gun Mount Model C Kai 3]]'''{{·}}[[12.7cm Twin Gun Mount Model D Kai 3]]{{·}}[[12.7cm Twin Gun Mount Model C Kai 3 H]]{{·}}[[12cm Single High-angle Gun Mount Model E Kai]]{{·}}[[10cm Twin High-angle Gun Mount Kai + Anti-Aircraft Fire Director Kai]]{{·}}'''[[13.8cm Twin Gun Mount]]'''{{·}}[[10cm Twin High-angle Gun Mount Kai]] |
|- | |- | ||
|{{Med Gun}}Medium Caliber | |{{Med Gun}}Medium Caliber | ||
| Line 490: | Line 497: | ||
|- | |- | ||
|{{Large Gun}}Large Caliber | |{{Large Gun}}Large Caliber | ||
| − | |[[Prototype 35.6cm Triple Gun Mount]]{{·}}[[Prototype 46cm Twin Gun Mount]]{{·}}[[41cm Triple Gun Mount Kai 2]]{{·}}[[41cm Twin Gun Mount Kai 2]]{{·}}[[35.6cm Twin Gun Mount Kai 2]]{{·}}[[Prototype 51cm Triple Gun Mount]]{{·}}[[46cm Triple Gun Mount Kai]]{{·}}[[35.6cm Twin Gun Mount Kai 3 (Dazzle Camouflage)]]{{·}}[[35.6cm Twin Gun Mount Kai 4]]{{·}}'''[[38cm Quadruple Gun Mount]]'''{{·}}[[38cm Quadruple Gun Mount Kai Deux]] | + | |[[Prototype 35.6cm Triple Gun Mount]]{{·}}[[Prototype 46cm Twin Gun Mount]]{{·}}[[41cm Triple Gun Mount Kai 2]]{{·}}[[41cm Twin Gun Mount Kai 2]]{{·}}[[35.6cm Twin Gun Mount Kai 2]]{{·}}[[Prototype 51cm Triple Gun Mount]]{{·}}[[46cm Triple Gun Mount Kai]]{{·}}[[35.6cm Twin Gun Mount Kai 3 (Dazzle Camouflage)]]{{·}}[[35.6cm Twin Gun Mount Kai 4]]{{·}}'''[[38cm Quadruple Gun Mount]]'''{{·}}[[38cm Quadruple Gun Mount Kai Deux]]{{·}}[[35.6cm Twin Gun Mount Kai 3 C]] |
|- | |- | ||
|colspan=2|{{Sec Gun}}Secondary Gun | |colspan=2|{{Sec Gun}}Secondary Gun | ||
| Line 496: | Line 503: | ||
|- | |- | ||
|colspan=2|{{AA Gun}}Anti-Air Gun | |colspan=2|{{AA Gun}}Anti-Air Gun | ||
| − | |[[25mm Triple Autocannon Mount | + | |[[25mm Triple Autocannon Mount Concentrated Deployment]]{{·}}[[12cm 30-tube Rocket Launcher Kai 2]]{{·}}[[25mm Anti-aircraft Autocannon Mount & Machine Guns]] |
|- | |- | ||
|colspan=2|{{AAFD}}AA Fire Director | |colspan=2|{{AAFD}}AA Fire Director | ||
|'''[[Type 94 Anti-Aircraft Fire Director]]''' | |'''[[Type 94 Anti-Aircraft Fire Director]]''' | ||
|- | |- | ||
| − | |rowspan=3|{{ | + | |rowspan=3|{{Torpedo Weapon}}Torpedoes |
|Surface | |Surface | ||
|[[Prototype 61cm Sextuple (Oxygen) Torpedo Mount]]{{·}}[[61cm Triple (Oxygen) Torpedo Mount]]{{·}}'''[[61cm Triple (Oxygen) Torpedo Mount Late Model]]'''{{·}}[[61cm Quadruple (Oxygen) Torpedo Mount Late Model]]{{·}}[[533mm Quintuple Torpedo Mount (Late Model)]] | |[[Prototype 61cm Sextuple (Oxygen) Torpedo Mount]]{{·}}[[61cm Triple (Oxygen) Torpedo Mount]]{{·}}'''[[61cm Triple (Oxygen) Torpedo Mount Late Model]]'''{{·}}[[61cm Quadruple (Oxygen) Torpedo Mount Late Model]]{{·}}[[533mm Quintuple Torpedo Mount (Late Model)]] | ||
| Line 524: | Line 531: | ||
|[[Prototype Keiun (Carrier-based Reconnaissance Model)]] | |[[Prototype Keiun (Carrier-based Reconnaissance Model)]] | ||
|- | |- | ||
| − | |{{ | + | |{{Jet Kikka}}Jet-Powered |
|'''[[Kikka Kai]]''' | |'''[[Kikka Kai]]''' | ||
|- | |- | ||
| Line 536: | Line 543: | ||
|rowspan=4|Seaplane | |rowspan=4|Seaplane | ||
|{{Seaplane}}Reconnaisance | |{{Seaplane}}Reconnaisance | ||
| − | |[[Ar196 Kai]]{{·}}[[Shiun]]{{·}}[[Ro.43 Reconnaissance Seaplane]]{{·}}'''[[OS2U]]'''{{·}}[[S9 Osprey]]{{·}}'''[[Type 0 Reconnaissance Seaplane Model 11B]]'''{{·}}[[Type 0 Reconnaissance Seaplane Model 11B (Skilled)]]{{·}}[[Type 0 Reconnaissance Seaplane Model 11B Kai (Night Recon)]]{{·}}[[Loire 130M]]{{·}}[[Type 0 Reconnaissance Seaplane Model 11A Kai 2]] | + | |[[Ar196 Kai]]{{·}}[[Shiun]]{{·}}[[Ro.43 Reconnaissance Seaplane]]{{·}}'''[[OS2U]]'''{{·}}[[S9 Osprey]]{{·}}'''[[Type 0 Reconnaissance Seaplane Model 11B]]'''{{·}}[[Type 0 Reconnaissance Seaplane Model 11B (Skilled)]]{{·}}[[Type 0 Reconnaissance Seaplane Model 11B Kai (Night Recon)]]{{·}}[[Loire 130M]]{{·}}[[Type 0 Reconnaissance Seaplane Model 11A Kai 2]]{{·}}[[Type 0 Small Reconnaissance Seaplane]] |
|- | |- | ||
|{{Seaplane}}Bomber | |{{Seaplane}}Bomber | ||
| Line 557: | Line 564: | ||
|'''[[SK Radar]]'''{{·}}[[Type 21 Air Radar Kai 2]]{{·}}[[15m Duplex Rangefinder + Type 21 Radar Kai 2]]{{·}}[[15m Duplex Rangefinder Kai + Type 21 Radar Kai 2 + Skilled Fire Direction Center]]{{·}}[[Type 42 Air Radar Kai 2]] | |'''[[SK Radar]]'''{{·}}[[Type 21 Air Radar Kai 2]]{{·}}[[15m Duplex Rangefinder + Type 21 Radar Kai 2]]{{·}}[[15m Duplex Rangefinder Kai + Type 21 Radar Kai 2 + Skilled Fire Direction Center]]{{·}}[[Type 42 Air Radar Kai 2]] | ||
|- | |- | ||
| − | |colspan=2|{{ | + | |colspan=2|{{Depth Charge}}Depth Charge |
| − | |[[Type 2 Depth Charge]]{{·}}'''[[Type 2 12cm Mortar Kai]]'''{{·}}[[Lightweight ASW Torpedo (Initial Test Model)]]{{·}}[[RUR-4A Weapon Alpha Kai]]{{·}}[[Hedgehog (Initial Model)]]{{·}}[[Mk.32 ASW Torpedo (Mk.2 Thrower)]] | + | |[[Type 2 Depth Charge]]{{·}}'''[[Type 2 12cm Mortar Kai]]'''{{·}}[[Type 3 Depth Charge Projector Concentrated Deployment]]{{·}}[[Lightweight ASW Torpedo (Initial Test Model)]]{{·}}[[RUR-4A Weapon Alpha Kai]]{{·}}[[Hedgehog (Initial Model)]]{{·}}[[Mk.32 ASW Torpedo (Mk.2 Thrower)]] |
|- | |- | ||
|colspan=2|{{Sonar}}SONAR | |colspan=2|{{Sonar}}SONAR | ||
| Line 566: | Line 573: | ||
|[[Type 1 Armor Piercing Shell]]{{·}}[[Type 3 Shell Kai]] | |[[Type 1 Armor Piercing Shell]]{{·}}[[Type 3 Shell Kai]] | ||
|- | |- | ||
| − | |colspan=2|{{ | + | |colspan=2|{{Landing Craft}}{{Amphibious Tank}}Landing Craft |
|[[Special Type 2 Amphibious Tank]]{{·}}[[Toku Daihatsu Landing Craft]]{{·}}[[Soukoutei (Armored Boat Class)]] | |[[Special Type 2 Amphibious Tank]]{{·}}[[Toku Daihatsu Landing Craft]]{{·}}[[Soukoutei (Armored Boat Class)]] | ||
|- | |- | ||
| Line 590: | Line 597: | ||
|rowspan=3|Main Gun | |rowspan=3|Main Gun | ||
|{{Light Gun}}Small Caliber | |{{Light Gun}}Small Caliber | ||
| − | |[[12.7cm Twin Gun Mount Model B Kai 2]]{{·}}[[10cm Twin High-angle Gun Mount + Anti-Aircraft Fire Director]]{{·}}[[12.7cm Twin Gun Mount Model C Kai 2]]{{·}}[[12.7cm Twin Gun Mount Model D Kai 2]]{{·}}'''[[12cm Single Gun Mount Kai 2]]'''{{·}}[[12.7cm Twin Gun Mount Model A Kai 2]]{{·}}'''[[120mm/50 Twin Gun Mount mod.1936]]'''{{·}}[[Prototype Long-barrel 12.7cm Twin Gun Mount Model A Kai 4]]{{·}}'''[[5inch Single Gun Mount Mk.30 Kai + GFCS Mk.37]]'''{{·}}'''[[12.7cm Twin Gun Mount Model C Kai 3]]'''{{·}}[[12.7cm Twin Gun Mount Model C Kai 3 H]]{{·}}'''[[120mm/50 Twin Gun Mount Kai A.mod.1937]]'''{{·}}[[12cm Single High-angle Gun Mount Model E Kai]]{{·}}[[10cm Twin High-angle Gun Mount Kai + Anti-Aircraft Fire Director Kai]]{{·}}[[13.8cm Twin Gun Mount Kai]] | + | |[[12.7cm Twin Gun Mount Model B Kai 2]]{{·}}[[10cm Twin High-angle Gun Mount + Anti-Aircraft Fire Director]]{{·}}[[12.7cm Twin Gun Mount Model C Kai 2]]{{·}}[[12.7cm Twin Gun Mount Model D Kai 2]]{{·}}'''[[12cm Single Gun Mount Kai 2]]'''{{·}}[[12.7cm Twin Gun Mount Model A Kai 2]]{{·}}'''[[120mm/50 Twin Gun Mount mod.1936]]'''{{·}}[[Prototype Long-barrel 12.7cm Twin Gun Mount Model A Kai 4]]{{·}}'''[[5inch Single Gun Mount Mk.30 Kai + GFCS Mk.37]]'''{{·}}'''[[12.7cm Twin Gun Mount Model C Kai 3]]'''{{·}}[[12.7cm Twin Gun Mount Model C Kai 3 H]]{{·}}'''[[120mm/50 Twin Gun Mount Kai A.mod.1937]]'''{{·}}[[12cm Single High-angle Gun Mount Model E Kai]]{{·}}[[10cm Twin High-angle Gun Mount Kai + Anti-Aircraft Fire Director Kai]]{{·}}[[13.8cm Twin Gun Mount Kai]]{{·}}[[10cm Twin High-angle Gun Mount Kai]] |
|- | |- | ||
|{{Med Gun}}Medium Caliber | |{{Med Gun}}Medium Caliber | ||
| − | |[[20.3cm (No.3) Twin Gun Mount]]{{·}}[[14cm Twin Gun Mount]]{{·}}[[14cm Twin Gun Mount Kai]]{{·}}[[15.2cm Twin Gun Mount]]{{·}}[[15.2cm Twin Gun Mount Kai]]{{·}}[[15.2cm Twin Gun Mount Kai 2]]{{·}}'''[[15.5cm Triple Gun Mount Kai]]'''{{·}}'''[[8inch Triple Gun Mount Mk.9 mod.2]]'''{{·}}'''[[14cm Twin Gun Mount Kai 2]]'''{{·}}'''[[Prototype 20.3cm (No.4) Twin Gun Mount]]'''{{·}}'''[[15.2cm Triple Main Gun Mount Kai]]''' | + | |[[20.3cm (No.3) Twin Gun Mount]]{{·}}[[14cm Twin Gun Mount]]{{·}}[[14cm Twin Gun Mount Kai]]{{·}}[[15.2cm Twin Gun Mount]]{{·}}[[15.2cm Twin Gun Mount Kai]]{{·}}[[15.2cm Twin Gun Mount Kai 2]]{{·}}'''[[15.5cm Triple Gun Mount Kai]]'''{{·}}'''[[8inch Triple Gun Mount Mk.9 mod.2]]'''{{·}}'''[[14cm Twin Gun Mount Kai 2]]'''{{·}}'''[[Prototype 20.3cm (No.4) Twin Gun Mount]]'''{{·}}'''[[15.2cm Triple Main Gun Mount Kai]]'''{{·}}[[6inch Triple Rapid Fire Gun Mount Mk.16 mod.2]] |
|- | |- | ||
|{{Large Gun}}Large Caliber | |{{Large Gun}}Large Caliber | ||
| − | |[[Prototype 35.6cm Triple Gun Mount]]{{·}}[[Prototype 41cm Triple Gun Mount]]{{·}}[[38cm Twin Gun Mount Kai]]{{·}}[[381mm/50 Triple Gun Mount Kai]]{{·}}'''[[16inch Triple Gun Mount Mk.7 + GFCS]]'''{{·}}'''[[38.1cm Mk.I/N Twin Gun Mount Kai]]'''{{·}}[[30.5cm Triple Gun Mount]]{{·}}'''[[41cm Triple Gun Mount Kai]]'''{{·}}[[38cm Quadruple Gun Mount Kai]]{{·}}'''[[46cm Triple Gun Mount Kai]]'''{{·}}[[41cm Triple Gun Mount Kai 2]]{{·}}[[41cm Twin Gun Mount Kai 2]]{{·}}[[35.6cm Twin Gun Mount Kai]]{{·}}[[16inch Mk.V Twin Gun Mount]]{{·}}[[Prototype 51cm Twin Gun Mount]]{{·}}'''[[51cm Twin Gun Mount]]'''{{·}}'''[[16inch Mk.VIII Twin Gun Mount Kai]]'''{{·}}[[16inch Triple Gun Mount Mk.6 mod.2]]{{·}}[[16inch Mk.I Triple Gun Mount + AFCT Kai]]{{·}}'''[[16inch Mk.I Triple Gun Mount Kai + FCR Type 284]]'''{{·}}'''[[35.6cm Triple Gun Mount Kai (Dazzle Camouflage)]]'''{{·}}'''[[35.6cm Twin Gun Mount Kai San (Dazzle Camouflage)]]'''{{·}}[[38cm Quadruple Gun Mount Kai Deux]] | + | |[[Prototype 35.6cm Triple Gun Mount]]{{·}}[[Prototype 41cm Triple Gun Mount]]{{·}}[[38cm Twin Gun Mount Kai]]{{·}}[[381mm/50 Triple Gun Mount Kai]]{{·}}'''[[16inch Triple Gun Mount Mk.7 + GFCS]]'''{{·}}'''[[38.1cm Mk.I/N Twin Gun Mount Kai]]'''{{·}}[[30.5cm Triple Gun Mount]]{{·}}'''[[41cm Triple Gun Mount Kai]]'''{{·}}[[38cm Quadruple Gun Mount Kai]]{{·}}'''[[46cm Triple Gun Mount Kai]]'''{{·}}[[41cm Triple Gun Mount Kai 2]]{{·}}[[41cm Twin Gun Mount Kai 2]]{{·}}[[35.6cm Twin Gun Mount Kai]]{{·}}[[16inch Mk.V Twin Gun Mount]]{{·}}[[Prototype 51cm Twin Gun Mount]]{{·}}'''[[51cm Twin Gun Mount]]'''{{·}}'''[[16inch Mk.VIII Twin Gun Mount Kai]]'''{{·}}[[16inch Triple Gun Mount Mk.6 mod.2]]{{·}}[[16inch Mk.I Triple Gun Mount + AFCT Kai]]{{·}}'''[[16inch Mk.I Triple Gun Mount Kai + FCR Type 284]]'''{{·}}'''[[35.6cm Triple Gun Mount Kai (Dazzle Camouflage)]]'''{{·}}'''[[35.6cm Twin Gun Mount Kai San (Dazzle Camouflage)]]'''{{·}}[[38cm Quadruple Gun Mount Kai Deux]]{{·}}[[320mm/44 Twin Gun Mount]]{{·}}[[320mm/44 Triple Gun Mount]] |
|- | |- | ||
|colspan=2|{{Sec Gun}}Secondary Gun | |colspan=2|{{Sec Gun}}Secondary Gun | ||
| Line 602: | Line 609: | ||
|- | |- | ||
|colspan=2|{{AA Gun}}Anti-Air Gun | |colspan=2|{{AA Gun}}Anti-Air Gun | ||
| − | |[[25mm Triple Autocannon Mount | + | |[[25mm Triple Autocannon Mount Concentrated Deployment]]{{·}}[[12cm 30-tube Rocket Launcher Kai 2]]{{·}}[[QF 2-pounder Octuple Pom-pom Gun Mount]] |
|- | |- | ||
|colspan=2|{{AAFD}}AA Fire Director | |colspan=2|{{AAFD}}AA Fire Director | ||
|[[Type 94 Anti-Aircraft Fire Director]] | |[[Type 94 Anti-Aircraft Fire Director]] | ||
|- | |- | ||
| − | |rowspan=2|{{ | + | |rowspan=2|{{Torpedo Weapon}}Torpedoes |
|Surface | |Surface | ||
| − | |[[61cm Quintuple (Oxygen) Torpedo Mount]]{{·}}[[61cm Triple (Oxygen) Torpedo Mount]]{{·}}[[61cm Triple (Oxygen) Torpedo Mount Late Model]]{{·}}[[21inch 6-tube Bow Torpedo Launcher (Late Model)]]{{·}}[[Late Model 53cm Bow Torpedo Mount (8 tubes)]]{{·}}[[21inch 4-tube Bow Torpedo Launcher (Late Model)]] | + | |[[61cm Quintuple (Oxygen) Torpedo Mount]]{{·}}[[61cm Triple (Oxygen) Torpedo Mount]]{{·}}[[61cm Triple (Oxygen) Torpedo Mount Late Model]]{{·}}[[21inch 6-tube Bow Torpedo Launcher (Late Model)]]{{·}}[[Late Model 53cm Bow Torpedo Mount (8 tubes)]]{{·}}[[21inch 4-tube Bow Torpedo Launcher (Late Model)]]{{·}}[[533mm Quintuple Torpedo Mount (Late Model)]] |
|- | |- | ||
|Midget Submarines | |Midget Submarines | ||
| Line 622: | Line 629: | ||
|- | |- | ||
|{{Dive Bomber}} Dive Bombers | |{{Dive Bomber}} Dive Bombers | ||
| − | |[[Type 0 Fighter Model 63 (Fighter-bomber)]]{{·}}'''[[Re.2001 CB Kai]]'''{{·}}[[F4U-1D]]{{·}}[[Type 99 Dive Bomber Model 22]]{{·}}'''[[Type 99 Dive Bomber Model 22 (Skilled)]]'''{{·}}[[SBD-5]]{{·}}'''[[SB2C-3]]'''{{·}}[[Suisei (Egusa Squadron)]]{{·}}'''[[Type 0 Fighter Model 64 (Skilled Fighter-bomber)]]'''{{·}}'''[[Suisei Model 12 (w/ Type 31 Photoelectric Fuze Bombs)]]'''{{·}}'''[[SB2C-5]]''' | + | |[[Type 0 Fighter Model 63 (Fighter-bomber)]]{{·}}'''[[Re.2001 CB Kai]]'''{{·}}[[F4U-1D]]{{·}}[[Type 99 Dive Bomber Model 22]]{{·}}'''[[Type 99 Dive Bomber Model 22 (Skilled)]]'''{{·}}[[SBD-5]]{{·}}'''[[SB2C-3]]'''{{·}}[[Suisei (Egusa Squadron)]]{{·}}'''[[Type 0 Fighter Model 64 (Skilled Fighter-bomber)]]'''{{·}}'''[[Suisei Model 12 (w/ Type 31 Photoelectric Fuze Bombs)]]'''{{·}}'''[[SB2C-5]]'''{{·}}[[SBD VB-2 (Bomber Squadron)]]{{·}}'''''[[Myoujou Kai]]'''''{{·}}'''''[[Type 99 Training Bomber Model 22 Kai (Experimental w/ Night Equipment)]]''''' |
|- | |- | ||
|{{Carrier Recon}}Reconnaissance | |{{Carrier Recon}}Reconnaissance | ||
|'''[[Fulmar (Reconnaissance Fighter/Skilled)]]''' | |'''[[Fulmar (Reconnaissance Fighter/Skilled)]]''' | ||
|- | |- | ||
| − | |{{ | + | |{{Jet Keiun}}Jet-Powered |
|'''[[Jet Keiun Kai]]''' | |'''[[Jet Keiun Kai]]''' | ||
|- | |- | ||
|rowspan=2|Land-Based Plane | |rowspan=2|Land-Based Plane | ||
|{{LB Attacker}}{{LB Assault}}Bomber | |{{LB Attacker}}{{LB Assault}}Bomber | ||
| − | |[[Type 1 Land-based Attack Aircraft]]{{·}}[[Type 1 Land-based Attack Aircraft Model 22A]]{{·}}'''[[Type 1 Land-based Attack Aircraft Model 34]]'''{{·}}'''''[[Type 4 Heavy Bomber Hiryuu (Skilled)]]'''''{{·}}'''[[Do 217 E-5 + Hs293 Initial Model]]'''{{·}}'''[[Ki-102 B]]'''{{·}}'''''[[Ginga (Skilled)]]''''' | + | |[[Type 1 Land-based Attack Aircraft]]{{·}}[[Type 1 Land-based Attack Aircraft Model 22A]]{{·}}'''[[Type 1 Land-based Attack Aircraft Model 34]]'''{{·}}'''''[[Type 4 Heavy Bomber Hiryuu (Skilled)]]'''''{{·}}'''[[Do 217 E-5 + Hs293 Initial Model]]'''{{·}}'''[[Ki-102 B]]'''{{·}}'''''[[Ginga (Skilled)]]'''''{{·}}'''''[[SM.79 bis]]''''' |
|- | |- | ||
|{{LB Fighter 1}}{{LB Fighter 2}}Fighter | |{{LB Fighter 1}}{{LB Fighter 2}}Fighter | ||
| Line 639: | Line 646: | ||
|rowspan=3|Seaplane | |rowspan=3|Seaplane | ||
|{{Seaplane}}Reconnaissance | |{{Seaplane}}Reconnaissance | ||
| − | |[[Swordfish Mk.II Kai (Reconnaissance Seaplane Model)]]{{·}}'''[[SO3C Seamew Kai]]''' | + | |[[Swordfish Mk.II Kai (Reconnaissance Seaplane Model)]]{{·}}'''[[SO3C Seamew Kai]]'''{{·}}'''[[SOC Seagull Late Model (Skilled)]]'''{{·}}'''[[Type 0 Small Reconnaissance Seaplane (Skilled)]]''' |
|- | |- | ||
|{{Seaplane}}Bomber | |{{Seaplane}}Bomber | ||
| Line 647: | Line 654: | ||
|[[Ro.44 Seaplane Fighter]]{{·}}'''[[Ro.44 Seaplane Fighter bis]]'''{{·}}[[Type 2 Seaplane Fighter Kai]]{{·}}[[Kyoufuu Kai]] | |[[Ro.44 Seaplane Fighter]]{{·}}'''[[Ro.44 Seaplane Fighter bis]]'''{{·}}[[Type 2 Seaplane Fighter Kai]]{{·}}[[Kyoufuu Kai]] | ||
|- | |- | ||
| − | |colspan=2|{{Autogyro}}{{ | + | |colspan=2|{{Autogyro}}{{Liaison}}ASW Aircraft |
|[[O Type Observation Autogyro Kai]]{{·}}'''[[O Type Observation Autogyro Kai 2]]'''{{·}}[[S-51J]]{{·}}'''[[S-51J Kai]]'''{{·}}'''[[Type 3 Command Liaison Aircraft Kai]]''' | |[[O Type Observation Autogyro Kai]]{{·}}'''[[O Type Observation Autogyro Kai 2]]'''{{·}}[[S-51J]]{{·}}'''[[S-51J Kai]]'''{{·}}'''[[Type 3 Command Liaison Aircraft Kai]]''' | ||
|- | |- | ||
| Line 657: | Line 664: | ||
|[[Type 21 Air Radar Kai]]{{·}}'''[[Type 32 Surface Radar Kai]]'''{{·}}[[Type 21 Air Radar Kai 2]]{{·}}'''[[SK + SG Radar]]'''{{·}}'''[[15m Duplex Rangefinder Kai + Type 21 Radar Kai 2 + Skilled Fire Direction Center]]''' | |[[Type 21 Air Radar Kai]]{{·}}'''[[Type 32 Surface Radar Kai]]'''{{·}}[[Type 21 Air Radar Kai 2]]{{·}}'''[[SK + SG Radar]]'''{{·}}'''[[15m Duplex Rangefinder Kai + Type 21 Radar Kai 2 + Skilled Fire Direction Center]]''' | ||
|- | |- | ||
| − | |{{ | + | |{{Submarine Radar}}Submarine |
|[[Submarine Radar & Passive Radiolocator (E27)]] | |[[Submarine Radar & Passive Radiolocator (E27)]] | ||
|- | |- | ||
| − | |colspan=2|{{ | + | |colspan=2|{{Depth Charge}}Depth Charge |
| − | |[[Type 2 Depth Charge]]{{·}}'''[[Type 2 12cm Mortar Kai | + | |[[Type 2 Depth Charge]]{{·}}'''[[Type 2 12cm Mortar Kai Concentrated Deployment]]''' |
|- | |- | ||
|colspan=2|{{Sonar}}SONAR | |colspan=2|{{Sonar}}SONAR | ||
| Line 672: | Line 679: | ||
|[[Type 1 Armor Piercing Shell]]{{·}}[[Type 3 Shell Kai]]{{·}}'''[[Type 1 Armor Piercing Shell Kai]]''' | |[[Type 1 Armor Piercing Shell]]{{·}}[[Type 3 Shell Kai]]{{·}}'''[[Type 1 Armor Piercing Shell Kai]]''' | ||
|- | |- | ||
| − | |colspan=2|{{ | + | |colspan=2|{{Landing Craft}}{{Amphibious Tank}}Landing Craft |
|'''[[Daihatsu Landing Craft (Type 89 Medium Tank & Landing Force)]]'''{{·}}[[Toku Daihatsu Landing Craft]]{{·}}'''[[Armed Daihatsu]]'''{{·}}[[Special Type 2 Amphibious Tank]]{{·}}'''[[Special Type 4 Amphibious Tank]]''' | |'''[[Daihatsu Landing Craft (Type 89 Medium Tank & Landing Force)]]'''{{·}}[[Toku Daihatsu Landing Craft]]{{·}}'''[[Armed Daihatsu]]'''{{·}}[[Special Type 2 Amphibious Tank]]{{·}}'''[[Special Type 4 Amphibious Tank]]''' | ||
|- | |- | ||
| Line 682: | Line 689: | ||
|- | |- | ||
|colspan=2|Miscellaneous | |colspan=2|Miscellaneous | ||
| − | |[[Combat Ration (Special Onigiri)]]{{·}}'''[[Type 4 20cm Anti-ground Rocket Launcher | + | |[[Combat Ration (Special Onigiri)]]{{·}}'''[[Type 4 20cm Anti-ground Rocket Launcher Concentrated Deployment]]''' |
|}<references/> | |}<references/> | ||
| Line 699: | Line 706: | ||
|- | |- | ||
|{{Large Gun}}Large Caliber | |{{Large Gun}}Large Caliber | ||
| − | |[[16inch Triple Gun Mount Mk.6 + GFCS | + | |[[16inch Triple Gun Mount Mk.6 + GFCS]] |
|- | |- | ||
| − | |colspan=2|{{ | + | |colspan=2|{{HA Gun}}Secondary Gun |
|[[5inch Twin Gun Mount (Secondary Armament) Concentrated Deployment]]{{·}}[[12cm Single High-angle Gun Mount + 25mm Machine Guns Additions]] | |[[5inch Twin Gun Mount (Secondary Armament) Concentrated Deployment]]{{·}}[[12cm Single High-angle Gun Mount + 25mm Machine Guns Additions]] | ||
|- | |- | ||
| − | |rowspan=2|{{ | + | |rowspan=2|{{Torpedo Weapon}}Torpedoes |
|Normal | |Normal | ||
|[[53cm Bow (Oxygen) Torpedo Mount]]{{·}}[[533mm Triple Torpedo Mount (Model 53-39)]] | |[[53cm Bow (Oxygen) Torpedo Mount]]{{·}}[[533mm Triple Torpedo Mount (Model 53-39)]] | ||
| Line 716: | Line 723: | ||
|- | |- | ||
|{{Torpedo Bomber}}Torpedo Bombers | |{{Torpedo Bomber}}Torpedo Bombers | ||
| − | |[[Swordfish Mk.III (Skilled)]]{{·}}[[Type 97 Torpedo Bomber (931 Air Group/Skilled)]]{{·}}[[Tenzan Model 12A Kai (Skilled w/ Type 6 Airborne Radar Kai)]]{{·}}[[Barracuda Mk.II]]{{·}}'''[[Barracuda Mk.III]]'''{{·}}[[Mosquito TR Mk.33]]{{·}}[[ | + | |[[Swordfish Mk.III (Skilled)]]{{·}}[[Type 97 Torpedo Bomber (931 Air Group/Skilled)]]{{·}}[[Tenzan Model 12A Kai (Skilled w/ Type 6 Airborne Radar Kai)]]{{·}}[[Barracuda Mk.II]]{{·}}'''[[Barracuda Mk.III]]'''{{·}}[[Mosquito TR Mk.33]]{{·}}[[Type 97 Torpedo Bomber Kai (Northeastern Air Group)]] |
|- | |- | ||
|{{Dive Bomber}}Dive Bombers | |{{Dive Bomber}}Dive Bombers | ||
| − | |[[Ju 87C Kai 2 (w/ KMX/Skilled)]]{{·}}[[F4U-4]]{{·}}[[AU-1]]{{·}}[[F4U-7]]{{·}}[[ | + | |[[Ju 87C Kai 2 (w/ KMX/Skilled)]]{{·}}[[F4U-4]]{{·}}[[AU-1]]{{·}}[[F4U-7]]{{·}}[[Prototype Myoujou (Additional Trial Model)]]{{·}}'''[[Myoujou Kai]]'''{{·}}'''[[Type 99 Training Bomber Model 22 Kai (Experimental w/ Night Equipment)]]'''{{·}}[[Type 0 Fighter Model 62 Kai (Night Fighter-bomber)]]{{·}}[[Type 0 Fighter Model 62 Kai (Skilled/Night Fighter-bomber)]] |
|- | |- | ||
|{{Carrier Recon}}Reconnaissance | |{{Carrier Recon}}Reconnaissance | ||
| − | |[[Saiun (Eastern Caroline Air Group)]]{{·}}[[Saiun (4th Recon Squad | + | |[[Saiun (Eastern Caroline Air Group)]]{{·}}[[Saiun (4th Recon Squad)]] |
|- | |- | ||
|rowspan=3|Land-Based Plane | |rowspan=3|Land-Based Plane | ||
| − | |{{LB Attacker}}{{ | + | |{{LB Attacker}}{{LB ASW}}{{LB Heavy}}Bomber |
| − | |[[Ginga]]{{·}}[[Bomb-carrying Type 1 Fighter Hayabusa Model III Kai (65th Squadron)]]{{·}}[[Toukai (901 Air Group)]]{{·}}[[Type 4 Heavy Bomber Hiryuu]]{{·}}'''[[Type 4 Heavy Bomber Hiryuu (Skilled)]]'''{{·}}[[Do 217 K-2 + Fritz-X]]{{·}}[[SM.79]]{{·}}[[SM.79 bis]]{{·}}[[SM.79 bis (Skilled)]]{{·}}[[Type 4 Heavy Bomber Hiryuu + No.1 Model 1A Guided Missile]]{{·}}[[Shinzan]]{{·}}[[Shinzan Kai]]{{·}}[[Ginga (Egusa Squadron)]]{{·}}[[B-25]]{{·}}[[Mosquito FB Mk.VI]]{{·}}[[Type 4 Heavy Bomber Hiryuu (Skilled) + No.1 Model 1A Guided Missile]]{{·}}[[Type 1 Land-based Attack Aircraft (Hachiman Force)]]{{·}}'''[[Ginga (Skilled)]]''' | + | |[[Ginga]]{{·}}[[Bomb-carrying Type 1 Fighter Hayabusa Model III Kai (65th Squadron)]]{{·}}[[Toukai (901 Air Group)]]{{·}}[[Type 4 Heavy Bomber Hiryuu]]{{·}}'''[[Type 4 Heavy Bomber Hiryuu (Skilled)]]'''{{·}}[[Do 217 K-2 + Fritz-X]]{{·}}[[SM.79]]{{·}}'''[[SM.79 bis]]'''{{·}}[[SM.79 bis (Skilled)]]{{·}}[[Type 4 Heavy Bomber Hiryuu + No.1 Model 1A Guided Missile]]{{·}}[[Shinzan]]{{·}}[[Shinzan Kai]]{{·}}[[Ginga (Egusa Squadron)]]{{·}}[[B-25]]{{·}}[[Mosquito FB Mk.VI]]{{·}}[[Type 4 Heavy Bomber Hiryuu (Skilled) + No.1 Model 1A Guided Missile]]{{·}}[[Type 1 Land-based Attack Aircraft (Hachiman Force)]]{{·}}'''[[Ginga (Skilled)]]''' |
|- | |- | ||
| − | |{{LB Fighter 1}}{{LB Fighter 2}}{{LB Fighter Jet}}Fighter | + | |{{LB Fighter 1}}{{LB Fighter 2}}{{LB Fighter Jet}} {{LB Shinden}}Fighter |
| − | |[[Type 1 Fighter Hayabusa Model III A (54th Squadron)]]{{·}}[[Type 1 Fighter Hayabusa Model II (64th Squadron)]]{{·}}[[Spitfire Mk.IX (Skilled)]]{{·}}[[Shiden Model 21 Shiden Kai]]{{·}}[[Type 4 Fighter Hayate]]{{·}}[[Shiden Kai (343 Air Group) 701st Fighter Squadron]]{{·}}[[Shiden Kai (343 Air Group) 407th Fighter Squadron]]{{·}}[[Reppuu Kai]]{{·}}[[Reppuu Kai (352 Air Group/Skilled)]]{{·}}[[Me 163B]]{{·}}[[Shuusui]]{{·}}[[Fw 190 D-9]]{{·}}[[Type 0 Fighter Model 21 (Tainan Air Group)]]{{·}}[[Type 0 Fighter Model 32 (Tainan Air Group)]]{{·}}[[Type 0 Fighter Model 22 (251 Air Group)]]{{·}}'''[[Type 3 Fighter Hien (244th Air Combat Group)]]'''{{·}}[[Me 262 A-1a/R1]] | + | |[[Type 1 Fighter Hayabusa Model III A (54th Squadron)]]{{·}}[[Type 1 Fighter Hayabusa Model II (64th Squadron)]]{{·}}[[Spitfire Mk.IX (Skilled)]]{{·}}[[Shiden Model 21 Shiden Kai]]{{·}}[[Type 4 Fighter Hayate]]{{·}}[[Shiden Kai (343 Air Group) 701st Fighter Squadron]]{{·}}[[Shiden Kai (343 Air Group) 407th Fighter Squadron]]{{·}}[[Reppuu Kai]]{{·}}[[Reppuu Kai (352 Air Group/Skilled)]]{{·}}[[Me 163B]]{{·}}[[Shuusui]]{{·}}[[Fw 190 D-9]]{{·}}[[Type 0 Fighter Model 21 (Tainan Air Group)]]{{·}}[[Type 0 Fighter Model 32 (Tainan Air Group)]]{{·}}[[Type 0 Fighter Model 22 (251 Air Group)]]{{·}}'''[[Type 3 Fighter Hien (244th Air Combat Group)]]'''{{·}}[[Me 262 A-1a/R1]]{{·}}[[Prototype Shinden (Land-based Fighter)]] |
|- | |- | ||
|{{LB Recon}}Reconnaissance | |{{LB Recon}}Reconnaissance | ||
|[[Type 2 Land-based Reconnaissance Aircraft]]{{·}}[[Type 2 Land-based Reconnaissance Aircraft (Skilled)]]{{·}}[[Mosquito PR Mk.IV]] | |[[Type 2 Land-based Reconnaissance Aircraft]]{{·}}[[Type 2 Land-based Reconnaissance Aircraft (Skilled)]]{{·}}[[Mosquito PR Mk.IV]] | ||
|- | |- | ||
| − | |colspan=2|{{Seaplane}}{{SPF}}Seaplane | + | |colspan=2|{{Seaplane}}{{SPF}}Seaplane |
| − | |[[Swordfish Mk.III Kai (Seaplane Model/Skilled)]]{{·}}[[Kyoufuu Kai 2]]{{·}}[[Walrus]]{{·}}[[Sea Otter]]{{·}}[[Shiun | + | |[[Swordfish Mk.III Kai (Seaplane Model/Skilled)]]{{·}}[[Kyoufuu Kai 2]]{{·}}[[Walrus]]{{·}}[[Sea Otter]]{{·}}[[Shiun (Skilled)]]{{·}}[[Loire 130M Kai (Skilled)]] |
|- | |- | ||
| − | |rowspan=3|{{Radar}}{{ | + | |rowspan=3|{{Radar}}{{Submarine Radar}}RADAR |
|Small | |Small | ||
|[[SG Radar (Late Model)]] | |[[SG Radar (Late Model)]] | ||
| Line 747: | Line 754: | ||
|[[Late Model Submarine Radar & Passive Radiolocator]]{{·}}[[Late Model Radar & Passive Radiolocator + Snorkel Equipment]] | |[[Late Model Submarine Radar & Passive Radiolocator]]{{·}}[[Late Model Radar & Passive Radiolocator + Snorkel Equipment]] | ||
|- | |- | ||
| − | |colspan=2|{{ | + | |colspan=2|{{Depth Charge}}Depth Charge |
| − | | | + | |[[Prototype 15cm 9-tube ASW Rocket Launcher]]{{·}}[[Type 2 Depth Charge Kai 2]] |
|- | |- | ||
|colspan=2|{{Sonar}}SONAR | |colspan=2|{{Sonar}}SONAR | ||
| Line 756: | Line 763: | ||
|[[Type 3 Shell Kai 2]] | |[[Type 3 Shell Kai 2]] | ||
|- | |- | ||
| − | |colspan=2|{{ | + | |colspan=2|{{Landing Craft}}{{Amphibious Tank}}{{Army Units}} Landing Craft |
|[[Toku Daihatsu Landing Craft + 11th Tank Regiment]]{{·}}[[M4A1 DD]]{{·}}[[Daihatsu Landing Craft (Panzer II/North African Specification)]]{{·}}[[Toku Daihatsu Landing Craft + Type 1 Gun Tank]]{{·}}[[Toku Daihatsu Landing Craft + Panzer III (North African Specification)]]{{·}}[[Toku Daihatsu Landing Craft + Chi-Ha]]{{·}}[[Toku Daihatsu Landing Craft + Chi-Ha Kai]]{{·}}[[Army Infantry Corps]]{{·}}[[Type 97 Medium Tank New Turret (Chi-Ha Kai)]]{{·}}[[Army Infantry Corps + Chi-Ha Kai]]{{·}}[[Toku Daihatsu Landing Craft + Panzer III Ausf J]]{{·}}[[Special Type 4 Amphibious Tank Kai]] | |[[Toku Daihatsu Landing Craft + 11th Tank Regiment]]{{·}}[[M4A1 DD]]{{·}}[[Daihatsu Landing Craft (Panzer II/North African Specification)]]{{·}}[[Toku Daihatsu Landing Craft + Type 1 Gun Tank]]{{·}}[[Toku Daihatsu Landing Craft + Panzer III (North African Specification)]]{{·}}[[Toku Daihatsu Landing Craft + Chi-Ha]]{{·}}[[Toku Daihatsu Landing Craft + Chi-Ha Kai]]{{·}}[[Army Infantry Corps]]{{·}}[[Type 97 Medium Tank New Turret (Chi-Ha Kai)]]{{·}}[[Army Infantry Corps + Chi-Ha Kai]]{{·}}[[Toku Daihatsu Landing Craft + Panzer III Ausf J]]{{·}}[[Special Type 4 Amphibious Tank Kai]] | ||
|- | |- | ||
|colspan=2|Miscellaneous | |colspan=2|Miscellaneous | ||
| − | |[[Elite Torpedo Squadron Command Facility]]{{·}}[[Arctic Gear & Deck Personnel]]{{·}}[[Skilled Deck Personnel]]{{·}}[[Skilled Deck Personnel + Aviation Maintenance Hands]]{{·}}[[Saiun (Disassembled for Transport)]](cannot be kept){{·}}[[Type 1 Fighter Hayabusa Model II Kai (20th Squadron)]]{{·}}[[Type 1 Fighter Hayabusa Model III Kai (Skilled/20th Squadron)]]{{·}}[[Barrage Balloon]]{{·}}[[Fleet Communication Antenna]] | + | |[[Elite Torpedo Squadron Command Facility]]{{·}}[[Arctic Gear & Deck Personnel]]{{·}}[[Skilled Deck Personnel]]{{·}}[[Skilled Deck Personnel + Aviation Maintenance Hands]]{{·}}[[Saiun (Disassembled for Transport)]](cannot be kept){{·}}[[Type 1 Fighter Hayabusa Model II Kai (20th Squadron)]]{{·}}[[Type 1 Fighter Hayabusa Model III Kai (Skilled/20th Squadron)]]{{·}}[[Barrage Balloon]]{{·}}[[Fleet Communication Antenna]]{{·}}[[Type 3 Command Liaison Aircraft Kai 2]] |
|} | |} | ||
| − | Note that the equipment IDs 321, 448, & | + | Note that the equipment IDs 321, 448, 462, 547, & 548 were never added to the game. |
*The [[Reppuu Kai 2 (CarDiv 1/Skilled)]] (ID 337) was added to game files, but never given away. | *The [[Reppuu Kai 2 (CarDiv 1/Skilled)]] (ID 337) was added to game files, but never given away. | ||
</tabber> | </tabber> | ||
| Line 813: | Line 820: | ||
|- | |- | ||
|height=90px|★★<br>★★★ | |height=90px|★★<br>★★★ | ||
| − | |style="color:#333333; background:linear-gradient(0deg, transparent, transparent 50%, rgba(255,255,255,0.5) 50%, rgba(255,255,255,0.5) calc(50% + 1px), transparent calc(50% + 1px)), linear-gradient(10deg, transparent, transparent 50%, rgba(255,255,255,0.5) 50%, rgba(255,255,255,0.5) calc(50% + 1px), transparent calc(50% + 1px)), linear-gradient(20deg, transparent, transparent 50%, rgba(255,255,255,0.5) 50%, rgba(255,255,255,0.5) calc(50% + 1px), transparent calc(50% + 1px)), linear-gradient(30deg, transparent, transparent 50%, rgba(255,255,255,0.5) 50%, rgba(255,255,255,0.5) calc(50% + 1px), transparent calc(50% + 1px)), linear-gradient(40deg, transparent, transparent 50%, rgba(255,255,255,0.5) 50%, rgba(255,255,255,0.5) calc(50% + 1px), transparent calc(50% + 1px)), linear-gradient(50deg, transparent, transparent 50%, rgba(255,255,255,0.5) 50%, rgba(255,255,255,0.5) calc(50% + 1px), transparent calc(50% + 1px)), linear-gradient(60deg, transparent, transparent 50%, rgba(255,255,255,0.5) 50%, rgba(255,255,255,0.5) calc(50% + 1px), transparent calc(50% + 1px)), linear-gradient(70deg, transparent, transparent 50%, rgba(255,255,255,0.5) 50%, rgba(255,255,255,0.5) calc(50% + 1px), transparent calc(50% + 1px)), linear-gradient(80deg, transparent, transparent 50%, rgba(255,255,255,0.5) 50%, rgba(255,255,255,0.5) calc(50% + 1px), transparent calc(50% + 1px)), linear-gradient(90deg, transparent, transparent 50%, rgba(255,255,255,0.5) 50%, rgba(255,255,255,0.5) calc(50% + 1px), transparent calc(50% + 1px)), linear-gradient(100deg, transparent, transparent 50%, rgba(255,255,255,0.5) 50%, rgba(255,255,255,0.5) calc(50% + 1px), transparent calc(50% + 1px)), linear-gradient(110deg, transparent, transparent 50%, rgba(255,255,255,0.5) 50%, rgba(255,255,255,0.5) calc(50% + 1px), transparent calc(50% + 1px)), linear-gradient(120deg, transparent, transparent 50%, rgba(255,255,255,0.5) 50%, rgba(255,255,255,0.5) calc(50% + 1px), transparent calc(50% + 1px)), linear-gradient(130deg, transparent, transparent 50%, rgba(255,255,255,0.5) 50%, rgba(255,255,255,0.5) calc(50% + 1px), transparent calc(50% + 1px)), linear-gradient(140deg, transparent, transparent 50%, rgba(255,255,255,0.5) 50%, rgba(255,255,255,0.5) calc(50% + 1px), transparent calc(50% + 1px)), linear-gradient(150deg, transparent, transparent 50%, rgba(255,255,255,0.5) 50%, rgba(255,255,255,0.5) calc(50% + 1px), transparent calc(50% + 1px)), linear-gradient(160deg, transparent, transparent 50%, rgba(255,255,255,0.5) 50%, rgba(255,255,255,0.5) calc(50% + 1px), transparent calc(50% + 1px)), linear-gradient(170deg, transparent, transparent 50%, rgba(255,255,255,0.5) 50%, rgba(255,255,255,0.5) calc(50% + 1px), transparent calc(50% + 1px)),linear-gradient(0deg, rgba(235,172,144,1) 2%, rgba(218,198,130,1) 12%, rgba(238,238,198,1) 25%, rgba(214,235,205,1) 39%, rgba(188,217,209,1) 50%, rgba(177,229,232,1) 62%, rgba(184,189,214,1) 79%, rgba(235,200,232,1) 94%, transparent), linear-gradient(10deg, transparent, transparent 50%, rgba(255,255,255,0.5) 50%, rgba(255,255,255,0.3) calc(50% + 1px), transparent calc(50% + 1px));"| | + | |style="color:#333333; background:linear-gradient(0deg, transparent, transparent 50%, rgba(255,255,255,0.5) 50%, rgba(255,255,255,0.5) calc(50% + 1px), transparent calc(50% + 1px)), linear-gradient(10deg, transparent, transparent 50%, rgba(255,255,255,0.5) 50%, rgba(255,255,255,0.5) calc(50% + 1px), transparent calc(50% + 1px)), linear-gradient(20deg, transparent, transparent 50%, rgba(255,255,255,0.5) 50%, rgba(255,255,255,0.5) calc(50% + 1px), transparent calc(50% + 1px)), linear-gradient(30deg, transparent, transparent 50%, rgba(255,255,255,0.5) 50%, rgba(255,255,255,0.5) calc(50% + 1px), transparent calc(50% + 1px)), linear-gradient(40deg, transparent, transparent 50%, rgba(255,255,255,0.5) 50%, rgba(255,255,255,0.5) calc(50% + 1px), transparent calc(50% + 1px)), linear-gradient(50deg, transparent, transparent 50%, rgba(255,255,255,0.5) 50%, rgba(255,255,255,0.5) calc(50% + 1px), transparent calc(50% + 1px)), linear-gradient(60deg, transparent, transparent 50%, rgba(255,255,255,0.5) 50%, rgba(255,255,255,0.5) calc(50% + 1px), transparent calc(50% + 1px)), linear-gradient(70deg, transparent, transparent 50%, rgba(255,255,255,0.5) 50%, rgba(255,255,255,0.5) calc(50% + 1px), transparent calc(50% + 1px)), linear-gradient(80deg, transparent, transparent 50%, rgba(255,255,255,0.5) 50%, rgba(255,255,255,0.5) calc(50% + 1px), transparent calc(50% + 1px)), linear-gradient(90deg, transparent, transparent 50%, rgba(255,255,255,0.5) 50%, rgba(255,255,255,0.5) calc(50% + 1px), transparent calc(50% + 1px)), linear-gradient(100deg, transparent, transparent 50%, rgba(255,255,255,0.5) 50%, rgba(255,255,255,0.5) calc(50% + 1px), transparent calc(50% + 1px)), linear-gradient(110deg, transparent, transparent 50%, rgba(255,255,255,0.5) 50%, rgba(255,255,255,0.5) calc(50% + 1px), transparent calc(50% + 1px)), linear-gradient(120deg, transparent, transparent 50%, rgba(255,255,255,0.5) 50%, rgba(255,255,255,0.5) calc(50% + 1px), transparent calc(50% + 1px)), linear-gradient(130deg, transparent, transparent 50%, rgba(255,255,255,0.5) 50%, rgba(255,255,255,0.5) calc(50% + 1px), transparent calc(50% + 1px)), linear-gradient(140deg, transparent, transparent 50%, rgba(255,255,255,0.5) 50%, rgba(255,255,255,0.5) calc(50% + 1px), transparent calc(50% + 1px)), linear-gradient(150deg, transparent, transparent 50%, rgba(255,255,255,0.5) 50%, rgba(255,255,255,0.5) calc(50% + 1px), transparent calc(50% + 1px)), linear-gradient(160deg, transparent, transparent 50%, rgba(255,255,255,0.5) 50%, rgba(255,255,255,0.5) calc(50% + 1px), transparent calc(50% + 1px)), linear-gradient(170deg, transparent, transparent 50%, rgba(255,255,255,0.5) 50%, rgba(255,255,255,0.5) calc(50% + 1px), transparent calc(50% + 1px)),linear-gradient(0deg, rgba(235,172,144,1) 2%, rgba(218,198,130,1) 12%, rgba(238,238,198,1) 25%, rgba(214,235,205,1) 39%, rgba(188,217,209,1) 50%, rgba(177,229,232,1) 62%, rgba(184,189,214,1) 79%, rgba(235,200,232,1) 94%, transparent), linear-gradient(10deg, transparent, transparent 50%, rgba(255,255,255,0.5) 50%, rgba(255,255,255,0.3) calc(50% + 1px), transparent calc(50% + 1px));"|Shining Rainbow |
! - | ! - | ||
|- | |- | ||
|height=90px|★★★<br>★★★ | |height=90px|★★★<br>★★★ | ||
| − | |rowspan=2; style="color:#333333; background:linear-gradient(0deg, transparent, transparent 50%, rgba(255,255,255,0.5) 50%, rgba(255,255,255,0.5) calc(50% + 1px), transparent calc(50% + 1px)), linear-gradient(10deg, transparent, transparent 50%, rgba(255,255,255,0.5) 50%, rgba(255,255,255,0.5) calc(50% + 1px), transparent calc(50% + 1px)), linear-gradient(20deg, transparent, transparent 50%, rgba(255,255,255,0.5) 50%, rgba(255,255,255,0.5) calc(50% + 1px), transparent calc(50% + 1px)), linear-gradient(30deg, transparent, transparent 50%, rgba(255,255,255,0.5) 50%, rgba(255,255,255,0.5) calc(50% + 1px), transparent calc(50% + 1px)), linear-gradient(40deg, transparent, transparent 50%, rgba(255,255,255,0.5) 50%, rgba(255,255,255,0.5) calc(50% + 1px), transparent calc(50% + 1px)), linear-gradient(50deg, transparent, transparent 50%, rgba(255,255,255,0.5) 50%, rgba(255,255,255,0.5) calc(50% + 1px), transparent calc(50% + 1px)), linear-gradient(60deg, transparent, transparent 50%, rgba(255,255,255,0.5) 50%, rgba(255,255,255,0.5) calc(50% + 1px), transparent calc(50% + 1px)), linear-gradient(70deg, transparent, transparent 50%, rgba(255,255,255,0.5) 50%, rgba(255,255,255,0.5) calc(50% + 1px), transparent calc(50% + 1px)), linear-gradient(80deg, transparent, transparent 50%, rgba(255,255,255,0.5) 50%, rgba(255,255,255,0.5) calc(50% + 1px), transparent calc(50% + 1px)), linear-gradient(90deg, transparent, transparent 50%, rgba(255,255,255,0.5) 50%, rgba(255,255,255,0.5) calc(50% + 1px), transparent calc(50% + 1px)), linear-gradient(100deg, transparent, transparent 50%, rgba(255,255,255,0.5) 50%, rgba(255,255,255,0.5) calc(50% + 1px), transparent calc(50% + 1px)), linear-gradient(110deg, transparent, transparent 50%, rgba(255,255,255,0.5) 50%, rgba(255,255,255,0.5) calc(50% + 1px), transparent calc(50% + 1px)), linear-gradient(120deg, transparent, transparent 50%, rgba(255,255,255,0.5) 50%, rgba(255,255,255,0.5) calc(50% + 1px), transparent calc(50% + 1px)), linear-gradient(130deg, transparent, transparent 50%, rgba(255,255,255,0.5) 50%, rgba(255,255,255,0.5) calc(50% + 1px), transparent calc(50% + 1px)), linear-gradient(140deg, transparent, transparent 50%, rgba(255,255,255,0.5) 50%, rgba(255,255,255,0.5) calc(50% + 1px), transparent calc(50% + 1px)), linear-gradient(150deg, transparent, transparent 50%, rgba(255,255,255,0.5) 50%, rgba(255,255,255,0.5) calc(50% + 1px), transparent calc(50% + 1px)), linear-gradient(160deg, transparent, transparent 50%, rgba(255,255,255,0.5) 50%, rgba(255,255,255,0.5) calc(50% + 1px), transparent calc(50% + 1px)), linear-gradient(170deg, transparent, transparent 50%, rgba(255,255,255,0.5) 50%, rgba(255,255,255,0.5) calc(50% + 1px), transparent calc(50% + 1px)),linear-gradient(0deg, rgba(235,172,144,1) 2%, rgba(218,198,130,1) 12%, rgba(238,238,198,1) 25%, rgba(214,235,205,1) 39%, rgba(188,217,209,1) 50%, rgba(177,229,232,1) 62%, rgba(184,189,214,1) 79%, rgba(235,200,232,1) 94%, transparent), linear-gradient(10deg, transparent, transparent 50%, rgba(255,255,255,0.5) 50%, rgba(255,255,255,0.3) calc(50% + 1px), transparent calc(50% + 1px));"|{{color|white|'''★'''}}<br>{{color|white|'''★'''}} | + | |rowspan=2; style="color:#333333; background:linear-gradient(0deg, transparent, transparent 50%, rgba(255,255,255,0.5) 50%, rgba(255,255,255,0.5) calc(50% + 1px), transparent calc(50% + 1px)), linear-gradient(10deg, transparent, transparent 50%, rgba(255,255,255,0.5) 50%, rgba(255,255,255,0.5) calc(50% + 1px), transparent calc(50% + 1px)), linear-gradient(20deg, transparent, transparent 50%, rgba(255,255,255,0.5) 50%, rgba(255,255,255,0.5) calc(50% + 1px), transparent calc(50% + 1px)), linear-gradient(30deg, transparent, transparent 50%, rgba(255,255,255,0.5) 50%, rgba(255,255,255,0.5) calc(50% + 1px), transparent calc(50% + 1px)), linear-gradient(40deg, transparent, transparent 50%, rgba(255,255,255,0.5) 50%, rgba(255,255,255,0.5) calc(50% + 1px), transparent calc(50% + 1px)), linear-gradient(50deg, transparent, transparent 50%, rgba(255,255,255,0.5) 50%, rgba(255,255,255,0.5) calc(50% + 1px), transparent calc(50% + 1px)), linear-gradient(60deg, transparent, transparent 50%, rgba(255,255,255,0.5) 50%, rgba(255,255,255,0.5) calc(50% + 1px), transparent calc(50% + 1px)), linear-gradient(70deg, transparent, transparent 50%, rgba(255,255,255,0.5) 50%, rgba(255,255,255,0.5) calc(50% + 1px), transparent calc(50% + 1px)), linear-gradient(80deg, transparent, transparent 50%, rgba(255,255,255,0.5) 50%, rgba(255,255,255,0.5) calc(50% + 1px), transparent calc(50% + 1px)), linear-gradient(90deg, transparent, transparent 50%, rgba(255,255,255,0.5) 50%, rgba(255,255,255,0.5) calc(50% + 1px), transparent calc(50% + 1px)), linear-gradient(100deg, transparent, transparent 50%, rgba(255,255,255,0.5) 50%, rgba(255,255,255,0.5) calc(50% + 1px), transparent calc(50% + 1px)), linear-gradient(110deg, transparent, transparent 50%, rgba(255,255,255,0.5) 50%, rgba(255,255,255,0.5) calc(50% + 1px), transparent calc(50% + 1px)), linear-gradient(120deg, transparent, transparent 50%, rgba(255,255,255,0.5) 50%, rgba(255,255,255,0.5) calc(50% + 1px), transparent calc(50% + 1px)), linear-gradient(130deg, transparent, transparent 50%, rgba(255,255,255,0.5) 50%, rgba(255,255,255,0.5) calc(50% + 1px), transparent calc(50% + 1px)), linear-gradient(140deg, transparent, transparent 50%, rgba(255,255,255,0.5) 50%, rgba(255,255,255,0.5) calc(50% + 1px), transparent calc(50% + 1px)), linear-gradient(150deg, transparent, transparent 50%, rgba(255,255,255,0.5) 50%, rgba(255,255,255,0.5) calc(50% + 1px), transparent calc(50% + 1px)), linear-gradient(160deg, transparent, transparent 50%, rgba(255,255,255,0.5) 50%, rgba(255,255,255,0.5) calc(50% + 1px), transparent calc(50% + 1px)), linear-gradient(170deg, transparent, transparent 50%, rgba(255,255,255,0.5) 50%, rgba(255,255,255,0.5) calc(50% + 1px), transparent calc(50% + 1px)),linear-gradient(0deg, rgba(235,172,144,1) 2%, rgba(218,198,130,1) 12%, rgba(238,238,198,1) 25%, rgba(214,235,205,1) 39%, rgba(188,217,209,1) 50%, rgba(177,229,232,1) 62%, rgba(184,189,214,1) 79%, rgba(235,200,232,1) 94%, transparent), linear-gradient(10deg, transparent, transparent 50%, rgba(255,255,255,0.5) 50%, rgba(255,255,255,0.3) calc(50% + 1px), transparent calc(50% + 1px));"|{{color|white|'''★'''}}<br>{{color|white|'''★'''}}Shining Rainbow{{color|white|'''★'''}}<br>+<br>{{color|white|'''★'''}}Stars{{color|white|'''★'''}}<br>{{color|white|'''★'''}}||SS Holo+<br>(SSホロ+) |
!colspan=5 rowspan=2| - | !colspan=5 rowspan=2| - | ||
|- | |- | ||
| Line 839: | Line 846: | ||
;Background | ;Background | ||
| − | * The following equipment have the ''' | + | * The following equipment have the '''Shining Rainbow''' instead of the '''Rainbow''' background of 4 stars rarity: |
**{{Equipment/Link|Prototype 41cm Triple Gun Mount}}, {{Equipment/Link|Reppuu (601 Air Group)}}, {{Equipment/Link|Ryuusei (601 Air Group)}}, {{Equipment/Link|Prototype 46cm Twin Gun Mount}}, {{Equipment/Link|Shiun}}, {{Equipment/Link|Saiun (Eastern Caroline Air Group)}}, {{Equipment/Link|Skilled Sonar Personnel + Late Model Bow Torpedo Mount (6 tubes)}}, {{Equipment/Link|Ro.44 Seaplane Fighter bis}}, {{Equipment/Link|Type 2 Seaplane Fighter Kai (Skilled)}}. | **{{Equipment/Link|Prototype 41cm Triple Gun Mount}}, {{Equipment/Link|Reppuu (601 Air Group)}}, {{Equipment/Link|Ryuusei (601 Air Group)}}, {{Equipment/Link|Prototype 46cm Twin Gun Mount}}, {{Equipment/Link|Shiun}}, {{Equipment/Link|Saiun (Eastern Caroline Air Group)}}, {{Equipment/Link|Skilled Sonar Personnel + Late Model Bow Torpedo Mount (6 tubes)}}, {{Equipment/Link|Ro.44 Seaplane Fighter bis}}, {{Equipment/Link|Type 2 Seaplane Fighter Kai (Skilled)}}. | ||
| − | * The {{Equipment/Link|HF/DF + Type144/147 ASDIC}} has the ''' | + | * The {{Equipment/Link|HF/DF + Type144/147 ASDIC}} has the '''Shining Rainbow + Stars''' instead of the '''Shining Rainbow''' background of 5 stars rarity, |
* The {{Equipment/Link|Daihatsu Landing Craft}} and {{Equipment/Link|Type A Kouhyouteki}} have a unique '''light blue''' background. | * The {{Equipment/Link|Daihatsu Landing Craft}} and {{Equipment/Link|Type A Kouhyouteki}} have a unique '''light blue''' background. | ||
* The {{Equipment/Link|Emergency Repair Personnel}} has a unique '''blue''' background. | * The {{Equipment/Link|Emergency Repair Personnel}} has a unique '''blue''' background. | ||
| − | * The {{Equipment/Link|Prototype Night Zuiun (Attack Equipment)}} has a unique '''black and | + | * The {{Equipment/Link|Prototype Night Zuiun (Attack Equipment)}} has a unique '''black, fire, and star shells''' background. |
| + | * The {{Equipment/Link|Type 99 Training Bomber Model 22 Kai (Experimental w/ Night Equipment)|Type 0 Fighter Model 62 Kai (Night Fighter-bomber)|Type 0 Fighter Model 62 Kai (Skilled/Night Fighter-bomber)|text=Night Dive Bombers}} each have a unique '''black and star shells''' background. | ||
;Icon petals | ;Icon petals | ||
| − | *The {{Equipment/Link|16inch Triple Gun Mount Mk.7}} | + | *The {{Equipment/Link|16inch Triple Gun Mount Mk.7}} has the '''16 petals''' instead of the '''"Rising Sun Cross"'''. |
| − | *The {{Equipment/Link|Type 0 Fighter Model 62 (Fighter-bomber)}} | + | *The {{Equipment/Link|Type 0 Fighter Model 62 (Fighter-bomber)}} has the '''"Rising Sun Cross"''' instead of the '''16 petals'''. |
;Border | ;Border | ||
| Line 854: | Line 862: | ||
=Equipment Cosmetics= | =Equipment Cosmetics= | ||
| − | Each equipment in the game comes with at least one "Fairy" (just like the other [[NPC]] ones). | + | Each equipment in the game comes with at least one "[[Fairy]]" (just like the other [[NPC]] ones). |
*Those fairies are mostly alone, but can come in groups or followed by some animals, | *Those fairies are mostly alone, but can come in groups or followed by some animals, | ||
*Most fairies are "original characters", being only linked to an equipment. | *Most fairies are "original characters", being only linked to an equipment. | ||
Revision as of 08:14, 23 March 2025
| Home Port's Mechanics Portal | ||
|---|---|---|
| Ship | Equipment | |
| Marriage · Morale and Fatigue · Gifting · Supply Repairs · Remodel · Modernization · Construction |
Development · Improvement · Fit Bonuses Speed · Range · Plane Proficiency | |
| Stats · Resources · Experience and Rank · Ranking | ||
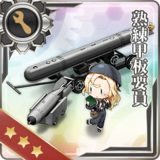
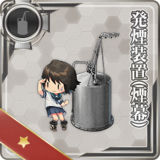
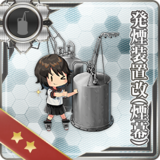
"Equipment" are gears meant to be fitted on girls to enhance their combat capacity, adding several sets of Stats and unlocking certain Mechanics.
- There are 552 equipent as of the 2025/03/23, with only 442 being genuinely obtainable.
Equipment come in multiple categories & types using different icons (sometimes overlapping between categories), and bringing most mechanics, each with its own behaviors and equipability.
The ways to acquire equipment are:
- Development (crafting),
- Ships' stock gears,
- Improvement upgrades,
- Quests rewards,
- Ranking rewards,
- Event rewards,
- Shop purchases (some "Consumables Equipment" only).
Equipment Categories, Types, Icons, and Mechanics
Every piece of equipment in the game has an icon, regrouping them by type, giving a quick visual indicator of what a given equipment is.
- One icon can be shared with different equipment types.
- Some icons are used for a single equipment.
- Some equipment icons on the wiki will be displayed with "text"
 Text, indicating special notes like stats or sub-types of equipment.
All icons here and on the rest of the wiki are clickable.
Aircraft
| ExpandAircraft |
|---|
Main Armament
| ExpandMain Armament |
|---|
Other Equipment
| ExpandOther Equipment |
|---|
- Notes
- Some equipment have unique mechanics within their categories.
- Certain mechanics like AACI and ASW will differentiate equipment within their category depending on their raw stats.
Custom icons made up for wiki usage:
Equipment Obtainability
Buildable Equipment
List of equipment that can be crafted in Development.
- Equipment demanding special flagships to be crafted are in Bold.
Unbuildable Equipment
Note that some equipment can appear on more than one list. The lists below do not include buildable equipment. Note that buildable equipment can also be obtained as stock equipment, quests, or improvement upgrades. Please refer to the individual equipment pages to find a more detailed list of where/how to obtain them.
Equipment obtainable as ship girl's stock gears.
- Equipment from event-only ships are in bold
Equipment Rarity
The equipment have two rarities:
- The system rarity, written in the equipment list
- There are 7 rarities from common to SS++
- The card or visual rarity found in the equipment card design in 3 different ways:
- The star ★ number in the bottom left corner from 1 to 7,
- The 5 different card backgrounds,
- The 4 different petals around the icon.
The system rarity determines the HQ level needed to craft any given equipment. Meanwhile, the card rarity is purely cosmetic.
- Note that the rarity is highly unreliable to judge an equipment's worth.
Distribution
| Star | Background | Icon Petals | Current System | Old System | |||||
|---|---|---|---|---|---|---|---|---|---|
| Rarity | Rarity | ||||||||
| ★ | Gray | "Iron cross" |
Rare (レア) |
Common (コモン) |
Rare (レア) |
- | - | - | |
| ★★ | Silver | "12 petals" |
Holo (ホロ) |
Holo (ホロ) | |||||
| ★★★ | Rainbow | "16 Petals" |
S Holo (Sホロ) |
- | S Holo (Sホロ) |
SS Holo (SSホロ) | |||
| ★★★★ | "Rising Sun Cross"
|
SS Holo (SSホロ) |
- | - | |||||
| ★★ ★★★ |
Shining Rainbow | - | |||||||
| ★★★ ★★★ |
★ ★Shining Rainbow★ + ★Stars★ ★ |
SS Holo+ (SSホロ+) |
- | ||||||
| ★★★ ★★★★ |
SS++ | ||||||||
- Old System Notes
At the beginning of the game, there was another less consistent distribution for rarity, but it was abandoned in 2014. Because of this, equipment released in 2013 and 2014 are not considered exceptions despite not following the current rules.
- The S Holo rarity seems to be an anomaly because it follows the current rule right from the beginning of the game. This could indicate that either the rarity of some old equipment has been updated (but no evidence so far) or there were two competing systems from the beginning and at the end one was chosen.
- The "Common" rarity has disappeared in the current system as the last common equipment was added on the 06/06/2014.
- The old system being "messy" and old it is more difficult to identify exceptions so none will be listed.
- Notably with the "Rising Sun Cross" having been changed to the "16 Petals" with updated CGs, that could be either corrections of exceptions or just following the new system.
Exceptions
The following equipment do not respect the current system:
- Rarity
- The 2 stars equipment 25mm Single Autocannon Mount
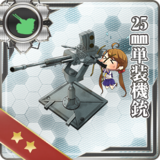 is Rare instead of Holo.
 - The 3 stars equipment Submarine Radar & Waterproof Telescope
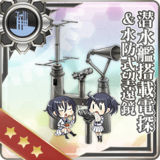 is Holo instead of S Holo.
 - The 4 stars equipment SG Radar (Initial Model)
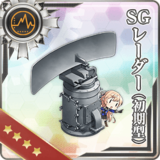 is S Holo instead of SS Holo.
- Background
- The following equipment have the Shining Rainbow instead of the Rainbow background of 4 stars rarity:
- The HF/DF + Type144/147 ASDIC
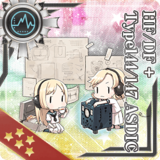 has the Shining Rainbow + Stars instead of the Shining Rainbow background of 5 stars rarity,
 - The Daihatsu Landing Craft
 and Type A Kouhyouteki
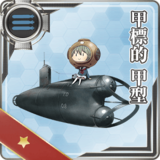 have a unique light blue background.
 - The Emergency Repair Personnel
 has a unique blue background.
 - The Prototype Night Zuiun (Attack Equipment)
 has a unique black, fire, and star shells background.
 - The Night Dive Bombers


 each have a unique black and star shells background.
- Icon petals
- The 16inch Triple Gun Mount Mk.7
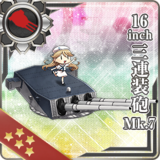 has the 16 petals instead of the "Rising Sun Cross".
 - The Type 0 Fighter Model 62 (Fighter-bomber)
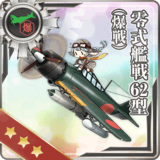 has the "Rising Sun Cross" instead of the 16 petals.
- Border
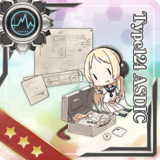
The following equipment are missing the card border: Night Operation Aviation Personnel , Type124 ASDIC
 , Type144/147 ASDIC
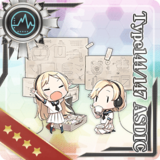 , HF/DF + Type144/147 ASDIC
Equipment Cosmetics
Each equipment in the game comes with at least one "Fairy" (just like the other NPC ones).
- Those fairies are mostly alone, but can come in groups or followed by some animals,
- Most fairies are "original characters", being only linked to an equipment.
- Some fairies are seen on several equipment, mostly equipment of the same family,
- Many fairies also represent specific ship girls, often on equipment historically tied to them.
Some gears can also have some historical details on them, especially advanced ones. Those details can be:
- Paintings, like for specific squadron planes,
- Fairy scenery, where the fairies are playing an historical scene,
- The fairies themselves, where the fairies represent some historical element, like a ship's insignia.
Additionally, some equipment can be "glowing", with either the gear, part of the gear, the fairy, part of the fairy, or part of the text, having a glowing halo around them.
- The equipment glowing, the part of the equipment glowing, and the color of the glowing are arbitrary.
See Also
- Equipment List
- Equipment List (Image)
- Equipment Ranking
- Equipment Equipability
- Fit Bonuses
- Development
- Equipment Setup
| ||


