- Welcome to the Kancolle Wiki!
- If you have any questions regarding site content, account registration, etc., please visit the KanColle Wiki Discord
Difference between revisions of "Land-Based Air Squadron"
Jigaraphale (talk | contribs) m (→Seaplanes) |
Jigaraphale (talk | contribs) (→Superfortress Air-Raid Sequence: Defunct Mechanic) |
||
| (121 intermediate revisions by 5 users not shown) | |||
| Line 1: | Line 1: | ||
| + | {{CombatPortal}} | ||
| + | |||
On certain maps, Land-Based Air Squadrons (LBAS) are available to support fleets. These squadrons can then be used to attack selected nodes or defend the base. | On certain maps, Land-Based Air Squadrons (LBAS) are available to support fleets. These squadrons can then be used to attack selected nodes or defend the base. | ||
*Land-based planes, carrier-based planes, and seaplanes can be assigned to these bases. | *Land-based planes, carrier-based planes, and seaplanes can be assigned to these bases. | ||
| Line 20: | Line 22: | ||
#* The screen needs to be reloaded to complete the relocation, | #* The screen needs to be reloaded to complete the relocation, | ||
#* This timer can be reduced down to 6 min if the LBAS group is upgraded. | #* This timer can be reduced down to 6 min if the LBAS group is upgraded. | ||
| − | # It costs bauxite to assign a plane to the base. The cost depends on the type of plane. Please see [[Land-Based Air Squadron#Assignment | + | # It costs bauxite to assign a plane to the base. The cost depends on the type of plane. Please see [[Land-Based Air Squadron#Assignment & Resupply|below]] for details. |
#* Moving planes around in the same base does not cost anything (they can be dragged and drop them between the slots). | #* Moving planes around in the same base does not cost anything (they can be dragged and drop them between the slots). | ||
#* Removing planes do not cost anything. | #* Removing planes do not cost anything. | ||
| Line 32: | Line 34: | ||
<div class="mw-collapsible mw-collapsed"> | <div class="mw-collapsible mw-collapsed"> | ||
| − | {{ | + | {{QuestsHeaderKai}} |
| − | {{ | + | {{QuestsKai |
| − | | type = | + | | cat= Factory| type= One| ID= F43 |
| − | | | + | | qreq1= B62| qreq2= F38 |
| − | | | + | | namejp= 中部海域「基地航空隊」展開! |
| − | | | + | | nameen= Begin The Preparations To "Build The Air Base"! |
| − | | namejp = 中部海域「基地航空隊」展開! | + | | text= Air Base Quest: |
| − | | nameen = Begin | + | | req= Scrap 2 [[Drum Canister]]s, and prepare 1 [[Construction Corps]], 1 200 fuel, and 3 000 bauxite. |
| − | | req = | + | | main= [[File:LBAS reward.png|250px|World 6 LBAS|link=LBAS]]<br>'''[[LBAS|World 6 LBAS]]'''<br>Also opens [[6-5]] if [[6-4]] is already cleared |
| − | + | | notes= Resources and item are consumed upon completion. | |
| − | | | ||
| − | | notes = Resources and | ||
}} | }} | ||
|} | |} | ||
| Line 53: | Line 53: | ||
<div class="mw-collapsible mw-collapsed"> | <div class="mw-collapsible mw-collapsed"> | ||
| − | {{ | + | {{QuestsHeaderKai}} |
| − | {{ | + | {{QuestsKai |
| − | | type = | + | | cat= Sortie| type= One| ID= B175 |
| − | | | + | | qreq1= B113| qreq2= B131 |
| − | | | + | | namejp= 南西海域「基地航空隊」開設! |
| − | | | + | | nameen= Southwestern Waters "Land Base Air Squadron" Established! |
| − | | namejp = 南西海域「基地航空隊」開設! | + | | text= Destroy enemy fleets near the Nansei Islands Patrol Area, Bashi Strait, the Eastern Orel Sea, and Deep off the coasts of Penang Island in the South Western Waters! Reach the port at Taiwan on the Shonan mainland route. Prepare a "Construction Corps" x1 and deploy the "Land Base Air Squadron" in the southwestern sea area that covers the area! |
| − | | nameen = Southwestern Waters "Land Base Air Squadron" Established! | + | | req= S rank the boss nodes of [[2-1]], [[2-2]], [[2-3]], and [[7-3|7-3 (Part 2)]], and reach node O in [[7-4]]. |
| − | | | + | * Prepare 1 [[Construction Corps]]. |
| − | + | | steel= 300 | |
| − | *Prepare 1 [[Construction Corps]]. | + | | bauxite= 300 |
| − | | steel = 300 | + | | main= [[File:LBAS reward.png|250px|World 7 LBAS|link=LBAS]]<br>'''[[LBAS|World 7 LBAS]] |
| − | | bauxite = 300 | + | | choice2= {{QuestRewardEquip|Type 1 Land-based Attack Aircraft}} {{QuestRewardEquip|Type 3 Fighter Hien|qty=2}} {{QuestRewardItem|Improvement Material|qty=5}} |
| − | | | + | | notes= Item is consumed upon completion. |
| − | | notes = | ||
}} | }} | ||
|} | |} | ||
| Line 76: | Line 75: | ||
*Please note that although additional bases may be unlocked as proceeding through the event, if an early event map has a limit of say 1 LBAS then only 1 can be used. The other bases will be on standby even if set to sortie. | *Please note that although additional bases may be unlocked as proceeding through the event, if an early event map has a limit of say 1 LBAS then only 1 can be used. The other bases will be on standby even if set to sortie. | ||
| − | ====LBAS | + | ====LBAS Relocation==== |
In some events, the LBAS's initial position on the map will be changed after reaching a certain phase. This will therefore change the ranges across the map, often making the boss easier to reach. | In some events, the LBAS's initial position on the map will be changed after reaching a certain phase. This will therefore change the ranges across the map, often making the boss easier to reach. | ||
| − | + | *This mechanic has been introduced in the [[Summer 2021 Event]]. | |
| − | *This mechanic has been | ||
==How to Use== | ==How to Use== | ||
| Line 90: | Line 88: | ||
#* Planes assigned to other LBAS within the same group will be labeled as such to be swapped (only 2 planes can be swapped, not one plane and an empty slot). | #* Planes assigned to other LBAS within the same group will be labeled as such to be swapped (only 2 planes can be swapped, not one plane and an empty slot). | ||
# Change the Deployment Mode notice by clicking on it on each available LBAS. It will rotate through: | # Change the Deployment Mode notice by clicking on it on each available LBAS. It will rotate through: | ||
| − | #* {{TextGlow|'''Standby (待機)'''|black|text- | + | #* {{TextGlow|'''Standby (待機)'''|black|text-color=White|glow-size=2px}} (default mode and is locked to this for empty bases) |
#* {{Color|red|'''Sortie (出撃)'''}} | #* {{Color|red|'''Sortie (出撃)'''}} | ||
| − | #* {{TextGlow|'''Air Defense (防空)'''|black|text- | + | #* {{TextGlow|'''Air Defense (防空)'''|black|text-color=yellow|glow-size=2px}} |
| − | #* {{TextGlow|'''Evacuation (退避)'''|black|text- | + | #* {{TextGlow|'''Evacuation (退避)'''|black|text-color=Cyan|glow-size=2px}} |
| − | #* {{TextGlow|'''Rest (休息)'''|black|text- | + | #* {{TextGlow|'''Rest (休息)'''|black|text-color=Lime|glow-size=2px}} |
#** If are using a KC viewer, the status of the LBAS will only be updated when exiting the LBAS menu. | #** If are using a KC viewer, the status of the LBAS will only be updated when exiting the LBAS menu. | ||
# When having at least 1 base set to sortie, there will be a green bar underneath the sortie button telling "Land-Based Air Squadron Ready to Sortie" (基地航空隊出撃準備中). | # When having at least 1 base set to sortie, there will be a green bar underneath the sortie button telling "Land-Based Air Squadron Ready to Sortie" (基地航空隊出撃準備中). | ||
| Line 113: | Line 111: | ||
*<math>\text{Plane}_\text{Cost}</math> is the deployment cost of the plane. Please refer to the [[Land-Based Air Squadron#Plane Stats Summary|tables below]] for costs. | *<math>\text{Plane}_\text{Cost}</math> is the deployment cost of the plane. Please refer to the [[Land-Based Air Squadron#Plane Stats Summary|tables below]] for costs. | ||
*<math>\text{Slot}_\text{Size}</math> is the size of the plane slot, being: | *<math>\text{Slot}_\text{Size}</math> is the size of the plane slot, being: | ||
| − | **'''4''' for " | + | **'''4''' for "[[Recon]]s" {{YellowPlane}}/{{Large Recon}}/{{Land-Based Recon}}/{{SPR}}/{{Night Recon}}/ [[LFB|Large Flying Boats]] {{Large Flying Boat}}, |
| − | **'''9''' for [[:Category:Land- | + | **'''9''' for [[:Category:Land-based Heavy Bombers|Land-Based Heavy Bombers]] {{Large Land-based Aircraft}}, |
**'''18''' for everything else. | **'''18''' for everything else. | ||
| Line 121: | Line 119: | ||
The resupply costs are: | The resupply costs are: | ||
| + | {|style="padding:10px; margin:20px; border:1px solid orange; border-radius:10px" | ||
| + | |valign="center"| <math>\text{Fuel} = 3 \times \text{Plane}</math> | ||
| + | <math>\text{Baux} = 5 \times \text{Plane}</math> | ||
| + | |} | ||
| − | |||
| − | |||
| − | |||
*<math>\text{Plane}</math> is the number of planes missing from the total count. | *<math>\text{Plane}</math> is the number of planes missing from the total count. | ||
=Deployment Modes= | =Deployment Modes= | ||
| − | =={{TextGlow|'''Standby'''|black|text- | + | =={{TextGlow|'''Standby'''|black|text-color=White|glow-size=2px}}== |
<div class="mw-collapsible"> | <div class="mw-collapsible"> | ||
| Line 166: | Line 165: | ||
===Combat Radius=== | ===Combat Radius=== | ||
| − | The Combat Radius determines the furthest node that a base can attack. This is displayed over the picture in the LBAS menu. | + | The Combat Radius (often represented using {{OpsRadius}}) determines the furthest node that a base can attack. This is displayed over the picture in the LBAS menu. |
* The distance of the nodes varies from map to map. Please refer to the LBAS range maps of relevant pages. | * The distance of the nodes varies from map to map. Please refer to the LBAS range maps of relevant pages. | ||
* Nodes will glow blue or yellow on mouseover with LBAS active. Yellow indicates nodes at the maximum range of the current base. | * Nodes will glow blue or yellow on mouseover with LBAS active. Yellow indicates nodes at the maximum range of the current base. | ||
* It is not possible to sortie if the range of the LBAS is unable to reach any node. | * It is not possible to sortie if the range of the LBAS is unable to reach any node. | ||
| − | *''Not to be confused with [[ | + | * The range of {{Autogyro}} [[Rotorcraft]] and {{ASWPlane}} {{Equipment/Link|Type 3 Command Liaison Aircraft (ASW)|Type 3 Command Liaison Aircraft Kai|text=Type 3 Command Liaison Aircraft|link=Liaison Aircraft}} cannot be increased. |
| + | *''Not to be confused with [[Range#Range Extension|Range Extension]] for ships.'' | ||
The effective range of an LBAS is given by: | The effective range of an LBAS is given by: | ||
| − | + | {{Formula|Title=LBAS Range Formula | |
| − | + | |Math=\text{Range}_\text{LBAS} = \text{Range}_\text{min} + \text{min} \Big( 3 \text{ ; } \biggl[ \sqrt{\text{Range}_\text{max} - \text{Range}_\text{min} } \biggr] \Big) | |
| − | + | |Var=<math>\text{Range}_\text{min}</math> is the minimum range of planes in the base. | |
| − | + | * <math>\text{Range}_\text{max}</math> is the maximum range of "Recons" ({{YellowPlane}}/{{Large Recon}}/{{Land-Based Recon}}/{{SPR}}/{{Night Recon}}/{{Large Flying Boat}}) in the base. | |
| − | |||
| − | * <math>\text{Range}_\text{max}</math> is the maximum range of "Recons" ({{YellowPlane}}/{{Large Recon}}/{{Land-Based Recon}}/{{SPR}}/{{Night Recon}}/{{ | ||
**<math>= \text{Range}_\text{min}</math> if no recon is present in the base. | **<math>= \text{Range}_\text{min}</math> if no recon is present in the base. | ||
* Value between <math>[ \ ]</math> is rounded up or down to the nearest integer. | * Value between <math>[ \ ]</math> is rounded up or down to the nearest integer. | ||
| + | |Notes= | ||
| + | }} | ||
Each LBAS ranges in a group are managed independently, so "range extenders" may be needed on multiple bases in some situations. | Each LBAS ranges in a group are managed independently, so "range extenders" may be needed on multiple bases in some situations. | ||
| Line 204: | Line 204: | ||
!width="50px"|10 | !width="50px"|10 | ||
|- | |- | ||
| − | !{{ | + | !{{Large Flying Boat}} {{Equipment/Link|Type 2 Large Flying Boat}} |
|20||4||5||6||7||8||9||10||11||12||13 | |20||4||5||6||7||8||9||10||11||12||13 | ||
|- | |- | ||
| − | !{{ | + | !{{Large Flying Boat}} {{Equipment/Link|PBY-5A Catalina}} |
|10||4||5||6||6||7||8||9||9||10|| - | |10||4||5||6||6||7||8||9||9||10|| - | ||
|- | |- | ||
| Line 241: | Line 241: | ||
===Attack Power=== | ===Attack Power=== | ||
Depending on the target, there are three different attack power formulas used. Please see the [[Land-Based_Air_Squadron#Plane_Stats_Summary|stats summary]] below for calculated attack power values. | Depending on the target, there are three different attack power formulas used. Please see the [[Land-Based_Air_Squadron#Plane_Stats_Summary|stats summary]] below for calculated attack power values. | ||
| − | * All '''"pre-cap"''' attack power is capped at | + | * All '''"pre-cap"''' attack power is capped at 220.<ref>https://twitter.com/Divinity_123/status/1651948848351158273</ref> |
* See [[Damage Calculations]] for more details. | * See [[Damage Calculations]] for more details. | ||
'''Please note that all formulas between <math>\lfloor \ \rfloor</math> are [[wikipedia:Floor and ceiling functions|rounded down]].''' | '''Please note that all formulas between <math>\lfloor \ \rfloor</math> are [[wikipedia:Floor and ceiling functions|rounded down]].''' | ||
| − | + | <onlyinclude> | |
| − | {| class="wikitable mw-collapsible mw-collapsed" width="100%" | + | {|class="wikitable mw-collapsible mw-collapsed" width="100%" |
| − | !Anti-Ship | + | !colspan=2|Anti-Ship |
|- | |- | ||
| + | !width=20px|<div style=writing-mode:vertical-rl;transform:rotate(180deg); text-align:left;>Pre-cap</div> | ||
| | | | ||
| − | + | {|style="padding:10px; margin:20px; border:1px solid orange; border-radius:10px" | |
| − | + | |valign="center"| <math>\text{Atk}_\text{pre-cap} = \biggl\lfloor \text{Mod}_\text{type} \times \Big( \big( \text{Mod}_\text{Sp1} \times \text{TP/DB} + \bigstar + \text{Mod}_\text{Sp2} \big) \times \sqrt{1.8 \times \text{Plane}_\text{Count}} + 25 \Big) \times \text{Mod}_\text{Sp3} \times \text{Mod}_\text{LBR} \biggr\rfloor</math> | |
| − | + | |} | |
| − | |||
| − | |||
| − | + | ;With | |
| − | * <math>\text{TP/DB}</math> | + | * <math>\text{TP/DB}</math> the: |
| − | ** '''Torpedo''' {{Torpedo}} stat for {{Land | + | ** '''Torpedo''' {{Torpedo}} stat for {{Land-based Attack Aircraft}}{{Land-based Assault Aircraft}}{{Large Land-based Aircraft}}{{Land-based Patrol Aircraft}}{{IconText|{{Interceptor Fighter2}}|bomber}} [[Land Based Bomber|LB Bombers]] and {{BluePlane}} [[Torpedo Bomber]]s, |
| − | ** '''Dive bombing''' {{Dive}} stat for {{RedPlane}}[[Dive Bomber]]s, {{JetFighterBomber1}}{{JetFighterBomber2}}[[Jets]], | + | ** '''Dive bombing''' {{Dive}} stat for {{RedPlane}} [[Dive Bomber]]s, {{JetFighterBomber1}}{{JetFighterBomber2}} [[Jets]], {{Seaplane}} [[Seaplane Bomber]]s, and {{IconText|{{ASWPlane}}|Hayabusa|8}} {{Equipment/Link|Type 1 Fighter Hayabusa Model II Kai (20th Squadron)|Type 1 Fighter Hayabusa Model III Kai (Skilled/20th Squadron)|link=Liaison Aircraft|text=ASW Hayabusa}}. |
** ''For carrier-based planes and seaplanes having both {{Torpedo}} & {{Dive}} stats, the second stat is not used.'' | ** ''For carrier-based planes and seaplanes having both {{Torpedo}} & {{Dive}} stats, the second stat is not used.'' | ||
| + | ** ''For aircraft with neither {{Torpedo}} nor {{Dive}} stat ({{Autogyro}} [[Rotorcraft]] & {{ASWPlane}} {{Equipment/Link|Type 3 Command Liaison Aircraft (ASW)|Type 3 Command Liaison Aircraft Kai|link=Liaison Aircraft|text=Command Liaison Aircraft}} so far), the formula still works, with minimal effectiveness.'' | ||
** ''The effect of the {{Firepower}} FP stat is unknown yet.'' | ** ''The effect of the {{Firepower}} FP stat is unknown yet.'' | ||
| − | * <math>\bigstar</math> | + | * <math>\bigstar</math> the [[Improvement]] bonuses of the equipment. |
| + | |||
| − | + | ;Pre-cap modifiers | |
| − | |||
| − | |||
| − | * <math>\text{Plane}_\text{Count}</math> | + | * <math>\text{Plane}_\text{Count}</math> the curent planes count in the slot. |
| − | ** It will be '''18''' (only '''9''' for [[:Category:Land- | + | ** It will be '''18''' (only '''9''' for [[:Category:Land-based Heavy Bombers|LB Heavy Bombers]]) for fully resupplied bases on their 1st attack. |
| − | * <math>\text{Mod}_\text{type}</math> | + | * <math>\text{Mod}_\text{type}</math> the type modifier: |
| − | ** ''' | + | ** '''0.8''' for other {{Land-based Attack Aircraft}}{{Land-based Assault Aircraft}}{{Land-based Patrol Aircraft}}{{IconText|{{Interceptor Fighter2}}|bomber}} [[:Category:Land-Based Attackers|LB Attackers]] and {{Large Land-based Aircraft}} [[:Category:Land-based Heavy Bombers|LB Heavy Bombers]] |
| − | + | ** '''1.0''' for {{RedPlane}} [[Dive Bomber]]s, {{BluePlane}} [[Torpedo Bomber]]s, {{SPB}} [[Seaplane Bomber]]s, {{Autogyro}} [[Rotorcraft]], and {{ASWPlane}} [[Anti-submarine Patrol Aircraft]], | |
| − | ** '''1.0''' for {{RedPlane}}[[Dive Bomber]]s, {{BluePlane}}[[Torpedo Bomber]]s, and {{ | ||
** '''0.7071''' for {{JetFighterBomber1}}{{JetFighterBomber2}}[[Jets]]. | ** '''0.7071''' for {{JetFighterBomber1}}{{JetFighterBomber2}}[[Jets]]. | ||
| − | * <math>\text{Mod}_\text{ | + | * <math>\text{Mod}_\text{Sp1}, \text{Mod}_\text{Sp2}, \text{Mod}_\text{Sp3}</math> the special modifiers for [[#LBAS Special Bombers]] on certain targets, |
| + | ** For other planes or against other targets, is '''1''' for Sp1 & Sp3, and '''0''' for Sp2. | ||
| − | + | * <math>\text{Mod}_\text{LBR}</math> the bonus for having a land-based recon {{Land-Based Recon}} present in the base. | |
| − | + | ** '''1.12''' for {{Equipment/Link|Type 2 Land-based Reconnaissance Aircraft}} and {{Equipment/Link|Mosquito PR Mk.IV}}, | |
| − | + | ** '''1.15''' for {{Equipment/Link|Type 2 Land-based Reconnaissance Aircraft (Skilled)}}, | |
| − | + | ** '''1''' otherwise. | |
| − | + | *** The bonus '''do not stack'''. If there are multiple recons in the land-base, only the highest bonus will be applied. | |
| − | * <math>\text{Mod}_\text{LBR}</math> | ||
| − | ** '''1. | ||
| − | ** '''1.15''' for {{Equipment/Link|Type 2 Land-based Reconnaissance Aircraft (Skilled)}} | ||
| − | ** '''1 | ||
| − | |||
| − | * | ||
| − | * | ||
| − | |||
| − | |||
| − | |||
| − | |||
|- | |- | ||
| + | !width=20px|<div style=writing-mode:vertical-rl;transform:rotate(180deg); text-align:left;>Post-cap</div> | ||
| | | | ||
| − | + | {|style="padding:10px; margin:20px; border:1px solid orange; border-radius:10px" | |
| − | + | |valign="center"| <math>\text{Atk}_\text{post-cap} = \biggl\lfloor \text{Atk}_\text{cap} \biggr\rfloor \times \text{Mod}_\text{Contact} \times \text{Mod}_\text{LBB} \times \text{Mod}_\text{CF} \times \text{Mod}_\text{historical} \times \text{Mod}_\text{boss} \times \text{Mod}_\text{balloon} \times_\downarrow \text{Mod}_\text{crit}</math> | |
| + | |} | ||
| − | + | ;Post-cap modifiers | |
| − | |||
| − | + | * <math>\text{Mod}_\text{Contact}</math> the contact bonus. Please see [[Contact]] for more details on the bonus. | |
| − | * <math>\text{ | + | * <math>\text{Mod}_\text{LBB}</math> being '''1.8''' for [[:Category:Land-Based Attackers|LB Attackers]], and '''1.0''' otherwise. |
| − | + | * <math>\text{Mod}_\text{CF}</math> the bonus when attacking combined fleets. It is '''1.1''' against combined fleets and '''1.0''' otherwise. | |
| − | * | + | * <math>\text{Mod}_\text{historical}</math> being the [[event]] historical bonuses. |
| − | + | * <math>\text{Mod}_\text{boss}</math> a bonus when attacking certain Princess and Demon-type enemies. The multiplier is chosen randomly between two values. The chance is roughly 50%. | |
| − | + | {|class="wikitable mw-collapsible mw-collapsed" | |
| − | + | !colspan=3|<math>\text{Mod}_\text{boss}</math><ref>https://twitter.com/Divinity_123/status/1659942254671216642</ref> | |
| − | + | |- | |
| − | + | !Boss (ID) !!Low mod !!High mod | |
| − | + | |- | |
| + | |{{Enemy/Link|PT Imp Pack|link=PT Imp Pack|text=PT Imp (1637-1640)}} ||0.4 ||0.7 | ||
| + | |- | ||
| + | |{{Enemy/Link|Battleship Princess|text=BB Hime (1557)}} ||1.7 ||3 | ||
| + | |- | ||
| + | |{{Enemy/Link|Battleship Summer Princess|text= Summer BB Hime (1696-1698)}}||1~1.68 ||1.77~2.42 | ||
| + | |- | ||
| + | |{{Enemy/Link|Aircraft Carrier Princess|text=CV Hime (1586)}} ||1.7 ||3 | ||
| + | |- | ||
| + | |{{Enemy/Link|Aircraft Carrier Princess B|text=CV Hime B (2105-2108)}} ||1 ||1 | ||
| + | |} | ||
| − | * <math>\text{Mod}_\text{ | + | * <math>\text{Mod}_\text{balloon}</math> being the effect of the deployed {{Balloon}} [[Barrage Balloon]]s on both side: |
| − | + | {|class="wikitable mw-collapsible mw-collapsed" style="text-align:center" | |
| + | !colspan=4|Balloon Effects | ||
| + | |- | ||
| + | !{{Balloon}} | ||
| + | !1!!2!!3 | ||
| + | |- | ||
| + | !colspan=4|Allied LBAS Damage | ||
| + | |- | ||
| + | !Allied balloons [https://twitter.com/yukicacoon/status/1697883339125055914?s=20] | ||
| + | |1.02||1.04||1.06 | ||
| + | |- | ||
| + | !Enemy balloons [https://twitter.com/yukicacoon/status/1702010314001367150] | ||
| + | |0.95||0.90||0.85 | ||
| + | |} | ||
| − | * <math>\text{Mod}_\text{ | + | * <math>\text{Mod}_\text{crit}</math> the critical multiplier of '''1.5''', |
| − | + | **It includes the proficiency [[Plane_Proficiency#Rank_Effects|critical damage multiplier]] ('''1.2''' for maxed proficiency {{Double Chevron}} planes), | |
| − | |||
| − | |||
| − | |||
| − | |||
| − | + | [https://twitter.com/Divinity_123/status/1659942242373566464] | |
| − | |||
|} | |} | ||
| − | {| class="wikitable mw-collapsible mw-collapsed" width="100%" | + | {|class="wikitable mw-collapsible mw-collapsed" width="100%" |
| − | ! | + | !colspan=2|Anti-Installation |
|- | |- | ||
| + | !width=20px|<div style=writing-mode:vertical-rl;transform:rotate(180deg); text-align:left;>Pre-cap</div> | ||
| | | | ||
| − | + | {|style="padding:10px; margin:20px; border:1px solid orange; border-radius:10px" | |
| − | + | |valign="center"| <math>\text{Atk}_\text{pre-cap} = \bigg\lfloor \text{Mod}_\text{type} \times \Big( \big( \text{TP/DB} + \bigstar \big) \times \sqrt{1.8 \times \text{Plane}_\text{Count}} + 25 \Big) \times \text{Mod}_\text{Sp3} \times \text{Mod}_\text{LBR} \bigg\rfloor</math> | |
| + | |} | ||
| − | ''' | + | ;With |
| − | * | + | * <math>\text{TP/DB}</math> the: |
| + | ** '''Torpedo''' {{Torpedo}} stat for {{BluePlane}}[[Torpedo Bomber]]s (behavior is still unclear). | ||
| + | ** '''Dive bombing''' {{Dive}} stat for {{Land-based Attack Aircraft}}{{Land-based Assault Aircraft}}{{Large Land-based Aircraft}}{{Land-based Patrol Aircraft}}{{IconText|{{Interceptor Fighter2}}|bomber}} [[Land Based Bomber|LB Bombers]], {{RedPlane}} [[Dive Bomber]]s, {{JetFighterBomber1}}{{JetFighterBomber2}} [[Jets]] (behavior is still unclear), {{SPB}}[[SPB|Seaplane Bombers]], and {{IconText|{{ASWPlane}}|Hayabusa|8}} {{Equipment/Link|Type 1 Fighter Hayabusa Model II Kai (20th Squadron)|Type 1 Fighter Hayabusa Model III Kai (Skilled/20th Squadron)|link=Liaison Aircraft|text=ASW Hayabusa}}. | ||
| − | + | |- | |
| − | + | !width=20px|<div style=writing-mode:vertical-rl;transform:rotate(180deg); text-align:left;>Post-cap</div> | |
| − | + | | | |
| − | + | {|style="padding:10px; margin:20px; border:1px solid orange; border-radius:10px" | |
| − | + | |valign="center"| <math>\text{Atk}_\text{post-cap} = \biggl\lfloor \text{Atk}_\text{cap} \biggr\rfloor \times \text{Mod}_\text{Contact} \times \text{Mod}_\text{LBB} \times \text{Mod}_\text{CF} \times \text{Mod}_\text{historical} \times \text{Mod}_\text{balloon} \times {\color{tomato}\text{Mod}_\text{Inst}} \times_\downarrow \text{Mod}_\text{crit}</math> | |
| − | + | |} | |
* ''Other variables are the same as for anti-ship.'' | * ''Other variables are the same as for anti-ship.'' | ||
| + | * <math>{\color{tomato}\text{Mod}_\text{Inst}}</math> is the anti-installation bonus, the multiplier is chosen randomly between two values. The chance is roughly 50%. ''see [[Combat/Anti-Installation#Airstrike_and_Land_Base_Bonus|here]] for more details: | ||
| − | * Only '''"[[ | + | {|class="wikitable" style="font-weight:bold; text-align:center" |
| − | ** If no aircraft in the base can perform ASW attacks, the base will not show at submarine-only nodes. | + | !colspan=9|<math>{\color{tomato}\text{Mod}_\text{Inst}}</math>[https://twitter.com/Divinity_123/status/1659942254671216642] |
| + | |- | ||
| + | !rowspan=2|Installation (ID) | ||
| + | !colspan=2|LBAS | ||
| + | |- | ||
| + | |Low mod ||High mod | ||
| + | |- | ||
| + | !{{Enemy/Banner|Isolated Island Princess|small=true}}<br>Isolated Island Princess (1671-1672) | ||
| + | |colspan=2| 2 | ||
| + | |- | ||
| + | !{{Enemy/Banner|Artillery Imp|small=true}}<br>Artillery Imp (1665-1667) | ||
| + | |1.6 ||2.5 | ||
| + | |- | ||
| + | !{{Enemy/Banner|Supply Depot Princess|small=true}}<br>"Old" Supply Depot Princesses (1653-1658) | ||
| + | |1.7 ||3.6? | ||
| + | |- | ||
| + | !{{Enemy/Banner|Supply Depot Princess D|small=true}}<br>"New" Supply Depot Princesses<br>(B, C, D, ...) (ID>1658) | ||
| + | ! - !! - | ||
| + | |- | ||
| + | !{{Enemy/Banner|Harbour Summer Princess B|small=true}}<br>Harbour Summer Princess B (2023) | ||
| + | |? ||? | ||
| + | |} | ||
| + | |||
| + | |} | ||
| + | |||
| + | {|class="wikitable mw-collapsible mw-collapsed" width="100%" | ||
| + | !colspan=2|ASW | ||
| + | |- | ||
| + | !width=20px|<div style=writing-mode:vertical-rl;transform:rotate(180deg); text-align:left;>Pre-cap</div> | ||
| + | | | ||
| + | {|style="padding:10px; margin:20px; border:1px solid orange; border-radius:10px" | ||
| + | |valign="center"| <math>\text{Atk}_\text{pre-cap} = \Big\lfloor \left( \big( \text{ASW} + \bigstar \big) \times \sqrt{1.8 \times \text{Plane Count}} + 25 \right) \times \text{Mod}_\text{ASW} \times \text{Mod}_\text{LBR} \Big\rfloor </math> | ||
| + | |} | ||
| + | ;With | ||
| + | * <math>\text{ASW}</math> the '''ASW''' {{ASW}} stat of the plane. | ||
| + | |||
| + | * <math>\text{Mod}_\text{ASW}</math> a '''random number''' based on the '''base ASW''' {{ASW}} of the plane. It is between: | ||
| + | ** '''0.35''' and '''0.8''' for 7-9 ASW planes. | ||
| + | ** '''0.7''' and '''1.0''' for 10+ ASW planes. | ||
| + | |- | ||
| + | !width=20px|<div style=writing-mode:vertical-rl;transform:rotate(180deg); text-align:left;>Post-cap</div> | ||
| + | | | ||
| + | {|style="padding:10px; margin:20px; border:1px solid orange; border-radius:10px" | ||
| + | |valign="center"| <math>\text{Atk}_\text{post-cap} = \bigg\lfloor\text{Atk}_\text{cap} \times \text{Mod}_\text{crit} \times \text{Mod}_\text{proficiency} \bigg\rfloor \times \text{Mod}_\text{Contact} \times \text{Mod}_\text{LBB}</math> | ||
| + | |} | ||
| + | |||
| + | * ''Other variables are the same as for anti-ship.'' | ||
| + | |- | ||
| + | |colspan=2| | ||
| + | ;Note | ||
| + | * Only '''"[[ASW Aircraft|ASW Planes]]"''' (7+ ASW) are able to perform ASW attacks. | ||
| + | ** If no aircraft in the base can perform ASW attacks, the base will not show at submarine-only nodes. | ||
|} | |} | ||
| − | + | ;Notes | |
* Unlike carrier airstrikes, the 1.2x critical proficiency bonus applies to each slot '''independently'''. | * Unlike carrier airstrikes, the 1.2x critical proficiency bonus applies to each slot '''independently'''. | ||
| + | * Jet Assault use the [[Damage_Calculations#Airstrike|airstrike formula]] even on land base. | ||
| + | <references/> | ||
| + | </onlyinclude> | ||
===LBAS Special Bombers=== | ===LBAS Special Bombers=== | ||
| Line 364: | Line 430: | ||
!Plane | !Plane | ||
!Target bonus | !Target bonus | ||
| − | ! | + | !<math>\text{Mod}_\text{Sp}</math> |
!Total Anti-Ship<br>Attack Power<ref>Assuming 18 planes and 0★</ref> | !Total Anti-Ship<br>Attack Power<ref>Assuming 18 planes and 0★</ref> | ||
!{{Hit}} Bonus | !{{Hit}} Bonus | ||
!Notes | !Notes | ||
|- | |- | ||
| − | !{{Equipment/Link|Bomb-carrying Type 1 Fighter Hayabusa Model III Kai (65th Squadron)}}<ref>https://twitter.com/juu_kanoya/status/1364361975061430274 | + | !{{Equipment/Link|Bomb-carrying Type 1 Fighter Hayabusa Model III Kai (65th Squadron)}}<ref>[https://twitter.com/juu_kanoya/status/1364361975061430274] [https://twitter.com/yukicacoon/status/1364852802103640064]</ref> |
| − | |rowspan= | + | |rowspan=3|DD |
| − | |{{Torpedo}} | + | |<math>\text{Mod}_\text{Sp2} = 25</math> |
| − | | | + | |239.4 |
| + | |0 | ||
| + | |{{Torpedo}} stat = '''0''' otherwise. | ||
| + | |- | ||
| + | !{{Equipment/Link|Type 1 Fighter Hayabusa Model III Kai (Skilled/20th Squadron)}}<ref>[https://twitter.com/Divinity_123/status/1651147441607983104]</ref> | ||
| + | |<math>\text{Mod}_\text{Sp2} = 30</math> | ||
| + | |195 | ||
|0 | |0 | ||
| − | | | + | |{{Dive}} stat = '''0''' against DD,<br>{{Dive}} stat = '''5''' otherwise. |
|- | |- | ||
!{{Equipment/Link|Ki-102 B}} | !{{Equipment/Link|Ki-102 B}} | ||
| Line 382: | Line 454: | ||
| | | | ||
|- | |- | ||
| − | !{{Equipment/Link|Type 4 Heavy Bomber Hiryuu + No.1 Model 1A Guided Missile}} | + | !rowspan=2|{{Equipment/Link|Type 4 Heavy Bomber Hiryuu + No.1 Model 1A Guided Missile}}<ref name="SP1">[https://twitter.com/Divinity_123/status/1659942247947808770]</ref> |
| − | | | + | |DD,CL,CA |
| − | |{{ | + | |<math>\text{Mod}_\text{Sp1} = 1.15</math> |
| − | |176 | + | |176.4 |
| − | | -1 against DD<br>+1 against CL | + | |rowspan=2| -1 against DD<br>+1 against CL |
| − | |rowspan= | + | |rowspan=7|'''Missile''' animation |
|- | |- | ||
| − | + | |(F)BB(V),CV(L/B) | |
| − | |{{ | + | |<math>\text{Mod}_\text{Sp1} = 1.13</math> |
| − | | | + | |174.6 |
| − | |||
|- | |- | ||
| − | !{{Equipment/Link|Do 217 E-5 + Hs293 Initial Model}} | + | !rowspan=2|{{Equipment/Link|Type 4 Heavy Bomber Hiryuu (Skilled) + No.1 Model 1A Guided Missile}}<ref name="SP1"/> |
| + | |DD,CL,CA | ||
| + | |<math>\text{Mod}_\text{Sp1} = \sim1.15</math> | ||
| + | |196.2 | ||
| + | |rowspan=2| +1 against CL<ref>[https://twitter.com/yukicacoon/status/1720787149342269528]</ref> | ||
| + | |- | ||
| + | |(F)BB(V),CV(L/B) | ||
| + | |<math>\text{Mod}_\text{Sp1} = \sim1.15</math> | ||
| + | |196.2 | ||
| + | |- | ||
| + | !rowspan=2|{{Equipment/Link|Ki-102 B Kai + No.1 Model 1B Guided Missile}}<ref name="SP1"/> | ||
| + | |DD,CL,CA | ||
| + | |<math>\text{Mod}_\text{Sp1} = 1.16</math> | ||
| + | |167.4 | ||
| + | |rowspan=2| -2 against DD<br>+1 against CL | ||
| + | |- | ||
| + | |(F)BB(V),CV(L/B) | ||
| + | |<math>\text{Mod}_\text{Sp1} = 1.14</math> | ||
| + | |165.6 | ||
| + | |- | ||
| + | !{{Equipment/Link|Do 217 E-5 + Hs293 Initial Model}}<ref>[https://twitter.com/yukicacoon/status/1431853861094842373]</ref> | ||
|DD | |DD | ||
| − | |<math>\text{Mod}_\text{ | + | |<math>\text{Mod}_\text{Sp1} = 1.10</math> |
|153 | |153 | ||
|rowspan=2|0 | |rowspan=2|0 | ||
|- | |- | ||
| − | !{{Equipment/Link|Do 217 K-2 + Fritz-X}} | + | !{{Equipment/Link|Do 217 K-2 + Fritz-X}}<ref>[https://twitter.com/kancolle_aki/status/1686396178454470656]</ref> |
|(F)BB(V) | |(F)BB(V) | ||
| − | |<math>\text{Mod}_\text{ | + | |<math>\text{Mod}_\text{Sp1} = 1.50</math> |
| − | | | + | |232 |
|'''Fritz-X''' animation | |'''Fritz-X''' animation | ||
|- | |- | ||
| − | !rowspan= | + | !rowspan=5|{{Equipment/Link|B-25}}<ref>[https://discord.com/channels/118339803660943369/178613137430282240/981575002967130112] [https://twitter.com/yukicacoon/status/1535905706783952897]</ref> |
|DD | |DD | ||
| − | |<math>\text{Mod}_\text{ | + | |<math>\text{Mod}_\text{Sp3} = 1.90</math> |
| − | | | + | |192.6 |
|rowspan=2| +2 | |rowspan=2| +2 | ||
| − | |rowspan= | + | |rowspan=5|'''Skip Bombing''' attack & animation.<ref>[[Abyssal Twin-engine Land-based Dive Bomber]] / [[Abyssal Twin-engine Land-based Dive Bomber Ace|Ace]] also perform such attack, but bonuses are unconfirmed.</ref> |
|- | |- | ||
|CL(T) | |CL(T) | ||
| − | |<math>\text{Mod}_\text{ | + | |<math>\text{Mod}_\text{Sp3} = 1.75</math> |
| − | |176 | + | |176.4 |
|- | |- | ||
|CA(V) | |CA(V) | ||
| − | |<math>\text{Mod}_\text{ | + | |<math>\text{Mod}_\text{Sp3} = 1.60</math> |
|162 | |162 | ||
| +3 | | +3 | ||
|- | |- | ||
|(F)BB(V) / CV(L) | |(F)BB(V) / CV(L) | ||
| − | |<math>\text{Mod}_\text{ | + | |<math>\text{Mod}_\text{Sp3} = 1.30</math> |
| − | |131 | + | |131.4 |
| +4 | | +4 | ||
| + | |- | ||
| + | |Installation | ||
| + | |<math>\text{Mod}_\text{Sp3} = 0.90</math><ref>[https://twitter.com/Divinity_123/status/1659942252997758977]</ref> | ||
| + | |149.4 | ||
| + | | +0? | ||
|} | |} | ||
| + | ''Alternative table: [https://twitter.com/hiryuuteitoku/status/1740873876073255351] | ||
<references/> | <references/> | ||
===Sortie Fighter-Power=== | ===Sortie Fighter-Power=== | ||
Please see the [[Land-Based_Air_Squadron#Plane_Stats_Summary|stats summary]] below for calculated sortie fighter-power values. | Please see the [[Land-Based_Air_Squadron#Plane_Stats_Summary|stats summary]] below for calculated sortie fighter-power values. | ||
| − | + | {{Formula | |
| − | + | |Title=Sortie Fighter-Power | |
| − | + | |Math=\text{Fighter-Power}_\text{sortie} = \left( \sum_{\text{All Slots} } \left[ \left(\text{AA} + \text{AA}_\text{★} + 1.5 \times \text{Intercept} \right) \times \sqrt{\text{Plane} }_\text{Count} + \text{Mod}_\text{proficiency} \right] \right) \times \text{Mod}_\text{LBR} | |
| − | | | + | |Var=<math>\text{Plane}_\text{Count}</math> the curent planes count in the slot. |
| − | |||
| − | |||
| − | |||
| − | |||
** It will be '''18''' for fully resupplied bases on their 1st attack. | ** It will be '''18''' for fully resupplied bases on their 1st attack. | ||
| − | * <math>\text{AA}</math> | + | * <math>\text{AA}</math> the Anti-Air {{AA}} stat of the plane. |
| − | * <math>\text{AA}_\text{★}</math> | + | * <math>\text{AA}_\text{★}</math> the Anti-Air {{AA}} stat gained from [[Improvement]]s. |
| − | * <math>\text{Intercept}</math> | + | * <math>\text{Intercept}</math> the Interception {{Interception}} stat of the plane. |
| − | * <math>\text{Mod}_\text{proficiency}</math> | + | * <math>\text{Mod}_\text{proficiency}</math> the fighter-power [[Proficiency]] bonus. For maxed proficiency {{Double Chevron}} planes it is: |
| − | ** '''25.464''' for {{ | + | ** '''25.464''' for {{LB Fighter 1}}{{LB Fighter 2}} [[Interceptor|Land-Based Fighters]], {{GreenPlane}} Carrier-Based [[Fighter]]s, {{SeaplaneFighter}} [[Seaplane Fighter]]s, and {{IconText|{{ASWPlane}}|Hayabusa|8}} {{Equipment/Link|Type 1 Fighter Hayabusa Model II Kai (20th Squadron)|Type 1 Fighter Hayabusa Model III Kai (Skilled/20th Squadron)|link=Liaison Aircraft|text=ASW Hayabusa}}. |
| − | ** '''9.464''' for {{ | + | ** '''9.464''' for {{SPB}} [[Seaplane Bomber]]s. |
** '''3.464''' for all other planes. | ** '''3.464''' for all other planes. | ||
| − | * <math>\text{Mod}_\text{LBR}</math> | + | * <math>\text{Mod}_\text{LBR}</math> the {{Land-Based Recon}} [[:Category:Land-based Reconnaissance Aircraft|LB Recons]] bonus. |
** '''1.15''' for {{Equipment/Link|Type 2 Land-based Reconnaissance Aircraft}}. | ** '''1.15''' for {{Equipment/Link|Type 2 Land-based Reconnaissance Aircraft}}. | ||
** '''1.18''' for {{Equipment/Link|Type 2 Land-based Reconnaissance Aircraft (Skilled)}}. | ** '''1.18''' for {{Equipment/Link|Type 2 Land-based Reconnaissance Aircraft (Skilled)}}. | ||
| − | ** '''1. | + | ** '''1.18''' for {{Equipment/Link|Mosquito PR Mk.IV}}. |
| − | + | }} | |
| + | |||
| − | + | ;Notes | |
* Contesting air control works exactly the same as normal aerial combat. | * Contesting air control works exactly the same as normal aerial combat. | ||
* A better air control state can reduce the losses taken by the LBAS. | * A better air control state can reduce the losses taken by the LBAS. | ||
| Line 462: | Line 556: | ||
* Be mindful not to compromise attack power by too much in order to reduce losses. Getting AD or AP is good enough. | * Be mindful not to compromise attack power by too much in order to reduce losses. Getting AD or AP is good enough. | ||
| − | + | ===Sortie Cost=== | |
| − | + | ||
| − | + | There is a flat cost associated with LBAS sorties. This is separate from the [[Land-Based_Air_Squadron#Resupply|resupply]] costs detailed above. | |
| − | + | ||
| − | + | '''[[Land Based Bomber|LB Bombers]]: | |
| − | + | {|style="padding:10px; margin:20px; border:1px solid orange; border-radius:10px" | |
| − | + | |valign="center"| | |
| − | + | *<math>\text{Fuel} = \lceil \text{Plane}_\text{Count} \times 1.5 \rceil</math> | |
| − | + | *<math>\text{Ammo} = \lfloor \text{Plane}_\text{Count} \times 0.7\rfloor</math> | |
| − | + | |} | |
| − | + | ||
| − | + | '''Other Planes: | |
| − | + | {|style="padding:10px; margin:20px; border:1px solid orange; border-radius:10px" | |
| − | + | |valign="center"| | |
| − | + | *<math>\text{Fuel} = \lceil \text{Plane}_\text{Count} \times 1.0 \rceil</math> | |
| − | + | *<math>\text{Ammo} = \lceil \text{Plane}_\text{Count} \times 0.6 \rceil</math> | |
| − | + | |} | |
| − | + | ||
| − | + | ;With | |
| − | + | * <math>\text{Plane}_\text{Count}</math> the current planes count in the slot. | |
| − | + | ||
| − | + | ;Notes | |
| − | + | * This cost is calculated '''per squadron'''. | |
| − | + | ** Empty slots do not cost anything. | |
| − | + | * Costs are '''rounded up''' except for the land-based ammo cost which is '''rounded down'''. | |
| − | + | ||
| − | + | ===[[PBY-5A Catalina]] rescue function=== | |
| − | + | [[File:Catalina rescue.png|thumb|right|3 bubbles Catalina rescue]] | |
| − | | | + | {{Equipment/Link|PBY-5A Catalina}} placed in LBAS have the ability to rescue planes lost in Land-Based Sorties. |
| − | + | * The rescue function will not trigger if: | |
| − | | style=" | + | ** A too large amount of Catalina is shot down, |
| − | + | ** No planes are lost, | |
| − | + | ** A 2nd wave does not occur due to all enemies dying. | |
| − | + | * The rescue can happen if the 2 LBAS attacks are split on different nodes, the rescue happening on both nodes. | |
| − | + | * Rescue only applies to bases with a Catalina equipped. | |
| − | + | * There 3 types of rescue that can trigger depending on the setup: | |
| − | + | ** Type 1, with 1 bubble, saving 1 slot, | |
| − | + | ** Type 2, with 2 bubbles, saving 2 slots, | |
| − | + | ** Type 3, with 3 bubbles, saving 3 slots. | |
| − | + | * Aircraft rescued by the Catalina will be restored : | |
| − | + | ** It saves some bauxite when resupplying, | |
| − | + | ** It '''does not''' prevent any loss of [[Plane Proficiency]]. | |
| − | + | * The number of Catalina used to rescue affects the rescue ratio. | |
| − | + | ** Catalina ranks do not affect the rescue ratio. | |
| − | + | *Losses are reduced per rescued slot (the final resupply value is about ~60% of what should be lost in battle). This doesn't carry over bases that are splitted. | |
| − | + | </div> | |
| − | |||
| − | |||
| − | | | ||
| − | |||
| − | |||
| − | |||
| − | |||
| − | |||
| − | |||
| − | |||
| − | |||
| − | |||
| − | |||
| − | |||
| − | |||
| − | |||
| − | |||
| − | | | ||
| − | |||
| − | |||
| − | |||
| − | | style=" | ||
| − | |||
| − | |||
| − | |||
| − | |||
| − | |||
| − | |||
| − | |||
| − | |||
| − | |||
| − | |||
| − | |||
| − | |||
| − | |||
| − | |||
| − | |||
| − | |||
| − | |||
| − | | | ||
| − | |||
| − | |||
| − | |||
| − | |||
| − | |||
| − | |||
| − | |||
| − | |||
| − | |||
| − | | | ||
| − | |||
| − | |||
| − | |||
| − | |||
| − | |||
| − | |||
| − | |||
| − | |||
| − | |||
| − | |||
| − | |||
| − | |||
| − | |||
| − | |||
| − | |||
| − | |||
| − | |||
| − | |||
| − | |||
| − | |||
| − | |||
| − | |||
| − | |||
| − | |||
| − | |||
| − | |||
| − | |||
| − | |||
| − | |||
| − | |||
| − | |||
| − | |||
| − | |||
| − | |||
| − | |||
| − | |||
| − | |||
| − | |||
| − | |||
| − | | | ||
| − | |||
| − | |||
| − | |||
| − | | | ||
| − | |||
| − | |||
| − | |||
| − | |||
| − | |||
| − | |||
| − | |||
| − | |||
| − | |||
| − | |||
| − | |||
| − | |||
| − | |||
| − | |||
| − | |||
| − | |||
| − | |||
| − | |||
| − | |||
| − | |||
| − | |||
| − | |||
| − | |||
| − | |||
| − | |||
| − | |||
| − | |||
| − | |||
| − | |||
| − | |||
| − | |||
| − | |||
| − | |||
| − | |||
| − | |||
| − | |||
| − | |||
| − | |||
| − | |||
| − | |||
| − | |||
| − | |||
| − | |||
| − | |||
| − | |||
| − | |||
| − | |||
| − | |||
| − | |||
| − | |||
| − | |||
| − | |||
| − | |||
| − | |||
| − | |||
| − | |||
| − | |||
| − | |||
| − | |||
| − | |||
| − | |||
| − | |||
| − | |||
| − | |||
| − | |||
| − | |||
| − | |||
| − | |||
| − | |||
| − | |||
| − | |||
| − | |||
| − | |||
| − | |||
| − | |||
| − | |||
| − | |||
| − | |||
| − | |||
| − | |||
| − | |||
| − | |||
| − | |||
| − | |||
| − | |||
| − | |||
| − | |||
| − | |||
| − | |||
| − | |||
| − | |||
| − | |||
| − | |||
| − | |||
| − | |||
| − | |||
| − | |||
| − | |||
| − | |||
| − | |||
| − | |||
| − | |||
| − | |||
| − | |||
| − | |||
| − | |||
| − | |||
| − | |||
| − | |||
| − | |||
| − | |||
| − | |||
| − | |||
| − | |||
| − | |||
| − | |||
| − | |||
| − | |||
| − | |||
| − | |||
| − | |||
| − | === | + | =={{TextGlow|'''Air Defense'''|black|text-color=yellow|glow-size=2px}}== |
| + | <div class="mw-collapsible"> | ||
| − | + | In [[6-5]] and some event maps, the enemy will raid the bases during the sortie. A base on air defense will attempt to intercept those raids to mitigate the damage done. | |
| + | * When intercepting enemy bombers, the '''first slot in the base will intercept the first slots on the enemy attackers''' and so on. | ||
| + | ** Planes with a higher anti-bomber {{Anti-Bomber}} stat should be deployed in slots with opposing bombers to minimize the damage taken. | ||
| − | + | ===Defense Fighter-Power=== | |
| − | + | Please see the [[Land-Based_Air_Squadron#Plane_Stats_Summary|stats summary]] below for calculated defense fighter-power values. | |
| − | *<math>\text{ | + | {{Formula |
| + | |Title=Defense Fighter-Power | ||
| + | |Math=\text{Fighter-Power}_\text{defense} = \left( \sum_{\text{All Slots} } \left[ \left(\text{AA} + \text{AA}_\text{★} + \text{Intercept} + 2 \times \text{Anti-Bomber} \right) \times \sqrt{\text{Plane}_\text{Count} } + \text{Mod}_\text{Proficiency} \right] \right) \times \text{Mod}_\text{recon} | ||
| + | |Var=<math>\text{AA}</math> the Anti-Air {{AA}} stat of the plane. | ||
| + | * <math>\text{AA}_\text{★}</math> the Anti-Air {{AA}} stat gained from [[Improvement]]s. | ||
| + | * <math>\text{Intercept}</math> the Interception {{Interception}} stat of the plane. | ||
| + | * <math>\text{Anti-Bomber}</math> the Anti-Bomber {{Anti-Bomber}} stat of the plane. | ||
| − | + | * <math>\text{Plane}_\text{Count}</math> the curent planes count in the slot. | |
| − | *<math>\text{ | + | ** It will be '''18''' for fully resupplied bases on their 1st attack. |
| − | * | ||
| − | + | * <math>\text{Mod}_\text{proficiency}</math> the fighter-power proficiency bonus. For maxed proficiency {{Double Chevron}} planes it is: | |
| − | * <math>\text{ | + | ** '''25.464''' for {{LB Fighter 1}}{{LB Fighter 2}} [[Interceptor|Land-Based Fighters]], {{GreenPlane}} Carrier-Based [[Fighter]]s, {{SeaplaneFighter}} [[Seaplane Fighter]]s, and {{IconText|{{ASWPlane}}|Hayabusa|8}} {{Equipment/Link|Type 1 Fighter Hayabusa Model II Kai (20th Squadron)|Type 1 Fighter Hayabusa Model III Kai (Skilled/20th Squadron)|link=Liaison Aircraft|text=ASW Hayabusa}}. |
| + | ** '''9.464''' for {{SPB}} [[Seaplane Bomber]]s. | ||
| + | ** '''3.464''' for all other planes. | ||
| + | |||
| + | * <math>\text{Mod}_\text{recon}</math> is the land-based reconnaissance bonus. Refer to the table below for details. | ||
| + | |||
| + | {{{!}}class="wikitable" style="text-align:center" | ||
| + | !colspan=4{{!}}Reconnaissance Defense Bonus | ||
| + | {{!}}- | ||
| + | !LoS | ||
| + | !{{SPR}}Seaplane<br>{{Large Flying Boat}}Large Flying Boat | ||
| + | !{{YellowPlane}}Carrier-based | ||
| + | !{{Land-Based Recon}}Land-Based | ||
| + | {{!}}- | ||
| + | {{!}}≥9{{!}}{{!}}1.16{{!}}{{!}}1.3{{!}}{{!}}1.24 | ||
| + | {{!}}- | ||
| + | {{!}}8{{!}}{{!}}1.13{{!}}{{!}} -{{!}}{{!}}1.18 | ||
| + | {{!}}- | ||
| + | {{!}}≤7{{!}}{{!}}1.1{{!}}{{!}}1.2{{!}}{{!}} - | ||
| + | {{!}}- | ||
| + | {{!}}} | ||
| + | |Notes=Planes with interception {{Interception}} and anti-bomber {{Anti-Bomber}} stats are much more effective. | ||
| + | * Obtaining air superiority reduces the chances to take no damage with planes that have 6 or more {{Anti-Bomber}}. | ||
| + | }} | ||
| − | + | ;Shootdown | |
| − | |||
| − | |||
| − | |||
| − | + | Unlike normal aerial combat, the shootdown for base defense is based on the anti-bomber {{Anti-Bomber}} stat of the plane. This is determined on a slot-by-slot basis as opposed to the whole air wing basis of aerial combat. | |
| − | |||
| − | {{ | ||
| − | |||
| − | |||
| − | |||
| − | |||
| − | |||
| − | |||
| − | |||
| − | |||
| − | |||
| − | |||
| − | |||
| − | |||
| − | |||
| − | |||
| − | |||
| − | |||
| − | |||
| − | + | {|class="wikitable mw-collapsible mw-collapsed" style="text-align:center" | |
| − | + | !colspan=3|Base Defense Shootdown % | |
| − | + | |- | |
| − | + | !width="64px"|Anti-Bomber | |
| − | + | !width="128px"|AP Shootdown % | |
| − | + | !width="128px"|AS Shootdown % | |
| − | + | |- | |
| − | = | + | |0<ref>Carrier-based fighters</ref>||6~60||52~80 |
| − | |||
| − | |||
| − | |||
| − | |||
|- | |- | ||
| − | | | + | |0||60~81||80~108 |
| − | |||
| − | |||
| − | |||
| − | |||
| − | |||
| − | |||
| − | |||
| − | |||
| − | |||
| − | |||
| − | |||
| − | |||
| − | |||
| − | |||
| − | |||
| − | |||
| − | |||
| − | |||
| − | |||
|- | |- | ||
| − | + | |1||63.5~88||83.5~115 | |
| − | |||
| − | |||
| − | |||
|- | |- | ||
| − | | | + | |2||67~95||87~122 |
|- | |- | ||
| − | | | + | |3||70.5~102||90.5~129 |
|- | |- | ||
| − | + | |4||74~109||94~136 | |
| − | |||
| − | |||
| − | |||
| − | |||
| − | |||
| − | |||
| − | |||
| − | |||
| − | |||
| − | |||
| − | |||
| − | |||
| − | |||
| − | |||
| − | |||
| − | |||
| − | |||
| − | |||
| − | |||
| − | |||
| − | |||
| − | |||
| − | |4||74~109||94~136 | ||
|- | |- | ||
|5||77.5~116||97.5~143 | |5||77.5~116||97.5~143 | ||
| Line 845: | Line 684: | ||
|} | |} | ||
<references/> | <references/> | ||
| − | |||
| − | ''' | + | ===Land Base Air-Raid=== |
| − | * | + | |
| − | * | + | During a sortie, an alert will say {{color|red|"Enemy formation approaching! Enemy aircraft are approaching our base" (敵編隊接近中!我が航空基地に敵機接近中。).}} |
| + | * The chance that this happens is random but increases when approaching the boss. | ||
| + | ** At the boss node, the chance is 100%. | ||
| + | * The damage dealt will not destroy the base. | ||
| + | * Either '''fuel or bauxite''' will be randomly lost for any damage done to the base. It is calculated as follows: | ||
| + | ** <math>\text{Resource Loss} = \text{Damage} \times 0.9 + 0.1</math> | ||
| + | *** <math>\text{Damage}</math> is the damage taken by the base. | ||
| + | ** The resource loss is rounded down. | ||
| + | ** The maximum cost is 179 fuel/bauxite. | ||
| + | * Only 1-4 planes in the '''first slot''' are lost due to damage. | ||
| + | ** Reconnaissance planes can '''only lose 1''' plane per raid. | ||
| + | ** If a slot only has 1 plane remaining, the loss will be applied to the slot below. | ||
{|class="wikitable mw-collapsible mw-collapsed" | {|class="wikitable mw-collapsible mw-collapsed" | ||
| − | |||
|- | |- | ||
| − | ! | + | !colspan=4|LBAS Raid Losses |
| − | |||
| − | |||
| − | |||
| − | |||
| − | |||
| − | |||
| − | |||
| − | |||
| − | |||
| − | | | ||
|- | |- | ||
| − | | | + | !width="128px"|Result |
| − | | | + | !width="256px"|Notice |
| − | | | + | !width="256px"|Losses |
| − | + | !width="512px"|Notes | |
| − | |||
|- | |- | ||
| − | | | + | |style="text-align: center; | No Damage |
| − | | | + | |style="text-align: center; | The base has suffered no losses.<br> |
| − | + | (空襲による基地の損害はありません。) | |
| − | | style=" | + | |style="text-align: center; | None |
| − | | | + | | |
| + | * Chance of occurring increases the better the air control state. | ||
| + | * This message is also displayed if fuel or bauxite is 0. | ||
|- | |- | ||
| − | | | + | |style="text-align: center; | <50 Damage |
| − | | | + | |style="text-align: center; color:orange;"| The air-raids have reduced our resource stockpiles!<br> |
| − | | style=" | + | (空襲により備蓄資源に損害を受けました!) |
| + | |style="text-align: center; | Resource loss | ||
| + | | | ||
|- | |- | ||
| − | | | + | |style="text-align: center; | >50 Damage |
| − | | | + | |style="text-align: center; color:red;"| The air raid has reduced our resource stockpiles, and our land-based air squadron has suffered losses on the ground!<br> |
| − | | | + | (空襲により備蓄資源に損害を受け、基地航空隊にも地上撃破の損害が発生しました!) |
| − | | style=" | + | |style="text-align: center;| Resource and plane loss. |
| − | | | + | | |
| + | * Bases that are "evacuated" will suffer only resource loss. | ||
| + | * Bases set to defense that take more than 50 damage will still lose planes but the display message will only indicate resources have been lost. | ||
|- | |- | ||
| − | | | + | |} |
| − | + | ||
| − | + | '''Notes:''' | |
| − | + | * Because the plane losses are not that high and the resource loss is limited, it is recommended to '''focus all available bases on attack''' instead, unless getting LBAS AS is needed. | |
| − | + | ||
| − | + | ===High Altitude Air-Raid=== | |
| − | + | ||
| − | + | This is a special air-raid where the LBAS is attacked by "high-altitude bombers". The defense power of the base is severely reduced unless one or more {{EquipmentLink|Me 163B|Prototype Shuusui|Shuusui|text=Land-based rocket interceptors}} are present. | |
| − | + | ||
| − | + | {{Category:High Altitude Interceptors}} | |
| − | + | ||
| − | + | * At least 2 "High Altitude Interceptors" are needed to remove the defense penalty. | |
| − | + | * The multiplier is calculated based on the number of rocket interceptors in '''all bases'''. | |
| − | + | * Damage works the same way as normal base raids. | |
| − | + | ||
| − | + | ===Superfortress Air-Raid Sequence=== | |
| − | + | On E-5 of the [[Winter 2022 Event]], a special interception mechanic was added, including the only "Quick Time Event" (QTE) in the game so far. | |
| − | + | *''See [[Superfortress Air-Raid Sequence]] for more details. | |
| − | + | </div> | |
| − | | | + | |
| − | | | + | =={{TextGlow|'''Evacuation'''|black|text-color=Cyan|glow-size=2px}}== |
| − | + | <div class="mw-collapsible"> | |
| − | | | + | |
| − | + | Bases set to "evacuate" will not lose planes to damage from "air-raids". | |
| − | + | * Resources will still be lost to damage. | |
| − | + | * Evacuated planes will recover morale slower. | |
| − | + | * Bases that have been evacuated will not cost resources on sortie. | |
| − | + | ||
| − | + | '''Notes:''' | |
| − | + | * Can be used to preserve planes in bases not currently used. | |
| − | + | * It can also save on sortie costs if a particular base is not currently needed on the sortie. | |
| − | + | ** E.g. a base with bombers when focusing on air defense. | |
| − | + | </div> | |
| − | + | ||
| − | + | =={{TextGlow|'''Rest'''|black|text-color=Lime|glow-size=2px}}== | |
| − | + | <div class="mw-collapsible"> | |
| − | + | ||
| − | + | During rest, the morale of the planes will recover faster. | |
| − | + | * The natural regeneration of bauxite {{Bauxite}} is '''severely reduced''' when a base is being rested. | |
| − | + | ** It is '''halved''' for one base and reduced to '''1/6''' for two bases. | |
| − | + | ** Because the only disadvantage of rest applies when being below the resource soft-cap, it can be freely used to recover bases faster when being above the soft-cap. | |
| − | + | ||
| − | + | *In Rest mode, to recover from 0 to good morale (30), it takes: | |
| − | + | ** 12 min at Lv 0 | |
| − | + | ** 9 min at Lv 1+ | |
| − | + | ** (1h30 in Sortie at Lv 0) | |
| − | + | * The waiting time is greatly affected by the LBAS group's level (see [[#Land Base Maintenance Menu|Land Base Maintenance menu]]). | |
| − | + | </div> | |
| − | + | ||
| − | + | =Morale= | |
| − | + | Squadrons will experience fatigue when sent on repeated sorties. Orange and red faces will be displayed on each individual squadron similar to ship girls. | |
| − | + | ||
| − | + | {|class="wikitable" style="text-align:center" | |
| − | + | !Morale Value!!Indication!! <math>\text{Mod}_\text{morale}</math> | |
| − | |||
| − | |||
| − | |||
| − | |||
| − | |||
| − | |||
| − | |||
| − | |||
| − | |||
| − | |||
| − | |||
| − | |||
| − | |||
| − | |||
| − | |||
| − | |||
| − | |||
| − | |||
| − | |||
| − | |||
| − | | | ||
| − | | | ||
| − | |||
| − | |- | ||
| − | |||
| − | |||
| − | |||
| − | |||
| − | |||
| − | |||
| − | |||
| − | |||
| − | |||
| − | |||
| − | |||
| − | |||
| − | |||
| − | |||
| − | |||
| − | |||
| − | |||
| − | |||
| − | |||
| − | |||
| − | |||
| − | | | ||
| − | | | ||
| − | |- | ||
| − | |||
| − | |||
| − | |||
| − | |||
| − | |||
| − | |||
| − | |||
| − | |||
| − | |||
| − | |||
| − | |||
| − | |||
| − | |||
| − | |||
| − | |||
| − | |||
| − | |||
| − | |||
| − | |||
| − | |||
| − | |||
| − | |||
| − | |||
| − | |||
| − | |||
| − | |||
| − | |||
| − | |||
| − | |||
| − | |||
| − | |||
| − | |||
| − | |||
| − | |||
| − | |||
| − | |||
| − | |||
| − | |||
| − | |||
| − | |||
| − | |||
| − | |||
| − | | | ||
| − | |||
| − | |||
| − | |||
| − | |||
| − | |||
| − | |||
| − | |||
| − | |||
|- | |- | ||
| − | | | + | |30-46||No mark||rowspan=2| 1.0 |
| − | | | ||
| − | | | ||
|- | |- | ||
| − | | | + | |20-29||style="color:orange"|'''Orange face''' |
| − | |||
| − | | style=" | ||
|- | |- | ||
| − | | | + | |0-19||style="color:red"|'''Red face'''|| 0.8 |
| − | + | |} | |
| − | | style=" | + | |
| − | | | + | * Planes have their morale set to 40 when deployed. |
| − | + | * Unlike ships, there is no "sparkle" morale. | |
| − | + | * The effect of morale is described [[Accuracy, Evasion and Criticals#Land-Based Air Squadron|here]]. | |
| − | + | * Each sortie decreases morale by '''6 when deployed to one node''' and '''8 when deployed to separate nodes'''. | |
| − | + | ** The result of the battle does not change the morale loss. | |
| − | + | ** The distance of the node does not affect morale loss. | |
| − | + | * Morale recovers every 3 min, the amount recovered depends on the mode of the base, and the recovery is improved when the LBAS level is increased, see [[#Land Base Maintenance Menu|Land Base Maintenance menu]]. | |
| − | + | ** Changing the mode before the 3 min timer is up will not change the amount recovered. | |
| − | + | ** Morale recovery from 40 to 46 is +1 per 3 min no matter the mode. | |
| − | + | *** If the morale recovery from a state below 40 is exceeding 40 after 3 min, it will still stop at 40. | |
| − | + | ||
| − | + | {|class="wikitable" style="text-align:center" | |
| − | + | !colspan=12|Recovery times from 0 morale [min] | |
| − | |||
| − | |||
| − | |||
| − | |||
| − | | | ||
| − | |||
| − | |||
| − | |||
| − | |||
|- | |- | ||
| − | | | + | !rowspan=2|Morale<br>goal |
| − | | | + | !colspan=2|Sorttie |
| − | | | + | !colspan=2|Air Defense |
| + | !colspan=2|Evacuation | ||
| + | !colspan=2|Standby | ||
| + | !colspan=3|Rest | ||
|- | |- | ||
| − | + | ! Lv 0-2!! Lv 3!! Lv 0-1!! Lv 2+!! Lv 0-1!! Lv 2+!! Lv 0-1!! Lv 2+!! Lv 0!! Lv 1!! Lv 2+ | |
| − | |||
| − | |||
|- | |- | ||
| − | | | + | | 0 to 20|| 60|| 30|| 30|| 21|| 21|| 15|| 15|| 12|| 9|| 6|| 6 |
| − | | | ||
| − | | | ||
|- | |- | ||
| − | | | + | | 0 to 30|| 90|| 45|| 45|| 30|| 30|| 24|| 24|| 18|| 12|| 9|| 9 |
| − | | | ||
| − | | | ||
|- | |- | ||
| − | | | + | | 0 to 40|| 120|| 60|| 60|| 42|| 42|| 30|| 30|| 24|| 15|| 12|| 12 |
| − | | | + | |} |
| − | | | + | |
| − | | | + | =Land Base Maintenance Menu= |
| − | | | + | [[file:LBAS_EN.png|thumb|right|The LBAS Maintenance menu]] |
| − | | | + | [[file:LBAS_light_EN.png|thumb|right|The menu seen on the Admiral's page]] |
| − | | | + | |
| − | | | + | Above any world menu for LBAS, can be found the button to access the general Land Base Maintenance menu. This menu gives access to the general level for each LBAS groups, including in this order: |
| − | | | + | *The '''"Limited time Land Base"''' (general [[Events]] LBAS group) |
| − | | | + | *The '''"Southwestern Land Base"''' ([[world 7]] LBAS group) |
| − | | | + | *The '''"Southern Land Base"''' ([[world 5]] LBAS group, currently not available) |
| − | | | + | *The '''"Central Land Base"''' ([[world 6]] LBAS group). |
| − | | | + | This menu is common to all world's LBAS groups. An additional menu is also found in the admiral's information menu, displaying a brief view of each LBAS group level. |
| − | | | + | |
| − | + | For each group, can be seen (from top to bottom), the: | |
| − | + | *4 LBAS groups | |
| − | + | *Current level of this group | |
| − | + | *Current mode of the group | |
| − | + | *Number of LBAS opened for the group | |
| − | + | *Amount of each plane type in the group with a scheme of each LBAS layout for: | |
| − | + | **LBAS Bombers, Interceptors, Fighters, Bombers, & Seaplanes and recons aircraft. | |
| − | + | ||
| − | + | Every group is initially at '''level 0''', and can be upgraded up to '''level 3''' using 1 {{Item/Link|Construction Corps}} each time. In the bottom right corner is showed how many Construction Corps are currently owned. | |
| − | + | ||
| − | | style=" | + | The effect for each level are the following: |
| − | | | + | {|class="wikitable" style="text-align: center" |
| − | | | + | !rowspan=2|Level |
| − | | [[ | + | !rowspan=2|Swapping<br>cooldown |
| − | + | !colspan=5|[[Land-Based_Air_Squadron#Morale|Morale]] recovery | |
|- | |- | ||
| − | | | + | !width="87px"|{{TextGlow|'''Standby'''|black|text-color=White|glow-size=2px}} |
| − | | | + | !width="87px"|{{color|red|'''Sortie'''}} |
| − | | | + | !width="87px"|{{TextGlow|'''Air Defense'''|black|text-color=Yellow|glow-size=2px}} |
| − | + | !width="87px"|{{TextGlow|'''Evacuation'''|black|text-color=Cyan|glow-size=2px}} | |
| − | | | + | !width="87px"|{{TextGlow|'''Rest'''|black|text-color=Lime|glow-size=2px}} |
|- | |- | ||
| − | | | + | |0||12 min||4||1||2||3||8 |
| − | | | ||
| − | | | ||
|- | |- | ||
| − | | | + | |1||10 min||4||1||2||3||10 |
| − | | | ||
| − | | | ||
|- | |- | ||
| − | | | + | |2||8 min||5||1||3||4||12 |
| − | | | ||
| − | | | ||
|- | |- | ||
| − | | | + | |3||6 min||5||2||3||4||12 |
| − | | | + | |} |
| − | | | + | |
| − | + | *Having an LBAS at LV 3 allows to make as many sorties as wished without worrying about morale in "sortie" mode, as long as at least 9 min are waited between sorties. | |
| − | | | ||
| − | | | ||
| − | |||
| − | |||
| − | | | ||
| − | | | ||
| − | | | ||
| − | | | ||
| − | |||
| − | |||
| − | |||
| − | |||
| − | |||
| − | = | + | In the case of the 1st group, {{TextGlow|'''all level improvements will carry over into future events'''|black|text-color=Lime|glow-size=2px}}. |
| − | + | From the [[Game Updates/2021/October 29th|2021/10/29 update]] to the [[Game Updates/2021/November 19th|2021/11/19 update]], Event's LBAS maintenance menu could no longer be accessed, and so cannot be improved. | |
| − | |||
| − | |||
| − | |||
| − | |||
| − | |||
| − | |||
| − | |||
| − | |||
| − | |||
| − | |||
| − | |||
| − | + | =Plane Proficiency Tips= | |
| − | + | Just like for regular planes in combat, planes in LBAS can gain and lose [[Proficiency]], by respectively taking part in battles, and being shot down. | |
| − | + | *Good spots to farm plane ranks are "weaker nodes", especially submarine nodes, where almost '''no''' plane is lost on them, guaranteeing the cheapest farming. | |
| − | + | *Such nodes are notably found on [[7-4]] and are a common occurrence in [[Events]]. | |
| − | + | ||
| − | + | The [[#PBY-5A Catalina rescue function]] does not prevent Proficiency loss. | |
| − | + | ||
| − | + | ===F5 Bug Exploit=== | |
| − | + | When any battle is interrupted before its end, if an LBAS has been sent to said combat, then '''no proficiency will be lost'''. | |
| − | + | *Interrupting a battle happens when the game crashes or is reloaded (via the F5 key notably). | |
| − | + | *This exploit is a well-known bug, but has yet to be fixed. | |
| − | ( | + | *Planes lost will still be counted as such and will have to be resupplied. |
| − | + | *As usual, interrupting a battle won't count for quest completion, exp or drop earning, ... | |
| − | + | ||
| − | * | + | This exploit is recommended to save on farming reranking planes during events, so planes can stay on {{Double Chevron}} until a node is cleared. |
| − | + | ||
| − | + | =Troubleshooting= | |
| − | + | <div class="mw-collapsible mw-collapsed"> | |
| − | + | '''Q: Does the plane order in the base matter?''' | |
| − | |||
| − | |||
| − | |||
| − | |||
| − | |||
| − | |||
| − | |||
| − | |||
| − | |||
| − | |||
| − | |||
| − | |||
| − | |||
| − | ''' | + | '''A:''' Yes. When taking damage from air raids, the plane in the top slot takes losses first. Therefore, you should try to put reconnaissance planes on top if you're running them. Otherwise, fighters or your weakest bomber go on top. |
| − | |||
| − | |||
| − | + | '''Q: Does it matter which base my planes are on?''' | |
| − | + | '''A:''' Yes. Because the first base goes first, you want your best fighter if you are running any in the first base to help reduce enemy airpower. If running all bombers, you want to order your bombers by fighter power so the highest goes into the first base and so on. This helps reduce the losses taken by subsequent bases. | |
| − | |||
| − | |||
| − | |||
| − | + | '''Q: How do I lock LBAS equipment?''' | |
| − | |||
| − | |||
| − | ''' | + | '''A:''' There are two ways. You can lock them from the ship girl equipment menu. Interceptors and fighters can be found under Others (...) and bombers can be found under the large plane icon at the bottom. You can also lock them from the LBAS equipment menu. |
| − | |||
| − | |||
| − | |||
| − | |||
| − | |||
| − | |||
| − | |||
| − | |||
| − | |||
| − | |||
| − | |||
| − | |||
| − | |||
| − | |||
| − | |||
| − | |||
| − | |||
| − | + | '''Q: How do I unequip planes on my LBAS?''' | |
| − | + | ||
| − | + | '''A:''' Click and drag them out of the slot. Note that this blocks out the slot until the plane is redeployed. If you wish to place a new plane in the slot, it is better to just replace it with a new one. | |
| − | |||
| − | |||
| − | |||
| − | |||
| − | |||
| − | |||
| − | |||
| − | |||
| − | |||
| − | |||
| − | |||
| − | |||
| − | |||
| − | |||
| − | |||
| − | |||
| − | |||
| − | |||
| − | |||
| − | |||
| − | |||
| − | |||
| − | |||
| − | |||
| − | |||
| − | |||
| − | |||
| − | |||
| − | |||
| − | |||
| − | |||
| − | |||
| − | + | '''Q: Can I move my planes between bases directly?''' | |
| − | + | ||
| − | + | '''A:''' Yes, though only between bases located in the same world (can't swap a plane between World 6 and Event Land Bases). The slot you're selecting from must also already have a plane in it (can't be empty, it swaps the planes rather than taking it). | |
| − | |||
| − | |||
| − | |||
| − | |||
| − | |||
| − | |||
| − | + | '''Q: How long does it take to redeploy?''' | |
| − | |||
| − | + | '''A:''' 12 minutes. Land Base upgrades will reduce this time. See [[Land-Based Air Squadron#Land Base Maintenance menu|Land Base Maintenance]] | |
| − | |||
| − | |||
| − | |||
| − | |||
| − | |||
| − | |||
| − | |||
| − | |||
| − | |||
| − | + | '''Q: Why can't I send my planes to X node?''' | |
| − | + | '''A:''' Double-check to see that the node is within your base's combat radius. | |
| − | |||
| − | |||
| − | |||
| − | |||
| − | |||
| − | |||
| − | |||
| − | |||
| − | |||
| − | + | '''Q: How can I make my planes reach X node?''' | |
| − | + | ||
| − | + | '''A:''' Use flying boats or other reconnaissance planes to extend the range of your other planes. See [[Land-Based_Air_Squadron#Deployment_Modes|combat radius]]. | |
| − | |||
| − | |||
| − | |||
| − | |||
| − | |||
| − | |||
| − | |||
| − | |||
| − | |||
| − | |||
| − | |||
| − | |||
| − | |||
| − | |||
| − | |||
| − | |||
| − | |||
| − | |||
| − | |||
| − | |||
| − | |||
| − | |||
| − | |||
| − | |||
| − | |||
| − | + | '''Q: Why are my planes deranked even though they've only taken minimal losses?''' | |
| − | + | ||
| − | + | '''A:''' Due to the way the planes are brought back to full strength for each wave, your plane was wiped during the first wave but got lucky during the second wave. | |
| + | |||
| − | + | '''Q: How do I rank my planes?''' | |
| − | |||
| − | |||
| − | |||
| − | |||
| − | |||
| − | + | '''A:''' By sending them on sorties. Please note that planes '''must participate''' in the sortie to gain experience. If previous waves sink all the enemies and planes in that base do not appear, '''they will not gain experience'''. This just wastes your resources. The best place to rank planes outside of events is [[7-4]]. | |
| − | |||
| − | |||
| − | |||
| − | |||
| − | |||
| − | |||
| − | |||
| − | + | '''Q: Why are my planes not ranking up?''' | |
| − | + | ||
| − | + | '''A:''' Double check that the planes in that base actually participated in the airstrike. They will not gain experience if they do not. If they did, please note that different planes have different leveling speeds. Check [[Plane_Proficiency#Leveling_Speed|Plane Proficiency]] for details. | |
| − | + | ||
| − | |||
| − | |||
| − | |||
| − | |||
| − | |||
| − | |||
| − | |||
| − | |||
| − | |||
| − | |||
| − | |||
| − | |||
| − | |||
| − | |||
| − | |||
| − | |||
| − | + | '''Q: How is my base taking damage?''' | |
| − | + | '''A:''' Your base is being attacked by [[Land-Based_Air_Squadron#Deployment_Modes|air raids]]. You need to set a base on defense with fighters or interceptors to mitigate that damage. It is generally not worth it to defend your land bases because the maximum you can lose per base is 179 fuel/bauxite and 4 planes from the top slot. Remember that reconnaissance planes take limited losses from air raids. | |
| − | |||
| − | + | '''Q: I can't find my planes!?''' | |
| − | |||
| − | |||
| − | |||
| − | + | '''A:''' Any plane currently deployed to a base or is being "Redeployed" cannot be viewed from the ship girl equipment menu. They can only be viewed in the LBAS equipment menu. | |
| − | |||
| − | |||
| − | |||
| − | |||
| − | |||
| − | |||
| − | |||
| − | |||
| − | + | '''Q: Why are my planes listed as deployed when they aren't?''' | |
| − | |||
| − | '''Q: | ||
| − | '''A:''' | + | '''A:''' Normal maps and event maps are not the same base. Check to see if those planes aren't being deployed elsewhere. |
| − | '''Q: | + | '''Q: Will it cost anything to shift my planes around?''' |
| − | '''A:''' | + | '''A:''' No, moving planes around '''in the same base''' does not incur a deployment cost. Be careful when dragging them around so you don't accidentally redeploy them. |
| − | '''Q: | + | '''Q: What happens in a night battle?''' |
| − | '''A:''' | + | '''A:''' Although the game allows you to select night battle nodes, there will be no LBAS attack performed. The exception to this is night-day nodes where the LBAS will perform the attack as usual once the battle shifts into day. |
| − | '''Q: | + | '''Q: What happens to event LBAS after the event ends?''' |
| − | '''A:''' | + | '''A:''' They will all be unequipped. There will be no additional resource loss even if you haven't resupplied your planes before the event ends. |
| − | '''Q: | + | '''Q: Is it worth it to open the 3rd base in World 6?''' |
| − | '''A:''' | + | '''A: <span style="color:red;">*</span>''' The 3rd base will pay for itself in fuel and bauxite savings in roughly 3 months of 6-5 clears. Assuming that your bases regularly get knocked to moderate damage. It will take longer to pay for itself if your bases take less damage. This also assumes you have good enough fighters and interceptors to negate damage. Otherwise, the payback period gets longer. It can be a good long-term investment. |
| − | '''Q: | + | '''Q: Is it worth it to open the 2nd & 3rd bases in World 7?''' |
| − | '''A:''' | + | '''A: <span style="color:red;">*</span>''' For now, there is only 7-4 with LBAS access in world 7, and there is only one LBAS available to sortie, and there is no air raid on this map, so opening any LBAS is useless. |
| − | '''Q: | + | '''Q: Is it worth it to upgrade LBAS groups?''' |
| − | '''A:''' | + | '''A: <span style="color:red;">*</span>''' Upgrading LBAS groups decrease the swapping cooldown and increase the morale recovery, something which can be invaluable during events where time is counted, but on the contrary, something almost meaningless on regular maps. |
| + | *For most admirals, Upgrading the 1st LBAS group (event) may be helpful. | ||
| + | *Upgrading the 4th LBAS group (W6) can be useful if you are used to clear 6-5 late in the month. | ||
| + | *Upgrading the 2nd LBAS group (W7) is almost useless. | ||
| − | ''' | + | <span style="color:red;">'''*'''''NOTE: It is possible to unlock [[Construction Corps]] through quests, without paying any money (800 ¥).''</span> |
| + | </div> | ||
| − | + | =Plane Stats Summary= | |
| + | The following assumptions apply: | ||
| + | * Full strength squadron | ||
| + | * Maxed proficiency ({{Double Chevron}}) | ||
| + | * Versus single fleet | ||
| + | * No contact | ||
| + | * No critical | ||
| + | * No anti-installation bonus factored in. | ||
| − | + | In addition, [[Aerial Combat#Anti-Air_Resistance|Anti-Air Resistance]] works for any relevant plane. | |
| − | + | ==Land-Based Planes== | |
| − | + | {|class="wikitable mw-collapsible mw-collapsed sortable" style="text-align:center; width:75%" | |
| − | + | |+[[Land Based Bomber|Bombers]] {{Land-based Attack Aircraft}}{{Land-based Assault Aircraft}}{{Large Land-based Aircraft}}{{Land-based Patrol Aircraft}} | |
| − | + | |- | |
| − | + | !rowspan=2|Name | |
| − | + | !rowspan=2|Deployment Cost | |
| − | + | !rowspan=2|Assignment Cost | |
| − | + | !rowspan=2|Combat Radius | |
| − | + | !colspan=3|Attack Power | |
| − | + | !rowspan=2|Sortie/Defense Fighter Power | |
| − | + | |- | |
| − | + | !Anti-Ship | |
| − | + | !Anti-Ground | |
| − | + | !ASW | |
| − | + | |- | |
| − | + | |{{Equipment/Link|Type 96 Land-based Attack Aircraft}}||10||180||8||100.8||117|| -||7 | |
| − | + | |- | |
| − | + | |{{Equipment/Link|Type 1 Land-based Attack Aircraft}}||12||216||9||117||133.2|| -||11 | |
| − | + | |- | |
| − | + | |{{Equipment/Link|Type 1 Land-based Attack Aircraft (Nonaka Squadron)}}||12||216||9||133.2||142.2|| -||16 | |
| − | + | |- | |
| − | + | |{{Equipment/Link|Type 1 Land-based Attack Aircraft Model 22A}}||12||216||10||126||133.2|| -||16 | |
| − | + | |- | |
| − | + | |{{Equipment/Link|Type 1 Land-based Attack Aircraft Model 34}}||12||216||8||126||133.2|| -||20 | |
| − | + | |- | |
| − | + | |{{Equipment/Link|Ginga}}||13||234||9||149.4||149.4|| -||16 | |
| − | + | |- | |
| − | + | |{{Equipment/Link|Bomb-carrying Type 1 Fighter Hayabusa Model III Kai (65th Squadron)}}||4||72||5||36<br>({{ToolTip|239.4|against DD}})||100.8|| -||28 | |
| − | + | |- | |
| − | + | |{{Equipment/Link|Prototype Toukai}}||9||162||8||36||52.2||102.6 ~ 145.8||3 | |
| − | + | |- | |
| − | + | |{{Equipment/Link|Toukai (901 Air Group)}}||9||162||8||36||52.2||109.8 ~ 156.6||3 | |
| − | + | |- | |
| − | ''' | + | |{{Equipment/Link|Do 17 Z-2}}||13||234||4||36||126|| -||11 |
| − | + | |- | |
| − | + | |{{Equipment/Link|Do 217 E-5 + Hs293 Initial Model}}||15||270||4||142.2 ({{ToolTip|153|against DD}})||216|| -||20 | |
| − | + | |- | |
| − | + | |{{Equipment/Link|Do 217 K-2 + Fritz-X}}||17||306||4||165.6 ({{ToolTip|232.2|against BB}})||232.2|| -||20 | |
| − | + | |- | |
| + | |{{Equipment/Link|Type 4 Heavy Bomber Hiryuu}}||14||252||5||149.4||158.4|| -||24 | ||
| + | |- | ||
| + | |{{Equipment/Link|Type 4 Heavy Bomber Hiryuu (Skilled)}}||14||252||5||149.4||165.6|| -||24 | ||
| + | |- | ||
| + | |{{Equipment/Link|Type 4 Heavy Bomber Hiryuu + No.1 Model 1A Guided Missile}}||15||270||5||176.4||199.8|| -||24 | ||
| + | |- | ||
| + | |{{Equipment/Link|SM.79}}||11||198||7||108||142.2|| -||11 | ||
| + | |- | ||
| + | |{{Equipment/Link|SM.79 bis}}||13||234||8||133.2||149.4|| -||16 | ||
| + | |- | ||
| + | |{{Equipment/Link|SM.79 bis (Skilled)}}||14||252||8||142.2||149.4|| -||13 | ||
| + | |- | ||
| + | |{{Equipment/Link|Shinzan}}||20||180||10||71||74|| -||7 | ||
| + | |- | ||
| + | |{{Equipment/Link|Shinzan Kai}}||21||189||11||74||81|| -||11 | ||
| + | |- | ||
| + | |{{Equipment/Link|Ginga (Egusa Squadron)}}||13||234||8||158.4||158.4|| -||16 | ||
| + | |- | ||
| + | |{{Equipment/Link|Ki-102 B}}||9||162||4||126||190.8|| -||20 | ||
| + | |- | ||
| + | |{{Equipment/Link|Ki-102 B Kai + No.1 Model 1B Guided Missile}}||12||216||3||167.4||199.8|| -||16 | ||
| + | |- | ||
| + | |{{Equipment/Link|B-25}}||13||234||7||{{ToolTip|{{TextGlow|'''⯁'''|black|glow-size=2px}}|See [[#LBAS Special Bombers]]}}||165.6|| -||20 | ||
| + | |- | ||
| + | |{{Equipment/Link|Mosquito FB Mk.VI}}||14||252||7||75.6||181.8|| -||24 | ||
| + | |- | ||
| + | |{{Equipment/Link|Type 4 Heavy Bomber Hiryuu (Skilled) + No.1 Model 1A Guided Missile}}||15||270||5||196.2||207|| -||24 | ||
| + | |- | ||
| + | |{{Equipment/Link|Ginga (Skilled)}}||13||234||7||149.4||158.4|| -||16.2 | ||
| + | |} | ||
| − | + | {|class="wikitable mw-collapsible mw-collapsed sortable" style="text-align:center; width:75%" | |
| − | + | |+[[Interceptor|Fighters]] {{LB Fighter 1}}{{LB Fighter 2}}{{LB Fighter Jet}} | |
| − | + | |- | |
| − | + | !Name | |
| − | + | !Deployment Cost | |
| − | + | !Assignment Cost | |
| − | + | !Combat Radius | |
| − | + | !Sortie Fighter-Power | |
| − | + | !Defense Fighter-Power | |
| − | + | |- | |
| − | + | |{{Equipment/Link|Raiden}}||6||108||2||63||101 | |
| − | + | |- | |
| − | + | |{{Equipment/Link|Type 3 Fighter Hien}}||7||126||3||78||80 | |
| − | + | |- | |
| − | + | |{{Equipment/Link|Type 3 Fighter Hien}} ★+10||7||126||3||86||89 | |
| − | + | |- | |
| − | + | |{{Equipment/Link|Type 3 Fighter Hien (244th Air Combat Group)}}||7||126||4||89||106 | |
| − | + | |- | |
| − | + | |{{Equipment/Link|Type 3 Fighter Hien Model 1D}}||7||126||4||82||93 | |
| − | + | |- | |
| − | + | |{{Equipment/Link|Shiden Model 11}}||6||108||3||65||72 | |
| − | |||
| − | |||
| − | |||
| − | |||
| − | |||
| − | |||
| − | |||
| − | |||
| − | |||
| − | |||
| − | |||
| − | |||
| − | |||
| − | |||
| − | |||
| − | |||
| − | {| | ||
| − | | | ||
|- | |- | ||
| − | + | |{{Equipment/Link|Shiden Model 11}} ★+10||6||108||3||74||80 | |
| − | |||
| − | |||
| − | |||
| − | |||
| − | |||
|- | |- | ||
| − | + | |{{Equipment/Link|Shiden Model 21 Shiden Kai}}||6||108||4||82||84 | |
| − | |||
| − | |||
|- | |- | ||
| − | |{{Equipment/Link|Type | + | |{{Equipment/Link|Type 4 Fighter Hayate}}||7||126||5||74||80 |
|- | |- | ||
| − | |{{Equipment/Link|Type 1 | + | |{{Equipment/Link|Type 1 Fighter Hayabusa Model II}}||4||72||6||63||59 |
|- | |- | ||
| − | |{{Equipment/Link|Type 1 | + | |{{Equipment/Link|Type 1 Fighter Hayabusa Model II}} ★+10||4||72||6||72||67 |
|- | |- | ||
| − | |{{Equipment/Link|Type 1 | + | |{{Equipment/Link|Type 1 Fighter Hayabusa Model III A}}||4||72||6||74||76 |
|- | |- | ||
| − | |{{Equipment/Link|Type 1 | + | |{{Equipment/Link|Type 1 Fighter Hayabusa Model III A}} ★+10||4||72||6||82||84 |
|- | |- | ||
| − | |{{Equipment/Link| | + | |{{Equipment/Link|Type 1 Fighter Hayabusa Model III A (54th Squadron)}}||4||72||7||78||80 |
|- | |- | ||
| − | |{{Equipment/Link| | + | |{{Equipment/Link|Type 1 Fighter Hayabusa Model II (64th Squadron)}}||4||72||7||103||101 |
|- | |- | ||
| − | |{{Equipment/Link| | + | |{{Equipment/Link|Spitfire Mk.I}}||5||90||4||61||76 |
|- | |- | ||
| − | |{{Equipment/Link| | + | |{{Equipment/Link|Spitfire Mk.I}} ★+10||5||90||4||70||84 |
|- | |- | ||
| − | |{{Equipment/Link| | + | |{{Equipment/Link|Spitfire Mk.V}}||5||90||5||76||97 |
|- | |- | ||
| − | |{{Equipment/Link| | + | |{{Equipment/Link|Spitfire Mk.IX (Skilled)}}||6||108||4||93||101 |
|- | |- | ||
| − | |{{Equipment/Link| | + | |{{Equipment/Link|Shiden Kai (343 Air Group) 301st Fighter Squadron}}||6||108||4||97||106 |
|- | |- | ||
| − | |{{Equipment/Link| | + | |{{Equipment/Link|Shiden Kai (343 Air Group) 701st Fighter Squadron}}||6||108||4||97||106 |
|- | |- | ||
| − | |{{Equipment/Link| | + | |{{Equipment/Link|Shiden Kai (343 Air Group) 407th Fighter Squadron}}||6||108||4||97||106 |
|- | |- | ||
| − | |{{Equipment/Link| | + | |{{Equipment/Link|Reppuu Kai}}||9||162||4||80||127 |
| + | |- | ||
| + | |{{Equipment/Link|Reppuu Kai (352 Air Group/Skilled)}}||9||162||4||91||144 | ||
| + | |- | ||
| + | |{{Equipment/Link|Me 163B}}||4||72||1||33||110 | ||
| + | |- | ||
| + | |{{Equipment/Link|Prototype Shuusui}}||4||72||1||33||101 | ||
| + | |- | ||
| + | |{{Equipment/Link|Shuusui}}||4||72||1||38||114 | ||
|- | |- | ||
| − | |{{Equipment/Link| | + | |{{Equipment/Link|Fw 190 D-9}}||8||144||3||95||114 |
|- | |- | ||
| − | |{{Equipment/Link| | + | |{{Equipment/Link|Type 0 Fighter Model 22 (251 Air Group)}} ★+2||4||72||7||97||99 |
|- | |- | ||
| − | |{{Equipment/Link| | + | |{{Equipment/Link|Type 0 Fighter Model 21 (Tainan Air Group)}} ★+2||4||72||7||92||95 |
|- | |- | ||
| − | |{{Equipment/Link| | + | |{{Equipment/Link|Type 0 Fighter Model 21 (Tainan Air Group)}} ★+4||4||72||7||94||96 |
|- | |- | ||
| − | |{{Equipment/Link| | + | |{{Equipment/Link|Type 0 Fighter Model 32 (Tainan Air Group)}} ★+2||4||72||5||103||103 |
|- | |- | ||
| − | |{{Equipment/Link| | + | |{{Equipment/Link|Type 0 Fighter Model 32 (Tainan Air Group)}} ★+3||4||72||5||104||104 |
|- | |- | ||
| − | |{{Equipment/Link| | + | |{{Equipment/Link|Type 2 Two-seat Fighter Toryuu}}||8||144||3||44||76 |
|- | |- | ||
| − | |{{Equipment/Link| | + | |{{Equipment/Link|Type 2 Two-seat Fighter Toryuu Model C}}||9||162||3||50||97 |
|- | |- | ||
| − | |{{Equipment/Link| | + | |{{Equipment/Link|Ki-96}}||10||180||3||72||106 |
|- | |- | ||
| − | |{{Equipment/Link| | + | |{{Equipment/Link|Me 262 A-1a/R1}}||13||234||3||95||144 |
|} | |} | ||
| − | {|class="wikitable mw-collapsible mw-collapsed sortable" style="text-align: center; width:75% | + | {|class="wikitable mw-collapsible mw-collapsed sortable" style="text-align:center; width:75%" |
| − | |+[[:Category: | + | |+[[:Category:Land-based Reconnaissance Aircraft|Recons]] {{Land-Based Recon}} |
|- | |- | ||
!Name | !Name | ||
| Line 1,607: | Line 1,169: | ||
!Assignment Cost | !Assignment Cost | ||
!Combat Radius | !Combat Radius | ||
| − | !Sortie | + | !Sortie/Defense Fighter-Power |
| − | |||
|- | |- | ||
| − | |{{Equipment/Link| | + | |{{Equipment/Link|Type 2 Land-based Reconnaissance Aircraft}}||7||28||8||9 |
|- | |- | ||
| − | |{{Equipment/Link|Type | + | |{{Equipment/Link|Type 2 Land-based Reconnaissance Aircraft (Skilled)}}||7||28||9||9 |
|- | |- | ||
| − | |{{Equipment/Link| | + | |{{Equipment/Link|Mosquito PR Mk.IV}}||14||56||9||3 |
| + | |} | ||
| + | <references/> | ||
| + | {{clear}} | ||
| + | |||
| + | ==Carrier-Based Planes== | ||
| + | {|class="wikitable mw-collapsible mw-collapsed sortable" style="text-align:center; width:75%" | ||
| + | |+[[Fighter]]s {{GreenPlane}}{{Night Fighter Aircraft}} | ||
|- | |- | ||
| − | + | !Name | |
| + | !Deployment Cost | ||
| + | !Assignment Cost | ||
| + | !Combat Radius | ||
| + | !Sortie/Defense Fighter-Power | ||
|- | |- | ||
| − | |{{Equipment/Link|Type | + | |{{Equipment/Link|Type 96 Fighter}}||3||54||3||38 |
|- | |- | ||
| − | |{{Equipment/Link| | + | |{{Equipment/Link|Type 96 Fighter}} ★+10||3||54||3||46 |
|- | |- | ||
| − | |{{Equipment/Link| | + | |{{Equipment/Link|Type 0 Fighter Model 21}}||4||72||7||46 |
|- | |- | ||
| − | |{{Equipment/Link| | + | |{{Equipment/Link|Type 0 Fighter Model 21}} ★+10||4||72||7||55 |
|- | |- | ||
| − | |{{Equipment/Link|Type | + | |{{Equipment/Link|Type 0 Fighter Model 52}}||5||90||6||50 |
|- | |- | ||
| − | |{{Equipment/Link|Type | + | |{{Equipment/Link|Type 0 Fighter Model 52}} ★+10||5||90||6||59 |
|- | |- | ||
| − | |{{Equipment/Link| | + | |{{Equipment/Link|Prototype Reppuu Late Model}}||7||126||5||67 |
|- | |- | ||
| − | |{{Equipment/Link| | + | |{{Equipment/Link|Reppuu Model 11}}||8||144||5||76 |
|- | |- | ||
| − | |{{Equipment/Link| | + | |{{Equipment/Link|Shiden Kai 2}}||6||108||3||63 |
|- | |- | ||
| − | |{{Equipment/Link| | + | |{{Equipment/Link|Shinden Kai}}||9||162||2||89 |
|- | |- | ||
| − | |{{Equipment/Link|Type | + | |{{Equipment/Link|Type 0 Fighter Model 21 (Skilled)}}||4||72||7||59 |
|- | |- | ||
| − | |{{Equipment/Link| | + | |{{Equipment/Link|Type 0 Fighter Model 21 (Skilled)}} ★+10||4||72||7||67 |
|- | |- | ||
| − | |{{Equipment/Link| | + | |{{Equipment/Link|Zero Fighter Model 52C (601 Air Group)}}||5||90||6||63 |
|- | |- | ||
| − | |{{Equipment/Link| | + | |{{Equipment/Link|Zero Fighter Model 52C (601 Air Group)}} ★+10||5||90||6||72 |
|- | |- | ||
| − | |{{Equipment/Link| | + | |{{Equipment/Link|Reppuu (601 Air Group)}}||7||126||5||72 |
|- | |- | ||
| − | |{{Equipment/Link| | + | |{{Equipment/Link|Reppuu (601 Air Group)}}★+10||7||126||5||80 |
|- | |- | ||
| − | |{{Equipment/Link| | + | |{{Equipment/Link|Type 0 Fighter Model 52 (Skilled)}}||5||90||6||63 |
|- | |- | ||
| − | |{{Equipment/Link| | + | |{{Equipment/Link|Type 0 Fighter Model 52 (Skilled)}} ★+10||5||90||6||72 |
| + | |- | ||
| + | |{{Equipment/Link|Zero Fighter Model 52C (w/ Iwai Flight)}}||5||90||6||67 | ||
|- | |- | ||
| − | |{{Equipment/Link| | + | |{{Equipment/Link|Zero Fighter Model 52C (w/ Iwai Flight)}} ★+10||5||90||6||76 |
|- | |- | ||
| − | |{{Equipment/Link| | + | |{{Equipment/Link|Zero Fighter Model 21 (w/ Iwamoto Flight)}}||4||72||7||63 |
|- | |- | ||
| − | |{{Equipment/Link| | + | |{{Equipment/Link|Zero Fighter Model 52A (w/ Iwamoto Flight)}}||5||90||6||72 |
|- | |- | ||
| − | |{{Equipment/Link| | + | |{{Equipment/Link|Zero Fighter Model 52A (w/ Iwamoto Flight)}} ★+10||5||90||6||80 |
|- | |- | ||
| − | |{{Equipment/Link|Type 0 Fighter Model | + | |{{Equipment/Link|Type 0 Fighter Model 53 (Iwamoto Squadron)}}||6||108||6||76 |
|- | |- | ||
| − | |{{Equipment/Link|Type 0 Fighter Model | + | |{{Equipment/Link|Type 0 Fighter Model 53 (Iwamoto Squadron)}} ★+10||6||108||6||84 |
|- | |- | ||
| − | |{{Equipment/Link| | + | |{{Equipment/Link|Bf 109T Kai}}||6||108||2||59 |
|- | |- | ||
| − | |{{Equipment/Link| | + | |{{Equipment/Link|Fw 190T Kai}}||6||108||3||67 |
|- | |- | ||
| − | |{{Equipment/Link|Type 0 Fighter Model 32 | + | |{{Equipment/Link|Type 0 Fighter Model 32}}||4||72||5||46 |
|- | |- | ||
| − | |{{Equipment/Link|Type | + | |{{Equipment/Link|Type 0 Fighter Model 32}}★+10||4||72||5||55 |
|- | |- | ||
| − | |{{Equipment/Link|Type | + | |{{Equipment/Link|Type 0 Fighter Model 32 (Skilled)}}||4||72||5||59 |
|- | |- | ||
| − | |{{Equipment/Link| | + | |{{Equipment/Link|Type 0 Fighter Model 32 (Skilled)}} ★+10||4||72||5||67 |
| − | | | ||
| − | |||
| − | |||
| − | |||
|- | |- | ||
| − | + | |{{Equipment/Link|Re.2001 OR Kai}}||6||108||4||50 | |
| − | |||
| − | |||
| − | |||
| − | |||
|- | |- | ||
| − | |{{Equipment/Link| | + | |{{Equipment/Link|Re.2001 OR Kai}} ★+10||6||108||4||59 |
|- | |- | ||
| − | |{{Equipment/Link| | + | |{{Equipment/Link|Re.2005 Kai}}||6||108||3||72 |
|- | |- | ||
| − | |{{Equipment/Link| | + | |{{Equipment/Link|F4F-3}}||5||90||4||42 |
| − | | | ||
| − | |||
| − | |||
| − | |||
| − | |||
| − | |||
| − | | | ||
|- | |- | ||
| − | + | |{{Equipment/Link|F4F-3}} ★+10||5||90||4||50 | |
| − | |||
| − | |||
| − | |||
| − | |||
|- | |- | ||
| − | |{{Equipment/Link| | + | |{{Equipment/Link|F4F-4}}||6||108||4||46 |
|- | |- | ||
| − | |{{Equipment/Link| | + | |{{Equipment/Link|F4F-4}} ★+10||6||108||4||55 |
|- | |- | ||
| − | |{{Equipment/Link| | + | |{{Equipment/Link|F6F-3}}||8||144||5||59 |
|- | |- | ||
| − | |{{Equipment/Link| | + | |{{Equipment/Link|F6F-3}} ★+10||8||144||5||67 |
|- | |- | ||
| − | |{{Equipment/Link| | + | |{{Equipment/Link|F6F-5}}||8||144||5||67 |
|- | |- | ||
| − | |{{Equipment/Link| | + | |{{Equipment/Link|F6F-5}} ★+10||8||144||5||76 |
|- | |- | ||
| − | |{{Equipment/Link| | + | |{{Equipment/Link|Type 96 Fighter Kai}}||3||54||4||42 |
|- | |- | ||
| − | |{{Equipment/Link| | + | |{{Equipment/Link|Fulmar}}||5||90||4||38 |
|- | |- | ||
| − | |{{Equipment/Link| | + | |{{Equipment/Link|Seafire Mk.III Kai}}||6||108||4||63 |
|- | |- | ||
| − | |{{Equipment/Link| | + | |{{Equipment/Link|F6F-3N}}||9||162||5||59 |
|- | |- | ||
| − | |{{Equipment/Link| | + | |{{Equipment/Link|F6F-5N}}||9||162||5||67 |
|- | |- | ||
| − | |{{Equipment/Link| | + | |{{Equipment/Link|Shiden Kai 4}}||7||126||4||67 |
|- | |- | ||
| − | |{{Equipment/Link| | + | |{{Equipment/Link|Reppuu Kai (Prototype Carrier-based Model)}}||10||180||4||67 |
|- | |- | ||
| − | |{{Equipment/Link| | + | |{{Equipment/Link|Reppuu Kai Ni}}||10||180||5||80 |
|- | |- | ||
| − | |{{Equipment/Link|Reppuu ( | + | |{{Equipment/Link|Reppuu Kai Ni (CarDiv 1/Skilled)}}||??||??||6||84 |
|- | |- | ||
| − | |{{Equipment/Link|Reppuu | + | |{{Equipment/Link|Reppuu Kai Ni Model E}}||11||198||5||72 |
|- | |- | ||
| − | |{{Equipment/Link| | + | |{{Equipment/Link|Reppuu Kai Ni Model E (CarDiv 1/Skilled)}}||11||198||6||76 |
|- | |- | ||
| − | |{{Equipment/Link| | + | |{{Equipment/Link|Fw 190 A-5 Kai (Skilled)}}||7||126||4||72 |
|- | |- | ||
| − | |{{Equipment/Link| | + | |{{Equipment/Link|XF5U}}||12||216||4||76 |
|- | |- | ||
| − | |{{Equipment/Link| | + | |{{Equipment/Link|FR-1 Fireball}}||9||162||5||72 |
|- | |- | ||
| − | |{{Equipment/Link| | + | |{{Equipment/Link|Corsair Mk.II}}||9||162||6||67 |
|- | |- | ||
| − | |{{Equipment/Link| | + | |{{Equipment/Link|Corsair Mk.II (Ace)}}||9||162||6||72 |
|- | |- | ||
| − | |{{Equipment/Link| | + | |{{Equipment/Link|Prototype Jinpuu}}||9||162||5||80 |
|- | |- | ||
| − | |{{Equipment/Link| | + | |{{Equipment/Link|F4U-2 Night Corsair}}||9||162||6||63 |
|- | |- | ||
| − | |{{Equipment/Link|Type 0 Fighter Model | + | |{{Equipment/Link|Type 0 Fighter Model 64 (Air Superiority Fighter Specification)}}||6||108||5||63 |
| + | |} | ||
| + | |||
| + | {|class="wikitable mw-collapsible mw-collapsed sortable" style="text-align:center; width:75%" | ||
| + | |+[[Torpedo Bomber]]s {{BluePlane}}{{Night Torpedo Bomber}} | ||
|- | |- | ||
| − | | | + | !rowspan=2|Name |
| + | !rowspan=2|Deployment Cost | ||
| + | !rowspan=2|Assignment Cost | ||
| + | !rowspan=2|Combat Radius | ||
| + | !colspan=2|Attack Power | ||
| + | !rowspan=2|Sortie/Defense Fighter-Power | ||
|- | |- | ||
| − | + | !Anti-Ship/Ground | |
| + | !ASW | ||
|- | |- | ||
| − | |{{Equipment/Link|Type | + | |{{Equipment/Link|Type 97 Torpedo Bomber}}||5||90||4||53|| -||3 |
|- | |- | ||
| − | |{{Equipment/Link|Type | + | |{{Equipment/Link|Type 97 Torpedo Bomber}} ★+10||5||90||4||64|| -||3 |
|- | |- | ||
| − | |{{Equipment/Link| | + | |{{Equipment/Link|Tenzan}}||6||108||5||64|| -||3 |
|- | |- | ||
| − | |{{Equipment/Link| | + | |{{Equipment/Link|Ryuusei}}||7||126||6||81|| -||3 |
|- | |- | ||
| − | |{{Equipment/Link| | + | |{{Equipment/Link|Ryuusei Kai}}||8||144||6||98|| -||3 |
|- | |- | ||
| − | |{{Equipment/Link| | + | |{{Equipment/Link|Type 97 Torpedo Bomber (931 Air Group)}}||5||90||4||59||22 ~ 51||3 |
|- | |- | ||
| − | |{{Equipment/Link| | + | |{{Equipment/Link|Type 97 Torpedo Bomber (931 Air Group)}} ★+10||5||90||4||70||26 ~ 60||3 |
|- | |- | ||
| − | |{{Equipment/Link| | + | |{{Equipment/Link|Tenzan (931 Air Group)}}||6||108||5||76||24 ~ 56||3 |
|- | |- | ||
| − | |{{Equipment/Link| | + | |{{Equipment/Link|Type 97 Torpedo Bomber (Tomonaga Squadron)}}||5||90||4||87|| -||7 |
|- | |- | ||
| − | |{{Equipment/Link| | + | |{{Equipment/Link|Tenzan Model 12 (Tomonaga Squadron)}}||6||108||5||104|| -||7 |
|- | |- | ||
| − | |{{Equipment/Link| | + | |{{Equipment/Link|Type 97 Torpedo Bomber (Skilled)}}||5||90||4||70|| -||3 |
|- | |- | ||
| − | |{{Equipment/Link| | + | |{{Equipment/Link|Tenzan (601 Air Group)}}||6||108||5||81|| -||3 |
|- | |- | ||
| − | |{{Equipment/Link| | + | |{{Equipment/Link|Ryuusei (601 Air Group)}}||7||126||6||98|| -||3 |
|- | |- | ||
| − | |{{Equipment/Link| | + | |{{Equipment/Link|Type 97 Torpedo Bomber (Murata Squadron)}}||5||90||4||93|| -||7 |
|- | |- | ||
| − | |{{Equipment/Link| | + | |{{Equipment/Link|Tenzan Model 12 (Murata Squadron)}}||6||108||5||110|| -||7 |
|- | |- | ||
| − | |{{Equipment/Link| | + | |{{Equipment/Link|Re.2001 G Kai}}||6||108||3||47|| -||20 |
|- | |- | ||
| − | |{{Equipment/Link| | + | |{{Equipment/Link|TBD}}||6||108||4||53|| -||3 |
|- | |- | ||
| − | |{{Equipment/Link| | + | |{{Equipment/Link|Swordfish}}||3||54||3||42|| -||3 |
|- | |- | ||
| − | |{{Equipment/Link| | + | |{{Equipment/Link|Swordfish Mk.II (Skilled)}}||3||54||3||53|| -||3 |
|- | |- | ||
| − | |{{Equipment/Link| | + | |{{Equipment/Link|Swordfish Mk.III (Skilled)}}||4||72||3||70||28 ~ 65||3 |
|- | |- | ||
| − | |{{Equipment/Link| | + | |{{Equipment/Link|TBF}}||10||180||6||76|| -||7 |
|- | |- | ||
| − | |{{Equipment/Link| | + | |{{Equipment/Link|TBM-3D}}||11||198||6||76||24 ~ 56||7 |
|- | |- | ||
| − | |{{Equipment/Link| | + | |{{Equipment/Link|Type 97 Torpedo Bomber (931 Air Group / Skilled)}}||5||90||4||70||26 ~ 60||3 |
| + | |- | ||
| + | |{{Equipment/Link|Ryuusei Kai (CarDiv 1)}}||9||162||6||104|| -||11 | ||
| + | |- | ||
| + | |{{Equipment/Link|Ryuusei Kai (CarDiv 1/Skilled)}}||9||162||6||110||22 ~ 51||16 | ||
| + | |- | ||
| + | |{{Equipment/Link|Prototype Type 97 Torpedo Bomber Kai No. 3 Model E (w/ Type 6 Airborne Radar Kai)}}||6||108||4||64|| -||3 | ||
|- | |- | ||
| − | |{{Equipment/Link| | + | |{{Equipment/Link|Prototype Type 97 Torpedo Bomber Kai No. 3 Model E (w/ Type 6 Airborne Radar Kai)}} ★+10||6||108||4||76|| -||3 |
|- | |- | ||
| − | |{{Equipment/Link| | + | |{{Equipment/Link|Prototype Type 97 Torpedo Bomber Kai (Skilled) No. 3 Model E (w/ Type 6 Airborne Radar Kai)}}||6||108||4||76||22 ~ 51||3 |
|- | |- | ||
| − | |{{Equipment/Link| | + | |{{Equipment/Link|Tenzan Model 12A}}||7||126||5||76||-||7 |
|- | |- | ||
| − | |{{Equipment/Link| | + | |{{Equipment/Link|Tenzan Model 12A Kai (w/ Type 6 Airborne Radar Kai)}}||8||144||5||87||-||7 |
|- | |- | ||
| − | |{{Equipment/Link| | + | |{{Equipment/Link|Tenzan Model 12A Kai (Skilled w/ Type 6 Airborne Radar Kai)}}||8||144||6||98||22 ~ 51||7 |
|- | |- | ||
| − | |{{Equipment/Link| | + | |{{Equipment/Link|TBM-3W+3S}}||12||216||5||{{ToolTip|81*|need to be checked}}||68 ~ 98||3 |
|- | |- | ||
| − | |{{Equipment/Link| | + | |{{Equipment/Link|Barracuda Mk.II}}||7||126||4||64||-||3 |
|- | |- | ||
| − | |{{Equipment/Link| | + | |{{Equipment/Link|Barracuda Mk.III}}||8||144||5||59||26 ~ 60||3 |
|- | |- | ||
| − | |{{Equipment/Link| | + | |{{Equipment/Link|Ryuusei Kai (Skilled)}}||9||168||6||98||-||16 |
|- | |- | ||
| − | |{{Equipment/Link| | + | |{{Equipment/Link|Mosquito TR Mk.33}}||14||252||7||70||-||24 |
|} | |} | ||
{|class="wikitable mw-collapsible mw-collapsed sortable" style="text-align:center; width:75%" | {|class="wikitable mw-collapsible mw-collapsed sortable" style="text-align:center; width:75%" | ||
| − | |+[[ | + | |+[[Dive Bomber]]s {{RedPlane}} |
|- | |- | ||
!rowspan=2|Name | !rowspan=2|Name | ||
| Line 1,841: | Line 1,412: | ||
!ASW | !ASW | ||
|- | |- | ||
| − | |{{Equipment/Link|Type | + | |{{Equipment/Link|Type 99 Dive Bomber}}||4||72||4||53|| -||3 |
|- | |- | ||
| − | |{{Equipment/Link| | + | |{{Equipment/Link|Suisei}}||5||90||4||70|| -||3 |
|- | |- | ||
| − | |{{Equipment/Link| | + | |{{Equipment/Link|Suisei Model 12A}}||6||108||5||81|| -||3 |
|- | |- | ||
| − | |{{Equipment/Link| | + | |{{Equipment/Link|Type 0 Fighter Model 62 (Fighter-bomber)}}||5||90||4||47|| -||20 |
|- | |- | ||
| − | |{{Equipment/Link| | + | |{{Equipment/Link|Type 0 Fighter Model 62 (Fighter-bomber)}} ★+10||5||90||4||47|| -||31 |
|- | |- | ||
| − | |{{Equipment/Link| | + | |{{Equipment/Link|Ju 87C Kai}}||6||108||4||76|| -||3 |
|- | |- | ||
| − | |{{Equipment/Link|Type | + | |{{Equipment/Link|Type 99 Dive Bomber (Skilled)}}||4||72||4||64|| -||7 |
|- | |- | ||
| − | |{{Equipment/Link| | + | |{{Equipment/Link|Type 99 Dive Bomber (Egusa Squadron)}}||4||72||4||81|| -||3 |
|- | |- | ||
| − | |{{Equipment/Link| | + | |{{Equipment/Link|Suisei (Egusa Squadron)}}||5||90||5||98|| -||7 |
|- | |- | ||
| − | |{{Equipment/Link| | + | |{{Equipment/Link|Suisei (601 Air Group)}}||5||90||5||87|| -||3 |
|- | |- | ||
| − | |{{Equipment/Link| | + | |{{Equipment/Link|Prototype Nanzan}}||9||162||5||87|| -||7 |
|- | |- | ||
| − | |{{Equipment/Link| | + | |{{Equipment/Link|Zero Fighter Model 62 (Fighter-bomber / Iwai Squadron)}}||5||90||5||47|| -||33 |
|- | |- | ||
| − | |{{Equipment/Link| | + | |{{Equipment/Link|Zero Fighter Model 62 (Fighter-bomber / Iwai Squadron)}} ★+10||5||90||5||47|| -||43 |
|- | |- | ||
| − | |{{Equipment/Link| | + | |{{Equipment/Link|SBD}}||5||90||4||59|| -||11 |
|- | |- | ||
| − | |{{Equipment/Link| | + | |{{Equipment/Link|Type 0 Fighter Model 63 (Fighter-bomber)}}||6||108||4||53|| -||24 |
|- | |- | ||
| − | |{{Equipment/Link| | + | |{{Equipment/Link|Type 0 Fighter Model 63 (Fighter-bomber)}} ★+10||6||108||4||53|| -||35 |
|- | |- | ||
| − | |{{Equipment/Link| | + | |{{Equipment/Link|F4U-1D}}||9||162||6||64|| -||33 |
|- | |- | ||
| − | |{{Equipment/Link| | + | |{{Equipment/Link|Skua}}||4||72||4||47|| -||11 |
|- | |- | ||
| − | |{{Equipment/Link| | + | |{{Equipment/Link|FM-2}}||6||108||4||36|| -||28 |
|- | |- | ||
| − | |{{Equipment/Link| | + | |{{Equipment/Link|Suisei Model 22 (634 Air Group)}}||5||90||5||87|| -||7 |
|- | |- | ||
| − | |{{Equipment/Link| | + | |{{Equipment/Link|Suisei Model 22 (634 Air Group/Skilled)}}||5||90||6||83|| -||11 |
|- | |- | ||
| − | |{{Equipment/Link| | + | |{{Equipment/Link|Ju 87C Kai Ni (w/ KMX)}}||8||144||4||76||26 ~ 60||3 |
|- | |- | ||
| − | |{{Equipment/Link| | + | |{{Equipment/Link|Ju 87C Kai Ni (w/ KMX/Skilled)}}||8||144||4||81||56 ~ 81||3 |
|- | |- | ||
| − | |{{Equipment/Link| | + | |{{Equipment/Link|Re.2001 CB Kai}}||6||108||3||59|| -||20 |
|- | |- | ||
| − | |{{Equipment/Link| | + | |{{Equipment/Link|Suisei Model 12 (634 Air Group w/ Type 3 Cluster Bombs)}}||5||90||5||93|| -||16 |
|- | |- | ||
| − | |{{Equipment/Link| | + | |{{Equipment/Link|Suisei Model 12 (w/ Type 31 Photoelectric Fuze Bombs)}}||6||108||5||87|| -||3 |
|- | |- | ||
| − | |{{Equipment/Link| | + | |{{Equipment/Link|Type 99 Dive Bomber Model 22}}||4||72||3||59||-||3 |
|- | |- | ||
| − | |{{Equipment/Link| | + | |{{Equipment/Link|Type 99 Dive Bomber Model 22 (Skilled)}}||4||72||3||70||-||7 |
|- | |- | ||
| − | |{{Equipment/Link| | + | |{{Equipment/Link|SBD-5}}||5||90||4||64||-||11 |
|- | |- | ||
| − | |{{Equipment/Link| | + | |{{Equipment/Link|SB2C-3}}||6||108||5||87||-||11 |
|- | |- | ||
| − | |{{Equipment/Link| | + | |{{Equipment/Link|SB2C-5}}||7||126||6||93||-||11 |
|- | |- | ||
| − | |{{Equipment/Link| | + | |{{Equipment/Link|Type 0 Fighter Model 64 (Two-seat w/ KMX)}}||5||90||4||42||24 ~56||20 |
|- | |- | ||
| − | |{{Equipment/Link| | + | |{{Equipment/Link|F4U-4}}||9||162||6||59||-||45 |
|- | |- | ||
| − | |{{Equipment/Link| | + | |{{Equipment/Link|AU-1}}||10||180||6||93||-||41 |
|- | |- | ||
| − | |{{Equipment/Link| | + | |{{Equipment/Link|F4U-7}}||11||198||6||87||-||45 |
|- | |- | ||
| − | |{{Equipment/Link| | + | |{{Equipment/Link|Type 0 Fighter Model 64 (Skilled Fighter-bomber)}}||6||108||5||59||-||33 |
|} | |} | ||
{|class="wikitable mw-collapsible mw-collapsed sortable" style="text-align:center; width:75%" | {|class="wikitable mw-collapsible mw-collapsed sortable" style="text-align:center; width:75%" | ||
| − | |+[[ | + | |+[[Jets]] {{JetFighterBomber1}}{{JetFighterBomber2}} |
|- | |- | ||
!rowspan=2|Name | !rowspan=2|Name | ||
| Line 1,921: | Line 1,492: | ||
!rowspan=2|Assignment Cost | !rowspan=2|Assignment Cost | ||
!rowspan=2|Combat Radius | !rowspan=2|Combat Radius | ||
| − | !colspan= | + | !colspan=3|Attack Power |
!rowspan=2|Sortie/Defense Fighter-Power | !rowspan=2|Sortie/Defense Fighter-Power | ||
|- | |- | ||
| + | !Jet Assault | ||
!Anti-Ship/Ground | !Anti-Ship/Ground | ||
!ASW | !ASW | ||
|- | |- | ||
| − | |{{Equipment/Link| | + | |{{Equipment/Link|Jet Keiun Kai}}||14||252||3||110||78|| -||28 |
|- | |- | ||
| − | |{{Equipment/Link| | + | |{{Equipment/Link|Kikka Kai}}||13||234||2||87||61|| -||54 |
| + | |} | ||
| + | |||
| + | {|class="wikitable mw-collapsible mw-collapsed sortable" style="text-align:center; width:75%" | ||
| + | |+[[Recon]]s {{YellowPlane}} | ||
|- | |- | ||
| − | + | !Name | |
| + | !Deployment Cost | ||
| + | !Assignment Cost | ||
| + | !Combat Radius | ||
| + | !Sortie/Defense Fighter Power | ||
|- | |- | ||
| − | |{{Equipment/Link| | + | |{{Equipment/Link|Saiun}}||9||36||8||3 |
|- | |- | ||
| − | |{{Equipment/Link|Type | + | |{{Equipment/Link|Type 2 Reconnaissance Aircraft}}||6||24||5||7 |
|- | |- | ||
| − | |{{Equipment/Link| | + | |{{Equipment/Link|Prototype Keiun (Carrier-based Reconnaissance Model)}}||12||48||8||3 |
|- | |- | ||
| − | |{{Equipment/Link| | + | |{{Equipment/Link|Saiun (Eastern Caroline Air Group)}}||9||36||8||3 |
|- | |- | ||
| − | |{{Equipment/Link| | + | |{{Equipment/Link|Saiun (4th Recon Squad)}}||9||36||7||11 |
|- | |- | ||
| − | |{{Equipment/Link| | + | |{{Equipment/Link|Fulmar (Reconnaissance Fighter/Skilled)}}||4||16||4||20 |
| + | |} | ||
| + | |||
| + | {|class="wikitable mw-collapsible mw-collapsed sortable" style="text-align:center; width:75%" | ||
| + | |+[[Liaison Aircraft]] {{ASWPlane}} | ||
|- | |- | ||
| − | | | + | !rowspan=2|Name |
| + | !rowspan=2|Deployment Cost | ||
| + | !rowspan=2|Assignment Cost | ||
| + | !rowspan=2|Combat Radius | ||
| + | !colspan=2|Attack Power | ||
| + | !rowspan=2|Sortie/Defense Fighter-Power | ||
|- | |- | ||
| − | + | !Anti-Ship/Ground | |
| + | !ASW | ||
|- | |- | ||
| − | |{{Equipment/Link| | + | |{{Equipment/Link|Type 3 Command Liaison Aircraft (ASW)}}||3||54||2||25||22 ~ 51||3 |
|- | |- | ||
| − | |{{Equipment/Link| | + | |{{Equipment/Link|Type 3 Command Liaison Aircraft Kai}}||4||72||2||25||26 ~ 60||3 |
|- | |- | ||
| − | |{{Equipment/Link| | + | |{{Equipment/Link|Type 1 Fighter Hayabusa Model II Kai (20th Squadron)}}||4||72||4||47||24 ~56||50 |
|- | |- | ||
| − | |{{Equipment/Link|Type | + | |{{Equipment/Link|Type 1 Fighter Hayabusa Model III Kai (Skilled/20th Squadron)}}||4||72||4||47 ({{ToolTip|195|against DD}})||24 ~56||55 |
| + | |} | ||
| + | <references/> | ||
| + | {{clear}} | ||
| + | |||
| + | ==Seaplanes== | ||
| + | {|class="wikitable mw-collapsible mw-collapsed sortable" style="text-align:center; width:75%" | ||
| + | |+[[SPF|Fighters]] {{SeaplaneFighter}} | ||
|- | |- | ||
| − | + | !Name | |
| + | !Deployment Cost | ||
| + | !Assignment Cost | ||
| + | !Combat Radius | ||
| + | !Sortie/Defense Fighter-Power | ||
|- | |- | ||
| − | |{{Equipment/Link| | + | |{{Equipment/Link|Ro.44 Seaplane Fighter}}||4||72||3||33 |
|- | |- | ||
| − | |{{Equipment/Link| | + | |{{Equipment/Link|Ro.44 Seaplane Fighter}} ★10||4||72||3||42 |
|- | |- | ||
| − | |{{Equipment/Link| | + | |{{Equipment/Link|Type 2 Seaplane Fighter Kai}}||5||90||4||38 |
|- | |- | ||
| − | |{{Equipment/Link| | + | |{{Equipment/Link|Type 2 Seaplane Fighter Kai}} ★10||5||90||4||46 |
|- | |- | ||
| − | |{{Equipment/Link| | + | |{{Equipment/Link|Ro.44 Seaplane Fighter bis}}||4||72||3||38 |
|- | |- | ||
| − | |{{Equipment/Link| | + | |{{Equipment/Link|Ro.44 Seaplane Fighter bis}} ★10||4||72||3||46 |
|- | |- | ||
| − | |{{Equipment/Link| | + | |{{Equipment/Link|Type 2 Seaplane Fighter Kai (Skilled)}}||5||90||4||46 |
|- | |- | ||
| − | |{{Equipment/Link| | + | |{{Equipment/Link|Type 2 Seaplane Fighter Kai (Skilled)}} ★10||5||90||4||55 |
|- | |- | ||
| − | |{{Equipment/Link| | + | |{{Equipment/Link|Kyoufuu Kai}}||6||108||3||46 |
|- | |- | ||
| − | |{{Equipment/Link| | + | |{{Equipment/Link|Kyoufuu Kai}} ★10||6||108||3||55 |
| − | |||
| − | |||
| − | |||
| − | |||
| − | |||
| − | |||
| − | |||
| − | |||
| − | |||
| − | |||
|- | |- | ||
| − | |{{Equipment/Link| | + | |{{Equipment/Link|Kyoufuu Kai Ni}}||6||108||3||50 |
| − | |||
| − | |||
| − | |||
| − | |||
| − | |||
| − | |||
|} | |} | ||
{|class="wikitable mw-collapsible mw-collapsed sortable" style="text-align:center; width:75%" | {|class="wikitable mw-collapsible mw-collapsed sortable" style="text-align:center; width:75%" | ||
| − | |+[[ | + | |+[[SPB|Bombers]] {{SPB}} |
|- | |- | ||
!rowspan=2|Name | !rowspan=2|Name | ||
| Line 2,011: | Line 1,596: | ||
!ASW | !ASW | ||
|- | |- | ||
| − | |{{Equipment/Link| | + | |{{Equipment/Link|Zuiun}}||6||108||5||47|| -||17 |
|- | |- | ||
| − | |{{Equipment/Link| | + | |{{Equipment/Link|Zuiun}} ★10||6||108||5||59|| -||17 |
| − | |||
| − | |||
| − | |||
| − | |||
|- | |- | ||
| − | + | |{{Equipment/Link|Prototype Seiran}}||10||180||4||87|| -||9 | |
| − | + | |- | |
| − | + | |{{Equipment/Link|Zuiun (634 Air Group)}}||6||108||5||59|| -||17 | |
| − | |||
| − | |||
|- | |- | ||
| − | |{{Equipment/Link| | + | |{{Equipment/Link|Zuiun (634 Air Group)}} ★10||6||108||5||70|| -||17 |
|- | |- | ||
| − | |{{Equipment/Link| | + | |{{Equipment/Link|Zuiun Model 12}}||7||126||5||64|| -||22 |
|- | |- | ||
| − | |{{Equipment/Link| | + | |{{Equipment/Link|Zuiun Model 12 (634 Air Group)}}||7||126||5||76|| -||22 |
|- | |- | ||
| − | |{{Equipment/Link| | + | |{{Equipment/Link|Laté 298B}}||7||126||4||53|| -||13 |
|- | |- | ||
| − | |{{Equipment/Link| | + | |{{Equipment/Link|Zuiun (631 Air Group)}}||6||108||5||64|| -||13 |
|- | |- | ||
| − | |{{Equipment/Link| | + | |{{Equipment/Link|Seiran (631 Air Group)}}||10||180||4||93|| -||9 |
| − | | | ||
| − | |||
| − | |||
| − | |||
| − | |||
| − | |||
| − | | | ||
|- | |- | ||
| − | + | |{{Equipment/Link|Zuiun (634 Air Group/Skilled)}}||6||108||5||76|| -||26 | |
| − | |||
| − | |||
| − | |||
| − | |||
|- | |- | ||
| − | |{{Equipment/Link| | + | |{{Equipment/Link|Zuiun (634 Air Group/Skilled)}} ★10||6||108||5||87|| -||26 |
|- | |- | ||
| − | |{{Equipment/Link| | + | |{{Equipment/Link|Zuiun Kai Ni (634 Air Group)}}||8||144||5||81|| -||26 |
|- | |- | ||
| − | |{{Equipment/Link| | + | |{{Equipment/Link|Zuiun Kai Ni (634 Air Group)}} ★10||8||144||5||93|| -||26 |
|- | |- | ||
| − | |{{Equipment/Link| | + | |{{Equipment/Link|Zuiun Kai Ni (634 Air Group/Skilled)}}||8||144||5||87||22 ~ 51||30 |
|- | |- | ||
| − | |{{Equipment/Link| | + | |{{Equipment/Link|Swordfish (Seaplane Model)}}||5||90||3||53||-||9 |
|- | |- | ||
| − | |{{Equipment/Link| | + | |{{Equipment/Link|Swordfish Mk.III Kai (Seaplane Model)}}||6||108||3||64||22 ~51||9 |
|- | |- | ||
| − | |{{Equipment/Link| | + | |{{Equipment/Link|Swordfish Mk.III Kai (Seaplane Model/Skilled)}}||5||90||3||70||24 ~56||9 |
|- | |- | ||
| − | |{{Equipment/Link| | + | |{{Equipment/Link|Prototype Night Zuiun (Attack Equipment)}}||8||144||4||81||-||26 |
| − | |||
| − | |||
| − | |- | ||
| − | |||
|} | |} | ||
| − | {|class="wikitable mw-collapsible mw-collapsed sortable" style="text-align: center; width:75% | + | {|class="wikitable mw-collapsible mw-collapsed sortable" style="text-align:center; width:75%" |
| − | |+[[ | + | |+[[SPR|Recons]] {{SPR}}{{Night Recon}}<ref>Upgraded variants not included because it only increases LoS.</ref> |
|- | |- | ||
| − | ! | + | !Name |
| − | ! | + | !Deployment Cost |
| − | ! | + | !Assignment Cost |
| − | ! | + | !Combat Radius |
| − | |||
| − | |||
| − | |||
| − | |||
!ASW | !ASW | ||
| + | !Sortie/Defense Fighter-Power | ||
|- | |- | ||
| − | |{{Equipment/Link| | + | |{{Equipment/Link|Type 0 Reconnaissance Seaplane}}||5||20||7|| -||11 |
|- | |- | ||
| − | |{{Equipment/Link| | + | |{{Equipment/Link|Type 0 Observation Seaplane}}||6||24||3|| -|| 11 |
|- | |- | ||
| − | |{{Equipment/Link| | + | |{{Equipment/Link|Type 98 Reconnaissance Seaplane (Night Recon)}}||8||32||6|| -||3 |
|- | |- | ||
| − | |{{Equipment/Link| | + | |{{Equipment/Link|Ar196 Kai}}||5||20||3|| -||7 |
|- | |- | ||
| − | |{{Equipment/Link| | + | |{{Equipment/Link|Shiun}}||9||36||4|| -||3 |
|- | |- | ||
| − | |{{Equipment/Link| | + | |{{Equipment/Link|Ro.43 Reconnaissance Seaplane}}||4||16||3|| -||7 |
|- | |- | ||
| − | |{{Equipment/Link| | + | |{{Equipment/Link|OS2U}}||6||24||3|| -||7 |
|- | |- | ||
| − | |{{Equipment/Link| | + | |{{Equipment/Link|Type 0 Reconnaissance Seaplane Model 11B}}||5||20||7||15 ~ 35||7 |
|- | |- | ||
| − | |{{Equipment/Link| | + | |{{Equipment/Link|Type 0 Reconnaissance Seaplane Model 11B (Skilled)}}||5||20||7||16 ~ 37||7 |
|- | |- | ||
| − | |{{Equipment/Link| | + | |{{Equipment/Link|S9 Osprey}}||3||12||3|| -||7 |
|- | |- | ||
| − | |{{Equipment/Link| | + | |{{Equipment/Link|Swordfish Mk.II Kai (Reconnaissance Seaplane Model)}}||5||20||3||-||3 |
| + | |- | ||
| + | |{{Equipment/Link|Fairey Seafox Kai}}||6||24||3||-||7 | ||
| + | |- | ||
| + | |{{Equipment/Link|SOC Seagull}}||3||12||3||-||3 | ||
| + | |- | ||
| + | |{{Equipment/Link|SO3C Seamew Kai}}||5||20||4||-||7 | ||
| + | |- | ||
| + | |{{Equipment/Link|Type 0 Reconnaissance Seaplane Model 11B Kai (Night Recon)}}||5||90||7||-||7 | ||
| + | |- | ||
| + | |{{Equipment/Link|Loire 130M}}||9||162||3||-||3 | ||
| + | |- | ||
| + | |{{Equipment/Link|Walrus}}||10||180||3||-||3 | ||
| + | |- | ||
| + | |{{Equipment/Link|Sea Otter}}||11||198||4||-||3 | ||
| + | |} | ||
| + | |||
| + | {|class="wikitable mw-collapsible mw-collapsed sortable" style="text-align:center; width:75%" | ||
| + | |+[[Large Flying Boat]]s {{LFB}} | ||
|- | |- | ||
| − | + | !Name | |
| + | !Deployment Cost | ||
| + | !Assignment Cost | ||
| + | !Combat Radius | ||
| + | !Sortie/Defense Fighter-Power | ||
|- | |- | ||
| − | |{{Equipment/Link| | + | |{{Equipment/Link|Type 2 Large Flying Boat}}||25||100||20||3 |
|- | |- | ||
| − | |{{Equipment/Link| | + | |{{Equipment/Link|PBY-5A Catalina}}||13||52||10||3 |
| + | |} | ||
| + | |||
| + | {|class="wikitable mw-collapsible mw-collapsed sortable" style="text-align:center; width:75%" | ||
| + | |+[[Rotorcraft]] {{Autogyro}} | ||
|- | |- | ||
| − | | | + | !rowspan=2|Name |
| + | !rowspan=2|Deployment Cost | ||
| + | !rowspan=2|Assignment Cost | ||
| + | !rowspan=2|Combat Radius | ||
| + | !colspan=2|Attack Power | ||
| + | !rowspan=2|Sortie/Defense Fighter-Power | ||
|- | |- | ||
| − | + | !Anti-Ship/Ground | |
| − | |||
| − | |||
| − | |||
| − | |||
| − | |||
| − | |||
| − | |||
| − | |||
| − | |||
| − | |||
| − | |||
| − | |||
| − | |||
!ASW | !ASW | ||
| − | |||
| − | |||
| − | |||
| − | |||
| − | |||
| − | |||
| − | |||
| − | |||
| − | |||
| − | |||
| − | |||
| − | |||
| − | |||
| − | |||
| − | |||
| − | |||
| − | |||
| − | |||
| − | |||
| − | |||
| − | |||
| − | |||
| − | |||
| − | |||
| − | |||
| − | |||
| − | |||
|- | |- | ||
| − | |||
|- | |- | ||
| − | |{{Equipment/Link|Type | + | |{{Equipment/Link|Ka Type Observation Autogyro}}||2||36||1||25||26 ~ 60||3 |
|- | |- | ||
| − | |{{Equipment/Link| | + | |{{Equipment/Link|O Type Observation Autogyro Kai}}||3||54||1||25||57 ~ 81||3 |
| − | | | ||
| − | |||
| − | |||
| − | |||
|- | |- | ||
| − | + | |{{Equipment/Link|O Type Observation Autogyro Kai Ni}}||4||72||1||25||61 ~ 87||3 | |
| − | |||
| − | |||
| − | |||
| − | |||
|- | |- | ||
| − | |{{Equipment/Link| | + | |{{Equipment/Link|S-51J}}||5||90||2||25||65 ~ 93||3 |
|- | |- | ||
| − | |{{Equipment/Link| | + | |{{Equipment/Link|S-51J Kai}}||5||90||2||25||69 ~ 98||3 |
|} | |} | ||
| − | |||
<references/> | <references/> | ||
{{clear}} | {{clear}} | ||
Latest revision as of 22:32, 2 May 2024
On certain maps, Land-Based Air Squadrons (LBAS) are available to support fleets. These squadrons can then be used to attack selected nodes or defend the base.
- Land-based planes, carrier-based planes, and seaplanes can be assigned to these bases.
- Rotorcraft and liaison aircraft cannot be assigned.
Currently, LBAS are only available in 7-4, 6-4, 6-5, and events.
Overview


- Maps where LBAS are available for use, are marked with a blue banner labeled "Land-Based Air Squadron Available" (基地航空隊運用).
- How many bases are available for use on the map is indicated under this as "Available for Sortie x# Squadrons" (出撃可能 x# 飛行隊).
- Even if a base is not available for use during the sortie, it is still available for use as base defense.
- On relevant maps, an LBAS group is composed of up to 3 LBAS, each having 4 plane slots.
- On W6 & W7, each LBAS needs to be unlocked.
- On events, the number of LBAS available is managed mapwise.
- All slots in the airbase are fixed at size 18.
- The exceptions are reconnaissance planes fixed at size 4 and Land-Based Heavy Bombers at 9.
- When a plane is removed from the airbase, there is a base 12 min cooldown while they are "Relocating" (配置転換中).
- The screen needs to be reloaded to complete the relocation,
- This timer can be reduced down to 6 min if the LBAS group is upgraded.
- It costs bauxite to assign a plane to the base. The cost depends on the type of plane. Please see below for details.
- Moving planes around in the same base does not cost anything (they can be dragged and drop them between the slots).
- Removing planes do not cost anything.
- Each LBAS group is independent to each other. This means planes need to be removed from a group to be relocated to another and vice versa.
- Attacks made by the LBAS occur before aerial combat, support, and opening attacks. Please see Combat for more details.
- It works the same way in a Combined Fleet.
Unlocking
World 6
In order to use the LBAS at World 6, the quest F43 has to be cleared. Construction Corps are then needed to open the 2nd and 3rd LBAS of world 6.
| Quest info | Rewards | |||||
|---|---|---|---|---|---|---|
F43 |
中部海域「基地航空隊」展開!
Begin The Preparations To "Build The Air Base"! |
0 |
0 |
0 |
0 | |
| Air Base Quest: |  World 6 LBAS Also opens 6-5 if 6-4 is already cleared | |||||
| Scrap 2 Drum Canisters, and prepare 1 Construction Corps, 1 200 fuel, and 3 000 bauxite. | ||||||
| Prerequisites | B62, F38 | |||||
| Notes | Resources and item are consumed upon completion. | |||||
World 7
In order to use the LBAS at World 7, the quest B175 has to be cleared. Construction Corps are then needed to open the 2nd and 3rd LBAS of world 7.
| Quest info | Rewards | |||||
|---|---|---|---|---|---|---|
B175 |
南西海域「基地航空隊」開設!
Southwestern Waters "Land Base Air Squadron" Established! |
0 |
0 |
300 |
300 | |
| Destroy enemy fleets near the Nansei Islands Patrol Area, Bashi Strait, the Eastern Orel Sea, and Deep off the coasts of Penang Island in the South Western Waters! Reach the port at Taiwan on the Shonan mainland route. Prepare a "Construction Corps" x1 and deploy the "Land Base Air Squadron" in the southwestern sea area that covers the area! | World 7 LBAS Then choose between:  Type 1 Land-based Attack Aircraft  Type 3 Fighter Hien 2x Improvement Material 5x | |||||
S rank the boss nodes of 2-1, 2-2, 2-3, and 7-3 (Part 2), and reach node O in 7-4.
| ||||||
| Prerequisites | B113, B131 | |||||
| Notes | Item is consumed upon completion. | |||||
Events
LBAS unlocking during events is straightforward. Airbases are accessible from the first map when it is available. More bases may be unlocked as progressing through the event.
- Please note that although additional bases may be unlocked as proceeding through the event, if an early event map has a limit of say 1 LBAS then only 1 can be used. The other bases will be on standby even if set to sortie.
LBAS Relocation
In some events, the LBAS's initial position on the map will be changed after reaching a certain phase. This will therefore change the ranges across the map, often making the boss easier to reach.
- This mechanic has been introduced in the Summer 2021 Event.
How to Use

To deploy an LBAS on a given map, it is needed to :
- Click on the blue LBAS banner to bring up the LBAS menu.
- LBAS for events are located in a different section, please refer to the examples shown on this page.
- Click on any slot to bring up a list of all available planes.
- Planes assigned to other LBAS groups will be greyed out and unavailable for assignment.
- Planes assigned to other LBAS within the same group will be labeled as such to be swapped (only 2 planes can be swapped, not one plane and an empty slot).
- Change the Deployment Mode notice by clicking on it on each available LBAS. It will rotate through:
- Standby (待機) (default mode and is locked to this for empty bases)
- Sortie (出撃)
- Air Defense (防空)
- Evacuation (退避)
- Rest (休息)
- If are using a KC viewer, the status of the LBAS will only be updated when exiting the LBAS menu.
- When having at least 1 base set to sortie, there will be a green bar underneath the sortie button telling "Land-Based Air Squadron Ready to Sortie" (基地航空隊出撃準備中).
- On the map, before the sortie begins, it will be asked to select up to two nodes per active base.
- A base can be sent to the same node twice or be split.
- Note that the LBAS strikes will proceed in the order of the airbases, so if all are sent to the same node, LBAS 1 will arrive first followed by 2 and 3.
- Once the targets are selected, click the green "Ready for Takeoff" (発進準備完了) button.
- If a mistake is made, click the red "Cancel" (解除) button to reset targets for that base, or just double click on the node currently selected.
- Repeat steps 5 and 6 for every active base.
- When the fleet reaches the targeted node, the LBAS attack will trigger.
Assignment & Resupply
Assignment
Assigning any plane to a LBAS group will cost bauxite ![]() following the formula:
following the formula:
[math]\displaystyle{ \text{Assignment Cost} = \text{Plane}_\text{Cost} \times \text{Slot}_\text{Size} }[/math]
- [math]\displaystyle{ \text{Plane}_\text{Cost} }[/math] is the deployment cost of the plane. Please refer to the tables below for costs.
- [math]\displaystyle{ \text{Slot}_\text{Size} }[/math] is the size of the plane slot, being:
- 4 for "Recons"
 /Sp/LB/
 Recon/
 / Large Flying Boats
  ,
, - 9 for Land-Based Heavy Bombers
 ,
, - 18 for everything else.
- 4 for "Recons"
Resupply
Planes can be resupplied by clicking the green "Resupply" (補充) button on the LBAS menu after a sortie. It is possible to either resupply one plane (航空機補充) or resupply the base (全中隊補充).
The resupply costs are:
| [math]\displaystyle{ \text{Fuel} = 3 \times \text{Plane} }[/math]
[math]\displaystyle{ \text{Baux} = 5 \times \text{Plane} }[/math] |
- [math]\displaystyle{ \text{Plane} }[/math] is the number of planes missing from the total count.
Deployment Modes
Standby
This is the default mode of all bases.
- The morale recovery rate is increased but the rate is lower than Rest.
- Damage from raids is similar to Sortie.
- If the airbase is not used, it is typically better to leave it in Evacuation or Rest instead.
Sortie


This enables the base to be sent out to attack targeted nodes.
- Up to two nodes can be targeted per base.
- In maps that do not allow all three bases, the first one or two bases set to sortie will be used for the attack.
- E.g If Base 1 is set to not sortie but Base 2 is, Base 2 will be dispatched.
- Only nodes within the combat radius of the base can be targeted. Please see "Combat Radius" for details.
- When multiple bases are sent to a node, they attack in order of bases.
- E.g Base 1 Wave 1, Base 1 Wave 2, Base 2 Wave 1, etc.
- LBAS attacks are subject to all aerial combat phases. Please see Aerial Combat for more details.
- Although air control is contested, the result will not be displayed.
- The enemy plane losses for the air control phase of LBAS can reduce the fighter-power values of the node.
- It is possible to trigger contact.
- There are several messages that are displayed when the planes in the base take heavy losses.
- Many LBAS planes did not return! (基地航空隊 攻撃機未帰還機多数!): 60% loss
- LBAS planes have suffered heavy losses! (基地航空隊 攻撃隊被害甚大!): 75% loss
- LBAS planes annihilated! (基地航空隊 攻撃隊全滅!): 100% loss
- Plane losses are not finalized until the results screen for the battle appears.
- Plane counts are reset between waves so every wave attacks at full strength.
- Note that sending one base to separate nodes can make that base weaker at the 2nd node.
- The base can be sent to any node. This includes nodes where the LBAS cannot appear.
- It is possible to use LBAS to weaken enemy air wings at air-raid nodes to help mitigate damage.
- The damage state of the base from Land Base air-raids does not affect airstrike damage.
Combat Radius
The Combat Radius (often represented using ![]() ) determines the furthest node that a base can attack. This is displayed over the picture in the LBAS menu.
) determines the furthest node that a base can attack. This is displayed over the picture in the LBAS menu.
- The distance of the nodes varies from map to map. Please refer to the LBAS range maps of relevant pages.
- Nodes will glow blue or yellow on mouseover with LBAS active. Yellow indicates nodes at the maximum range of the current base.
- It is not possible to sortie if the range of the LBAS is unable to reach any node.
- The range of
 Rotorcraft and
  Type 3 Command Liaison Aircraft
 cannot be increased.
 - Not to be confused with Range Extension for ships.
The effective range of an LBAS is given by:
| LBAS Range Formula | |
|---|---|
|
Each LBAS ranges in a group are managed independently, so "range extenders" may be needed on multiple bases in some situations.
Following this formula, it is possible to determine the effectiveness of certain recon to extend range:
| Range Extenders | |||||||||||
|---|---|---|---|---|---|---|---|---|---|---|---|
| Name | Combat Radius | Minimum Range and Extended Range | |||||||||
| 1 | 2 | 3 | 4 | 5 | 6 | 7 | 8 | 9 | 10 | ||
|
20 | 4 | 5 | 6 | 7 | 8 | 9 | 10 | 11 | 12 | 13 |
|
10 | 4 | 5 | 6 | 6 | 7 | 8 | 9 | 9 | 10 | - |
 |
9 | 4 | 5 | 5 | 6 | 7 | 8 | 8 | 9 | - | - |
 |
8 | 4 | 4 | 5 | 6 | 7 | 7 | 8 | - | - | - |
|
7 | 3 | 4 | 5 | 6 | 6 | 7 | - | - | - | - |
|
6 | 3 | 4 | 5 | 5 | 6 | - | - | - | - | - |
|
5 | 3 | 4 | 4 | 5 | - | - | - | - | - | - |
| All other recons | <5 | Too short to be relevant | |||||||||
Attack Power
Depending on the target, there are three different attack power formulas used. Please see the stats summary below for calculated attack power values.
- All "pre-cap" attack power is capped at 220.[1]
- See Damage Calculations for more details.
Please note that all formulas between [math]\displaystyle{ \lfloor \ \rfloor }[/math] are rounded down.
| Anti-Ship | |||||||||||||||||||||||||||||||||||||||||||
|---|---|---|---|---|---|---|---|---|---|---|---|---|---|---|---|---|---|---|---|---|---|---|---|---|---|---|---|---|---|---|---|---|---|---|---|---|---|---|---|---|---|---|---|
Pre-cap
|
| ||||||||||||||||||||||||||||||||||||||||||
Post-cap
|
| ||||||||||||||||||||||||||||||||||||||||||


| Anti-Installation | |||||||||||||||||||||||||||||||
|---|---|---|---|---|---|---|---|---|---|---|---|---|---|---|---|---|---|---|---|---|---|---|---|---|---|---|---|---|---|---|---|
Pre-cap
|
| ||||||||||||||||||||||||||||||
Post-cap
|
| ||||||||||||||||||||||||||||||
| ASW | ||
|---|---|---|
Pre-cap
|
| |
Post-cap
|
| |
| ||
- Notes
- Unlike carrier airstrikes, the 1.2x critical proficiency bonus applies to each slot independently.
- Jet Assault use the airstrike formula even on land base.
LBAS Special Bombers
Special bombers refer to bombers with unconventional setups, like guided bombs/effect bombs/missiles. In the game, this is reflected in some equipment having special buffs against certain types of ships, and with special attack animations.
| Special Bombers | |||||
|---|---|---|---|---|---|
| Plane | Target bonus | [math]\displaystyle{ \text{Mod}_\text{Sp} }[/math] | Total Anti-Ship Attack Power[1] |
Notes | |
Bomb-carrying Type 1 Fighter Hayabusa Model III Kai (65th Squadron) [2] [2]
|
DD | [math]\displaystyle{ \text{Mod}_\text{Sp2} = 25 }[/math] | 239.4 | 0 | |
Type 1 Fighter Hayabusa Model III Kai (Skilled/20th Squadron) [3] [3]
|
[math]\displaystyle{ \text{Mod}_\text{Sp2} = 30 }[/math] | 195 | 0 | ||
Ki-102 B
|
- | 126 | +1 | ||
Type 4 Heavy Bomber Hiryuu + No.1 Model 1A Guided Missile [4] [4]
|
DD,CL,CA | [math]\displaystyle{ \text{Mod}_\text{Sp1} = 1.15 }[/math] | 176.4 | -1 against DD +1 against CL |
Missile animation |
| (F)BB(V),CV(L/B) | [math]\displaystyle{ \text{Mod}_\text{Sp1} = 1.13 }[/math] | 174.6 | |||
Type 4 Heavy Bomber Hiryuu (Skilled) + No.1 Model 1A Guided Missile [4] [4]
|
DD,CL,CA | [math]\displaystyle{ \text{Mod}_\text{Sp1} = \sim1.15 }[/math] | 196.2 | +1 against CL[5] | |
| (F)BB(V),CV(L/B) | [math]\displaystyle{ \text{Mod}_\text{Sp1} = \sim1.15 }[/math] | 196.2 | |||
Ki-102 B Kai + No.1 Model 1B Guided Missile [4] [4]
|
DD,CL,CA | [math]\displaystyle{ \text{Mod}_\text{Sp1} = 1.16 }[/math] | 167.4 | -2 against DD +1 against CL | |
| (F)BB(V),CV(L/B) | [math]\displaystyle{ \text{Mod}_\text{Sp1} = 1.14 }[/math] | 165.6 | |||
Do 217 E-5 + Hs293 Initial Model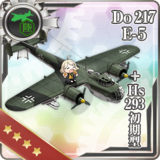 [6] [6]
|
DD | [math]\displaystyle{ \text{Mod}_\text{Sp1} = 1.10 }[/math] | 153 | 0 | |
Do 217 K-2 + Fritz-X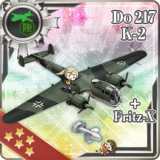 [7] [7]
|
(F)BB(V) | [math]\displaystyle{ \text{Mod}_\text{Sp1} = 1.50 }[/math] | 232 | Fritz-X animation | |
B-25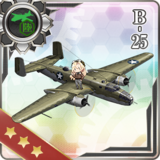 [8] [8]
|
DD | [math]\displaystyle{ \text{Mod}_\text{Sp3} = 1.90 }[/math] | 192.6 | +2 | Skip Bombing attack & animation.[9] |
| CL(T) | [math]\displaystyle{ \text{Mod}_\text{Sp3} = 1.75 }[/math] | 176.4 | |||
| CA(V) | [math]\displaystyle{ \text{Mod}_\text{Sp3} = 1.60 }[/math] | 162 | +3 | ||
| (F)BB(V) / CV(L) | [math]\displaystyle{ \text{Mod}_\text{Sp3} = 1.30 }[/math] | 131.4 | +4 | ||
| Installation | [math]\displaystyle{ \text{Mod}_\text{Sp3} = 0.90 }[/math][10] | 149.4 | +0? | ||
Alternative table: [15]
Sortie Fighter-Power
Please see the stats summary below for calculated sortie fighter-power values.
| Sortie Fighter-Power | |
|---|---|
|
- Notes
- Contesting air control works exactly the same as normal aerial combat.
- A better air control state can reduce the losses taken by the LBAS.
- It also weakens the enemy fighter-power by more.
- Be mindful not to compromise attack power by too much in order to reduce losses. Getting AD or AP is good enough.
Sortie Cost
There is a flat cost associated with LBAS sorties. This is separate from the resupply costs detailed above.
|
Other Planes:
|
- With
- [math]\displaystyle{ \text{Plane}_\text{Count} }[/math] the current planes count in the slot.
- Notes
- This cost is calculated per squadron.
- Empty slots do not cost anything.
- Costs are rounded up except for the land-based ammo cost which is rounded down.
PBY-5A Catalina rescue function

PBY-5A Catalina placed in LBAS have the ability to rescue planes lost in Land-Based Sorties.
- The rescue function will not trigger if:
- A too large amount of Catalina is shot down,
- No planes are lost,
- A 2nd wave does not occur due to all enemies dying.
- The rescue can happen if the 2 LBAS attacks are split on different nodes, the rescue happening on both nodes.
- Rescue only applies to bases with a Catalina equipped.
- There 3 types of rescue that can trigger depending on the setup:
- Type 1, with 1 bubble, saving 1 slot,
- Type 2, with 2 bubbles, saving 2 slots,
- Type 3, with 3 bubbles, saving 3 slots.
- Aircraft rescued by the Catalina will be restored :
- It saves some bauxite when resupplying,
- It does not prevent any loss of Plane Proficiency.
- The number of Catalina used to rescue affects the rescue ratio.
- Catalina ranks do not affect the rescue ratio.
- Losses are reduced per rescued slot (the final resupply value is about ~60% of what should be lost in battle). This doesn't carry over bases that are splitted.
Air Defense
In 6-5 and some event maps, the enemy will raid the bases during the sortie. A base on air defense will attempt to intercept those raids to mitigate the damage done.
- When intercepting enemy bombers, the first slot in the base will intercept the first slots on the enemy attackers and so on.
- Planes with a higher anti-bomber
 stat should be deployed in slots with opposing bombers to minimize the damage taken.
- Planes with a higher anti-bomber
Defense Fighter-Power
Please see the stats summary below for calculated defense fighter-power values.
| Defense Fighter-Power | |||||||||||||||||||||
|---|---|---|---|---|---|---|---|---|---|---|---|---|---|---|---|---|---|---|---|---|---|
| |||||||||||||||||||||
| |||||||||||||||||||||
- Shootdown
Unlike normal aerial combat, the shootdown for base defense is based on the anti-bomber ![]() stat of the plane. This is determined on a slot-by-slot basis as opposed to the whole air wing basis of aerial combat.
stat of the plane. This is determined on a slot-by-slot basis as opposed to the whole air wing basis of aerial combat.
| Base Defense Shootdown % | ||
|---|---|---|
| Anti-Bomber | AP Shootdown % | AS Shootdown % |
| 0[1] | 6~60 | 52~80 |
| 0 | 60~81 | 80~108 |
| 1 | 63.5~88 | 83.5~115 |
| 2 | 67~95 | 87~122 |
| 3 | 70.5~102 | 90.5~129 |
| 4 | 74~109 | 94~136 |
| 5 | 77.5~116 | 97.5~143 |
| 6 | 81~123 | 101~150 |
| 7 | 84.5~130 | 104.5~157 |
| 8 | 88~137 | 108~164 |
| 9 | 91.5~144 | 101.5~171 |
- ↑ Carrier-based fighters
Land Base Air-Raid
During a sortie, an alert will say "Enemy formation approaching! Enemy aircraft are approaching our base" (敵編隊接近中!我が航空基地に敵機接近中。).
- The chance that this happens is random but increases when approaching the boss.
- At the boss node, the chance is 100%.
- The damage dealt will not destroy the base.
- Either fuel or bauxite will be randomly lost for any damage done to the base. It is calculated as follows:
- [math]\displaystyle{ \text{Resource Loss} = \text{Damage} \times 0.9 + 0.1 }[/math]
- [math]\displaystyle{ \text{Damage} }[/math] is the damage taken by the base.
- The resource loss is rounded down.
- The maximum cost is 179 fuel/bauxite.
- [math]\displaystyle{ \text{Resource Loss} = \text{Damage} \times 0.9 + 0.1 }[/math]
- Only 1-4 planes in the first slot are lost due to damage.
- Reconnaissance planes can only lose 1 plane per raid.
- If a slot only has 1 plane remaining, the loss will be applied to the slot below.
| LBAS Raid Losses | |||
|---|---|---|---|
| Result | Notice | Losses | Notes |
| No Damage | The base has suffered no losses. (空襲による基地の損害はありません。) |
None |
|
| <50 Damage | The air-raids have reduced our resource stockpiles! (空襲により備蓄資源に損害を受けました!) |
Resource loss | |
| >50 Damage | The air raid has reduced our resource stockpiles, and our land-based air squadron has suffered losses on the ground! (空襲により備蓄資源に損害を受け、基地航空隊にも地上撃破の損害が発生しました!) |
Resource and plane loss. |
|
Notes:
- Because the plane losses are not that high and the resource loss is limited, it is recommended to focus all available bases on attack instead, unless getting LBAS AS is needed.
High Altitude Air-Raid
This is a special air-raid where the LBAS is attacked by "high-altitude bombers". The defense power of the base is severely reduced unless one or more Land-based rocket interceptors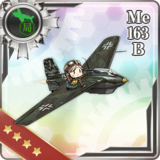
 are present.
- High Altitude Interceptors multiply the total air power of all land bases in Air Defense mode, when defending against enemy High-Altitude Bombers. The multiplier depends on the number of high altitude interceptors equipped and which difficulty the event map is played on:
 Me 163B  Prototype Shuusui  Shuusui | ||||
| Airpower modifier against high altitude raids: | ||||
| Event Map Difficulty |
Number of High Altitude Interceptors Defending | |||
| 0 | 1 | 2 | 3+ | |
| Casual/Easy: | 1x | 1.1x | 1.2x | |
| Medium/Hard: | 0.5x | 0.8x | ||
- At least 2 "High Altitude Interceptors" are needed to remove the defense penalty.
- The multiplier is calculated based on the number of rocket interceptors in all bases.
- Damage works the same way as normal base raids.
Superfortress Air-Raid Sequence
On E-5 of the Winter 2022 Event, a special interception mechanic was added, including the only "Quick Time Event" (QTE) in the game so far.
- See Superfortress Air-Raid Sequence for more details.
Evacuation
Bases set to "evacuate" will not lose planes to damage from "air-raids".
- Resources will still be lost to damage.
- Evacuated planes will recover morale slower.
- Bases that have been evacuated will not cost resources on sortie.
Notes:
- Can be used to preserve planes in bases not currently used.
- It can also save on sortie costs if a particular base is not currently needed on the sortie.
- E.g. a base with bombers when focusing on air defense.
Rest
During rest, the morale of the planes will recover faster.
- The natural regeneration of bauxite
 is severely reduced when a base is being rested.
- It is halved for one base and reduced to 1/6 for two bases.
- Because the only disadvantage of rest applies when being below the resource soft-cap, it can be freely used to recover bases faster when being above the soft-cap.
- In Rest mode, to recover from 0 to good morale (30), it takes:
- 12 min at Lv 0
- 9 min at Lv 1+
- (1h30 in Sortie at Lv 0)
- The waiting time is greatly affected by the LBAS group's level (see Land Base Maintenance menu).
Morale
Squadrons will experience fatigue when sent on repeated sorties. Orange and red faces will be displayed on each individual squadron similar to ship girls.
| Morale Value | Indication | [math]\displaystyle{ \text{Mod}_\text{morale} }[/math] |
|---|---|---|
| 30-46 | No mark | 1.0 |
| 20-29 | Orange face | |
| 0-19 | Red face | 0.8 |
- Planes have their morale set to 40 when deployed.
- Unlike ships, there is no "sparkle" morale.
- The effect of morale is described here.
- Each sortie decreases morale by 6 when deployed to one node and 8 when deployed to separate nodes.
- The result of the battle does not change the morale loss.
- The distance of the node does not affect morale loss.
- Morale recovers every 3 min, the amount recovered depends on the mode of the base, and the recovery is improved when the LBAS level is increased, see Land Base Maintenance menu.
- Changing the mode before the 3 min timer is up will not change the amount recovered.
- Morale recovery from 40 to 46 is +1 per 3 min no matter the mode.
- If the morale recovery from a state below 40 is exceeding 40 after 3 min, it will still stop at 40.
| Recovery times from 0 morale [min] | |||||||||||
|---|---|---|---|---|---|---|---|---|---|---|---|
| Morale goal |
Sorttie | Air Defense | Evacuation | Standby | Rest | ||||||
| Lv 0-2 | Lv 3 | Lv 0-1 | Lv 2+ | Lv 0-1 | Lv 2+ | Lv 0-1 | Lv 2+ | Lv 0 | Lv 1 | Lv 2+ | |
| 0 to 20 | 60 | 30 | 30 | 21 | 21 | 15 | 15 | 12 | 9 | 6 | 6 |
| 0 to 30 | 90 | 45 | 45 | 30 | 30 | 24 | 24 | 18 | 12 | 9 | 9 |
| 0 to 40 | 120 | 60 | 60 | 42 | 42 | 30 | 30 | 24 | 15 | 12 | 12 |
Land Base Maintenance Menu


Above any world menu for LBAS, can be found the button to access the general Land Base Maintenance menu. This menu gives access to the general level for each LBAS groups, including in this order:
- The "Limited time Land Base" (general Events LBAS group)
- The "Southwestern Land Base" (world 7 LBAS group)
- The "Southern Land Base" (world 5 LBAS group, currently not available)
- The "Central Land Base" (world 6 LBAS group).
This menu is common to all world's LBAS groups. An additional menu is also found in the admiral's information menu, displaying a brief view of each LBAS group level.
For each group, can be seen (from top to bottom), the:
- 4 LBAS groups
- Current level of this group
- Current mode of the group
- Number of LBAS opened for the group
- Amount of each plane type in the group with a scheme of each LBAS layout for:
- LBAS Bombers, Interceptors, Fighters, Bombers, & Seaplanes and recons aircraft.
Every group is initially at level 0, and can be upgraded up to level 3 using 1 Construction Corps each time. In the bottom right corner is showed how many Construction Corps are currently owned.
The effect for each level are the following:
| Level | Swapping cooldown |
Morale recovery | ||||
|---|---|---|---|---|---|---|
| Standby | Sortie | Air Defense | Evacuation | Rest | ||
| 0 | 12 min | 4 | 1 | 2 | 3 | 8 |
| 1 | 10 min | 4 | 1 | 2 | 3 | 10 |
| 2 | 8 min | 5 | 1 | 3 | 4 | 12 |
| 3 | 6 min | 5 | 2 | 3 | 4 | 12 |
- Having an LBAS at LV 3 allows to make as many sorties as wished without worrying about morale in "sortie" mode, as long as at least 9 min are waited between sorties.
In the case of the 1st group, all level improvements will carry over into future events .
From the 2021/10/29 update to the 2021/11/19 update, Event's LBAS maintenance menu could no longer be accessed, and so cannot be improved.
Plane Proficiency Tips
Just like for regular planes in combat, planes in LBAS can gain and lose Proficiency, by respectively taking part in battles, and being shot down.
- Good spots to farm plane ranks are "weaker nodes", especially submarine nodes, where almost no plane is lost on them, guaranteeing the cheapest farming.
- Such nodes are notably found on 7-4 and are a common occurrence in Events.
The #PBY-5A Catalina rescue function does not prevent Proficiency loss.
F5 Bug Exploit
When any battle is interrupted before its end, if an LBAS has been sent to said combat, then no proficiency will be lost.
- Interrupting a battle happens when the game crashes or is reloaded (via the F5 key notably).
- This exploit is a well-known bug, but has yet to be fixed.
- Planes lost will still be counted as such and will have to be resupplied.
- As usual, interrupting a battle won't count for quest completion, exp or drop earning, ...
This exploit is recommended to save on farming reranking planes during events, so planes can stay on ❱❱ until a node is cleared.
Troubleshooting
Q: Does the plane order in the base matter?
A: Yes. When taking damage from air raids, the plane in the top slot takes losses first. Therefore, you should try to put reconnaissance planes on top if you're running them. Otherwise, fighters or your weakest bomber go on top.
Q: Does it matter which base my planes are on?
A: Yes. Because the first base goes first, you want your best fighter if you are running any in the first base to help reduce enemy airpower. If running all bombers, you want to order your bombers by fighter power so the highest goes into the first base and so on. This helps reduce the losses taken by subsequent bases.
Q: How do I lock LBAS equipment?
A: There are two ways. You can lock them from the ship girl equipment menu. Interceptors and fighters can be found under Others (...) and bombers can be found under the large plane icon at the bottom. You can also lock them from the LBAS equipment menu.
Q: How do I unequip planes on my LBAS?
A: Click and drag them out of the slot. Note that this blocks out the slot until the plane is redeployed. If you wish to place a new plane in the slot, it is better to just replace it with a new one.
Q: Can I move my planes between bases directly?
A: Yes, though only between bases located in the same world (can't swap a plane between World 6 and Event Land Bases). The slot you're selecting from must also already have a plane in it (can't be empty, it swaps the planes rather than taking it).
Q: How long does it take to redeploy?
A: 12 minutes. Land Base upgrades will reduce this time. See Land Base Maintenance
Q: Why can't I send my planes to X node?
A: Double-check to see that the node is within your base's combat radius.
Q: How can I make my planes reach X node?
A: Use flying boats or other reconnaissance planes to extend the range of your other planes. See combat radius.
Q: Why are my planes deranked even though they've only taken minimal losses?
A: Due to the way the planes are brought back to full strength for each wave, your plane was wiped during the first wave but got lucky during the second wave.
Q: How do I rank my planes?
A: By sending them on sorties. Please note that planes must participate in the sortie to gain experience. If previous waves sink all the enemies and planes in that base do not appear, they will not gain experience. This just wastes your resources. The best place to rank planes outside of events is 7-4.
Q: Why are my planes not ranking up?
A: Double check that the planes in that base actually participated in the airstrike. They will not gain experience if they do not. If they did, please note that different planes have different leveling speeds. Check Plane Proficiency for details.
Q: How is my base taking damage?
A: Your base is being attacked by air raids. You need to set a base on defense with fighters or interceptors to mitigate that damage. It is generally not worth it to defend your land bases because the maximum you can lose per base is 179 fuel/bauxite and 4 planes from the top slot. Remember that reconnaissance planes take limited losses from air raids.
Q: I can't find my planes!?
A: Any plane currently deployed to a base or is being "Redeployed" cannot be viewed from the ship girl equipment menu. They can only be viewed in the LBAS equipment menu.
Q: Why are my planes listed as deployed when they aren't?
A: Normal maps and event maps are not the same base. Check to see if those planes aren't being deployed elsewhere.
Q: Will it cost anything to shift my planes around?
A: No, moving planes around in the same base does not incur a deployment cost. Be careful when dragging them around so you don't accidentally redeploy them.
Q: What happens in a night battle?
A: Although the game allows you to select night battle nodes, there will be no LBAS attack performed. The exception to this is night-day nodes where the LBAS will perform the attack as usual once the battle shifts into day.
Q: What happens to event LBAS after the event ends?
A: They will all be unequipped. There will be no additional resource loss even if you haven't resupplied your planes before the event ends.
Q: Is it worth it to open the 3rd base in World 6?
A: * The 3rd base will pay for itself in fuel and bauxite savings in roughly 3 months of 6-5 clears. Assuming that your bases regularly get knocked to moderate damage. It will take longer to pay for itself if your bases take less damage. This also assumes you have good enough fighters and interceptors to negate damage. Otherwise, the payback period gets longer. It can be a good long-term investment.
Q: Is it worth it to open the 2nd & 3rd bases in World 7?
A: * For now, there is only 7-4 with LBAS access in world 7, and there is only one LBAS available to sortie, and there is no air raid on this map, so opening any LBAS is useless.
Q: Is it worth it to upgrade LBAS groups?
A: * Upgrading LBAS groups decrease the swapping cooldown and increase the morale recovery, something which can be invaluable during events where time is counted, but on the contrary, something almost meaningless on regular maps.
- For most admirals, Upgrading the 1st LBAS group (event) may be helpful.
- Upgrading the 4th LBAS group (W6) can be useful if you are used to clear 6-5 late in the month.
- Upgrading the 2nd LBAS group (W7) is almost useless.
*NOTE: It is possible to unlock Construction Corps through quests, without paying any money (800 ¥).
Plane Stats Summary
The following assumptions apply:
- Full strength squadron
- Maxed proficiency ( ❱❱ )
- Versus single fleet
- No contact
- No critical
- No anti-installation bonus factored in.
In addition, Anti-Air Resistance works for any relevant plane.
Land-Based Planes
| Name | Deployment Cost | Assignment Cost | Combat Radius | Attack Power | Sortie/Defense Fighter Power | ||
|---|---|---|---|---|---|---|---|
| Anti-Ship | Anti-Ground | ASW | |||||
Type 96 Land-based Attack Aircraft |
10 | 180 | 8 | 100.8 | 117 | - | 7 |
Type 1 Land-based Attack Aircraft |
12 | 216 | 9 | 117 | 133.2 | - | 11 |
Type 1 Land-based Attack Aircraft (Nonaka Squadron) |
12 | 216 | 9 | 133.2 | 142.2 | - | 16 |
Type 1 Land-based Attack Aircraft Model 22A |
12 | 216 | 10 | 126 | 133.2 | - | 16 |
Type 1 Land-based Attack Aircraft Model 34 |
12 | 216 | 8 | 126 | 133.2 | - | 20 |
Ginga |
13 | 234 | 9 | 149.4 | 149.4 | - | 16 |
| Bomb-carrying Type 1 Fighter Hayabusa Model III Kai (65th Squadron) |
4 | 72 | 5 | 36 (239.4against DD) |
100.8 | - | 28 |
Prototype Toukai |
9 | 162 | 8 | 36 | 52.2 | 102.6 ~ 145.8 | 3 |
Toukai (901 Air Group) |
9 | 162 | 8 | 36 | 52.2 | 109.8 ~ 156.6 | 3 |
Do 17 Z-2 |
13 | 234 | 4 | 36 | 126 | - | 11 |
| Do 217 E-5 + Hs293 Initial Model |
15 | 270 | 4 | 142.2 (153against DD) | 216 | - | 20 |
| Do 217 K-2 + Fritz-X |
17 | 306 | 4 | 165.6 (232.2against BB) | 232.2 | - | 20 |
Type 4 Heavy Bomber Hiryuu |
14 | 252 | 5 | 149.4 | 158.4 | - | 24 |
Type 4 Heavy Bomber Hiryuu (Skilled) |
14 | 252 | 5 | 149.4 | 165.6 | - | 24 |
| Type 4 Heavy Bomber Hiryuu + No.1 Model 1A Guided Missile |
15 | 270 | 5 | 176.4 | 199.8 | - | 24 |
SM.79 |
11 | 198 | 7 | 108 | 142.2 | - | 11 |
SM.79 bis |
13 | 234 | 8 | 133.2 | 149.4 | - | 16 |
SM.79 bis (Skilled) |
14 | 252 | 8 | 142.2 | 149.4 | - | 13 |
Shinzan |
20 | 180 | 10 | 71 | 74 | - | 7 |
Shinzan Kai |
21 | 189 | 11 | 74 | 81 | - | 11 |
Ginga (Egusa Squadron) |
13 | 234 | 8 | 158.4 | 158.4 | - | 16 |
| Ki-102 B |
9 | 162 | 4 | 126 | 190.8 | - | 20 |
| Ki-102 B Kai + No.1 Model 1B Guided Missile |
12 | 216 | 3 | 167.4 | 199.8 | - | 16 |
| B-25 |
13 | 234 | 7 | ⯁ See #LBAS Special Bombers | 165.6 | - | 20 |
Mosquito FB Mk.VI |
14 | 252 | 7 | 75.6 | 181.8 | - | 24 |
| Type 4 Heavy Bomber Hiryuu (Skilled) + No.1 Model 1A Guided Missile |
15 | 270 | 5 | 196.2 | 207 | - | 24 |
Ginga (Skilled) |
13 | 234 | 7 | 149.4 | 158.4 | - | 16.2 |


| Name | Deployment Cost | Assignment Cost | Combat Radius | Sortie/Defense Fighter-Power |
|---|---|---|---|---|
| Type 2 Land-based Reconnaissance Aircraft |
7 | 28 | 8 | 9 |
| Type 2 Land-based Reconnaissance Aircraft (Skilled) |
7 | 28 | 9 | 9 |
Mosquito PR Mk.IV |
14 | 56 | 9 | 3 |
Carrier-Based Planes


| Name | Deployment Cost | Assignment Cost | Combat Radius | Attack Power | Sortie/Defense Fighter-Power | ||
|---|---|---|---|---|---|---|---|
| Jet Assault | Anti-Ship/Ground | ASW | |||||
Jet Keiun Kai |
14 | 252 | 3 | 110 | 78 | - | 28 |
Kikka Kai |
13 | 234 | 2 | 87 | 61 | - | 54 |
| Name | Deployment Cost | Assignment Cost | Combat Radius | Sortie/Defense Fighter Power |
|---|---|---|---|---|
Saiun |
9 | 36 | 8 | 3 |
| Type 2 Reconnaissance Aircraft |
6 | 24 | 5 | 7 |
Prototype Keiun (Carrier-based Reconnaissance Model) |
12 | 48 | 8 | 3 |
Saiun (Eastern Caroline Air Group) |
9 | 36 | 8 | 3 |
Saiun (4th Recon Squad) |
9 | 36 | 7 | 11 |
Fulmar (Reconnaissance Fighter/Skilled) |
4 | 16 | 4 | 20 |
| Name | Deployment Cost | Assignment Cost | Combat Radius | Attack Power | Sortie/Defense Fighter-Power | |
|---|---|---|---|---|---|---|
| Anti-Ship/Ground | ASW | |||||
| Type 3 Command Liaison Aircraft (ASW) |
3 | 54 | 2 | 25 | 22 ~ 51 | 3 |
| Type 3 Command Liaison Aircraft Kai |
4 | 72 | 2 | 25 | 26 ~ 60 | 3 |
Type 1 Fighter Hayabusa Model II Kai (20th Squadron) |
4 | 72 | 4 | 47 | 24 ~56 | 50 |
| Type 1 Fighter Hayabusa Model III Kai (Skilled/20th Squadron) |
4 | 72 | 4 | 47 (195against DD) | 24 ~56 | 55 |
Seaplanes
| Name | Deployment Cost | Assignment Cost | Combat Radius | Sortie/Defense Fighter-Power |
|---|---|---|---|---|
Ro.44 Seaplane Fighter |
4 | 72 | 3 | 33 |
| Ro.44 Seaplane Fighter ★10 |
4 | 72 | 3 | 42 |
Type 2 Seaplane Fighter Kai |
5 | 90 | 4 | 38 |
| Type 2 Seaplane Fighter Kai ★10 |
5 | 90 | 4 | 46 |
Ro.44 Seaplane Fighter bis |
4 | 72 | 3 | 38 |
| Ro.44 Seaplane Fighter bis ★10 |
4 | 72 | 3 | 46 |
Type 2 Seaplane Fighter Kai (Skilled) |
5 | 90 | 4 | 46 |
| Type 2 Seaplane Fighter Kai (Skilled) ★10 |
5 | 90 | 4 | 55 |
Kyoufuu Kai |
6 | 108 | 3 | 46 |
| Kyoufuu Kai ★10 |
6 | 108 | 3 | 55 |
Kyoufuu Kai Ni |
6 | 108 | 3 | 50 |
| Name | Deployment Cost | Assignment Cost | Combat Radius | Attack Power | Sortie/Defense Fighter-Power | |
|---|---|---|---|---|---|---|
| Anti-Ship/Ground | ASW | |||||
Zuiun |
6 | 108 | 5 | 47 | - | 17 |
| Zuiun ★10 |
6 | 108 | 5 | 59 | - | 17 |
Prototype Seiran |
10 | 180 | 4 | 87 | - | 9 |
Zuiun (634 Air Group) |
6 | 108 | 5 | 59 | - | 17 |
| Zuiun (634 Air Group) ★10 |
6 | 108 | 5 | 70 | - | 17 |
Zuiun Model 12 |
7 | 126 | 5 | 64 | - | 22 |
Zuiun Model 12 (634 Air Group) |
7 | 126 | 5 | 76 | - | 22 |
Laté 298B |
7 | 126 | 4 | 53 | - | 13 |
Zuiun (631 Air Group) |
6 | 108 | 5 | 64 | - | 13 |
Seiran (631 Air Group) |
10 | 180 | 4 | 93 | - | 9 |
Zuiun (634 Air Group/Skilled) |
6 | 108 | 5 | 76 | - | 26 |
| Zuiun (634 Air Group/Skilled) ★10 |
6 | 108 | 5 | 87 | - | 26 |
Zuiun Kai Ni (634 Air Group) |
8 | 144 | 5 | 81 | - | 26 |
| Zuiun Kai Ni (634 Air Group) ★10 |
8 | 144 | 5 | 93 | - | 26 |
Zuiun Kai Ni (634 Air Group/Skilled) |
8 | 144 | 5 | 87 | 22 ~ 51 | 30 |
Swordfish (Seaplane Model) |
5 | 90 | 3 | 53 | - | 9 |
Swordfish Mk.III Kai (Seaplane Model) |
6 | 108 | 3 | 64 | 22 ~51 | 9 |
Swordfish Mk.III Kai (Seaplane Model/Skilled) |
5 | 90 | 3 | 70 | 24 ~56 | 9 |
Prototype Night Zuiun (Attack Equipment) |
8 | 144 | 4 | 81 | - | 26 |
| Name | Deployment Cost | Assignment Cost | Combat Radius | ASW | Sortie/Defense Fighter-Power |
|---|---|---|---|---|---|
| Type 0 Reconnaissance Seaplane |
5 | 20 | 7 | - | 11 |
Type 0 Observation Seaplane |
6 | 24 | 3 | - | 11 |
| Type 98 Reconnaissance Seaplane (Night Recon) |
8 | 32 | 6 | - | 3 |
Ar196 Kai |
5 | 20 | 3 | - | 7 |
Shiun |
9 | 36 | 4 | - | 3 |
Ro.43 Reconnaissance Seaplane |
4 | 16 | 3 | - | 7 |
OS2U |
6 | 24 | 3 | - | 7 |
Type 0 Reconnaissance Seaplane Model 11B |
5 | 20 | 7 | 15 ~ 35 | 7 |
Type 0 Reconnaissance Seaplane Model 11B (Skilled) |
5 | 20 | 7 | 16 ~ 37 | 7 |
S9 Osprey |
3 | 12 | 3 | - | 7 |
Swordfish Mk.II Kai (Reconnaissance Seaplane Model) |
5 | 20 | 3 | - | 3 |
Fairey Seafox Kai |
6 | 24 | 3 | - | 7 |
SOC Seagull |
3 | 12 | 3 | - | 3 |
SO3C Seamew Kai |
5 | 20 | 4 | - | 7 |
Type 0 Reconnaissance Seaplane Model 11B Kai (Night Recon) |
5 | 90 | 7 | - | 7 |
Loire 130M |
9 | 162 | 3 | - | 3 |
Walrus |
10 | 180 | 3 | - | 3 |
Sea Otter |
11 | 198 | 4 | - | 3 |
| Name | Deployment Cost | Assignment Cost | Combat Radius | Sortie/Defense Fighter-Power |
|---|---|---|---|---|
| Type 2 Large Flying Boat |
25 | 100 | 20 | 3 |
| PBY-5A Catalina |
13 | 52 | 10 | 3 |
| Name | Deployment Cost | Assignment Cost | Combat Radius | Attack Power | Sortie/Defense Fighter-Power | |
|---|---|---|---|---|---|---|
| Anti-Ship/Ground | ASW | |||||
Ka Type Observation Autogyro |
2 | 36 | 1 | 25 | 26 ~ 60 | 3 |
O Type Observation Autogyro Kai |
3 | 54 | 1 | 25 | 57 ~ 81 | 3 |
O Type Observation Autogyro Kai Ni |
4 | 72 | 1 | 25 | 61 ~ 87 | 3 |
S-51J |
5 | 90 | 2 | 25 | 65 ~ 93 | 3 |
S-51J Kai |
5 | 90 | 2 | 25 | 69 ~ 98 | 3 |
- ↑ Upgraded variants not included because it only increases LoS.
See Also
| |||||||||||||||||||||||||||||||||||||