Day Battle Breakdown
The Day Battle is the phase where the majority of combat takes place.
- This article will go more in-depth on the stages that take place during the surface combat.
- Although it will be mentioned when the other related battle phases take place, keep in mind that this page won't go deeper about it, due to the complexity of the mechanics behind them, please refer to each individual page for more details.
The Day Battle has the following structure:
- Detection
- Engagement
- Aerial Combat
- Surface Combat
- Support Expedition
- Battle Opening
- Shelling Phase
- Second Shelling Phase
- Closing Torpedo Salvo
In case neither fleet meet the requirements, the sub-phase will be skipped.
Detection
During Detection, the fleet attempts to detect the enemy fleet. The success rate of Detection is influenced by many factors such as the number and quality of Recons, Radars, fleet Line of Sight (LoS), and such. It is not required to have any equipment to have successful Detection. Generally, it is extremely unlikely to fail detection unless using a very low leveled fleet.
Planes that participate in this phase:
In case the fleet fails to detect the enemy fleet, the fleet will not participate in the Aerial Combat Phase.
Regardless of Detection success, the recons may also be shot down if the enemy fleet has significantly more fighters than equipped recons and the fleet contains no Carriers.
Although the displayed message indicates that Accuracy and Evasion have changed, testing has shown that it has no noticeable effect.
Enemy Abyssal fleets always succeed in Detection. PVP opponents however may fail detection, and therefore not launch planes in Aerial Combat.
| ExpandDetection
|
|
These formulas are taken from the Vita version and has not been tested, it may be outdated.
The success chance of detection is calculated by the following formula:
[math]\displaystyle{ \text{Success Rate}_\text{%} = \frac{\lfloor \text{Detection}_\text{power} + 1 \rfloor}{20} }[/math]
[math]\displaystyle{ \text{Detection}_\text{power} = \sum^{\text{All Ships}} \frac{\text{LoS}_\text{ship} + \text{LoS}_\text{Equipment}}{\text{Mod}_\text{order}} + \text{Mod}_\text{NbShip} - 20 + \lfloor \sqrt{10 \times \text{Recon}_\text{power}} \rfloor }[/math]
With:
- [math]\displaystyle{ \text{LoS}_\text{Ship} }[/math] the base
 of the ship. of the ship.
- [math]\displaystyle{ \text{LoS}_\text{Equipment} }[/math] the sum of the of all participating planes of the ship.
- [math]\displaystyle{ \text{Mod}_\text{order} }[/math] depends on the ship position in the fleet:
| Expand[math]\displaystyle{ \text{Mod}_\text{order} }[/math]
|
| Position
|
Modifier
|
| 1 |
2
|
| 2 |
5
|
| 3~6 |
8
|
- [math]\displaystyle{ \text{Mod}_\text{NbShip} }[/math] depends on the number of ships in the fleet:
| Expand[math]\displaystyle{ \text{Mod}_\text{NbShip} }[/math]
|
| Number of Ships
|
Modifier
|
| 1~2 |
0
|
| 3 |
1
|
| 4 |
2
|
| 5 |
3
|
| 6 |
4
|
- [math]\displaystyle{ \text{Recon}_\text{power} = \sum^{\text{All Recon}}\big( \text{Count}_\text{Plane} + \text{Mod}_\text{proficiency} \big) + \text{Mod}_\text{Carrier} }[/math]
With:
- [math]\displaystyle{ \text{Count}_\text{Plane} }[/math] the current plane count for planes that participate in Detection.
- [math]\displaystyle{ \text{Mod}_\text{proficiency} }[/math] the plane proficiency bonus (not applied if [math]\displaystyle{ \text{Count}_\text{Plane} }[/math] is 0):
| Expand[math]\displaystyle{ {Mod}_\text{proficiency} }[/math]
|
| Plane Rank
|
Modifier
|
| (blank)
|
0
|
| |
|
| ||
|
5
|
| |||
|
| \
|
15
|
| \\\
|
| \\\\\
|
| ❱❱
|
30
|
- [math]\displaystyle{ \text{Mod}_\text{Carrier} }[/math] depends on the number of Carriers in the fleet:
- +30 for the first carrier and +10 for each additional carrier.
|
|
Recons are shot down (each recon slot loses a random number between 0-2) if [math]\displaystyle{ \text{Shotdown}_\text{val} \le 0 }[/math] with:
[math]\displaystyle{ \text{Shotdown}_\text{val} = \text{Recon}_\text{power} - \lfloor \text{Def}_\text{fighter} \times \text{Rand} \rfloor }[/math]
With:
- [math]\displaystyle{ \text{Def}_\text{fighter} = f(\sum^{\text{All Fighters}} \text{Count}_\text{Plane}) }[/math] with:
- [math]\displaystyle{ \text{Count}_\text{Plane} }[/math] the plane counts of the opposing fleet
- [math]\displaystyle{ f(x) }[/math] a function defined as:
| [math]\displaystyle{ x }[/math]
|
Expand[math]\displaystyle{ f(x) }[/math]
|
| [math]\displaystyle{ 0\lt x \le 30 }[/math]
|
[math]\displaystyle{ 1+x/9 }[/math]
|
| [math]\displaystyle{ 30\lt x \le 120 }[/math]
|
[math]\displaystyle{ 2+x/20 }[/math]
|
| [math]\displaystyle{ 120\lt x }[/math]
|
[math]\displaystyle{ 6+(x-120)/40 }[/math]
|
- [math]\displaystyle{ \text{Rand} }[/math] is a random value between 1.0 and 1.4.
|
Engagement
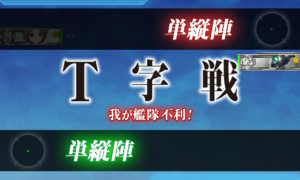
Red T Engagement is declared
Before the battle proper begins, the game will roll one of 4 possible engagements:
| Form |
Common name |
Damage Modifier |
Chance |
Chance with Saiun
|
Crossing the T (Advantage)
T字戦有利 (T Ji-sen Yuuri, T字戦有利?)
|
Green T
|
120% |
15% |
15%
|
Parallel Engagement
同航戦 (Doukousen, 同航戦?)
|
Parallel
|
100% |
45% |
45%
|
Head-on Engagement
反航戦 (Hankousen, 反航戦?)
|
Head-on
|
80% |
30% |
40%
|
Crossing the T (Disadvantage)
T字戦不利 (T Ji-sen Furi, T字戦不利?)
|
Red T
|
60% |
10% |
0%
|
- Engagement modifier affects the Shelling Phase, as well as the Battle Openings, the Closing Torpedo Salvo, and Support Expeditions.
- All engagement forms affect both sides equally, including Green T and Red T.
- The exception are some Special Attacks.
- Night Battle and Aerial Combat are not affected by engagement.
- Equipping a
 Saiun
Saiun
will override Red T engagements and turn them into Head-on engagements instead.
- This mechanic does not work if the Saiun is in a zero plane slot or on "air nodes".
- It can be useful to not take a Saiun in order to get more Red T, as it can also hamper the enemy from damaging the fleet.
Smoke Screen
 Smoke Generators can be used in combat to deploy a smoke screen.
Example of a large smoke deployed.
- There are 3 smoke screen sizes, being Small < Medium < Large.
- The maximum smoke size that can be generated is dependent on the number of smoke generators, being respectively 1/2/3.
- Note that
 improvements also affect the maximum smoke level possible.
- It sharply reduces the accuracy of all fleets, proportionally to the smoke screen size (the hit rate is still capped at 11%).
- This effect can be partially bypassed by using radars (both sides).
- The effect will last for the day battle, even so the animation will fade before the battle's end.
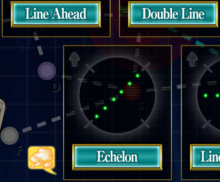
Smoke activation button next to the Formation ones.
- If equipped, it can be activated with a specific button when selecting the formation.
- It can be activated multiple times per sortie until it triggers, being triggerable once, in day battle only.
- It cannot be activated in Exercises in the current implementation.
- The trigger rate is not 100% and depends on the fleet's flagship's luck
 , as well as the amount and type of Smoke Generators used.
- For combined fleets, it is the luck of the main flagship.
- The size of the triggered smoke screen depends on how many smoke generators are used.
- It will only trigger at the beginning of day battle.
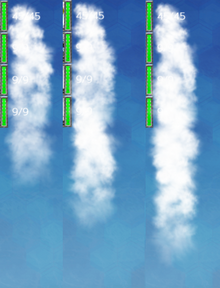
The 3 different smoke size
- The trigger rate depends on:
- Regarding the equipment:
Two formulas have been determined to approximate the trigger rate of smoke screens.
- The 2nd formula is based on the 1st one with additional hypothesis,
- A measurement of the trigger rate can be found here,
- Both formulas can be directly compared here.
- It is possible to have a total trigger rate for all 3 sizes of 100%, giving the FS has enough luck & enough generators are used.
| ExpandTrigger Rate Formula 1 [3]
|
| [math]\displaystyle{ \text{P}_\text{0} = 3.2 - 0.2 \times \text{K} - \text{N}_\text{Generator} }[/math]
|
- If [math]\displaystyle{ \text{Luck}_\text{flag} ≥ 1 \text{ & } \text{N}_\text{Generator} ≥ 3 }[/math], then [math]\displaystyle{ \text{P}_\text{0} = 0 }[/math]
| [math]\displaystyle{ \text{K} = \bigg\lceil \sqrt{ \text{Luck}_\text{flag} } + 0.3 \times \bigstar_\text{base} + 0.5 \times \bigstar_\text{Kai} \bigg\rceil }[/math]
|
|
| [math]\displaystyle{ \text{N}_\text{Generator} = 1 }[/math]
|
[math]\displaystyle{ \text{N}_\text{Generator} = 2 }[/math]
|
[math]\displaystyle{ \text{N}_\text{Generator} ≥ 3 }[/math]
|
| [math]\displaystyle{ \begin{align}
\text{P}_\text{1} &= 1 - \text{P}_\text{0} \\
\text{P}_\text{2} &= 0 \\
\text{P}_\text{3} &= 0
\end{align} }[/math]
|
|
| [math]\displaystyle{ \begin{align}
\text{P}_\text{1} &= 1 - \text{P}_\text{0} - \text{P}_\text{2} \\
\text{P}_\text{2} &= 0.05 \times ( 1 - \text{P}_\text{0} ) \times ( \text{K} + 2 ) \\
\text{P}_\text{3} &= 0
\end{align} }[/math]
|
|
| [math]\displaystyle{ \begin{align}
\text{P}_\text{1} &= 1 - \text{P}_\text{2} - \text{P}_\text{3} \\
\text{P}_\text{2} &= \min ( 0.3 ; 1 - \text{P}_\text{3}) \\
\text{P}_\text{3} &= X \times \text{K} + 0.15 \times ( \text{N}_\text{Generator} - 3 )
\end{align} }[/math]
|
- The X coefficient is unclear yet, being about 0.04~0.045.
|
- With
- [math]\displaystyle{ \text{P}_\text{0}, \text{P}_\text{1}, \text{P}_\text{2}, \text{P}_\text{3} }[/math] the respective rates for the trigger of smokes levels 0 to 3,
- [math]\displaystyle{ \text{N}_\text{Generator} }[/math] the amount of Smoke Generators:
- [math]\displaystyle{ \text{Luck}_\text{flag} }[/math] the flagship's luck,
- [math]\displaystyle{ \bigstar_\text{base} }[/math] the total improvement level of the base generators,
- [math]\displaystyle{ \bigstar_\text{Kai} }[/math] the total improvement level of the Kai generators,
|
| ExpandTrigger Rate Formula 2 [4]
|
| [math]\displaystyle{ \text{Level 0}_\text{Rate %} = \max \big( 0 ; \min ( 100 ; 3.2 - 0.2 \times \text{K} - \text{N}_\text{Generator} ) \big) }[/math]
|
- If [math]\displaystyle{ \text{Luck}_\text{flag} ≥ 1 \text{ & } \text{N}_\text{Generator} ≥ 3 }[/math], then [math]\displaystyle{ \text{Level 0}_\text{Rate %} = 0 }[/math]
| [math]\displaystyle{ \text{K} = 5 \times \text{N}_\text{Generator} + 1.5 \times \sqrt{ \text{Luck}_\text{flag} } + 0.3 \times \bigstar_\text{base} + 0.5 \times \bigstar_\text{Kai} }[/math]
|
|
| [math]\displaystyle{ \text{N}_\text{Generator} = 1 }[/math]
|
[math]\displaystyle{ \text{N}_\text{Generator} = 2 }[/math]
|
[math]\displaystyle{ \text{N}_\text{Generator} ≥ 3 }[/math]
|
| [math]\displaystyle{ \begin{align}
\text{Level 1}_\text{Rate %} &= 100 - \text{Level 0}_\text{Rate %} \\
\text{Level 2}_\text{Rate %} &= 0 \\
\text{Level 3}_\text{Rate %} &= 0
\end{align} }[/math]
|
|
| [math]\displaystyle{ \begin{align}
\text{Level 1}_\text{Rate %} &= ( 100 - \text{Level 2}_\text{Rate %} ) \times ( 1 - \text{Level 0}_\text{Rate %} ) \\
\text{Level 2}_\text{Rate %} &= ( 3 \times \big\lceil \text{K} - 5 \big\rceil + 1 ) \times ( 1 - \text{Level 0}_\text{Rate %} ) \\
\text{Level 3}_\text{Rate %} &= 0
\end{align} }[/math]
|
|
| [math]\displaystyle{ \begin{align}
\text{Level 1}_\text{Rate %} &= \min ( 0 ; 100 - \text{Level 2}_\text{Rate %} - \text{Level 3}_\text{Rate %}) \\
\text{Level 2}_\text{Rate %} &= \min ( 30 ; 100 - \text{Level 3}_\text{Rate %} ) \\
\text{Level 3}_\text{Rate %} &= 3 \times \big\lceil \text{K} - 15 \big\rceil + 1
\end{align} }[/math]
|
|
- With
- [math]\displaystyle{ \text{N}_\text{Generator} }[/math] the amount of Smoke Generators:
- [math]\displaystyle{ \text{Luck}_\text{flag} }[/math] the flagship's luck,
- [math]\displaystyle{ \bigstar_\text{base} }[/math] the total improvement level of the base generators,
- [math]\displaystyle{ \bigstar_\text{Kai} }[/math] the total improvement level of the Kai generators,
|
- The smoke gives an Accuracy malus to both fleets when used:
- Please note that these are initial estimations and are subject to change.
- It is currently unknown if the airstrike accuracy is affected by the smoke.
- Some modifiers are near impossible to determine because the fleet hit the lower bound hit rate (11% hard cap).
- There are some inconsistencies between "old" and "new" enemies.
- Having a (surface ?) radar equipped reduces the smoke effect for both fleets, but only for the shelling phase.
- It has been observed that in some cases, the Yamato-class and Nagato-class (but not Nelson-class) Special Attacks may still have decent accuracy despite smoke being active[1]. This may possibly be due to the attack's accuracy mod (which are currently unknown) overcoming the smoke's penalty mod.
| Expand[math]\displaystyle{ \text{Mod}_\text{smoke} }[/math][2]
|
| Day Shelling
|
| Fleet |
Radar Equipped |
Type 1 |
Type 2 |
Type 3
|
| Allied
|
No |
< 0.3 |
< 0.33 |
< 0.37
|
| Yes |
0.35 |
0.25 |
< 0.37
|
| Enemy
|
No |
< 0.69 |
< 0.7 |
< 0.7
|
| Yes |
0.91 |
0.83 |
0.75
|
| Torpedo Phases
|
| Fleet |
Type 1 |
Type 2 |
Type 3
|
| Allied |
0.45 |
0.42 |
0.42
|
| Enemy |
0.7 |
0.6 |
0.5
|
| ASW
|
| Allied |
0.25
|
| Enemy |
1
|
- AA effects:
- The smoke affects the allied shootdown but not the enemy shootdown.
- No fixed shootdown above 2 has been observed under a smoke.
- The guaranteed shootdown does not seem to be affected.
- A modifier to the Adjusted AA is suspected but there is not enough data to confirm it.
- The Smoke reduce the Anti-Air Rocket Barrage trigger rate either directly or by reducing the Adjusted AA.
Effects may be updated in a later update.
Shelling Phase
Following engagement, each side will begin the Shelling phase. A ship's single attack, carrier plane sweep, or ASW attack, as well as Artillery Spotting and Special Attacks are shelling attacks.
Some rules are applied for shelling attacks:
- Standard and Light Aircraft Carriers (CV and CVL) are unable to shell if they are moderately damaged (中破) or heavily damaged (大破). This includes Installations that are of the Aircraft Carrier (CV) and Aviation Battleship (BBV) types.
- Armored Aircraft Carriers (CVB) are only unable to shell when heavily damaged (大破) instead.
- Aircraft Carriers will not attack if they have no bombers or the equipped bombers' slots are reduced to 0 during the sortie.
- Ships that are able to attack submarines are forced to attack submarines as long there is at least one submarine alive (see here).
- Ships may perform special attacks denominated Artillery Spotting and Special Attacks, if applicable.
The firing order is defined when each of the Shelling Phase subphases starts, and skips over ships unable to attack, such as damaged/deplaned carriers, or sunk/evacuated ships.
If a ship would normally be able to attack but currently is unable to, such as a carrier that is moderately damaged (中破) or lost all its equipped bombers, their turn will still be accounted for in the turn order. Ships that are unable to attack during their turn or sink before their turn will still take actionless turns.
First Shelling Phase
- In this phase, both fleets will take turns shelling the opposing fleet, with the Shooting Order defined by each ship's Range
 stat. It is possible to increase a ship's range with proper equipment.
- The shelling order is Longest > Very Long > Long > Medium > Short > None.
- If two or more ships tie for range, the order between them is random.
- Notes
- "Longest" range is only attainable on certain ships, using range extenders (see Range Extension).
- Unlike the other ranges, Longest does not have a proper in-game icon and so is just displayed as "Very Long".
- "None" range is mostly reserved for Abyssal Aircraft Carriers and Transport Ships.
Second Shelling Phase
This phase will only occur if either side of the battle has any kind of Battleship present. The Battleship doesn't have to be alive for this phase to trigger.
In this phase, both fleets will take turns shelling the opposing fleet, with the turn order defined by the fleet order.
Closing Torpedo Salvo
After the Shelling Phase, any ship with a base  torpedo stat higher than 0 that is no more than lightly damaged (小破) will fire a Closing Torpedo. Each torpedo will target a surface ship at random and all torpedoes will strike both sides at the same time. After the Closing Torpedo Salvo, the Day Battle is over.
- Submarines and Installations cannot be targeted.
- Ships must have a base stat greater than 0 to attack. stats from equipment do not count.
- See Damage Calculations and Accuracy, Evasion and Criticals for calculation details.
- It's been observed that during Combined Fleet vs Combined Fleet (12 vs 12) and Player Single Fleet vs Enemy Combined Fleet (6 vs 12) scenarios, the player side torpedoes will resolve their damage before Abyssal side torpedoes, causing Abyssal torpedo power to be lowered if the Abyssal is Medium Damaged, or reduced to zero if Heavy Damaged or sunk (causing only scratch damage if it hits), in the same way a damaged ship firing opening torpedoes is handled.
Aftermath
If any of the enemy ships are still alive after Day Battle ends, a prompt asking if the player desires to pursue the enemy fleet into Night Battle will appear. Accepting this prompt will move the battle to Night Battle, starting with the conditions on which the Day Battle ended.
If the Day Battle was preceded by a Night Battle in the same node, such a prompt will not appear, and the battle will automatically end instead.
See Also

 Recon/
 Seaplane Recons
 Seaplane Bombers
 Large Flying Boats