- Welcome to the Kancolle Wiki!
- If you have any questions regarding site content, account registration, etc., please visit the KanColle Wiki Discord
Difference between revisions of "Spring 2025 Event"
Jigaraphale (talk | contribs) |
Jigaraphale (talk | contribs) |
||
| (21 intermediate revisions by 4 users not shown) | |||
| Line 60: | Line 60: | ||
*Rei-Go Part 1 was the [[Winter 2016 Event]]. | *Rei-Go Part 1 was the [[Winter 2016 Event]]. | ||
*''See: [https://pacificwrecks.com/location/philippines_mindoro_san_jose.html]. | *''See: [https://pacificwrecks.com/location/philippines_mindoro_san_jose.html]. | ||
| − | On the 24th of December 1944, a Japanese Navy force containing two cruisers: Ashigara and Ōyodo; plus eight destroyers: Kiyoshimo, Asashimo, Kasumi, Kaya, Kashi, and Sugi; departs Camranh Bay off Indochina (Vietnam) as part of "Operation Rei-Go" a raiding force to bombard the San Jose beachhead. On the evening of 26th of December 1944, the force was spotted and attacked by B-25 Mitchells and PT Boats. Kiyoshimo sustained heavy damage and was eventually sunk. Between 11 PM and 1 AM the next day, the remaining force bombards the beachhead area but causes little damage. This was one of the last Japanese surface unit attacks on an American beachhead during the Pacific War. The next day, the survivors return to Camranh Bay. (Pacific Wrecks) | + | On the 24th of December 1944, a Japanese Navy force containing two cruisers: Ashigara and Ōyodo; plus eight destroyers: Kiyoshimo, Asashimo, Kasumi, Kaya, Kashi, and Sugi; departs Camranh Bay off Indochina (Vietnam) as part of "Operation Rei-Go" a raiding force to bombard the San Jose beachhead on the Philippine Island of Mindoro. On the evening of 26th of December 1944, the force was spotted and attacked by B-25 Mitchells and PT Boats. Kiyoshimo sustained heavy damage and was eventually sunk. Between 11 PM and 1 AM the next day, the remaining force bombards the beachhead area but causes little damage. This was one of the last Japanese surface unit attacks on an American beachhead during the Pacific War. The next day, the survivors return to Camranh Bay. (Pacific Wrecks) |
The main goal of the operation was to counter "Operation Love III", the US seizure of a sizeable lodgement on Mindoro island in the central part of the Japanese-occupied Philippine islands group (15/21 December 1944). | The main goal of the operation was to counter "Operation Love III", the US seizure of a sizeable lodgement on Mindoro island in the central part of the Japanese-occupied Philippine islands group (15/21 December 1944). | ||
| Line 187: | Line 187: | ||
| '''Second Operation Rei-Go | | '''Second Operation Rei-Go | ||
| '''Striking<br>Combined | | '''Striking<br>Combined | ||
| − | | '''1/ | + | | '''1/3 |
| ''TBA | | ''TBA | ||
| [[File:{{PAGENAME}} Tag 6.png|40px]] [[File:{{PAGENAME}} Tag 7.png|40px]] [[File:{{PAGENAME}} Tag 8.png|40px]] | | [[File:{{PAGENAME}} Tag 6.png|40px]] [[File:{{PAGENAME}} Tag 7.png|40px]] [[File:{{PAGENAME}} Tag 8.png|40px]] | ||
| Line 194: | Line 194: | ||
! [[{{PAGENAME}}/E-6|E-6]] | ! [[{{PAGENAME}}/E-6|E-6]] | ||
| '''Return of the Second Striking Force | | '''Return of the Second Striking Force | ||
| − | | ''' | + | | '''Striking<br>Combined |
| '''TBA | | '''TBA | ||
| ''TBA | | ''TBA | ||
| − | | | + | | [[File:{{PAGENAME}} Tag 6.png|40px]] [[File:{{PAGENAME}} Tag 9.png|40px]] [[File:{{PAGENAME}} Tag 10.png|40px]] |
|style="text-align:left"|'''Lock limited to Hard Only''' | |style="text-align:left"|'''Lock limited to Hard Only''' | ||
| + | *[[File:{{PAGENAME}} Tag 6.png|25px]][[File:{{PAGENAME}} Tag 9.png|25px]][[File:{{PAGENAME}} Tag 10.png|25px]] can be mixed during phases 2 & 3 | ||
* Once E-6 is cleared, {{TextGlow|'''tag restrictions stop getting enforced on every map!'''|black|text-colour=Lime|glow-size=2px}} | * Once E-6 is cleared, {{TextGlow|'''tag restrictions stop getting enforced on every map!'''|black|text-colour=Lime|glow-size=2px}} | ||
|} | |} | ||
| Line 256: | Line 257: | ||
| | | | ||
| | | | ||
| − | |style="background:yellow; color:black"| | + | |style="background:yellow; color:black"|Phase 3<br>''Combined |
|style="background:yellow; color:black"|Phase 2 & 3<br>''Combined | |style="background:yellow; color:black"|Phase 2 & 3<br>''Combined | ||
| − | | | + | |style="background:yellow; color:black"|Gimmick 1<br>Phase 2 & 3 mix<br>''Striking |
|- | |- | ||
![[File:{{ROOTPAGENAME}} Tag 7.png|40px]]!!''Cavite Reinforcement Unit | ![[File:{{ROOTPAGENAME}} Tag 7.png|40px]]!!''Cavite Reinforcement Unit | ||
| Line 282: | Line 283: | ||
| | | | ||
| | | | ||
| − | |style="background:orange; color:black"| | + | |style="background:orange; color:black"|Gimmick 2<br>Phase 1<br>Phase 2 & 3 mix<br>''Combined |
|- | |- | ||
![[File:{{ROOTPAGENAME}} Tag 10.png|40px]]!!''2nd Strike Force | ![[File:{{ROOTPAGENAME}} Tag 10.png|40px]]!!''2nd Strike Force | ||
| Line 290: | Line 291: | ||
| | | | ||
| | | | ||
| − | |style="background:red; color:black"| | + | |style="background:red; color:black"|Phase 2 & 3 mix<br>''Combined |
|} | |} | ||
| Line 297: | Line 298: | ||
===New Mechanics=== | ===New Mechanics=== | ||
| − | |||
E-2 and E-5 have a new kind of [[Transport Operation]], where "tanks" do work better: | E-2 and E-5 have a new kind of [[Transport Operation]], where "tanks" do work better: | ||
| − | { | + | {{:Transport Operation/Landing}} |
| − | |||
| − | |||
| − | |||
| − | |||
| − | |||
| − | |||
| − | |||
| − | |||
| − | |||
| − | |||
| − | |||
| − | |||
| − | |||
| − | |||
| − | |||
| − | |||
| − | |||
| − | |||
| − | |||
| − | |||
| − | |||
| − | |||
| − | |||
| − | |||
| − | |||
| − | |||
| − | |||
| − | |||
| − | |||
| − | |||
| − | |||
| − | |||
| − | |||
| − | |||
| − | |||
| − | |||
| − | |||
| − | |||
| − | |||
| − | |||
| − | |||
| − | |||
| − | |||
| − | |||
| − | |||
| − | |||
| − | |||
| − | |||
| − | |||
| − | |||
| − | |||
| − | |||
| − | |||
| − | |||
| − | |||
| − | |||
| − | |||
| − | |||
| − | |||
| − | |||
| − | |||
| − | |||
| − | |||
| − | |||
| − | |||
| − | |||
| − | |||
| − | |||
| − | |||
| − | |||
| − | |||
| − | |||
| − | |||
| − | |||
| − | |||
| − | |||
| − | |||
| − | |||
| − | |||
| − | |||
| − | |||
| − | |||
| − | |||
| − | |||
| − | |||
| − | |||
| − | |||
| − | |||
| − | |||
| − | |||
| − | |||
| − | |||
| − | |||
| − | |||
| − | |||
| − | |||
| − | |||
| − | |||
| − | |||
| − | |||
| − | |||
| − | |||
| − | |||
| − | |||
| − | |||
| − | |||
| − | |||
| − | |||
| − | |||
| − | |||
| − | |||
| − | |||
| − | |||
| − | |||
| − | |||
| − | |||
===New Ships=== | ===New Ships=== | ||
| Line 424: | Line 308: | ||
|{{Ship/Banner|small=true|Wahoo}}||[[SS]]||[[Wahoo]]||E-2 Reward & E-3 Drop | |{{Ship/Banner|small=true|Wahoo}}||[[SS]]||[[Wahoo]]||E-2 Reward & E-3 Drop | ||
|- | |- | ||
| − | |{{Ship/Banner|small=true|Kaya}}||[[DD]]||[[Kaya]]||E-2, E-3, | + | |{{Ship/Banner|small=true|Kaya}}||[[DD]]||[[Kaya]]||E-2, E-3, E-4, E-5, E-6 Drop |
|- | |- | ||
|{{Ship/Banner|small=true|Kirov}}||[[CL]]||[[Kirov]]||E-3 Reward | |{{Ship/Banner|small=true|Kirov}}||[[CL]]||[[Kirov]]||E-3 Reward | ||
|- | |- | ||
| − | |{{Ship/Banner|small=true|Sugi}}||[[DD]]||[[Sugi]]||E-4 | + | |{{Ship/Banner|small=true|Sugi}}||[[DD]]||[[Sugi]]||E-4, E-5, E-6 Drop |
|- | |- | ||
| − | |{{Ship/Banner|small=true|Shimane Maru}}||[[AO]]||[[Shimane Maru]]|| | + | |{{Ship/Banner|small=true|Shimane Maru}}||[[AO]]||[[Shimane Maru]]||E-5 & E-6 Drop |
|- | |- | ||
|{{Ship/Banner|small=true|Minneapolis}}||[[CA]]||[[Minneapolis]]||E-6 Reward | |{{Ship/Banner|small=true|Minneapolis}}||[[CA]]||[[Minneapolis]]||E-6 Reward | ||
| Line 452: | Line 336: | ||
!{{QuestRewardShip|Gangut|small=true|collapsed=names}} | !{{QuestRewardShip|Gangut|small=true|collapsed=names}} | ||
|E-3 | |E-3 | ||
| + | !{{QuestRewardShip|Musashi|small=true|collapsed=names}} | ||
| + | |E-6 | ||
| + | !{{QuestRewardShip|Iowa|small=true|collapsed=names}} | ||
| + | |E-6 | ||
|} | |} | ||
| Line 459: | Line 347: | ||
!{{QuestRewardShip|Langley|small=true|collapsed=names}} | !{{QuestRewardShip|Langley|small=true|collapsed=names}} | ||
|E-2 | |E-2 | ||
| + | !{{QuestRewardShip|Lexington|small=true|collapsed=names}} | ||
| + | |E-6 | ||
| + | !{{QuestRewardShip|Saratoga|small=true|collapsed=names}} | ||
| + | |E-6 | ||
| + | |- | ||
| + | !{{QuestRewardShip|Hornet|small=true|collapsed=names}} | ||
| + | |E-6 | ||
| + | !{{QuestRewardShip|Intrepid|small=true|collapsed=names}} | ||
| + | |E-6 | ||
|} | |} | ||
| Line 470: | Line 367: | ||
!{{QuestRewardShip|Phoenix|small=true|collapsed=names}} | !{{QuestRewardShip|Phoenix|small=true|collapsed=names}} | ||
|E-5 | |E-5 | ||
| + | |- | ||
| + | !{{QuestRewardShip|Brooklyn|small=true|collapsed=names}} | ||
| + | |E-5 | ||
| + | !{{QuestRewardShip|Northampton|small=true|collapsed=names}} | ||
| + | |E-5 | ||
| + | !{{QuestRewardShip|Tuscaloosa|small=true|collapsed=names}} | ||
| + | |E-5 & E-6 | ||
|} | |} | ||
| Line 480: | Line 384: | ||
|E-1 | |E-1 | ||
!{{QuestRewardShip|Suzutsuki|small=true|collapsed=names}} | !{{QuestRewardShip|Suzutsuki|small=true|collapsed=names}} | ||
| − | |E-1 | + | |E-1 & E-5 |
|- | |- | ||
!{{QuestRewardShip|Tashkent|small=true|collapsed=names}} | !{{QuestRewardShip|Tashkent|small=true|collapsed=names}} | ||
| Line 490: | Line 394: | ||
|- | |- | ||
!{{QuestRewardShip|Ume|small=true|collapsed=names}} | !{{QuestRewardShip|Ume|small=true|collapsed=names}} | ||
| − | |E-2 | + | |E-2, E-4, & E-5 |
!{{QuestRewardShip|Momo|small=true|collapsed=names}} | !{{QuestRewardShip|Momo|small=true|collapsed=names}} | ||
| − | |E-2 | + | |E-2, E-4, & E-5 |
!{{QuestRewardShip|Hayashio|small=true|collapsed=names}} | !{{QuestRewardShip|Hayashio|small=true|collapsed=names}} | ||
|E-4 | |E-4 | ||
| Line 513: | Line 417: | ||
|E-2 | |E-2 | ||
!{{QuestRewardShip|I-36|small=true|collapsed=names}} | !{{QuestRewardShip|I-36|small=true|collapsed=names}} | ||
| − | |E-2 | + | |E-2 & E-6 |
| + | !{{QuestRewardShip|I-26|small=true|collapsed=names}} | ||
| + | |E-6 | ||
|} | |} | ||
| Line 534: | Line 440: | ||
|- | |- | ||
!{{QuestRewardShip|Heian Maru|small=true|collapsed=names}} | !{{QuestRewardShip|Heian Maru|small=true|collapsed=names}} | ||
| − | |E-3 | + | |E-3 & E-6 |
|} | |} | ||
|} | |} | ||
| Line 543: | Line 449: | ||
|[[18cm/57 Triple Main Gun Mount]] | |[[18cm/57 Triple Main Gun Mount]] | ||
|{{Med Gun}} [[Medium Caliber Main Gun]] | |{{Med Gun}} [[Medium Caliber Main Gun]] | ||
| − | |E-3 | + | |E-3 reward |
|- | |- | ||
|{{Equipment/Card|10cm/56 Single High-angle Gun Mount (Concentrated Deployment)|size=60px}} | |{{Equipment/Card|10cm/56 Single High-angle Gun Mount (Concentrated Deployment)|size=60px}} | ||
|[[10cm/56 Single High-angle Gun Mount (Concentrated Deployment)]] | |[[10cm/56 Single High-angle Gun Mount (Concentrated Deployment)]] | ||
|{{Sec HA Gun}} [[Secondary High-angle Gun]] | |{{Sec HA Gun}} [[Secondary High-angle Gun]] | ||
| − | |E-3 | + | |E-3 reward |
|- | |- | ||
|{{Equipment/Card|Type 0 Fighter Model 62 Kai (Night Fighter-bomber)|size=60px}} | |{{Equipment/Card|Type 0 Fighter Model 62 Kai (Night Fighter-bomber)|size=60px}} | ||
|[[Type 0 Fighter Model 62 Kai (Night Fighter-bomber)]] | |[[Type 0 Fighter Model 62 Kai (Night Fighter-bomber)]] | ||
|rowspan=2|{{Night Dive Bomber}} [[Night Dive Bomber]] | |rowspan=2|{{Night Dive Bomber}} [[Night Dive Bomber]] | ||
| − | |E- | + | |E-5 & E-6 reward |
|- | |- | ||
|{{Equipment/Card|Type 0 Fighter Model 62 Kai (Skilled/Night Fighter-bomber)|size=60px}} | |{{Equipment/Card|Type 0 Fighter Model 62 Kai (Skilled/Night Fighter-bomber)|size=60px}} | ||
|[[Type 0 Fighter Model 62 Kai (Skilled/Night Fighter-bomber)]] | |[[Type 0 Fighter Model 62 Kai (Skilled/Night Fighter-bomber)]] | ||
| − | |E- | + | |E-6 reward |
|} | |} | ||
| Line 566: | Line 472: | ||
*[[Non-Treaty Cruiser Water Princess]] | *[[Non-Treaty Cruiser Water Princess]] | ||
*[[Supply Depot Princess Kai]] | *[[Supply Depot Princess Kai]] | ||
| − | *[[ | + | *[[Occupied Airfield Princess]] |
| − | *[[ | + | *[[New Heavy Cruiser Princess]] |
===New Enemy Equipment=== | ===New Enemy Equipment=== | ||
Latest revision as of 18:12, 31 March 2025
 
| |||||||||
|---|---|---|---|---|---|---|---|---|---|
 
The 2nd Stage Operations have been released!
FF release: TBA Approximate time until the end of the event: ([1][2] after KC 12th anniversary)
22 days, 3 hours, 31 minutes and 29 seconds
| |||||||||
The Spring 2025 Event, is launched on the 8th of March, with a launch of the 2nd part scheduled for the 23rd of March. The event is planned to last 1 month and a half. It is a "Large Scale Event".
- The 1st Stage Operations are titled "Hokkaido Defence Operation", a what-if scenario,
- The 2nd Stage Operations are titled "Operation Rei-Go Part 2".
The event is still referred to as a "Winter Event" in the API.
For additional information regarding event-related subjects and content, please refer to Mechanics.
Historical Background
1st Stage Operations - "Hokkaido Defence Operation"Expand


2nd Stage Operations - "Operation Rei-Go Part 2"Expand
Information
Quick Info Table
| Classification | Map | Name | Fleet Type | LBAS | Friendly Fleet | Fleet Tags | Notes |
|---|---|---|---|---|---|---|---|
| 1st Stage Operations | E-1 | Hokkaido Defence Operation | Single Striking |
1/2 | TBA | ||
| E-2 | Otoineppu Defense Line | Striking Combined |
2 | TBA | |||
| E-3 | The Rumoi Sea Fleet's Decisive Battle | Striking Combined |
2/3 | TBA | |||
| 2nd Stage Operations | E-4 | War Clouds off the Spratly Islands | Striking Combined |
2/3 | TBA | ||
| E-5 | Second Operation Rei-Go | Striking Combined |
1/3 | TBA | |||
| E-6 | Return of the Second Striking Force | Striking Combined |
TBA | TBA | Lock limited to Hard Only
|
Fleet Locking Table
| Tags | E-1 | E-2 | E-3 | E-4 | E-5 | E-6 | |
|---|---|---|---|---|---|---|---|
| 104th Squadron | Gimmick 1 & 2 Single |
Gimmick 2 Striking |
|||||
| 1st Fleet | Gimmick 2 Phase 1 Striking |
Gimmick 1 & 2 Striking |
|||||
| 5th Fleet | Phase 1 & 2 Combined |
Gimmick 1 Phase 1 Striking |
|||||
| Combined Fleet | Gimmick 2 Phase 2 & 3 Combined |
||||||
| Southwestern Area Unit | Gimmick 1 Phase 1 & 2 Striking |
||||||
| Operation Rei-go Unit | Phase 3 Combined |
Phase 2 & 3 Combined |
Gimmick 1 Phase 2 & 3 mix Striking | ||||
| Cavite Reinforcement Unit | Gimmick 1 Phase 1 Striking |
||||||
| 31st Squadron | Gimmick 1 Striking |
||||||
| 4th Carrier Division | Gimmick 2 Phase 1 Phase 2 & 3 mix Combined | ||||||
| 2nd Strike Force | Phase 2 & 3 mix Combined | ||||||
Event-Wide Bonuses
Note: Ship-specific bonuses are displayed here.
- Ship class bonuses are excluded from this table for simplicity but still apply.
Do note that several of the 5th fleet members will have historical significance in the "2nd Stage Operations"!
| ExpandEvent-Wide Bonus Ships: 1st Stage Operations | |||||||||||||
|---|---|---|---|---|---|---|---|---|---|---|---|---|---|
| Ship [Toggle Names] |
Type | E-1 | E-2 | E-3 | |||||||||
| Mapwide | Mapwide | NodesC/D/F1/F2/H/I/K (A1 unconfirmed) |
Mapwide | ||||||||||
New Mechanics
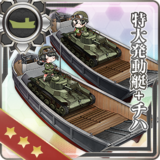
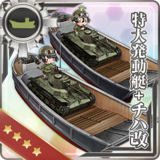
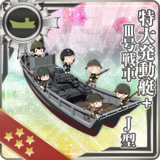
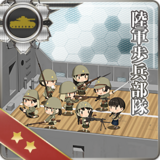
E-2 and E-5 have a new kind of Transport Operation, where "tanks" do work better:
During "Landing Operation", the TP drain formula is altered, with regular modifiers being nerfed, and tanks gaining additional bonuses:
| ExpandTP Depletion Formula |
|---|


Tank TP
The additional "tank bonus" given by equipment Landing Operations is as follows:
- The values are from the Spring 2025 Event.
| ExpandLanding Operation - Tanks [6] [7] | |||
|---|---|---|---|
| Type | Equipment | [math]\displaystyle{ \text{TP}_\text{tank} }[/math] | |
| E-2 | E-5 | ||


New Ships
| AO | Ootomari | E-1 & E-2 Drop | |
| SS | Wahoo | E-2 Reward & E-3 Drop | |
| DD | Kaya | E-2, E-3, E-4, E-5, E-6 Drop | |
| CL | Kirov | E-3 Reward | |
| DD | Sugi | E-4, E-5, E-6 Drop | |
| AO | Shimane Maru | E-5 & E-6 Drop | |
| CA | Minneapolis | E-6 Reward |
- Matsu-class "Kashi" have been announced but not introduced this event,
- USS Boise (CL-47) and USS Louisville (CA-28) have been teased but not introduced this event.
Returning Ships
A non-exhaustive list of "notable returning ships". Please refer to drop table of each individual map for more complete lists.
- See below for the full list of returning "Event Only Drops",
- See uptodate drop database via KCnav, or via Discord bots.
| Notable returning ships [Toggle Names] | ||||||||||||||||||||||||||||||||||||
|---|---|---|---|---|---|---|---|---|---|---|---|---|---|---|---|---|---|---|---|---|---|---|---|---|---|---|---|---|---|---|---|---|---|---|---|---|
| ||||||||||||||||||||||||||||||||||||
New Equipment


New Enemy Vessels
- Destroyer Ra-Class (α, β, γ, δ, ζ)
- Transport Ship Wa-Class B (Landing) Elite
- Submarine Seerfish Water Demon
- Non-Treaty Cruiser Water Princess
- Supply Depot Princess Kai
- Occupied Airfield Princess
- New Heavy Cruiser Princess
New Enemy Equipment
Friendly Fleets
Friendly Fleets (FF) come with a function that allows players to choose if they want to use a FF to aid them in battle or not. It is possible to choose between using "normal only" or "normal and powerful" FF. Powerful FF have an additional cost of 6 Instant Constructions ![]() for each time they are deployed in a battle (the blowtorches won't be consumed unless a powerful FF appears).
for each time they are deployed in a battle (the blowtorches won't be consumed unless a powerful FF appears).
- Friendly Fleets are available on:
- Soon™
Voice Lines
Mechanics
Participation requirements
To take part in any event, a player MUST HAVE at least:
- A 75% sortie win ratio.
- 5 empty ship slots.
- 20 empty equipment slots.
Special Mechanics
In addition to regular Sortie mechanics, events often involve some specific or rarer mechanics :
| Map Clearing Medals | |||
|---|---|---|---|
Hard
|
Medium
|
Easy
|
Casual
|
Depending of the HQ level, it is possible to choose between:
- Hard ("operation A", 甲), at HQ 80+
- Medium ("operation B", 乙), at HQ 35+
- Easy ("operation C", 丙), at HQ 1+
- Casual ("operation D", 丁), at HQ 1+
The map difficulty will directly affect the enemy encounters, making them more numerous, with higher stats, or even replacing weaker ships with stonger ones. Additionaly, will vary:
- The maps' phases' gauges (HP/TP),
- The amount of map gimmicks to complete,
- The LoS requirements,
- The maps' rewards,
- The ship Drops.
Changing difficulty is possible but limited:
- When switching from any "lower" difficulty to any "higher" difficulty, the map will fully be reset.
- When switching from any "higher" difficulty to any "lower" difficulty, the map will stay in the very same state it was previously, with only +25% of TP/HP being reset on the current phase's TP/HP bar.
- Gimmicks might also be reset when applicable, notably the debuffs.
Beginning with the second map, difficulty progression rules apply.
- In order to play a map on Hard difficulty, the prior map must have been completed on either Medium or Hard.
- In order to play a map on Medium difficulty, the prior map must have been completed on either Easy, Medium, or Hard.
To simulate simultaneity of battles in different locations, Fleet Tags conditions & deployment restrictions are employed.
- Ships not already tagged will be tagged with the associated tag of the map phase when deployed. This tag will be applied regardless of the difficulty and can't be removed by any measure before the end of the event.
- One map can use multiple tags, usually separated by phases or fleets.
- Several maps can share one or more tags.
- On Medium or Hard difficulty, ships must have either the same tag as the map/phase they are being deployed to, or have no tag at all.
- This requirement is sometimes waived on certain maps, mostly on the last map of the event where tags only matter on Hard.
- Once the event is cleared (last map of the EO), all tag restrictions stop getting enforced on every map (tag routing will still apply).


Farming
LBAS Leveling
It is possible to regain Proficiency for LBAS aircraft on the following spots:
| Map | Amount of LBAS |
LBAS range |
Recommended Fleets |
Route | Lock | Notes |
|---|---|---|---|---|---|---|
| E-1 | 1 | 2 | 1 SS(V) | 1 D
1 B B1 |
||
| E-2 | 2 | 6 | 1 SS(V) | 1 A A1 | ||
| E-3 | 2 | 1 | 2 SS(V) | 1 H H1 H3 |
Resource Farming
Resource Nodes are present on this event and can bring some substantial resources:
| Map | Nodes | Resource | Gains | Cap | Recommended Fleets | Route | Lock | Notes |
|---|---|---|---|---|---|---|---|---|
| E-1 | C2 | 33 | 144? | 0-1 CVL, 1 CL/AO, 4/5 DD | 1 A B B2 C1 C2 |
|
| ExpandSpecial Resource Nodes Gain Modifiers Type 1 |
|---|
See Also
| Expand[edit]Event Only Drops History |
|---|


|
| |||||||||
|---|---|---|---|---|---|---|---|---|---|
|
The 2nd Stage Operations have been released!
FF release: TBA Approximate time until the end of the event: ([11][12] after KC 12th anniversary)
22 days, 3 hours, 31 minutes and 29 seconds
| |||||||||
| ||