- Welcome to the Kancolle Wiki!
- If you have any questions regarding site content, account registration, etc., please visit the KanColle Wiki Discord
Summer 2019 Event
The "Summer 2019 Event", European Counterattack Operation! Commence "Operation Shingle" is scheduled to begin on August 30th. The scale of the event is Small Scale, and it consists of 3 maps (2 Main Operations and 1 Extra Operation).
Currently, only Main Operation maps are accessible. The Extra Operation is scheduled to be released on September 4th, Wednesday.
The theme of the event will be a "European Interception / Counterattack Operation. The first operational area will have your fleet sortieing from the naval base in Brest, France to intercept Abyssal forces heading to Brittany, France. Eventually, your fleet will travel to Italy, where the final operation will be an amphibious landing operation. Expect to use Anti-Installation equipment for the final part of the event.
For additional information regarding event-related subjects and content, please refer to the following links:
- Combined Fleet
- Armor Reduction
- Land-Based Air Squadron
- Transport Operation
- Anti-Air Cut-In
- Line of Sight
- Improving Ship Speed (May become a part of event map requirements)
- Vanguard Formation
- Striking Force Fleet
Historical Background
Disclaimer: The following information is based upon a summary of World War II history and may not have any bearing on in-game mechanics. This is for historical reference only.
Operation Shingle
Operation Shingle AKA, the Battle of Anzio served as a major battle front at the beginning of 1944 where the British and the American Forces proceeded to storm and land in Anzio, Italy. To attempt to gain control of the Italian costal front.
E-3 mainly represents the naval battle that took place in Anzio, Italy leading to the storming of the city. Because there it not many historical ships tied to this event outside of Jervis and Janus, in place of this, ships that have national ties to Britain, America, Italy, and Germany will have greater importance here.
Information
New Mechanics
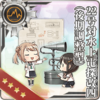
- Emergency Anchorage Maintenance/Repairs 【緊急泊地修理】
- Both Akashi Kai and Akitsushima Kai will be capable of conducting emergency repairs; however, Akitsushima will have more limited capabilities compared to Akashi.
- Both ships will drop from E-1 of the event.
- A new type of resource, Emergency Repair Materials (緊急修理資材) will be required in order to conduct repairs.
- Steel will also be consumed in order to conduct the repairs.
- Morale of repaired ships will also improve slightly. (Improvement values may be adjusted in the future.)
- Ship Repair Facility must be equipped on Akashi or Akitushima in order for repairs to take place.
- Akashi:
- Repair Facility in Slot 1 - Can repair 1st Fleet ships 1-3.
- Repair Facility in Slot 2 - Can repair 1st Fleet ships 4-6.
- Repair Facility in Slot 3 - Can repair 2nd Fleet ships 1-3.
- Repair Facility in Slot 4 - Can repair 2nd Fleet ships 4-6.
- Akitsushima:
- Repair Facility in Slot 1 - Can repair 2nd Fleet ships 1-3.
- Repair Facility in Slot 2 - Can repair 2nd Fleet ships 4-6.
- Akashi:
- Obtainable from E-1, and from quests in the future.
- Akashi or Akitsushima must be in the fleet and must not be in the flagship position.
- Repairs can only be conducted in specific areas/anchorages (緊急泊地修理可能な泊地).
- Other conditions may also apply.
- More details will be released at a later date.
- Both Akashi Kai and Akitsushima Kai will be capable of conducting emergency repairs; however, Akitsushima will have more limited capabilities compared to Akashi.
- On Medium and Hard difficulties, a new type of high-altitude enemy bomber may conduct air raids against admirals' LBAS bases after the midpoint of the operation.
- A new type of land-based interceptor capable of countering these bombers will be obtainable from E-1 onwards.
New Ships
A total of 4 new ships will be released as part of the event.
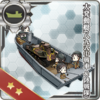
- Destroyer Escort Mikura - E1 and E2 drop
- Light Cruiser Duca degli Abruzzi (L.d.S.D.d.Abruzzi) - E2 Reward
- Destroyer Grecale - E2 Drop
- Destroyer Janus - E3 Reward
Returning Ships
This list is not exhaustive and derived from staff tweets.
New Equipment
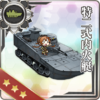
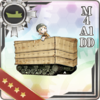
- M4A1 DD
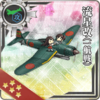
- Me 163B
- Prototype Shuusui
- Shuusui
- Emergency Repair Materials
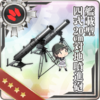
- New Model Rocket Development Material (新型噴進装備開発資材)
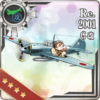
- Fw 190 D-9
- Fw 190 A-5 Kai (Skilled)
New Enemy Vessels
New Enemy Equipment
Abyssal Floating Sky Fortresses - High alttitude bombers suspected of reducing your land bases air power by -0.5, Rocket-powered interceptors are needed to counter these effects and increase your air power. Each rocket interceptor modifies your entire land base air strength by the following (0.3/0.3/0.1)
Friend Fleet
Fleet Formations
Friend Fleets will now come with a new function which will allow players to choose if they wish to bring in a Friend Fleet to aid them in battle or not. They can also choose to also decide if they want a normal Friend Fleet come aid them in battle or if they wish to use a powerful Friend Fleet that will require the cost of 6 Instant Constructions ![]() to allow you call in a more powerful Friend Fleet to aid you into battle.
to allow you call in a more powerful Friend Fleet to aid you into battle.
If you choose to opt in for the powerful Friend fleet, the Instant Constructions ![]() will not be consumed unless a powerful Friend Fleet appears.
will not be consumed unless a powerful Friend Fleet appears.
| ExpandE-1 N |
|---|


| ExpandE-2 V |
|---|
| ExpandE-3 J |
|---|
| ExpandE-3 U |
|---|

| ExpandAppearance |
|---|
Voice Lines
Friend Fleet Voice Lines
| Ship | Japanese/English | ExpandNotes |
|---|
Event Voice Lines
| Ship | Japanese/English | ExpandNotes |
|---|
Mechanics
Participation requirements
- Must have a 75% sortie win ratio.
- Must have 5 empty ship slots for new ships.
- Must have 20 free equipment slots.
Special Mechanics
- The difficulty system first used in Spring 2015 Event returns: you can choose between Operation A (甲, Hard), Operation B (乙, Medium), Operation C (丙, Easy) or Operation D (丁, Very Easy) .
- Choosing A or B requires certain HQ Level (HQ Lv 35 for B / 80 for A in Spring 2015 Event).
- An important note to all Admirals intending to clear the event on Hard difficulty - further (new) conditions now apply:
- When switching difficulty from any other difficulty to Hard, the map's debuff mechanism (where applicable) will be reset.
- Switching between any other difficulties will not reset the debuff mechanism.
- When switching difficulty from any other difficulty to Hard, the map's debuff mechanism (where applicable) will be reset.
- The debuff system from Summer 2015 Event's final map, where certain nodes had to be killed to reduce boss armor will return.
- It might be possible, that they will allow a fleet with seven ships (Striking Force Fleet) to sortie to certain event maps that allow single fleet operations starting from E-2, and also includes the final map of the event.
- The Striking Force cannot be sortied during exercises or sent on expeditions while it contains seven ships.
- The Striking Force can only be created and used in the third fleet in the menu (out of a total of four fleets).
- A Striking Force with a flagship that carries a new piece of equipment, the Striking Force Fleet Command Facility, will be able to make use of the new Single Ship Evacuation mechanic.
- The new Single Ship Evacuation mechanic that will become available for the Striking Force as of E-4 allowing a single ship in the fleet to retreat from the battlefield after an enemy engagement if she suffered heavy damage.
- It is possible for the damage to become even worse during a Single Ship Evacuation.
- Unlike the Combined Fleet's evacuation mechanic, it does not require an escort destroyer.
- The new Striking Force Fleet Command Facility will become obtainable and useable via the old Fleet Command Facility and the Action Report that can be earned in the upcoming Fall Event. The Fleet Command Facility, as well as the new Action Report item, will be obtainable on all difficulty levels, including Medium and Easy Mode.
- Supplementary information regarding the new Striking Force Fleet Command Facility and the Single Ship Evacuation it allows when carried by the striking force's flagship:
- The evacuation does not require an escort destroyer.
- The evacuation consumes the ship's entire fuel & ammo reserves.
- Only one ship can be evacuated per battle.
- The damage the ship suffered may become worse during the evacuation, but she will never sink.
- The new Single Ship Evacuation mechanic that will become available for the Striking Force as of E-4 allowing a single ship in the fleet to retreat from the battlefield after an enemy engagement if she suffered heavy damage.
- Returning this event, the Vanguard Formation can be used .
- This formation will organize the fleet such that the 3rd-6th/7th ships protect the Flagship and 2nd Ship of the Fleet.
- In addition, the formation allows for ships to become more evasive in combat situations, especially with well-trained Destroyer.
- This formation is also available only during the duration of the event.
- The formation will be usable by both normal fleets as well as the Striking Force Fleet.
- This formation will organize the fleet such that the 3rd-6th/7th ships protect the Flagship and 2nd Ship of the Fleet.
- New: NPC Friend Fleets have been introduced into the game.
- Friend Fleets act as another unit that appears in particular battles to help aid your fleet when attacking the enemy at the start of night battle.
- NPC Friend Fleets are selected from a randomized preset list of ship.
- Depending on who you have in your fleet can also influence who will be arrive to aid you in battle.
- Friend Fleets act as another unit that appears in particular battles to help aid your fleet when attacking the enemy at the start of night battle.
- New: Enemy Radar Ambush Nodes is introduced into the game.
- Entering this node will result in your fleet facing off against an enemy fleet that will ambush and attack your fleet
- Your Fleet will not be able to fight against the enemy Fleet.
- By meeting certain conditions, you can evade these nodes.
- Entering this node will result in your fleet facing off against an enemy fleet that will ambush and attack your fleet
Quick Info Table
| Classification | Map | Name | Fleet Type? | Land-Based Air Squadron? | Friendly Fleet? | Color of Tag | Tag Condition & Deployment Restriction | Difficulty Restrictions | Notes |
|---|---|---|---|---|---|---|---|---|---|
| Main Operation |
E-1 | Brest Defense Operation | Single | Yes | Yes | Tagging: Ships not already color-tagged will be tagged with the color associated with the map when deployed. This tag exists on all difficulties and is not reset on remodel, etc. Deployment Restriction: Normal or Hard: Must have either the same-colored tag or no tag. |
No restrictions. All difficulties OK | ||
| E-2 | Crossing Gibraltar | Combined | Yes | Yes | In order to play these maps on hard, you must complete the previous map* on either normal or hard. (e.g., to do E-2 on hard, you must complete E-1 on normal or hard.) | ||||
| Final Operation |
E-3 | Commence! "Operation Shingle" | Single/Combined Fleet | Yes | Yes | (Hard Only) |
Event Maps
E-1

Information
(Phase 1 - Boss): Summer French Battleship Princess
Key Rewards:
|
  | ||||||||||||||||||||||||||||||||||||||||||||||||||||||||||||||||||||||||||||||||||||||||||||||||||||
|
Branching rules
Branching compositions were reported over the course of the event. | |||||||||||||||||||||||||||||||||||||||||||||||||||||||||||||||||||||||||||||||||||||||||||||||||||||
|
Tips
Locking Recommendation Total of 8/9 Ships:
Phase 1: Scouting the area (Unlocking the Boss Route) This is pretty straightforward, as it requires you to A-Rank the Nodes A, D, K and L. You have one LBAS at your disposal, which you can send to help you complete these nodes. The maximum Range required is 5
Completing these tasks will unlock Node N containing the Boss Phase 2: Fighting Summer French Battleship Princess To clear the map, you are required to deplete the HP Bar by damaging the Summer French Battleship Princess and sink her on Last Dance. As she has up to 254 Armour on Last Dance, bringing TCI or Ships with historical Bonus is highly recommended. As the Preboss nodes are fairly weak, you can send a 5 Range LBAS to the Boss. You are required to have 58 Fighterpower to meet Air Denial on all compositions. AS on the boss itself ranges from 108-257, so plan the Aircraft of the LBAS and your Fleet accordingly There are two routes:
| |||||||||||||||||||||||||||||||||||||||||||||||||||||||||||||||||||||||||||||||||||||||||||||||||||||
|
Ship drops
| |||||||||||||||||||||||||||||||||||||||||||||||||||||||||||||||||||||||||||||||||||||||||||||||||||||
E-2

Information
(Phase 1 - Boss): Summer Harbor Princess
(Phase 2 - Boss): Abyssal Mediterranean Princess
|
  | ||||||||||||||||||||||||||||||||||||||||||||||||||||||||||||||||||||||||||||||||||||||||||||||||||||
|
Branching rules
Branching compositions were reported over the course of the event. | |||||||||||||||||||||||||||||||||||||||||||||||||||||||||||||||||||||||||||||||||||||||||||||||||||||
|
Tips
Locking Recommendation On Hard difficulty, several considerations should be taken into account (as these will also affect your potential options for E-3, the final map).
If you are confident that you have sufficient resources to split between E-2 and E-3, you can consider using the guide below as it will cover mostly Hard mode preparations. Otherwise, if you plan to do Medium or less, there is no reason to hold back on who your bring to get the best out of your fleet as E-3 will have no lock on Medium or below. A rough outline of possible asset allocation (hello, economics 101, scarcity) follows. Also note that current research suggests that Ark Royal, Jervis, and Italian ships in general have the highest bonus modifiers for the E-2 P2 boss (E-2 P1 boss is essentially an anti-installation equipment check). Allied ships generally appear to have higher bonus modifiers for the E-3 P2 boss. The E-3 P1 boss is generally vulnerable to anti-installation set-ups, and also takes torpedo damage into account.
First Phase: Going through Gibraltar The E2P1 boss is essentially an anti-installation equipment check. There are three approaches to defeat the Boss. One involves a Surface Task Force allowing you to bring more firepower, the other a Transport Combined Fleet, enabling you to skip a dangerous Preboss Node
Second Phase: Killing the Abyssal Mediterranean Princess There are two options: Fast STF and Superheavy STF. Both will reach the boss fairly consistently, but expect LD to be more difficult to clear due to the boss' high armour on LD. LD on hard mode is especially difficult as you will be pitted up against a powerful Heavy Cruiser Princess along with the Abyssal Mediterranean Princess. Both which will have extremly high armor (278 and 288 resepctively) Friend Fleets may make LD somewhat easier once implemented. Until then, however, expect to face some difficulty in clearing as you are effectively rolling for crits against the boss' armour.
The event guides are to be constructed through the respective Event map page guide and reviewed by editor staff / collaboration committee before being approved here. Do not under any circumstance update the guides through this page or attempt to fix them through this page. Please only update guides through their respective sandbox pages. | |||||||||||||||||||||||||||||||||||||||||||||||||||||||||||||||||||||||||||||||||||||||||||||||||||||
|
Enemy comps | |||||||||||||||||||||||||||||||||||||||||||||||||||||||||||||||||||||||||||||||||||||||||||||||||||||
|
Ship drops
| |||||||||||||||||||||||||||||||||||||||||||||||||||||||||||||||||||||||||||||||||||||||||||||||||||||
E-3

Information
(Phase 1 - Boss): Anchorage Water Demon (Vacation Mode)
(Phase 2 - Boss): Anzio Princess
Key Rewards:
|
  | ||||||||||||||||||||||||||||||||||||||||||||||||||||||||||||||||||||||||||||||||||||||||||||||||||||
|
Branching rules
Branching compositions were reported over the course of the event. | |||||||||||||||||||||||||||||||||||||||||||||||||||||||||||||||||||||||||||||||||||||||||||||||||||||
|
Tips
Preparing for E-3 E-3 will require you to be well prepared in terms of Interceptor equipment, anti-installation equipment and specific ships that will help you turn the tides of battle more easily for the higher difficulties. Below is a list of important questions you may want to ask yourself prior to deciding upon what difficulty to challenge yourself with.
Key Ships to consider For E-3 any ship that hails from Italy, Germany, America, or Britain are consider useful for this map. As they will all have useful bonuses which are further listed below. Do note that if you complete the debuff requirements you the affects will stack even further. Below is a list of some ships you should consider preserving for E-3 if possible:
In addition to the historical here some important non-historical can also be considered for this map which include:
LBAS Key Notes LBAS:
Ship Bonuses
Part 1: Destroying Anchorage Water Demon (Vacation Mode) The most straightforward phase of the map. A Fast Surface Task Force with 2FBB and no CVs (CVL allowed, but no more than 3 BBs+CVLs) or Single Fleet (no speed and Ship Restrictions) will give you the fastest route to the boss. The enemy Main Fleet features PT-Imp Packs. While their ending torps don't pose a threat in this configuration, they are considerable tanks.
Part 2: Unlocking the Second Boss Node (U) Once you defeat the Anchorage Water Demon (Vacation Mode) you will be able to unlock additional paths to other locations across the maps. During this part, your fleet will need to complete several major steps in order to gain access to Anzio (Node U). Below are the requirements that will be needed based upon difficulty. Casual - B+ Rank Node E and O Each difficulty is scale accordingly so plan your method of how you will complete each step as the recommended requirements will be listed below.
Once all conditions are complete, you will unlock the path to Anzio (Node U) along with some additional paths which will be will be vital for the next step of the operation. Part 3: Unlocking the Second Start Point In this phase, you will be using your fleet to complete various objective around the map, this will including some difficult challenges as well as encountering the boss node and getting some victories against the boss itself. Below is a summary of the requirements you will need to complete. Casual - AS Node N and A Rank Node U Depending on the difficulty you may need to complete additional steps, below are the steps that will summarize what is needed for each requirement.
Once completed, all ships will get an additional 1.07x damage modifer against the boss fleet in Node U and the 2nd starting point will be unlocked for your Carrier Task Force or Transport Combined Fleet to use. Part 4: Chip Anzio Hime until LD Range With all the before mentioned phases complete, you will now need to deplete Anzio Princess's HP bar down till the final phase of the battle, until then no additional steps are required.
Once you are able to deplete her to the final phase of battle you can then choose to continue on with the final debuff phase(which is recommended if you can complete all the requirements. Or attempt to try to defeat the boss without the debuff which is possible, but quite difficult. Part 5: Debuffing the Boss (once HP bar is within LD range ONLY) For the final debuff phase, several changes will occure across the map which will make the last part of the challenge difficult in some difficulties which will include:
Preparations will need to be made to make sure you can complete all of the requirements needed for this phase if you choose to do it. Below is a listing of all the requirements you will need to complete based on difficulty. Casual - AS Node D and A+ Rank Node J {Single or TCF only) It should be noted that because hard mode has such a high AS requirement, you will need to carefully check to see if you can successfully achive it. Do note that:
From here on, we will cover the steps required for each step needed to complete each phase this part.
It should be noted that unlike previous event, this segment does not have any ding notification to tell you if you completed the objective. You will only get an indication where all requirements are completed. When all conditions are met, you should get a voice line to play when the result screen come up. You should here the Anzio Princess shout, "Tch, What the hell?!" indicating you completed the entire debuff requirement. Once you successfully completed this step the following debuff changes will be added:
Part 6: Delivering the final kill against Anzio Princess
The event guides are to be constructed through the respective Event map page guide and reviewed by editor staff / collaboration committee before being approved here. Do not under any circumstance update the guides through this page or attempt to fix them through this page. Please only update guides through their respective sandbox pages. | |||||||||||||||||||||||||||||||||||||||||||||||||||||||||||||||||||||||||||||||||||||||||||||||||||||
|
Enemy comps | |||||||||||||||||||||||||||||||||||||||||||||||||||||||||||||||||||||||||||||||||||||||||||||||||||||
|
Ship drops
| |||||||||||||||||||||||||||||||||||||||||||||||||||||||||||||||||||||||||||||||||||||||||||||||||||||
| ||