• Welcome to the Kancolle Wiki!
  • If you have any questions regarding site content, account registration, etc., please visit the KanColle Wiki Discord

Early Fall 2018 Event

From Kancolle Wiki
Jump to navigation Jump to search

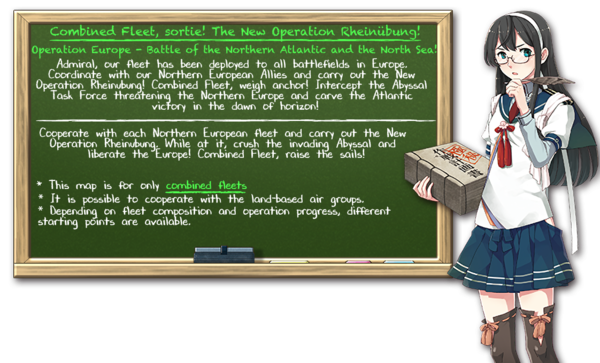
The "Early" Autumn 2018 Event, "Set Sail! Combined Fleet, to the West" is scheduled to begin on the September 8th, 2018, will last for 3 weeks and will serve as the first event that will be implemented with the HTML 5 release of KanColle as it enters Phase 2.

Due to the numerous delays that have occurred, Kanmusu and Abyssals will still be dressed in their Summer Seasonal CGs since the event was originally intended to be released during the Summer.

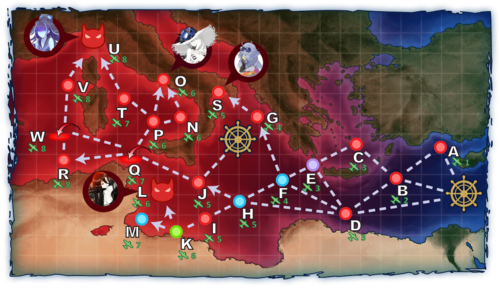
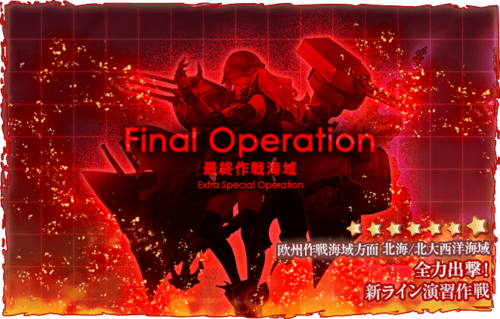
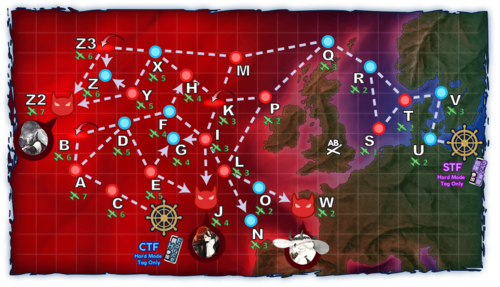
As of current, the known details of the event is that the main operation of the event will be taking place in the "South Western and Western Waters" as your fleet makes it's way to European Waters where the Extra Operations will take place. The Extra Operations will be released on August 12th, 2018. The final battle of the Extra Operation will take place up in the far north of the European Waters.

There will be a total of 5 new ships that will be released with this event.

For additional information regarding event-related subjects and content, please refer to the following links:

Historical Background

Disclaimer: The following information is based upon a summary of World War II history and may not have any influence on the game itself. This is for historical reference only.

Battle of Badung Strait

Indian Ocean Raid

Information

New Ships

Currently, the devs have noted that there will a total of 5 ships which will all be unique and diverse.

Destroyer

  • A Yuugumo-class Destroyer Kishinami
    • Avaliable as a drop on E-2 and E-3 Boss nodes
  • Maestrale-class Destroyer Maestrale
    • Will be the Reward for E-4

Escort Carrier

  • Escort Carrier Shinyou
    • Avalaible as a reward for completing the Main Operation

Light Cruiser

  • Swedish Light Cruiser Gotland
    • Will be Avalaible as a Drop in the Extra Operation

Battleships

  • Nelson-Class Battleship(s) - Nelson
    • Will be the Final Operation Reward
    • May come with a new mechanic ability code named "Nelson's Touch" (Release of said ability pending)

New Equipment

New Enemy Vessels

New Enemy Equipment

Friend Fleet

Fleet Formations

E-3 Phases 2 and 3 Node Q
Kanmusu Equipment 1 Equipment 2 Equipment 3 Equipment 4
Destroyer Division 31 Variant 1
Ship Banner Naganami Kai Ni.png
Naganami
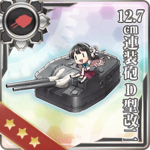
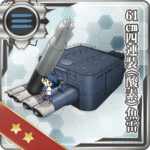
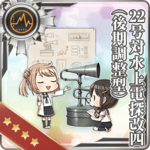
Equipment Card 12.7cm Twin Gun Mount Model D Kai 2.png Equipment Card 61cm Quadruple (Oxygen) Torpedo Mount.png Equipment Card Type 22 Surface Radar Kai 4 (Calibrated Late Model).png
Ship Banner Takanami Kai.png
Takanami
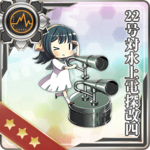
Equipment Card 12.7cm Twin Gun Mount Model D Kai 2.png Equipment Card 61cm Quadruple (Oxygen) Torpedo Mount.png Equipment Card Type 22 Surface Radar Kai 4.png
Ship Banner Okinami Kai.png
Okinami
Equipment Card 12.7cm Twin Gun Mount Model D Kai 2.png Equipment Card 61cm Quadruple (Oxygen) Torpedo Mount.png Equipment Card Type 22 Surface Radar Kai 4.png
US Fleet Variant 1
Ship Banner Intrepid Kai.png
Intrepid
Equipment Card F6F-5N.png Equipment Card TBM-3D.png Equipment Card TBF.png Equipment Card Night Operation Aviation Personnel.png
Ship Banner Saratoga Mk.II.png
Saratoga
Equipment Card F6F-3N.png Equipment Card TBM-3D.png Equipment Card TBM-3D.png Equipment Card TBF.png
Ship Banner Gambier Bay Kai.png
Gambier Bay
Equipment Card FM-2.png Equipment Card TBM-3D.png Equipment Card Night Operation Aviation Personnel.png
Ship Banner Samuel B. Roberts Kai.png
Samuel B. Roberts
Equipment Card 5inch Single Gun Mount Mk.30.png Equipment Card 5inch Single Gun Mount Mk.30.png
US Fleet Variant 2
Ship Banner Saratoga Mk.II.png
Saratoga
Equipment Card F6F-3N.png Equipment Card TBM-3D.png Equipment Card TBM-3D.png Equipment Card TBF.png
Ship Banner Gambier Bay Kai.png
Gambier Bay
Equipment Card FM-2.png Equipment Card TBM-3D.png Equipment Card Night Operation Aviation Personnel.png
Ship Banner Samuel B. Roberts Kai.png
Samuel B. Roberts
Equipment Card 5inch Single Gun Mount Mk.30.png Equipment Card 5inch Single Gun Mount Mk.30.png
Unassorted Fleet Variant 1
Ship Banner Asakaze Kai.png
Asakaze
Equipment Card 12cm Single Gun Mount Kai 2.png Equipment Card 53cm Twin Torpedo Mount.png Equipment Card Type 22 Surface Radar Kai 4.png
Ship Banner Harukaze Kai.png
Harukaze
Equipment Card 12cm Single Gun Mount Kai 2.png Equipment Card 53cm Twin Torpedo Mount.png Equipment Card Type 22 Surface Radar Kai 4.png
Ship Banner Matsukaze Kai.png
Matsukaze
Equipment Card 12cm Single Gun Mount Kai 2.png Equipment Card 53cm Twin Torpedo Mount.png Equipment Card Type 22 Surface Radar Kai 4.png
Ship Banner Hatakaze Kai.png
Hatakaze
Equipment Card 53cm Twin Torpedo Mount.png Equipment Card 53cm Twin Torpedo Mount.png Equipment Card 53cm Twin Torpedo Mount.png
Unassorted Fleet Variant 2
Ship Banner Gambier Bay Kai.png
Gambier Bay
Equipment Card FM-2.png Equipment Card TBM-3D.png Equipment Card Night Operation Aviation Personnel.png
Ship Banner Samuel B. Roberts Kai.png
Samuel B. Roberts
Equipment Card 5inch Single Gun Mount Mk.30.png Equipment Card 5inch Single Gun Mount Mk.30.png
Ship Banner Matsukaze Kai.png
Matsukaze
Equipment Card 12cm Single Gun Mount Kai 2.png Equipment Card 53cm Twin Torpedo Mount.png Equipment Card Type 22 Surface Radar Kai 4.png
Ship Banner Hatakaze Kai.png
Hatakaze
Equipment Card 53cm Twin Torpedo Mount.png Equipment Card 53cm Twin Torpedo Mount.png Equipment Card 53cm Twin Torpedo Mount.png
E-4 Phase 2 Node U
Kanmusu Equipment 1 Equipment 2 Equipment 3 Equipment 4
Destroyer Division 31 Variant 1
Ship Banner Okinami Kai.png
Okinami
Equipment Card 12.7cm Twin Gun Mount Model D Kai 2.png Equipment Card 12.7cm Twin Gun Mount Model D Kai 2.png Equipment Card Searchlight.png
Ship Banner Kishinami Kai.png
Kishinami
Equipment Card 12.7cm Twin Gun Mount Model D Kai 2.png Equipment Card 12.7cm Twin Gun Mount Model D Kai 2.png Equipment Card Star Shell.png
Ship Banner Asashimo Kai.png
Asashimo
Equipment Card 12.7cm Twin Gun Mount Model D Kai 2.png Equipment Card 61cm Quadruple (Oxygen) Torpedo Mount.png Equipment Card Type 22 Surface Radar Kai 4.png
Ship Banner Naganami Kai Ni.png
Naganami
Equipment Card 12.7cm Twin Gun Mount Model D Kai 2.png Equipment Card 61cm Quadruple (Oxygen) Torpedo Mount.png Equipment Card Type 22 Surface Radar Kai 4 (Calibrated Late Model).png
Europe Fleet Variant 1
Ship Banner Aquila Kai.png
Aquila
150px 150px 150px
Ship Banner Zara Due.png
Zara
Equipment Character 203mm 53 Twin Gun Mount.png Equipment Character 203mm 53 Twin Gun Mount.png Equipment Character 203mm 53 Twin Gun Mount.png Equipment Card Ro.43 Reconnaissance Seaplane.png
Ship Banner Pola Kai.png
Pola
Equipment Character 203mm 53 Twin Gun Mount.png Equipment Character 203mm 53 Twin Gun Mount.png Equipment Character 203mm 53 Twin Gun Mount.png 150px
Ship Banner Maestrale Kai.png
Maestrale
Equipment Card 120mm 50 Twin Gun Mount.png Equipment Card 120mm 50 Twin Gun Mount.png Equipment Card WG42 (Wurfgerät 42).png
Ship Banner Libeccio Kai.png
Libeccio
Equipment Card 120mm 50 Twin Gun Mount.png Equipment Card 120mm 50 Twin Gun Mount.png Equipment Card WG42 (Wurfgerät 42).png
Europe Fleet Variant 2
Ship Banner Gotland.png
Gotland
Equipment Card Bofors 15.2cm Twin Gun Mount Model 1930.png Equipment Card Bofors 15.2cm Twin Gun Mount Model 1930.png Equipment Card S9 Osprey.png
Ship Banner Z1 Zwei.png
Z1
Equipment Card 12.7cm Single Gun Mount.png Equipment Card 12.7cm Single Gun Mount.png Equipment Card WG42 (Wurfgerät 42).png
Ship Banner Z3 Zwei.png
Z3
Equipment Card 12.7cm Single Gun Mount.png Equipment Card 12.7cm Single Gun Mount.png Equipment Card WG42 (Wurfgerät 42).png
Ship Banner Jervis Kai.png
Jervis
Equipment Card QF 4.7inch Gun Mk.XII Kai.png Equipment Card QF 4.7inch Gun Mk.XII Kai.png Equipment Card Type124 ASDIC.png
Ship Banner Tashkent Kai.png
Tashkent
Equipment Card 130mm B-13 Twin Gun Mount.png Equipment Card 130mm B-13 Twin Gun Mount.png Equipment Card 533mm Triple Torpedo Mount.png Equipment Card Type 22 Surface Radar Kai 4.png
Ship Banner Maestrale Kai.png
Maestrale
Equipment Card 120mm 50 Twin Gun Mount.png Equipment Card 533mm Triple Torpedo Mount.png Equipment Card Type 22 Surface Radar Kai 4.png
Europe Fleet Variant 3
Ship Banner Italia.png
Italia
Equipment Card 381mm 50 Triple Gun Mount.png Equipment Card 381mm 50 Triple Gun Mount.png Equipment Card 381mm 50 Triple Gun Mount.png Equipment Card OTO 152mm Triple Rapid Fire Gun Mount.png
Ship Banner Roma Kai.png
Roma
Equipment Card 381mm 50 Triple Gun Mount.png Equipment Card 381mm 50 Triple Gun Mount.png Equipment Card 381mm 50 Triple Gun Mount.png Equipment Card OTO 152mm Triple Rapid Fire Gun Mount.png
Ship Banner Maestrale Kai.png
Maestrale
Equipment Card 120mm 50 Twin Gun Mount.png Equipment Card 120mm 50 Twin Gun Mount.png Equipment Card WG42 (Wurfgerät 42).png
Ship Banner Libeccio Kai.png
Libeccio
Equipment Card 120mm 50 Twin Gun Mount.png Equipment Card 120mm 50 Twin Gun Mount.png Equipment Card WG42 (Wurfgerät 42).png
Europe Fleet Variant 4
Ship Banner Zara Due.png
Zara
Equipment Character 203mm 53 Twin Gun Mount.png Equipment Character 203mm 53 Twin Gun Mount.png Equipment Character 203mm 53 Twin Gun Mount.png Equipment Card Searchlight.png
Ship Banner Pola Kai.png
Pola
Equipment Character 203mm 53 Twin Gun Mount.png Equipment Character 203mm 53 Twin Gun Mount.png Equipment Character 203mm 53 Twin Gun Mount.png 150px
Ship Banner Maestrale Kai.png
Maestrale
Equipment Card 120mm 50 Twin Gun Mount.png Equipment Card 120mm 50 Twin Gun Mount.png Equipment Card WG42 (Wurfgerät 42).png
Ship Banner Libeccio Kai.png
Libeccio
Equipment Card 120mm 50 Twin Gun Mount.png Equipment Card 120mm 50 Twin Gun Mount.png Equipment Card WG42 (Wurfgerät 42).png
E-5 Phases 2 and 3 Node W
Kanmusu Equipment 1 Equipment 2 Equipment 3 Equipment 4
Destroyer Division 31 Variant 1
Ship Banner Kishinami Kai.png
Kishinami
Equipment Card 12.7cm Twin Gun Mount Model D Kai 2.png Equipment Card 12.7cm Twin Gun Mount Model D Kai 2.png Equipment Card Searchlight.png
Ship Banner Okinami Kai.png
Okinami
Equipment Card 12.7cm Twin Gun Mount Model D Kai 2.png Equipment Card 61cm Quadruple (Oxygen) Torpedo Mount.png Equipment Card Type 22 Surface Radar Kai 4.png
Ship Banner Asashimo Kai.png
Asashimo
Equipment Card 12.7cm Twin Gun Mount Model D Kai 2.png Equipment Card 61cm Quadruple (Oxygen) Torpedo Mount.png Equipment Card Type 22 Surface Radar Kai 4.png
Destroyer Division 31 Variant 2
Ship Banner Naganami Kai Ni.png
Naganami
Equipment Card 12.7cm Twin Gun Mount Model D Kai 2.png Equipment Card 61cm Quadruple (Oxygen) Torpedo Mount.png Equipment Card Type 22 Surface Radar Kai 4 (Calibrated Late Model).png
Ship Banner Kishinami Kai.png
Kishinami
Equipment Card 12.7cm Twin Gun Mount Model D Kai 2.png Equipment Card 12.7cm Twin Gun Mount Model D Kai 2.png Equipment Card Searchlight.png
Ship Banner Asashimo Kai.png
Asashimo
Equipment Card 12.7cm Twin Gun Mount Model D Kai 2.png Equipment Card 61cm Quadruple (Oxygen) Torpedo Mount.png Equipment Card WG42 (Wurfgerät 42).png
Ship Banner Okinami Kai.png
Okinami
Equipment Card 12.7cm Twin Gun Mount Model D Kai 2.png Equipment Card 12.7cm Twin Gun Mount Model D Kai 2.png Equipment Card WG42 (Wurfgerät 42).png
Ship Banner Takanami Kai.png
Takanami
Equipment Card 12.7cm Twin Gun Mount Model D Kai 2.png Equipment Card 61cm Quadruple (Oxygen) Torpedo Mount.png Equipment Card Type 22 Surface Radar Kai 4.png
Europe Fleet Variant 1
Ship Banner Gotland.png
Gotland
Equipment Card Bofors 15.2cm Twin Gun Mount Model 1930.png Equipment Card Bofors 15.2cm Twin Gun Mount Model 1930.png Equipment Card Star Shell.png
Ship Banner Maestrale Kai.png
Maestrale
Equipment Card 120mm 50 Twin Gun Mount.png Equipment Card 120mm 50 Twin Gun Mount.png Equipment Card WG42 (Wurfgerät 42).png
Ship Banner Libeccio Kai.png
Libeccio
Equipment Card 120mm 50 Twin Gun Mount.png Equipment Card 120mm 50 Twin Gun Mount.png Equipment Card WG42 (Wurfgerät 42).png
Ship Banner Italia.png
Italia
Equipment Card 381mm 50 Triple Gun Mount.png Equipment Card 381mm 50 Triple Gun Mount.png Equipment Card 381mm 50 Triple Gun Mount.png Equipment Card OTO 152mm Triple Rapid Fire Gun Mount.png
Ship Banner Roma Kai.png
Roma
Equipment Card 381mm 50 Triple Gun Mount.png Equipment Card 381mm 50 Triple Gun Mount.png Equipment Card 381mm 50 Triple Gun Mount.png Equipment Card OTO 152mm Triple Rapid Fire Gun Mount.png
Europe Fleet Variant 2
Ship Banner Gotland.png
Gotland
Equipment Card Bofors 15.2cm Twin Gun Mount Model 1930.png Equipment Card Bofors 15.2cm Twin Gun Mount Model 1930.png Equipment Card S9 Osprey.png
Ship Banner Maestrale.png
Maestrale
Equipment Card 120mm 50 Twin Gun Mount.png Equipment Card 120mm 50 Twin Gun Mount.png Equipment Card WG42 (Wurfgerät 42).png
Ship Banner Z1 Zwei.png
Z1
Equipment Card 12.7cm Single Gun Mount.png Equipment Card 12.7cm Single Gun Mount.png Equipment Card WG42 (Wurfgerät 42).png
Ship Banner Z3 Zwei.png
Z3
Equipment Card 12.7cm Single Gun Mount.png Equipment Card 12.7cm Single Gun Mount.png Equipment Card WG42 (Wurfgerät 42).png
Ship Banner Jervis.png
Jervis
Equipment Card QF 4.7inch Gun Mk.XII Kai.png Equipment Card QF 4.7inch Gun Mk.XII Kai.png Equipment Card Type124 ASDIC.png
Ship Banner Tashkent.png
Tashkent
Equipment Card 130mm B-13 Twin Gun Mount.png Equipment Card 130mm B-13 Twin Gun Mount.png Equipment Card 533mm Triple Torpedo Mount.png
Europe Fleet Variant 3
Ship Banner Gotland.png
Gotland
Equipment Card Bofors 15.2cm Twin Gun Mount Model 1930.png Equipment Card Bofors 15.2cm Twin Gun Mount Model 1930.png Equipment Card Star Shell.png
Ship Banner Richelieu Kai.png
Richelieu
Equipment Card 38cm Quadruple Gun Mount Kai.png Equipment Card 38cm Quadruple Gun Mount Kai.png Equipment Card 15.2cm Triple Gun Mount.png Equipment Card Searchlight.png
Ship Banner Maestrale Kai.png
Maestrale
Equipment Card 120mm 50 Twin Gun Mount.png Equipment Card 120mm 50 Twin Gun Mount.png Equipment Card WG42 (Wurfgerät 42).png
Ship Banner Libeccio Kai.png
Libeccio
Equipment Card 120mm 50 Twin Gun Mount.png Equipment Card 120mm 50 Twin Gun Mount.png Equipment Card WG42 (Wurfgerät 42).png
Ship Banner Italia.png
Italia
Equipment Card 381mm 50 Triple Gun Mount.png Equipment Card 381mm 50 Triple Gun Mount.png Equipment Card 381mm 50 Triple Gun Mount.png Equipment Card OTO 152mm Triple Rapid Fire Gun Mount.png
Ship Banner Roma Kai.png
Roma
Equipment Card 381mm 50 Triple Gun Mount.png Equipment Card 381mm 50 Triple Gun Mount.png Equipment Card 381mm 50 Triple Gun Mount.png Equipment Card OTO 152mm Triple Rapid Fire Gun Mount.png
Europe Fleet Variant 4
Ship Banner Warspite Kai.png
Warspite
Equipment Card 38.1cm Mk.I Twin Gun Mount.png Equipment Card 38.1cm Mk.I Twin Gun Mount.png Equipment Card 38.1cm Mk.I Twin Gun Mount.png Equipment Card Searchlight.png
Ship Banner Richelieu Kai.png
Richelieu
Equipment Card 38cm Quadruple Gun Mount Kai.png Equipment Card 38cm Quadruple Gun Mount Kai.png Equipment Card 15.2cm Triple Gun Mount.png Equipment Card Star Shell.png
Ship Banner Commandant Teste Kai.png
Commandant Teste
Equipment Card Laté 298B.png Equipment Card WG42 (Wurfgerät 42).png Equipment Card WG42 (Wurfgerät 42).png 150px
Ship Banner Jervis Kai.png
Jervis
Equipment Card QF 4.7inch Gun Mk.XII Kai.png Equipment Card 61cm Quintuple (Oxygen) Torpedo Mount.png Equipment Card Type 22 Surface Radar Kai 4 (Calibrated Late Model).png
Europe Fleet Variant 5
Ship Banner Zara Due.png
Zara
Equipment Character 203mm 53 Twin Gun Mount.png Equipment Character 203mm 53 Twin Gun Mount.png Equipment Character 203mm 53 Twin Gun Mount.png Equipment Card Searchlight.png
Ship Banner Pola Kai.png
Pola
Equipment Character 203mm 53 Twin Gun Mount.png Equipment Character 203mm 53 Twin Gun Mount.png Equipment Character 203mm 53 Twin Gun Mount.png Equipment Card Star Shell.png
Ship Banner Maestrale Kai.png
Maestrale
Equipment Card 120mm 50 Twin Gun Mount.png Equipment Card 120mm 50 Twin Gun Mount.png Equipment Card WG42 (Wurfgerät 42).png
Ship Banner Libeccio Kai.png
Libeccio
Equipment Card 120mm 50 Twin Gun Mount.png Equipment Card 120mm 50 Twin Gun Mount.png Equipment Card WG42 (Wurfgerät 42).png
Europe Fleet Variant 6
Ship Banner Commandant Teste Kai.png
Commandant Teste
Equipment Card Laté 298B.png Equipment Card WG42 (Wurfgerät 42).png Equipment Card WG42 (Wurfgerät 42).png 150px
Ship Banner Richelieu Kai.png
Richelieu
Equipment Card 38cm Quadruple Gun Mount Kai.png Equipment Card 38cm Quadruple Gun Mount Kai.png Equipment Card 15.2cm Triple Gun Mount.png Equipment Card Searchlight.png
Ship Banner Z1 Zwei.png
Z1
Equipment Card 12.7cm Single Gun Mount.png Equipment Card 12.7cm Single Gun Mount.png Equipment Card WG42 (Wurfgerät 42).png
Ship Banner Z3 Zwei.png
Z3
Equipment Card 12.7cm Single Gun Mount.png Equipment Card 12.7cm Single Gun Mount.png Equipment Card WG42 (Wurfgerät 42).png
Europe Fleet Variant 7
Ship Banner Commandant Teste Kai.png
Commandant Teste
Equipment Card Laté 298B.png Equipment Card WG42 (Wurfgerät 42).png Equipment Card WG42 (Wurfgerät 42).png 150px
Ship Banner Z1 Zwei.png
Z1
Equipment Card 12.7cm Single Gun Mount.png Equipment Card 12.7cm Single Gun Mount.png Equipment Card WG42 (Wurfgerät 42).png
Ship Banner Z3 Zwei.png
Z3
Equipment Card 12.7cm Single Gun Mount.png Equipment Card 12.7cm Single Gun Mount.png Equipment Card WG42 (Wurfgerät 42).png
E-5 Phases 3 Node Z2
Kanmusu Equipment 1 Equipment 2 Equipment 3 Equipment 4
Destroyer Division 31 Variant 1
Ship Banner Kishinami Kai.png
Kishinami
Equipment Card 12.7cm Twin Gun Mount Model D Kai 2.png Equipment Card 12.7cm Twin Gun Mount Model D Kai 2.png Equipment Card Star Shell.png
Ship Banner Okinami Kai.png
Okinami
Equipment Card 12.7cm Twin Gun Mount Model D Kai 2.png Equipment Card 12.7cm Twin Gun Mount Model D Kai 2.png Equipment Card Searchlight.png
Ship Banner Asashimo Kai.png
Asashimo
Equipment Card 12.7cm Twin Gun Mount Model D Kai 2.png Equipment Card 61cm Quadruple (Oxygen) Torpedo Mount.png Equipment Card Type 22 Surface Radar Kai 4.png
Destroyer Division 31 Variant 2
Ship Banner Naganami Kai Ni.png
Naganami
Equipment Card 12.7cm Twin Gun Mount Model D Kai 2.png Equipment Card 61cm Quadruple (Oxygen) Torpedo Mount.png Equipment Card Type 22 Surface Radar Kai 4 (Calibrated Late Model).png
Ship Banner Kishinami Kai.png
Kishinami
Equipment Card 12.7cm Twin Gun Mount Model D Kai 2.png Equipment Card 12.7cm Twin Gun Mount Model D Kai 2.png Equipment Card Searchlight.png
Ship Banner Asashimo Kai.png
Asashimo
Equipment Card 12.7cm Twin Gun Mount Model D Kai 2.png Equipment Card 61cm Quadruple (Oxygen) Torpedo Mount.png Equipment Card WG42 (Wurfgerät 42).png
Ship Banner Okinami Kai.png
Okinami
Equipment Card 12.7cm Twin Gun Mount Model D Kai 2.png Equipment Card 12.7cm Twin Gun Mount Model D Kai 2.png Equipment Card WG42 (Wurfgerät 42).png
Ship Banner Takanami Kai.png
Takanami
Equipment Card 12.7cm Twin Gun Mount Model D Kai 2.png Equipment Card 61cm Quadruple (Oxygen) Torpedo Mount.png Equipment Card Type 22 Surface Radar Kai 4.png
Destroyer Divison 31 Variant 3
Ship Banner Kishinami Kai.png
Kishinami
Equipment Card 12.7cm Twin Gun Mount Model D Kai 2.png Equipment Card 12.7cm Twin Gun Mount Model D Kai 2.png Equipment Card Star Shell.png
Ship Banner Okinami Kai.png
Okinami
Equipment Card 12.7cm Twin Gun Mount Model D Kai 2.png Equipment Card 12.7cm Twin Gun Mount Model D Kai 2.png Equipment Card Searchlight.png
Ship Banner Asashimo Kai.png
Asashimo
Equipment Card 12.7cm Twin Gun Mount Model D Kai 2.png Equipment Card 61cm Quadruple (Oxygen) Torpedo Mount.png Equipment Card Type 22 Surface Radar Kai 4.png
Ship Banner Naganami Kai Ni.png
Naganami
Equipment Card 12.7cm Twin Gun Mount Model D Kai 2.png Equipment Card 61cm Quadruple (Oxygen) Torpedo Mount.png Equipment Card Type 22 Surface Radar Kai 4 (Calibrated Late Model).png
Europe Fleet Variant 1
Ship Banner Ark Royal Kai.png
Ark Royal
Equipment Card Swordfish Mk.II (Skilled).png Equipment Card Swordfish Mk.III (Skilled).png Equipment Card TBM-3D.png Equipment Card Night Operation Aviation Personnel + Skilled Deckhands.png
Ship Banner Nelson Kai.png
Nelson
Equipment Card 16inch Mk.I Triple Gun Mount + AFCT Kai.png Equipment Card 16inch Mk.I Triple Gun Mount + AFCT Kai.png Equipment Card 16inch Mk.I Triple Gun Mount + AFCT Kai.png Equipment Card 20-tube 7inch UP Rocket Launchers.png
Ship Banner Warspite Kai.png
Warspite
Equipment Card 38.1cm Mk.I Twin Gun Mount.png Equipment Card 38.1cm Mk.I Twin Gun Mount.png Equipment Card 38.1cm Mk.I Twin Gun Mount.png 191-1.png
Ship Banner Jervis Kai.png
Jervis
Equipment Card QF 4.7inch Gun Mk.XII Kai.png Equipment Card 61cm Quintuple (Oxygen) Torpedo Mount.png Equipment Card Type 22 Surface Radar Kai 4 (Calibrated Late Model).png
Europe Fleet Variant 2
Ship Banner Gotland Kai.png
Gotland
Equipment Card Bofors 15.2cm Twin Gun Mount Model 1930.png Equipment Card Bofors 15.2cm Twin Gun Mount Model 1930.png Equipment Card Bofors 15.2cm Twin Gun Mount Model 1930.png 150px
Ship Banner Maestrale Kai.png
Maestrale
Equipment Card 120mm 50 Twin Gun Mount.png Equipment Card 120mm 50 Twin Gun Mount.png Equipment Card WG42 (Wurfgerät 42).png
Ship Banner Libeccio Kai.png
Libeccio
Equipment Card 120mm 50 Twin Gun Mount.png Equipment Card 120mm 50 Twin Gun Mount.png Equipment Card Star Shell.png
Ship Banner Graf Zeppelin Kai.png
Graf Zeppelin
Equipment Card Fw 190T Kai.png 150px Equipment Card Ju 87C Kai.png Equipment Card Night Operation Aviation Personnel + Skilled Deckhands.png
Ship Banner Z1 Zwei.png
Z1
Equipment Card 12.7cm Single Gun Mount.png Equipment Card 12.7cm Single Gun Mount.png Equipment Card 2cm Flakvierling 38.png
Ship Banner Z3 Zwei.png
Z3
Equipment Card 12.7cm Single Gun Mount.png Equipment Card 12.7cm Single Gun Mount.png Equipment Card 3.7cm FlaK M42.png
Europe Fleet Variant 3
Ship Banner Gotland Kai.png
Gotland
Equipment Card Bofors 15.2cm Twin Gun Mount Model 1930.png Equipment Card Bofors 15.2cm Twin Gun Mount Model 1930.png Equipment Card Bofors 15.2cm Twin Gun Mount Model 1930.png 150px
Ship Banner Zara Due.png
Zara
Equipment Character 203mm 53 Twin Gun Mount.png Equipment Character 203mm 53 Twin Gun Mount.png Equipment Character 203mm 53 Twin Gun Mount.png Equipment Card Skilled Lookouts.png
Ship Banner Pola Kai.png
Pola
Equipment Character 203mm 53 Twin Gun Mount.png Equipment Character 203mm 53 Twin Gun Mount.png Equipment Character 203mm 53 Twin Gun Mount.png Equipment Card Skilled Lookouts.png
Ship Banner Aquila Kai.png
Aquila
Equipment Card Swordfish Mk.III (Skilled).png Equipment Card TBM-3D.png Equipment Card Night Operation Aviation Personnel.png
Ship Banner Maestrale Kai.png
Maestrale
Equipment Card 120mm 50 Twin Gun Mount.png Equipment Card 120mm 50 Twin Gun Mount.png Equipment Card Searchlight.png
Ship Banner Libeccio Kai.png
Libeccio
Equipment Card 120mm 50 Twin Gun Mount.png Equipment Card 120mm 50 Twin Gun Mount.png Equipment Card Star Shell.png
Europe Fleet Variant 4
Ship Banner Nelson Kai.png
Nelson
Equipment Card 16inch Mk.I Triple Gun Mount + AFCT Kai.png Equipment Card 16inch Mk.I Triple Gun Mount + AFCT Kai.png Equipment Card 16inch Mk.I Triple Gun Mount + AFCT Kai.png Equipment Card 20-tube 7inch UP Rocket Launchers.png
Ship Banner Ark Royal Kai.png
Ark Royal
Equipment Card Swordfish Mk.II (Skilled).png Equipment Card Swordfish Mk.III (Skilled).png Equipment Card TBM-3D.png Equipment Card Night Operation Aviation Personnel + Skilled Deckhands.png
Ship Banner Maestrale Kai.png
Maestrale
Equipment Card 120mm 50 Twin Gun Mount.png Equipment Card 120mm 50 Twin Gun Mount.png Equipment Card WG42 (Wurfgerät 42).png
Ship Banner Libeccio Kai.png
Libeccio
Equipment Card 120mm 50 Twin Gun Mount.png Equipment Card 120mm 50 Twin Gun Mount.png Equipment Card Star Shell.png
Ship Banner Richelieu Kai.png
Richelieu
Equipment Card 38cm Quadruple Gun Mount Kai.png Equipment Card 38cm Quadruple Gun Mount Kai.png Equipment Card 15.2cm Triple Gun Mount.png Equipment Card Skilled Lookouts.png
Europe Fleet Variant 5
Ship Banner Warspite Kai.png
Warspite
Equipment Card 38.1cm Mk.I Twin Gun Mount.png Equipment Card 38.1cm Mk.I Twin Gun Mount.png Equipment Card 38.1cm Mk.I Twin Gun Mount.png 191-1.png
Ship Banner Nelson Kai.png
Nelson
Equipment Card 16inch Mk.I Triple Gun Mount + AFCT Kai.png Equipment Card 16inch Mk.I Triple Gun Mount + AFCT Kai.png Equipment Card 16inch Mk.I Triple Gun Mount + AFCT Kai.png Equipment Card 20-tube 7inch UP Rocket Launchers.png
Ship Banner Kongou Kai Ni.png
Kongou
Equipment Card 35.6cm Twin Gun Mount.png Equipment Card 35.6cm Twin Gun Mount.png Equipment Card 35.6cm Twin Gun Mount.png Equipment Card Star Shell.png
Ship Banner Hiei Kai Ni.png
Hiei
Equipment Card 35.6cm Twin Gun Mount.png Equipment Card 35.6cm Twin Gun Mount.png Equipment Card 35.6cm Twin Gun Mount.png Equipment Card Searchlight.png
Ship Banner Jervis Kai.png
Jervis
Equipment Card QF 4.7inch Gun Mk.XII Kai.png Equipment Card 61cm Quintuple (Oxygen) Torpedo Mount.png Equipment Card Type 22 Surface Radar Kai 4 (Calibrated Late Model).png

Friend Fleet Voice Lines

Ship Japanese/English Notes
Destroyers
Asakaze
Play
2nd ship of the Kamikaze-class destroyers, Asakaze, charging in!
神風型駆逐艦、二番館、朝風、突っ込むわ!
Matsukaze
Play
Aha, I like this.
あはぁ、好きだよ、こういうの。
Naganami
Play
Alriiight, this is my time to shine. I'm charging in!
よーし、ここが長波様の見せ場だな。突撃する!
Okinami
Play
The 31st Destroyer Division has arrived on the battlefield. Kishi-chan, Asa-chan; are you ready? Let's attack!
第三十一駆逐隊、戦場海域に到達しました。キシちゃん。アサちゃん、いいですか?突入します!
Okinami
Play
Roger that! We'll begin the attack! Feel free to go all out, Asa-chan!
衝波、瞭解しました!これより突入します!アサちゃんも、好きなだけやっちゃって!
Kishinami
Play
Roger that! DesDiv31, attack!
岸波、瞭解!三十一駆、突入!
Kishinami
Play
The 31st Destroyer Division has arrived on the battlefield! We'll now back up the friendly fleet. Oki-nee, Naga-nee, Asa-chan... Let's attack!
第三十一駆逐隊、戦場海域に到達!これより友軍艦隊を援護します。オキ姉、ナガ姉、アサちゃん…突入です!
Kishinami
Play
The 31st Destroyer Division has arrived on the battlefield! We'll now back up the friendly fleet.
第三十一駆逐隊、戦場海域に到達!これより友軍艦隊を掩壕します。
Maestrale
Play
From: 10th Destroyer Division, Maestrale. To: Special Operations Fleet. We will now proceed to back you up. Attack!
発:伊第十駆逐隊、Maestrale。宛:特務艦隊。我、友軍艦隊をこれより援護する。突入!
Maestrale
Play
Maestrale Division, roger! Got it, Libe? Follow me!
駆逐隊、Maestrale、瞭解!Libe、いい?付いてきて!
Libeccio
Play
Hello, hello! Roger!
Ciao, ciao! Libe, 瞭解!
Libeccio
Play
Hello, hello! I'm here! Are you all doing well? I'm here to back you up! Raaaawr!
Ciao!Libe來たよ!みんな、元気している?援護しちゃうぞ!ガオガオ!
Tashkent
Play
Alright good. Are you ready, Comrades? Hurrah!
よーし、いいね。同志諸君、準備はいいかい?Ура!
Samuel B. Roberts
Play
Attack! Fire!
突っ込め!Fire!
Light Cruisers
Gotland
Play
Aviation cruiser Gotland. We'll be backing you up now!
航空巡洋艦、Gotland.これよりあなたたちを援護します!
Gotland
Play
European Combined Fleet representative flagship, Gotland, has arrived at the operation area! We'll now back up the friendly fleet. All ships, increase speed. Attack!
歐州方面連合艦隊旗艦代理、Gotland、戦場海域を到達!これより友軍艦隊を援護します。艦隊増速。突入!
Battleships
Warspite
Play
Roger that! Begin the attack!
Warspite、瞭解しました!突入、開始します!
Warspite
Play
Sorry to keep you waiting! Battleship Warspite, has arrived on the battlefield! We'll now back you up. Are you ready, Nelson? Let's go!
お待たせしました!戦艦Warspite、戦場海域に到著しました!これより皆さんを援護します。Nelson,準備はいい?行きましょう!
Warspite
Play
Sorry to keep you waiting! Battleship Warspite, has arrived on the battlefield! We'll now back you up.
お待たせしました!戦艦Warspite、戦場海域に到著しました!これより皆さんを援護します。
Richelieu
Play
I'm Richelieu. I've come. I'll back you up. Now, open fire!
Richelieuよ。來て上げたわ。援護してあげます。さあ、打ちなさい!
Nelson
Play
Battleship Nelson, roger. I'll show you what I can do. We'll attack in double line! Split the enemy down the middle. Let's go!
戦艦Nelson、瞭解だ。見せてやろう。我が複縦陣による突撃を!敵の中央を分斷する。行くぞ!
Nelson
Play
I've kept you waiting. Home Fleet flagship, Nelson, has arrived! Let's go! Each should do their duty! Charge!
待たせだな。本國艦隊旗艦、Nelson、見參!行くぞ!各々そのその責務を果たせ!突撃!
Nelson
Play
Nelson Touch. Main guns 1 and 2, one more shot! Nelson Touch Line
Nelson Touch。主砲、一番、二番、もう一撃だ!
Light Carriers
Gambier Bay
Play
Task Force 77 has arrived on the battlefield. We'll now back up the friendly fleet!
Task Force 77、戦場海域に到達。これより友軍を援護します!
Standard Carriers
Ark Royal
Play
The Home Fleet has arrived! Come, I'll show you! Let's go! Follow me, Nelson!
本國艦隊到著だ!さあ、見せてやろう!行くぞ!Nelson、付いて來い!
Ark Royal
Play
Roger! Swordfish squadrons, begin takeoff!
瞭解だ!Swordfish squadron発艦初め!
Intrepid
Play
Shall we sally forth at full force?
全力出撃で行きましょうか?
Auxiliaries
Commandant Teste
Play
I'll support you even though I'm not that capable. Fire!
私も微力ながら、援護いたします。Feu!
Commandant Teste
Play
Thank you. Even I have managed to make it to the battlefield. Begin the attack.
Merci。私も、戦場海域に到著できました。攻撃開始。

Mechanics

Participation requirements

  • Must have a 75% sortie win ratio.
  • Must have 5 empty ship slots for new ships.
  • Must have 20 free equipment slots.

Special Mechanics

  1. The difficulty system first used in Spring 2015 Event returns: you can choose between Operation A (, Hard), Operation B (, Medium), Operation C (, Easy) or Operation D (, Very Easy) .
    • Choosing A or B requires certain HQ Level (HQ Lv 35 for B / 80 for A in Spring 2015 Event).
    • An important note to all Admirals intending to clear the event on Hard difficulty - further (new) conditions now apply:
      • When switching difficulty from any other difficulty to Hard, the map's debuff mechanism (where applicable) will be reset.
        • Switching between any other difficulties will not reset the debuff mechanism.
  2. The debuff system from Summer 2015 Event's final map, where certain nodes had to be killed to reduce boss armor will return.
  3. Returning this event will allow a fleet with seven ships (Striking Force Fleet) to sortie to certain event maps that allow single fleet operations starting from E-2, and also includes the final map of the event.
    • The Striking Force cannot be sortied during exercises or sent on expeditions while it contains seven ships.
    • The Striking Force can only be created and used in the third fleet in the menu (out of a total of four fleets).
    • A Striking Force with a flagship that carries a new piece of equipment, the Striking Force Fleet Command Facility, will be able to make use of the new Single Ship Evacuation mechanic.
      • The new Single Ship Evacuation mechanic that will become available for the Striking Force as of E-4 allowing a single ship in the fleet to retreat from the battlefield after an enemy engagement if she suffered heavy damage.
        • It is possible for the damage to become even worse during a Single Ship Evacuation.
        • Unlike the Combined Fleet's evacuation mechanic, it does not require an escort destroyer.
      • The new Striking Force Fleet Command Facility will become obtainable and useable via the old Fleet Command Facility and the Action Report that can be earned in the upcoming Fall Event. The Fleet Command Facility, as well as the new Action Report item, will be obtainable on all difficulty levels, including Medium and Easy Mode.
      • Supplementary information regarding the new Striking Force Fleet Command Facility and the Single Ship Evacuation it allows when carried by the striking force's flagship:
        • The evacuation does not require an escort destroyer.
        • The evacuation consumes the ship's entire fuel & ammo reserves.
        • Only one ship can be evacuated per battle.
        • The damage the ship suffered may become worse during the evacuation, but she will never sink.
  4. Returning this event, a new Fleet formation will be introduced called the Vanguard Formation.
    • This formation will organize the fleet such that the 3rd-6th/7th ships protect the Flagship and 2nd Ship of the Fleet.
      • In addition, the formation allows for ships to become more evasive in combat situations, especially with well-trained Destroyer.
      • This formation is also available only during the duration of the event.
      • The formation will be usable by both normal fleets as well as the Striking Force Fleet.
  5. New: NPC Friend Fleets have been introduced into the game.
    • Friend Fleets act as another unit that appears in particular battles to help aid your fleet when attacking the enemy at the start of night battle.
      • As of current, only E-4 will allow the use of Friend Fleets at the boss node.
      • NPC Friend Fleets are selected from a randomized preset list of ship.
      • Depending on who you have in your fleet can also influence who will be arrive to aid you in battle.

Quick Info Table

Classification Map Name Fleet Type? Land-Based Air Squadron? Friendly Fleet? Color of Tag Tag Condition & Deployment Restriction Difficulty Restrictions Notes
Main Operation
South-Western Sea Area Operation
E-1 Off the Bali Island Single Fleet No No GreyTagSummer2018.png Tagging:
Ships not already color-tagged will be tagged with the color associated with the map when deployed. This tag exists on all difficulties and is not reset on remodel, etc.
Deployment Restriction:
Normal or Hard: Must have either the same-colored tag or no tag.
There will be 2 additional locks for Hard mode players in E5.
No restrictions. All difficulties OK
E-2 Northern Straits of Malacca Single Fleet Yes No LightGreenSummer2018.png In order to play these maps on hard, you must complete the previous map* on either normal or hard.
(e.g., to do E-4 on hard, you must complete E-3 on normal or hard.)
E-3 Battle off South-western Ceylon Single Fleet
+
Combined Fleet
Yes Yes
To be implemented this weekend
GreenTagSummer2018.png
Extra Operation E-4 The Winds of Genova Single Fleet
+
Combined Fleet
Yes Yes OrangeTagSummer2018.png
Final Operation E-5 Sortie Out! New Operation Rhineburg! Combined Fleet Yes Yes BlueTagSummer2018.png
PurpleTagSummer2018.png

Event Maps

E-1

OoyodoE-1Summer2018.png

Off the Bali Island
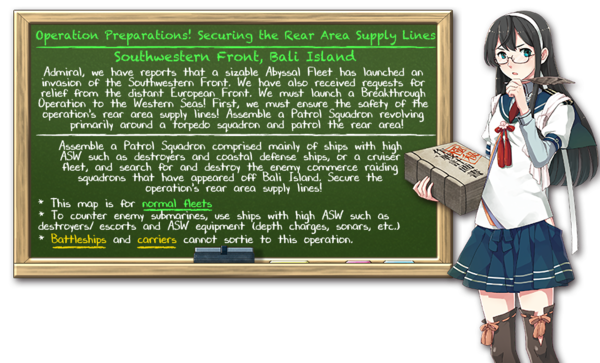
南西作戦海域方面 バリ島沖

Information

  • Event Tag: GreyTagSummer2018.png

Boss: New Submarine Princess (Vacation Mode)

  • Hard (): 1500 HP
  • Medium (): 1200 HP
  • Easy (): 750 HP
  • Casual (): 750 HP

Key Rewards:

Summer2018E-1Banner.png
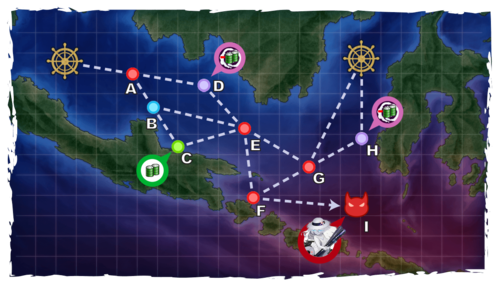
Summer2018E-1Map.png

Branching rules

E-1 Branching Rules
Nodes Rules
Start
1
  • Do not meet the requirement to start at 2.
2
  • Meet ALL of the following requirements:
    • Fleet may only contain DE/DD/CL/CT
    • Amount of CL+CT ≤ 2
    • Meet ONE of the following requirements:
      • Amount of DE+DD ≥ 2 AND amount of CL ≤ 1
      • Amount of DE+DD ≥ 4
A
B
  • Meet ALL of the following to go to B:
    • Amount of CA(V) ≤ 2
    • No SS(V)
  • Random routing if fleet contains SS(V)
  • Otherwise, go to D.
D
B
C
  • Meet ANY of the following requirements to go to C:
    • Amount of DE ≥ 3
    • Amount of AV ≥ 2
    • Fleet contains AO
  • Random routing if amount of DE = 2
  • Meeting ANY of the following FORCES you to E:
    • Do not meet any of the above requirements for either random routing or routing to C.
    • Fleet contains CA(V)
E
E
F
  • Fixed route
2
G
  • Meet ANY of the following requirements to go to G:
    • Amount of ships ≤ 5
    • Amount of CL+CT ≥ 2
    • Fleet contains no CL
  • Otherwise, 60% G, 40% H.
H
G
E
  • Meet ANY of the following requirements to go to F:
    • Amount of ships ≤ 5
    • Amount of DE ≥ 3
  • Otherwise, 30% E, 70% F.
F

Branching compositions were reported over the course of the event.

Tips
The following guide is an early version. While this will provide some basic info, please be careful when using it as it may still have incomplete information.

Important notice: To anyone wishing the challenge Medium or Hard Mode for E-4 (Medium/ Hard Mode locking) and E-5 (for locking on Hard Mode), it is very important to not use European ships until these segments, see E-4 and E-5 for more details

Recommended fleet: 2CL/CT, 3-4DE, 0-1DD. This fleet takes the shortest route to the boss. (Start Point #2->G->F->I)

It is also possible to use a 5-ship fleet (see routing restrictions above) to clear the map via the shortest route, although having one less ship in the fleet will probably affect your chances of success. A fleet of 3-6DE, 0-3DD could hypothetically also reach the boss via the same route, but the primary consideration in recommending the 2CL/CT configuration is survivability, as nodes G & F are surface combat nodes.

Vanguard Formation and node support is recommended to help your fleet reach the boss node. Line abreast is recommended for the boss node. During Last Dance, boss support (ASW) may also be useful to help deal with the other submarines in the boss fleet before your own fleet engages, especially when faced with disadvantageous engagement modifiers.

The event guides are to be constructed through the respective Event map page guide and reviewed by editor staff / collaboration committee before being approved here. Do not under any circumstance update the guides through this page or attempt to fix them through this page. Please only update guides through their respective sandbox pages.

Show/Hide Nodes and Enemy Encounters
Nodes and Enemy Encounters
NodePatternXpNode InfoFormAir
A
深海通商破壊部隊 前衛A群
Abbyssal Commerce Raid Force
Vanguard Group A
Pattern 1 Light Cruiser Ho-Class flagshipDestroyer I-Class Late ModelDestroyer I-Class Late ModelDestroyer I-Class Late ModelDestroyer I-Class Late ModelSubmarine Ka-Class
Formation 1: Line Ahead
Formation 2: Double Line
Formation 3: Diamond
B
Battle Avoided
Pattern 1"Must be my imagination" (battle avoided)
C
Resource Node
Pattern 1Fuel + ?
D
Maelstrom Node
Pattern 1Fuel - ?
E
深海通商破壊部隊 前衛B群
Abbyssal Commerce Raid Force
Vanguard Group B
Pattern 1 Heavy Cruiser Ri-Class flagshipHeavy Cruiser Ri-Class flagshipLight Cruiser Ho-Class flagshipDestroyer I-Class Late ModelDestroyer I-Class Late ModelSubmarine Ka-Class
Formation 1: Line Ahead
Formation 2: Double Line
Formation 3: Diamond
F
深海通商破壊部隊 支援補給群
Abbyssal Commerce Raid Force
Support Supply Group
Pattern 1 Transport Ship Wa-Class eliteTransport Ship Wa-ClassTransport Ship Wa-ClassTransport Ship Wa-ClassDestroyer I-Class Late ModelDestroyer I-Class Late Model
Formation 2: Double Line
Pattern 2 Transport Ship Wa-Class eliteTransport Ship Wa-Class eliteTransport Ship Wa-ClassTransport Ship Wa-ClassDestroyer I-Class Late ModelDestroyer I-Class Late Model
Formation 2: Double Line
Pattern 3 Transport Ship Wa-Class eliteTransport Ship Wa-Class eliteTransport Ship Wa-Class eliteTransport Ship Wa-Class eliteDestroyer I-Class Late ModelDestroyer I-Class Late Model
Formation 2: Double Line
Pattern 4 Transport Ship Wa-Class eliteTransport Ship Wa-Class eliteTransport Ship Wa-Class eliteTransport Ship Wa-Class elitePT Imp GroupPT Imp Group
Formation 2: Double Line
G
深海駆逐隊
Abyssal Destroyer Unit
Pattern 1 Destroyer I-Class Late Model eliteDestroyer I-Class Late ModelDestroyer I-Class Late ModelDestroyer I-ClassDestroyer I-Class
Formation 1: Line Ahead
Formation 2: Double Line
Formation 3: Diamond
H
Maelstrom Node
Pattern 1Fuel - ?
I
深海通商破壊部隊 指揮潛水艦
Abbyssal Commerce Raid Force
Commanding Submarine Group
Pattern 1 New Submarine Princess - Vacation ModeSubmarine Yo-Class eliteSubmarine Yo-Class eliteDestroyer I-Class Late ModelDestroyer I-Class Late Model
Formation 3: Diamond
Pattern 2 New Submarine Princess - Vacation ModeSubmarine Ka-Class eliteSubmarine Ka-Class eliteSubmarine Ka-Class eliteDestroyer I-Class Late ModelDestroyer I-Class Late Model
Formation 3: Diamond
Pattern 3 New Submarine Princess - Vacation ModeSubmarine Ka-Class flagshipSubmarine Ka-Class eliteSubmarine Ka-Class eliteDestroyer I-Class Late Model eliteDestroyer I-Class Late Model elite
Formation 3: Diamond

Show/Hide Nodes and Enemy Encounters
Nodes and Enemy Encounters
NodePatternXpNode InfoFormAir
A
深海通商破壊部隊 前衛A群
Abbyssal Commerce Raid Force
Vanguard Group A
Pattern 1 Light Cruiser Ho-Class flagshipDestroyer I-Class Late ModelDestroyer I-Class Late ModelDestroyer I-ClassDestroyer I-ClassSubmarine Ka-Class
Formation 1: Line Ahead
Formation 2: Double Line
Formation 3: Diamond
Pattern 2 Light Cruiser Ho-Class flagshipDestroyer I-Class Late ModelDestroyer I-Class Late ModelDestroyer I-Class Late ModelDestroyer I-Class Late ModelSubmarine Ka-Class
Formation 1: Line Ahead
Formation 2: Double Line
Formation 3: Diamond
B
Battle Avoided
Pattern 1"Must be my imagination" (battle avoided)
C
Resource Node
Pattern 1Fuel + ?
D
Maelstrom Node
Pattern 1Fuel - ?
E
深海通商破壊部隊 前衛B群
Abbyssal Commerce Raid Force
Vanguard Group B
Pattern 1 Heavy Cruiser Ri-Class flagshipHeavy Cruiser Ri-Class flagshipLight Cruiser Ho-Class eliteDestroyer I-Class Late ModelDestroyer I-ClassDestroyer I-Class
Formation 1: Line Ahead
Formation 2: Double Line
Formation 3: Diamond
Pattern 2 Heavy Cruiser Ri-Class flagshipHeavy Cruiser Ri-Class flagshipLight Cruiser Ho-Class flagshipDestroyer I-Class Late ModelDestroyer I-Class Late ModelSubmarine Ka-Class
Formation 1: Line Ahead
Formation 2: Double Line
Formation 3: Diamond
F
深海通商破壊部隊 支援補給群
Abbyssal Commerce Raid Force
Support Supply Group
Pattern 1 Transport Ship Wa-ClassTransport Ship Wa-ClassTransport Ship Wa-ClassDestroyer I-Class Late ModelDestroyer I-Class Late Model
Formation 2: Double Line
Pattern 2 Transport Ship Wa-Class eliteTransport Ship Wa-ClassTransport Ship Wa-ClassTransport Ship Wa-ClassDestroyer I-Class Late ModelDestroyer I-Class Late Model
Formation 2: Double Line
Pattern 3 Transport Ship Wa-Class eliteTransport Ship Wa-ClassTransport Ship Wa-ClassPT Imp GroupPT Imp Group
Formation 2: Double Line
Pattern 4 Transport Ship Wa-Class eliteTransport Ship Wa-Class eliteTransport Ship Wa-ClassTransport Ship Wa-ClassDestroyer I-Class Late ModelDestroyer I-Class Late Model
Formation 2: Double Line
Pattern 5 Transport Ship Wa-Class eliteTransport Ship Wa-Class eliteTransport Ship Wa-Class eliteTransport Ship Wa-Class eliteDestroyer I-Class Late ModelDestroyer I-Class Late Model
Formation 2: Double Line
Pattern 6 Transport Ship Wa-Class eliteTransport Ship Wa-Class eliteTransport Ship Wa-Class eliteTransport Ship Wa-Class elitePT Imp GroupPT Imp Group
Formation 2: Double Line
G
深海駆逐隊
Abyssal Destroyer Unit
Pattern 1 Destroyer I-Class Late ModelDestroyer I-Class Late ModelDestroyer I-ClassDestroyer I-Class
Formation 1: Line Ahead
Formation 2: Double Line
Formation 3: Diamond
Pattern 2 Destroyer I-Class Late Model eliteDestroyer I-Class Late ModelDestroyer I-Class Late ModelDestroyer I-ClassDestroyer I-Class
Formation 1: Line Ahead
Formation 2: Double Line
Formation 3: Diamond
H
Maelstrom Node
Pattern 1Fuel - ?
I
深海通商破壊部隊 指揮潛水艦
Abbyssal Commerce Raid Force
Commanding Submarine Group
Pattern 1 New Submarine Princess - Vacation ModeSubmarine Ka-ClassSubmarine Ka-Class
Formation 3: Diamond
Pattern 2 New Submarine Princess - Vacation ModeSubmarine Ka-ClassSubmarine Ka-ClassDestroyer I-Class Late Model
Formation 3: Diamond
Pattern 3 New Submarine Princess - Vacation ModeSubmarine Ka-ClassSubmarine Ka-ClassDestroyer I-Class Late ModelDestroyer I-Class Late Model
Formation 3: Diamond

Show/Hide Nodes and Enemy Encounters
Nodes and Enemy Encounters
NodePatternXpNode InfoFormAir
A
深海通商破壊部隊 前衛A群
Abbyssal Commerce Raid Force
Vanguard Group A
Pattern 1 Light Cruiser Ho-Class eliteDestroyer I-Class Late ModelDestroyer I-Class Late ModelDestroyer I-ClassDestroyer I-Class
Formation 1: Line Ahead
Formation 2: Double Line
Formation 3: Diamond
Pattern 2 Light Cruiser Ho-Class flagshipDestroyer I-Class Late ModelDestroyer I-Class Late ModelDestroyer I-ClassDestroyer I-ClassSubmarine Ka-Class
Formation 1: Line Ahead
Formation 2: Double Line
Formation 3: Diamond
B
Battle Avoided
Pattern 1"Must be my imagination" (battle avoided)
C
Resource Node
Pattern 1Fuel + ?
D
Maelstrom Node
Pattern 1Fuel - ?
E
深海通商破壊部隊 前衛B群
Abbyssal Commerce Raid Force
Vanguard Group B
Pattern 1 Heavy Cruiser Ri-Class eliteHeavy Cruiser Ri-Class eliteLight Cruiser Ho-Class eliteDestroyer I-Class Late ModelDestroyer I-ClassDestroyer I-Class
Formation 1: Line Ahead
Formation 2: Double Line
Formation 3: Diamond
Pattern 2 Heavy Cruiser Ri-Class flagshipHeavy Cruiser Ri-Class flagshipLight Cruiser Ho-Class eliteDestroyer I-Class Late ModelDestroyer I-ClassDestroyer I-Class
Formation 1: Line Ahead
Formation 2: Double Line
Formation 3: Diamond
F
深海通商破壊部隊 支援補給群
Abbyssal Commerce Raid Force
Support Supply Group
Pattern 1 Transport Ship Wa-ClassTransport Ship Wa-ClassTransport Ship Wa-ClassDestroyer I-ClassDestroyer I-Class
Formation 2: Double Line
Pattern 2 Transport Ship Wa-ClassTransport Ship Wa-ClassTransport Ship Wa-ClassDestroyer I-Class Late ModelDestroyer I-Class Late Model
Formation 2: Double Line
Pattern 3 Transport Ship Wa-ClassTransport Ship Wa-ClassTransport Ship Wa-ClassPT Imp GroupPT Imp Group
Formation 2: Double Line
Pattern 4 Transport Ship Wa-Class eliteTransport Ship Wa-ClassTransport Ship Wa-ClassDestroyer I-ClassDestroyer I-Class
Formation 2: Double Line
Pattern 5 Transport Ship Wa-Class eliteTransport Ship Wa-ClassTransport Ship Wa-ClassTransport Ship Wa-ClassDestroyer I-Class Late ModelDestroyer I-Class Late Model
Formation 2: Double Line
Pattern 6 Transport Ship Wa-Class eliteTransport Ship Wa-ClassTransport Ship Wa-ClassPT Imp GroupPT Imp Group
Formation 2: Double Line
G
深海駆逐隊
Abyssal Destroyer Unit
Pattern 1 Destroyer I-Class Late ModelDestroyer I-ClassDestroyer I-Class
Formation 1: Line Ahead
Formation 2: Double Line
Formation 3: Diamond
Pattern 2 Destroyer I-Class Late ModelDestroyer I-Class Late ModelDestroyer I-ClassDestroyer I-Class
Formation 1: Line Ahead
Formation 2: Double Line
Formation 3: Diamond
H
Maelstrom Node
Pattern 1Fuel - ?
I
深海通商破壊部隊 指揮潛水艦
Abbyssal Commerce Raid Force
Commanding Submarine Group
Pattern 1 New Submarine Princess - Vacation ModeSubmarine Ka-Class
Formation 3: Diamond
Pattern 2 New Submarine Princess - Vacation ModeSubmarine Ka-ClassSubmarine Ka-Class
Formation 3: Diamond
Pattern 3 New Submarine Princess - Vacation ModeSubmarine Ka-ClassSubmarine Ka-Class
Formation 3: Diamond
Pattern 4 New Submarine Princess - Vacation ModeSubmarine Ka-ClassSubmarine Ka-ClassDestroyer I-Class Late Model
Formation 3: Diamond

Show/Hide Nodes and Enemy Encounters
Nodes and Enemy Encounters
NodePatternXpNode InfoFormAir
A
深海通商破壊部隊 前衛A群
Abbyssal Commerce Raid Force
Vanguard Group A
Pattern 1 Light Cruiser Ho-Class eliteDestroyer I-Class Late ModelDestroyer I-Class Late ModelDestroyer I-ClassDestroyer I-Class
Formation 1: Line Ahead
Formation 2: Double Line
Formation 3: Diamond
B
Battle Avoided
Pattern 1"Must be my imagination" (battle avoided)
C
Resource Node
Pattern 1Fuel + ?
D
Maelstrom Node
Pattern 1Fuel - ?
E
深海通商破壊部隊 前衛B群
Abbyssal Commerce Raid Force
Vanguard Group B
Pattern 1 Heavy Cruiser Ri-Class eliteHeavy Cruiser Ri-Class eliteLight Cruiser Ho-Class eliteDestroyer I-Class Late ModelDestroyer I-ClassDestroyer I-Class
Formation 1: Line Ahead
Formation 2: Double Line
Formation 3: Diamond
F
深海通商破壊部隊 支援補給群
Abbyssal Commerce Raid Force
Support Supply Group
Pattern 1 Transport Ship Wa-ClassTransport Ship Wa-ClassTransport Ship Wa-ClassDestroyer I-ClassDestroyer I-Class
Formation 2: Double Line
Pattern 2 Transport Ship Wa-ClassTransport Ship Wa-ClassTransport Ship Wa-ClassPT Imp GroupPT Imp Group
Formation 2: Double Line
Pattern 3 Transport Ship Wa-Class eliteTransport Ship Wa-ClassTransport Ship Wa-ClassDestroyer I-ClassDestroyer I-Class
Formation 2: Double Line
G
深海駆逐隊
Abyssal Destroyer Unit
Pattern 1 Destroyer I-Class Late ModelDestroyer I-ClassDestroyer I-Class
Formation 1: Line Ahead
Formation 2: Double Line
Formation 3: Diamond
H
Maelstrom Node
Pattern 1Fuel - ?
I
深海通商破壊部隊 指揮潛水艦
Abbyssal Commerce Raid Force
Commanding Submarine Group
Pattern 1 New Submarine Princess - Vacation Mode
Formation 3: Diamond
Pattern 2 New Submarine Princess - Vacation ModeSubmarine Ka-Class
Formation 3: Diamond
Pattern 3 New Submarine Princess - Vacation ModeSubmarine Ka-ClassSubmarine Ka-Class
Formation 3: Diamond

Ship drops

NodeShip List
ADestroyersAkatsuki Akebono Ayanami Fubuki Fumizuki Hatsuyuki Hibiki Ikazuchi Inazuma Isonami Kikuzuki Kisaragi Mikazuki Miyuki Mochizuki Murakumo Mutsuki Nagatsuki Oboro Satsuki Sazanami Shikinami Shirayuki Ushio
Light CruisersIsuzu Jintsuu Kiso Nagara Naka Natori Tama Yura
EDestroyersAkatsuki Akebono Ayanami Fubuki Fumizuki Hatsuyuki Hibiki Ikazuchi Inazuma Isonami Kikuzuki Kisaragi Mikazuki Miyuki Mochizuki Murakumo Mutsuki Nagatsuki Oboro Satsuki Sazanami Shikinami Shirayuki Ushio
Light CruisersAbukuma Isuzu Jintsuu Kinu Kiso Kitakami Kuma Nagara Naka Natori Ooi Sendai Tama Yura Yuubari
Light Aircraft CarriersHoushou Shouhou
Seaplane TendersChitose Chiyoda
FDestroyer EscortsEtorofu Matsuwa
DestroyersAkatsuki Akebono Ayanami Fubuki Fumizuki Hatsuyuki Hibiki Ikazuchi Inazuma Isonami Kikuzuki Kisaragi Mikazuki Miyuki Mochizuki Murakumo Mutsuki Nagatsuki Oboro Satsuki Sazanami Shikinami Shirayuki Uranami Ushio
Light CruisersAbukuma Isuzu Jintsuu Kinu Kiso Kitakami Kuma Nagara Naka Natori Ooi Sendai Tama Yura Yuubari
Light Aircraft CarriersHoushou Shouhou
Seaplane TendersChitose Chiyoda
Auxiliary ShipsAkashi Hayasui
GDestroyersAkatsuki Akebono Ayanami Fubuki Fumizuki Hatsuyuki Hibiki Ikazuchi Inazuma Isonami Kikuzuki Kisaragi Mikazuki Miyuki Mochizuki Murakumo Mutsuki Nagatsuki Oboro Satsuki Sazanami Shikinami Shirayuki Ushio
Light CruisersIsuzu Jintsuu Kiso Naka Natori Tama
IDestroyersAkatsuki Akebono Arare Arashio Asashio Ayanami Fubuki Fumizuki Hatsuharu Hatsushimo Hatsuyuki Hibiki Ikazuchi Inazuma Isonami Kagerou Kasumi Kikuzuki Kisaragi Kuroshio Michishio Mikazuki Miyuki Mochizuki Murakumo Murasame Mutsuki Nagatsuki Nenohi Oboro Ooshio Samidare Satsuki Sazanami Shigure Shikinami Shiranui Shiratsuyu Shirayuki Suzukaze Uranami Ushio Wakaba Yukikaze Yuudachi
Light CruisersIsuzu Jintsuu Kiso Naka Natori Tama Tatsuta Tenryuu Yura
Heavy CruisersAoba Ashigara Atago Chikuma Choukai Furutaka Haguro Kako Kinugasa Kumano Maya Mogami Myoukou Nachi Suzuya Takao Tone
BattleshipsHaruna Hiei Kirishima Kongou
Light Aircraft CarriersShouhou Zuihou
Seaplane TendersChitose Chiyoda
SubmarinesI-13 I-168 I-19 I-26 I-400 I-58 I-8 Maruyu


E-2

OoyodoE-2Summer2018.png

Northern Straits of Malacca
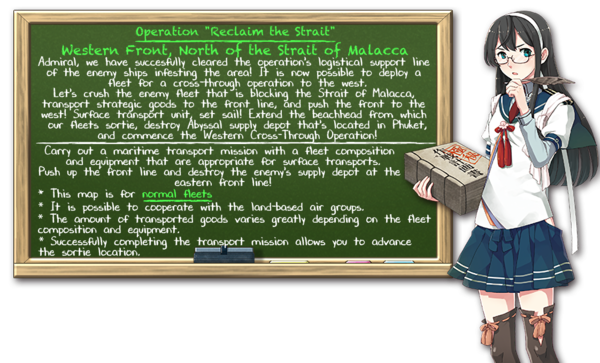
No map name yet

Information

  • Event Tag: LightGreenSummer2018.png

Boss: Part 1: Transport Phase

  • Hard (): 300 TP
  • Medium (): 210 TP
  • Easy (): 200 TP
  • Casual (): 200 TP

Part 2: Supply Depot Princess (Vacation Mode)

  • Hard (): 3000 HP
  • Medium (): 2600 HP
  • Easy (): 2300 HP
  • Casual (): 2300 HP

Key Rewards:

Summer2018E-2Banner.png
Summer2018E-2Map.png

Branching rules

E-2 Branching Rules
Nodes Rules
Start
1
  • Phase 1
2
  • Phase 2
A
B
  • Do not meet the requirements to go to C.
C
  • Meet ALL of the following requirements:
    • Amount of DE+DD ≥ 2
    • Amount of FBB+CVL ≤ 2
    • No BB(V)
    • No CV(B)
D
F
  • Node J is not unlocked yet.
  • Or meet ALL of the following requirements:
    • Amount of DD+CL ≥ 2
    • Amount of CV(B) ≤ 1
    • If fleet contains BBV, amount of CT+CLT+CA(V)+(F)BB(V)+CV(L/B) ≤ 3
    • Amount of (F)BB(V)+CV(L/B) ≤ 3
J
  • Do not meet the requirements to go to F.
F
E
  • Active branching
G
G
H
  • Fail the LoS check.
I
  • Pass the LoS check.
K
M
  • Meet ALL of the following requirements:
    • Amount of DD ≥ 2
    • Amount of (F)BB(V)+CV(B) ≤ 2
    • Amount of CLT?+CA+(F)BB(V)+CV(L/B) ≤ 3 (CAV does not count)
N
  • Do not meet the requirements to go to M.
M
L
  • Fail the LoS check.
O
  • Pass the LoS check.


Branching compositions were reported over the course of the event.

Tips
The following guide is an early version. While this will provide some basic info, please be careful when using it as it may still have incomplete information.

Important notice: To anyone wishing the challenge Medium or Hard Mode for E-4 (Medium/ Hard Mode locking) and E-5 (for locking on Hard Mode), it is very important to not use European ships until these segments, see E-4 and E-5 for more details'

E-2 Operation will involving organizing your fleet to complete 2 major task before completing the entire maps.

Complete the Transport Operation

Fleet Recommendation

1CA, 1CAV, 1CL, 3 DD
2DD, 1CA, 1CAV, 1CVL, 1FBB

Path: A-C-D-F-G-I

If you are playing on a Medium of hard difficulty, consider using ships that can be good in both transports and Anti-Installation combat to help out with the fight.

As like most transport operations, you will need to organize a balance between transport supplies and Combat equipment. Since this operation will involve using a single fleet it's suggested to bring at most 4 Drum Canisters or Daihatsu (preferred).

Your CAV should have at least 1 Seaplane Fighter to ensure that you'll gain air superiority (as the Transport boss has no air power)

While moving through the nodes, use the Vanguard formation to improve your chances of survival until reaching the boss node.

The boss fleet will consist of a Heavy Cruiser Princess along with a few CAs and DDs. Using an LBAS full of Land Base Bombers is recommended to take care of the enemies on this boss fight there fore the following LBAS should be considered:

Recommended LBAS

4 Land Base Bombers/ Torpedo Bombers

If your fleet is capable enough they should gain score consistent A or S ranks at the boss node clearing this map easily.

Defeating the Supply Depot Princess

Fleet Recommendation

1 CV, 1CA, 1CAV, 3 DD
1FBB, 1CAV, 1CVL, 1CV, 2DD
1 CV, 1 BB(V),1 CAV, 0-1 CL, 2-3 DD


Path: D-F-E-K-M-O

In this phase your fleet will need to be armed to deal with Anti-Installation combat since the main target the operation . Because of the high air power in K and O, you will need to have a Carrier that will be equipped with only fighters (some one that isn't Akagi, Souryuu, Hiryuu, Shoukaku and Zuikaku is preferred since they're important for E-3)

If you bring a CV + CVL, then it can be possible to consider being torpedo bombers and Dive bombers, but keep in mind that the AA strength of the enemy will be powerful through the entire may and may destroy your planes.

All your CA(V)s, and (F)BB(V) should be armed with Type 3 Shell to help battle against the Supply Depot Princess at the boss nodes.

For weaker FBBs you may consider AP shells if you need a way to pick off Artillery Imps if you're lacking in Anti-Installation gear.

As for your CL and DDs, use a combination of WG42s, Daihatsu, Daihatsu-class Landing Craft (Type 89 Medium Tanks & Marines), and Type 2 Ka-Mi Tanks to stack up the multiplier you can do against Installations.

Do remember that:

The most ideal set up for a very stong anti-installation attack from a DD is Type 2 Ka-Mi Tank, Daihatsu-class Landing Craft (Type 89 Medium Tanks & Marines) and WG42. The more modified the equipment is, the stronger the results can be.

Using this set up can be super effective in severely or instant killing the Supply Depot Princess in a single hit.

If you are lacking in some of the above mention gear for your CL/ DD consider spreading at least on of the above mention gear among your DD and CL and use 2 guns on them, while this set up isn't nearly as strong, it's will likely hit result in suitable damage against the boss.

On route to the boss use, Vanguard Formation to protect your fleet if you're using a more lighter fleet, but if you're using a more heavier fleet, using Line head can be a possible option.

There will be an Air Attack node with the Supply Depot Princess along with some Airfield Princess, use diamond formation and if you bring a DD with AACI, your chances of survival should improve.

At the boss node, you will face the Vacation Mode Supply Depot Princess along with some Artillery Imps, a DD and a transport.

On Harder difficulties it's possible for an Airfield Princess to appear in the composition as well.

Using an LBAS with an effective set up can help clear out some of the enemies as well as the Artillery Imps that may block your way.

Recommended LBAS

1 Fighter/Land Base Fighter, 3 Land Base Bombers/ Torpedo Bombers

Keep in mind that due to the presence of Artillery Imps they may be able to knock out your LBAS's ranks easily and while this may not be a problem for farming or pre-final kill, the boss kill may present some problems as the being able to eliminate as many of the enemies as possible is needed to help improve your odds of success when delivering the final kill on the Supply Depot Princess

If an Airfield Princess is present on the final kill, try to make sure your fleet's air power + AACI is strong enough to wipe out all the bombers so you can fully disable her during day battle to make the fight easier and more possible to efficiently defeat the Supply Depot Princess once all enemy ships are eliminated.

Support Shelling fleets for both in-route and Boss node are recommend to ensure you will survive your trip and improve your odds of success.

The event guides are to be constructed through the respective Event map page guide and reviewed by editor staff / collaboration committee before being approved here. Do not under any circumstance update the guides through this page or attempt to fix them through this page. Please only update guides through their respective sandbox pages.


Show/Hide Nodes and Enemy Encounters
Nodes and Enemy Encounters
NodePatternXpNode InfoFormAir
A
Battle Avoided
Pattern 1"Must be my imagination" (battle avoided)
B
海峽封鎖 深海戦艦部隊
Strait Blockade
Abyssal Battleship Group
Pattern 1 Battleship Ru-Class flagshipBattleship Ru-Class flagshipLight Cruiser Ho-Class flagshipLight Cruiser Tsu-ClassDestroyer I-Class Late ModelDestroyer I-Class Late Model
Formation 2: Double Line
Pattern 2 Battleship Ru-Class flagshipBattleship Ru-Class flagshipLight Cruiser Ho-Class flagshipLight Cruiser Tsu-ClassDestroyer Ro-Class Late ModelDestroyer Ro-Class Late Model
Formation 1: Line Ahead
Formation 2: Double Line
C
海峽警備 深海水雷戦隊
Strait Defense
Abyssal Torpedo Squadron
Pattern 1 Light Cruiser Ho-Class flagshipDestroyer I-Class Late ModelDestroyer I-Class Late ModelDestroyer I-Class Late ModelDestroyer I-ClassDestroyer I-Class
Formation 1: Line Ahead
Formation 2: Double Line
Formation 3: Diamond
D
海峽封鎖 深海遊撃部隊
Strait Blockade
Abyssal Vanguard Unit
Pattern 1 Light Cruiser Tsu-Class eliteDestroyer Ro-Class Late ModelDestroyer Ro-Class Late ModelDestroyer I-ClassDestroyer I-ClassSubmarine Ka-Class flagship
Formation 1: Line Ahead
Formation 2: Double Line
Pattern 2 Light Cruiser Tsu-Class eliteDestroyer Ro-Class Late ModelDestroyer Ro-Class Late ModelDestroyer Ro-Class Late ModelDestroyer Ro-Class Late ModelSubmarine Ka-Class flagship
Formation 1: Line Ahead
E
深海集積地プーケット航空隊
Abyssal Supply Depot
Phuket Air Raid
Air Battle Node
Pattern 1 Supply Depot Princess - Vacation ModeAirfield PrincessAirfield PrincessArtillery ImpArtillery Imp
Formation 4: Echelon
AP:96
AS:216
AS+:432
Pattern 2 Supply Depot Princess - Vacation ModeAirfield PrincessAirfield PrincessArtillery ImpArtillery Imp
Formation 4: Echelon
AP:123
AS:276
AS+:552
Pattern 3 Supply Depot Princess - Vacation Mode - DamagedAirfield PrincessAirfield PrincessAirfield PrincessArtillery ImpArtillery Imp
Formation 4: Echelon
AP:136
AS:306
AS+:612
F
Pattern 1Choose your route
G
Transport Drop-Off Node
Pattern 1 Transport drop-off
H
Battle Avoided
Pattern 1"Must be my imagination" (battle avoided)
I
海峽警備 深海重巡戦隊
Strait Defense
Abyssal Heavy Cruiser Squadron
Pattern 1 Heavy Cruiser Summer PrincessHeavy Cruiser Ri-Class flagshipHeavy Cruiser Ri-Class flagshipLight Cruiser Ho-Class flagshipDestroyer Ro-Class Late ModelDestroyer Ro-Class Late Model
Formation 1: Line Ahead
Pattern 2 Heavy Cruiser Summer PrincessHeavy Cruiser Ri-Class flagshipHeavy Cruiser Ri-Class flagshipLight Cruiser He-Class flagshipDestroyer Ro-Class Late ModelDestroyer Ro-Class Late Model
Formation 1: Line Ahead
Pattern 3 Heavy Cruiser Summer PrincessHeavy Cruiser Ri-Class flagshipHeavy Cruiser Ri-Class flagshipDestroyer Ro-Class Late ModelDestroyer Ro-Class Late ModelDestroyer Ro-Class Late Model
Formation 1: Line Ahead
J
海峽封鎖 深海遊撃部隊
Strait Blockade
Abyssal Vanguard Unit
Pattern 1 Light Cruiser Tsu-Class eliteDestroyer Ro-Class Late ModelDestroyer Ro-Class Late ModelDestroyer I-ClassDestroyer I-ClassSubmarine Ka-Class flagship
Formation 1: Line Ahead
Formation 2: Double Line
Pattern 2 Light Cruiser Tsu-Class eliteDestroyer Ro-Class Late ModelDestroyer Ro-Class Late ModelDestroyer Ro-Class Late ModelDestroyer Ro-Class Late ModelSubmarine Ka-Class flagship
Formation 1: Line Ahead
K
Battle Avoided
Pattern 1"Must be my imagination" (battle avoided)
L
Battle Avoided
Pattern 1"Must be my imagination" (battle avoided)
M
海峽前線集積地 防衛艦隊
Abyssal Supply Depot Defense Line
Defense Fleet
Pattern 1 Light Carrier Nu-Class flagshipLight Carrier Nu-Class eliteHeavy Cruiser Ne-Class eliteLight Cruiser Tsu-ClassDestroyer Ro-Class Late ModelDestroyer Ro-Class Late Model
Formation 2: Double Line
Formation 4: Echelon
AP:98
AS:219
AS+:438
Pattern 2 Light Carrier Nu-Class flagshipLight Carrier Nu-Class flagshipHeavy Cruiser Ne-Class eliteLight Cruiser Tsu-Class eliteDestroyer Ro-Class Late ModelDestroyer Ro-Class Late Model
Formation 2: Double Line
Formation 4: Echelon
AP:126
AS:282
AS+:564
N
深海潛水艦隊 海峽封鎖B群
Abyssal Submarine Fleet
Strait Defense Group B
Pattern 1 Submarine Ka-Class flagshipSubmarine Ka-Class eliteSubmarine Ka-Class elite
Formation 3: Diamond
Formation 5: Line Abreast
Pattern 2 Submarine Ka-Class flagshipSubmarine Ka-Class eliteSubmarine Ka-Class eliteSubmarine Ka-Class elite
Formation 3: Diamond
Formation 5: Line Abreast
O
深海前線集積地 本部
Abyssal Frontline
Supply Depot Headquarters
Pattern 1 Supply Depot Princess - Vacation ModeArtillery ImpArtillery ImpDestroyer Ro-Class Late Model eliteDestroyer Ro-Class Late Model eliteTransport Ship Wa-Class elite
Formation 2: Double Line
AP:32
AS:72
AS+:144
Pattern 2 Supply Depot Princess - Vacation ModeAirfield PrincessArtillery ImpArtillery ImpDestroyer Ro-Class Late Model eliteTransport Ship Wa-Class elite
Formation 2: Double Line
AP:55
AS:123
AS+:246
Pattern 3 Supply Depot Princess - Vacation Mode - DamagedAirfield PrincessArtillery ImpArtillery ImpDestroyer Ro-Class Late Model eliteTransport Ship Wa-Class elite
Formation 2: Double Line
AP:32
AS:72
AS+:144

Show/Hide Nodes and Enemy Encounters
Nodes and Enemy Encounters
NodePatternXpNode InfoFormAir
A
Battle Avoided
Pattern 1"Must be my imagination" (battle avoided)
B
海峽封鎖 深海戦艦部隊
Strait Blockade
Abyssal Battleship Group
Pattern 1 Battleship Ru-Class flagshipBattleship Ru-Class flagshipLight Cruiser Ho-Class eliteDestroyer Ro-Class Late ModelDestroyer I-ClassDestroyer I-Class
Formation 2: Double Line
Pattern 2 Battleship Ru-Class flagshipBattleship Ru-Class flagshipLight Cruiser Ho-Class eliteDestroyer Ro-Class Late ModelDestroyer Ro-Class Late ModelDestroyer I-Class
Formation 1: Line Ahead
Pattern 3 Battleship Ru-Class flagshipBattleship Ru-Class flagshipLight Cruiser Ho-Class flagshipLight Cruiser Tsu-ClassDestroyer Ro-Class Late ModelDestroyer Ro-Class Late Model
Formation 1: Line Ahead
Formation 2: Double Line
Pattern 4 Battleship Ru-Class flagshipBattleship Ru-Class flagshipLight Cruiser Ho-Class flagshipLight Cruiser Tsu-ClassDestroyer I-Class Late ModelDestroyer I-Class Late Model
Formation 2: Double Line
C
海峽警備 深海水雷戦隊
Strait Defense
Abyssal Torpedo Squadron
Pattern 1 Light Cruiser Ho-Class flagshipDestroyer I-Class Late ModelDestroyer I-Class Late ModelDestroyer I-ClassDestroyer I-ClassDestroyer I-Class
Formation 1: Line Ahead
Formation 2: Double Line
Formation 3: Diamond
Pattern 2 Light Cruiser Ho-Class flagshipDestroyer I-Class Late ModelDestroyer I-Class Late ModelDestroyer I-Class Late ModelDestroyer I-ClassDestroyer I-Class
Formation 1: Line Ahead
Formation 2: Double Line
Formation 3: Diamond
D
海峽封鎖 深海遊撃部隊
Strait Blockade
Abyssal Vanguard Unit
Pattern 1 Light Cruiser Tsu-ClassDestroyer Ro-Class Late ModelDestroyer Ro-Class Late ModelDestroyer I-ClassDestroyer I-ClassSubmarine Ka-Class
Formation 1: Line Ahead
Formation 2: Double Line
Pattern 2 Light Cruiser Tsu-ClassDestroyer Ro-Class Late ModelDestroyer Ro-Class Late ModelDestroyer I-ClassDestroyer I-ClassSubmarine Ka-Class elite
Formation 1: Line Ahead
Formation 2: Double Line
E
深海集積地プーケット航空隊
Abyssal Supply Depot
Phuket Air Raid
Air Battle Node
Pattern 1 Supply Depot Princess - Vacation ModeAirfield PrincessAirfield PrincessArtillery ImpArtillery Imp
Formation 4: Echelon
AP:76
AS:170
AS+:339
Pattern 2 Supply Depot Princess - Vacation ModeAirfield PrincessAirfield PrincessArtillery ImpArtillery Imp
Formation 4: Echelon
AP:94
AS:212
AS+:423
Pattern 3 Supply Depot Princess - Vacation Mode - DamagedAirfield PrincessAirfield PrincessAirfield PrincessArtillery ImpArtillery Imp
Formation 4: Echelon
AP:96
AS:216
AS+:432
F
Pattern 1Choose your route
G
Transport Drop-Off Node
Pattern 1 Transport drop-off
H
Battle Avoided
Pattern 1"Must be my imagination" (battle avoided)
I
海峽警備 深海重巡戦隊
Strait Defense
Abyssal Heavy Cruiser Squadron
Pattern 1 Heavy Cruiser Summer PrincessHeavy Cruiser Ri-Class eliteHeavy Cruiser Ri-Class eliteDestroyer Ro-Class Late ModelDestroyer Ro-Class Late ModelDestroyer I-Class
Formation 1: Line Ahead
Pattern 2 Heavy Cruiser Summer PrincessHeavy Cruiser Ri-Class eliteHeavy Cruiser Ri-Class eliteDestroyer Ro-Class Late ModelDestroyer Ro-Class Late ModelDestroyer Ro-Class Late Model
Formation 1: Line Ahead
Pattern 3 Heavy Cruiser Summer PrincessHeavy Cruiser Ri-Class eliteHeavy Cruiser Ri-Class eliteLight Cruiser Ho-Class flagshipDestroyer Ro-Class Late ModelDestroyer Ro-Class Late Model
Formation 1: Line Ahead
J
海峽封鎖 深海遊撃部隊
Strait Blockade
Abyssal Vanguard Unit
Pattern 1 Light Cruiser Tsu-ClassDestroyer Ro-Class Late ModelDestroyer Ro-Class Late ModelDestroyer I-ClassDestroyer I-ClassSubmarine Ka-Class
Formation 1: Line Ahead
Formation 2: Double Line
Pattern 2 Light Cruiser Tsu-ClassDestroyer Ro-Class Late ModelDestroyer Ro-Class Late ModelDestroyer I-ClassDestroyer I-ClassSubmarine Ka-Class elite
Formation 1: Line Ahead
Formation 2: Double Line
K
Battle Avoided
Pattern 1"Must be my imagination" (battle avoided)
L
Battle Avoided
Pattern 1"Must be my imagination" (battle avoided)
M
海峽前線集積地 防衛艦隊
Abyssal Supply Depot Defense Line
Defense Fleet
Pattern 1 Light Carrier Nu-Class eliteHeavy Cruiser Ne-ClassLight Cruiser Tsu-ClassDestroyer Ro-Class Late ModelDestroyer I-ClassDestroyer I-Class
Formation 2: Double Line
Formation 4: Echelon
AP:46
AS:104
AS+:207
Pattern 2 Light Carrier Nu-Class flagshipLight Carrier Nu-Class eliteHeavy Cruiser Ne-ClassLight Cruiser Tsu-ClassDestroyer Ro-Class Late ModelDestroyer Ro-Class Late Model
Formation 2: Double Line
Formation 4: Echelon
AP:98
AS:219
AS+:438
Pattern 3 Light Carrier Nu-Class flagshipLight Carrier Nu-Class eliteHeavy Cruiser Ne-Class eliteLight Cruiser Tsu-ClassDestroyer Ro-Class Late ModelDestroyer Ro-Class Late Model
Formation 2: Double Line
Formation 4: Echelon
AP:98
AS:219
AS+:438
N
深海潛水艦隊 海峽封鎖B群
Abyssal Submarine Fleet
Strait Defense Group B
Pattern 1 Submarine Ka-Class eliteSubmarine Ka-ClassSubmarine Ka-Class
Formation 3: Diamond
Formation 5: Line Abreast
Pattern 2 Submarine Ka-Class eliteSubmarine Ka-Class eliteSubmarine Ka-Class elite
Formation 3: Diamond
Formation 5: Line Abreast
Pattern 3 Submarine Ka-Class flagshipSubmarine Ka-Class eliteSubmarine Ka-Class elite
Formation 3: Diamond
Formation 5: Line Abreast
O
深海前線集積地 本部
Abyssal Frontline
Supply Depot Headquarters
Pattern 1 Supply Depot Princess - Vacation ModeArtillery ImpDestroyer Ro-Class Late ModelDestroyer I-ClassDestroyer I-ClassTransport Ship Wa-Class
Formation 4: Echelon
AP:30
AS:68
AS+:135
Pattern 2 Supply Depot Princess - Vacation ModeAirfield PrincessDestroyer Ro-Class Late ModelDestroyer I-ClassDestroyer I-ClassTransport Ship Wa-Class
Formation 4: Echelon
AP:53
AS:119
AS+:237
Pattern 3 Supply Depot Princess - Vacation Mode - DamagedAirfield PrincessArtillery ImpDestroyer Ro-Class Late ModelDestroyer I-ClassTransport Ship Wa-Class
Formation 4: Echelon
AP:23
AS:51
AS+:102

Show/Hide Nodes and Enemy Encounters
Nodes and Enemy Encounters
NodePatternXpNode InfoFormAir
A
Battle Avoided
Pattern 1"Must be my imagination" (battle avoided)
B
海峽封鎖 深海戦艦部隊
Strait Blockade
Abyssal Battleship Group
Pattern 1 Battleship Ru-Class eliteBattleship Ru-Class eliteLight Cruiser Ho-Class eliteDestroyer Ro-Class Late ModelDestroyer I-ClassDestroyer I-Class
Formation 1: Line Ahead
Formation 2: Double Line
Pattern 2 Battleship Ru-Class eliteBattleship Ru-Class eliteLight Cruiser Ho-Class eliteDestroyer I-ClassDestroyer I-ClassDestroyer I-Class
Formation 2: Double Line
Pattern 3 Battleship Ru-Class flagshipBattleship Ru-Class flagshipLight Cruiser Ho-Class eliteDestroyer Ro-Class Late ModelDestroyer I-ClassDestroyer I-Class
Formation 2: Double Line
Pattern 4 Battleship Ru-Class flagshipBattleship Ru-Class flagshipLight Cruiser Ho-Class eliteDestroyer Ro-Class Late ModelDestroyer Ro-Class Late ModelDestroyer I-Class
Formation 1: Line Ahead
C
海峽警備 深海水雷戦隊
Strait Defense
Abyssal Torpedo Squadron
Pattern 1 Light Cruiser Ho-Class flagshipDestroyer I-Class Late ModelDestroyer I-ClassDestroyer I-ClassDestroyer I-Class
Formation 1: Line Ahead
Formation 2: Double Line
Formation 3: Diamond
Pattern 2 Light Cruiser Ho-Class flagshipDestroyer I-Class Late ModelDestroyer I-Class Late ModelDestroyer I-ClassDestroyer I-ClassDestroyer I-Class
Formation 1: Line Ahead
Formation 2: Double Line
Formation 3: Diamond
D
海峽封鎖 深海遊撃部隊
Strait Blockade
Abyssal Vanguard Unit
Pattern 1 Light Cruiser Tsu-ClassDestroyer Ro-Class Late ModelDestroyer I-ClassDestroyer I-ClassDestroyer I-Class
Formation 1: Line Ahead
Formation 2: Double Line
Pattern 2 Light Cruiser Tsu-ClassDestroyer Ro-Class Late ModelDestroyer Ro-Class Late ModelDestroyer I-ClassDestroyer I-ClassSubmarine Ka-Class
Formation 1: Line Ahead
Formation 2: Double Line
E
深海集積地プーケット航空隊
Abyssal Supply Depot
Phuket Air Raid
Air Battle Node
Pattern 1 Supply Depot Princess - Vacation ModeAirfield PrincessArtillery ImpArtillery Imp
Formation 4: Echelon
AP:50
AS:111
AS+:222
Pattern 2 Supply Depot Princess - Vacation ModeAirfield PrincessAirfield PrincessArtillery ImpArtillery Imp
Formation 4: Echelon
AP:72
AS:162
AS+:324
Pattern 3 Supply Depot Princess - Vacation Mode - DamagedAirfield PrincessAirfield PrincessAirfield PrincessArtillery ImpArtillery Imp
Formation 4: Echelon
AP:68
AS:153
AS+:306
F
Pattern 1Choose your route
G
Transport Drop-Off Node
Pattern 1 Transport drop-off
H
Battle Avoided
Pattern 1"Must be my imagination" (battle avoided)
I
海峽警備 深海重巡戦隊
Strait Defense
Abyssal Heavy Cruiser Squadron
Pattern 1 Heavy Cruiser Summer PrincessHeavy Cruiser Ri-Class eliteHeavy Cruiser Ri-Class eliteDestroyer I-ClassDestroyer I-ClassDestroyer I-Class
Formation 1: Line Ahead
Pattern 2 Heavy Cruiser Summer PrincessHeavy Cruiser Ri-Class eliteHeavy Cruiser Ri-Class eliteDestroyer Ro-Class Late ModelDestroyer I-ClassDestroyer I-Class
Formation 1: Line Ahead
Pattern 3 Heavy Cruiser Summer PrincessHeavy Cruiser Ri-Class eliteHeavy Cruiser Ri-Class eliteDestroyer Ro-Class Late ModelDestroyer Ro-Class Late ModelDestroyer I-Class
Formation 1: Line Ahead
J
海峽封鎖 深海遊撃部隊
Strait Blockade
Abyssal Vanguard Unit
Pattern 1 Light Cruiser Tsu-ClassDestroyer Ro-Class Late ModelDestroyer I-ClassDestroyer I-ClassDestroyer I-Class
Formation 1: Line Ahead
Formation 2: Double Line
Pattern 2 Light Cruiser Tsu-ClassDestroyer Ro-Class Late ModelDestroyer Ro-Class Late ModelDestroyer I-ClassDestroyer I-ClassSubmarine Ka-Class
Formation 1: Line Ahead
Formation 2: Double Line
K
Battle Avoided
Pattern 1"Must be my imagination" (battle avoided)
L
Battle Avoided
Pattern 1"Must be my imagination" (battle avoided)
M
海峽前線集積地 防衛艦隊
Abyssal Supply Depot Defense Line
Defense Fleet
Pattern 1 Light Carrier Nu-Class eliteHeavy Cruiser Ne-ClassDestroyer Ro-Class Late ModelDestroyer I-ClassDestroyer I-ClassDestroyer I-Class
Formation 4: Echelon
AP:16
AS:36
AS+:72
Pattern 2 Light Carrier Nu-Class eliteHeavy Cruiser Ne-ClassLight Cruiser Tsu-ClassDestroyer Ro-Class Late ModelDestroyer I-ClassDestroyer I-Class
Formation 2: Double Line
Formation 4: Echelon
AP:46
AS:104
AS+:207
Pattern 3 Light Carrier Nu-Class flagshipLight Carrier Nu-Class eliteHeavy Cruiser Ne-ClassLight Cruiser Tsu-ClassDestroyer Ro-Class Late ModelDestroyer Ro-Class Late Model
Formation 2: Double Line
Formation 4: Echelon
AP:98
AS:219
AS+:438
N
深海潛水艦隊 海峽封鎖B群
Abyssal Submarine Fleet
Strait Defense Group B
Pattern 1 Submarine Ka-ClassSubmarine Ka-ClassSubmarine Ka-Class
Formation 3: Diamond
Pattern 2 Submarine Ka-Class eliteSubmarine Ka-ClassSubmarine Ka-Class
Formation 3: Diamond
Formation 5: Line Abreast
Pattern 3 Submarine Ka-Class eliteSubmarine Ka-Class eliteSubmarine Ka-Class elite
Formation 3: Diamond
Formation 5: Line Abreast
O
深海前線集積地 本部
Abyssal Frontline
Supply Depot Headquarters
Pattern 1 Supply Depot Princess - Vacation ModeDestroyer Ro-Class Late ModelDestroyer I-ClassDestroyer I-ClassTransport Ship Wa-Class
Formation 4: Echelon
AP:27
AS:60
AS+:120
Pattern 2 Supply Depot Princess - Vacation Mode - DamagedArtillery ImpDestroyer Ro-Class Late ModelDestroyer Ro-Class Late ModelTransport Ship Wa-Class
Formation 4: Echelon

Show/Hide Nodes and Enemy Encounters
Nodes and Enemy Encounters
NodePatternXpNode InfoFormAir
A
Battle Avoided
Pattern 1"Must be my imagination" (battle avoided)
B
海峽封鎖 深海戦艦部隊
Strait Blockade
Abyssal Battleship Group
Pattern 1 Battleship Ru-Class eliteBattleship Ru-Class eliteLight Cruiser Ho-Class eliteDestroyer I-ClassDestroyer I-ClassDestroyer I-Class
Formation 2: Double Line
Pattern 2 Battleship Ru-Class eliteBattleship Ru-Class eliteLight Cruiser Ho-Class eliteDestroyer Ro-Class Late ModelDestroyer I-ClassDestroyer I-Class
Formation 1: Line Ahead
Formation 2: Double Line
C
海峽警備 深海水雷戦隊
Strait Defense
Abyssal Torpedo Squadron
Pattern 1 Light Cruiser Ho-Class flagshipDestroyer I-Class Late ModelDestroyer I-ClassDestroyer I-ClassDestroyer I-Class
Formation 1: Line Ahead
Formation 2: Double Line
Formation 3: Diamond
D
海峽封鎖 深海遊撃部隊
Strait Blockade
Abyssal Vanguard Unit
Pattern 1 Light Cruiser Tsu-ClassDestroyer Ro-Class Late ModelDestroyer I-ClassDestroyer I-ClassDestroyer I-Class
Formation 1: Line Ahead
Formation 2: Double Line
Pattern 2 Light Cruiser Tsu-ClassDestroyer Ro-Class Late ModelDestroyer Ro-Class Late ModelDestroyer I-ClassDestroyer I-ClassSubmarine Ka-Class
Formation 1: Line Ahead
Formation 2: Double Line
E
深海集積地プーケット航空隊
Abyssal Supply Depot
Phuket Air Raid
Air Battle Node
Pattern 1 Supply Depot Princess - Vacation ModeAirfield PrincessArtillery ImpArtillery Imp
Formation 4: Echelon
AP:50
AS:111
AS+:222
Pattern 2 Supply Depot Princess - Vacation ModeAirfield PrincessAirfield PrincessArtillery ImpArtillery Imp
Formation 4: Echelon
AP:72
AS:162
AS+:324
Pattern 3 Supply Depot Princess - Vacation Mode - DamagedAirfield PrincessAirfield PrincessAirfield PrincessArtillery ImpArtillery Imp
Formation 4: Echelon
AP:68
AS:153
AS+:306
F
Pattern 1Choose your route
G
Transport Drop-Off Node
Pattern 1 Transport drop-off
H
Battle Avoided
Pattern 1"Must be my imagination" (battle avoided)
I
海峽警備 深海重巡戦隊
Strait Defense
Abyssal Heavy Cruiser Squadron
Pattern 1 Heavy Cruiser Summer PrincessHeavy Cruiser Ri-Class eliteHeavy Cruiser Ri-Class eliteDestroyer I-ClassDestroyer I-ClassDestroyer I-Class
Formation 1: Line Ahead
Pattern 2 Heavy Cruiser Summer PrincessHeavy Cruiser Ri-Class eliteHeavy Cruiser Ri-Class eliteDestroyer Ro-Class Late ModelDestroyer I-ClassDestroyer I-Class
Formation 1: Line Ahead
Pattern 3 Heavy Cruiser Summer PrincessHeavy Cruiser Ri-Class eliteHeavy Cruiser Ri-Class eliteDestroyer Ro-Class Late ModelDestroyer Ro-Class Late ModelDestroyer I-Class
Formation 1: Line Ahead
J
海峽封鎖 深海遊撃部隊
Strait Blockade
Abyssal Vanguard Unit
Pattern 1 Light Cruiser Tsu-ClassDestroyer Ro-Class Late ModelDestroyer I-ClassDestroyer I-ClassDestroyer I-Class
Formation 1: Line Ahead
Formation 2: Double Line
Pattern 2 Light Cruiser Tsu-ClassDestroyer Ro-Class Late ModelDestroyer Ro-Class Late ModelDestroyer I-ClassDestroyer I-ClassSubmarine Ka-Class
Formation 1: Line Ahead
Formation 2: Double Line
K
Battle Avoided
Pattern 1"Must be my imagination" (battle avoided)
L
Battle Avoided
Pattern 1"Must be my imagination" (battle avoided)
M
海峽前線集積地 防衛艦隊
Abyssal Supply Depot Defense Line
Defense Fleet
Pattern 1 Light Carrier Nu-Class eliteHeavy Cruiser Ne-ClassDestroyer Ro-Class Late ModelDestroyer I-ClassDestroyer I-ClassDestroyer I-Class
Formation 4: Echelon
AP:16
AS:36
AS+:72
Pattern 2 Light Carrier Nu-Class eliteHeavy Cruiser Ne-ClassLight Cruiser Tsu-ClassDestroyer Ro-Class Late ModelDestroyer I-ClassDestroyer I-Class
Formation 2: Double Line
Formation 4: Echelon
AP:46
AS:104
AS+:207
N
深海潛水艦隊 海峽封鎖B群
Abyssal Submarine Fleet
Strait Defense Group B
Pattern 1 Submarine Ka-ClassSubmarine Ka-ClassSubmarine Ka-Class
Formation 3: Diamond
Pattern 2 Submarine Ka-Class eliteSubmarine Ka-ClassSubmarine Ka-Class
Formation 3: Diamond
Formation 5: Line Abreast
O
深海前線集積地 本部
Abyssal Frontline
Supply Depot Headquarters
Pattern 1 Supply Depot Princess - Vacation ModeDestroyer Ro-Class Late ModelDestroyer I-ClassDestroyer I-ClassTransport Ship Wa-Class
Formation 4: Echelon
AP:27
AS:60
AS+:120
Pattern 2 Supply Depot Princess - Vacation Mode - DamagedDestroyer Ro-Class Late ModelDestroyer I-ClassDestroyer I-ClassTransport Ship Wa-Class
Formation 4: Echelon

Ship drops

NodeShip List
BDestroyersFumizuki Hatsuharu Hatsushimo Kikuzuki Kisaragi Mikazuki Mochizuki Murasame Mutsuki Nagatsuki Nenohi Samidare Satsuki Shigure Shiratsuyu Suzukaze Wakaba Yuudachi
Light CruisersIsuzu Jintsuu Kiso Nagara Naka Natori Tama Yura
CDestroyersFumizuki Hatsuharu Hatsushimo Kikuzuki Kisaragi Mikazuki Mochizuki Murasame Mutsuki Nagatsuki Nenohi Samidare Satsuki Shigure Shiratsuyu Suzukaze Wakaba Yuudachi
Light CruisersIsuzu Jintsuu Kiso Naka Natori Tama
DDestroyersFumizuki Hatsuharu Hatsushimo Kikuzuki Kisaragi Mikazuki Mochizuki Murasame Mutsuki Nagatsuki Nenohi Samidare Satsuki Shigure Shiratsuyu Suzukaze Wakaba Yuudachi
Light CruisersIsuzu Jintsuu Kiso Kitakami Kuma Nagara Naka Natori Sendai Tama Yura
Heavy CruisersAoba Furutaka Kako
IDestroyer EscortsDaitou
DestroyersAkatsuki Akebono Arare Arashio Asashimo Asashio Ayanami Fubuki Fumizuki Hatsuharu Hatsushimo Hatsuyuki Hibiki Ikazuchi Isonami Kagerou Kasumi Kikuzuki Kisaragi Kishinami Kuroshio Michishio Mikazuki Miyuki Mochizuki Murakumo Murasame Mutsuki Nagatsuki Nenohi Oboro Okinami Ooshio Samidare Satsuki Shigure Shikinami Shiranui Shiratsuyu Shirayuki Suzukaze Wakaba Yuudachi
Light CruisersIsuzu Jintsuu Kiso Naka Natori Ooyodo Tama Tatsuta Tenryuu Yura
Heavy CruisersAoba Ashigara Atago Chikuma Choukai Furutaka Haguro Kako Kinugasa Kumano Maya Mikuma Mogami Myoukou Nachi Pola Suzuya Takao Tone Zara
BattleshipsHaruna Hiei Kirishima Kongou Fusou Hyuuga Ise Yamashiro
Light Aircraft CarriersHiyou Junyou Ryuujou
MDestroyer EscortsDaitou Hiburi
DestroyersFumizuki Hatsuharu Hatsushimo Kikuzuki Kisaragi Matsukaze Mikazuki Minazuki Mochizuki Murasame Mutsuki Nagatsuki Nenohi Samidare Satsuki Shigure Shiratsuyu Suzukaze Wakaba Yuudachi
Light CruisersIsuzu Jintsuu Kiso Kitakami Kuma Nagara Naka Natori Ooi Ooyodo Sendai Tama Yura
Heavy CruisersAoba Furutaka Kako Kinugasa
Auxiliary ShipsKamoi
ODestroyer EscortsDaitou Hiburi
DestroyersAkatsuki Akebono Arare Arashio Asashimo Asashio Ayanami Fubuki Fumizuki Hatsuharu Hatsushimo Hatsuyuki Hibiki Ikazuchi Inazuma Isonami Kagerou Kasumi Kikuzuki Kisaragi Kishinami Kuroshio Michishio Mikazuki Miyuki Mochizuki Murakumo Murasame Mutsuki Nagatsuki Nenohi Oboro Okinami Ooshio Samidare Satsuki Sazanami Shigure Shikinami Shiranui Shiratsuyu Shirayuki Suzukaze Ushio Wakaba Yuudachi
Light CruisersIsuzu Jintsuu Kiso Naka Natori Ooyodo Sendai Tama Tatsuta Tenryuu Yura
Heavy CruisersAoba Ashigara Atago Chikuma Choukai Furutaka Haguro Kako Kinugasa Kumano Maya Mikuma Mogami Myoukou Nachi Pola Suzuya Takao Tone Zara
BattleshipsHaruna Hiei Kirishima Kongou Fusou Hyuuga Ise Yamashiro
Light Aircraft CarriersHiyou Junyou Ryuujou
Auxiliary ShipsKamoi


E-3

OoyodoE-3Summer2018.png

Battle off South-Western Ceylon
No map name yet

Information

  • Event Tag: GreenTagSummer2018.png

Boss: Part 1: Summer Harbor Princess

  • Hard (): 2000 HP
  • Medium (): 1800 HP
  • Easy (): 1700 HP
  • Casual (): 1700 HP

Boss: Part 2: Anchorage Water Demon (Vacation Mode)

  • Hard (): 1500 HP
  • Medium (): 1400 HP
  • Easy (): 1300 HP
  • Casual (): 1300 HP

Boss: Part 3: German Escort Princess

  • Hard (): 1400 HP
  • Medium (): 1350 HP
  • Easy (): 1300 HP
  • Casual (): 1300 HP

Key Rewards: Shinyou

Summer2018E-3Banner.png
Summer2018E-3Map.png

Branching rules

E-3 Branching Rules
Nodes Rules
A
B
  • Meet ANY of the following requirements to go to B:
    • Amount of (F)BB(V)+CV(L/B) in MAIN Fleet = 4
    • Amount of (F)BB(V)+CV(L/B) in MAIN Fleet = 6
  • Meet ALL of the following requirements to go to E:
    • Amount of ships ≤ 5
    • Amount of DD = 4
    • No CLT
    • ???
    • ???
  • Otherwise, go to C
C
E
B
C
  • Meet ANY of the following requirements:
    • Single Fleet
    • Amount of (F)BB(V)+CV(L/B) in MAIN Fleet = 6
D
  • Do not meet the requirements to go to C.
C
D
  • Meet ANY of the following requirements to go to F:
    • Single Fleet AND amount of DD ≥ 2
    • Amount of (F)BB(V)+CV(L/B) in MAIN Fleet ≤ 3
  • Otherwise, go to D.
F
E
  • ???
E
F
  • Active Branching
H
F
I
  • Active Branching
J
H
G
  • ???
J
  • ???
J
K
  • Failing LoS check FORCES you to L.
  • Go to K if Combined Fleet.
  • Go to M if Single Fleet
L
M
I
N
  • Amount of (F)BB(V)+CV(L/B) in MAIN Fleet ≥ 4
O
  • Amount of (F)BB(V)+CV(L/B) in MAIN Fleet ≤ 3
N
O
  • Amount of (F)BB(V)+CV(L/B) in MAIN Fleet ≤ 4
P
  • Amount of (F)BB(V)+CV(L/B) in MAIN Fleet ≥ 5
O
L
  • Fail the LoS check.
Q
  • Pass the LoS check.

Branching compositions were reported over the course of the event.

Tips

The following guide is an early version. While this will provide some basic info, please be careful when using it as it may still have incomplete information.

Important notice: To anyone wishing the challenge Medium or Hard Mode for E-4 (Medium/ Hard Mode locking) and E-5 (for locking on Hard Mode), it is very important to not use European ships until these segments, see E-4 and E-5 for more details

Historical Ships

Historical may not be 100% confirmed especially the unconventional DDs

Phase 3 Boss bonuses

  • Historical Ships: 1.2x
  • SPF/SPB: 1.3x
  • T3 Shell: 1.35x
  • DB: 1.4x
  • 2DB. 2.1x

Phase 1: Sink Summer Harbor Princess

The goal of phase 1 is to sink Summer Harbor Princess either using a single fleet or a Surface Task Force. The boss in this phase is an installation so the usage of T3 shells and WG are advised. (need confirmation about T89 and Ka Mi tanks).

Composition

  • 1 FBB 1 CV 1-2 CAV 2-3 DD
  • 2 FBB 1 CAV 1 CV 2 DD + 1 CL 2 DD 2 CLT 1 CAV (can we get confirmation on if using CAs instead of DDs work?)

A single fleet allows you to conserve additional ships from being locked at the cost of requiring node support to reliability pass J node. (Might want to note some positives, my opinion is that this is the weaker composition overall)

Using the Surface Task Force composition allows for you to skip the usage of node support but in return you will take an additional sub node K. This composition has a stronger performance at the boss due to the extra shelling rounds and ability to bring more installation killing ships.

Phase 2: Sink Anchorage Water Demon (Vacation Mode)

Composition

  • STF: 2 (F)BB(V) 1 CV(B) 3 CA(V) + 1 CL 1-2 CA(V) 1-2 CLT 2 DD
  • CTF: 3 CV(B) 2 CA(V) 1 SS(V) + 1 CL 1-2 CA(V) 1-2 CLT 2 DD

Notes

SSV tanking can be used to distract boss and nu Boss in LD does not target sub anymore

Phase 3: Sink German Escort Princess Composition

  • CTF: 3 CV(B) 1 SS(V) 2 CA(V) + 1 CL 1-2 CA(V) 2 DD 1-2 CLT 0-1 CVL

This boss fight is extremely difficult due to the lack of post-cap modifiers given against the rest of the enemies on the boss node as well as the bosses extremely high armor.

It's advised to in mind the historical and equipment post-cap modifiers granted against the boss while equipping your fleet for this battle.

Any ships that do not utilize these modifiers will have trouble breaking through the armor outside of a critical, so please plan accordingly.

Notes

  • Carriers should be equipped for Carrier CI (CVI), 1TB/2DB/1 fighter
  • CAV should either be equipped with seaplane fighters (SPF) or T3 shells.
  • SSV used for sub tanking enemies in the boss node and supplement air power.

The event guides are to be constructed through the respective Event map page guide and reviewed by editor staff / collaboration committee before being approved here. Do not under any circumstance update the guides through this page or attempt to fix them through this page. Please only update guides through their respective sandbox pages.


Show/Hide Nodes and Enemy Encounters
Nodes and Enemy Encounters
NodePatternXpNode InfoFormAir
A
Battle Avoided
Pattern 1"Must be my imagination" (battle avoided)
B
深海潛水艦隊 前方展開群
Abyssal Submarine Fleet
Frontline Deploymen Group
Pattern 1 Submarine Ka-Class flagshipSubmarine Ka-Class eliteSubmarine Ka-Class eliteSubmarine Ka-Class elite
Formation 3: Diamond
Formation 5: Line Abreast
Pattern 2 Submarine Ka-Class flagshipSubmarine Ka-Class eliteSubmarine Ka-Class elite
Formation 3: Diamond
Formation 5: Line Abreast
C
深海前線泊地艦隊 前衛水雷戦隊
Abyssal Front Line Anchorage Fleet
Vanguard Torpedo Squadron
Pattern 1 Light Cruiser Tsu-Class eliteDestroyer Ha-Class Late ModelDestroyer Ha-Class Late ModelDestroyer Ha-Class Late ModelDestroyer I-ClassDestroyer I-Class
Formation 1: Line Ahead
Formation 2: Double Line
Pattern 2 Light Cruiser Tsu-Class eliteDestroyer Ha-Class Late ModelDestroyer Ha-Class Late ModelDestroyer Ha-Class Late ModelDestroyer Ro-Class Late ModelDestroyer Ro-Class Late Model
Formation 1: Line Ahead
D
深海前線泊地艦隊 高速機動部隊
Abyssal Front Line Anchorage Fleet
High Speed Mobile Task Force
Pattern 1 Standard Carrier Wo-Class Kai flagshipHeavy Cruiser Ri-Class flagshipHeavy Cruiser Ri-Class flagshipLight Cruiser Tsu-Class eliteDestroyer Ha-Class Late ModelDestroyer Ha-Class Late Model
Formation 2: Double Line
Formation 4: Echelon
AP:84
AS:189
AS+:378
Pattern 2 Standard Carrier Wo-Class Kai flagshipHeavy Cruiser Ri-Class flagshipHeavy Cruiser Ri-Class flagshipLight Cruiser Tsu-Class eliteDestroyer Ha-Class Late ModelDestroyer Ha-Class Late Model
Formation 4: Echelon
AP:88
AS:198
AS+:396
E
Pattern 1
F
Pattern 1Choose your route
G
Pattern 1
H
深海港灣兵站 補給船団
Abyssal Port Supply Line
Logistic Fleet
Pattern 1 Transport Ship Wa-Class eliteTransport Ship Wa-Class eliteTransport Ship Wa-ClassTransport Ship Wa-ClassDestroyer Ro-Class Late ModelDestroyer Ro-Class Late Model
Formation 2: Double Line
Pattern 2 Transport Ship Wa-Class eliteTransport Ship Wa-Class eliteTransport Ship Wa-Class eliteTransport Ship Wa-ClassDestroyer Ro-Class Late ModelDestroyer Ro-Class Late Model
Formation 2: Double Line
Pattern 3 Transport Ship Wa-Class eliteTransport Ship Wa-ClassTransport Ship Wa-ClassTransport Ship Wa-ClassDestroyer Ro-Class Late ModelDestroyer Ro-Class Late Model
Formation 2: Double Line
Pattern 4 Transport Ship Wa-Class eliteTransport Ship Wa-Class eliteTransport Ship Wa-Class eliteTransport Ship Wa-Class eliteDestroyer Ro-Class Late ModelDestroyer Ro-Class Late Model
Formation 2: Double Line
I
深海東方増派潛水艦隊 I群
Abyssal Eastern Reinforcement Submarine Fleet
Group I
Pattern 1 Submarine Yo-Class flagshipSubmarine Ka-Class eliteSubmarine Ka-Class eliteSubmarine Ka-Class elite
Formation 3: Diamond
Formation 5: Line Abreast
Pattern 2 Submarine Yo-Class flagshipSubmarine Ka-Class eliteSubmarine Ka-Class elite
Formation 3: Diamond
Formation 5: Line Abreast
Pattern 3 Submarine Yo-Class flagshipSubmarine Yo-Class flagshipSubmarine Ka-Class eliteSubmarine Ka-Class elite
Formation 3: Diamond
J
海峽封鎖 深海戦艦部隊
Strait Blockade
Abyssal Battleship Unit
Pattern 1 Battleship Ta-Class flagshipBattleship Ta-Class flagshipLight Carrier Nu-Class flagshipLight Cruiser Tsu-Class eliteDestroyer Ha-Class Late ModelDestroyer Ha-Class Late Model
Formation 1: Line Ahead
Formation 2: Double Line
AP:63
AS:141
AS+:282
Pattern 2 Battleship Ta-Class flagshipBattleship Ta-Class flagshipLight Carrier Nu-Class flagshipLight Cruiser Tsu-ClassDestroyer Ha-Class Late ModelDestroyer Ha-Class Late Model
Formation 1: Line Ahead
Formation 2: Double Line
AP:52
AS:116
AS+:231
K
深海東方増派潛水艦隊 II群
Abyssal Eastern Reinforcement Submarine Fleet
Group II
Pattern 1 Submarine Yo-Class flagshipSubmarine Ka-Class eliteSubmarine Ka-Class eliteSubmarine Ka-Class elite
Formation 3: Diamond
Formation 5: Line Abreast
Pattern 2 Submarine Yo-Class flagshipSubmarine Yo-Class flagshipSubmarine Ka-Class eliteSubmarine Ka-Class elite
Formation 3: Diamond
Pattern 3 Submarine Yo-Class flagshipSubmarine Ka-Class eliteSubmarine Ka-Class elite
Formation 3: Diamond
Formation 5: Line Abreast
L
Battle Avoided
Pattern 1"Must be my imagination" (battle avoided)
M
セイロン島南部 深海佔拠港灣
South Ceylon Island
Abyssal Controlled Harbor
Pattern 1 summer_Harbor Princess Final FormArtillery ImpArtillery ImpLight Cruiser Tsu-Class elitePT Imp GroupPT Imp Group
Formation 2: Double Line
AP:64
AS:144
AS+:288
Pattern 2 Harbor Summer PrincessArtillery ImpArtillery ImpPT Imp GroupPT Imp GroupTransport Ship Wa-Class elite
Formation 2: Double Line
AP:64
AS:144
AS+:288
Pattern 3 Harbor Summer PrincessArtillery ImpArtillery ImpArtillery ImpPT Imp GroupPT Imp Group
Formation 2: Double Line
AP:64
AS:144
AS+:288
N
深海前線葉艦棲泊地 航空隊
Abyssal Frontline Mobile Fleet Anchorage
Air Group
Air Battle Node
Pattern 1 German Escort Princess - DamagedLight Carrier Nu-Class flagshipLight Carrier Nu-Class flagshipLight Carrier Nu-Class flagshipDestroyer Na-Class Late Model eliteDestroyer Na-Class Late Model elite
Formation 4: Echelon
Unknown
Pattern 2 Anchorage Water Demon - Vacation ModeLight Carrier Nu-Class eliteLight Carrier Nu-Class eliteLight Cruiser Tsu-Class eliteDestroyer Na-Class Late ModelDestroyer Na-Class Late Model
Formation 4: Echelon
Unknown
Pattern 3 German Escort PrincessLight Carrier Nu-Class flagshipLight Carrier Nu-Class flagshipLight Cruiser Tsu-Class eliteDestroyer Na-Class Late Model eliteDestroyer Na-Class Late Model elite
Formation 4: Echelon
Unknown
Pattern 4 Anchorage Water Demon - Vacation ModeLight Carrier Nu-Class flagshipLight Carrier Nu-Class flagshipLight Cruiser Tsu-Class eliteDestroyer Na-Class eliteDestroyer Na-Class elite
Formation 4: Echelon
Unknown
O
深海前線葉艦棲泊地 警備艦隊
Abyssal Frontline Mobile Fleet Anchorage
Defense Fleet
Pattern 1 Battleship Ta-Class flagshipBattleship Ta-Class flagshipHeavy Cruiser Ne-Class eliteLight Cruiser Tsu-Class eliteDestroyer Ha-Class Late ModelDestroyer Ha-Class Late Model
Formation 1: Line Ahead
Formation 2: Double Line
Pattern 2 Battleship Ta-Class flagshipHeavy Cruiser Ne-Class eliteHeavy Cruiser Ne-Class eliteLight Cruiser Tsu-Class eliteDestroyer Ha-Class Late ModelDestroyer Ha-Class Late Model
Formation 1: Line Ahead
Formation 2: Double Line
P
深海前線葉艦棲泊地 航空隊
Abyssal Frontline Mobile Fleet Anchorage
Air Group
Air Battle Node
Pattern 1 Anchorage Water Demon - Vacation ModeLight Carrier Nu-Class eliteLight Carrier Nu-Class eliteLight Cruiser Tsu-Class eliteDestroyer Na-Class Late ModelDestroyer Na-Class Late Model
Formation 4: Echelon
Unknown
Pattern 2 German Escort Princess - DamagedLight Carrier Nu-Class flagshipLight Carrier Nu-Class flagshipLight Carrier Nu-Class flagshipDestroyer Na-Class Late Model eliteDestroyer Na-Class Late Model elite
Formation 4: Echelon
Unknown
Pattern 3 German Escort PrincessLight Carrier Nu-Class flagshipLight Carrier Nu-Class flagshipLight Cruiser Tsu-Class eliteDestroyer Na-Class Late Model eliteDestroyer Na-Class Late Model elite
Formation 4: Echelon
Unknown
Pattern 4 Anchorage Water Demon - Vacation ModeLight Carrier Nu-Class flagshipLight Carrier Nu-Class flagshipLight Cruiser Tsu-Class eliteDestroyer Na-Class eliteDestroyer Na-Class elite
Formation 4: Echelon
Unknown
Q
深海前線葉艦棲泊地
Abyssal Frontline Mobile Fleet Anchorage
Pattern 1
phase 2
Anchorage Water Demon - Vacation ModeLight Carrier Nu-Class eliteLight Carrier Nu-Class eliteBattleship Ru-Class flagshipHeavy Cruiser Ne-Class eliteHeavy Cruiser Ne-Class elite
Light Cruiser Tsu-Class eliteDestroyer Na-Class eliteDestroyer Na-Class Late ModelDestroyer Na-Class Late ModelDestroyer Ha-Class Late ModelDestroyer Ha-Class Late Model
Cruising Formation 4: Battle Formation
Unknown
Pattern 2
Final Form
phase 2
Anchorage Water Demon - Vacation ModeLight Carrier Nu-Class flagshipLight Carrier Nu-Class flagshipBattleship Ru-Class flagshipHeavy Cruiser Ne-Class eliteHeavy Cruiser Ne-Class elite
Light Cruiser Tsu-Class eliteDestroyer Na-Class eliteDestroyer Na-Class eliteDestroyer Na-Class eliteDestroyer Ha-Class Late ModelDestroyer Ha-Class Late Model
Cruising Formation 4: Battle Formation
Unknown
Pattern 3
phase 3
German Escort PrincessLight Carrier Nu-Class flagshipLight Carrier Nu-Class flagshipBattleship Summer PrincessHeavy Cruiser Ne-Class eliteHeavy Cruiser Ne-Class elite
Light Cruiser Tsu-Class eliteDestroyer Na-Class Late Model eliteDestroyer Na-Class Late Model eliteDestroyer Na-Class Late Model eliteDestroyer Ha-Class Late ModelDestroyer Ha-Class Late Model
Cruising Formation 4: Battle Formation
Unknown
Pattern 4
Final Form
phase 3
German Escort Princess - DamagedLight Carrier Nu-Class flagshipLight Carrier Nu-Class flagshipBattleship Summer PrincessBattleship Summer PrincessHeavy Cruiser Ne-Class elite
Light Cruiser Tsu-Class eliteDestroyer Na-Class Late Model eliteDestroyer Na-Class Late Model eliteDestroyer Na-Class Late Model eliteDestroyer Na-Class Late Model eliteDestroyer Na-Class Late Model elite
Cruising Formation 4: Battle Formation
Unknown

Show/Hide Nodes and Enemy Encounters
Nodes and Enemy Encounters
NodePatternXpNode InfoFormAir
A
Battle Avoided
Pattern 1"Must be my imagination" (battle avoided)
B
深海潛水艦隊 前方展開群
Abyssal Submarine Fleet
Frontline Deploymen Group
Pattern 1 Submarine Ka-Class flagshipSubmarine Ka-Class eliteSubmarine Ka-Class elite
Formation 3: Diamond
Formation 5: Line Abreast
Pattern 2 Submarine Ka-Class eliteSubmarine Ka-Class eliteSubmarine Ka-Class elite
Formation 3: Diamond
Formation 5: Line Abreast
Pattern 3 Submarine Ka-Class eliteSubmarine Ka-ClassSubmarine Ka-Class
Formation 3: Diamond
Formation 5: Line Abreast
C
深海前線泊地艦隊 前衛水雷戦隊
Abyssal Front Line Anchorage Fleet
Vanguard Torpedo Squadron
Pattern 1 Light Cruiser Tsu-ClassDestroyer Ha-Class Late ModelDestroyer Ha-Class Late ModelDestroyer I-ClassDestroyer I-ClassDestroyer I-Class
Formation 1: Line Ahead
Formation 2: Double Line
Pattern 2 Light Cruiser Tsu-ClassDestroyer Ha-Class Late ModelDestroyer I-ClassDestroyer I-ClassDestroyer I-Class
Formation 1: Line Ahead
Formation 2: Double Line
Pattern 3 Light Cruiser Tsu-ClassDestroyer Ha-Class Late ModelDestroyer Ha-Class Late ModelDestroyer Ha-Class Late ModelDestroyer I-ClassDestroyer I-Class
Formation 1: Line Ahead
Pattern 4 Light Cruiser Tsu-ClassDestroyer Ha-Class Late ModelDestroyer Ha-Class Late ModelDestroyer I-ClassDestroyer I-Class
Formation 1: Line Ahead
D
深海前線泊地艦隊 高速機動部隊
Abyssal Front Line Anchorage Fleet
High Speed Mobile Task Force
Pattern 1 Standard Carrier Wo-Class flagshipHeavy Cruiser Ri-Class eliteHeavy Cruiser Ri-Class eliteLight Cruiser Tsu-ClassDestroyer Ha-Class Late ModelDestroyer Ha-Class Late Model
Formation 2: Double Line
Formation 4: Echelon
AP:69
AS:155
AS+:309
Pattern 2 Standard Carrier Wo-Class flagshipHeavy Cruiser Ri-Class flagshipHeavy Cruiser Ri-Class flagshipLight Cruiser Tsu-ClassDestroyer Ha-Class Late ModelDestroyer Ha-Class Late Model
Formation 4: Echelon
AP:69
AS:155
AS+:309
Pattern 3 Standard Carrier Wo-Class flagshipHeavy Cruiser Ri-Class eliteHeavy Cruiser Ri-Class eliteLight Cruiser Tsu-ClassDestroyer Ha-Class Late ModelDestroyer Ha-Class Late Model
Formation 4: Echelon
AP:67
AS:150
AS+:300
E
Pattern 1
F
Pattern 1Choose your route
G
Pattern 1
H
深海港灣兵站 補給船団
Abyssal Port Supply Line
Logistic Fleet
Pattern 1 Transport Ship Wa-ClassTransport Ship Wa-ClassTransport Ship Wa-ClassTransport Ship Wa-ClassDestroyer Ro-Class Late ModelDestroyer Ro-Class Late Model
Formation 2: Double Line
Pattern 2 Transport Ship Wa-ClassTransport Ship Wa-ClassTransport Ship Wa-ClassDestroyer I-Class Late ModelDestroyer I-Class Late Model
Formation 2: Double Line
Pattern 3 Transport Ship Wa-Class eliteTransport Ship Wa-ClassTransport Ship Wa-ClassTransport Ship Wa-ClassDestroyer Ro-Class Late ModelDestroyer Ro-Class Late Model
Formation 2: Double Line
Pattern 4 Transport Ship Wa-ClassTransport Ship Wa-ClassTransport Ship Wa-ClassDestroyer Ro-Class Late ModelDestroyer Ro-Class Late Model
Formation 2: Double Line
Pattern 5 Transport Ship Wa-Class eliteTransport Ship Wa-Class eliteTransport Ship Wa-ClassTransport Ship Wa-ClassDestroyer Ro-Class Late ModelDestroyer Ro-Class Late Model
Formation 2: Double Line
I
深海東方増派潛水艦隊 I群
Abyssal Eastern Reinforcement Submarine Fleet
Group I
Pattern 1 Submarine Yo-Class flagshipSubmarine Ka-Class eliteSubmarine Ka-Class elite
Formation 3: Diamond
Formation 5: Line Abreast
Pattern 2 Submarine Yo-Class eliteSubmarine Ka-Class eliteSubmarine Ka-Class elite
Formation 3: Diamond
Formation 5: Line Abreast
Pattern 3 Submarine Yo-Class eliteSubmarine Ka-ClassSubmarine Ka-Class
Formation 3: Diamond
Formation 5: Line Abreast
Pattern 4 Submarine Yo-Class flagshipSubmarine Ka-Class eliteSubmarine Ka-Class eliteSubmarine Ka-Class elite
Formation 3: Diamond
Formation 5: Line Abreast
J
海峽封鎖 深海戦艦部隊
Strait Blockade
Abyssal Battleship Unit
Pattern 1 Battleship Ta-Class eliteBattleship Ta-Class eliteLight Carrier Nu-Class eliteLight Cruiser Tsu-ClassDestroyer Ha-Class Late ModelDestroyer Ha-Class Late Model
Formation 1: Line Ahead
Formation 2: Double Line
AP:46
AS:104
AS+:207
Pattern 2 Battleship Ta-Class flagshipBattleship Ta-Class flagshipLight Carrier Nu-Class flagshipLight Cruiser Tsu-ClassDestroyer Ha-Class Late ModelDestroyer Ha-Class Late Model
Formation 1: Line Ahead
Formation 2: Double Line
AP:52
AS:116
AS+:231
K
深海東方増派潛水艦隊 II群
Abyssal Eastern Reinforcement Submarine Fleet
Group II
Pattern 1 Submarine Yo-Class eliteSubmarine Ka-Class eliteSubmarine Ka-Class elite
Formation 3: Diamond
Formation 5: Line Abreast
Pattern 2 Submarine Yo-Class flagshipSubmarine Ka-Class eliteSubmarine Ka-Class elite
Formation 3: Diamond
Formation 5: Line Abreast
Pattern 3 Submarine Yo-Class flagshipSubmarine Ka-Class eliteSubmarine Ka-Class eliteSubmarine Ka-Class elite
Formation 3: Diamond
Formation 5: Line Abreast
Pattern 4 Submarine Yo-Class eliteSubmarine Ka-ClassSubmarine Ka-Class
Formation 3: Diamond
Formation 5: Line Abreast
L
Battle Avoided
Pattern 1"Must be my imagination" (battle avoided)
M
セイロン島南部 深海佔拠港灣
South Ceylon Island
Abyssal Controlled Harbor
Pattern 1 Harbor Summer PrincessArtillery ImpArtillery ImpPT Imp GroupPT Imp GroupTransport Ship Wa-Class
Formation 2: Double Line
AP:50
AS:113
AS+:225
Pattern 2 summer_Harbor Princess Final FormArtillery ImpArtillery ImpLight Cruiser Tsu-ClassPT Imp GroupPT Imp Group
Formation 2: Double Line
AP:50
AS:113
AS+:225
N
深海前線葉艦棲泊地 航空隊
Abyssal Frontline Mobile Fleet Anchorage
Air Group
Air Battle Node
Pattern 1 Anchorage Water Demon - Vacation ModeLight Carrier Nu-Class eliteLight Carrier Nu-Class eliteLight Cruiser Tsu-ClassDestroyer Ha-Class Late ModelDestroyer Ha-Class Late Model
Formation 4: Echelon
Unknown
Pattern 2 German Escort PrincessLight Carrier Nu-Class eliteLight Carrier Nu-Class eliteLight Cruiser Tsu-ClassDestroyer Na-ClassDestroyer Na-Class
Formation 4: Echelon
Unknown
Pattern 3 German Escort Princess - DamagedLight Carrier Nu-Class eliteLight Carrier Nu-Class eliteLight Cruiser Tsu-ClassDestroyer Na-Class Late ModelDestroyer Na-Class Late Model
Formation 4: Echelon
Unknown
Pattern 4 Anchorage Water Demon - Vacation ModeLight Carrier Nu-Class eliteLight Carrier Nu-Class eliteLight Cruiser Tsu-ClassDestroyer Na-ClassDestroyer Na-Class
Formation 4: Echelon
Unknown
O
深海前線葉艦棲泊地 警備艦隊
Abyssal Frontline Mobile Fleet Anchorage
Defense Fleet
Pattern 1 Battleship Ta-Class flagshipHeavy Cruiser Ne-Class eliteHeavy Cruiser Ne-Class eliteLight Cruiser Tsu-Class eliteDestroyer Ha-Class Late ModelDestroyer Ha-Class Late Model
Formation 1: Line Ahead
Formation 2: Double Line
Pattern 2 Battleship Ta-Class eliteHeavy Cruiser Ne-Class eliteHeavy Cruiser Ne-Class eliteLight Cruiser Tsu-ClassDestroyer Ha-Class Late ModelDestroyer Ha-Class Late Model
Formation 1: Line Ahead
Formation 2: Double Line
Pattern 3 Battleship Ta-Class eliteHeavy Cruiser Ne-Class eliteHeavy Cruiser Ne-ClassLight Cruiser Tsu-ClassDestroyer Ha-Class Late ModelDestroyer Ha-Class Late Model
Formation 1: Line Ahead
P
深海前線葉艦棲泊地 航空隊
Abyssal Frontline Main Fleet Anchorage
Air Group
Air Battle Node
Pattern 1 Anchorage Water Demon - Vacation ModeLight Carrier Nu-Class eliteLight Carrier Nu-Class eliteLight Cruiser Tsu-ClassDestroyer Ha-Class Late ModelDestroyer Ha-Class Late Model
Formation 4: Echelon
Unknown
Pattern 2 German Escort Princess - DamagedLight Carrier Nu-Class eliteLight Carrier Nu-Class eliteLight Cruiser Tsu-ClassDestroyer Na-Class Late ModelDestroyer Na-Class Late Model
Formation 4: Echelon
Unknown
Q
深海前線葉艦棲泊地
Abyssal Frontline Mobile Fleet Anchorage
Pattern 1
phase 2
Anchorage Water Demon - Vacation ModeLight Carrier Nu-Class eliteLight Carrier Nu-Class eliteBattleship Ru-Class eliteHeavy Cruiser Ne-ClassHeavy Cruiser Ne-Class
Light Cruiser Tsu-ClassDestroyer Na-ClassDestroyer Ha-Class Late ModelDestroyer Ha-Class Late ModelDestroyer I-ClassDestroyer I-Class
Cruising Formation 4: Battle Formation
Unknown
Pattern 2
Final Form
phase 2
Anchorage Water Demon - Vacation ModeLight Carrier Nu-Class eliteLight Carrier Nu-Class eliteBattleship Ru-Class eliteHeavy Cruiser Ne-ClassHeavy Cruiser Ne-Class
Light Cruiser Tsu-ClassDestroyer Na-ClassDestroyer Na-ClassDestroyer Na-ClassDestroyer I-ClassDestroyer I-Class
Cruising Formation 4: Battle Formation
Unknown
Pattern 3
phase 3
German Escort PrincessLight Carrier Nu-Class eliteLight Carrier Nu-Class eliteBattleship Ru-Class flagshipHeavy Cruiser Ne-ClassHeavy Cruiser Ne-Class
Light Cruiser Tsu-ClassDestroyer Na-Class Late ModelDestroyer Na-ClassDestroyer Na-ClassDestroyer I-ClassDestroyer I-Class
Cruising Formation 4: Battle Formation
Unknown
Pattern 4
Final Form
phase 3
German Escort Princess - DamagedLight Carrier Nu-Class eliteLight Carrier Nu-Class eliteBattleship Ru-Class flagshipHeavy Cruiser Ne-ClassHeavy Cruiser Ne-Class
Light Cruiser Tsu-ClassDestroyer Na-Class Late ModelDestroyer Na-Class Late ModelDestroyer Na-Class Late ModelDestroyer I-ClassDestroyer I-Class
Cruising Formation 4: Battle Formation
Unknown

Show/Hide Nodes and Enemy Encounters
Nodes and Enemy Encounters
NodePatternXpNode InfoFormAir
A
Battle Avoided
Pattern 1"Must be my imagination" (battle avoided)
B
深海潛水艦隊 前方展開群
Abyssal Submarine Fleet
Frontline Deploymen Group
Pattern 1 Submarine Ka-Class eliteSubmarine Ka-ClassSubmarine Ka-Class
Formation 3: Diamond
Formation 5: Line Abreast
Pattern 2 Submarine Ka-Class eliteSubmarine Ka-Class eliteSubmarine Ka-Class elite
Formation 3: Diamond
Formation 5: Line Abreast
Pattern 3 Submarine Ka-ClassSubmarine Ka-ClassSubmarine Ka-Class
Formation 3: Diamond
C
深海前線泊地艦隊 前衛水雷戦隊
Abyssal Front Line Anchorage Fleet
Vanguard Torpedo Squadron
Pattern 1 Light Cruiser Tsu-ClassDestroyer Ha-Class Late ModelDestroyer I-ClassDestroyer I-ClassDestroyer I-Class
Formation 1: Line Ahead
Formation 2: Double Line
Pattern 2 Light Cruiser Tsu-ClassDestroyer Ha-Class Late ModelDestroyer Ha-Class Late ModelDestroyer I-ClassDestroyer I-Class
Formation 1: Line Ahead
Pattern 3 Light Cruiser Tsu-ClassDestroyer Ha-Class Late ModelDestroyer Ha-Class Late ModelDestroyer I-ClassDestroyer I-ClassDestroyer I-Class
Formation 1: Line Ahead
Formation 2: Double Line
D
深海前線泊地艦隊 高速機動部隊
Abyssal Front Line Anchorage Fleet
High Speed Mobile Task Force
Pattern 1 Standard Carrier Wo-Class flagshipHeavy Cruiser Ri-Class eliteHeavy Cruiser Ri-Class eliteLight Cruiser Tsu-ClassDestroyer I-ClassDestroyer I-Class
Formation 2: Double Line
Formation 4: Echelon
AP:67
AS:150
AS+:300
Pattern 2 Standard Carrier Wo-Class flagshipHeavy Cruiser Ri-Class eliteHeavy Cruiser Ri-Class eliteLight Cruiser Tsu-ClassDestroyer Ha-Class Late ModelDestroyer Ha-Class Late Model
Formation 4: Echelon
AP:67
AS:150
AS+:300
E
Pattern 1
F
Pattern 1Choose your route
G
Pattern 1
H
深海港灣兵站 補給船団
Abyssal Port Supply Line
Logistic Fleet
Pattern 1 Transport Ship Wa-ClassTransport Ship Wa-ClassTransport Ship Wa-ClassDestroyer I-ClassDestroyer I-Class
Formation 2: Double Line
Pattern 2 Transport Ship Wa-ClassTransport Ship Wa-ClassTransport Ship Wa-ClassTransport Ship Wa-ClassDestroyer Ro-Class Late ModelDestroyer Ro-Class Late Model
Formation 2: Double Line
Pattern 3 Transport Ship Wa-ClassTransport Ship Wa-ClassTransport Ship Wa-ClassDestroyer I-Class Late ModelDestroyer I-Class
Formation 2: Double Line
Pattern 4 Transport Ship Wa-ClassTransport Ship Wa-ClassTransport Ship Wa-ClassDestroyer Ro-Class Late ModelDestroyer Ro-Class Late Model
Formation 2: Double Line
Pattern 5 Transport Ship Wa-ClassTransport Ship Wa-ClassTransport Ship Wa-ClassDestroyer I-Class Late ModelDestroyer I-Class Late Model
Formation 2: Double Line
I
深海東方増派潛水艦隊 I群
Abyssal Eastern Reinforcement Submarine Fleet
Group I
Pattern 1 Submarine Yo-Class eliteSubmarine Ka-Class eliteSubmarine Ka-Class elite
Formation 3: Diamond
Formation 5: Line Abreast
Pattern 2 Submarine Yo-Class eliteSubmarine Ka-ClassSubmarine Ka-Class
Formation 3: Diamond
Formation 5: Line Abreast
Pattern 3 Submarine Yo-Class flagshipSubmarine Ka-Class eliteSubmarine Ka-Class elite
Formation 3: Diamond
Formation 5: Line Abreast
J
海峽封鎖 深海戦艦部隊
Strait Blockade
Abyssal Battleship Unit
Pattern 1 Battleship Ta-Class eliteBattleship Ta-Class eliteLight Carrier Nu-Class eliteLight Cruiser Tsu-ClassDestroyer I-ClassDestroyer I-Class
Formation 1: Line Ahead
Formation 2: Double Line
AP:46
AS:104
AS+:207
Pattern 2 Battleship Ta-Class eliteBattleship Ta-Class eliteLight Carrier Nu-Class eliteLight Cruiser Tsu-ClassDestroyer Ha-Class Late ModelDestroyer Ha-Class Late Model
Formation 1: Line Ahead
Formation 2: Double Line
AP:46
AS:104
AS+:207
Pattern 3 Battleship Ta-ClassBattleship Ta-ClassLight Carrier Nu-Class eliteLight Cruiser Tsu-ClassDestroyer I-ClassDestroyer I-Class
Formation 1: Line Ahead
AP:46
AS:104
AS+:207
K
深海東方増派潛水艦隊 II群
Abyssal Eastern Reinforcement Submarine Fleet
Group II
Pattern 1 Submarine Yo-Class eliteSubmarine Ka-ClassSubmarine Ka-Class
Formation 3: Diamond
Formation 5: Line Abreast
Pattern 2 Submarine Yo-Class eliteSubmarine Ka-Class eliteSubmarine Ka-Class elite
Formation 3: Diamond
Formation 5: Line Abreast
Pattern 3 Submarine Yo-Class flagshipSubmarine Ka-Class eliteSubmarine Ka-Class elite
Formation 3: Diamond
Formation 5: Line Abreast
L
Battle Avoided
Pattern 1"Must be my imagination" (battle avoided)
M
セイロン島南部 深海佔拠港灣
South Ceylon Island
Abyssal Controlled Harbor
Pattern 1 Harbor Summer PrincessArtillery ImpArtillery ImpPT Imp GroupDestroyer I-ClassTransport Ship Wa-Class
Formation 2: Double Line
AP:36
AS:81
AS+:162
Pattern 2 summer_Harbor Princess Final FormArtillery ImpArtillery ImpLight Cruiser Tsu-ClassPT Imp GroupTransport Ship Wa-Class
Formation 2: Double Line
AP:36
AS:81
AS+:162
N
深海前線葉艦棲泊地 航空隊
Abyssal Frontline Mobile Fleet Anchorage
Air Group
Air Battle Node
Pattern 1 Anchorage Water Demon - Vacation ModeLight Carrier Nu-Class eliteLight Cruiser Tsu-ClassDestroyer Ha-Class Late ModelDestroyer I-ClassDestroyer I-Class
Formation 4: Echelon
Unknown
Pattern 2 German Escort PrincessLight Carrier Nu-Class eliteLight Carrier Nu-Class eliteLight Cruiser Tsu-ClassDestroyer Ha-Class Late ModelDestroyer Ha-Class Late Model
Formation 4: Echelon
Unknown
Pattern 3 Anchorage Water Demon - Vacation ModeLight Carrier Nu-Class eliteLight Carrier Nu-Class eliteLight Cruiser Tsu-ClassDestroyer Ha-Class Late ModelDestroyer Ha-Class Late Model
Formation 4: Echelon
Unknown
Pattern 4 German Escort Princess - DamagedLight Carrier Nu-Class eliteLight Carrier Nu-Class eliteLight Cruiser Tsu-ClassDestroyer Ha-Class Late ModelDestroyer Ha-Class Late Model
Formation 4: Echelon
Unknown
O
深海前線葉艦棲泊地 警備艦隊
Abyssal Frontline Mobile Fleet Anchorage
Defense Fleet
Pattern 1 Battleship Ta-Class eliteHeavy Cruiser Ne-Class eliteHeavy Cruiser Ne-ClassLight Cruiser Tsu-ClassDestroyer Ha-Class Late ModelDestroyer Ha-Class Late Model
Formation 1: Line Ahead
Formation 2: Double Line
Pattern 2 Battleship Ta-Class eliteHeavy Cruiser Ne-Class eliteHeavy Cruiser Ne-Class eliteLight Cruiser Tsu-ClassDestroyer Ha-Class Late ModelDestroyer Ha-Class Late Model
Formation 1: Line Ahead
Formation 2: Double Line
Pattern 3 Battleship Ta-Class eliteHeavy Cruiser Ne-ClassHeavy Cruiser Ne-ClassLight Cruiser Tsu-ClassDestroyer I-ClassDestroyer I-Class
Formation 1: Line Ahead
P
深海前線葉艦棲泊地 航空隊
Abyssal Frontline Mobile Fleet Anchorage
Air Group
Air Battle Node
Pattern 1 Anchorage Water Demon - Vacation ModeLight Carrier Nu-Class eliteLight Cruiser Tsu-ClassDestroyer Ha-Class Late ModelDestroyer I-ClassDestroyer I-Class
Formation 4: Echelon
Unknown
Pattern 2 Anchorage Water Demon - Vacation ModeLight Carrier Nu-Class eliteLight Carrier Nu-Class eliteLight Cruiser Tsu-ClassDestroyer Ha-Class Late ModelDestroyer Ha-Class Late Model
Formation 4: Echelon
Unknown
Pattern 3 German Escort Princess - DamagedLight Carrier Nu-Class eliteLight Carrier Nu-Class eliteLight Cruiser Tsu-ClassDestroyer Ha-Class Late ModelDestroyer Ha-Class Late Model
Formation 4: Echelon
Unknown
Pattern 4 German Escort PrincessLight Carrier Nu-Class eliteLight Carrier Nu-Class eliteLight Cruiser Tsu-ClassDestroyer Ha-Class Late ModelDestroyer Ha-Class Late Model
Formation 4: Echelon
Unknown
Q
深海前線葉艦棲泊地
Abyssal Frontline Mobile Fleet Anchorage
Pattern 1
phase 2
Anchorage Water Demon - Vacation ModeLight Carrier Nu-Class eliteLight Carrier Nu-Class eliteBattleship Ru-Class eliteHeavy Cruiser Ne-ClassHeavy Cruiser Ne-Class
Light Cruiser Tsu-ClassDestroyer Ha-Class Late ModelDestroyer Ha-Class Late ModelDestroyer Ha-Class Late ModelDestroyer I-ClassDestroyer I-Class
Cruising Formation 3: Ring Formation
Unknown
Pattern 2
Final Form
phase 2
Anchorage Water Demon - Vacation ModeLight Carrier Nu-Class eliteLight Carrier Nu-Class eliteBattleship Ru-Class eliteHeavy Cruiser Ne-ClassHeavy Cruiser Ne-Class
Light Cruiser Tsu-ClassDestroyer Ha-Class Late ModelDestroyer Ha-Class Late ModelDestroyer Ha-Class Late ModelDestroyer I-ClassDestroyer I-Class
Cruising Formation 3: Ring Formation
Unknown
Pattern 3
phase 3
German Escort PrincessLight Carrier Nu-Class eliteLight Carrier Nu-Class eliteBattleship Ru-Class eliteHeavy Cruiser Ne-ClassHeavy Cruiser Ne-Class
Light Cruiser Tsu-ClassDestroyer Na-ClassDestroyer Ha-Class Late ModelDestroyer Ha-Class Late ModelDestroyer I-ClassDestroyer I-Class
Cruising Formation 3: Ring Formation
Unknown
Pattern 4
Final Form
phase 3
German Escort Princess - DamagedLight Carrier Nu-Class eliteLight Carrier Nu-Class eliteBattleship Ru-Class eliteHeavy Cruiser Ne-ClassHeavy Cruiser Ne-Class
Light Cruiser Tsu-ClassDestroyer Na-ClassDestroyer Ha-Class Late ModelDestroyer Ha-Class Late ModelDestroyer I-ClassDestroyer I-Class
Cruising Formation 3: Ring Formation
Unknown

Show/Hide Nodes and Enemy Encounters
Nodes and Enemy Encounters
NodePatternXpNode InfoFormAir
A
Battle Avoided
Pattern 1"Must be my imagination" (battle avoided)
B
深海潛水艦隊 前方展開群
Abyssal Submarine Fleet
Frontline Deploymen Group
Pattern 1 Submarine Ka-Class eliteSubmarine Ka-ClassSubmarine Ka-Class
Formation 3: Diamond
Formation 5: Line Abreast
Pattern 2 Submarine Ka-ClassSubmarine Ka-ClassSubmarine Ka-Class
Formation 3: Diamond
C
深海前線泊地艦隊 前衛水雷戦隊
Abyssal Front Line Anchorage Fleet
Vanguard Torpedo Squadron
Pattern 1 Light Cruiser Tsu-ClassDestroyer Ha-Class Late ModelDestroyer I-ClassDestroyer I-ClassDestroyer I-Class
Formation 1: Line Ahead
Formation 2: Double Line
Pattern 2 Light Cruiser Tsu-ClassDestroyer Ha-Class Late ModelDestroyer Ha-Class Late ModelDestroyer I-ClassDestroyer I-Class
Formation 1: Line Ahead
D
深海前線泊地艦隊 高速機動部隊
Abyssal Front Line Anchorage Fleet
High Speed Mobile Task Force
Pattern 1 Standard Carrier Wo-Class flagshipHeavy Cruiser Ri-Class eliteHeavy Cruiser Ri-Class eliteLight Cruiser Tsu-ClassDestroyer I-ClassDestroyer I-Class
Formation 2: Double Line
Formation 4: Echelon
AP:67
AS:150
AS+:300
E
Pattern 1
F
Pattern 1Choose your route
G
Pattern 1
H
深海港灣兵站 補給船団
Abyssal Port Supply Line
Logistic Fleet
Pattern 1 Transport Ship Wa-ClassTransport Ship Wa-ClassTransport Ship Wa-ClassDestroyer I-Class Late ModelDestroyer I-Class
Formation 2: Double Line
Pattern 2 Transport Ship Wa-ClassTransport Ship Wa-ClassTransport Ship Wa-ClassDestroyer I-Class Late ModelDestroyer I-Class Late Model
Formation 2: Double Line
Pattern 3 Transport Ship Wa-ClassTransport Ship Wa-ClassTransport Ship Wa-ClassDestroyer I-ClassDestroyer I-Class
Formation 2: Double Line
I
深海東方増派潛水艦隊 I群
Abyssal Eastern Reinforcement Submarine Fleet
Group I
Pattern 1 Submarine Yo-Class eliteSubmarine Ka-ClassSubmarine Ka-Class
Formation 3: Diamond
Formation 5: Line Abreast
J
海峽封鎖 深海戦艦部隊
Strait Blockade
Abyssal Battleship Unit
Pattern 1 Battleship Ta-Class eliteBattleship Ta-Class eliteLight Carrier Nu-Class eliteLight Cruiser Tsu-ClassDestroyer I-ClassDestroyer I-Class
Formation 1: Line Ahead
Formation 2: Double Line
AP:46
AS:104
AS+:207
Pattern 2 Battleship Ta-ClassBattleship Ta-ClassLight Carrier Nu-Class eliteLight Cruiser Tsu-ClassDestroyer I-ClassDestroyer I-Class
Formation 1: Line Ahead
AP:46
AS:104
AS+:207
K
深海東方増派潛水艦隊 II群
Abyssal Eastern Reinforcement Submarine Fleet
Group II
Pattern 1 Submarine Yo-Class eliteSubmarine Ka-ClassSubmarine Ka-Class
Formation 3: Diamond
Formation 5: Line Abreast
L
Battle Avoided
Pattern 1"Must be my imagination" (battle avoided)
M
セイロン島南部 深海佔拠港灣
South Ceylon Island
Abyssal Controlled Harbor
Pattern 1 Harbor Summer PrincessArtillery ImpPT Imp GroupDestroyer I-ClassDestroyer I-ClassTransport Ship Wa-Class
Formation 2: Double Line
AP:36
AS:81
AS+:162
Pattern 2 summer_Harbor Princess Final FormArtillery ImpArtillery ImpPT Imp GroupDestroyer I-ClassTransport Ship Wa-Class
Formation 2: Double Line
AP:36
AS:81
AS+:162
N
深海前線葉艦棲泊地 航空隊
Abyssal Frontline Mobile Fleet Anchorage
Air Group
Air Battle Node
Pattern 1 Anchorage Water Demon - Vacation ModeLight Carrier Nu-Class eliteLight Cruiser Tsu-ClassDestroyer Ha-Class Late ModelDestroyer I-ClassDestroyer I-Class
Formation 4: Echelon
Unknown
Pattern 2 German Escort Princess - DamagedLight Carrier Nu-Class eliteLight Carrier Nu-Class eliteLight Cruiser Tsu-ClassDestroyer Ha-Class Late ModelDestroyer Ha-Class Late Model
Formation 4: Echelon
Unknown
Pattern 3 Anchorage Water Demon - Vacation ModeLight Carrier Nu-Class eliteLight Carrier Nu-Class eliteLight Cruiser Tsu-ClassDestroyer Ha-Class Late ModelDestroyer Ha-Class Late Model
Formation 4: Echelon
Unknown
Pattern 4 German Escort PrincessLight Carrier Nu-Class eliteLight Carrier Nu-Class eliteLight Cruiser Tsu-ClassDestroyer Ha-Class Late ModelDestroyer Ha-Class Late Model
Formation 4: Echelon
Unknown
O
深海前線葉艦棲泊地 警備艦隊
Abyssal Frontline Mobile Fleet Anchorage
Defense Fleet
Pattern 1 Battleship Ta-Class eliteHeavy Cruiser Ne-Class eliteHeavy Cruiser Ne-ClassLight Cruiser Tsu-ClassDestroyer Ha-Class Late ModelDestroyer Ha-Class Late Model
Formation 1: Line Ahead
Formation 2: Double Line
Pattern 2 Battleship Ta-Class eliteHeavy Cruiser Ne-ClassHeavy Cruiser Ne-ClassLight Cruiser Tsu-ClassDestroyer I-ClassDestroyer I-Class
Formation 1: Line Ahead
P
深海前線葉艦棲泊地 航空隊
Abyssal Frontline Mobile Fleet Anchorage
Air Group
Air Battle Node
Pattern 1 Anchorage Water Demon - Vacation ModeLight Carrier Nu-Class eliteLight Cruiser Tsu-ClassDestroyer Ha-Class Late ModelDestroyer I-ClassDestroyer I-Class
Formation 4: Echelon
Unknown
Pattern 2 German Escort PrincessLight Carrier Nu-Class eliteLight Carrier Nu-Class eliteLight Cruiser Tsu-ClassDestroyer Ha-Class Late ModelDestroyer Ha-Class Late Model
Formation 4: Echelon
Unknown
Q
深海前線葉艦棲泊地
Abyssal Frontline Mobile Fleet Anchorage
Enemy Combined Fleet
Pattern 1
phase 2
Anchorage Water Demon - Vacation ModeLight Carrier Nu-Class eliteLight Carrier Nu-Class eliteBattleship Ru-Class eliteHeavy Cruiser Ri-ClassHeavy Cruiser Ri-Class
Light Cruiser Tsu-ClassDestroyer Ha-Class Late ModelDestroyer Ha-Class Late ModelDestroyer I-ClassDestroyer I-ClassDestroyer I-Class
Cruising Formation 3: Ring Formation
Unknown
Pattern 2
Final Form
phase 2
Anchorage Water Demon - Vacation ModeLight Carrier Nu-Class eliteLight Carrier Nu-Class eliteBattleship Ru-Class eliteHeavy Cruiser Ne-ClassHeavy Cruiser Ne-Class
Light Cruiser Tsu-ClassDestroyer Ha-Class Late ModelDestroyer Ha-Class Late ModelDestroyer I-ClassDestroyer I-ClassDestroyer I-Class
Cruising Formation 3: Ring Formation
Unknown
Pattern 3
phase 3
German Escort PrincessLight Carrier Nu-Class eliteLight Carrier Nu-Class eliteBattleship Ru-Class eliteHeavy Cruiser Ne-ClassHeavy Cruiser Ne-Class
Light Cruiser Tsu-ClassDestroyer Ha-Class Late ModelDestroyer Ha-Class Late ModelDestroyer I-ClassDestroyer I-ClassDestroyer I-Class
Cruising Formation 3: Ring Formation
Unknown
Pattern 4
Final Form
phase 3
German Escort Princess - DamagedLight Carrier Nu-Class eliteLight Carrier Nu-Class eliteBattleship Ru-Class eliteHeavy Cruiser Ne-ClassHeavy Cruiser Ne-Class
Light Cruiser Tsu-ClassDestroyer Ha-Class Late ModelDestroyer Ha-Class Late ModelDestroyer Ha-Class Late ModelDestroyer I-ClassDestroyer I-Class
Cruising Formation 3: Ring Formation
Unknown

Ship drops

NodeShip List
CDestroyersArare Arashio Asashio Kagerou Kasumi Kuroshio Michishio Murasame Ooshio Shigure Shiranui Shiratsuyu Yuudachi
Light CruisersIsuzu Jintsuu Kiso Naka Natori Tama Tatsuta Tenryuu Yura
DDestroyersArare Arashio Asashio Harusame Kagerou Kasumi Kuroshio Maikaze Michishio Murasame Nowaki Ooshio Shigure Shiranui Shiratsuyu Yamagumo Yuudachi
Light CruisersIsuzu Jintsuu Kiso Kuma Nagara Naka Natori Sendai Tama Tatsuta Tenryuu Yura
HDestroyersArare Arashio Asashio Harusame Kagerou Kasumi Kuroshio Maikaze Michishio Murasame Nowaki Ooshio Shigure Shiranui Shiratsuyu Yuudachi
Light CruisersIsuzu Jintsuu Kiso Kuma Nagara Naka Natori Sendai Tama Tatsuta Tenryuu Yura
JDestroyersArare Arashio Asagumo Asashio Hamakaze Harusame Isokaze Kagerou Kasumi Kuroshio Maikaze Michishio Murasame Nowaki Ooshio Oyashio Shigure Shiranui Shiratsuyu Tanikaze Urakaze Yamagumo Yuudachi
Light CruisersIsuzu Jintsuu Kiso Kuma Nagara Naka Natori Sendai Tama Tatsuta Tenryuu Yura
Heavy CruisersKinugasa
MDestroyer EscortsKunashiri Shimushu
DestroyersArare Arashio Asagumo Asashio Hamakaze Harusame Isokaze Kagerou Kasumi Kuroshio Maikaze Michishio Murasame Nowaki Ooshio Oyashio Shigure Shiranui Shiratsuyu Tanikaze Urakaze Yamagumo Yuudachi
Light CruisersIsuzu Jintsuu Kiso Kuma Nagara Naka Natori Sendai Tama Tatsuta Tenryuu Yura
Heavy CruisersKinugasa
Auxiliary ShipsKashima
ODestroyersArare Arashio Asagumo Asashio Hamakaze Harusame Isokaze Kagerou Kasumi Kuroshio Maikaze Michishio Murasame Nowaki Ooshio Oyashio Shigure Shiranui Shiratsuyu Tanikaze Urakaze Yamagumo Yuudachi
Light CruisersIsuzu Jintsuu Kiso Kuma Nagara Naka Natori Sendai Tama Tatsuta Tenryuu Yura
Heavy CruisersKinugasa
QDestroyer EscortsKunashiri Shimushu
DestroyersAkatsuki Akebono Amatsukaze Arare Arashio Asashimo Asashio Ayanami Fubuki Fumizuki Harusame Hatsuharu Hatsukaze Hatsushimo Hatsuyuki Hibiki Ikazuchi Inazuma Isonami Kagerou Kasumi Kikuzuki Kisaragi Kishinami Kuroshio Michishio Mikazuki Miyuki Mochizuki Murakumo Murasame Mutsuki Naganami Nagatsuki Nenohi Oboro Okinami Ooshio Oyashio Samidare Satsuki Sazanami Shigure Shikinami Shiranui Shiratsuyu Shirayuki Suzukaze Tokitsukaze Ushio Wakaba
Light CruisersIsuzu Jintsuu Kiso Naka Natori Ooyodo Sendai Tama Yura
Heavy CruisersAoba Ashigara Atago Chikuma Choukai Furutaka Haguro Kako Kinugasa Kumano Maya Mogami Myoukou Nachi Suzuya Takao Tone
BattleshipsHaruna Hiei Kirishima Kongou Fusou Hyuuga Ise Mutsu Nagato Yamashiro
Light Aircraft CarriersHoushou Kasuga Maru
Auxiliary ShipsKashima


E-4

OoyodoE-4Summer2018.png

Winds of Genova
No map name yet

Information

  • Event Tag:

Boss: Part 1: Transport Phase

  • Hard (): 400TP
  • Medium (): 280TP
  • Easy (): 220TP
  • Casual (): 220TP

Boss: Dock Princess

  • Hard (): 3500HP
  • Medium (): 3500HP
  • Easy (): 3500HP
  • Very Easy (): 3500HP

Key Rewards: Maestrale

Summer2018E-4Banner.png
Summer2018E-4Map.png

Branching rules

E-4 Branching Rules Part 1
Nodes Rules
1
A
  • Meeting ANY of the following FORCES you to A:
    • Carrier Task Force
    • Surface Task Force
  • Meet ANY of the following requirements to go to B:
    • Amount of CA(V) in ESCORT ≥ 2
    • Fleet contains CLT, (F)BB(V), CV(B) or SS(V)
  • Meet ALL of the following requirements to go to D:
    • Do not meet any of the requirements to go to either A or B.
    • Transport Escort
    • MAIN fleet contains CL.
    • Amount of in MAIN DD ≥ 4
    • Amount of in MAIN CAV+CVL ≤ 1
  • Go to D if Single Fleet and fleet only contains DDs.
  • Otherwise, random routing between B and D.
B
D
B
C
  • Meet ANY of the following requirements:
    • Amount of CVL ≥ 2
    • Fleet contains CV(B)
    • Amount of (F)BB(V) ≥ 4
    • Fleet contains SS(V)
D
  • Do not meet the requirements to go to C.
D
E
  • Meet ANY of the following requirements to go to E:
    • Surface Task Force
    • Single fleet AND amount of DD ≤ 1
  • Go to F if Single Fleet AND amount of DD ≥ 2
  • Go to H if Transport Escort.
F
H
F
G
  • Active branching
H
H
I
  • Active branching
J
K
L
  • Pass the LoS check.
M
  • Fail the LoS check.


E-4 Branching Rules Part 2
Nodes Rules
Start
1
  • Combined Fleet
2
  • Single Fleet
Q
P
  • Meet ANY of the following requirements to go to P:
    • Combined Fleet
    • Amount of DD ≥ 2
    • Fleet contains SS(V)
  • Otherwise, go to R.
  • Note: Keep in mind that the above branching rules changes once node V and W are unlocked. Refer to part 3 after that.
R
P
N
  • Meeting ANY of the following FORCES you to N:
    • Fleet contains SS(V)
    • Carrier Task Force
    • Surface Task Force
  • Go to O if amount of DD ≥ 3
  • Otherwise, random routing.
  • Note: Keep in mind that the above branching rules changes once node V and W are unlocked. Refer to part 3 after that.
O


E-4 Branching Rules Part 3
Nodes Rules
Start
1
  • Combined Fleet
2
  • Single Fleet
Q
P
  • Meet ALL of the following requirements to go to W:
    • Amount of DD ≥ 2
    • Amount of Italian ships ≥ 2 OR Fast Fleet
    • Amount of CV(B) ≤ 1
    • Amount of (F)BB(V)+CV(L/B) ≤ 3
    • No SS(V)
  • Meet ALL of the following requirements to go to R instead:
    • Amount of Italian ships ≥ 2 OR Fast Fleet
    • No CL
    • Do not meet the requirement to go to W.
  • Alternatively, meet ALL of the following requirements to go to T:
    • Amount of DD ≥ 2
    • Fleet contains CL
    • Amount of (F)BB(V)+CV(L/B) ≤ 3
    • No SS(V)
  • Otherwise, go to P.
R
T
W
P
N
  • Amount of (F)BB(V)+CV(L/B) ≥ 4 FORCES you to T.
  • If fleet contains SS(V), the amount of ships with both Type 2 Tank(Ka-Mi) and WG42 equipped affects your routing:
    • 2 ships: Go to T
    • 3+ ships: Go to N
    • Anything else: Random routing between N and T.
      • Note: You cannot route to T if node W is not unlocked yet, even if you meet all the requirements!
  • Otherwise, random routing between N and O.
O
T

Branching compositions were reported over the course of the event.

Tips

Important Notice:

The Following map will can be taken advantage of using European ships (Italians), please read all the information carefully from E-4 and E-5 before weighing your options for who to use for this map as playing on E-5 Hard will have additional locks which you'll need enough European ships to complete the map on Hard.

In this Operation you will need to complete a series of steps which will involve doing various tasks based on Ooyodo's notes in order to complete this operation, these include the following:

  1. Complete a transport Operation to drop of transport supplies to North Africa (Node K) (And fight the Battleship Summer Princess (Node L))
  2. Gain Control of the Harbors in Naples (Node O - Harbor Summer Princess)
  3. Eliminate the Submarines to the West (Node R)
  4. Gain Control of the Supply Depot in Taranto (Node S - Supply Depot Princess (Vacation Mode) (Optional, but recommend))
  5. Gain Control of the Docks at Genova and eliminate the Dock Princess (Node U)

You will also have 3 LBAS available for this map but can only use 2 of them. If you are playing on Normal or Hard difficulty, you will need to set up your 3rd LBAS to do Air Defense again enemy air raids that will attack your base.

LBAS Recommendations'

LBAS 3 - 4 Interceptors or 3 Interceptors + 1 Saiun

Transport Operation to North Africa

Recommended Fleet

Option 1: Transport Combined Fleet - 1 CVL (CVE), 1 CL, 4 DD + 1 CL, 1 CA, 4 DD
Option 2: Single Fleet - 6 DD

Path: - D - H - I - K - L

As like most Transport Operations, it's recommend to organized a fleet that can care a health balance of combat gear and Transport equipment to help complete the operation

The major things to remember when playing this map is the advantages and disadvantage of each of the fleet

Transport combined Fleet

  • + Will deplete transport gauge faster
  • - Will however use more ships that will be tagged to this map
  • - May present possible accuracy issues and take possible damage, when fighting PT Imp Groups in Node D

Single Fleet

  • + Can use Vanguard Formation to evade attacks
  • + Will allow you to use less ships to complete the operation
  • - Will deplete TP Gauge a little slower
  • - May present possible issues over at Node I due to lack of Air power if you use an all DD group

Which ever fleet type you choose be sure to remember the following:

  • With a Transport Combined Fleet, you can use the main fleet to carry lots of Daihatsu and Drum Canister while your escort fleet can focus on combat.
  • With a single fleet, you will need to be careful how you organize your fleet so they can meet both LoS requirements and bring still care some transport goods and reach the boss node to fight and at least secure an A rank.

Since you'll face PT imps along the way to the boss, consider bringing AA guns if you use a transport combined fleet or use Vanguard to survive the torpedo attacks.

The node with the Carrier should be manageable with a CVL in a transport combined fleet, while with a single fleet you may need to vanguard you way to survive the battle.

Once you reach the boss you'll face the Battleship Summer Princess who will be in a combined fleet.

Depending on the difficulty she may or may not have an additional Battleship Princess during the battle, but since her entire fleet will lack in any air power, gain air superiority should be easy if you bring a CVL in your fleet, and should allow you to use a full on LBAS bomber unit to attack the boss at full force making gaining an A rank easy to do and might open for a chance for an S rank as well.

LBAS Recommendations

LBAS 1 & 2 - 4 LBAS Bobmers / Torpedo Bombers (Distance of 6 Required)

Repeat until you successfully deplete the TP gauge which will then open up the 2nd starting point which will allow for your single fleet to do the next objectives.

With your new starting point, you will now proceed to launch an attack on Naples (Node O) and some submarine to the West (Node R)

Gain Control of the Harbors in Naples (Node O - Harbor Summer Princess)

Recommended Fleet: Single Fleet - 2 FBB, 3 DD, 1 CV

Path: J - Q - P - O

In this fight, you will need to organize a fleet that can specialize in Anti-Installation Combat while maintaining strong air power as you will be going through a series of carrier battles + an air strike before reaching the boss. Bringing an AACI DD can help with clearing out some of the planes in the air attacks improving your chances of survival.

In addition to this, you may want to also bring some AA guns to help with dealing with PT imps at the Target node.

Node O will have a Harbor Summer Princess along with some CVL and some Artillry Imps and PT Imp Groups, bringing and LBAS with a good mixuture of fighters and bombers can help reduce the air power along with allowing your bombers to bomb effiecently against the enemies present at the node. If all goes well it can be possible to wipe out the imps before the fight commences making for an easier chance at successfully completing the objective.

An A rank is needed at minimum to complete the requirement.

LBAS Recommendation

LBAS 1 - 2 Fighter/ LBAS Fighters + 2 LBAS bombers (Distance 6 Needed) LBAS 1 - 1 Fighter/ LBAS Fighters + 3 LBAS bombers (Distance 6 Needed)

Eliminate the Submarines to the West (Node R)

Recommended Fleet: Single Fleet - 2 FBB, 2 DD, 2 CV/CVL

Path: J - Q - R

For section, you may not need your LBAS here so consider putting them on standby or evacuate from the land base to protect them from possible damage on higher difficulties.

If possible, consider bringing your ASW CVL you may have used on the transport phase along with some pre-ASW DD and bring enough air power to overcome the air attack. Once you reach the node R, you'll have a small group of submarines to take out. All which should be easily beatable with your Pre-ASW DDs.

An A rank is needed at minimum to complete the requirement.

Once both Node R and O are successfully completed the path to Node S and the Boss node (through Node T) will be open

Gain Control of the Supply Depot in Taranto (Node S - Supply Depot Princess (Vacation Mode) (Optional, but recommend))

Recommended Fleet

Surface Task Force - 2 (F)BB. 3 CA, 1 CVL + 1 CL, 5 DD

Path: A - B - D - E - F - G - S

Once again, your fleet will need to be organized to do another Anti installation assault against the Supply Depot Princess at Taranto (Node S). So remember to bring Type 3 Shell, AP Shells, WG42, various Daihatsu equipment and Type 2 Ka-Mi Tanks. Using a CVL will help you by pass the Carrier Summer Demon so that you can have your LBAS focus on concentrating all thier attacks on Node S.

Outside of the sub fight at the start, the rest of the battles should be straight forward as you make your way to the target node. Boss itself will be a combined fleet consisting transports, destroyers, some Artillery Imps, Airfield Princesses and the Supply Depot Princess. With some decent air power and some strong LBAS you shouldn't have much of a problem wiping out the smaller units along with possibly eliminating some of the Artillery Imps and weaken down some of the installations.

LBAS 1 - 1 Fighter/ LBAS Fighters + 3 LBAS bombers (Distance 5 Needed) LBAS 2 - 4 LBAS bombers (Distance 5 Needed)

If possible try to eliminate at least 8 out of the 12 units to successfully score an A rank.

Once this condition is complete an alternative path to node U (Re-class Route) is then open.

Gain Control of the Docks at Genova and eliminate the Dock Princess (Node U)

Recommended Fleet Composition: 2 (F)BB(V), 1 CV, 1 CA, 2 DD

Path: J - Q - W - V - U

Recommended Fleet Composition: 6 SS

Path: J - Q - T - U or J - Q - P - T - U (Depending on how many WG42 and Type 2 Ka-Mi Tank you bring

During the final part of the operation, your fleet will have over come a series of air waves to reach the boss node and you will need a decently strong air power Carrier to help you pull through. If possible, consider CVs like Saratoga or Kaga for this operation (with the former being good to utilize with Night Planes). You Fleet will need to traverse through some carrier attacks, air strikes, and a node to fight against a Battleship Re-class. During these fights, take advantage of the Vanguard formation to hope that the enemy fleet rolls an echelon formation to maximize your chances for survival.

Alternatively you can consider using an all Submarine fleet on this map to go through a path where you may face only some DDs and Tsu-class CLs that may pose a treat to your submarines. If you are able to by pass this you can reach the boss to easily chip away at her HP and can also be used to farm for Gotland on hard mode.

At the boss node you will face the Dock Princess who will be accompanied by a Supply Depot Princess, a few destroyers, and a PT Imp.

During the normal phases, she will have very little air power making it possible to launch a full scale bombing strike from your LBAS making it very possible to wipe out most of the enemies at the start of the fight. However the boss is also very armored and may be difficult to break through on higher difficulty. However the Dock Princess, while she is a Destroyer by code, is treated more like an installation. So the most effective means to take her down will be to use Anti-Installation Equipment.

LBAS Recommendations

LBAS 1 & 2 - 4 LBAS Bobmers (Distance of 8 Required)

So using CA and BBs with Type 3 shells can help and having DDs armed with the ideal combination like Type 2 Ka-Mi Tank, Daihatsu-class Landing Craft (Type 89 Medium Tanks & Marines) and WG42 can be used to help brake through her armor.

Other effective means can be using a Torpedo cut in DD with WG42 to magnify the damage.

However, the most effective way to defeat the boss is by bringing in Italian ships to help aid in battle as they are giving a bonus modifier to thier attacks which can help them get through the boss's armor more efficiently.

The following modifiers are confirmed to through tests against the Dock Princess:

  • Italian Ship: 1.2
  • Type 3 Shell: ~1.428
  • Type 2 Ka-mi Tank: 1.31 ~ 1.51
  • Type 2 Ka-mi Tank (+max): 1.7 ~ 2.16
  • Daihatsu-class Landing Craft (Type 89 Medium Tanks & Marines): 1.37 ~ 2.18
  • Daihatsu-class Landing Craft (Type 89 Medium Tanks & Marines) (+max): 1.25 ~ 2.02
  • Daihatsu: (+6): 1.22 ~ 2.11
  • 11th Tank Regiment: 1.64 ~ 1.86
  • WG42: 1.46 ~ 1.47
  • 11th Tank + WG42 + Kami: 2.24 ~ 2.30
  • 11th Tank + WG42 + Kami (+max): 2.94 ~ 3.17

By using a combination of this equipment and Italian ships you can easily meet the requirements to take down boss with a well place crit.

On final kill, the armor of the princess will increase along with much tougher DD variants and a CVL appearing in the fleet. You can continue to use the same LBAS set up as before to deliver a devastating blow, however you are at risk of possibly losing rank during this since the CVL may be capable of destroying your planes. So if necessary retrain planes rank to improve crit chances.

Outside of this, the boss is mostly the same and with a strong well place crits and either using Italians or proper Anti-installation equipment it may be possible to take down the princess. If you also use Italians remember that you can limit them so that only Gotland's European Fleet can come in to aid you or Des Div 31 in night battle.

And for additional note to hard mode players, please be careful how many Italian ships you use as you may need to use them towards the final map.

The event guides are to be constructed through the respective Event map page guide and reviewed by editor staff / collaboration committee before being approved here. Do not under any circumstance update the guides through this page or attempt to fix them through this page. Please only update guides through their respective sandbox pages.

Show/Hide Nodes and Enemy Encounters
Nodes and Enemy Encounters
NodePatternXpNode InfoFormAir
A
深海地中海艦隊 前衛潛水艦群
Abyssal Mediterranean Fleet
Vanguard Submarine Group
Pattern 1 Submarine Summer PrincessSubmarine Yo-Class eliteSubmarine Yo-Class eliteSubmarine Yo-Class elite
Formation 3: Diamond
Formation 5: Line Abreast
Pattern 2 Submarine Summer PrincessSubmarine Yo-Class eliteSubmarine Yo-Class elite
Formation 3: Diamond
Formation 5: Line Abreast
B
深海地中海艦隊 前衛警戒部隊
Abyssal Mediterranean Fleet
Vanguard Surveillance Unit
Pattern 1 Heavy Cruiser Ne-Class eliteLight Cruiser Tsu-Class eliteDestroyer Ha-Class Late ModelDestroyer Ha-Class Late ModelDestroyer Ha-Class Late ModelDestroyer Ha-Class Late Model
Formation 1: Line Ahead
Formation 2: Double Line
Pattern 2 Heavy Cruiser Ne-Class eliteLight Cruiser Tsu-Class eliteDestroyer Ha-Class Late ModelDestroyer Ha-Class Late ModelDestroyer I-ClassDestroyer I-Class
Formation 1: Line Ahead
Formation 2: Double Line
C
深海地中海艦隊 前衛機動部隊
Abyssal Mediterranean Fleet
Vanguard Mobile Task Force
Pattern 1 Aircraft Carrier Summer DemonLight Carrier Nu-Class flagshipLight Carrier Nu-Class flagshipLight Cruiser Tsu-Class eliteDestroyer Ha-Class Late ModelDestroyer Ha-Class Late Model
Formation 4: Echelon
AP:216
AS:485
AS+:969
Pattern 2 Aircraft Carrier Summer DemonLight Carrier Nu-Class flagshipLight Carrier Nu-Class flagshipLight Cruiser Tsu-Class eliteDestroyer Ha-Class Late ModelDestroyer Ha-Class Late Model
Formation 4: Echelon
AP:176
AS:395
AS+:789
Pattern 3 Aircraft Carrier Summer DemonLight Carrier Nu-Class flagshipLight Carrier Nu-Class flagshipLight Cruiser Tsu-Class eliteDestroyer Ha-Class Late ModelDestroyer Ha-Class Late Model
Formation 4: Echelon
AP:198
AS:446
AS+:891
Pattern 4 Aircraft Carrier Summer DemonLight Carrier Nu-Class eliteLight Carrier Nu-Class eliteLight Cruiser Tsu-Class eliteDestroyer Ha-Class Late ModelDestroyer Ha-Class Late Model
Formation 4: Echelon
AP:165
AS:371
AS+:741
D
深海地中海艦隊 地域警備隊
Abyssal Mediterranean Fleet
Region Guard
Pattern 1 Destroyer Ha-Class Late Model eliteDestroyer Ro-Class Late ModelDestroyer Ro-Class Late ModelPT Imp GroupPT Imp GroupPT Imp Group
Formation 1: Line Ahead
Formation 4: Echelon
Pattern 2 Destroyer Ha-Class Late Model eliteDestroyer Ro-Class Late ModelDestroyer Ro-Class Late ModelPT Imp GroupPT Imp GroupPT Imp Group
Formation 1: Line Ahead
E
Maelstrom Node
Pattern 1Fuel - ?
F
Choose your route
Pattern 1Choose your route
G
深海地中海艦隊 タラント補給船団
Abyssal Mediterranean Fleet
Taranto Supply Fleet
Pattern 1 Transport Ship Wa-Class flagshipTransport Ship Wa-Class flagshipLight Cruiser Ho-Class flagshipDestroyer Ro-Class Late Model eliteDestroyer Ro-Class Late ModelDestroyer Ro-Class Late Model
Formation 2: Double Line
Formation 4: Echelon
Pattern 2 Transport Ship Wa-Class flagshipTransport Ship Wa-Class flagshipLight Cruiser Ho-Class flagshipDestroyer Ro-Class Late Model eliteDestroyer Ro-Class Late Model eliteDestroyer Ro-Class Late Model elite
Formation 2: Double Line
H
Choose your route
Pattern 1Choose your route
I
深海地中海艦隊 軽空母部隊a群
Abyssal Mediterranean Fleet
Light Carrier Fleet a group
Pattern 1 Light Carrier Nu-Class flagshipLight Carrier Nu-Class eliteLight Cruiser Tsu-Class eliteDestroyer Ha-Class Late ModelDestroyer Ha-Class Late ModelDestroyer Ha-Class Late Model
Formation 2: Double Line
Formation 4: Echelon
AP:109
AS:245
AS+:489
Pattern 2 Light Carrier Nu-Class flagshipLight Cruiser Tsu-Class eliteDestroyer Ha-Class Late ModelDestroyer Ha-Class Late ModelDestroyer Ha-Class Late ModelDestroyer Ha-Class Late Model
Formation 2: Double Line
Formation 4: Echelon
AP:63
AS:141
AS+:282
J
深海地中海艦隊 軽空母部隊b群
Abyssal Mediterranean Fleet
Light Carrier Fleet b group
Pattern 1 Light Carrier Nu-Class eliteLight Carrier Nu-Class eliteLight Cruiser Tsu-Class eliteDestroyer Ha-Class Late ModelDestroyer Ha-Class Late ModelDestroyer Ha-Class Late Model
Formation 2: Double Line
Formation 4: Echelon
AP:92
AS:207
AS+:414
Pattern 2 Light Carrier Nu-Class flagshipLight Cruiser Tsu-Class eliteDestroyer Ha-Class Late ModelDestroyer Ha-Class Late ModelDestroyer I-ClassDestroyer I-Class
Formation 2: Double Line
Formation 4: Echelon
AP:63
AS:141
AS+:282
K
Transport Drop-Off Node
Pattern 1 Transport drop-off
L
深海地中海艦隊 戦艦戦隊
Abyssal Mediterranean Fleet
Battleship Squadron
Enemy Combined Fleet
Pattern 1 Battleship Summer PrincessLight Carrier Nu-Class flagshipHeavy Cruiser Ri-Class flagshipHeavy Cruiser Ri-Class flagshipHeavy Cruiser Ri-Class flagshipLight Cruiser Tsu-Class elite
Destroyer Ha-Class Late Model eliteDestroyer Ha-Class Late ModelDestroyer Ha-Class Late ModelDestroyer Ha-Class Late ModelDestroyer I-ClassDestroyer I-Class
Cruising Formation 4: Battle Formation
AP:100
AS:225
AS+:450
Pattern 2 Battleship Summer PrincessBattleship Summer PrincessLight Carrier Nu-Class flagshipHeavy Cruiser Ri-Class flagshipHeavy Cruiser Ri-Class flagshipLight Cruiser Tsu-Class elite
Destroyer Ha-Class Late Model eliteDestroyer Ha-Class Late ModelDestroyer Ha-Class Late ModelDestroyer Ha-Class Late ModelDestroyer I-ClassDestroyer I-Class
Cruising Formation 4: Battle Formation
AP:100
AS:225
AS+:450
M
Battle Avoided
Pattern 1"Must be my imagination" (battle avoided)
N
深海地中海艦隊 マルタ島兵站線
Abyssal Mediterranean Fleet
Malta Logistic Line
Pattern 1 Transport Ship Wa-Class flagshipTransport Ship Wa-Class flagshipLight Cruiser He-Class flagshipDestroyer Ro-Class Late Model eliteDestroyer Ro-Class Late ModelDestroyer Ro-Class Late Model
Formation 2: Double Line
Formation 4: Echelon
Pattern 2 Transport Ship Wa-Class flagshipTransport Ship Wa-Class flagshipLight Cruiser He-Class flagshipDestroyer Ro-Class Late Model eliteDestroyer Ro-Class Late Model eliteDestroyer Ro-Class Late Model elite
Formation 2: Double Line
O
深海地中海艦隊 ナポリ佔拠集団
Abyssal Mediterranean Fleet
Naples Controlled Group
Pattern 1 summer_Harbor Princess Final FormLight Carrier Nu-Class flagshipArtillery ImpArtillery ImpPT Imp GroupPT Imp Group
Formation 4: Echelon
AP:164
AS:369
AS+:738
Pattern 2 summer_Harbor Princess Final FormLight Carrier Nu-Class flagshipLight Carrier Nu-Class flagshipArtillery ImpArtillery ImpPT Imp Group
Formation 4: Echelon
AP:264
AS:594
AS+:1188
P
深海潛水艦マルタ島集団 II群
Abyssal Malta Island Submarine Group
Group II
Pattern 1 Submarine So-Class flagshipSubmarine Ka-Class eliteSubmarine Ka-Class elite
Formation 3: Diamond
Formation 5: Line Abreast
Pattern 2 Submarine So-Class flagshipSubmarine Ka-Class eliteSubmarine Ka-Class eliteSubmarine Ka-Class elite
Formation 3: Diamond
Formation 5: Line Abreast
Pattern 3 Submarine So-Class flagshipSubmarine So-Class flagshipSubmarine Ka-Class eliteSubmarine Ka-Class elite
Formation 3: Diamond
Q
深海地中海艦隊 基地航空隊
Abyssal Mediterranean Fleet
Air Base Group
Air Battle Node
Pattern 1 Dock PrincessSupply Depot Princess - Vacation ModeAirfield PrincessAirfield PrincessPT Imp GroupTransport Ship Wa-Class elite
Formation 4: Echelon
AP:87
AS:195
AS+:390
Pattern 2 Dock Princess - DamagedSupply Depot Princess - Vacation Mode - DamagedAirfield PrincessAirfield PrincessAirfield PrincessPT Imp Group
Formation 4: Echelon
AP:110
AS:246
AS+:492
Pattern 3 Dock PrincessSupply Depot Princess - Vacation ModeAirfield PrincessAirfield PrincessPT Imp GroupTransport Ship Wa-Class elite
Formation 4: Echelon
AP:100
AS:225
AS+:450
R
深海潛水艦マルタ島集団 I群
Abyssal Malta Island Submarine Group
Group I
Pattern 1 Submarine So-Class flagshipSubmarine Ka-Class eliteSubmarine Ka-Class elite
Formation 3: Diamond
Formation 5: Line Abreast
Pattern 2 Submarine So-Class flagshipSubmarine Ka-Class eliteSubmarine Ka-Class eliteSubmarine Ka-Class elite
Formation 3: Diamond
Formation 5: Line Abreast
Pattern 3 Submarine So-Class flagshipSubmarine So-Class flagshipSubmarine Ka-Class eliteSubmarine Ka-Class elite
Formation 3: Diamond
S
深海地中海艦隊 タラント集積拠點
Abyssal Mediterranean Fleet
Taranto Occupied Supply Depot
Enemy Combined Fleet
Pattern 1 Supply Depot Princess - Vacation Mode - DamagedAirfield PrincessArtillery ImpArtillery ImpArtillery ImpTransport Ship Wa-Class elite
Light Cruiser Ho-Class flagshipDestroyer Ro-Class Late Model eliteTransport Ship Wa-Class eliteTransport Ship Wa-Class eliteDestroyer Ro-Class Late ModelDestroyer Ro-Class Late Model
Cruising Formation 4: Battle Formation
AP:46
AS:102
AS+:204
Pattern 2 Supply Depot Princess - Vacation Mode - DamagedAirfield PrincessAirfield PrincessArtillery ImpArtillery ImpTransport Ship Wa-Class elite
Light Cruiser Ho-Class flagshipDestroyer Ro-Class Late Model eliteTransport Ship Wa-Class eliteTransport Ship Wa-Class eliteDestroyer Ro-Class Late ModelDestroyer Ro-Class Late Model
Cruising Formation 4: Battle Formation
AP:78
AS:174
AS+:348
T
深海地中海艦隊 増派機動部隊
Abyssal Mediterranean Fleet
Reinforcement Mobile Task Foce
Pattern 1 Aircraft Carrier Summer PrincessBattleship Ta-Class flagshipBattleship Ta-Class flagshipLight Cruiser Tsu-Class eliteDestroyer Na-Class eliteDestroyer Na-Class elite
Formation 1: Line Ahead
Formation 2: Double Line
AP:77
AS:173
AS+:345
Pattern 2 Aircraft Carrier Summer PrincessBattleship Ta-Class flagshipBattleship Ta-Class flagshipLight Cruiser Tsu-Class eliteDestroyer Ha-Class Late ModelDestroyer Ha-Class Late Model
Formation 1: Line Ahead
Formation 2: Double Line
AP:77
AS:173
AS+:345
U
深海地中海艦隊 ジェノヴァ船渠
Abyssal Mediterranean Fleet
Genoa Docks
Enemy Combined Fleet
Pattern 1 Dock PrincessSupply Depot Princess - Vacation ModeTransport Ship Wa-Class flagshipDestroyer Na-Class Late Model eliteDestroyer Na-Class Late Model elitePT Imp Group
Light Cruiser Tsu-Class eliteDestroyer Na-Class Late Model eliteDestroyer Na-Class Late Model eliteDestroyer Na-Class Late Model eliteDestroyer Ro-Class Late ModelDestroyer Ro-Class Late Model
Cruising Formation 4: Battle Formation
AP:32
AS:72
AS+:144
Pattern 2
Final Form
Dock Princess - DamagedSupply Depot Princess - Vacation Mode - DamagedLight Carrier Nu-Class flagshipDestroyer Na-Class Late Model eliteDestroyer Na-Class Late Model elitePT Imp Group
Light Cruiser Tsu-Class eliteDestroyer Na-Class Late Model eliteDestroyer Na-Class Late Model eliteDestroyer Na-Class Late Model eliteDestroyer Na-Class Late Model eliteDestroyer Na-Class Late Model elite
Cruising Formation 4: Battle Formation
AP:100
AS:225
AS+:450
V
深海地中海艦隊 緊急展開部隊
Abyssal Mediterranean Fleet
Emergency Deployment Force
Pattern 1 Battleship Re-Class eliteHeavy Cruiser Ne-Class eliteLight Cruiser Tsu-Class eliteDestroyer Na-ClassDestroyer Ro-Class Late ModelDestroyer Ro-Class Late Model
Formation 1: Line Ahead
Formation 3: Diamond
AP:72
AS:161
AS+:321
Pattern 2 Battleship Re-Class eliteHeavy Cruiser Ne-Class eliteLight Cruiser Tsu-ClassDestroyer Na-ClassDestroyer I-ClassDestroyer I-Class
Formation 1: Line Ahead
Formation 3: Diamond
AP:72
AS:161
AS+:321
W
深海地中海艦隊 基地航空隊
Abyssal Mediterranean Fleet
Air Base Group
Air Battle Node
Pattern 1 Dock Princess - DamagedSupply Depot Princess - Vacation Mode - DamagedAirfield PrincessAirfield PrincessAirfield PrincessPT Imp Group
Formation 4: Echelon
AP:110
AS:246
AS+:492
Pattern 2 Dock PrincessSupply Depot Princess - Vacation ModeAirfield PrincessAirfield PrincessPT Imp GroupTransport Ship Wa-Class elite
Formation 4: Echelon
AP:100
AS:225
AS+:450
Pattern 3 Dock PrincessSupply Depot Princess - Vacation ModeAirfield PrincessAirfield PrincessPT Imp GroupTransport Ship Wa-Class elite
Formation 4: Echelon
AP:87
AS:195
AS+:390

Show/Hide Nodes and Enemy Encounters
Nodes and Enemy Encounters
NodePatternXpNode InfoFormAir
A
深海地中海艦隊 前衛潛水艦群
Abyssal Mediterranean Fleet
Vangaurd Submarine Group
Pattern 1 Submarine Summer PrincessSubmarine Yo-Class eliteSubmarine Yo-Class elite
Formation 3: Diamond
Formation 5: Line Abreast
Pattern 2 Submarine Summer PrincessSubmarine Yo-Class eliteSubmarine Yo-Class elite
Formation 3: Diamond
Formation 5: Line Abreast
Pattern 3 Submarine Summer PrincessSubmarine Yo-Class eliteSubmarine Yo-Class elite
Formation 3: Diamond
Formation 5: Line Abreast
B
深海地中海艦隊 前衛警戒部隊
Abyssal Mediterranean Fleet
Vanguard Surveillance Unit
Pattern 1 Heavy Cruiser Ne-Class eliteLight Cruiser Tsu-ClassDestroyer Ha-Class Late ModelDestroyer Ha-Class Late ModelDestroyer I-ClassDestroyer I-Class
Formation 1: Line Ahead
Formation 2: Double Line
Pattern 2 Heavy Cruiser Ne-Class eliteLight Cruiser Tsu-Class eliteDestroyer Ha-Class Late ModelDestroyer Ha-Class Late ModelDestroyer I-ClassDestroyer I-Class
Formation 1: Line Ahead
Formation 2: Double Line
Pattern 3 Heavy Cruiser Ne-ClassLight Cruiser Tsu-ClassDestroyer Ha-Class Late ModelDestroyer Ha-Class Late ModelDestroyer I-ClassDestroyer I-Class
Formation 1: Line Ahead
Formation 2: Double Line
C
深海地中海艦隊 前衛機動部隊
Abyssal Mediterranean Fleet
Vanguard Mobile Task Force
Pattern 1 Aircraft Carrier Summer DemonLight Carrier Nu-Class eliteLight Carrier Nu-Class eliteLight Cruiser Tsu-ClassDestroyer Ha-Class Late ModelDestroyer Ha-Class Late Model
Formation 4: Echelon
AP:165
AS:371
AS+:741
Pattern 2 Aircraft Carrier Summer DemonLight Carrier Nu-Class eliteLight Carrier Nu-Class eliteLight Cruiser Tsu-Class eliteDestroyer Ha-Class Late ModelDestroyer Ha-Class Late Model
Formation 4: Echelon
AP:165
AS:371
AS+:741
Pattern 3 Aircraft Carrier Summer DemonLight Carrier Nu-Class flagshipLight Carrier Nu-Class flagshipLight Cruiser Tsu-Class eliteDestroyer Ha-Class Late ModelDestroyer Ha-Class Late Model
Formation 4: Echelon
AP:176
AS:395
AS+:789
Pattern 4 Aircraft Carrier Summer DemonLight Carrier Nu-Class eliteLight Carrier Nu-Class eliteLight Cruiser Tsu-ClassDestroyer Ha-Class Late ModelDestroyer Ha-Class Late Model
Formation 4: Echelon
AP:135
AS:303
AS+:606
Pattern 5 Aircraft Carrier Summer DemonLight Carrier Nu-Class eliteLight Cruiser Tsu-ClassDestroyer Ha-Class Late ModelDestroyer I-ClassDestroyer I-Class
Formation 4: Echelon
AP:89
AS:200
AS+:399
Pattern 6 Aircraft Carrier Summer DemonLight Carrier Nu-Class eliteLight Carrier Nu-Class eliteLight Cruiser Tsu-ClassDestroyer Ha-Class Late ModelDestroyer Ha-Class Late Model
Formation 4: Echelon
AP:105
AS:236
AS+:471
D
深海地中海艦隊 地域警備隊
Abyssal Mediterranean Fleet
Region Guard
Pattern 1 Destroyer Ha-Class Late Model eliteDestroyer I-ClassDestroyer I-ClassPT Imp GroupPT Imp GroupPT Imp Group
Formation 1: Line Ahead
Formation 3: Diamond
Pattern 2 Destroyer Ha-Class Late Model eliteDestroyer Ro-Class Late ModelDestroyer Ro-Class Late ModelPT Imp GroupPT Imp GroupPT Imp Group
Formation 1: Line Ahead
Pattern 3 Destroyer Ha-Class Late Model eliteDestroyer I-ClassDestroyer I-ClassPT Imp GroupPT Imp GroupPT Imp Group
Formation 1: Line Ahead
E
Maelstrom Node
Pattern 1Fuel - ?
F
Choose your route
Pattern 1Choose your route
G
深海地中海艦隊 タラント補給船団
Abyssal Mediterranean Fleet
Taranto Supply Fleet
Pattern 1 Transport Ship Wa-Class eliteTransport Ship Wa-Class eliteLight Cruiser Ho-Class flagshipDestroyer Ro-Class Late ModelDestroyer Ro-Class Late ModelDestroyer Ro-Class Late Model
Formation 2: Double Line
Formation 4: Echelon
Pattern 2 Transport Ship Wa-Class eliteTransport Ship Wa-Class eliteLight Cruiser Ho-Class flagshipDestroyer Ro-Class Late ModelDestroyer I-ClassDestroyer I-Class
Formation 2: Double Line
Formation 4: Echelon
H
Choose your route
Pattern 1Choose your route
I
深海地中海艦隊 軽空母部隊a群
Abyssal Mediterranean Fleet
Light Carrier Fleet a group
Pattern 1 Light Carrier Nu-Class eliteLight Cruiser Tsu-Class eliteDestroyer Ha-Class Late ModelDestroyer Ha-Class Late ModelDestroyer I-ClassDestroyer I-Class
Formation 2: Double Line
Formation 4: Echelon
AP:46
AS:104
AS+:207
Pattern 2 Light Carrier Nu-Class flagshipLight Cruiser Tsu-Class eliteDestroyer Ha-Class Late ModelDestroyer Ha-Class Late ModelDestroyer Ha-Class Late ModelDestroyer Ha-Class Late Model
Formation 2: Double Line
Formation 4: Echelon
AP:63
AS:141
AS+:282
Pattern 3 Light Carrier Nu-Class eliteLight Cruiser Tsu-ClassDestroyer Ha-Class Late ModelDestroyer Ha-Class Late ModelDestroyer I-ClassDestroyer I-Class
Formation 2: Double Line
Formation 4: Echelon
AP:46
AS:104
AS+:207
J
深海地中海艦隊 軽空母部隊b群
Abyssal Mediterranean Fleet
Light Carrier Fleet b group
Pattern 1 Light Carrier Nu-Class eliteLight Cruiser Tsu-Class eliteDestroyer Ha-Class Late ModelDestroyer I-ClassDestroyer I-ClassDestroyer I-Class
Formation 2: Double Line
Formation 4: Echelon
AP:46
AS:104
AS+:207
Pattern 2 Light Carrier Nu-Class flagshipLight Cruiser Tsu-Class eliteDestroyer Ha-Class Late ModelDestroyer Ha-Class Late ModelDestroyer I-ClassDestroyer I-Class
Formation 2: Double Line
Formation 4: Echelon
AP:63
AS:141
AS+:282
Pattern 3 Light Carrier Nu-Class eliteLight Cruiser Tsu-ClassDestroyer Ha-Class Late ModelDestroyer I-ClassDestroyer I-ClassDestroyer I-Class
Formation 2: Double Line
Formation 4: Echelon
AP:46
AS:104
AS+:207
K
Transport Drop-Off Node
Pattern 1 Transport drop-off
L
深海地中海艦隊 戦艦戦隊
Abyssal Mediterranean Fleet
Battleship Squadron
Enemy Combined Fleet
Pattern 1 Battleship Summer PrincessLight Carrier Nu-Class eliteHeavy Cruiser Ri-Class eliteHeavy Cruiser Ri-Class eliteHeavy Cruiser Ri-Class eliteLight Cruiser Tsu-Class
Destroyer Ha-Class Late ModelDestroyer Ha-Class Late ModelDestroyer Ha-Class Late ModelDestroyer I-ClassDestroyer I-ClassDestroyer I-Class
Cruising Formation 4: Battle Formation
AP:72
AS:162
AS+:324
Pattern 2 Battleship Summer PrincessBattleship Summer PrincessLight Carrier Nu-Class eliteHeavy Cruiser Ri-Class eliteHeavy Cruiser Ri-Class eliteLight Cruiser Tsu-Class
Destroyer Ha-Class Late ModelDestroyer Ha-Class Late ModelDestroyer Ha-Class Late ModelDestroyer I-ClassDestroyer I-ClassDestroyer I-Class
Cruising Formation 4: Battle Formation
AP:72
AS:162
AS+:324
Pattern 3 Battleship Summer PrincessBattleship Summer PrincessLight Carrier Nu-Class eliteHeavy Cruiser Ri-Class eliteLight Cruiser Tsu-ClassDestroyer I-Class
Destroyer Ha-Class Late ModelDestroyer Ha-Class Late ModelDestroyer I-ClassDestroyer I-ClassDestroyer I-ClassDestroyer I-Class
Cruising Formation 4: Battle Formation
AP:16
AS:36
AS+:72
Pattern 4 Battleship Summer PrincessLight Carrier Nu-Class eliteHeavy Cruiser Ri-Class eliteHeavy Cruiser Ri-Class eliteLight Cruiser Tsu-ClassDestroyer I-Class
Destroyer Ha-Class Late ModelDestroyer Ha-Class Late ModelDestroyer I-ClassDestroyer I-ClassDestroyer I-ClassDestroyer I-Class
Cruising Formation 4: Battle Formation
AP:16
AS:36
AS+:72
M
Battle Avoided
Pattern 1"Must be my imagination" (battle avoided)
N
深海地中海艦隊 マルタ島兵站線
Abyssal Mediterranean Fleet
Malta Logistic Line
Pattern 1 Transport Ship Wa-Class eliteTransport Ship Wa-Class eliteLight Cruiser He-Class flagshipDestroyer Ro-Class Late ModelDestroyer I-ClassDestroyer I-Class
Formation 2: Double Line
Formation 4: Echelon
Pattern 2 Transport Ship Wa-Class eliteTransport Ship Wa-Class eliteLight Cruiser He-Class flagshipDestroyer Ro-Class Late ModelDestroyer Ro-Class Late ModelDestroyer Ro-Class Late Model
Formation 2: Double Line
Formation 4: Echelon
O
深海地中海艦隊 ナポリ佔拠集団
Abyssal Mediterranean Fleet
Naples Controlled Group
Pattern 1 summer_Harbor Princess Final FormLight Carrier Nu-Class eliteArtillery ImpArtillery ImpPT Imp GroupPT Imp Group
Formation 4: Echelon
AP:138
AS:311
AS+:621
Pattern 2 summer_Harbor Princess Final FormLight Carrier Nu-Class eliteLight Carrier Nu-Class eliteArtillery ImpArtillery ImpPT Imp Group
Formation 4: Echelon
AP:226
AS:509
AS+:1017
Pattern 3 summer_Harbor Princess Final FormLight Carrier Nu-Class eliteArtillery ImpArtillery ImpPT Imp GroupPT Imp Group
Formation 4: Echelon
AP:122
AS:275
AS+:549
Pattern 4 summer_Harbor Princess Final FormLight Carrier Nu-Class eliteLight Carrier Nu-Class eliteArtillery ImpArtillery ImpPT Imp Group
Formation 4: Echelon
AP:194
AS:437
AS+:873
P
深海潛水艦マルタ島集団 II群
Abyssal Malta Island Submarine Group
Group II
Pattern 1 Submarine So-Class flagshipSubmarine Ka-Class eliteSubmarine Ka-Class elite
Formation 3: Diamond
Formation 5: Line Abreast
Pattern 2 Submarine So-Class eliteSubmarine Ka-Class eliteSubmarine Ka-Class elite
Formation 3: Diamond
Formation 5: Line Abreast
Pattern 3 Submarine So-Class eliteSubmarine Ka-ClassSubmarine Ka-Class
Formation 3: Diamond
Formation 5: Line Abreast
Pattern 4 Submarine So-Class flagshipSubmarine Ka-Class eliteSubmarine Ka-Class eliteSubmarine Ka-Class elite
Formation 3: Diamond
Formation 5: Line Abreast
Q
深海地中海艦隊 基地航空隊
Abyssal Mediterranean Fleet
Air Base Group

Air Battle Node
Pattern 1 Dock PrincessSupply Depot Princess - Vacation ModeAirfield PrincessAirfield PrincessPT Imp GroupTransport Ship Wa-Class
Formation 4: Echelon
AP:76
AS:170
AS+:339
Pattern 2 Dock PrincessSupply Depot Princess - Vacation ModeAirfield PrincessAirfield PrincessPT Imp GroupTransport Ship Wa-Class
Formation 4: Echelon
AP:85
AS:191
AS+:381
Pattern 3 Dock Princess - DamagedSupply Depot Princess - Vacation Mode - DamagedAirfield PrincessAirfield PrincessAirfield PrincessPT Imp Group
Formation 4: Echelon
AP:91
AS:204
AS+:408
R
深海潛水艦マルタ島集団 I群
Abyssal Malta Island Submarine Group
Group I
Pattern 1 Submarine So-Class eliteSubmarine Ka-Class eliteSubmarine Ka-Class elite
Formation 3: Diamond
Formation 5: Line Abreast
Pattern 2 Submarine So-Class flagshipSubmarine Ka-Class eliteSubmarine Ka-Class elite
Formation 3: Diamond
Formation 5: Line Abreast
Pattern 3 Submarine So-Class eliteSubmarine Ka-ClassSubmarine Ka-Class
Formation 3: Diamond
Formation 5: Line Abreast
Pattern 4 Submarine So-Class flagshipSubmarine Ka-Class eliteSubmarine Ka-Class eliteSubmarine Ka-Class elite
Formation 3: Diamond
Formation 5: Line Abreast
S
深海地中海艦隊 タラント集積拠點
Abyssal Mediterranean Fleet
Taranto Occupied Supply Depot
Enemy Combined Fleet
Pattern 1 Supply Depot Princess - Vacation Mode - DamagedAirfield PrincessArtillery ImpArtillery ImpArtillery ImpTransport Ship Wa-Class
Destroyer Ro-Class Late ModelDestroyer Ro-Class Late ModelTransport Ship Wa-Class eliteTransport Ship Wa-Class eliteDestroyer I-ClassDestroyer I-Class
Cruising Formation 4: Battle Formation
AP:32
AS:72
AS+:144
Pattern 2 Supply Depot Princess - Vacation Mode - DamagedAirfield PrincessAirfield PrincessArtillery ImpArtillery ImpTransport Ship Wa-Class elite
Destroyer Ro-Class Late ModelDestroyer Ro-Class Late ModelTransport Ship Wa-Class eliteTransport Ship Wa-Class eliteDestroyer I-ClassDestroyer I-Class
Cruising Formation 4: Battle Formation
AP:64
AS:144
AS+:288
T
深海地中海艦隊 増派機動部隊
Abyssal Mediterranean Fleet
Reinformement Mobile Task Force
Pattern 1 Aircraft Carrier Summer PrincessBattleship Ta-Class eliteBattleship Ta-Class eliteLight Cruiser Tsu-ClassDestroyer Ha-Class Late ModelDestroyer Ha-Class Late Model
Formation 1: Line Ahead
Formation 2: Double Line
AP:77
AS:173
AS+:345
Pattern 2 Aircraft Carrier Summer PrincessBattleship Ta-Class eliteLight Cruiser Tsu-ClassDestroyer Ha-Class Late ModelDestroyer I-ClassDestroyer I-Class
Formation 1: Line Ahead
Formation 2: Double Line
AP:77
AS:173
AS+:345
U
深海地中海艦隊 ジェノヴァ船渠
Abyssal Mediterranean Fleet
Genoa Docks
Enemy Combined Fleet
Pattern 1 Dock PrincessSupply Depot Princess - Vacation ModeDestroyer Na-Class Late ModelDestroyer Na-Class Late ModelPT Imp GroupTransport Ship Wa-Class
Light Cruiser Tsu-ClassDestroyer Na-Class Late ModelDestroyer Na-Class Late ModelDestroyer Ro-Class Late ModelDestroyer I-ClassDestroyer I-Class
Cruising Formation 4: Battle Formation
AP:30
AS:68
AS+:135
Pattern 2
Final Form
Dock Princess - DamagedSupply Depot Princess - Vacation Mode - DamagedLight Carrier Nu-Class eliteDestroyer Na-Class Late ModelDestroyer Na-Class Late ModelPT Imp Group
Light Cruiser Tsu-Class eliteDestroyer Na-Class Late ModelDestroyer Na-Class Late ModelDestroyer Ro-Class Late ModelDestroyer I-ClassDestroyer I-Class
Cruising Formation 4: Battle Formation
AP:88
AS:198
AS+:396
V
深海地中海艦隊 緊急展開部隊
Abyssal Mediterranean Fleet
Emergency Deployment Force
Pattern 1 Battleship Re-ClassHeavy Cruiser Ne-ClassLight Cruiser Tsu-ClassDestroyer Na-ClassDestroyer I-ClassDestroyer I-Class
Formation 1: Line Ahead
Formation 3: Diamond
AP:63
AS:141
AS+:282
Pattern 2 Battleship Re-ClassHeavy Cruiser Ne-ClassLight Cruiser Tsu-ClassDestroyer I-ClassDestroyer I-ClassDestroyer I-Class
Formation 1: Line Ahead
Formation 3: Diamond
AP:63
AS:141
AS+:282
Pattern 3 Battleship Re-Class eliteHeavy Cruiser Ne-Class eliteLight Cruiser Tsu-ClassDestroyer Na-ClassDestroyer I-ClassDestroyer I-Class
Formation 1: Line Ahead
Formation 3: Diamond
AP:72
AS:161
AS+:321
W
深海地中海艦隊 基地航空隊
Abyssal Mediterranean Fleet
Air Base Group
Air Battle Node
Pattern 1 Dock PrincessSupply Depot Princess - Vacation ModeAirfield PrincessAirfield PrincessPT Imp GroupTransport Ship Wa-Class
Formation 4: Echelon
AP:85
AS:191
AS+:381
Pattern 2 Dock Princess - DamagedSupply Depot Princess - Vacation Mode - DamagedAirfield PrincessAirfield PrincessAirfield PrincessPT Imp Group
Formation 4: Echelon
AP:91
AS:204
AS+:408
Pattern 3 Dock PrincessSupply Depot Princess - Vacation ModeAirfield PrincessAirfield PrincessPT Imp GroupTransport Ship Wa-Class
Formation 4: Echelon
AP:76
AS:170
AS+:339

Show/Hide Nodes and Enemy Encounters
Nodes and Enemy Encounters
NodePatternXpNode InfoFormAir
A
深海地中海艦隊 前衛潛水艦群
Abyssal Mediterranean Fleet
Vangaurd Submarine Group
Pattern 1 Submarine Summer PrincessSubmarine Yo-Class eliteSubmarine Yo-Class elite
Formation 3: Diamond
Formation 5: Line Abreast
Pattern 2 Submarine Summer PrincessSubmarine Yo-Class eliteSubmarine Yo-Class elite
Formation 3: Diamond
Formation 5: Line Abreast
Pattern 3 Submarine Summer PrincessSubmarine Ka-ClassSubmarine Ka-Class
Formation 3: Diamond
B
深海地中海艦隊 前衛警戒部隊
Abyssal Mediterranean Fleet
Vanguard Surveillance Unit
Pattern 1 Heavy Cruiser Ne-ClassLight Cruiser Tsu-ClassDestroyer Ha-Class Late ModelDestroyer Ha-Class Late ModelDestroyer I-ClassDestroyer I-Class
Formation 1: Line Ahead
Formation 2: Double Line
Pattern 2 Heavy Cruiser Ne-ClassDestroyer Ha-Class Late ModelDestroyer Ha-Class Late ModelDestroyer I-ClassDestroyer I-ClassDestroyer I-Class
Formation 1: Line Ahead
Pattern 3 Heavy Cruiser Ne-Class eliteLight Cruiser Tsu-ClassDestroyer Ha-Class Late ModelDestroyer Ha-Class Late ModelDestroyer I-ClassDestroyer I-Class
Formation 1: Line Ahead
Formation 2: Double Line
C
深海地中海艦隊 前衛機動部隊
Abyssal Mediterranean Fleet
Mobile Task Force
Pattern 1 Aircraft Carrier Summer DemonLight Carrier Nu-Class eliteLight Carrier Nu-Class eliteLight Cruiser Tsu-ClassDestroyer Ha-Class Late ModelDestroyer Ha-Class Late Model
Formation 4: Echelon
AP:105
AS:236
AS+:471
Pattern 2 Aircraft Carrier Summer DemonLight Cruiser Tsu-ClassDestroyer Ha-Class Late ModelDestroyer Ha-Class Late ModelDestroyer I-ClassDestroyer I-Class
Formation 4: Echelon
AP:73
AS:164
AS+:327
Pattern 3 Aircraft Carrier Summer DemonLight Carrier Nu-Class eliteLight Cruiser Tsu-ClassDestroyer Ha-Class Late ModelDestroyer I-ClassDestroyer I-Class
Formation 4: Echelon
AP:89
AS:200
AS+:399
Pattern 4 Aircraft Carrier Summer DemonLight Carrier Nu-Class eliteLight Carrier Nu-Class eliteLight Cruiser Tsu-ClassDestroyer Ha-Class Late ModelDestroyer Ha-Class Late Model
Formation 4: Echelon
AP:135
AS:303
AS+:606
Pattern 5 Aircraft Carrier Summer DemonLight Carrier Nu-Class eliteLight Carrier Nu-Class eliteLight Cruiser Tsu-ClassDestroyer Ha-Class Late ModelDestroyer Ha-Class Late Model
Formation 4: Echelon
AP:165
AS:371
AS+:741
D
深海地中海艦隊 地域警備隊
Abyssal Mediterranean Fleet
Region Guard
Pattern 1 Destroyer Ro-Class Late Model eliteDestroyer I-ClassDestroyer I-ClassPT Imp GroupPT Imp GroupPT Imp Group
Formation 1: Line Ahead
Formation 3: Diamond
Pattern 2 Destroyer Ha-Class Late Model eliteDestroyer I-ClassDestroyer I-ClassPT Imp GroupPT Imp GroupPT Imp Group
Formation 1: Line Ahead
Pattern 3 Destroyer Ro-Class Late Model eliteDestroyer I-ClassDestroyer I-ClassPT Imp GroupPT Imp Group
Formation 1: Line Ahead
E
Maelstrom Node
Pattern 1Fuel - ?
F
Choose your route
Pattern 1Choose your route
G
深海地中海艦隊 タラント補給船団
Abyssal Mediterranean Fleet
Taranto Supply Fleet
Pattern 1 Transport Ship Wa-Class eliteTransport Ship Wa-Class eliteLight Cruiser Ho-Class flagshipDestroyer Ro-Class Late ModelDestroyer I-ClassDestroyer I-Class
Formation 2: Double Line
Formation 4: Echelon
Pattern 2 Transport Ship Wa-ClassTransport Ship Wa-ClassLight Cruiser Ho-Class flagshipDestroyer Ro-Class Late ModelDestroyer I-ClassDestroyer I-Class
Formation 2: Double Line
Formation 4: Echelon
H
Choose your route
Pattern 1Choose your route
I
深海地中海艦隊 軽空母部隊a群
Abyssal Mediterranean Fleet
Light Carrier Fleet a group
Pattern 1 Light Carrier Nu-Class eliteLight Cruiser Tsu-ClassDestroyer Ha-Class Late ModelDestroyer Ha-Class Late ModelDestroyer I-ClassDestroyer I-Class
Formation 2: Double Line
Formation 4: Echelon
AP:46
AS:104
AS+:207
Pattern 2 Light Carrier Nu-Class eliteLight Cruiser Tsu-ClassDestroyer Ha-Class Late ModelDestroyer Ha-Class Late ModelDestroyer I-ClassDestroyer I-Class
Formation 4: Echelon
AP:16
AS:36
AS+:72
Pattern 3 Light Carrier Nu-Class eliteLight Cruiser Tsu-Class eliteDestroyer Ha-Class Late ModelDestroyer Ha-Class Late ModelDestroyer I-ClassDestroyer I-Class
Formation 2: Double Line
Formation 4: Echelon
AP:46
AS:104
AS+:207
J
深海地中海艦隊 軽空母部隊b群
Abyssal Mediterranean Fleet
Light Carrier Fleet b group
Pattern 1 Light Carrier Nu-Class eliteLight Cruiser Tsu-ClassDestroyer Ha-Class Late ModelDestroyer I-ClassDestroyer I-ClassDestroyer I-Class
Formation 2: Double Line
Formation 4: Echelon
AP:46
AS:104
AS+:207
Pattern 2 Light Carrier Nu-Class eliteLight Cruiser Tsu-ClassDestroyer Ha-Class Late ModelDestroyer I-ClassDestroyer I-ClassDestroyer I-Class
Formation 4: Echelon
AP:16
AS:36
AS+:72
Pattern 3 Light Carrier Nu-Class eliteLight Cruiser Tsu-Class eliteDestroyer Ha-Class Late ModelDestroyer I-ClassDestroyer I-ClassDestroyer I-Class
Formation 2: Double Line
Formation 4: Echelon
AP:46
AS:104
AS+:207
K
Transport Drop-Off Node
Pattern 1 Transport drop-off
L
深海地中海艦隊 戦艦戦隊
Abyssal Mediterranean Fleet
Battleship Squadron
Enemy Combined Fleet
Pattern 1 Battleship Summer PrincessLight Carrier Nu-Class eliteHeavy Cruiser Ri-Class eliteHeavy Cruiser Ri-Class eliteLight Cruiser Tsu-ClassDestroyer I-Class
Destroyer Ha-Class Late ModelDestroyer Ha-Class Late ModelDestroyer I-ClassDestroyer I-ClassDestroyer I-ClassDestroyer I-Class
Cruising Formation 4: Battle Formation
AP:16
AS:36
AS+:72
Pattern 2 Battleship Summer PrincessHeavy Cruiser Ri-Class eliteHeavy Cruiser Ri-Class eliteLight Cruiser Tsu-ClassDestroyer I-ClassDestroyer I-Class
Destroyer Ha-Class Late ModelDestroyer I-ClassDestroyer I-ClassDestroyer I-ClassDestroyer I-ClassDestroyer I-Class
Cruising Formation 4: Battle Formation
Pattern 3 Battleship Summer PrincessBattleship Summer PrincessLight Carrier Nu-Class eliteHeavy Cruiser Ri-Class eliteLight Cruiser Tsu-ClassDestroyer I-Class
Destroyer Ha-Class Late ModelDestroyer Ha-Class Late ModelDestroyer I-ClassDestroyer I-ClassDestroyer I-ClassDestroyer I-Class
Cruising Formation 4: Battle Formation
AP:16
AS:36
AS+:72
M
Battle Avoided
Pattern 1"Must be my imagination" (battle avoided)
N
深海地中海艦隊 マルタ島兵站線
Abyssal Mediterranean Fleet
Malta Logistic Line
Pattern 1 Transport Ship Wa-ClassTransport Ship Wa-ClassLight Cruiser He-Class flagshipDestroyer Ro-Class Late ModelDestroyer I-ClassDestroyer I-Class
Formation 2: Double Line
Formation 4: Echelon
Pattern 2 Transport Ship Wa-Class eliteTransport Ship Wa-Class eliteLight Cruiser He-Class flagshipDestroyer Ro-Class Late ModelDestroyer I-ClassDestroyer I-Class
Formation 2: Double Line
Formation 4: Echelon
O
深海地中海艦隊 ナポリ佔拠集団
Abyssal Mediterranean Fleet
Naples Controlled Group
Pattern 1 summer_Harbor Princess Final FormLight Carrier Nu-Class eliteArtillery ImpArtillery ImpPT Imp GroupPT Imp Group
Formation 4: Echelon
AP:108
AS:243
AS+:486
Pattern 2 summer_Harbor Princess Final FormLight Carrier Nu-Class eliteLight Carrier Nu-Class eliteArtillery ImpArtillery ImpPT Imp Group
Formation 4: Echelon
AP:180
AS:405
AS+:810
Pattern 3 summer_Harbor Princess Final FormLight Carrier Nu-Class eliteLight Carrier Nu-Class eliteArtillery ImpArtillery ImpPT Imp Group
Formation 4: Echelon
AP:194
AS:437
AS+:873
Pattern 4 summer_Harbor Princess Final FormLight Carrier Nu-Class eliteArtillery ImpArtillery ImpPT Imp GroupPT Imp Group
Formation 4: Echelon
AP:122
AS:275
AS+:549
P
深海潛水艦マルタ島集団 II群
Abyssal Malta Island Submarine Group
Group II
Pattern 1 Submarine So-Class eliteSubmarine Ka-ClassSubmarine Ka-Class
Formation 3: Diamond
Formation 5: Line Abreast
Pattern 2 Submarine So-Class eliteSubmarine Ka-Class eliteSubmarine Ka-Class elite
Formation 3: Diamond
Formation 5: Line Abreast
Pattern 3 Submarine So-Class flagshipSubmarine Ka-Class eliteSubmarine Ka-Class elite
Formation 3: Diamond
Formation 5: Line Abreast
Q
深海地中海艦隊 基地航空隊
Abyssal Mediterranean Fleet
Air Base Group
Air Battle Node
Pattern 1 Dock PrincessSupply Depot Princess - Vacation ModeAirfield PrincessPT Imp GroupTransport Ship Wa-ClassTransport Ship Wa-Class
Formation 4: Echelon
AP:50
AS:111
AS+:222
Pattern 2 Dock PrincessSupply Depot Princess - Vacation ModeAirfield PrincessAirfield PrincessTransport Ship Wa-ClassTransport Ship Wa-Class
Formation 4: Echelon
AP:72
AS:162
AS+:324
Pattern 3 Dock Princess - DamagedSupply Depot Princess - Vacation Mode - DamagedAirfield PrincessAirfield PrincessDestroyer Ro-Class Late ModelDestroyer Ro-Class Late Model
Formation 4: Echelon
AP:55
AS:123
AS+:246
R
深海潛水艦マルタ島集団 I群
Abyssal Malta Island Submarine Group
Group I
Pattern 1 Submarine So-Class eliteSubmarine Ka-ClassSubmarine Ka-Class
Formation 3: Diamond
Formation 5: Line Abreast
Pattern 2 Submarine So-Class eliteSubmarine Ka-Class eliteSubmarine Ka-Class elite
Formation 3: Diamond
Formation 5: Line Abreast
Pattern 3 Submarine So-Class flagshipSubmarine Ka-Class eliteSubmarine Ka-Class elite
Formation 3: Diamond
Formation 5: Line Abreast
S
深海地中海艦隊 タラント集積拠點
Abyssal Mediterranean Fleet
Taanto Occupied Supply Deopt
Enemy Combined Fleet
Pattern 1 Supply Depot Princess - Vacation Mode - DamagedAirfield PrincessArtillery ImpArtillery ImpArtillery ImpTransport Ship Wa-Class
Destroyer Ro-Class Late ModelDestroyer Ro-Class Late ModelTransport Ship Wa-ClassTransport Ship Wa-ClassDestroyer I-ClassDestroyer I-Class
Cruising Formation 4: Battle Formation
AP:23
AS:51
AS+:102
Pattern 2 Supply Depot Princess - Vacation Mode - DamagedAirfield PrincessAirfield PrincessArtillery ImpArtillery ImpTransport Ship Wa-Class
Destroyer Ro-Class Late ModelDestroyer Ro-Class Late ModelTransport Ship Wa-ClassTransport Ship Wa-ClassDestroyer I-ClassDestroyer I-Class
Cruising Formation 4: Battle Formation
AP:46
AS:102
AS+:204
T
深海地中海艦隊 増派機動部隊
Abyssal Mediterranean Fleet
Reinforcement Mobile Task Force
Pattern 1 Aircraft Carrier Summer PrincessBattleship Ta-Class eliteLight Cruiser Tsu-ClassDestroyer Ha-Class Late ModelDestroyer I-ClassDestroyer I-Class
Formation 1: Line Ahead
Formation 2: Double Line
AP:77
AS:173
AS+:345
Pattern 2 Aircraft Carrier Summer PrincessBattleship Ta-Class eliteBattleship Ta-Class eliteLight Cruiser Tsu-ClassDestroyer Ha-Class Late ModelDestroyer Ha-Class Late Model
Formation 1: Line Ahead
Formation 2: Double Line
AP:77
AS:173
AS+:345
Pattern 3 Aircraft Carrier Summer PrincessBattleship Ta-Class eliteDestroyer Ha-Class Late ModelDestroyer I-ClassDestroyer I-ClassDestroyer I-Class
Formation 1: Line Ahead
AP:77
AS:173
AS+:345
U
深海地中海艦隊 ジェノヴァ船渠
Abyssal Mediterranean Fleet
Genoa Docks
Enemy Combined Fleet
Pattern 1 Dock PrincessSupply Depot Princess - Vacation ModeDestroyer Ro-Class Late ModelPT Imp GroupTransport Ship Wa-ClassTransport Ship Wa-Class
Light Cruiser Tsu-ClassDestroyer Ro-Class Late ModelDestroyer Ro-Class Late ModelDestroyer I-ClassDestroyer I-ClassDestroyer I-Class
Cruising Formation 4: Battle Formation
AP:27
AS:60
AS+:120
Pattern 2
Final Form
Dock Princess - DamagedSupply Depot Princess - Vacation Mode - DamagedLight Carrier Nu-Class eliteDestroyer Ro-Class Late ModelDestroyer Ro-Class Late ModelPT Imp Group
Light Cruiser Tsu-ClassDestroyer Ro-Class Late ModelDestroyer Ro-Class Late ModelDestroyer Ro-Class Late ModelDestroyer I-ClassDestroyer I-Class
Cruising Formation 4: Battle Formation
AP:72
AS:162
AS+:324
V
深海地中海艦隊 緊急展開部隊
Abyssal Mediterranean Fleet
Emergency Deployment Force
Pattern 1 Battleship Re-ClassHeavy Cruiser Ne-ClassLight Cruiser Tsu-ClassDestroyer I-ClassDestroyer I-ClassDestroyer I-Class
Formation 1: Line Ahead
Formation 3: Diamond
AP:63
AS:141
AS+:282
Pattern 2 Battleship Re-ClassHeavy Cruiser Ne-ClassLight Cruiser Tsu-ClassDestroyer Na-ClassDestroyer I-ClassDestroyer I-Class
Formation 1: Line Ahead
Formation 3: Diamond
AP:63
AS:141
AS+:282
Pattern 3 Battleship Re-ClassHeavy Cruiser Ne-ClassDestroyer I-ClassDestroyer I-ClassDestroyer I-ClassDestroyer I-Class
Formation 1: Line Ahead
AP:63
AS:141
AS+:282
W
深海地中海艦隊 基地航空隊
Abyssal Mediterranean Fleet
Air Base Group
Air Battle Node
Pattern 1 Dock PrincessSupply Depot Princess - Vacation ModeAirfield PrincessAirfield PrincessTransport Ship Wa-ClassTransport Ship Wa-Class
Formation 4: Echelon
AP:72
AS:162
AS+:324
Pattern 2 Dock PrincessSupply Depot Princess - Vacation ModeAirfield PrincessPT Imp GroupTransport Ship Wa-ClassTransport Ship Wa-Class
Formation 4: Echelon
AP:50
AS:111
AS+:222
Pattern 3 Dock Princess - DamagedSupply Depot Princess - Vacation Mode - DamagedAirfield PrincessAirfield PrincessDestroyer Ro-Class Late ModelDestroyer Ro-Class Late Model
Formation 4: Echelon
AP:55
AS:123
AS+:246

Show/Hide Nodes and Enemy Encounters
Nodes and Enemy Encounters
NodePatternXpNode InfoFormAir
A
深海地中海艦隊 前衛潛水艦群
Abyssal Mediterranean Fleet
Vanguard Submarine Group
Pattern 1 Submarine Summer PrincessSubmarine Yo-Class eliteSubmarine Yo-Class elite
Formation 3: Diamond
Formation 5: Line Abreast
Pattern 2 Submarine Summer PrincessSubmarine Ka-ClassSubmarine Ka-Class
Formation 3: Diamond
B
深海地中海艦隊 前衛警戒部隊
Abyssal Mediterranean Fleet
Vanguard Surveillance Unit
Pattern 1 Heavy Cruiser Ne-ClassLight Cruiser Tsu-ClassDestroyer Ha-Class Late ModelDestroyer Ha-Class Late ModelDestroyer I-ClassDestroyer I-Class
Formation 1: Line Ahead
Formation 2: Double Line
Pattern 2 Heavy Cruiser Ne-ClassDestroyer Ha-Class Late ModelDestroyer Ha-Class Late ModelDestroyer I-ClassDestroyer I-ClassDestroyer I-Class
Formation 1: Line Ahead
C
深海地中海艦隊 前衛機動部隊
Abyssal Mediterranean Fleet
Vanguard Mobile Task Force
Pattern 1 Aircraft Carrier Summer DemonLight Cruiser Tsu-ClassDestroyer Ha-Class Late ModelDestroyer Ha-Class Late ModelDestroyer I-ClassDestroyer I-Class
Formation 4: Echelon
AP:73
AS:164
AS+:327
Pattern 2 Aircraft Carrier Summer DemonLight Carrier Nu-Class eliteLight Cruiser Tsu-ClassDestroyer Ha-Class Late ModelDestroyer I-ClassDestroyer I-Class
Formation 4: Echelon
AP:89
AS:200
AS+:399
Pattern 3 Aircraft Carrier Summer DemonLight Carrier Nu-Class eliteLight Carrier Nu-Class eliteLight Cruiser Tsu-ClassDestroyer Ha-Class Late ModelDestroyer Ha-Class Late Model
Formation 4: Echelon
AP:105
AS:236
AS+:471
D
深海地中海艦隊 地域警備隊
Abyssal Mediterranean Fleet
Region Guard
Pattern 1 Destroyer Ro-Class Late Model eliteDestroyer I-ClassDestroyer I-ClassPT Imp GroupPT Imp GroupPT Imp Group
Formation 1: Line Ahead
Formation 3: Diamond
Pattern 2 Destroyer Ro-Class Late Model eliteDestroyer I-ClassDestroyer I-ClassPT Imp GroupPT Imp Group
Formation 1: Line Ahead
E
Maelstrom Node
Pattern 1Fuel - ?
F
Choose your route
Pattern 1Choose your route
G
深海地中海艦隊 タラント補給船団
Abyssal Mediterranean Fleet
Taranto Supply Fleet
Pattern 1 Transport Ship Wa-ClassTransport Ship Wa-ClassLight Cruiser Ho-Class flagshipDestroyer Ro-Class Late ModelDestroyer I-ClassDestroyer I-Class
Formation 2: Double Line
Formation 4: Echelon
Pattern 2 Transport Ship Wa-Class eliteTransport Ship Wa-Class eliteLight Cruiser Ho-Class flagshipDestroyer Ro-Class Late ModelDestroyer I-ClassDestroyer I-Class
Formation 2: Double Line
Formation 4: Echelon
H
Choose your route
Pattern 1Choose your route
I
深海地中海艦隊 軽空母部隊a群
Abyssal Mediterranean Fleet
Light Carrier Fleet a group
Pattern 1 Light Carrier Nu-Class eliteLight Cruiser Tsu-ClassDestroyer Ha-Class Late ModelDestroyer Ha-Class Late ModelDestroyer I-ClassDestroyer I-Class
Formation 2: Double Line
Formation 4: Echelon
AP:46
AS:104
AS+:207
Pattern 2 Light Carrier Nu-Class eliteLight Cruiser Tsu-ClassDestroyer Ha-Class Late ModelDestroyer Ha-Class Late ModelDestroyer I-ClassDestroyer I-Class
Formation 4: Echelon
AP:16
AS:36
AS+:72
J
深海地中海艦隊 軽空母部隊b群
Abyssal Mediterranean Fleet
Light Carrier Fleet b group
Pattern 1 Light Carrier Nu-Class eliteLight Cruiser Tsu-ClassDestroyer Ha-Class Late ModelDestroyer I-ClassDestroyer I-ClassDestroyer I-Class
Formation 2: Double Line
Formation 4: Echelon
AP:46
AS:104
AS+:207
Pattern 2 Light Carrier Nu-Class eliteLight Cruiser Tsu-ClassDestroyer Ha-Class Late ModelDestroyer I-ClassDestroyer I-ClassDestroyer I-Class
Formation 4: Echelon
AP:16
AS:36
AS+:72
K
Transport Drop-Off Node
Pattern 1 Transport drop-off
L
深海地中海艦隊 戦艦戦隊
Abyssal Mediterranean Fleet
Battleship Squadron
Enemy Combined Fleet
Pattern 1 Battleship Summer PrincessHeavy Cruiser Ri-Class eliteLight Cruiser Tsu-ClassDestroyer I-ClassDestroyer I-ClassDestroyer I-Class
Destroyer Ha-Class Late ModelDestroyer I-ClassDestroyer I-ClassDestroyer I-ClassDestroyer I-ClassDestroyer I-Class
Cruising Formation 4: Battle Formation
Pattern 2 Battleship Summer PrincessHeavy Cruiser Ri-Class eliteHeavy Cruiser Ri-Class eliteLight Cruiser Tsu-ClassDestroyer I-ClassDestroyer I-Class
Destroyer Ha-Class Late ModelDestroyer I-ClassDestroyer I-ClassDestroyer I-ClassDestroyer I-ClassDestroyer I-Class
Cruising Formation 4: Battle Formation
M
Battle Avoided
Pattern 1"Must be my imagination" (battle avoided)
N
深海地中海艦隊 マルタ島兵站線
Abyssal Mediterranean Fleet
Malta Logistic Line
Pattern 1 Transport Ship Wa-ClassTransport Ship Wa-ClassLight Cruiser He-Class flagshipDestroyer Ro-Class Late ModelDestroyer I-ClassDestroyer I-Class
Formation 2: Double Line
Formation 4: Echelon
Pattern 2 Transport Ship Wa-Class eliteTransport Ship Wa-Class eliteLight Cruiser He-Class flagshipDestroyer Ro-Class Late ModelDestroyer I-ClassDestroyer I-Class
Formation 2: Double Line
Formation 4: Echelon
O
深海地中海艦隊 ナポリ佔拠集団
Abyssal Mediterranean Fleet
Naples Controlled Group
Pattern 1 summer_Harbor Princess Final FormLight Carrier Nu-Class eliteArtillery ImpArtillery ImpPT Imp GroupPT Imp Group
Formation 4: Echelon
AP:108
AS:243
AS+:486
Pattern 2 summer_Harbor Princess Final FormLight Carrier Nu-Class eliteLight Carrier Nu-Class eliteArtillery ImpArtillery ImpPT Imp Group
Formation 4: Echelon
AP:180
AS:405
AS+:810
P
深海潛水艦マルタ島集団 II群
Abyssal Malta Island Submarine Group
Group II
Pattern 1 Submarine So-Class eliteSubmarine Ka-ClassSubmarine Ka-Class
Formation 3: Diamond
Formation 5: Line Abreast
Q
深海地中海艦隊 基地航空隊
Abyssal Mediterranean Fleet
Air Base Group
Air Battle Node
Pattern 1 Dock PrincessSupply Depot Princess - Vacation ModeAirfield PrincessPT Imp GroupTransport Ship Wa-ClassTransport Ship Wa-Class
Formation 4: Echelon
AP:50
AS:111
AS+:222
Pattern 2 Dock Princess - DamagedSupply Depot Princess - Vacation Mode - DamagedAirfield PrincessAirfield PrincessDestroyer Ro-Class Late ModelDestroyer Ro-Class Late Model
Formation 4: Echelon
AP:55
AS:123
AS+:246
Pattern 3 Dock PrincessSupply Depot Princess - Vacation ModeAirfield PrincessAirfield PrincessTransport Ship Wa-ClassTransport Ship Wa-Class
Formation 4: Echelon
AP:72
AS:162
AS+:324
R
深海潛水艦マルタ島集団 I群
Abyssal Malta Island Submarine Group
Group I
Pattern 1 Submarine So-Class eliteSubmarine Ka-ClassSubmarine Ka-Class
Formation 3: Diamond
Formation 5: Line Abreast
S
深海地中海艦隊 タラント集積拠點
Abyssal Mediterranean Fleet
Taranto Occupied Supply Depot
Enemy Combined Fleet
Pattern 1 Supply Depot Princess - Vacation Mode - DamagedArtillery ImpArtillery ImpArtillery ImpTransport Ship Wa-ClassTransport Ship Wa-Class
Destroyer Ro-Class Late ModelTransport Ship Wa-ClassTransport Ship Wa-ClassDestroyer I-ClassDestroyer I-ClassDestroyer I-Class
Cruising Formation 4: Battle Formation
Pattern 2 Supply Depot Princess - Vacation Mode - DamagedAirfield PrincessArtillery ImpArtillery ImpArtillery ImpTransport Ship Wa-Class
Destroyer Ro-Class Late ModelTransport Ship Wa-ClassTransport Ship Wa-ClassDestroyer I-ClassDestroyer I-ClassDestroyer I-Class
Cruising Formation 4: Battle Formation
AP:23
AS:51
AS+:102
T
深海地中海艦隊 増派機動部隊
Abyssal Mediterranean Fleet
Reinforcement Task Froce
Pattern 1 Aircraft Carrier Summer PrincessBattleship Ta-Class eliteLight Cruiser Tsu-ClassDestroyer Ha-Class Late ModelDestroyer I-ClassDestroyer I-Class
Formation 1: Line Ahead
Formation 2: Double Line
AP:77
AS:173
AS+:345
Pattern 2 Aircraft Carrier Summer PrincessBattleship Ta-Class eliteDestroyer Ha-Class Late ModelDestroyer I-ClassDestroyer I-ClassDestroyer I-Class
Formation 1: Line Ahead
AP:77
AS:173
AS+:345
U
深海地中海艦隊 ジェノヴァ船渠
Abyssal Mediterranean Fleet
Genoa Docks
Enemy Combined Fleet
Pattern 1 Dock PrincessSupply Depot Princess - Vacation ModeDestroyer Ro-Class Late ModelPT Imp GroupTransport Ship Wa-ClassTransport Ship Wa-Class
Destroyer Ro-Class Late ModelDestroyer Ro-Class Late ModelDestroyer I-ClassDestroyer I-ClassDestroyer I-ClassDestroyer I-Class
Cruising Formation 4: Battle Formation
AP:27
AS:60
AS+:120
Pattern 2
Final Form
Dock Princess - DamagedSupply Depot Princess - Vacation Mode - DamagedLight Carrier Nu-Class eliteDestroyer Ro-Class Late ModelDestroyer Ro-Class Late ModelPT Imp Group
Light Cruiser Tsu-ClassDestroyer Ro-Class Late ModelDestroyer Ro-Class Late ModelDestroyer I-ClassDestroyer I-ClassDestroyer I-Class
Cruising Formation 4: Battle Formation
AP:16
AS:36
AS+:72
V
深海地中海艦隊 緊急展開部隊
Abyssal Mediterranean Fleet
Emergency Deployment Force
Pattern 1 Battleship Re-ClassHeavy Cruiser Ne-ClassLight Cruiser Tsu-ClassDestroyer I-ClassDestroyer I-ClassDestroyer I-Class
Formation 1: Line Ahead
Formation 3: Diamond
AP:63
AS:141
AS+:282
Pattern 2 Battleship Re-ClassHeavy Cruiser Ne-ClassDestroyer I-ClassDestroyer I-ClassDestroyer I-ClassDestroyer I-Class
Formation 1: Line Ahead
AP:63
AS:141
AS+:282
W
深海地中海艦隊 基地航空隊
Abyssal Mediterranean Fleet
Air Base Group
Air Battle Node
Pattern 1 Dock PrincessSupply Depot Princess - Vacation ModeAirfield PrincessPT Imp GroupTransport Ship Wa-ClassTransport Ship Wa-Class
Formation 4: Echelon
AP:50
AS:111
AS+:222
Pattern 2 Dock Princess - DamagedSupply Depot Princess - Vacation Mode - DamagedAirfield PrincessAirfield PrincessDestroyer Ro-Class Late ModelDestroyer Ro-Class Late Model
Formation 4: Echelon
AP:55
AS:123
AS+:246
Pattern 3 Dock PrincessSupply Depot Princess - Vacation ModeAirfield PrincessAirfield PrincessTransport Ship Wa-ClassTransport Ship Wa-Class
Formation 4: Echelon
AP:72
AS:162
AS+:324

Ship drops

NodeShip List
FDestroyers
Light Cruisers
Auxiliary Ships
IDestroyers
Light Cruisers
KDestroyers
NDestroyers
Light Cruisers
Auxiliary Ships
ODestroyer Escorts
Destroyers
Light Cruisers
Heavy Cruisers
Battleships
Light Aircraft Carriers
Seaplane Tenders
Submarines


E-5

OoyodoE-5Summer2018.png

Sortie Out! New Operation Rhineburg!
No map name yet

Information

  • Event Tag:

Boss: Part 1 Battleship Summer Princess

  • Hard ():
  • Medium ():
  • Easy ():
  • Very Easy ():

Boss: Part 2 French Battleship Summer Princess

  • Hard ():
  • Medium ():
  • Easy ():
  • Very Easy ():

Boss: Part 3 European Water Princess

  • Hard ():
  • Medium ():
  • Easy ():
  • Very Easy ():

Key Rewards: Nelson

Summer2018E-5Banner.png
Summer2018E-5Map.png

Branching rules

E-5 Branching Rules Part 1
Nodes Rules
A
B
  • Do not meet the requirements to go to D.
D
  • Amount of historical ships ≥ 1/2/4/6 on Casual/Easy/Medium/Hard
  • Or meet ALL of the following requirements:
    • Amount of CV(B) ≤ 2
    • Amount of CLT ≤ 1
D
E
  • Active branching
F
E
G
  • Fail the LoS check.
J
  • Pass the LoS check.
F
H
  • Active branching
I
I
G
  • Fail the LoS check.
J
  • Pass the LoS check.


E-5 Branching Rules Part 2
Nodes Rules
Start
1
  • Carrier Task Force
2
  • Surface Task Force
T
R
  • Amount of historical ships ≥ 0/2/4/6 on Easy/Medium/Hard
    • Note: The amount of historicals needed seems to depend on how many (F)BB(V), CV(L/B) and CLTs you have in your fleet.
  • Or amount of (F)BB(V)+CV(L/B)+CLT ≤ 3
S
  • Do not meet the requirements to go to R.
Q
M
  • Do not meet the requirements to go to P.
P
  • Meet ANY of the following requirements:
    • Fleet contains AV
    • Fleet contains AO
    • Amount of (F)BB(V)+CV(L/B) ≤ 5 (Casual/Easy)
    • Amount of (F)BB(V)+CV(L/B) ≤ 4 (Medium)
    • Amount of (F)BB(V)+CV(L/B) ≤ 3 (Hard)
  • Note: Keep in mind that the above branching rules no longer apply once node Z3 is unlocked. Refer to part 3 after that.
P
K
  • Do not meet the requirements to go to L.
L
  • Meet ANY of the following requirements:
    • Amount of (F)BB(V) ≤ 4 (Casual/Easy)
    • Amount of (F)BB(V) ≤ 3 (Medium)
    • Amount of (F)BB(V) ≤ 2 (Hard)
I
G
  • Failing the LoS check FORCES you to G.
J
  • Do not meet the requirements to go to L.
L
  • Meet ANY of the following requirements:
    • Surface Task Force
    • Fleet contains AO
    • Amount of German+French ships ≥ 2
L
N
  • Go to O if amount of French+German ships ≥ 1?/2/3/4 on Casual/Easy/Medium/Hard
  • Otherwise, random routing.
O


E-5 Branching Rules Part 3
Nodes Rules
Start
1
  • Carrier Task Force (check out Part 1 for skipping node B)
2
  • Surface Task Force (check out Part 2 for skipping node S)
Q
M
  • Meet ALL of the following requirements:
    • No AV
    • No AO
    • Amount of CLT ≤ 2
    • Shortcut must be unlocked. (check out part 2 if shortcut is not unlocked yet)
    • Meet ONE of the following requirements:
      • Amount of DD ≥ 3
      • Amount of (F)BB(V)+CV(L/B) ≥ 6 (Casual/Easy)
      • Amount of (F)BB(V)+CV(L/B) ≥ 5 (Medium)
      • Amount of (F)BB(V)+CV(L/B) ≥ 4 (Hard)
P
  • Do not meet the requirements to go to M.
M
K
  • Do not meet the requirements to go to X.
X
  • Meet ALL of the following requirements:
    • Shortcut must be unlocked.
    • Amount of (F)BB(V) ≤ 2
    • No CV(B)
    • Amount of CVL in MAIN ≤ 1 OR amount of historical ships ≥ ?/?/4/6 on Casual/Easy/Medium/Hard
K
H
  • Meet ALL of the following requirements:
    • Route to H must be unlocked.
    • Amount of (F)BB(V) ≤ 2 OR amount of CL ≥ 2
    • No LHA
I
  • Do not meet the requirements to go to H.
X
Y
  • Meeting ANY of the following requirements FORCES you to Y:
    • Fleet contains SS(V)
    • Fleet contains CV(B) AND Slow Fleet
    • Z3 is not unlocked yet.
    • Do not meet the requirements to go to Z3.
Z3
  • Meet ANY of the following requirements:
    • Surface Task Force AND amount of (F)BB(V)+CV(B) ≤ 2
    • Amount of DE+DD+CL ≥ 5
    • Fast+ Fleet
Y
Z
  • Fail the LoS check.
Z2
  • Pass the LoS check.
Z3
Z
  • Fail the LoS check.
Z2
  • Pass the LoS check.

Branching compositions were reported over the course of the event.

Tips


Before entering into this map on Hard difficulty, please read the following information below as it will vital for your planning for E-1 to E-5

Planning out E-5 for Hard Difficulty

On E-5 the major obstacle that Hard mode players will face is additional locking requirements that none of the other difficulties have. In this operation you will be split up 2 combined fleets to form the two major fleets:

  • Force H
  • Rheinübung Fleet

Within each of the fleets you will need to organize and prepare and reserve a minimum of 24 ships you will be using in the final operation.

These include the following things:

  • 4-5 (F)BB(V)
  • 4-6 CA(V)
  • 2-3 CL
  • 6-9 DD
  • 4-6 CV
  • 1-3 CVL
  • 0-1 AV
  • 0-1 SS(V)
  • Any additional Auxiliary ships like LHA, AOs, ect.
  • At least 12 European ships (British, Italian, German, French and Russian)
    • 6 for Force H * (Low Priority due the significance of the Rheinübung Fleet's European ships requirements.)
    • 6 for Rheinübung Fleet (With at least 4 of them being French and German)

If you are able to meet most of the requirements then you will need to carefully weigh your options on who to bring for each segment as both Force H and Rheinübung Fleet must be carefully planned out.

A critical mistake of using too many European ships in other maps will possibly prevent you from completing hard mode, and may result in a drop in difficulty and / or hunting for additional ships to meet the quota

Steps to completing the Operations in this map'

The following conditions need to be completed in order move forward along the map:

  1. Use the Carrier Task Force (Force H Hard Mode) to defeat the Battleship Summer Princess
  2. Use The Surface Task Force ( Rheinübung Fleet Hard Mode) to defeat the French Battleship Summer Princess
  3. Unlock the path to the European Water Princess (Easy+)
  4. Unlock the alternate path to the European Water Princess
  5. Chipping away at the European Water Princess
  6. Triggering the Debuff for the European Water Princess
  7. Defeating the European Water Princess

The following guide will look at each phase on Hard mode and go downward through easier difficulties as the strategies can vary on lower difficulty levels.

Step 1: Use the Carrier Task Force (Force H Hard Mode) to defeat the Battleship Summer Princess

Recommended Fleet: 4 CV(L)(B), 2 (F)BB(V) + 1 CL, 1-2 CA, 3 DD 0-1 CLT (0(Casual)/2(Easy)/4(Normal)/6(Hard) European Ships needed for best pathing)

Path: C-A-D-E-J or C-A-D-F-I-J (with European Ship requirement) Path: C-A-B-D-E-J or C-A-B-D-F-I-J (without meeting European Ship requirement [May be recommend for planning out the Rheinübung Fleet on Hard Mode)

LBAS Recommendation:

  • LBAS 1: 0-2 Interceptor + 2-4 LBAS Bombers (Depending on difficulty & Equipment)
  • LBAS 2: 0-1 Interceptor + 3-4 LBAS Bombers (Depending on difficulty & Equipment)
  • LBAS 3: 4 LBAS Bombers
  • LBAS 3 Alternative: 3-4 Interceptor + 0-1 Saiun (If using for base defense)
    • Distance of 4 Needed

The first part of the operation is somewhat simple as your fleet will go through a Submarine fleet, followed by a Surface Fleet. Following this you'll have to choose a path, but regardless you will need fight the same Carrier Fleet. While it isn't necessary to go through both paths, it's recommended to at least try it once as beating Node I will contribute to a later part of the mission requirements.

If you can successfully pass these nodes without taking too much damage you'll face the Battleship Summer Princess whose fleet consists of a combined fleet and may include a Heavy Cruiser Summer Princess. Depending on the difficulty, this fleet may or may not have air power.

Overall using a strong LBAS and a strong fleet along with boss support should make short work of the enemy fleets and the boss making the battle easy to complete.

In addition, this area is a good place for farm for German ships and Gotland.

Step 2: Use The Surface Task Force ( Rheinübung Fleet Hard Mode) to defeat the French Battleship Summer Princess

Recommended Fleet varies depending on difficulty

  • Casual/Easy: 4(F)BB(V), 0-1 CA, 0-1 AV, 0-1 CV, 0-2 CVL, 0-1SS(V) + 1CL, 2-4 DD, 1-2 CA, 0-1 AV, 0-1 CLT (1/2 European ships required + more if you choose to bring CVLs and/or CLT)
  • Normal: 3(F)BB(V), 1-2 CA(V), 0-1 AV, 0-1 CV, 0-2 CVL, 0-1SS(V) + 1CL, 2-4 DD, 1-2 CA, 0-1 AV, 0-1 CLT (4 European ships required + more if you choose to bring CVLs and/or CLT)
  • Hard: 2(F)BB(V), 1-2 CA, 0-1 AV, 0-1 CV, 0-2 CVL, 0-1SS(V) + 1CL, 2-4 DD, 1-2 CA, 0-1 AV, 0-1 CLT (5 European ships required + more if you choose to bring CVLs and/or CLT)


Path: U-V-T-R-Q-P-L-O-W (with European Ship requirement + German and French Ships)

LBAS Recommendation

  • LBAS 1-2 (Node W): 1 Interceptor/Fighter + 3 LBAS Bombers or Torpedo Bombers
  • LBAS 3 (Node W): 4 LBAS Bombers or Torpedo Bombers
  • LBAS 3 (Node T): 0-3 Toukai + ASW Bomber or 4 ASW Bomber

On this path your surface task force fleet will have to travel through some sub fleet consisting of the New Submarine Princess which can be a possible issue unless you confront them in a line abreast formation or use a LBAS consisting of ASW plane to help take out subs. Following this, you will encounter a carrier fleet. Depending on the difficulty, this will require you to have relatively high fighter power to either maintain or overcome the air power. A high plane capacity carrier like Intrepid or similar are preferred or bringing 2 CVL in your fleet. Finally, you'll encounter a Surface fleet consisting of battleships, torpedo cruisers, light cruisers, and destroyers which should be easily managed under normal Surface Task Force conditions.

If you choose to bring a submarine in your fleet be aware tat nodes P and L will have lots of small ships that may be ASW capable and could present a possible issue but having a submarine at the boss node will help give you a big advantage compared to other ships.

Once reaching the boss fleet, you will encounter the French Summmer Battleship Princess accompanied by a Summer Harbor Princess, possibly an Airfield Princess (doesn't appear outside final kill on lower difficulties), some Artillery Imps, PT Imp Groups, Destroyers and a light cruiser.

Depending on the difficulty you play and the approach you do, the amount of work required to defeating her will vary. Below are some compositions that can be considered:

Hard:

In this difficulty, you will need everything you can possibly throw at the boss to ensure the greatest chances of success in battle. Your equipment will need to be well modified and prepared so that your ships can attack all enemy units effectively and maximize the damage you can deliver upon them. Bringing a Sub can be risky since the earlier battles present great dangers that can potentially risk the sub sinking in battle, so if you choose this path, bring in route support to minimize your sub's risk of sinking. Boss support is also highly recommended as they will be needed to help eliminate or take out certain enemy units in the battle along with your LBAS.

Since the boss is located close to your air base, you can use interceptors or strong AA type planes in 1 slot of both your first and 2nd air base to help reduce the air power. If you are utilizing the sub strategy, do consider that if you bring too much anti-air and shoot down all of French Summmer Battleship Princess's planes will result in her targeting your fleet rather than your sub.

Carefully consider the placement of AA guns/skilled lookouts for your ships. In the event PT Imps survive the opening attacks they can easily take away shots that could target the big 3 targets. You want to try to reduce the fleet down to just the 3 major targets and do as much damage as you can to the princesses before the Day Battle turn ends.

If all goes well, your friend fleet may be able to pick off at least one installation and leave the other for your Anti-installation ships in the escort fleet to finish off in night battle.

Outside of this, the French Summmer Battleship Princess has armor that exceeds cap levels (312 armor) making it very difficulty to strike through her. She is however most weak to attacks coming from European ships (about 1.2x modifier), so use torpedo cut in set up for your DDs like Tashkent and CAs like Prinz Eugen to hope you score a low armor roll and/or crit which can successfully end the battle.

Medium:

Most of the above mentioned strategies should remain the same, however without the tag restrictions that occur on hard mode. This makes it possible to bring more Heavy hitting ships along with extra European ships without restriction.

Enemy composition should also be weaker and easier to deal with, especially if you have enough European ships in tow with you. Allowing for your fleet to bring more damage buffer ships and be able to fight efficiently without restriction.

The French Summmer Battleship Princess is still heavily armored but does have less armor than on hard mode.

Easy/ Casual

  • 4BB, 1 CV, 1SS(V) + 1CL, 2-3 DD, 2 CA, 1 CLT
  • 4BB, 2CVL + 1CL, 2-3 DD, 2 CA, 1 CLT

Same case, but now with freedom to use a full set of BBs in the main fleet. As mentioned before, European ships are still very helpful here because of the damage multiplier. The French Summmer Battleship Princess's armor should be low enough the a European ship cut in and / or crit from any ship should be more than enough to defeat her if her HP is low.

Once completed, the new boss bar will appear which will then begin the final phase of the battle.

Step 3: Unlock the path to the European Water Princess (Easy+)

Note: If you're playing on Casual, the path to the boss will be already open, so you can disregard this step.

Recommended Fleet: 4 CV(L)(B), 2 (F)BB(V) + 1 CL, 1-2 CA, 3 DD, 0-1 CLT

LBAS: Not Necessary, consider Air Defense or Evacuate for this phase

Path: C-A-D-F-H or C-A-D-F-I (with European Ship requirement)

In this step you'll use your carrier task for to go to Node H and I and defeat some basic enemy fleets. Node H consists of Battleships while I has carriers. Use your fleet to successfully defeat the enemy in each node and score an S rank. Once the condition is met, the new path should be unlocked to the boss.

Step 4: Unlock the alternate path to the European Water Princess

2-4(F)BB(V), 0-1 CA, 0-1 CL, 0-1 CV, 0-2 CVL, + 1CL, 2-5 DD 0-2 DE (ASW Focused)

Path: U-V-T-R-Q-P-L-O-W (with European Ship requirement + German and French Ships) (only consider additional nodes if Land Base Air Raid has not triggered past T consider discontinuing sortie before W)

  • LBAS 1-2 (Node W): 4 Interceptor/Fighter or 3 Interceptor/ Fighter + Saiun (may not need both LBAS depending on equipment + difficulty)
  • LBAS 1-2 (Node K): 4 Interceptor/Fighter or 3 Interceptor/ Fighter + Saiun (may not need both LBAS depending on equipment + difficulty)
  • LBAS 3 (Node T): 0-3 Toukai + 1 ASW Bomber or 4 ASW Bomber

In this operation you will need to complete the following objectives:

  • Defeat the New Submarine Princess fleet at Node T
  • Successfully gain Air Superiority at an LBAS Air Raid (Twice on Medium +, Once on Casual - Easy)
  • Score AS as Node K ( Twice on Hard, Once on Medium)

Bring a Fleet with ASW capable ships and use your fleet along with an ASW LBAS or ASW support fleet to help wipe out the subs at Node T. LBAS air raids should trigger as early as Node T making it possible to consider pulling back after you complete Node T.

Once you completed this step, consider organizing your fleet with two CVL or other ships that can carry Carrier based equipment and travel through node M which will consist of a large group of battleships. Then you will reach an air attack node where you must gain air superiority on. The best way to do this is to send both LBAS that you used for the LBAS Air Raid to Node K as they will be more than sufficient for helping you fleet achieve Air superiority.

Repeat until conditions are met and an alternate path will be open for your surface fleet to travel to the boss.

Step 5: Chipping away at the European Water Princess

  • 2(F)BB(V),2 CA, 2 CVL, + 1CL, 3 DD, 1-2 CA, 0-1 CLT (European ships required to meet the difficulty requirements)

Path: U-V-T-R-Q-M-X-Z3-Z2 (with European Ship requirement)

  • LBAS 1 (Node Z2): 0-2 Fighter + 1-4 LBAS Bombers (more fighters needed depending on difficulty + Equipment)
  • LBAS 2 (Node Z2): 0-1 Fighter + 2-4 LBAS Bombers (more fighters needed depending on difficulty + Equipment)
  • LBAS 3 (Node Z2): 4 LBAS Bombers (more fighters needed depending on difficulty + Equipment)
  • LBAS 3 (Node T): 0-3 Toukai + 1 ASW Bomber or 4 ASW Bombers
    • (Distance of 7 Required)

This path is the shortest path the STF can take to the boss and should arrive with a decent supply of fuel and ammo. Your fleet along with LBAS should be able to damage most enemy units with ease. On higher difficulties, you will have to deal with additional princesses. If necessary, bring boss support to do as much damage as you can to the European Water Princess.

European ships and various European equipment can provide additional modifiers against the boss. Consider this when building your fleet to maximize damage.

Step 6: Triggering the Debuff for the European Water Princess (Recommended for Normal +)

STF - 2(F)BB(V),2 CA, 2 CVL, + 1CL, 3 DD, 1-2 CA, 0-1 CLT (European ships required to meet the difficult requirements)

Path: U-V-T-R-Q-M-X-Z3-Z2 (with European Ship requirement)

CTF - 4 CV(B), 2 (F)BB(V) + 1 CL, 0-2 CA, 3-5 DD 0-1 CLT (European ships required to meet the difficult requirements)

Path: C-A-D-F-H-X-Y-Z2 or C-A-D-F-H-X-Z3-Z2 (with European Ship requirement)

  • LBAS 1 (Node Z2): 0-3 Fighter + 1-4 LBAS Bombers (more fighters needed depending on difficulty + Equipment)
  • LBAS 2 (Node Z2): 0-2 Fighter + 2-4 LBAS Bombers (more fighters needed depending on difficulty + Equipment)
  • LBAS 3 (Node Z2): 0-1 Fighter + 3-4 LBAS Bombers (more fighters needed depending on difficulty + Equipment)

In the final battle against the European Water Princess players on higher difficulties will need to successfully debuff the boss so she can be killed. You will need to complete the following conditions:

  • Score an A rank with the STF
  • Score an A rank with the CTF

Bringing the appropriate fleet will along with a strong Boss support and LBAS should allow you to gain an A rank on lower difficulty, but you may need to have stronger ships like CLT and Topedo Cut in ships for higher difficulties especially on hard where you will face a main fleet of multiple princesses.

If you successfully score an A rank with both fleets, when returning to base, you should hear a confirmation tone indicating you completed the debuff.

Players on Easy and Casual can optionally consider this step as the European Water Princess is weak enough that she should be able to be killed without the help of the debuff.

Step 7: Triggering the Debuff for the European Water Princess

STF - 2(F)BB(V),2 CA, 2 CVL, + 1CL, 3 DD, 1-2 CA, 0-1 CLT (European ships required to meet the difficult requirements, , Recommended for Casual and Easy)

Path: U-V-T-R-Q-M-X-Z3-Z2 (with European Ship requirement)

CTF - 4 CV(B), 2 (F)BB(V) + 1 CL, 0-2 CA, 3-5 DD 0-1 CLT (European ships required to meet the difficult requirements, recommended for Medium and Hard or as an alternative if STF doesn't work)

Path: C-A-D-F-H-X-Y-Z2 or C-A-D-F-H-X-Z3-Z2 (with European Ship requirement)

The final step can be use the very same process that was used in Part 6 if you chose to debuff. As a CTF will be needed to deliver the final blow if you choose to play on Medium and Hard difficulty.

With the debuff in place the boss fleet will be severely weakened and the following damage modifiers will occur:

  • All ships get a 1.5x modifier
  • European Ships get an additional 1.2x modifier
  • 1.3x modifier if Seaplane Bomber or Seaplane Fighter is equipped
  • 1.2x modifier if Type 3 is equipped
  • 1.2 - 1.25x modifier if Dive Bombers is equipped
  • Ark Royal Kai gets a modifier based on the swordfish TB she is equipped.
    • 1.35x - 1.45x if one Swordfish
    • 1.7x if two Swordfish

Take an en route support and Boss support to help successfully reach the boss. Boss fleet should fall easily and with a well place torpedo cut in, you should be able to successfully win the battle.

The event guides are to be constructed through the respective Event map page guide and reviewed by editor staff / collaboration committee before being approved here. Do not under any circumstance update the guides through this page or attempt to fix them through this page. Please only update guides through their respective sandbox pages.

Show/Hide Nodes and Enemy Encounters
Nodes and Enemy Encounters
NodePatternXpNode InfoFormAir
A
深海北大西洋艦隊 機動部隊III群
Abyssal Northern Atlantic Fleet
Task Force Group III
Pattern 1 Battleship Ta-Class flagshipBattleship Ta-Class flagshipHeavy Cruiser Ne-Class eliteLight Cruiser Tsu-Class eliteDestroyer Ni-Class Late ModelDestroyer Ni-Class Late Model
Formation 1: Line Ahead
Formation 2: Double Line
Pattern 2 Standard Carrier Wo-Class flagshipBattleship Ta-Class flagshipHeavy Cruiser Ne-Class eliteLight Cruiser Tsu-Class eliteDestroyer Ni-Class Late ModelDestroyer Ni-Class Late Model
Formation 4: Echelon
AP:56
AS:126
AS+:252
B
北大西洋深海旗艦艦隊 攻撃隊
Northern Atlantic Abyssal Flagship Fleet
Attack Force
Air Battle Node
Pattern 1 European Water PrincessLight Carrier Nu-Class flagshipLight Carrier Nu-Class flagshipHeavy Cruiser Summer PrincessHeavy Cruiser Ne-Class eliteHeavy Cruiser Ne-Class elite
Formation 4: Echelon
AP:230
AS:516
AS+:1032
Pattern 2 European Water PrincessLight Carrier Nu-Class flagshipLight Carrier Nu-Class flagshipLight Carrier Nu-Class eliteHeavy Cruiser Summer PrincessHeavy Cruiser Ne-Class elite
Formation 4: Echelon
AP:300
AS:675
AS+:1350
Pattern 3 European Water Princess - DamagedLight Carrier Nu-Class flagshipLight Carrier Nu-Class flagshipLight Carrier Nu-Class eliteLight Carrier Nu-Class eliteHeavy Cruiser Summer Princess
Formation 4: Echelon
AP:378
AS:849
AS+:1698
C
深海北大西洋艦隊 潛水艦集団
Abyssal Northern Atlantic Fleet
Submarine Group
Pattern 1 Submarine So-Class flagshipSubmarine Ka-Class eliteSubmarine Ka-Class eliteSubmarine Ka-Class elite
Formation 3: Diamond
Formation 5: Line Abreast
Pattern 2 Submarine So-Class flagshipSubmarine Ka-Class eliteSubmarine Ka-Class eliteSubmarine Ka-Class
Formation 3: Diamond
Formation 5: Line Abreast
Pattern 3 Submarine So-Class flagshipSubmarine So-Class flagshipSubmarine Ka-Class eliteSubmarine Ka-Class elite
Formation 3: Diamond
D
Choose your route
Pattern 1Choose your route
E
深海北大西洋艦隊 機動部隊II群
Abyssal Northern Atlantic Fleet
Naval Task Force Group II
Pattern 1 Standard Carrier Wo-Class flagshipLight Carrier Nu-Class flagshipLight Carrier Nu-Class flagshipLight Cruiser Tsu-Class eliteDestroyer Ni-Class Late ModelDestroyer Ni-Class Late Model
Formation 4: Echelon
AP:232
AS:522
AS+:1044
Pattern 2 Standard Carrier Wo-Class flagshipLight Carrier Nu-Class flagshipLight Carrier Nu-Class flagshipLight Cruiser Tsu-Class eliteDestroyer Ni-Class Late ModelDestroyer Ni-Class Late Model
Formation 4: Echelon
AP:256
AS:576
AS+:1152
Pattern 3 Standard Carrier Wo-Class flagshipLight Carrier Nu-Class flagshipHeavy Cruiser Ne-Class eliteLight Cruiser Tsu-Class eliteDestroyer Ni-Class Late ModelDestroyer Ni-Class Late Model
Formation 4: Echelon
AP:128
AS:287
AS+:573
F
Choose your route
Pattern 1Choose your route
G
Battle Avoided
Pattern 1"Must be my imagination" (battle avoided)
H
深海北大西洋艦隊 戦艦戦隊I群
Abyssal Northern Atlantic Fleet
Battleship Squadron Group I
Pattern 1 Battleship Ta-Class flagshipBattleship Ru-Class flagshipBattleship Ru-Class flagshipBattleship Ru-Class flagshipDestroyer Ni-Class Late ModelDestroyer Ni-Class Late Model
Formation 1: Line Ahead
Formation 2: Double Line
Pattern 2 Battleship Ta-Class flagshipBattleship Ru-Class flagshipBattleship Ru-Class flagshipBattleship Ru-Class flagshipDestroyer Ni-Class Late Model eliteDestroyer Ni-Class Late Model elite
Formation 1: Line Ahead
I
深海北大西洋艦隊 機動部隊I群
Abyssal Northern Atlantic Fleet
Naval Task Force Group I
Pattern 1 Standard Carrier Wo-Class flagshipLight Carrier Nu-Class flagshipLight Carrier Nu-Class flagshipLight Cruiser Tsu-Class eliteDestroyer Ni-Class Late ModelDestroyer Ni-Class Late Model
Formation 4: Echelon
AP:256
AS:576
AS+:1152
Pattern 2 Standard Carrier Wo-Class flagshipLight Carrier Nu-Class flagshipLight Carrier Nu-Class flagshipLight Cruiser Tsu-Class eliteDestroyer Ni-Class Late ModelDestroyer Ni-Class Late Model
Formation 4: Echelon
AP:232
AS:522
AS+:1044
Pattern 3 Standard Carrier Wo-Class flagshipLight Carrier Nu-Class flagshipHeavy Cruiser Ne-Class eliteLight Cruiser Tsu-Class eliteDestroyer Ni-Class Late ModelDestroyer Ni-Class Late Model
Formation 4: Echelon
AP:128
AS:287
AS+:573
J
北大西洋深海通商破壊主力部隊
Northern Atlantic Abyssal Commerce Raiding Main Forces
Enemy Combined Fleet
Pattern 1 Battleship Summer PrincessHeavy Cruiser Summer PrincessLight Carrier Nu-Class flagshipDestroyer Na-Class Late Model eliteDestroyer Na-Class Late Model eliteDestroyer Na-Class Late Model elite
Light Cruiser Tsu-Class eliteDestroyer Na-Class Late Model eliteDestroyer Na-Class Late Model eliteDestroyer Na-Class Late Model eliteDestroyer Ni-Class Late ModelDestroyer Ni-Class Late Model
Cruising Formation 4: Battle Formation
AP:100
AS:225
AS+:450
Pattern 2 Battleship Summer PrincessHeavy Cruiser Summer PrincessAircraft Carrier PrincessDestroyer Na-Class Late Model eliteDestroyer Na-Class Late Model eliteDestroyer Na-Class Late Model elite
Light Cruiser Tsu-Class eliteLight Cruiser Tsu-Class eliteDestroyer Na-Class Late Model eliteDestroyer Na-Class Late Model eliteDestroyer Na-Class Late Model eliteDestroyer Na-Class Late Model elite
Cruising Formation 4: Battle Formation
AP:103
AS:231
AS+:462
K
深海北大西洋艦隊 機動部隊群
Abyssal Northern Atlantic Fleet
Mobile Task Force Group
Air Battle Node
Pattern 1 Standard Carrier Wo-Class flagshipLight Carrier Nu-Class flagshipLight Carrier Nu-Class flagshipLight Cruiser Tsu-Class eliteDestroyer Ni-Class Late ModelDestroyer Ni-Class Late Model
Formation 4: Echelon
AP:256
AS:576
AS+:1152
Pattern 2 Standard Carrier Wo-Class flagshipLight Carrier Nu-Class flagshipLight Carrier Nu-Class flagshipLight Cruiser Tsu-Class eliteDestroyer Ni-Class Late ModelDestroyer Ni-Class Late Model
Formation 4: Echelon
AP:232
AS:522
AS+:1044
Pattern 3 Standard Carrier Wo-Class flagshipLight Carrier Nu-Class flagshipLight Carrier Nu-Class flagshipLight Cruiser Tsu-Class eliteDestroyer Ni-Class Late ModelDestroyer Ni-Class Late Model
Formation 4: Echelon
AP:190
AS:428
AS+:855
L
北大西洋深海艦隊 重雷裝戦隊
Northern Atlantic Abyssal Fleet
Elite Torpedo Squadron
Pattern 1 Battleship Ta-Class flagshipTorpedo Cruiser Chi-Class flagshipTorpedo Cruiser Chi-Class flagshipLight Cruiser Tsu-Class eliteDestroyer Ni-Class Late Model eliteDestroyer Ni-Class Late Model elite
Formation 1: Line Ahead
Pattern 2 Battleship Ta-Class flagshipTorpedo Cruiser Chi-Class flagshipTorpedo Cruiser Chi-Class flagshipLight Cruiser Tsu-Class eliteDestroyer Ni-Class Late ModelDestroyer Ni-Class Late Model
Formation 1: Line Ahead
Formation 2: Double Line
M
深海北大西洋艦隊 戦艦戦隊II群
Abyssal Northern Atlantic Fleet
Battleship Squadron Group II
Pattern 1 Battleship Ru-Class flagshipBattleship Ru-Class flagshipBattleship Ru-Class flagshipLight Cruiser Tsu-Class eliteDestroyer Ni-Class Late ModelDestroyer Ni-Class Late Model
Formation 1: Line Ahead
Formation 2: Double Line
Pattern 2 Battleship Ta-Class flagshipBattleship Ta-Class flagshipLight Cruiser He-Class flagshipLight Cruiser Tsu-Class eliteDestroyer Ni-Class Late Model eliteDestroyer Ni-Class Late Model elite
Formation 1: Line Ahead
N
Battle Avoided
Pattern 1"Must be my imagination" (battle avoided)
O
Battle Avoided
Pattern 1"We are approaching the port of Brest, currently under enemy occupation. All ships, prepare for battle! We're charging in! Follow me!" (battle avoided)
P
深海北大西洋艦隊 追撃空母群
Abyssal Northern Atlantic Fleet
Pursuing Carrier Group
Pattern 1 Standard Carrier Wo-Class Kai flagshipLight Carrier Nu-Class flagshipHeavy Cruiser Ne-Class eliteLight Cruiser Tsu-Class eliteDestroyer Ni-Class Late ModelDestroyer Ni-Class Late Model
Formation 4: Echelon
AP:188
AS:423
AS+:846
Pattern 2 Standard Carrier Wo-Class Kai flagshipLight Carrier Nu-Class flagshipHeavy Cruiser Ne-Class eliteLight Cruiser Tsu-Class eliteDestroyer Ni-Class Late ModelDestroyer Ni-Class Late Model
Formation 4: Echelon
AP:184
AS:414
AS+:828
Pattern 3 Standard Carrier Wo-Class flagshipLight Carrier Nu-Class flagshipHeavy Cruiser Ne-Class eliteLight Cruiser Tsu-Class eliteDestroyer Ni-Class Late ModelDestroyer Ni-Class Late Model
Formation 4: Echelon
AP:169
AS:380
AS+:759
Q
Battle Avoided
Pattern 1"The fleet has broken through Scapa Flow... We are now advancing into the North Atlantic front! Fleet, assume defensive formation! Operation Rheinübung Fleet, all ships, prepare for battle!" (battle avoided)
R
Battle Avoided
Pattern 1"The Dover Strait area is blockaded by enemy submarines... The fleet will now proceed north-westward." (battle avoided)
S
深海ドーバー海峽封鎖潛水艦群
Abyssal Dover Strait Blockade
Submarine Group
Pattern 1 Submarine Summer PrincessSubmarine So-Class eliteSubmarine So-Class eliteSubmarine So-Class elite
Formation 3: Diamond
Formation 5: Line Abreast
Pattern 2 Submarine Summer PrincessSubmarine So-Class flagshipSubmarine So-Class eliteSubmarine So-Class elite
Formation 3: Diamond
Formation 5: Line Abreast
Pattern 3 Submarine Summer PrincessSubmarine So-Class flagshipSubmarine So-Class flagshipSubmarine So-Class flagship
Formation 3: Diamond
T
深海北海潛水艦隊集団
Abyssal Northern Water Submarine Group
Pattern 1 New Submarine Princess - Vacation ModeSubmarine So-Class eliteSubmarine So-Class elite
Formation 3: Diamond
Formation 5: Line Abreast
Pattern 2 New Submarine Princess - Vacation ModeSubmarine So-Class eliteSubmarine So-Class eliteSubmarine So-Class elite
Formation 3: Diamond
Formation 5: Line Abreast
Pattern 3 New Submarine Princess - Vacation ModeSubmarine So-Class flagshipSubmarine So-Class eliteSubmarine So-Class elite
Formation 3: Diamond
U
Battle Avoided
Pattern 1"Operation Rheinübung Fleet, sortieing! We will now be entering the North Sea via the Baltic Sea!" (battle avoided)
V
Battle Avoided
Pattern 1"We're breaking through the Skagerrak to the northern front. Stay on submarine alert!" (battle avoided)
W
北大西洋深海艦隊 ブレスト軍港
Northern Atlantic Abyssal Fleet
Brest Naval Port
Enemy Combined Fleet
Pattern 1 French Battleship Princess - Vacation ModeHarbor Summer PrincessAirfield PrincessArtillery ImpArtillery ImpPT Imp Group
Light Cruiser Tsu-Class eliteDestroyer Na-Class Late Model eliteDestroyer Na-Class Late Model eliteTransport Ship Wa-Class elitePT Imp GroupPT Imp Group
Cruising Formation 4: Battle Formation
AP:158
AS:354
AS+:708
Pattern 2 French Battleship Princess - Vacation Mode - Damagedsummer_Harbor Princess Final FormAirfield PrincessArtillery ImpArtillery ImpPT Imp Group
Light Cruiser Tsu-Class eliteDestroyer Na-Class Late Model eliteDestroyer Na-Class Late Model eliteDestroyer Na-Class Late Model elitePT Imp GroupPT Imp Group
Cruising Formation 4: Battle Formation
AP:162
AS:363
AS+:726
X
Battle Avoided
Pattern 1"The Main Abyssal Northern Atlantic fleet has been spotted heading towards Europe. We will now carry out our final assault! Carve the victory in the dawn of horizon." (battle avoided)
Y
北大西洋深海旗艦艦隊 前衛集団
Northern Atlantic Abyssal Flagship Fleet
Vanguard Group
Pattern 1 Light Cruiser He-Class flagshipHeavy Cruiser Ne-Class eliteHeavy Cruiser Ne-Class eliteLight Cruiser Tsu-Class eliteDestroyer Na-Class Late Model eliteDestroyer Na-Class Late Model elite
Formation 1: Line Ahead
Pattern 2 Light Cruiser He-Class flagshipHeavy Cruiser Ne-Class eliteHeavy Cruiser Ne-Class eliteLight Cruiser Tsu-Class eliteDestroyer Na-Class eliteDestroyer Na-Class elite
Formation 1: Line Ahead
Pattern 3 Light Carrier Nu-Class flagshipLight Carrier Nu-Class flagshipLight Cruiser He-Class flagshipLight Cruiser Tsu-Class eliteDestroyer Na-Class eliteDestroyer Na-Class elite
Formation 4: Echelon
AP:176
AS:396
AS+:792
Z
Battle Avoided
Pattern 1"Must be my imagination" (battle avoided)
Z2
北大西洋深海艦隊 旗艦艦隊
Northern Atlantic Abyssal Fleet
Flagship Fleet
Enemy Combined Fleet
Pattern 1 European Water PrincessAircraft Carrier Summer PrincessBattleship Summer PrincessHeavy Cruiser Summer PrincessHeavy Cruiser Ne-Class eliteHeavy Cruiser Ne-Class elite
Light Cruiser He-Class flagshipLight Cruiser Tsu-Class eliteDestroyer Na-Class flagshipDestroyer Na-Class flagshipDestroyer Na-Class flagshipDestroyer Na-Class flagship
Cruising Formation 4: Battle Formation
AP:130
AS:293
AS+:585
Pattern 2 European Water Princess - DamagedAircraft Carrier Summer PrincessAircraft Carrier Summer PrincessBattleship Summer PrincessBattleship Summer PrincessHeavy Cruiser Summer Princess
Light Cruiser He-Class flagshipLight Cruiser Tsu-Class eliteDestroyer Na-Class Late Model flagshipDestroyer Na-Class Late Model flagshipDestroyer Na-Class Late Model flagshipDestroyer Na-Class Late Model flagship
Cruising Formation 4: Battle Formation
AP:214
AS:480
AS+:960
Z3
北大西洋深海旗艦艦隊 攻撃隊
Northern Atlantic Abyssal Flagship Fleet
Attack Force
Pattern 1 European Water PrincessLight Carrier Nu-Class flagshipLight Carrier Nu-Class flagshipLight Carrier Nu-Class eliteHeavy Cruiser Summer PrincessHeavy Cruiser Ne-Class elite
Formation 4: Echelon
AP:300
AS:675
AS+:1350
Pattern 2 European Water Princess - DamagedLight Carrier Nu-Class flagshipLight Carrier Nu-Class flagshipLight Carrier Nu-Class eliteLight Carrier Nu-Class eliteHeavy Cruiser Summer Princess
Formation 4: Echelon
AP:378
AS:849
AS+:1698
Pattern 3 European Water PrincessLight Carrier Nu-Class flagshipLight Carrier Nu-Class flagshipHeavy Cruiser Summer PrincessHeavy Cruiser Ne-Class eliteHeavy Cruiser Ne-Class elite
Formation 4: Echelon
AP:230
AS:516
AS+:1032

Show/Hide Nodes and Enemy Encounters
Nodes and Enemy Encounters
NodePatternXpNode InfoFormAir
A
深海北大西洋艦隊 機動部隊III群
Abyssal Northern Atlantic Fleet
Task Force Group III
Pattern 1 Battleship Ta-Class eliteBattleship Ta-Class eliteHeavy Cruiser Ne-ClassLight Cruiser Tsu-ClassDestroyer Ni-Class Late ModelDestroyer Ni-Class Late Model
Formation 1: Line Ahead
Formation 2: Double Line
Pattern 2 Standard Carrier Wo-Class flagshipBattleship Ta-Class eliteHeavy Cruiser Ne-ClassLight Cruiser Tsu-ClassDestroyer Ni-Class Late ModelDestroyer Ni-Class Late Model
Formation 4: Echelon
AP:56
AS:126
AS+:252
B
北大西洋深海旗艦艦隊 攻撃隊
Northern Atlantic Abyssal Flagship Fleet
Attack Force
Air Battle Node
Pattern 1 European Water PrincessLight Carrier Nu-Class eliteLight Carrier Nu-Class eliteHeavy Cruiser Summer PrincessDestroyer Na-ClassDestroyer Na-Class
Formation 4: Echelon
AP:182
AS:408
AS+:816
Pattern 2 European Water Princess - DamagedLight Carrier Nu-Class flagshipLight Carrier Nu-Class eliteHeavy Cruiser Summer PrincessDestroyer Na-ClassDestroyer Na-Class
Formation 4: Echelon
Unknown
C
深海北大西洋艦隊 潛水艦集団
Abyssal Northern Atlantic Fleet
Submarine Group
Pattern 1 Submarine So-Class flagshipSubmarine Ka-Class eliteSubmarine Ka-Class eliteSubmarine Ka-Class
Formation 3: Diamond
Formation 5: Line Abreast
Pattern 2 Submarine So-Class eliteSubmarine Ka-Class eliteSubmarine Ka-Class eliteSubmarine Ka-Class
Formation 3: Diamond
Formation 5: Line Abreast
Pattern 3 Submarine So-Class flagshipSubmarine Ka-Class eliteSubmarine Ka-Class eliteSubmarine Ka-Class elite
Formation 3: Diamond
Formation 5: Line Abreast
Pattern 4 Submarine So-Class eliteSubmarine Ka-ClassSubmarine Ka-ClassSubmarine Ka-Class
Formation 3: Diamond
Formation 5: Line Abreast
D
Choose your route
Pattern 1Choose your route
E
深海北大西洋艦隊 機動部隊II群
Abyssal Northern Atlantic Fleet
Naval Task Force Group II
Pattern 1 Standard Carrier Wo-Class flagshipLight Carrier Nu-Class eliteLight Carrier Nu-Class eliteLight Cruiser Tsu-ClassDestroyer Ni-Class Late ModelDestroyer Ni-Class Late Model
Formation 4: Echelon
AP:232
AS:522
AS+:1044
Pattern 2 Standard Carrier Wo-Class flagshipLight Carrier Nu-Class eliteLight Carrier Nu-Class eliteLight Cruiser Tsu-ClassDestroyer Ni-Class Late ModelDestroyer Ni-Class Late Model
Formation 4: Echelon
AP:198
AS:444
AS+:888
Pattern 3 Standard Carrier Wo-Class flagshipLight Carrier Nu-Class flagshipHeavy Cruiser Ne-ClassLight Cruiser Tsu-ClassDestroyer Ni-Class Late ModelDestroyer Ni-Class Late Model
Formation 4: Echelon
AP:119
AS:267
AS+:534
F
Choose your route
Pattern 1Choose your route
G
Battle Avoided
Pattern 1"Must be my imagination" (battle avoided)
H
深海北大西洋艦隊 戦艦戦隊I群
Abyssal Northern Atlantic Fleet
Battleship Squadron Group I
Pattern 1 Battleship Ta-Class flagshipBattleship Ru-Class flagshipBattleship Ru-Class eliteBattleship Ru-Class eliteDestroyer Ni-Class Late ModelDestroyer Ni-Class Late Model
Formation 1: Line Ahead
Formation 2: Double Line
Pattern 2 Battleship Ta-Class flagshipBattleship Ru-Class flagshipBattleship Ru-Class flagshipBattleship Ru-Class eliteDestroyer Ni-Class Late ModelDestroyer Ni-Class Late Model
Formation 1: Line Ahead
I
深海北大西洋艦隊 機動部隊I群
Abyssal Northern Atlantic Fleet
Naval Task Force Group I
Pattern 1 Standard Carrier Wo-Class flagshipLight Carrier Nu-Class eliteLight Carrier Nu-Class eliteLight Cruiser Tsu-ClassDestroyer Ni-Class Late ModelDestroyer Ni-Class Late Model
Formation 4: Echelon
AP:232
AS:522
AS+:1044
Pattern 2 Standard Carrier Wo-Class flagshipLight Carrier Nu-Class eliteLight Carrier Nu-Class eliteLight Cruiser Tsu-ClassDestroyer Ni-Class Late ModelDestroyer Ni-Class Late Model
Formation 4: Echelon
AP:198
AS:444
AS+:888
Pattern 3 Standard Carrier Wo-Class flagshipLight Carrier Nu-Class flagshipHeavy Cruiser Ne-ClassLight Cruiser Tsu-ClassDestroyer Ni-Class Late ModelDestroyer Ni-Class Late Model
Formation 4: Echelon
AP:119
AS:267
AS+:534
J
北大西洋深海通商破壊主力部隊
Northern Atlantic Abyssal Commerce Raiding Main Forces
Enemy Combined Fleet
Pattern 1 Battleship Summer PrincessHeavy Cruiser Summer PrincessDestroyer Na-Class Late ModelDestroyer Na-Class Late ModelDestroyer Na-Class Late ModelDestroyer Na-Class Late Model
Light Cruiser Tsu-ClassDestroyer Na-Class Late ModelDestroyer Na-Class Late ModelDestroyer Na-Class Late ModelDestroyer Ni-Class Late ModelDestroyer Ni-Class Late Model
Cruising Formation 4: Battle Formation
Pattern 2 Battleship Summer PrincessHeavy Cruiser Summer PrincessLight Carrier Nu-Class eliteLight Carrier Nu-Class eliteDestroyer Na-Class Late ModelDestroyer Na-Class Late Model
Light Cruiser Tsu-Class eliteDestroyer Na-Class Late ModelDestroyer Na-Class Late ModelDestroyer Na-Class Late ModelDestroyer Ni-Class Late ModelDestroyer Ni-Class Late Model
Cruising Formation 4: Battle Formation
AP:176
AS:396
AS+:792
K
深海北大西洋艦隊 機動部隊群
Abyssal Northern Atlantic Fleet
Mobile Task Force Group
Air Battle Node
Pattern 1 Standard Carrier Wo-Class flagshipLight Carrier Nu-Class eliteLight Carrier Nu-Class eliteLight Cruiser Tsu-ClassDestroyer Ni-Class Late ModelDestroyer Ni-Class Late Model
Formation 4: Echelon
AP:232
AS:522
AS+:1044
Pattern 2 Standard Carrier Wo-Class flagshipLight Carrier Nu-Class flagshipLight Carrier Nu-Class eliteLight Cruiser Tsu-ClassDestroyer Ni-Class Late ModelDestroyer Ni-Class Late Model
Formation 4: Echelon
AP:165
AS:371
AS+:741
Pattern 3 Standard Carrier Wo-Class flagshipLight Carrier Nu-Class eliteLight Carrier Nu-Class eliteLight Cruiser Tsu-ClassDestroyer Ni-Class Late ModelDestroyer Ni-Class Late Model
Formation 4: Echelon
AP:198
AS:444
AS+:888
L
北大西洋深海艦隊 重雷裝戦隊
Northern Atlantic Abyssal Fleet
Elite Torpedo Squadron
Pattern 1 Battleship Ta-Class eliteTorpedo Cruiser Chi-Class flagshipTorpedo Cruiser Chi-Class flagshipLight Cruiser Tsu-ClassDestroyer Ni-Class Late ModelDestroyer Ni-Class Late Model
Formation 1: Line Ahead
Formation 2: Double Line
Pattern 2 Battleship Ta-Class flagshipTorpedo Cruiser Chi-Class flagshipTorpedo Cruiser Chi-Class flagshipLight Cruiser Tsu-ClassDestroyer Ni-Class Late ModelDestroyer Ni-Class Late Model
Formation 2: Double Line
M
深海北大西洋艦隊 戦艦戦隊II群
Abyssal Northern Atlantic Fleet
Battleship Squadron Group II
Pattern 1 Battleship Ru-Class flagshipBattleship Ru-Class eliteBattleship Ru-Class eliteLight Cruiser Tsu-ClassDestroyer Ni-Class Late ModelDestroyer Ni-Class Late Model
Formation 1: Line Ahead
Formation 2: Double Line
Pattern 2 Battleship Ta-Class flagshipBattleship Ta-Class eliteLight Cruiser He-Class flagshipLight Cruiser Tsu-ClassDestroyer Ni-Class Late ModelDestroyer Ni-Class Late Model
Formation 1: Line Ahead
N
Battle Avoided
Pattern 1"Must be my imagination" (battle avoided)
O
Battle Avoided
Pattern 1"Must be my imagination" (battle avoided)
P
深海北大西洋艦隊 追撃空母群
Abyssal Northern Atlantic Fleet
Pursuing Carrier Group
Pattern 1 Standard Carrier Wo-Class Kai flagshipLight Carrier Nu-Class eliteHeavy Cruiser Ne-ClassLight Cruiser Tsu-ClassDestroyer Ni-Class Late ModelDestroyer Ni-Class Late Model
Formation 4: Echelon
AP:160
AS:360
AS+:720
Pattern 2 Standard Carrier Wo-Class flagshipLight Carrier Nu-Class eliteHeavy Cruiser Ne-ClassLight Cruiser Tsu-ClassDestroyer Ni-Class Late ModelDestroyer Ni-Class Late Model
Formation 4: Echelon
AP:155
AS:348
AS+:696
Pattern 3 Standard Carrier Wo-Class flagshipLight Carrier Nu-Class eliteHeavy Cruiser Ne-ClassLight Cruiser Tsu-ClassDestroyer Ni-Class Late ModelDestroyer Ni-Class Late Model
Formation 4: Echelon
AP:139
AS:312
AS+:624
Q
Battle Avoided
Pattern 1"Must be my imagination" (battle avoided)
R
Battle Avoided
Pattern 1"Must be my imagination" (battle avoided)
S
深海ドーバー海峽封鎖潛水艦群
Abyssal Dover Strait Blockade
Submarine Group
Pattern 1 Submarine Summer PrincessSubmarine So-Class eliteSubmarine So-Class eliteSubmarine So-Class
Formation 3: Diamond
Formation 5: Line Abreast
Pattern 2 Submarine Summer PrincessSubmarine So-Class eliteSubmarine So-Class eliteSubmarine So-Class elite
Formation 3: Diamond
Formation 5: Line Abreast
Pattern 3 Submarine Summer PrincessSubmarine So-Class eliteSubmarine So-ClassSubmarine So-Class
Formation 3: Diamond
Formation 5: Line Abreast
T
深海北海潛水艦隊集団
Abyssal Northern Water Submarine Group
Pattern 1 New Submarine Princess - Vacation ModeSubmarine So-Class eliteSubmarine So-Class
Formation 3: Diamond
Formation 5: Line Abreast
Pattern 2 New Submarine Princess - Vacation ModeSubmarine So-Class eliteSubmarine So-Class elite
Formation 3: Diamond
Formation 5: Line Abreast
U
Battle Avoided
Pattern 1"Must be my imagination" (battle avoided)
V
Battle Avoided
Pattern 1"Must be my imagination" (battle avoided)
W
北大西洋深海艦隊 ブレスト軍港
Northern Atlantic Abyssal Fleet
Brest Naval Port
Enemy Combined Fleet
Pattern 1 French Battleship Princess - Vacation ModeHarbor Summer PrincessAirfield PrincessArtillery ImpArtillery ImpPT Imp Group
Light Cruiser Tsu-ClassDestroyer Na-Class Late ModelDestroyer Na-Class Late ModelTransport Ship Wa-ClassPT Imp GroupPT Imp Group
Cruising Formation 4: Battle Formation
Unknown
Pattern 2 French Battleship Princess - Vacation Mode - Damagedsummer_Harbor Princess Final FormAirfield PrincessArtillery ImpArtillery ImpPT Imp Group
Light Cruiser Tsu-ClassDestroyer Na-Class Late ModelDestroyer Na-Class Late ModelDestroyer Na-Class Late ModelPT Imp GroupPT Imp Group
Cruising Formation 4: Battle Formation
Unknown
X
Battle Avoided
Pattern 1"Must be my imagination" (battle avoided)
Y
北大西洋深海旗艦艦隊 前衛集団
Northern Atlantic Abyssal Flagship Fleet
Vanguard Group
Pattern 1 Light Cruiser He-Class flagshipHeavy Cruiser Ne-Class eliteHeavy Cruiser Ne-ClassLight Cruiser Tsu-ClassDestroyer Na-ClassDestroyer Na-Class
Formation 1: Line Ahead
Pattern 2 Light Carrier Nu-Class eliteLight Carrier Nu-Class eliteLight Cruiser He-Class flagshipLight Cruiser Tsu-ClassDestroyer Na-ClassDestroyer Na-Class
Formation 4: Echelon
Unknown
Pattern 3 Light Cruiser He-Class flagshipHeavy Cruiser Ne-Class eliteHeavy Cruiser Ne-ClassLight Cruiser Tsu-ClassDestroyer Na-Class Late ModelDestroyer Na-Class Late Model
Formation 1: Line Ahead
Z
Battle Avoided
Pattern 1"Must be my imagination" (battle avoided)
Z2
北大西洋深海艦隊 旗艦艦隊
Northern Atlantic Abyssal Fleet
Flagship Fleet
Enemy Combined Fleet
Pattern 1 European Water PrincessLight Carrier Nu-Class eliteBattleship Summer PrincessHeavy Cruiser Summer PrincessDestroyer Na-ClassDestroyer Na-Class
Light Cruiser He-Class flagshipLight Cruiser Tsu-ClassDestroyer Na-ClassDestroyer Na-ClassDestroyer Na-ClassDestroyer Na-Class
Cruising Formation 4: Battle Formation
AP:111
AS:249
AS+:498
Pattern 2 European Water Princess - DamagedLight Carrier Nu-Class flagshipBattleship Summer PrincessHeavy Cruiser Summer PrincessHeavy Cruiser Ne-ClassHeavy Cruiser Ne-Class
Light Cruiser He-Class flagshipLight Cruiser Tsu-ClassDestroyer Na-Class Late ModelDestroyer Na-Class Late ModelDestroyer Na-Class Late ModelDestroyer Na-Class Late Model
Cruising Formation 4: Battle Formation
Unknown
Z3
北大西洋深海旗艦艦隊 攻撃隊
Northern Atlantic Abyssal Flagship Fleet
Attack Force
Pattern 1 European Water PrincessLight Carrier Nu-Class eliteLight Carrier Nu-Class eliteHeavy Cruiser Summer PrincessDestroyer Na-ClassDestroyer Na-Class
Formation 4: Echelon
AP:182
AS:408
AS+:816
Pattern 2 European Water Princess - DamagedLight Carrier Nu-Class flagshipLight Carrier Nu-Class eliteHeavy Cruiser Summer PrincessDestroyer Na-ClassDestroyer Na-Class
Formation 4: Echelon
Unknown

Show/Hide Nodes and Enemy Encounters
Nodes and Enemy Encounters
NodePatternXpNode InfoFormAir
A
深海北大西洋艦隊 機動部隊III群
Abyssal Northern Atlantic Fleet
Task Force Group III
Pattern 1 Battleship Ta-Class eliteBattleship Ta-Class eliteLight Cruiser Tsu-ClassDestroyer Ni-Class Late ModelDestroyer I-ClassDestroyer I-Class
Formation 1: Line Ahead
Formation 2: Double Line
Pattern 2 Standard Carrier Wo-Class flagshipBattleship Ta-Class eliteLight Cruiser Tsu-ClassDestroyer Ni-Class Late ModelDestroyer I-ClassDestroyer I-Class
Formation 4: Echelon
AP:56
AS:126
AS+:252
B
北大西洋深海旗艦艦隊 攻撃隊
Northern Atlantic Abyssal Flagship Fleet
Attack Force
Air Battle Node
Pattern 1 European Water PrincessLight Carrier Nu-Class eliteHeavy Cruiser Summer PrincessDestroyer Ni-Class Late ModelDestroyer Ni-Class Late ModelDestroyer Ni-Class Late Model
Formation 4: Echelon
Unknown
Pattern 2 European Water Princess - DamagedLight Carrier Nu-Class eliteLight Carrier Nu-Class eliteHeavy Cruiser Summer PrincessDestroyer Na-ClassDestroyer Na-Class
Formation 4: Echelon
Unknown
C
深海北大西洋艦隊 潛水艦集団
Abyssal Northern Atlantic Fleet
Submarine Group
Pattern 1 Submarine So-Class eliteSubmarine Ka-ClassSubmarine Ka-ClassSubmarine Ka-Class
Formation 3: Diamond
Formation 5: Line Abreast
Pattern 2 Submarine So-Class eliteSubmarine Ka-Class eliteSubmarine Ka-Class eliteSubmarine Ka-Class
Formation 3: Diamond
Formation 5: Line Abreast
Pattern 3 Submarine So-Class flagshipSubmarine Ka-Class eliteSubmarine Ka-Class eliteSubmarine Ka-Class
Formation 3: Diamond
Formation 5: Line Abreast
D
Choose your route
Pattern 1Choose your route
E
深海北大西洋艦隊 機動部隊II群
Abyssal Northern Atlantic Fleet
Naval Task Force Group II
Pattern 1 Standard Carrier Wo-Class flagshipLight Carrier Nu-Class eliteLight Cruiser Tsu-ClassDestroyer Ni-Class Late ModelDestroyer I-ClassDestroyer I-Class
Formation 4: Echelon
Unknown
Pattern 2 Standard Carrier Wo-Class flagshipLight Carrier Nu-Class eliteLight Cruiser Tsu-ClassDestroyer Ni-Class Late ModelDestroyer I-ClassDestroyer I-Class
Formation 4: Echelon
AP:128
AS:288
AS+:576
Pattern 3 Standard Carrier Wo-Class flagshipLight Carrier Nu-Class eliteLight Cruiser Tsu-ClassDestroyer Ni-Class Late ModelDestroyer I-ClassDestroyer I-Class
Formation 4: Echelon
AP:102
AS:230
AS+:459
Pattern 4 Standard Carrier Wo-Class flagshipLight Carrier Nu-Class flagshipHeavy Cruiser Ne-ClassLight Cruiser Tsu-ClassDestroyer Ni-Class Late ModelDestroyer Ni-Class Late Model
Formation 4: Echelon
AP:119
AS:267
AS+:534
F
Choose your route
Pattern 1Choose your route
G
Battle Avoided
Pattern 1"Must be my imagination" (battle avoided)
H
深海北大西洋艦隊 戦艦戦隊I群
Abyssal Northern Atlantic Fleet
Battleship Squadron Group I
Pattern 1 Battleship Ta-Class eliteBattleship Ru-Class eliteBattleship Ru-Class eliteDestroyer Ni-Class Late ModelDestroyer I-ClassDestroyer I-Class
Formation 1: Line Ahead
Formation 2: Double Line
Pattern 2 Battleship Ta-Class flagshipBattleship Ru-Class eliteBattleship Ru-Class eliteDestroyer Ni-Class Late ModelDestroyer I-ClassDestroyer I-Class
Formation 1: Line Ahead
I
深海北大西洋艦隊 機動部隊I群
Abyssal Northern Atlantic Fleet
Naval Task Force Group I
Pattern 1 Standard Carrier Wo-Class flagshipLight Carrier Nu-Class eliteLight Cruiser Tsu-ClassDestroyer Ni-Class Late ModelDestroyer I-ClassDestroyer I-Class
Formation 4: Echelon
AP:128
AS:288
AS+:576
Pattern 2 Standard Carrier Wo-Class flagshipLight Carrier Nu-Class eliteLight Cruiser Tsu-ClassDestroyer Ni-Class Late ModelDestroyer I-ClassDestroyer I-Class
Formation 4: Echelon
Unknown
Pattern 3 Standard Carrier Wo-Class flagshipLight Carrier Nu-Class flagshipHeavy Cruiser Ne-ClassLight Cruiser Tsu-ClassDestroyer Ni-Class Late ModelDestroyer Ni-Class Late Model
Formation 4: Echelon
AP:119
AS:267
AS+:534
Pattern 4 Standard Carrier Wo-Class flagshipLight Carrier Nu-Class eliteLight Cruiser Tsu-ClassDestroyer Ni-Class Late ModelDestroyer I-ClassDestroyer I-Class
Formation 4: Echelon
AP:102
AS:230
AS+:459
J
北大西洋深海通商破壊主力部隊
Northern Atlantic Abyssal Commerce Raiding Main Forces
Enemy Combined Fleet
Pattern 1 Battleship Summer PrincessHeavy Cruiser Summer PrincessDestroyer Na-ClassDestroyer Na-ClassDestroyer I-ClassDestroyer I-Class
Destroyer Na-ClassDestroyer Ni-Class Late ModelDestroyer Ni-Class Late ModelDestroyer I-ClassDestroyer I-ClassDestroyer I-Class
Cruising Formation 4: Battle Formation
Pattern 2 Battleship Summer PrincessHeavy Cruiser Summer PrincessLight Carrier Nu-Class eliteLight Carrier Nu-Class eliteDestroyer Na-ClassDestroyer Na-Class
Light Cruiser Tsu-ClassDestroyer Na-Class Late ModelDestroyer Ni-Class Late ModelDestroyer Ni-Class Late ModelDestroyer I-ClassDestroyer I-Class
Cruising Formation 4: Battle Formation
AP:32
AS:72
AS+:144
K
深海北大西洋艦隊 機動部隊群
Abyssal Northern Atlantic Fleet
Mobile Task Force Group
Air Battle Node
Pattern 1 Standard Carrier Wo-Class flagshipLight Carrier Nu-Class flagshipLight Carrier Nu-Class eliteLight Cruiser Tsu-ClassDestroyer Ni-Class Late ModelDestroyer Ni-Class Late Model
Formation 4: Echelon
AP:165
AS:371
AS+:741
Pattern 2 Standard Carrier Wo-Class flagshipLight Carrier Nu-Class eliteLight Carrier Nu-Class eliteDestroyer Ni-Class Late ModelDestroyer I-ClassDestroyer I-Class
Formation 4: Echelon
AP:200
AS:450
AS+:900
Pattern 3 Standard Carrier Wo-Class flagshipLight Carrier Nu-Class eliteLight Cruiser Tsu-ClassDestroyer Ni-Class Late ModelDestroyer I-ClassDestroyer I-Class
Formation 4: Echelon
Unknown
Pattern 4 Standard Carrier Wo-Class flagshipLight Carrier Nu-Class eliteLight Cruiser Tsu-ClassDestroyer Ni-Class Late ModelDestroyer I-ClassDestroyer I-Class
Formation 4: Echelon
AP:102
AS:230
AS+:459
L
北大西洋深海艦隊 重雷裝戦隊
Northern Atlantic Abyssal Fleet
Elite Torpedo Squadron
Pattern 1 Battleship Ta-Class eliteTorpedo Cruiser Chi-Class flagshipTorpedo Cruiser Chi-Class flagshipLight Cruiser Tsu-ClassDestroyer I-ClassDestroyer I-Class
Formation 1: Line Ahead
Formation 2: Double Line
Pattern 2 Battleship Ta-Class eliteTorpedo Cruiser Chi-Class flagshipTorpedo Cruiser Chi-Class flagshipLight Cruiser Tsu-ClassDestroyer Ha-Class Late ModelDestroyer Ha-Class Late Model
Formation 1: Line Ahead
M
深海北大西洋艦隊 戦艦戦隊II群
Abyssal Northern Atlantic Fleet
Battleship Squadron Group II
Pattern 1 Battleship Ru-Class eliteBattleship Ru-Class eliteLight Cruiser Tsu-ClassDestroyer Ni-Class Late ModelDestroyer I-ClassDestroyer I-Class
Formation 1: Line Ahead
Formation 2: Double Line
Pattern 2 Battleship Ta-Class eliteBattleship Ta-Class eliteLight Cruiser Tsu-ClassDestroyer Ni-Class Late ModelDestroyer Ni-Class Late ModelDestroyer I-Class
Formation 1: Line Ahead
N
Battle Avoided
Pattern 1"Must be my imagination" (battle avoided)
O
Battle Avoided
Pattern 1"Must be my imagination" (battle avoided)
P
深海北大西洋艦隊 追撃空母群
Abyssal Northern Atlantic Fleet
Pursuing Carrier Group
Pattern 1 Standard Carrier Wo-Class Kai flagshipHeavy Cruiser Ne-ClassLight Cruiser Tsu-ClassDestroyer Ni-Class Late ModelDestroyer I-ClassDestroyer I-Class
Formation 4: Echelon
AP:72
AS:162
AS+:324
Pattern 2 Standard Carrier Wo-Class flagshipHeavy Cruiser Ne-ClassLight Cruiser Tsu-ClassDestroyer Ni-Class Late ModelDestroyer I-ClassDestroyer I-Class
Formation 4: Echelon
AP:67
AS:150
AS+:300
Pattern 3 Standard Carrier Wo-Class flagshipHeavy Cruiser Ne-ClassLight Cruiser Tsu-ClassDestroyer Ni-Class Late ModelDestroyer I-ClassDestroyer I-Class
Formation 4: Echelon
AP:19
AS:42
AS+:84
Q
Battle Avoided
Pattern 1"Must be my imagination" (battle avoided)
R
Battle Avoided
Pattern 1"Must be my imagination" (battle avoided)
S
深海ドーバー海峽封鎖潛水艦群
Abyssal Dover Strait Blockade
Submarine Group
Pattern 1 Submarine Summer PrincessSubmarine So-Class eliteSubmarine So-ClassSubmarine So-Class
Formation 3: Diamond
Formation 5: Line Abreast
Pattern 2 Submarine Summer PrincessSubmarine So-Class eliteSubmarine So-Class eliteSubmarine So-Class
Formation 3: Diamond
Formation 5: Line Abreast
T
深海北海潛水艦隊集団
Abyssal Northern Water Submarine Group
Pattern 1 New Submarine Princess - Vacation ModeSubmarine So-ClassSubmarine So-Class
Formation 3: Diamond
Formation 5: Line Abreast
Pattern 2 New Submarine Princess - Vacation ModeSubmarine So-Class eliteSubmarine So-Class
Formation 3: Diamond
Formation 5: Line Abreast
U
Battle Avoided
Pattern 1"Must be my imagination" (battle avoided)
V
Battle Avoided
Pattern 1"Must be my imagination" (battle avoided)
W
北大西洋深海艦隊 ブレスト軍港
Northern Atlantic Abyssal Fleet
Brest Naval Port
Enemy Combined Fleet
Pattern 1 French Battleship Princess - Vacation ModeHarbor Summer PrincessAirfield PrincessArtillery ImpArtillery ImpPT Imp Group
Destroyer Na-Class Late ModelDestroyer Ni-Class Late ModelDestroyer I-ClassDestroyer I-ClassTransport Ship Wa-ClassPT Imp Group
Cruising Formation 4: Battle Formation
Unknown
Pattern 2 French Battleship Princess - Vacation Mode - Damagedsummer_Harbor Princess Final FormAirfield PrincessArtillery ImpArtillery ImpPT Imp Group
Light Cruiser Tsu-ClassDestroyer Na-Class Late ModelDestroyer Ni-Class Late ModelDestroyer I-ClassDestroyer I-ClassPT Imp Group
Cruising Formation 4: Battle Formation
Unknown
X
Battle Avoided
Pattern 1"Must be my imagination" (battle avoided)
Y
北大西洋深海旗艦艦隊 前衛集団
Northern Atlantic Abyssal Flagship Fleet
Vanguard Group
Pattern 1 Light Cruiser He-Class flagshipHeavy Cruiser Ne-ClassLight Cruiser Tsu-ClassDestroyer Ni-Class Late ModelDestroyer I-ClassDestroyer I-Class
Formation 1: Line Ahead
Pattern 2 Light Carrier Nu-Class eliteLight Cruiser He-Class flagshipLight Cruiser Tsu-ClassDestroyer Ni-Class Late ModelDestroyer I-ClassDestroyer I-Class
Formation 4: Echelon
AP:71
AS:159
AS+:318
Pattern 3 Light Cruiser He-Class flagshipHeavy Cruiser Ne-ClassLight Cruiser Tsu-ClassDestroyer Ni-Class Late ModelDestroyer Ni-Class Late ModelDestroyer Ni-Class Late Model
Formation 1: Line Ahead
Z
Battle Avoided
Pattern 1"Must be my imagination" (battle avoided)
Z2
北大西洋深海艦隊 旗艦艦隊
Northern Atlantic Abyssal Fleet
Flagship Fleet
Enemy Combined Fleet
Pattern 1 European Water PrincessBattleship Summer PrincessHeavy Cruiser Summer PrincessDestroyer Ni-Class Late ModelDestroyer Ni-Class Late ModelTransport Ship Wa-Class
Light Cruiser He-Class flagshipLight Cruiser Tsu-ClassDestroyer Ni-Class Late ModelDestroyer Ni-Class Late ModelDestroyer I-ClassDestroyer I-Class
Cruising Formation 4: Battle Formation
Unknown
Pattern 2 European Water Princess - DamagedLight Carrier Nu-Class eliteBattleship Summer PrincessHeavy Cruiser Summer PrincessDestroyer Na-ClassDestroyer Na-Class
Light Cruiser He-Class flagshipLight Cruiser Tsu-ClassDestroyer Na-ClassDestroyer Na-ClassDestroyer I-ClassDestroyer I-Class
Cruising Formation 4: Battle Formation
Unknown
Z3
北大西洋深海旗艦艦隊 攻撃隊
Northern Atlantic Abyssal Flagship Fleet
Attack Force
Pattern 1 European Water PrincessLight Carrier Nu-Class eliteHeavy Cruiser Summer PrincessDestroyer Ni-Class Late ModelDestroyer Ni-Class Late ModelDestroyer Ni-Class Late Model
Formation 4: Echelon
Unknown
Pattern 2 European Water Princess - DamagedLight Carrier Nu-Class eliteLight Carrier Nu-Class eliteHeavy Cruiser Summer PrincessDestroyer Na-ClassDestroyer Na-Class
Formation 4: Echelon
Unknown

Show/Hide Nodes and Enemy Encounters
Nodes and Enemy Encounters
NodePatternXpNode InfoFormAir
A
深海北大西洋艦隊 機動部隊III群
Abyssal Northern Atlantic Fleet
Task Force Group III
Pattern 1 Battleship Ta-Class eliteBattleship Ta-Class eliteLight Cruiser Tsu-ClassDestroyer Ni-Class Late ModelDestroyer I-ClassDestroyer I-Class
Formation 1: Line Ahead
Formation 2: Double Line
Pattern 2 Standard Carrier Wo-Class flagshipBattleship Ta-Class eliteLight Cruiser Tsu-ClassDestroyer Ni-Class Late ModelDestroyer I-ClassDestroyer I-Class
Formation 4: Echelon
AP:56
AS:126
AS+:252
B
北大西洋深海旗艦艦隊 攻撃隊
Northern Atlantic Abyssal Flagship Fleet
Attack Force
Air Battle Node
Pattern 1 European Water PrincessLight Carrier Nu-Class eliteDestroyer Ni-Class Late ModelDestroyer Ni-Class Late ModelDestroyer I-ClassDestroyer I-Class
Formation 4: Echelon
Unknown
Pattern 2 European Water Princess - DamagedLight Carrier Nu-Class eliteLight Carrier Nu-Class eliteDestroyer Ni-Class Late ModelDestroyer I-ClassDestroyer I-Class
Formation 4: Echelon
Unknown
C
深海北大西洋艦隊 潛水艦集団
Abyssal Northern Atlantic Fleet
Submarine Group
Pattern 1 Submarine So-Class eliteSubmarine Ka-ClassSubmarine Ka-ClassSubmarine Ka-Class
Formation 3: Diamond
Formation 5: Line Abreast
D
Choose your route
Pattern 1Choose your route
E
深海北大西洋艦隊 機動部隊II群
Abyssal Northern Atlantic Fleet
Naval Task Force Group II
Pattern 1 Standard Carrier Wo-Class flagshipLight Carrier Nu-Class eliteLight Cruiser Tsu-ClassDestroyer Ni-Class Late ModelDestroyer I-ClassDestroyer I-Class
Formation 4: Echelon
AP:102
AS:230
AS+:459
Pattern 2 Standard Carrier Wo-Class flagshipLight Carrier Nu-Class eliteLight Cruiser Tsu-ClassDestroyer Ni-Class Late ModelDestroyer I-ClassDestroyer I-Class
Formation 4: Echelon
AP:128
AS:288
AS+:576
Pattern 3 Standard Carrier Wo-Class flagshipLight Carrier Nu-Class eliteLight Cruiser Tsu-ClassDestroyer Ni-Class Late ModelDestroyer I-ClassDestroyer I-Class
Formation 4: Echelon
Unknown
F
Choose your route
Pattern 1Choose your route
G
Battle Avoided
Pattern 1"Must be my imagination" (battle avoided)
H
深海北大西洋艦隊 戦艦戦隊I群
Abyssal Northern Atlantic Fleet
Battleship Squadron Group I
Pattern 1 Battleship Ta-Class eliteBattleship Ru-Class eliteBattleship Ru-Class eliteDestroyer Ni-Class Late ModelDestroyer I-ClassDestroyer I-Class
Formation 1: Line Ahead
Formation 2: Double Line
Pattern 2 Battleship Ta-Class flagshipBattleship Ru-Class eliteBattleship Ru-Class eliteDestroyer Ni-Class Late ModelDestroyer I-ClassDestroyer I-Class
Formation 1: Line Ahead
I
深海北大西洋艦隊 機動部隊I群
Abyssal Northern Atlantic Fleet
Naval Task Force Group I
Pattern 1 Standard Carrier Wo-Class flagshipLight Carrier Nu-Class eliteLight Cruiser Tsu-ClassDestroyer Ni-Class Late ModelDestroyer I-ClassDestroyer I-Class
Formation 4: Echelon
AP:128
AS:288
AS+:576
Pattern 2 Standard Carrier Wo-Class flagshipLight Carrier Nu-Class eliteLight Cruiser Tsu-ClassDestroyer Ni-Class Late ModelDestroyer I-ClassDestroyer I-Class
Formation 4: Echelon
Unknown
Pattern 3 Standard Carrier Wo-Class flagshipLight Carrier Nu-Class eliteLight Cruiser Tsu-ClassDestroyer Ni-Class Late ModelDestroyer I-ClassDestroyer I-Class
Formation 4: Echelon
AP:102
AS:230
AS+:459
J
北大西洋深海通商破壊主力部隊
Northern Atlantic Abyssal Commerce Raiding Main Forces
Enemy Combined Fleet
Pattern 1 Battleship Summer PrincessHeavy Cruiser Summer PrincessDestroyer I-ClassDestroyer I-ClassDestroyer I-ClassDestroyer I-Class
Destroyer Ni-Class Late ModelDestroyer I-ClassDestroyer I-ClassDestroyer I-ClassDestroyer I-ClassDestroyer I-Class
Cruising Formation 4: Battle Formation
Pattern 2 Battleship Summer PrincessHeavy Cruiser Summer PrincessDestroyer Na-ClassDestroyer Na-ClassDestroyer I-ClassDestroyer I-Class
Destroyer Ni-Class Late ModelDestroyer Ni-Class Late ModelDestroyer I-ClassDestroyer I-ClassDestroyer I-ClassDestroyer I-Class
Cruising Formation 4: Battle Formation
K
深海北大西洋艦隊 機動部隊群
Abyssal Northern Atlantic Fleet
Mobile Task Force Group
Air Battle Node
Pattern 1 Standard Carrier Wo-Class flagshipLight Carrier Nu-Class eliteLight Carrier Nu-Class eliteDestroyer Ni-Class Late ModelDestroyer I-ClassDestroyer I-Class
Formation 4: Echelon
AP:200
AS:450
AS+:900
Pattern 2 Standard Carrier Wo-Class flagshipLight Carrier Nu-Class eliteLight Cruiser Tsu-ClassDestroyer Ni-Class Late ModelDestroyer I-ClassDestroyer I-Class
Formation 4: Echelon
Unknown
Pattern 3 Standard Carrier Wo-Class flagshipLight Carrier Nu-Class eliteLight Cruiser Tsu-ClassDestroyer Ni-Class Late ModelDestroyer I-ClassDestroyer I-Class
Formation 4: Echelon
AP:102
AS:230
AS+:459
L
北大西洋深海艦隊 重雷裝戦隊
Northern Atlantic Abyssal Fleet
Elite Torpedo Squadron
Pattern 1 Battleship Ta-Class eliteTorpedo Cruiser Chi-Class flagshipTorpedo Cruiser Chi-Class flagshipLight Cruiser Tsu-ClassDestroyer I-ClassDestroyer I-Class
Formation 1: Line Ahead
Formation 2: Double Line
Pattern 2 Battleship Ta-Class eliteTorpedo Cruiser Chi-Class flagshipTorpedo Cruiser Chi-Class flagshipLight Cruiser Tsu-ClassDestroyer Ha-Class Late ModelDestroyer Ha-Class Late Model
Formation 1: Line Ahead
M
深海北大西洋艦隊 戦艦戦隊II群
Abyssal Northern Atlantic Fleet
Battleship Squadron Group II
Pattern 1 Battleship Ru-Class eliteBattleship Ru-Class eliteLight Cruiser Tsu-ClassDestroyer Ni-Class Late ModelDestroyer I-ClassDestroyer I-Class
Formation 1: Line Ahead
Formation 2: Double Line
Pattern 2 Battleship Ta-Class eliteBattleship Ta-Class eliteLight Cruiser Tsu-ClassDestroyer Ni-Class Late ModelDestroyer Ni-Class Late ModelDestroyer I-Class
Formation 1: Line Ahead
N
Battle Avoided
Pattern 1"Must be my imagination" (battle avoided)
O
Battle Avoided
Pattern 1"Must be my imagination" (battle avoided)
P
深海北大西洋艦隊 追撃空母群
Abyssal Northern Atlantic Fleet
Pursuing Carrier Group
Pattern 1 Standard Carrier Wo-Class flagshipHeavy Cruiser Ne-ClassLight Cruiser Tsu-ClassDestroyer Ni-Class Late ModelDestroyer I-ClassDestroyer I-Class
Formation 4: Echelon
AP:19
AS:42
AS+:84
Pattern 2 Standard Carrier Wo-Class flagshipHeavy Cruiser Ne-ClassLight Cruiser Tsu-ClassDestroyer Ni-Class Late ModelDestroyer I-ClassDestroyer I-Class
Formation 4: Echelon
AP:67
AS:150
AS+:300
Pattern 3 Standard Carrier Wo-Class Kai flagshipHeavy Cruiser Ne-ClassLight Cruiser Tsu-ClassDestroyer Ni-Class Late ModelDestroyer I-ClassDestroyer I-Class
Formation 4: Echelon
AP:72
AS:162
AS+:324
Q
Battle Avoided
Pattern 1"Must be my imagination" (battle avoided)
R
Battle Avoided
Pattern 1"Must be my imagination" (battle avoided)
S
深海ドーバー海峽封鎖潛水艦群
Abyssal Dover Strait Blockade
Submarine Group
Pattern 1 Submarine Summer PrincessSubmarine So-Class eliteSubmarine So-ClassSubmarine So-Class
Formation 3: Diamond
Formation 5: Line Abreast
T
深海北海潛水艦隊集団
Abyssal Northern Water Submarine Group
Pattern 1 New Submarine Princess - Vacation ModeSubmarine So-ClassSubmarine So-Class
Formation 3: Diamond
Formation 5: Line Abreast
U
Battle Avoided
Pattern 1"Must be my imagination" (battle avoided)
V
Battle Avoided
Pattern 1"Must be my imagination" (battle avoided)
W
北大西洋深海艦隊 ブレスト軍港
Northern Atlantic Abyssal Fleet
Brest Naval Port
Enemy Combined Fleet
Pattern 1 French Battleship Princess - Vacation ModeHarbor Summer PrincessArtillery ImpArtillery ImpPT Imp GroupPT Imp Group
Destroyer Ni-Class Late ModelDestroyer I-ClassDestroyer I-ClassTransport Ship Wa-ClassTransport Ship Wa-ClassPT Imp Group
Cruising Formation 4: Battle Formation
Unknown
Pattern 2 French Battleship Princess - Vacation Mode - Damagedsummer_Harbor Princess Final FormAirfield PrincessArtillery ImpArtillery ImpPT Imp Group
Destroyer Ni-Class Late ModelDestroyer Ni-Class Late ModelDestroyer I-ClassDestroyer I-ClassTransport Ship Wa-ClassPT Imp Group
Cruising Formation 4: Battle Formation
Unknown
X
Battle Avoided
Pattern 1"Must be my imagination" (battle avoided)
Y
北大西洋深海旗艦艦隊 前衛集団
Northern Atlantic Abyssal Flagship Fleet
Vanguard Group
Pattern 1 Light Cruiser He-Class flagshipHeavy Cruiser Ne-ClassLight Cruiser Tsu-ClassDestroyer Ni-Class Late ModelDestroyer I-ClassDestroyer I-Class
Formation 1: Line Ahead
Pattern 2 Light Carrier Nu-Class eliteLight Cruiser He-Class flagshipLight Cruiser Tsu-ClassDestroyer Ni-Class Late ModelDestroyer I-ClassDestroyer I-Class
Formation 4: Echelon
AP:71
AS:159
AS+:318
Z
Battle Avoided
Pattern 1"Must be my imagination" (battle avoided)
Z2
北大西洋深海艦隊 旗艦艦隊
Northern Atlantic Abyssal Fleet
Flagship Fleet
Enemy Combined Fleet
Pattern 1 European Water PrincessDestroyer Ni-Class Late ModelDestroyer Ni-Class Late ModelDestroyer I-ClassDestroyer I-ClassTransport Ship Wa-Class
Light Cruiser Tsu-ClassDestroyer Ni-Class Late ModelDestroyer Ni-Class Late ModelDestroyer I-ClassDestroyer I-ClassDestroyer I-Class
Cruising Formation 4: Battle Formation
Unknown
Pattern 2 European Water Princess - DamagedLight Carrier Nu-Class eliteBattleship Summer PrincessDestroyer Ni-Class Late ModelDestroyer Ni-Class Late ModelTransport Ship Wa-Class
Light Cruiser He-Class flagshipLight Cruiser Tsu-ClassDestroyer Ni-Class Late ModelDestroyer Ni-Class Late ModelDestroyer I-ClassDestroyer I-Class
Cruising Formation 4: Battle Formation
Unknown
Z3
北大西洋深海旗艦艦隊 攻撃隊
Northern Atlantic Abyssal Flagship Fleet
Attack Force
Pattern 1 European Water PrincessLight Carrier Nu-Class eliteDestroyer Ni-Class Late ModelDestroyer Ni-Class Late ModelDestroyer I-ClassDestroyer I-Class
Formation 4: Echelon
Unknown
Pattern 2 European Water Princess - DamagedLight Carrier Nu-Class eliteLight Carrier Nu-Class eliteDestroyer Ni-Class Late ModelDestroyer I-ClassDestroyer I-Class
Formation 4: Echelon
Unknown

Ship drops

NodeShip List
FDestroyers
Light Cruisers
Auxiliary Ships
IDestroyers
Light Cruisers
KDestroyers
NDestroyers
Light Cruisers
Auxiliary Ships
ODestroyer Escorts
Destroyers
Light Cruisers
Heavy Cruisers
Battleships
Light Aircraft Carriers
Seaplane Tenders
Submarines