- Welcome to the Kancolle Wiki!
- If you have any questions regarding site content, account registration, etc., please visit the KanColle Wiki Discord
Spring 2025 Event
 
| |||||||||
|---|---|---|---|---|---|---|---|---|---|
 
The 2nd Stage Operations have been released!
FF release: TBA Approximate time until the end of the event: ([1] KC 12th anniversary)
| |||||||||
The Spring 2025 Event, is launched on the 8th of March, with a launch of the 2nd part scheduled for the 23rd of March. The event is planned to last 1 month and a half. It is a "Large Scale Event".
- The 1st Stage Operations are titled "Hokkaido Defence Operation", a what-if scenario,
- The 2nd Stage Operations are titled "Operation Rei-Go Part 2".
The event is still referred to as a "Winter Event" in the API.
For additional information regarding event-related subjects and content, please refer to Mechanics.
Historical Background
1st Stage Operations - "Hokkaido Defence Operation"
The 1st Stage Operations have been announced to be a what-if scenario about an "Hokkaido Defence Operation".
- See: [2].
- Northeastern Air Group
This operation mainly revolves around the planned invasion of Northern Japan by the USSR in the last stages of the war. This initial plan was canceled after the Soviet experiences fighting the Japanese forces in the Kuriles. During the New Year 2025 Live event, there was mention and talk of the 11th Tank Regiment having a key role or bonuses. The historical note and reference for the 11th Tank Regiment was that their engagements with the Soviets during the war's end happened in Manchuria, Sakhalin, and the Kuriles. The Soviets thought it would be easy to defeat the Japanese with their numerous soldiers and more modern tanks compared to the poorly equipped Japanese Army (most of their best units and equipment had to be sent to fight in the Pacific over the years), yet despite the advantages, the Japanese resistance was very stiff. The 11th Tank regiment, along with other Imperial Japanese Army units, played a key role in the defense operation, and the fighting here showed the Russians the tenacity of the Japanese, which made Soviet commanders rethink their island-hopping campaign and the planned Hokkaido invasion. One of the reasons Soviet commanders underestimated the Japanese was that their armor technology was obsolete, and their T-34 would have no trouble fighting them. However, the Japanese did field a decent tank during WW2, and it was the Shinhoto Chi-Ha (an "improved" Chi-Ha tank utilizing the high-velocity 47 mm Type 1 gun). These tanks proved to be a decent match against the M4 Sherman in the American island-hopping campaign, particularly in the major tank battles in the Philippines, and later against the Soviet T-34 in the last days of the war. This was because the gun was able to penetrate the side and rear armor of both Allied tanks and were primarily used in ambush tactics.
Involved Forces
The following list of historical ships is based on the kanmusu currently implemented:
| Hokkaido Defence Forces | ||||||||||||||
|---|---|---|---|---|---|---|---|---|---|---|---|---|---|---|
|
| |||||||||||||


2nd Stage Operations - "Operation Rei-Go Part 2"
The 2nd Stage Operations have been announced to be "Operation Rei-Go Part 2".
- Rei-Go Part 1 was the Winter 2016 Event.
- See: [3].
On the 24th of December 1944, a Japanese Navy force containing two cruisers: Ashigara and Ōyodo; plus eight destroyers: Kiyoshimo, Asashimo, Kasumi, Kaya, Kashi, and Sugi; departs Camranh Bay off Indochina (Vietnam) as part of "Operation Rei-Go" a raiding force to bombard the San Jose beachhead. On the evening of 26th of December 1944, the force was spotted and attacked by B-25 Mitchells and PT Boats. Kiyoshimo sustained heavy damage and was eventually sunk. Between 11 PM and 1 AM the next day, the remaining force bombards the beachhead area but causes little damage. This was one of the last Japanese surface unit attacks on an American beachhead during the Pacific War. The next day, the survivors return to Camranh Bay. (Pacific Wrecks)
The main goal of the operation was to counter "Operation Love III", the US seizure of a sizeable lodgement on Mindoro island in the central part of the Japanese-occupied Philippine islands group (15/21 December 1944).
There is a heavy hint that the Extra Operation will incorporate many things from the official KanColle Operation Rei Go 1944 Stage Play which ran for a few weeks prior to the start of the Event.
- See: [4]
Involved Forces
The following list of historical ships is based on the kanmusu currently implemented:
| Operation Rei Go | Operation Love III | |||||||||||||||||||
|---|---|---|---|---|---|---|---|---|---|---|---|---|---|---|---|---|---|---|---|---|
|
|
Information
Quick Info Table
| Classification | Map | Name | Fleet Type | LBAS | Friendly Fleet | Fleet Tags | Notes |
|---|---|---|---|---|---|---|---|
| 1st Stage Operations | E-1 | Hokkaido Defence Operation | Single Striking |
1/2 | TBA | ||
| E-2 | Otoineppu Defense Line | Striking Combined |
2 | TBA | |||
| E-3 | The Rumoi Sea Fleet's Decisive Battle | Striking Combined |
2/3 | TBA | |||
| 2nd Stage Operations | E-4 | War Clouds off the Spratly Islands | TBA | 2/3 | TBA | ||
| E-5 | Second Operation Rei-Go | TBA | 1/? | TBA | |||
| E-6 | Return of the Second Striking Force | TBA | TBA | TBA | Lock limited to Hard Only
|
Fleet Locking Table
| Tags | E-1 | E-2 | E-3 | E-4 | E-5 | E-6 | |
|---|---|---|---|---|---|---|---|
| 104th Squadron | Gimmick 1 & 2 Single |
Gimmick 2 Striking |
|||||
| 1st Fleet | Gimmick 2 Phase 1 Striking |
Gimmick 1 & 2 Striking |
|||||
| 5th Fleet | Phase 1 & 2 Combined |
Gimmick 1 Phase 1 Striking |
|||||
| Combined Fleet | Gimmick 2 Phase 2 & 3 Combined |
||||||
| Southwestern Area Unit | ? | ||||||
| Operation Rei-go Unit | ? | ? | |||||
| Cavite Reinforcement Unit | ? | ||||||
| 31st Squadron | ? | ||||||
| 4th Carrier Division | ? | ||||||
| 2nd Strike Force | ? | ||||||
Event-Wide Bonuses
Note: Ship-specific bonuses are displayed here.
- Ship class bonuses are excluded from this table for simplicity but still apply.
Do note that several of the 5th fleet members will have historical significance in the "2nd Stage Operations"!
| Event-Wide Bonus Ships: 1st Stage Operations | ||||||||||||||||
|---|---|---|---|---|---|---|---|---|---|---|---|---|---|---|---|---|
| Ship [Toggle Names] |
Type | E-1 | E-2 | E-3 | ||||||||||||
| Mapwide | Mapwide | NodesC/D/F1/F2/H/I/K (A1 unconfirmed) |
Mapwide | |||||||||||||
Ootomari Kai Souya |
Fleet Oiler (AO) |
1.28 | 1.28 | 1.28 | ||||||||||||
|
Heavy Cruiser (CA) |
1.16 | 1.16 | 1.2992 | 1.2296 | 1.3456 | 1.16 | 1.2064 | 1.2412 | 1.2296 | ||||||
|
Light Cruiser / Torpedo Cruiser (CL/CLT) |
1.16 | 1.16 | 1.2528 | 1.218 | 1.2992 | 1.16 | 1.2296 | 1.2296 | 1.2528 | ||||||
|
Destroyer (DD) |
1.16 | 1.16 | 1.2296 | 1.2064 | 1.2528 | 1.16 | 1.2528 | 1.218 | 1.2296 | ||||||
|
Multiple | 1.11 | 1.12 | 1.13 | ||||||||||||
|
Multiple | 1.16 | 1.16 | |||||||||||||
New Mechanics


E-2 and E-5 have a new kind of Transport Operation, where "tanks" do work better:
| Landing Operation - Equipment [5] | |||
|---|---|---|---|
| Type | Equipment | S-Rank | A-Rank |
Daihatsu Landing Craft Toku Daihatsu Landing Craft  Armed Daihatsu  Soukoutei 
|
5.2 | 3.64 | |
DLC + T89 Tank |
14.2 | 9.94 | |
DLC + Panzer II |
21.2 | 14.84 | |
Toku DLC + Ho-Ni Tank |
40.2 | 28.14 | |
Toku DLC + 11th Reg |
46.2 | 32.34 | |
M4A1 DD |
24.2 | 16.94 | |
Toku DLC + Panzer III |
27.2 | 19.04 | |
Toku DLC + Chi-Ha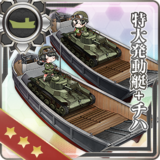 |
22.2 | 15.54 | |
Toku DLC + Chi-Ha Kai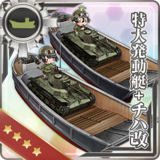 |
28.2 | 19.74 | |
Toku DLC + Panzer III J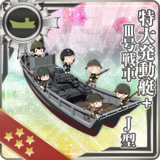 |
32.2 | 22.54 | |
Ka-Mi tank |
9.3 | 6.51 | |
Ka-Tsu tank |
6.3 | 4.41 | |
Ka-Tsu tank Kai |
8.3 | 5.81 | |
Army Infantry Corps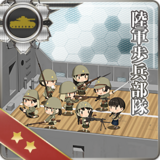 |
15.0 | 10.50 | |
Chi-Ha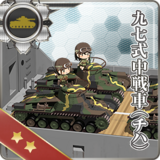 |
17.0 | 11.90 | |
Chi-Ha Kai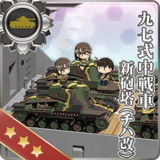 |
23.0 | 16.10 | |
Infantry + Chi-Ha Kai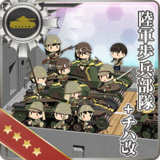 |
38.0 | 26.60 | |
Drum Canisters |
3.25 | 2.275 | |
Rations   |
0.65 | 0.455 | |
| Landing Operation - Ship [6] | |||
|---|---|---|---|
| Ship Type | S-Rank | A-Rank | |
| AO | Fleet Oiler | 9.75 | 6.825 |
| LHA | Amphibious Assault Ship | 7.8 | 5.46 |
Kinu Kai Ni
|
8 | 5.6 | |
| AV | Seaplane Tender | 5.85 | 4.095 |
| BBV | Aviation Battleship | 4.55 | 3.185 |
| AS | Submarine Tender | ||
| CT | Training Cruiser | 3.90 | 2.730 |
| DD | Destroyer | 3.25 | 2.275 |
| CAV | Aviation Cruiser | 2.60 | 1.820 |
| CL | Light Cruiser | 1.30 | 0.910 |
| SSV | Aircraft Carrying Submarine | 0.65 | 0.455 |
| BB | Battleship | 0.0 | 0.0 |
| FBB | Fast Battleship | ||
| CV | Standard Carrier | ||
| CVB | Armored Carrier | ||
| CVL | Light Carrier | ||
| CA | Heavy Cruiser | ||
| CLT | Torpedo Cruiser | ||
| DE | Coastal Defense Ships | ||
| SS | Submarine | ||
- Notes
- The total amount of TP is computed separately for each fleet in a combined fleet, with a rounding down on each.
New Ships
| AO | Ootomari | E-1 & E-2 Drop | |
| SS | Wahoo | E-2 Reward & E-3 Drop | |
| DD | Kaya | E-2, E-3, & E-4 Drop | |
| CL | Kirov | E-3 Reward | |
| DD | Sugi | E-4 & E-5 Drop | |
| AO | Shimane Maru | ? | |
| CA | Minneapolis | E-6 Reward |
- Matsu-class "Kashi" have been announced but not introduced this event,
- USS Boise (CL-47) and USS Louisville (CA-28) have been teased but not introduced this event.
Returning Ships
A non-exhaustive list of "notable returning ships". Please refer to drop table of each individual map for more complete lists.
- See below for the full list of returning "Event Only Drops",
- See uptodate drop database via KCnav, or via Discord bots.
| Notable returning ships [Toggle Names] | ||||||||||||||||||||||||||||||||||||||||||||||||||||||||||||||||||||||||||||||||||||||||||
|---|---|---|---|---|---|---|---|---|---|---|---|---|---|---|---|---|---|---|---|---|---|---|---|---|---|---|---|---|---|---|---|---|---|---|---|---|---|---|---|---|---|---|---|---|---|---|---|---|---|---|---|---|---|---|---|---|---|---|---|---|---|---|---|---|---|---|---|---|---|---|---|---|---|---|---|---|---|---|---|---|---|---|---|---|---|---|---|---|---|---|
| ||||||||||||||||||||||||||||||||||||||||||||||||||||||||||||||||||||||||||||||||||||||||||
New Equipment


New Enemy Vessels
- Destroyer Ra-Class (α, β, γ, δ, ζ)
- Transport Ship Wa-Class B (Landing) Elite
- Submarine Seerfish Water Demon
- Non-Treaty Cruiser Water Princess
- Supply Depot Princess Kai
- 飛行場棲姫
- 重巡新棲姫
New Enemy Equipment
Friendly Fleets
Friendly Fleets (FF) come with a function that allows players to choose if they want to use a FF to aid them in battle or not. It is possible to choose between using "normal only" or "normal and powerful" FF. Powerful FF have an additional cost of 6 Instant Constructions ![]() for each time they are deployed in a battle (the blowtorches won't be consumed unless a powerful FF appears).
for each time they are deployed in a battle (the blowtorches won't be consumed unless a powerful FF appears).
- Friendly Fleets are available on:
- Soon™
Voice Lines
Mechanics
Participation requirements
To take part in any event, a player MUST HAVE at least:
- A 75% sortie win ratio.
- 5 empty ship slots.
- 20 empty equipment slots.
Special Mechanics
In addition to regular Sortie mechanics, events often involve some specific or rarer mechanics :
| Map Clearing Medals | |||
|---|---|---|---|
Hard
|
Medium
|
Easy
|
Casual
|
Depending of the HQ level, it is possible to choose between:
- Hard ("operation A", 甲), at HQ 80+
- Medium ("operation B", 乙), at HQ 35+
- Easy ("operation C", 丙), at HQ 1+
- Casual ("operation D", 丁), at HQ 1+
The map difficulty will directly affect the enemy encounters, making them more numerous, with higher stats, or even replacing weaker ships with stonger ones. Additionaly, will vary:
- The maps' phases' gauges (HP/TP),
- The amount of map gimmicks to complete,
- The LoS requirements,
- The maps' rewards,
- The ship Drops.
Changing difficulty is possible but limited:
- When switching from any "lower" difficulty to any "higher" difficulty, the map will fully be reset.
- When switching from any "higher" difficulty to any "lower" difficulty, the map will stay in the very same state it was previously, with only +25% of TP/HP being reset on the current phase's TP/HP bar.
- Gimmicks might also be reset when applicable, notably the debuffs.
Beginning with the second map, difficulty progression rules apply.
- In order to play a map on Hard difficulty, the prior map must have been completed on either Medium or Hard.
- In order to play a map on Medium difficulty, the prior map must have been completed on either Easy, Medium, or Hard.
To simulate simultaneity of battles in different locations, Fleet Tags conditions & deployment restrictions are employed.
- Ships not already tagged will be tagged with the associated tag of the map phase when deployed. This tag will be applied regardless of the difficulty and can't be removed by any measure before the end of the event.
- One map can use multiple tags, usually separated by phases or fleets.
- Several maps can share one or more tags.
- On Medium or Hard difficulty, ships must have either the same tag as the map/phase they are being deployed to, or have no tag at all.
- This requirement is sometimes waived on certain maps, mostly on the last map of the event where tags only matter on Hard.
- Once the event is cleared (last map of the EO), all tag restrictions stop getting enforced on every map (tag routing will still apply).
The Combined Fleet (CF), a fleet assembling both the 1st and 2nd fleets, may come back.
- The CF is only available for the two 1st fleets, where the 2nd fleet can be merged with the 1st one in the "Fleet menu".
- The CF cannot be used in anything outside of event sorties.
- 3 different types of CF are available, depending on the map requirements and the current fleet setup.
- CF with a flagship that carries the
 Fleet Command Facility
 , will be able to make use of the Evacuation mechanic.
- The evacuation requires an escort destroyer.
- Only one ship can be evacuated per battle.
The Striking Force Fleet (SF), a fleet with seven ships, may come back.
- The SF is only available for the 3rd fleet, where an extra 7th ship can be added in the Fleet menu.
- The SF cannot be used in anything outside of event sorties.
- A SF with a flagship that carries the Striking Force Fleet Command Facility
 , will be able to make use of the Evacuation mechanic.
- Only one ship can be evacuated per battle.
The Vanguard Formation can be used.
- This formation will organize the fleet such that the 2 to 3 last ships protect the 2 to 4 first ships of the Fleet.
- This formation is available for single and Strike Force fleets made of 4 to 7 ships.
- The formation makes ships way more evasive in combat, especially DD, and more accurate against DD, especially PT Imps.
- This formation is available only during the duration of the event, on the event's maps as well as on the regular maps.
NPC Friendly Fleets (FF) may be introduced to the event.
- FFs act as another unit that appears in particular battles to help aid the fleet when attacking the enemy.
- It is possible to choose between using "normal only" or "normal and powerful" FF in the main menu.
- Powerful FFs have an additional cost of 6 Instant Constructions
 for each time they are deployed in a battle.
- The blowtorches won't be consumed unless a powerful FF appears.
- If activated, one FF is randomly selected from a preset list of fleets to help the fleet.
- Which ships are in the fleet will influence which FF can help, excluding the FFs containing ships also in the main fleet.
- The FF will appear at the start of either day or night battle, depending on the node.
- Powerful FFs have an additional cost of 6 Instant Constructions
- FFs are usually available sometime after the start of the event, to help Admirals facing difficulties clearing the maps.
Most maps have various bonuses, coming in many shapes. Since most of those bonuses follow the historical formations/tactics used in the relevant operations, they are referred to as "Historical Bonuses". Such bonuses are also found on 7-4 and 7-5.
- The bonuses can be given to:
- Ships, including all remodels,
- Ship types, with all ships of a given type sharing a bonus,
- In those cases, types do not overlap (e.g. a CLT does not count as a CL),
- Ships Nationalities, with foreigners (non-Japanese) sharing a bonus,
- Equipment, with some types or specific ones giving a bonus,
- It is only applied to the ship they are equipped on,
- For planes, those bonuses won't work if the plane count is 0, but for the Foreign Plane Bonuses.
- Then, bonuses can be applied:
- Map-wide, working on all nodes
- On some Nodes only, with usually boss or gimmick nodes having some bonuses,
- Those node bonuses are often split following the map's phases.
- Against some abyssals specifically,
- Usually bosses and their escorts,
- Bonuses are either damage, accuracy, and/or evasion,
- Damage and evasion bonuses are "post-cap",
- Some gimmicks like the map's phase can further affect the bonuses (usually the Debuff).
- Completion Gimmicks might be required to further progress the map, demanding certain conditions to be accomplished on a given map to unlock several things :
- Boss Debuffs, where once the "Last Dance" of the final boss of a given map is reached, its debuffed form can be unlocked.
- Map phases, where some map areas need to be unlocked, like on 7-2, 7-3, and 7-5.
- Map areas can either be a path to the next boss, an intermediate path asking for new gimmicks, or a shortcut.
- LBAS Relocation.
- Choosing a higher difficulty on an event map will reset it to its initial state.
- These conditions range from reaching certain nodes, defeating specific nodes, attaining air superiority on certain nodes, and defending against Air Raids. As soon as all the given conditions are met, the map advances to the next phase. Lower difficulties may require fewer conditions to be met to complete the phase. The order in which the gimmicks are completed does not matter.
- Completing a gimmick will play a "bell" sound once back in the main port (Play Bell Completion Sound Effect).
- Nodes required to be visited/defeated in gimmicks are highlighted.
- Special Nodes:
- Emergency Anchorage Repairs:
- Akashi Kai, Asahi Kai, and Akitsushima Kai can be capable of conducting emergency repairs; however, only Akashi has the full capabilities compared to the others.
- This consumes
 Emergency Repair Materials.
 - AR Kai, Akitsushima Kai, and AO Kai will also take advantage of the special routing linked to this mechanic, even if it is not used.
- Enemy Ambush Nodes, "off-route ambush nodes",
- They serve as a "radar check", with fleets lacking enough Surface Radars being off-routed there,
- The fleet will not be able to fight against the enemy fleet.
- Airstrike Supported Battle Nodes, ("ASS nodes") "off-route combat nodes",
- The enemy fleet will consist of "normal surface enemies" (4-5 SS so far), followed by "air support enemies" (1-2 CVL so far), bringing air support, and that cannot be attacked,
- By meeting certain conditions, these nodes can be evaded.
- "Balloon Nodes", being most nodes having one or more Installation in it, and were
 Barrage Balloons can be deployed.
 - "Atoll Nodes", being some nodes located on atolls, and were
 Ka-Tsu tanks spacial attack can be triggered.
- Emergency Anchorage Repairs:

- High-Altitude Abyssal Bombers that are resistant to all types of interceptors other than the Land-Based Rocket Interceptors
 .
.
- Superfortress Air-Raid Sequence, a QTE where the LBAS is attacked by bombers, and where the player must click on a button at the right moment to obtain better interception, using "Land-based high-altitude interceptors".
 AGDP Arctic Gear & Deck Personnel
 (AGDP) needs to be equipped on CV(B/L), Ise-class Kai Ni, and Akitsu Maru Kai, to sortie them on "arctic" maps. Exclusive to the Fall 2020 Event and Early Spring 2024 Event so far.
Bug: It is possible to save a sunk ship in events:
- When sinking a ship on a "time-limited event map", by closing the game before the battle ends (before battle result screen is shown), and refraining from logging in until a maintenance in which the time-limited map is removed from the game occurs, upon entering the game after the map is removed, the sunken ship will remain in the game, at 0 HP and with the "Sunk" status.
- The ship can be repaired as per normal; removing this status, and sortieing it at 0HP will cause it to return to 1HP.
- Opening the game at any time before the map is removed, or sinking a ship in a normal map will not enact this behavior, regardless of whether a maintenance has occurred or not.
Some error messages you may encounter before a sortie.
- Do note that:
- Most errors are "general" and can be seen in many situations,
- Some errors are event only, being liked to event maps/locks/mechanics.
| Original message | Translation |
|---|---|
 |

|
 |

|
 |

|
 |

|
 |

|
 |

|
 |

|
 |

|
 |

|
 |

|
 |

|
 |

|
 |

|
 |

|
 |

|
 |

|
 |

|
 |

|
 |

|
 |

|
 |

|
 |

|
 |

|
 |

|
 |

|
 |

|
 |

|
 |

|
 |

|
 |

|
 |

|
 |

|
 |

|
 |

|
 |

|
 |

|
 |

|
 |

|
 |

|
 |

|
 |

|
 |

|
 |

|
 |

|
 |

|
 |

|
 |

|
 |

|
 |

|
 |

|
 |
|
 |

|
 |

|
 |

|
 |

|
 |

|
 |

|
 |

|
 |

|
 |

|
 |

|
- Event mechanics:
- Help:Event Preparation
- Ship Locking ("Tags")
- Combined Fleet (STF/CTF/TCF)
- Striking Force Fleet (SF)
- Vanguard Formation ("Spoon")
- Transport Operation (TP)
- Debuffs
- Friendly Fleets (FF)
- Emergency Anchorage Repair
- Foreign Plane Bonuses
- General mechanics:
Farming
LBAS Leveling
It is possible to regain Proficiency for LBAS aircraft on the following spots:
| Map | Amount of LBAS |
LBAS range |
Recommended Fleets |
Route | Lock | Notes |
|---|---|---|---|---|---|---|
| E-1 | 1 | 2 | 1 SS(V) | 1 D
1 B B1 |
||
| E-2 | 2 | 6 | 1 SS(V) | 1 A A1 | ||
| E-3 | 2 | 1 | 2 SS(V) | 1 H H1 H3 |
Resource Farming
Resource Nodes are present on this event and can bring some substantial resources:
| Map | Nodes | Resource | Gains | Cap | Recommended Fleets | Route | Lock | Notes |
|---|---|---|---|---|---|---|---|---|
| E-1 | C2 | 33 | 144? | 0-1 CVL, 1 CL/AO, 4/5 DD | 1 A B B2 C1 C2 |
|
| Special Resource Nodes Gain Modifiers Type 1 | |||||||||||||
|---|---|---|---|---|---|---|---|---|---|---|---|---|---|
| Equipment / Ship | Bonus Gains (per DLC / Ship)[1] | ||||||||||||
| Type | Name | 2-5 | 5-4 I |
5-5 E |
7-4 O | ||||||||
| M |
N |
||||||||||||
| A | Toku Daihatsu Landing Craft Daihatsu Landing Craft Armed Daihatsu DLC + T89 Tank DLC + Panzer II Soukoutei Toku DLC + Ho-Ni Tank
|
5.0 | 10.0 | 15.0 | 10.0 | 7.0 | 10.0 | ||||||
| Ka-Mi Tank Ka-Tsu Tank Ka-Tsu Tank Kai
| |||||||||||||
| B | Drums
|
10.0 | 5.0 | 10.0 | 15.0 | 8.0 | 6.0 | ||||||
| C | Toku DLC + 11th Reg M4A1 DD Toku DLC + Panzer III Toku DLC + Chi-Ha Toku DLC + Chi-Ha Kai Toku DLC + Panzer III J
|
0.0 | |||||||||||
| Ship | Souya  
|
0.0 | 0.0 | 0.0 | 0.0 | 22.0 | 16.0 | ||||||
| AO | 15.0 | 10.0 | |||||||||||
| BBV | 10.0 | 10.0 | |||||||||||
| LHA | 8.0 | 7.0 | |||||||||||
| CVL | 7.0 | 4.0 | |||||||||||
| AV | 6.0 | 5.0 | |||||||||||
| AS | 5.0 | 5.0 | |||||||||||
| Other types | 0.0 | 0.0 | |||||||||||
| Resource Cap | 150 | 150 | 180 | 180 | 200 | 120 | |||||||
| Random Resource Increments | 0 | ||||||||||||
Notes:
| |||||||||||||
See Also
| [edit]Event Only Drops History | ||||||||||||||||||||
|---|---|---|---|---|---|---|---|---|---|---|---|---|---|---|---|---|---|---|---|---|
| Legend: R = Reward, R & D = Reward & Drop, D = Drop, Empty = not implemented yet, N = not dropped | ||||||||||||||||||||
| Exclusive Ships | 2018 Events | 2019 Events | 2020 Events | 2021 Events | 2022 Events | 2023 Events | 2024 Events | 2025 Events | ||||||||||||
| Portrait Name | ||||||||||||||||||||
 Akizuki |
R | N | N | D | N | D | N | D | N | N | N | N | D | D | D | D | N | N | D | D |
 Prinz Eugen |
R | D | N | N | N | N | N | N | D | N | D | N | N | D | D | N | N | N | D | |
 U-511 |
R | N | N | N | D | N | N | D | D | N | D | N | D | N | D | N | D | N | D | |
 Amagi |
R | N | N | N | N | D | N | N | N | N | N | N | N | D | N | D | N | N | N | |
 Katsuragi |
R | N | N | D | N | N | N | N | N | N | N | N | D | N | N | D | N | N | N | |
 Littorio |
R | D | N | N | D | N | N | N | D | N | D | N | N | N | D | N | D | N | D | |
 Roma |
D | D | N | N | D | N | N | N | N | N | D | N | N | N | D | N | D | N | D | |
 Teruzuki |
R | N | D | D | N | D | N | D | N | D | N | N | N | D | N | N | D | D | D | |
 Graf Zeppelin |
D | D | N | N | N | N | N | D | D | D | D | N | D | N | D | N | D | N | D | |
 Hatsuzuki |
R | D | N | N | N | D | N | D | D | D | N | N | D | N | N | D | N | N | D | D |
 Iowa |
R | N | N | D | N | N | N | N | N | N | N | N | D | N | D | D | N | N | N | D |
 Pola |
R | D | N | N | D | N | N | N | N | N | D | N | N | N | D | N | D | N | D | |
 Harukaze |
D | N | N | N | N | D | N | N | D | D | N | N | N | D | N | D | N | N | N | |
 Aquila |
D | D | N | N | D | N | N | N | D | N | D | N | N | N | D | N | D | N | D | |
 I-26 |
D | D | N | N | D | D | N | D | N | D | N | D | N | N | D | D | D | D | N | D |
 Commandant Teste |
R | D | N | D | D | N | N | N | D | N | N | D | N | D | D | N | D | N | D | |
 Matsukaze |
R | D | N | N | N | D | N | D | D | D | N | N | N | D | N | D | N | N | N | |
 I-14 |
R | D | N | N | N | N | N | D | N | N | N | N | N | D | N | N | D | D | N | |
 I-13 |
D | D | N | N | N | D | N | D | N | N | N | N | N | D | N | N | D | D | N | |
 Kasuga Maru |
R | D | D | D | N | D | N | D | D | D | N | D | D | N | N | N | N | N | N | |
 Gangut |
R | N | N | D | N | N | N | D | D | N | D | N | N | N | N | N | N | N | N | D |
 Shimushu |
D | D | D | D | N | N | N | D | D | D | D | D | N | D | D | N | D | D | N | D |
 Kunashiri |
D | D | D | D | N | D | N | D | N | D | D | D | N | N | D | N | D | D | N | D |
 Etorofu |
D | D | D | D | D | D | D | D | N | D | D | D | D | D | D | N | D | D | N | D |
 Hatakaze |
R | N | N | N | N | D | N | D | D | D | N | D | N | D | N | D | N | N | N | |
 Richelieu |
R | D | N | N | D | N | D | N | D | N | D | N | N | N | D | N | D | N | D | |
 Luigi Torelli |
D | D | N | D | D | N | N | D | D | N | D | N | D | N | D | N | D | N | N | |
 Matsuwa |
D | D | N | D | N | D | D | D | D | D | D | N | D | D | D | N | N | D | N | |
 Suzutsuki |
R | N | D | D | N | N | N | D | N | D | N | N | D | D | N | D | D | N | N | D |
 Sado |
R | D | N | D | D | D | D | D | D | D | D | D | D | D | D | N | N | N | D | |
 Tsushima |
D | D | D | D | D | D | D | D | D | D | N | D | D | D | D | D | D | N | D | D |
 I-400 |
D | D | N | D | N | N | N | D | N | N | N | D | N | D | D | D | N | D | D | |
 Hiburi |
R | D | D | D | D | D | N | D | D | D | N | D | D | D | D | N | N | D | N | |
 Gambier Bay |
R | N | N | D | N | N | D | D | D | N | N | N | N | D | D | D | D | N | D | |
 Intrepid |
R | N | N | D | N | N | N | N | N | N | N | D | N | D | D | D | D | D | D | D |
 Daitou |
D | D | D | D | D | D | N | D | D | D | N | D | D | D | D | N | D | N | D | D |
 Jervis |
D | N | N | N | D | N | N | N | D | N | D | N | D | N | D | N | D | N | D | |
 Hamanami |
D | N | D | D | D | D | D | D | D | D | D | N | D | D | D | N | N | N | D | D |
 Tashkent |
D | N | N | D | D | N | N | D | D | N | N | N | N | N | N | N | N | N | D | D |
 Samuel B. Roberts |
[EDT 1] | N | N | D | N | N | D | N | N | N | N | N | D | D | D | N | D | D | N | |
 Fukae |
[EDT 2] | D | D | D | D | D | D | D | N | N | N | D | D | D | D | N | N | N | N | D |
 Shinyou |
R | N | D | D | D | N | D | D | N | D | D | D | D | D | N | D | N | N | ||
 Maestrale |
R | N | N | D | N | N | N | N | N | D | N | N | N | D | N | D | N | D | ||
 Nelson |
R | N | N | D | N | N | N | D | N | D | N | N | N | D | N | D | D | D | ||
 Gotland |
D | D | D | D | N | D | N | D | N | N | N | N | D | N | N | D | N | D | D | |
 Minegumo |
R | N | D | D | D | D | N | D | N | N | N | D | N | N | N | N | N | |||
 Nisshin |
R | N | N | N | N | D | N | D | N | N | N | D | N | D | N | D | N | |||
 Hayanami |
D | D | D | D | D | D | D | D | D | N | D | D | D | N | N | N | D | D | ||
 Johnston |
D | D | D | N | N | D | N | N | N | N | N | D | D | D | D | D | N | |||
 Giuseppe Garibaldi |
R | N | N | N | N | D | N | D | N | N | N | D | N | D | N | N | ||||
 Colorado |
R | N | N | N | N | D | D | N | N | D | D | D | N | N | D | N | ||||
 Hachijou |
R | N | D | N | D | N | D | D | D | D | D | D | D | N | D | N | D | |||
 Ishigaki |
D | N | D | N | D | N | D | D | D | D | D | D | D | N | D | N | ||||
 Fletcher |
D | N | D | N | D | N | D | N | D | N | D | D | D | D | D | D | ||||
 Duca degli Abruzzi |
R | N | N | N | N | N | D | N | N | N | D | N | D | N | N | |||||
 Janus |
R | N | N | N | D | N | D | N | N | N | D | N | D | N | D | |||||
 Mikura |
D | D | N | D | N | D | N | D | D | D | N | D | N | N | D | D | ||||
 Grecale |
D | N | N | N | D | N | D | N | N | N | D | N | D | N | D | |||||
 Perth |
R | N | D | D | D | D | N | D | D | D | N | D | N | N | ||||||
 Shinshuu Maru |
R | N | N | D | D | N | D | D | N | N | D | D | N | D | ||||||
 Atlanta |
R | N | N | N | N | N | N | D | N | N | D | D | D | D | ||||||
 De Ruyter |
D | N | D | N | N | N | N | D | N | N | N | D | N | N | ||||||
 Houston |
D | N | D | N | D | N | N | D | N | D | D | D | D | N | ||||||
 Hirato |
D | D | D | N | D | N | D | D | D | D | D | N | N | N | ||||||
 Akishimo |
D | N | D | N | D | N | N | N | D | D | N | D | N | N | D | |||||
 Usugumo |
R | N | N | N | D | N | D | D | D | D | D | D | D | |||||||
 I-47 |
R | N | D | N | N | D | D | D | N | N | D | N | ||||||||
 Matsu |
R | N | N | N | D | D | N | N | D | D | N | N | D | |||||||
 South Dakota |
R | N | D | N | N | D | D | D | D | D | D | N | ||||||||
 Hornet |
R | N | D | N | N | D | D | D | D | D | D | D | D | |||||||
 Jingei |
D | D | D | N | N | D | D | D | D | D | D | D | ||||||||
 Kaiboukan No.4 |
D | D | D | D | D | D | D | N | D | D | N | N | ||||||||
 Ariake |
D | N | D | D | N | D | D | N | D | D | N | D | D | |||||||
 Helena |
D | N | D | N | N | D | N | D | D | D | D | N | ||||||||
 Yashiro |
D | N | D | N | D | D | D | N | D | N | D | D | D | |||||||
 Washington |
R | D | D | N | D | N | D | D | D | D | N | |||||||||
 Take |
R | N | N | D | D | N | N | D | D | N | D | D | ||||||||
 Scirocco |
D | N | D | N | N | N | D | N | D | N | D | |||||||||
 Sheffield |
D | N | D | N | D | N | D | N | D | D | D | |||||||||
 Momo |
R | N | D | D | N | N | N | D | N | N | D | |||||||||
 Northampton |
R | N | N | N | N | D | N | N | D | N | D | |||||||||
 Honolulu |
R | N | N | N | N | N | D | D | D | D | D | |||||||||
 I-203 |
D | N | D | D | D | N | D | D | N | N | ||||||||||
 Makinami |
D | N | N | N | D | N | N | N | N | N | ||||||||||
 Suzunami |
D | D | N | N | D | D | N | D | N | D | D | |||||||||
Souya (AGS) |
D | D | D | D | D | N | D | D | D | N | D | |||||||||
 Conte di Cavour |
R | N | N | N | N | N | N | N | D | |||||||||||
 Victorious |
R | N | D | N | N | N | D | D | D | |||||||||||
 Chougei |
D | D | D | D | D | N | D | D | D | |||||||||||
 Kaiboukan No.30 |
D | D | D | D | N | D | D | N | N | |||||||||||
 Scamp |
R | N | D | N | D | D | D | N | D | |||||||||||
 Shounan |
D | D | D | D | N | D | D | D | D | |||||||||||
 Yamashio Maru |
R | N | N | D | D | N | N | D | ||||||||||||
 Fuyutsuki |
R | N | N | D | D | N | D | D | ||||||||||||
 Ume |
D | N | N | D | D | N | N | D | ||||||||||||
 Tamanami |
D | D | N | N | N | N | N | D | ||||||||||||
 Hayashio |
R | N | N | N | N | D | D | |||||||||||||
 Maryland |
R | N | D | N | N | N | ||||||||||||||
 I-201 |
D | N | D | N | N | N | ||||||||||||||
 Kurahashi |
D | N | N | N | D | D | D | |||||||||||||
 Langley |
R | D | N | N | D | D | ||||||||||||||
 Ranger |
R | D | D | D | D | |||||||||||||||
 Jean Bart |
R | N | D | N | D | |||||||||||||||
 Ukuru |
D | N | D | N | D | D | ||||||||||||||
 Natsugumo |
D | N | N | N | D | |||||||||||||||
 Brooklyn |
D | D | D | D | D | D | ||||||||||||||
 Massachusetts |
D | D | D | D | N | |||||||||||||||
 Kumano Maru |
R | D | N | N | D | |||||||||||||||
 Tuscaloosa |
R&D | D | D | N | D | |||||||||||||||
 No.101 Transport Ship |
R | D | D | D | D | |||||||||||||||
 Yuugure |
D | D | N | D | D | |||||||||||||||
 Heywood L. Edwards |
D | D | D | N | ||||||||||||||||
 Noumi |
D | N | N | D | D | |||||||||||||||
 Inagi |
R&D | N | D | D | ||||||||||||||||
 Shirakumo |
R | D | N | D | ||||||||||||||||
 Nevada |
R&D | N | D | |||||||||||||||||
 Rodney |
R | N | D | |||||||||||||||||
 Kaiboukan No.22 |
D | N | N | D | ||||||||||||||||
 Asahi |
D | D | N | |||||||||||||||||
 Salmon |
D | D | N | |||||||||||||||||
 C.Cappellini |
D | D | D | |||||||||||||||||
 Javelin |
D | N | D | |||||||||||||||||
 Drum |
R | N | ||||||||||||||||||
 I-41 |
R | N | ||||||||||||||||||
 I-36 |
D | N | D | |||||||||||||||||
 Heian Maru |
D | D | D | |||||||||||||||||
 Gloire |
R&D | |||||||||||||||||||
 Lexington |
R | D | ||||||||||||||||||
 Mogador |
D | |||||||||||||||||||
 Valiant |
D | |||||||||||||||||||
 Phoenix |
D | D | ||||||||||||||||||
 Wahoo |
R&D | |||||||||||||||||||
 Kirov |
R | |||||||||||||||||||
 Minneapolis |
R | |||||||||||||||||||
 Ootomari |
D | |||||||||||||||||||
 Kaya |
D | |||||||||||||||||||
 Sugi |
D | |||||||||||||||||||
 Shimane Maru |
D | |||||||||||||||||||
This table includes all ships that are currently not permanently available outside of events (Limited Time Drops are still counted as "event drops").
| ||||||||||||||||||||
|
| |||||||||
|---|---|---|---|---|---|---|---|---|---|
|
The 2nd Stage Operations have been released!
FF release: TBA Approximate time until the end of the event: ([10] KC 12th anniversary)
| |||||||||
| ||||||||||||||||||||||||||||||||||||||||||||||||||||||||||||||||