- Welcome to the Kancolle Wiki!
- If you have any questions regarding site content, account registration, etc., please visit the KanColle Wiki Discord
Difference between revisions of "Early Spring 2024 Event/Info"
Jigaraphale (talk | contribs) |
Jigaraphale (talk | contribs) m |
||
| (37 intermediate revisions by 3 users not shown) | |||
| Line 1: | Line 1: | ||
{{:{{ROOTPAGENAME}}/Hub}} | {{:{{ROOTPAGENAME}}/Hub}} | ||
| − | The '''{{ROOTPAGENAME}}''', | + | The '''{{ROOTPAGENAME}}''', launched on the '''1st of March 2024''' (1 day delay), with a delayed launch of 2 days for the 2nd half of the event, and ended on the 10th of April 2024. It is a '''"Medium Scale Event"'''. |
| − | *The 1st Stage Operations | + | *The 1st Stage Operations are titled "Commence! Operation Tatsumaki!", |
**It will involve the use of submarines, submarine tenders, and amphibious tanks. | **It will involve the use of submarines, submarine tenders, and amphibious tanks. | ||
*The 2nd Stage Operation theme is unknown yet. | *The 2nd Stage Operation theme is unknown yet. | ||
| Line 12: | Line 12: | ||
=Historical Background= | =Historical Background= | ||
| − | + | <div class="mw-collapsible mw-collapsed"> | |
==Operation Tatsumaki== | ==Operation Tatsumaki== | ||
| Line 118: | Line 118: | ||
|} | |} | ||
|} | |} | ||
| − | |||
</div> | </div> | ||
| Line 138: | Line 137: | ||
| '''Single | | '''Single | ||
| '''1 | | '''1 | ||
| − | | | + | | {{MapRoute|X|red}} |
| [[File:{{ROOTPAGENAME}} Tag 1.png|40px]]{{·}}[[File:{{ROOTPAGENAME}} Tag 2.png|40px]]{{·}}[[File:{{ROOTPAGENAME}} Tag 3.png|40px]] | | [[File:{{ROOTPAGENAME}} Tag 1.png|40px]]{{·}}[[File:{{ROOTPAGENAME}} Tag 2.png|40px]]{{·}}[[File:{{ROOTPAGENAME}} Tag 3.png|40px]] | ||
|style="text-align:left"| | |style="text-align:left"| | ||
| Line 145: | Line 144: | ||
| '''Operation Tatsumaki | | '''Operation Tatsumaki | ||
| '''Single<br>Striking Force<br>Combined | | '''Single<br>Striking Force<br>Combined | ||
| − | | ''' | + | | '''2 |
| − | | | + | | {{MapRoute|Y|red}} |
| [[File:{{ROOTPAGENAME}} Tag 2.png|40px]]{{·}}[[File:{{ROOTPAGENAME}} Tag 4.png|40px]]{{·}}[[File:{{ROOTPAGENAME}} Tag 5.png|40px]] | | [[File:{{ROOTPAGENAME}} Tag 2.png|40px]]{{·}}[[File:{{ROOTPAGENAME}} Tag 4.png|40px]]{{·}}[[File:{{ROOTPAGENAME}} Tag 5.png|40px]] | ||
|style="text-align:left"| | |style="text-align:left"| | ||
| Line 153: | Line 152: | ||
| '''Break into the Anchorage! Operation Tatsumaki (Expanded) | | '''Break into the Anchorage! Operation Tatsumaki (Expanded) | ||
| '''Striking Force<br>Combined | | '''Striking Force<br>Combined | ||
| − | | ''' | + | | '''2 |
| − | | | + | | {{MapRoute|O3|red}} |
| [[File:{{ROOTPAGENAME}} Tag 4.png|40px]]{{·}}[[File:{{ROOTPAGENAME}} Tag 5.png|40px]]{{·}}[[File:{{ROOTPAGENAME}} Tag 6.png|40px]]{{·}}[[File:{{ROOTPAGENAME}} Tag 7.png|40px]] | | [[File:{{ROOTPAGENAME}} Tag 4.png|40px]]{{·}}[[File:{{ROOTPAGENAME}} Tag 5.png|40px]]{{·}}[[File:{{ROOTPAGENAME}} Tag 6.png|40px]]{{·}}[[File:{{ROOTPAGENAME}} Tag 7.png|40px]] | ||
|style="text-align:left"| | |style="text-align:left"| | ||
| Line 161: | Line 160: | ||
! [[{{ROOTPAGENAME}}/E-4|E-4]] | ! [[{{ROOTPAGENAME}}/E-4|E-4]] | ||
| '''New Operation Z Kai | | '''New Operation Z Kai | ||
| − | | ''' | + | | '''Striking Force<br>Combined |
| − | | ''' | + | | '''3 |
| − | | | + | | {{MapRoute|G|red|Z|red}} |
| − | | [[File:{{ROOTPAGENAME}} Tag | + | | [[File:{{ROOTPAGENAME}} Tag 8.png|40px]]{{·}}[[File:{{ROOTPAGENAME}} Tag 9.png|40px]]{{·}}[[File:{{ROOTPAGENAME}} Tag 10.png|40px]]{{·}}[[File:{{ROOTPAGENAME}} Tag 11.png|40px]] |
|style="text-align:left"|'''Lock limited to Hard Only''' | |style="text-align:left"|'''Lock limited to Hard Only''' | ||
* Once E-4 is cleared, {{TextGlow|'''tag restrictions stop getting enforced on every map!'''|black|text-colour=Lime|glow-size=2px}} | * Once E-4 is cleared, {{TextGlow|'''tag restrictions stop getting enforced on every map!'''|black|text-colour=Lime|glow-size=2px}} | ||
|} | |} | ||
| − | |||
===Fleet Locking Table=== | ===Fleet Locking Table=== | ||
| Line 179: | Line 177: | ||
|- | |- | ||
![[File:{{ROOTPAGENAME}} Tag 1.png|40px]]!!1st Fleet | ![[File:{{ROOTPAGENAME}} Tag 1.png|40px]]!!1st Fleet | ||
| − | |style="background:Blue"|Starting point 1 | + | |style="background:Blue; color:white"|Gimmick<br>Starting point 1 |
| | | | ||
| | | | ||
| Line 185: | Line 183: | ||
|- | |- | ||
![[File:{{ROOTPAGENAME}} Tag 2.png|40px]]!!2nd Fleet | ![[File:{{ROOTPAGENAME}} Tag 2.png|40px]]!!2nd Fleet | ||
| − | |style="background: | + | |style="background:#56e4a4; color:black"|Starting point 2 |
| − | |style="background: | + | |style="background:#56e4a4; color:black"|Gimmick |
| | | | ||
| | | | ||
|- | |- | ||
![[File:{{ROOTPAGENAME}} Tag 3.png|40px]]!!5th Fleet | ![[File:{{ROOTPAGENAME}} Tag 3.png|40px]]!!5th Fleet | ||
| − | |style="background:Purple; color: | + | |style="background:Purple; color:white"|Starting point 3 |
| | | | ||
| | | | ||
| Line 198: | Line 196: | ||
![[File:{{ROOTPAGENAME}} Tag 4.png|40px]]!!''Task Force | ![[File:{{ROOTPAGENAME}} Tag 4.png|40px]]!!''Task Force | ||
| | | | ||
| − | |style="background:Cyan; color:black"| | + | |style="background:Cyan; color:black"|Phase 1 |
| − | |style="background:Cyan; color:black"| | + | |style="background:Cyan; color:black"|Gimmick<br>Phase 1 |
| | | | ||
|- | |- | ||
![[File:{{ROOTPAGENAME}} Tag 5.png|40px]]!!''6th Fleet | ![[File:{{ROOTPAGENAME}} Tag 5.png|40px]]!!''6th Fleet | ||
| | | | ||
| − | |style="background:yellow; color:black"| | + | |style="background:yellow; color:black"|Phase 2 |
| − | |style="background:yellow; color:black"| | + | |style="background:yellow; color:black"|Phase 3 |
| | | | ||
|- | |- | ||
| Line 211: | Line 209: | ||
| | | | ||
| | | | ||
| − | |style="background:#a4d56f; color:black"| | + | |style="background:#a4d56f; color:black"|Gimmick<br>Phase 2 |
| − | + | | | |
|- | |- | ||
![[File:{{ROOTPAGENAME}} Tag 7.png|40px]]!!''Vanguard Fleet | ![[File:{{ROOTPAGENAME}} Tag 7.png|40px]]!!''Vanguard Fleet | ||
| | | | ||
| | | | ||
| − | |style="background:gray; color: | + | |style="background:gray; color:white"|Phase 2<br>(optional) |
| + | | | ||
| + | |- | ||
| + | ![[File:{{ROOTPAGENAME}} Tag 8.png|40px]]!!''3rd Fleet | ||
| + | | | ||
| + | | | ||
| | | | ||
| + | |style="background:green; color:white"|Gimmick<br>Phase 1 | ||
|- | |- | ||
| − | ![[File:{{ROOTPAGENAME}} Tag | + | ![[File:{{ROOTPAGENAME}} Tag 9.png|40px]]!!''Wake Island Transport Unit |
| | | | ||
| | | | ||
| | | | ||
| − | |style="background: | + | |style="background:brown; color:white"|Phase 2 |
|- | |- | ||
| − | ![[File:{{ROOTPAGENAME}} Tag | + | ![[File:{{ROOTPAGENAME}} Tag 10.png|40px]]!!''The New Tatsumaki Fleet |
| | | | ||
| | | | ||
| | | | ||
| − | |style="background: | + | |style="background:orange; color:black"|Phase 3 |
|- | |- | ||
| − | ![[File:{{ROOTPAGENAME}} Tag | + | ![[File:{{ROOTPAGENAME}} Tag 11.png|40px]]!!''Op. Z Decisive Battle Fleet |
| | | | ||
| | | | ||
| | | | ||
| − | |style="background:gold; color:black"| | + | |style="background:gold; color:black"|Phase 4 |
|} | |} | ||
| + | |||
| + | ===Pay To Win Guide=== | ||
| + | This event requires to use "submarine fleets" on the last phases of E-2 and E-3 using the [[File:{{ROOTPAGENAME}} Tag 5.png|30px]] tag, and on the 2nd to last phase of E-4 using the [[File:{{ROOTPAGENAME}} Tag 10.png|30px]] tag. | ||
| + | |||
| + | In all cases, it is possible to clear those phases on "free to play", using regular fleets and mechanics. However, if possible, it is advised to utilize the "'''[[Submarine Touch]]'''" to at least clear each last dance, to save on cost and greatly optimize the clear rate. | ||
| + | *Using this touch imply to consume {{Card|Submarine Supply Material|type=Item|size=30x30px}} '''{{Item/Link|Submarine Supply Material}}''', a premium item. | ||
| + | To optimize the "pay to win" aspect of this mechanic, it is then advised to: | ||
| + | *Only buy Submarine Supply Material once in the [[Shop]], giving 3 of those for 500 DMM points, | ||
| + | *Only use this touch on the "last dance" of the boss of those specific phases, | ||
| + | *Always refresh ("F5") the game '''BEFORE the boss battle ends''' if the touch failed to kill the boss, to not consume any material on failed runs. | ||
| + | This way, a total of only '''3''' Submarine Supply Material is needed to clear the event. | ||
===Event-Wide Bonus=== | ===Event-Wide Bonus=== | ||
| Line 244: | Line 259: | ||
===New Mechanics=== | ===New Mechanics=== | ||
| − | + | {{:Ka-Tsu}} | |
| − | |||
| − | |||
| − | |||
| − | |||
| − | |||
| − | |||
| − | |||
===New Ships=== | ===New Ships=== | ||
| Line 261: | Line 269: | ||
|- | |- | ||
|{{Ship/Banner|small=true|I-41}} | |{{Ship/Banner|small=true|I-41}} | ||
| − | |[[ | + | |[[SSV]] |
|[[I-41]] | |[[I-41]] | ||
|E-4 Reward | |E-4 Reward | ||
| Line 273: | Line 281: | ||
|[[AS]] | |[[AS]] | ||
|[[Heian Maru]] | |[[Heian Maru]] | ||
| − | |E-2 drop | + | |E-2 & E-3 drop |
|} | |} | ||
| Line 292: | Line 300: | ||
!{{QuestRewardShip|Washington|small=true|collapsed=names}} | !{{QuestRewardShip|Washington|small=true|collapsed=names}} | ||
|E-2 | |E-2 | ||
| + | !{{QuestRewardShip|Massachusetts|small=true|collapsed=names}} | ||
| + | |E-2 | ||
| + | |- | ||
!{{QuestRewardShip|Colorado|small=true|collapsed=names}} | !{{QuestRewardShip|Colorado|small=true|collapsed=names}} | ||
|E-2 | |E-2 | ||
| − | |||
!{{QuestRewardShip|Warspite|small=true|collapsed=names}} | !{{QuestRewardShip|Warspite|small=true|collapsed=names}} | ||
|E-3 | |E-3 | ||
!{{QuestRewardShip|Nelson|small=true|collapsed=names}} | !{{QuestRewardShip|Nelson|small=true|collapsed=names}} | ||
|E-3 | |E-3 | ||
| − | !{{QuestRewardShip||small=true|collapsed=names}} | + | |- |
| − | |E- | + | !{{QuestRewardShip|Musashi|small=true|collapsed=names}} |
| + | |E-4 | ||
|} | |} | ||
| Line 314: | Line 325: | ||
|- | |- | ||
!{{QuestRewardShip|Hornet|small=true|collapsed=names}} | !{{QuestRewardShip|Hornet|small=true|collapsed=names}} | ||
| − | |E-2 | + | |E-2 & E-4 |
!{{QuestRewardShip|Victorious|small=true|collapsed=names}} | !{{QuestRewardShip|Victorious|small=true|collapsed=names}} | ||
|E-4 | |E-4 | ||
| − | !{{QuestRewardShip||small=true|collapsed=names}} | + | !{{QuestRewardShip|Ark Royal|small=true|collapsed=names}} |
| − | |E- | + | |E-4 |
| + | |- | ||
| + | !{{QuestRewardShip|Ranger|small=true|collapsed=names}} | ||
| + | |E-4 | ||
|} | |} | ||
| Line 335: | Line 349: | ||
!{{QuestRewardShip|Tuscaloosa|small=true|collapsed=names}} | !{{QuestRewardShip|Tuscaloosa|small=true|collapsed=names}} | ||
|E-3 | |E-3 | ||
| − | !{{QuestRewardShip||small=true|collapsed=names}} | + | !{{QuestRewardShip|Honolulu|small=true|collapsed=names}} |
| − | |E- | + | |E-4 |
| + | |- | ||
| + | !{{QuestRewardShip|Brooklyn|small=true|collapsed=names}} | ||
| + | |E-4 | ||
| + | !{{QuestRewardShip|Sheffield|small=true|collapsed=names}} | ||
| + | |E-4 | ||
|} | |} | ||
| Line 353: | Line 372: | ||
!{{QuestRewardShip|Teruzuki|small=true|collapsed=names}} | !{{QuestRewardShip|Teruzuki|small=true|collapsed=names}} | ||
|E-3 | |E-3 | ||
| − | |||
| − | |||
|} | |} | ||
| Line 370: | Line 387: | ||
|E-2 | |E-2 | ||
!{{QuestRewardShip|Maruyu|small=true|collapsed=names}} | !{{QuestRewardShip|Maruyu|small=true|collapsed=names}} | ||
| − | |E-3 | + | |E-3 & E-4 |
!{{QuestRewardShip|I-14|small=true|collapsed=names}} | !{{QuestRewardShip|I-14|small=true|collapsed=names}} | ||
|E-3 | |E-3 | ||
| Line 378: | Line 395: | ||
!{{QuestRewardShip|C.Cappellini|small=true|collapsed=names}} | !{{QuestRewardShip|C.Cappellini|small=true|collapsed=names}} | ||
|E-3 | |E-3 | ||
| − | !{{QuestRewardShip||small=true|collapsed=names}} | + | !{{QuestRewardShip|I-401|small=true|collapsed=names}} |
| − | |E- | + | |E-4 |
|} | |} | ||
| Line 397: | Line 414: | ||
|E-1 | |E-1 | ||
!{{QuestRewardShip|Nisshin|small=true|collapsed=names}} | !{{QuestRewardShip|Nisshin|small=true|collapsed=names}} | ||
| − | |E- | + | |E-3 & E-4 |
|- | |- | ||
!{{QuestRewardShip|Akitsushima|small=true|collapsed=names}} | !{{QuestRewardShip|Akitsushima|small=true|collapsed=names}} | ||
| + | |E-4 | ||
| + | !{{QuestRewardShip|Asahi|small=true|collapsed=names}} | ||
| + | |E-4 | ||
| + | !{{QuestRewardShip|No.101 Transport Ship|small=true|collapsed=names}} | ||
|E-4 | |E-4 | ||
|} | |} | ||
| Line 413: | Line 434: | ||
|{{Equipment/Card|Type 0 Small Reconnaissance Seaplane (Skilled)|size=60px}} | |{{Equipment/Card|Type 0 Small Reconnaissance Seaplane (Skilled)|size=60px}} | ||
|[[Type 0 Small Reconnaissance Seaplane (Skilled)]] | |[[Type 0 Small Reconnaissance Seaplane (Skilled)]] | ||
| − | | | + | |E-4 |
|- | |- | ||
|{{Equipment/Card|Special Type 4 Amphibious Tank|size=60px}} | |{{Equipment/Card|Special Type 4 Amphibious Tank|size=60px}} | ||
| Line 427: | Line 448: | ||
===New Enemy Vessels=== | ===New Enemy Vessels=== | ||
*[[American Destroyer Princess]] (E2 final boss) | *[[American Destroyer Princess]] (E2 final boss) | ||
| − | *[[American Destroyer Princess Mass-Produced Model]] (E3 U boss) | + | *[[American Destroyer Princess Mass-Produced Model]] (E3 U boss, 2nd Stage main enemies) |
*[[Atoll Aircraft Carrier Anchorage Princess]] (E3 final boss) | *[[Atoll Aircraft Carrier Anchorage Princess]] (E3 final boss) | ||
*[[New Mass-Produced Aircraft Carrier Princess]] (2nd Stage mid-bosses etc.) | *[[New Mass-Produced Aircraft Carrier Princess]] (2nd Stage mid-bosses etc.) | ||
| − | |||
*[[Abyssal I-go Water Princess]] (2nd Stage final boss) | *[[Abyssal I-go Water Princess]] (2nd Stage final boss) | ||
===New Enemy Equipment=== | ===New Enemy Equipment=== | ||
| − | + | *[[Abyssal 5inch Single Gun Mount Mk.30 + GFCS]] (American Destroyer Princess and her Mass-Produced Model Equipment) | |
| + | *[[Abyssal 533mm Quintuple Torpedo Mount + Abyssal SG]] (American Destroyer Princess and her Mass-Produced Model Equipment) | ||
| + | *[[Abyssal Hedgehog Mk.10]] (American Destroyer Princess and her Mass-Produced Model Equipment) | ||
| + | *[[GFCS + Abyssal 5inch Twin Gun Mount Mk.32]] (Atoll Aircraft Carrier Anchorage Princess Equipment) | ||
| + | *[[Abyssal Combat Autogyro Seagull]] (Atoll Aircraft Carrier Anchorage Princess and New Mass-Produced Aircraft Carrier Princess Equipment) | ||
==[[Friendly Fleet]]s== | ==[[Friendly Fleet]]s== | ||
Friendly Fleets (FF) come with a function that allows players to choose if they want to use a FF to aid them in battle or not. It is possible to choose between using "normal only" or "normal and powerful" FF. Powerful FF have an additional cost of '''6 Instant Constructions''' {{IC}} for each time they are deployed in a battle (the blowtorches won't be consumed unless a powerful FF appears). | Friendly Fleets (FF) come with a function that allows players to choose if they want to use a FF to aid them in battle or not. It is possible to choose between using "normal only" or "normal and powerful" FF. Powerful FF have an additional cost of '''6 Instant Constructions''' {{IC}} for each time they are deployed in a battle (the blowtorches won't be consumed unless a powerful FF appears). | ||
| − | *Friendly Fleets | + | *Friendly Fleets are available on: |
| + | **[[{{ROOTPAGENAME}}/E-1|E-1]] {{MapRoute|X|red}} | ||
| + | **[[{{ROOTPAGENAME}}/E-2|E-2]] {{MapRoute|Y|red}} | ||
| + | **[[{{ROOTPAGENAME}}/E-3|E-3]] {{MapRoute|O3|red}} | ||
| + | **[[{{ROOTPAGENAME}}/E-4|E-4]] {{MapRoute|G|red|Z|red}} | ||
==Voice Lines== | ==Voice Lines== | ||
| Line 459: | Line 487: | ||
|1SS(V)||{{MapRoute|2||I|blue|N1|red}} | |1SS(V)||{{MapRoute|2||I|blue|N1|red}} | ||
|[[File:{{ROOTPAGENAME}} Tag 2.png|30px]] | |[[File:{{ROOTPAGENAME}} Tag 2.png|30px]] | ||
| + | |- | ||
| + | ![[{{ROOTPAGENAME}}/E-4|E-4]] | ||
| + | |3||2 | ||
| + | |1SS(V)||{{MapRoute|1||A1|red}} | ||
| + | |[[File:{{ROOTPAGENAME}} Tag 8.png|30px]][[File:{{ROOTPAGENAME}} Tag 10.png|30px]] | ||
|} | |} | ||
| − | |||
| − | |||
| − | |||
| − | |||
=See Also= | =See Also= | ||
Revision as of 06:35, 10 April 2024
 
| |||||||||
|---|---|---|---|---|---|---|---|---|---|
|
Time until event's end:
The event has ended
| |||||||||
|
|
Due to some recent game code changes, game viewers like KC3 & Poi predictions are inaccurate if not up-to-date, and may result in you sinking ships! Please make sure your viewer is up-to-date. |
The Early Spring 2024 Event, launched on the 1st of March 2024 (1 day delay), with a delayed launch of 2 days for the 2nd half of the event, and ended on the 10th of April 2024. It is a "Medium Scale Event".
- The 1st Stage Operations are titled "Commence! Operation Tatsumaki!",
- It will involve the use of submarines, submarine tenders, and amphibious tanks.
- The 2nd Stage Operation theme is unknown yet.
4 new ships have been added, 3 submarines and a submarine tender.
4 new equipment have also been added, with their images and fairies, drawn by Shibafu.
For additional information regarding event-related subjects and content, please refer to Mechanics.
Historical BackgroundExpand
Information
Quick Info Table
| Classification | Map | Name | Fleet Type | LBAS | Friendly Fleet | Fleet Tags | Notes |
|---|---|---|---|---|---|---|---|
| 1st Stage Operations | E-1 | Towards the Q-Base | Single | 1 | X | ||
| E-2 | Operation Tatsumaki | Single Striking Force Combined |
2 | Y | |||
| E-3 | Break into the Anchorage! Operation Tatsumaki (Expanded) | Striking Force Combined |
2 | O3 | |||
| 2nd Stage Operation | E-4 | New Operation Z Kai | Striking Force Combined |
3 | G Z | Lock limited to Hard Only
|
Fleet Locking Table
| Tags | E-1 | E-2 | E-3 | E-4 (Hard Only) | |
|---|---|---|---|---|---|
| 1st Fleet | Gimmick Starting point 1 |
||||
| 2nd Fleet | Starting point 2 | Gimmick | |||
| 5th Fleet | Starting point 3 | ||||
| Task Force | Phase 1 | Gimmick Phase 1 |
|||
| 6th Fleet | Phase 2 | Phase 3 | |||
| 3rd Fleet Advance Force |
Gimmick Phase 2 |
||||
| Vanguard Fleet | Phase 2 (optional) |
||||
| 3rd Fleet | Gimmick Phase 1 | ||||
| Wake Island Transport Unit | Phase 2 | ||||
| The New Tatsumaki Fleet | Phase 3 | ||||
| Op. Z Decisive Battle Fleet | Phase 4 | ||||
Pay To Win Guide
This event requires to use "submarine fleets" on the last phases of E-2 and E-3 using the ![]() tag, and on the 2nd to last phase of E-4 using the
tag, and on the 2nd to last phase of E-4 using the ![]() tag.
tag.
In all cases, it is possible to clear those phases on "free to play", using regular fleets and mechanics. However, if possible, it is advised to utilize the "Submarine Touch" to at least clear each last dance, to save on cost and greatly optimize the clear rate.
- Using this touch imply to consume
 Submarine Supply Material
 , a premium item.
To optimize the "pay to win" aspect of this mechanic, it is then advised to:
- Only buy Submarine Supply Material once in the Shop, giving 3 of those for 500 DMM points,
- Only use this touch on the "last dance" of the boss of those specific phases,
- Always refresh ("F5") the game BEFORE the boss battle ends if the touch failed to kill the boss, to not consume any material on failed runs.
This way, a total of only 3 Submarine Supply Material is needed to clear the event.
Event-Wide Bonus
Soon™
New Mechanics
| Ka-Tsu Animation | |||
|---|---|---|---|
| Ka-Tsu: | |||
| Ka-Tsu Kai: | |||
Uniquely on "Atoll Nodes", it is possible to deploy the ![]() Ka-Tsu tanks
Ka-Tsu tanks
 to trigger a special Opening Torpedo Salvo.
- On those nodes, regular oTorp will not work,
- This can only be deployed by SS, SSV, and the AV Mikuma Kai Ni Toku, Nisshin A, and Mizuho Kai fast,
- They must carry at least one Ka-Tsu tank,
- On the "atoll node", ships meeting those requirements will carry out a special opening torpedo attack,
- In night battle, those ships will additionally trigger the same attack as a cutin,
- This attack overrides regular Night Cut-ins attacks (e.g. if a ship is setuped for a TCI, it will still trigger the Ka-Tsu attack).
- Using several Ka-Tsu tanks on a same ship will make it carry out several of those attacks in a row (day and night),
- It capped at 2 attacks per ship at night.
- This attack utilizes a new special animation, with the tank climbing the atoll's soil.
New Ships
| SS | Drum | E-3 Reward | |
| SSV | I-41 | E-4 Reward | |
| SSV | I-36 | E-1 & E-2 drop | |
| AS | Heian Maru | E-2 & E-3 drop |
Returning Ships
A non-exhaustive list of "notable returning ships". Please refer to drop table of each individual map for more complete lists.
- See below for the full list of returning "Event Only Drops",
- See uptodate drop database via KCnav, or via Discord bots.
| Notable returning ships [Toggle Names] | ||||||||||||||||||||||||||||||||||||
|---|---|---|---|---|---|---|---|---|---|---|---|---|---|---|---|---|---|---|---|---|---|---|---|---|---|---|---|---|---|---|---|---|---|---|---|---|
| ||||||||||||||||||||||||||||||||||||
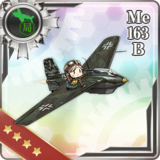
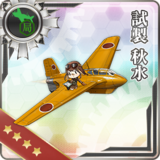
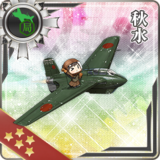
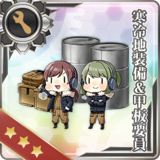
New Equipment


New Enemy Vessels
- American Destroyer Princess (E2 final boss)
- American Destroyer Princess Mass-Produced Model (E3 U boss, 2nd Stage main enemies)
- Atoll Aircraft Carrier Anchorage Princess (E3 final boss)
- New Mass-Produced Aircraft Carrier Princess (2nd Stage mid-bosses etc.)
- Abyssal I-go Water Princess (2nd Stage final boss)
New Enemy Equipment
- Abyssal 5inch Single Gun Mount Mk.30 + GFCS (American Destroyer Princess and her Mass-Produced Model Equipment)
- Abyssal 533mm Quintuple Torpedo Mount + Abyssal SG (American Destroyer Princess and her Mass-Produced Model Equipment)
- Abyssal Hedgehog Mk.10 (American Destroyer Princess and her Mass-Produced Model Equipment)
- GFCS + Abyssal 5inch Twin Gun Mount Mk.32 (Atoll Aircraft Carrier Anchorage Princess Equipment)
- Abyssal Combat Autogyro Seagull (Atoll Aircraft Carrier Anchorage Princess and New Mass-Produced Aircraft Carrier Princess Equipment)
Friendly Fleets
Friendly Fleets (FF) come with a function that allows players to choose if they want to use a FF to aid them in battle or not. It is possible to choose between using "normal only" or "normal and powerful" FF. Powerful FF have an additional cost of 6 Instant Constructions ![]() for each time they are deployed in a battle (the blowtorches won't be consumed unless a powerful FF appears).
for each time they are deployed in a battle (the blowtorches won't be consumed unless a powerful FF appears).
Voice Lines
Soon™
Mechanics
Participation requirements
To take part in any event, a player MUST HAVE at least:
- A 75% sortie win ratio.
- 5 empty ship slots.
- 20 empty equipment slots.
Special Mechanics
In addition to regular Sortie mechanics, events often involve some specific or rarer mechanics :
| Map Clearing Medals | |||
|---|---|---|---|
Hard
|
Medium
|
Easy
|
Casual
|
Depending of the HQ level, it is possible to choose between:
- Hard ("operation A", 甲), at HQ 80+
- Medium ("operation B", 乙), at HQ 35+
- Easy ("operation C", 丙), at HQ 1+
- Casual ("operation D", 丁), at HQ 1+
The map difficulty will directly affect the enemy encounters, making them more numerous, with higher stats, or even replacing weaker ships with stonger ones. Additionaly, will vary:
- The maps' phases' gauges (HP/TP),
- The amount of map gimmicks to complete,
- The LoS requirements,
- The maps' rewards,
- The ship Drops.
Changing difficulty is possible but limited:
- When switching from any "lower" difficulty to any "higher" difficulty, the map will fully be reset.
- When switching from any "higher" difficulty to any "lower" difficulty, the map will stay in the very same state it was previously, with only +25% of TP/HP being reset on the current phase's TP/HP bar.
- Gimmicks might also be reset when applicable, notably the debuffs.
Beginning with the second map, difficulty progression rules apply.
- In order to play a map on Hard difficulty, the prior map must have been completed on either Medium or Hard.
- In order to play a map on Medium difficulty, the prior map must have been completed on either Easy, Medium, or Hard.
To simulate simultaneity of battles in different locations, Fleet Tags conditions & deployment restrictions are employed.
- Ships not already tagged will be tagged with the associated tag of the map phase when deployed. This tag will be applied regardless of the difficulty and can't be removed by any measure before the end of the event.
- One map can use multiple tags, usually separated by phases or fleets.
- Several maps can share one or more tags.
- On Medium or Hard difficulty, ships must have either the same tag as the map/phase they are being deployed to, or have no tag at all.
- This requirement is sometimes waived on certain maps, mostly on the last map of the event where tags only matter on Hard.
- Once the event is cleared (last map of the EO), all tag restrictions stop getting enforced on every map (tag routing will still apply).


Farming
LBAS Leveling
It is possible to regain Proficiency for LBAS aircraft on the following spots:
| Map | Amount of LBAS |
LBAS range |
Recommended Fleets |
Route | Lock |
|---|---|---|---|---|---|
| E-1 | 1 | 3 | 1SS(V) | 2 I N1 | |
| E-4 | 3 | 2 | 1SS(V) | 1 A1 |
See Also
| Expand[edit]Event Only Drops History |
|---|


|
| |||||||||
|---|---|---|---|---|---|---|---|---|---|
|
Time until event's end:
The event has ended
| |||||||||
|
|
Due to some recent game code changes, game viewers like KC3 & Poi predictions are inaccurate if not up-to-date, and may result in you sinking ships! Please make sure your viewer is up-to-date. |