- Welcome to the Kancolle Wiki!
- If you have any questions regarding site content, account registration, etc., please visit the KanColle Wiki Discord
Difference between revisions of "Improvement"
Jigaraphale (talk | contribs) |
Jigaraphale (talk | contribs) |
||
| (31 intermediate revisions by the same user not shown) | |||
| Line 11: | Line 11: | ||
# Improvement levels are displayed beside equipment names. | # Improvement levels are displayed beside equipment names. | ||
#* They run from {{Star}}'''+1''' to {{MaxStar}} (+10). | #* They run from {{Star}}'''+1''' to {{MaxStar}} (+10). | ||
| − | # Improvement bonuses are '''hidden'''. The increase in stats is not reflected on ship girls' stat cards. | + | # Improvement bonuses are '''hidden''' stat increases. The increase in stats is not reflected on ship girls' stat cards. |
| − | #* This means they do not count | + | #* This means they do not count for reaching certain thresholds like for [[OASW]]. |
#* Those bonuses work to some extent to reach regular [[Expeditions]] thresholds (''see [[#Expeditions Bonus|here]]''). | #* Those bonuses work to some extent to reach regular [[Expeditions]] thresholds (''see [[#Expeditions Bonus|here]]''). | ||
| − | #* Some improvements on equipment can also add some additional [[#Visible Fit Bonuses|Visible Fit Bonuses]]. | + | #** For [[Support Expedition]]s, only the [[#Misc Bonuses|FCA]] bonuses do work, with any damage, accuracy, and fighter power bonuses notably not working. |
| + | #* Some improvements on equipment can also add some additional [[#Visible Fit Bonuses|Visible Fit Bonuses]], or even affect the [[RE]]'s [[#Equipability|equipability]]. | ||
#** This works on an equipment-to-equipment and ship-to-ship basis with no general rule. | #** This works on an equipment-to-equipment and ship-to-ship basis with no general rule. | ||
# Most conversion quests (e.g. {{Q|F62}}), allow to use improved equipment, but any {{Star}} are {{color|red|lost during conversion}}. | # Most conversion quests (e.g. {{Q|F62}}), allow to use improved equipment, but any {{Star}} are {{color|red|lost during conversion}}. | ||
| Line 20: | Line 21: | ||
#*So far, this is only applicable to quests {{Q|F13}}, {{Q|F14}}, {{Q|F15}}, {{Q|F19}}, {{Q|F24}}, {{Q|F26}}, {{Q|F28}}, {{Q|F29}}, {{Q|F30}}, {{Q|Fm1}}, and {{Q|Fm2}}. | #*So far, this is only applicable to quests {{Q|F13}}, {{Q|F14}}, {{Q|F15}}, {{Q|F19}}, {{Q|F24}}, {{Q|F26}}, {{Q|F28}}, {{Q|F29}}, {{Q|F30}}, {{Q|Fm1}}, and {{Q|Fm2}}. | ||
#* This is currently the '''only''' way to obtain improved versions of the {{Equipment/Link|Tenzan Model 12 (Tomonaga Squadron)}}, {{Equipment/Link|Suisei (Egusa Squadron)}} & {{Equipment/Link|Reppuu (601 Air Group)}} (through F13-14-15 respectively, unimprovable otherwise). | #* This is currently the '''only''' way to obtain improved versions of the {{Equipment/Link|Tenzan Model 12 (Tomonaga Squadron)}}, {{Equipment/Link|Suisei (Egusa Squadron)}} & {{Equipment/Link|Reppuu (601 Air Group)}} (through F13-14-15 respectively, unimprovable otherwise). | ||
| + | #Improved equipment cannot be used as fodder via [[Akashi's Improvement Arsenal]]. | ||
| + | #Improved equipment can be used in ship [[Remodeling]] ([[Yamato Kai Ni]] only so far). | ||
=Improvement Bonuses= | =Improvement Bonuses= | ||
| Line 43: | Line 46: | ||
!colspan=2 rowspan=2|Equipment Type | !colspan=2 rowspan=2|Equipment Type | ||
!colspan=2|Day Battle | !colspan=2|Day Battle | ||
| − | !rowspan=2|Night Battle | + | !rowspan=2 width=78px|Night Battle |
!rowspan=2|ASW | !rowspan=2|ASW | ||
!colspan=2|AA | !colspan=2|AA | ||
| Line 51: | Line 54: | ||
!colspan=2|Evasion | !colspan=2|Evasion | ||
|- class="fixed-header-2" | |- class="fixed-header-2" | ||
| − | !Firepower!!Torpedo | + | !width=78px|Firepower!!Torpedo |
| − | !Ship!!Fleet | + | !width=78px|Ship!!width=78px|Fleet |
| − | !Day!!Night<ref>[https://docs.google.com/spreadsheets/d/183MFdMfBS7Oc3doCZYyI-R1jxDaCZ-Y9wMt_HW8PFEg/edit#gid=0]</ref>!!Torpedo!!ASW | + | !width=78px|Day!!width=78px|Night<ref>[https://docs.google.com/spreadsheets/d/183MFdMfBS7Oc3doCZYyI-R1jxDaCZ-Y9wMt_HW8PFEg/edit#gid=0]</ref>!!Torpedo!!ASW |
!Shelling!!Torpedo | !Shelling!!Torpedo | ||
|- | |- | ||
| Line 63: | Line 66: | ||
| 1|| -|| 1|| -|| -|| -|| -|| -|| 1|| 1.3|| -|| -|| -|| - | | 1|| -|| 1|| -|| -|| -|| -|| -|| 1|| 1.3|| -|| -|| -|| - | ||
|- | |- | ||
| − | |[[:Category:Main High-Angle Guns|HA]] (Green)<br>{{Main | + | |[[:Category:Main High-Angle Guns|HA]] (Green)<br>{{Main HA Gun}} |
| − | | 1|| -|| 1|| -||rowspan=3| 2 | + | | 1|| -|| 1|| -||rowspan=3| 2 ({{AA}}≤7)<br>3 ({{AA}}≥8)||rowspan=3| 2 ({{AA}}≤7)<br>3 ({{AA}}≥8)|| -|| -|| 1|| 1.3|| -|| -|| -|| - |
|- | |- | ||
| rowspan=4|[[Secondary Gun]]s | | rowspan=4|[[Secondary Gun]]s | ||
| − | |{{EquipmentLink|90mm Single High-angle Gun Mount|text=90 mm Single HA}}<br>{{Sec | + | |{{EquipmentLink|90mm Single High-angle Gun Mount|text=90 mm Single HA}}<br>{{Sec HA Gun}} |
| 1|| -|| 1|| -|| -|| -|| 1|| 1.3|| -|| -|| -|| - | | 1|| -|| 1|| -|| -|| -|| 1|| 1.3|| -|| -|| -|| - | ||
|- | |- | ||
| − | |(Large) [[:Category:Secondary High-Angle Guns|HA]] (Green)<br>{{Sec | + | |(Large) [[:Category:Secondary High-Angle Guns|HA]] (Green)<br>{{Sec HA Gun}} {{Large Sec HA Gun}} |
| − | |rowspan=2| [[#Linear Bonus|Linear]] 0.2 | + | |rowspan=2| [[#Linear Bonus|Linear]]:<br>0.2 ({{Firepower}}≤3)<br>0.3 ({{Firepower}}≥5)|| -||rowspan=2| [[#Linear Bonus|Linear]]:<br>0.2 ({{Firepower}}≤3)<br> 0.3 ({{Firepower}}≥5)|| -|| -|| -|| 1|| 1.3|| -|| -|| -|| - |
|- | |- | ||
|Surface (Yellow)<br>{{Sec Gun}} | |Surface (Yellow)<br>{{Sec Gun}} | ||
| Line 80: | Line 83: | ||
|- | |- | ||
| colspan=2|[[Anti-Aircraft Fire Director]]s<br>{{AAFD}} | | colspan=2|[[Anti-Aircraft Fire Director]]s<br>{{AAFD}} | ||
| − | | 1|| -|| 1|| -|| 2 | + | | 1|| -|| 1|| -|| 2 ({{AA}}≤7)<br>3 ({{AA}}≥8)|| 2 ({{AA}}≤7)<br>3 ({{AA}}≥8)|| -|| -|| 1|| 1.3|| -|| -|| -|| - |
|- | |- | ||
| colspan=2|[[AA Gun|Anti-Air Guns]]<br>{{AA Gun}} | | colspan=2|[[AA Gun|Anti-Air Guns]]<br>{{AA Gun}} | ||
| − | | 1|| 1.2|| -|| -|| 4 | + | | 1|| 1.2|| -|| -|| 4 ({{AA}}≤7)<br>6 ({{AA}}≥8)|| -|| -|| -|| -|| -|| 2|| -|| -|| - |
|- | |- | ||
| − | | colspan=2|[[Torpedo]]es<br>{{ | + | | colspan=2|[[Torpedo]]es<br>{{Torpedo Weapon}} |
| -|| 1.2|| 1|| -|| -|| -|| -|| -|| -|| 1.3|| 2|| -|| -|| - | | -|| 1.2|| 1|| -|| -|| -|| -|| -|| -|| 1.3|| 2|| -|| -|| - | ||
|- | |- | ||
| Line 104: | Line 107: | ||
| -|| -|| -|| -|| -|| -|| -|| 1.1|| -|| -|| -|| -|| -|| - | | -|| -|| -|| -|| -|| -|| -|| 1.1|| -|| -|| -|| -|| -|| - | ||
|- | |- | ||
| − | | colspan=2|[[Rotorcraft]]/[[Liaison Aircraft]]<br>{{Autogyro}}{{ | + | | colspan=2|[[Rotorcraft]]/[[Liaison Aircraft]]<br>{{Autogyro}}{{Liaison}} |
| − | | -|| -|| -|| [[#Linear Bonus|Linear]]|| -|| -|| -|| 0<ref> | + | | -|| -|| -|| [[#Linear Bonus|Linear]]|| -|| -|| -|| 0 {{Rotorcraft}}<ref>[https://x.com/CC_jabberwock/status/1124684463051395073]</ref><br>1 {{Liaison}}<ref>[https://x.com/CC_jabberwock/status/1523715685834129408]</ref>|| 1?<ref name="?">Unconfirmed yet</ref>|| 1.3?<ref name="?"/>|| -|| -|| -|| - |
| + | |- | ||
| + | | colspan=2|[[Night Plane]]s<br>{{Night Fighter}}{{Night Torpedo Bomber}}{{IconText|{{Torpedo Bomber}}|Swordfish}}{{Night Dive Bomber}}{{IconText|{{Dive Bomber}}|Photo}} {{IconText|{{Dive Bomber}}|Iwai}} | ||
| + | | -|| -|| 1<ref>[[Damage_Calculations#Carrier_Night_Air_Attacks|Carrier Night Air Attack damage only]]</ref>|| -|| -|| -|| -|| -|| -|| -|| -|| -|| -|| - | ||
|- | |- | ||
| rowspan=2|[[Land Based Bomber]]s | | rowspan=2|[[Land Based Bomber]]s | ||
| Line 115: | Line 121: | ||
|- | |- | ||
| colspan=2|[[Radar]]s<br>{{Radar}} | | colspan=2|[[Radar]]s<br>{{Radar}} | ||
| − | | -|| -|| -|| -|| -|| 0 | + | | -|| -|| -|| -|| -|| 0 {{Surface Radar}}<br>1.5 {{Air Radar}}|| -|| 1.25 {{Small Radar}}<br>1.4 {{Large Radar}}|| 1 ({{Hit}}≤2)<br>1.7 ({{Hit}}≥3)|| 1.3 ({{Hit}}≤2)<br>1.6 ({{Hit}}≥3)|| -|| -|| -|| - |
|- | |- | ||
| − | | colspan=2|[[Depth Charge]]s<br>{{ | + | | colspan=2|[[Depth Charge]]s<br>{{Depth Charge}} |
| 0.75|| -|| -||rowspan=2| 0.67|| -|| -|| -|| -|| -|| -|| -|| -|| -|| - | | 0.75|| -|| -||rowspan=2| 0.67|| -|| -|| -|| -|| -|| -|| -|| -|| -|| - | ||
|- | |- | ||
| − | | colspan=2|{{EquipmentLink|Type 95 Depth Charge|text=T95 DC}} & {{EquipmentLink|Type 2 Depth Charge|Type 2 Depth Charge Kai 2|text=T2/K2 DC}}<br>{{ | + | | colspan=2|{{EquipmentLink|Type 95 Depth Charge|text=T95 DC}} & {{EquipmentLink|Type 2 Depth Charge|Type 2 Depth Charge Kai 2|text=T2/K2 DC}}<br>{{Depth Charge}} |
| -|| -|| -|| -|| -|| -|| -|| -|| -|| -|| -|| -|| - | | -|| -|| -|| -|| -|| -|| -|| -|| -|| -|| -|| -|| - | ||
|- | |- | ||
| Line 129: | Line 135: | ||
| -|| -|| -|| -|| -|| -|| -|| -|| -|| -|| -|| -||colspan=2| 1.5 | | -|| -|| -|| -|| -|| -|| -|| -|| -|| -|| -|| -||colspan=2| 1.5 | ||
|- | |- | ||
| − | | colspan=2|[[Submarine Equipment]]s<br>{{ | + | | colspan=2|[[Submarine Equipment]]s<br>{{Submarine Radar}} |
| -|| -|| -|| -|| -|| -|| -|| -|| -|| -|| -|| -|| 1.5<ref>[https://x.com/PorterXRey/status/1864620483049869524]</ref>|| - | | -|| -|| -|| -|| -|| -|| -|| -|| -|| -|| -|| -|| 1.5<ref>[https://x.com/PorterXRey/status/1864620483049869524]</ref>|| - | ||
|- | |- | ||
| − | | colspan=2|[[Shell]]s/[[Searchlights]]/[[Lookout]]s<br>[[ | + | | colspan=2|[[Shell]]s/[[Searchlights]]/[[Lookout]]s/[[Landing Equipment]]<br>[[Command Facilities]]/[[Aviation Personnel]]s<br>{{AA Shell}}{{AP Shell}}{{Searchlight}}{{Lookout}}{{Landing Craft}}{{Amphibious Tank}}{{Army Units}}{{FCF}}{{Aviation Personnel}} |
| 1|| -|| 1|| -|| -|| -|| -|| -|| 1|| 1.3|| -|| -|| -|| - | | 1|| -|| 1|| -|| -|| -|| -|| -|| 1|| 1.3|| -|| -|| -|| - | ||
|- | |- | ||
| − | | colspan=2| | + | | colspan=2|[[Anti-Ground Rocket]]s<br>[[Smoke Generator]]s<br>{{Anti-Ground Rocket}}{{Smoke}} |
| 1|| -|| 1|| -|| -|| -|| -|| -|| 1?<ref name="?"/>|| 1.3?<ref name="?"/>|| -|| -|| -|| - | | 1|| -|| 1|| -|| -|| -|| -|| -|| 1?<ref name="?"/>|| 1.3?<ref name="?"/>|| -|| -|| -|| - | ||
|} | |} | ||
| Line 162: | Line 168: | ||
| -|| -|| 0.2|| -|| - | | -|| -|| 0.2|| -|| - | ||
|- | |- | ||
| − | | colspan=2|[[Fighter]]s/[[SPF]]/[[Interceptor|LB Fighters]]<br>{{Fighter}} | + | | colspan=2|[[Fighter]]s/[[SPF]]/[[Interceptor|LB Fighters]]<br>{{Fighter}}{{Night Fighter}}{{SPF}}{{LB Fighter 1}}{{LB Fighter 2}}{{LB Fighter Jet}}{{LB Shinden}} |
| 0.2|| -|| -|| -|| - | | 0.2|| -|| -|| -|| - | ||
|- | |- | ||
| Line 168: | Line 174: | ||
|rowspan=2| 0.25|| -|| -|| -|| - | |rowspan=2| 0.25|| -|| -|| -|| - | ||
|- | |- | ||
| − | | colspan=2|{{EquipmentLink|Type 0 Fighter Model 64 (Two-seat w/ KMX)|Type 0 Fighter Model 64 (Skilled Fighter-bomber)|text=Mod 64 Zero FB}}<br>{{ | + | | colspan=2|{{EquipmentLink|Type 0 Fighter Model 64 (Two-seat w/ KMX)|Type 0 Fighter Model 64 (Skilled Fighter-bomber)|text=Mod 64 Zero FB}}<br>{{Dive Bomber}} |
| -|| -||rowspan=3| 0.2||| - | | -|| -||rowspan=3| 0.2||| - | ||
|- | |- | ||
| − | | colspan=2|[[Dive Bomber]]s (ex. FB)<br>{{Dive Bomber}} | + | | colspan=2|[[Dive Bomber]]s (ex. FB)<br>{{Dive Bomber}}{{Night Dive Bomber}} |
| -|| 0.2|| -|| - | | -|| 0.2|| -|| - | ||
|- | |- | ||
| − | | colspan=2|[[Torpedo Bomber]]s<br>{{Torpedo Bomber}} | + | | colspan=2|[[Torpedo Bomber]]s<br>{{Torpedo Bomber}}{{Night Torpedo Bomber}} |
| -|| -|| 0.2|| - | | -|| -|| 0.2|| - | ||
|- | |- | ||
| Line 181: | Line 187: | ||
|- | |- | ||
| colspan=2|[[Rotorcraft]]<br>{{Autogyro}} | | colspan=2|[[Rotorcraft]]<br>{{Autogyro}} | ||
| − | | -|| -|| -||0.2 | + | | -|| -|| -||0.2 ({{ASW}}≤10)<br>0.3 ({{ASW}}≥11)|| - |
|- | |- | ||
| − | | colspan=2|[[Liaison Aircraft]]<br>{{ | + | | colspan=2|[[Liaison Aircraft]]<br>{{Liaison}}<ref>[https://twitter.com/hedgehog_hasira/status/1522381044976013315][https://twitter.com/CC_jabberwock/status/1621947944596557824]</ref> |
| − | | -|| -|| -|| 0.2 | + | | -|| -|| -|| 0.2 ({{ASW}}≤7)<br>0.3 ({{ASW}}≥8)|| - |
|- | |- | ||
| − | | rowspan=2|[[Extra Armor]]<br>{{ | + | | rowspan=2|[[Extra Armor]]<br>{{Extra Armor}} |
| [[Medium Extra Armor|Medium]] | | [[Medium Extra Armor|Medium]] | ||
| -|| -|| -|| -|| 0.2 | | -|| -|| -|| -|| 0.2 | ||
| Line 211: | Line 217: | ||
! style="color:tomato"|C | ! style="color:tomato"|C | ||
|- | |- | ||
| − | |colspan=2|[[Landing Craft]]<br>{{ | + | |colspan=2|[[Landing Craft]]<br>{{Landing Craft}} |
|1 + (Average {{Star}} /50) | |1 + (Average {{Star}} /50) | ||
|[1 + (Average {{Star}} /50)]<sup>'''N'''</sup><ref name="N">N = 1 for any [[Landing Craft]]/[[Ka-Tsu]], +1 to N for each unique: | |[1 + (Average {{Star}} /50)]<sup>'''N'''</sup><ref name="N">N = 1 for any [[Landing Craft]]/[[Ka-Tsu]], +1 to N for each unique: | ||
| Line 276: | Line 282: | ||
**[[Night Cut-In]] rate of neither fleets, | **[[Night Cut-In]] rate of neither fleets, | ||
**[[Shooting Order and Targeting#Searchlights|Targeting]] rate. | **[[Shooting Order and Targeting#Searchlights|Targeting]] rate. | ||
| − | *{{Star}} on {{ | + | *{{Star}} on {{Lookout}} [[Lookout]]s do NOT increase [[Night Cut-In]] rate, |
| − | *{{Star}} on {{ | + | *{{Star}} on {{Submarine Radar}} [[Submarine Equipment]]s do NOT increase [[Night Cut-In]] rate <ref>https://twitter.com/Divinity_123/status/1377666014834479104</ref>. |
<references/> | <references/> | ||
{{Clear}} | {{Clear}} | ||
| Line 323: | Line 329: | ||
| | | | ||
|- | |- | ||
| − | !rowspan= | + | !rowspan=10|{{Med Gun}} |
|{{EquipmentLink|SKC34 20.3cm Twin Gun Mount}} | |{{EquipmentLink|SKC34 20.3cm Twin Gun Mount}} | ||
| | | | ||
| Line 349: | Line 355: | ||
|- | |- | ||
|{{EquipmentLink|15.2cm Triple Main Gun Mount Kai}} | |{{EquipmentLink|15.2cm Triple Main Gun Mount Kai}} | ||
| + | |Not improvable | ||
| + | |- | ||
| + | |{{EquipmentLink|18cm/57 Triple Main Gun Mount}} | ||
|Not improvable | |Not improvable | ||
|- | |- | ||
| Line 377: | Line 386: | ||
|- | |- | ||
|{{EquipmentLink|13.8cm Twin Gun Mount Kai}} | |{{EquipmentLink|13.8cm Twin Gun Mount Kai}} | ||
| − | | | + | | |
|- | |- | ||
| − | !rowspan=5|{{Small | + | !rowspan=5|{{Small HA Gun}} |
|{{EquipmentLink|10cm Twin High-angle Gun Mount + Anti-Aircraft Fire Director}} | |{{EquipmentLink|10cm Twin High-angle Gun Mount + Anti-Aircraft Fire Director}} | ||
| | | | ||
| Line 399: | Line 408: | ||
| | | | ||
|- | |- | ||
| − | !rowspan=5|{{Sec | + | !rowspan=5|{{Sec HA Gun}} |
|{{EquipmentLink|12.7cm High-angle Gun + Anti-Aircraft Fire Director}} | |{{EquipmentLink|12.7cm High-angle Gun + Anti-Aircraft Fire Director}} | ||
| | | | ||
| Line 434: | Line 443: | ||
|Not improvable | |Not improvable | ||
|- | |- | ||
| − | !rowspan=3|{{ | + | !rowspan=3|{{Torpedo Weapon}} |
|{{EquipmentLink|53cm Twin Torpedo Mount}} | |{{EquipmentLink|53cm Twin Torpedo Mount}} | ||
|Only as synergy | |Only as synergy | ||
| Line 461: | Line 470: | ||
| | | | ||
|- | |- | ||
| − | !rowspan= | + | !rowspan=9|{{Dive Bomber}} |
|{{EquipmentLink|SBD-5}} | |{{EquipmentLink|SBD-5}} | ||
| | | | ||
| Line 483: | Line 492: | ||
| | | | ||
|- | |- | ||
| − | !rowspan=3|{{Torpedo Bomber}} | + | |{{EquipmentLink|Prototype Myoujou (Additional Trial Model)}} |
| + | | | ||
| + | |- | ||
| + | |{{EquipmentLink|Myoujou Kai}} | ||
| + | | | ||
| + | |- | ||
| + | !rowspan=3|{{Night Dive Bomber}} | ||
| + | |{{EquipmentLink|Type 99 Training Bomber Model 22 Kai (Experimental w/ Night Equipment)}} | ||
| + | | | ||
| + | |- | ||
| + | |{{EquipmentLink|Type 0 Fighter Model 62 Kai (Night Fighter-bomber)}} | ||
| + | |Not improvable | ||
| + | |- | ||
| + | |{{EquipmentLink|Type 0 Fighter Model 62 Kai (Skilled/Night Fighter-bomber)}} | ||
| + | |Not improvable | ||
| + | |- | ||
| + | !rowspan=4|{{Torpedo Bomber}} | ||
|{{EquipmentLink|Barracuda Mk.II}} | |{{EquipmentLink|Barracuda Mk.II}} | ||
| | | | ||
| Line 492: | Line 517: | ||
|{{EquipmentLink|TBD (Yellow Wings)}} | |{{EquipmentLink|TBD (Yellow Wings)}} | ||
| | | | ||
| + | |- | ||
| + | |{{EquipmentLink|Type 97 Torpedo Bomber Kai (Northeastern Air Group)}} | ||
| + | |Not improvable | ||
|- | |- | ||
!rowspan=6|{{Carrier Recon}} | !rowspan=6|{{Carrier Recon}} | ||
| Line 554: | Line 582: | ||
| | | | ||
|- | |- | ||
| − | !rowspan=4|{{ | + | !rowspan=4|{{Liaison}} |
|{{EquipmentLink|Type 3 Command Liaison Aircraft Kai}} | |{{EquipmentLink|Type 3 Command Liaison Aircraft Kai}} | ||
| | | | ||
| Line 567: | Line 595: | ||
| | | | ||
|- | |- | ||
| − | !rowspan=2|{{ | + | !rowspan=2|{{Depth Charge}} |
|{{EquipmentLink|Type 2 Depth Charge}} | |{{EquipmentLink|Type 2 Depth Charge}} | ||
| | | | ||
| Line 605: | Line 633: | ||
|Not improvable | |Not improvable | ||
|- | |- | ||
| − | !{{ | + | !{{Submarine Radar}} |
|{{EquipmentLink|Late Model Radar & Passive Radiolocator + Snorkel Equipment}} | |{{EquipmentLink|Late Model Radar & Passive Radiolocator + Snorkel Equipment}} | ||
|Not improvable | |Not improvable | ||
| Line 616: | Line 644: | ||
| | | | ||
|- | |- | ||
| − | !{{ | + | !{{Lookout}} |
|{{EquipmentLink|Torpedo Squadron Skilled Lookouts}} | |{{EquipmentLink|Torpedo Squadron Skilled Lookouts}} | ||
|Not improvable | |Not improvable | ||
| Line 624: | Line 652: | ||
| | | | ||
|- | |- | ||
| − | !rowspan= | + | !rowspan=3|{{Extra Armor}} |
|{{EquipmentLink|Pugliese Underwater Protection Bulkhead}} | |{{EquipmentLink|Pugliese Underwater Protection Bulkhead}} | ||
| | | | ||
| Line 631: | Line 659: | ||
| | | | ||
|- | |- | ||
| − | !{{Aviation Personnel}} | + | |{{EquipmentLink|Arctic Camouflage (+ Arctic Equipment)}} |
| + | |Not improvable | ||
| + | |- | ||
| + | !rowspan=2|{{Aviation Personnel}} | ||
| + | |{{EquipmentLink|Night Operation Aviation Personnel}} | ||
| + | |Not improvable | ||
| + | |- | ||
|{{EquipmentLink|Skilled Deck Personnel + Aviation Maintenance Hands}} | |{{EquipmentLink|Skilled Deck Personnel + Aviation Maintenance Hands}} | ||
| | | | ||
| Line 649: | Line 683: | ||
==Equipability== | ==Equipability== | ||
The following equipment have enhanced [[Equipment/Equipability|equipability]] when improved: | The following equipment have enhanced [[Equipment/Equipability|equipability]] when improved: | ||
| − | + | ||
| − | + | {|class="wikitable" | |
| − | + | ! Type | |
| − | + | ! Equipment | |
| + | ! Minimum Level | ||
| + | ! [[RE]] Equipability | ||
| + | |- | ||
| + | !{{Small Radar}} | ||
| + | |{{EquipmentLink|Passive Radiolocator (E27) + Type 22 Surface Radar Kai 4 (Calibrated Late Model)}} | ||
| + | |{{Star}}+4 | ||
| + | |FBB: {{Class|Kongou|Kai Ni B/C}}<br>DD: {{Class|Kagerou}}, {{Class|Yuugumo}}, {{Class|Matsu}}, [[Shimakaze Kai]], [[Shigure Kai San]], [[Harusame Kai Ni]] | ||
| + | |- | ||
| + | !{{Large Radar}} | ||
| + | | {{EquipmentLink|FuMO25 Radar}} | ||
| + | |{{Star}}+7 | ||
| + | |FBB: {{Class|Bismarck}}<br>CA: {{Class|Admiral Hipper}} | ||
| + | |- | ||
| + | !{{Medium Armor}} | ||
| + | |{{EquipmentLink|Arctic Camouflage (+ Arctic Equipment)}} | ||
| + | |{{Star}}+7 | ||
| + | |FBB: {{Class|Gangut}}<br>CL/T: [[Tama]], [[Kiso]], [[Abukuma]], [[Gotland]], {{Class|Kirov}}<br>DD: [[Tashkent]]<br>AO: [[Ootomari]] | ||
| + | |} | ||
==Resource Node Bonus== | ==Resource Node Bonus== | ||
Latest revision as of 08:08, 23 March 2025
| Home Port's Mechanics Portal | ||
|---|---|---|
| Ship | Equipment | |
| Marriage · Morale and Fatigue · Gifting · Supply Repairs · Remodel · Modernization · Construction |
Development · Improvement · Fit Bonuses Speed · Range · Plane Proficiency | |
| Stats · Resources · Experience and Rank · Ranking | ||
"Improvements" are increases in performance for equipment, being represented using ![]() stars.
stars.
Improvements are notably done via "Akashi's Improvement Arsenal", requiring Akashi and Improvement Materials ![]() , or may be already present on the equipment when obtained.
, or may be already present on the equipment when obtained.
- See how to perform improvements here.
- See the full list of improvable equipment here (this omit the equipment not improvable but obtainable already improved) .
- For a comprehensive list, please refer to Akashi-List.
- See the full list of ship Helpers here.
Overview
- Improvement levels are displayed beside equipment names.
- Improvement bonuses are hidden stat increases. The increase in stats is not reflected on ship girls' stat cards.
- This means they do not count for reaching certain thresholds like for OASW.
- Those bonuses work to some extent to reach regular Expeditions thresholds (see here).
- For Support Expeditions, only the FCA bonuses do work, with any damage, accuracy, and fighter power bonuses notably not working.
- Some improvements on equipment can also add some additional Visible Fit Bonuses, or even affect the RE's equipability.
- This works on an equipment-to-equipment and ship-to-ship basis with no general rule.
- Most conversion quests (e.g. F62), allow to use improved equipment, but any
 are lost during conversion.
 - Certain conversion quests that do not require improved equipment, will carry over any
 from the required equipment to the upgraded equipment.
- So far, this is only applicable to quests F13, F14, F15, F19, F24, F26, F28, F29, F30, Fm1, and Fm2.
- This is currently the only way to obtain improved versions of the Tenzan Model 12 (Tomonaga Squadron)
 , Suisei (Egusa Squadron)
 & Reppuu (601 Air Group)
 (through F13-14-15 respectively, unimprovable otherwise).
- Improved equipment cannot be used as fodder via Akashi's Improvement Arsenal.
- Improved equipment can be used in ship Remodeling (Yamato Kai Ni only so far).
Improvement Bonuses
The bonus stats gained from improvement will vary depending on the type of equipment as well as the stat itself.
- Most improved stats will come as decimal numbers, due to how square roots work.
- It is important to note that decimals must not be discarded in favor of whole numbers, as stats will be multiplied by various formulas anyway, to finally be rounded down/up.
- For calculated improvement bonuses, please refer to the Categories Charts.
The improvement effects are unknown/unclear for some equipment types/cases.
Square Rooted Bonus
Most bonuses are all a function of the square root of the improvement level. The bonus can be calculated by:
| [math]\displaystyle{ \text{Bonus}_\text{stat} = \sum_{\text{All equips}} \text{Mod}_\text{equip} \sqrt{\bigstar} }[/math] |
- With
- [math]\displaystyle{ \bigstar }[/math] the improvement level of the equipment.
- [math]\displaystyle{ \text{Mod}_\text{equip} }[/math] the equipment modifier for that stat, described below:
| Equipment Type | Day Battle | Night Battle | ASW | AA | Fighter Power | LoS | Accuracy | Evasion | |||||||
|---|---|---|---|---|---|---|---|---|---|---|---|---|---|---|---|
| Firepower | Torpedo | Ship | Fleet | Day | Night[1] | Torpedo | ASW | Shelling | Torpedo | ||||||
| Main Guns | (Very) Large |
1.5 | - | 1 | - | - | - | - | - | 1 | 1.3 | - | - | - | - |
| Medium/Small (Red) |
1 | - | 1 | - | - | - | - | - | 1 | 1.3 | - | - | - | - | |
| HA (Green) |
1 | - | 1 | - | 2 ( 3 ( |
2 ( 3 ( |
- | - | 1 | 1.3 | - | - | - | - | |
| Secondary Guns | 90 mm Single HA |
1 | - | 1 | - | - | - | 1 | 1.3 | - | - | - | - | ||
| (Large) HA (Green) |
Linear: 0.2 ( 0.3 ( |
- | Linear: 0.2 ( 0.3 ( |
- | - | - | 1 | 1.3 | - | - | - | - | |||
| Surface (Yellow) |
- | - | - | - | - | - | 1 | 1.3 | - | - | - | - | |||
15.2 cm Single & OTO & OTO |
1 | - | 1 | - | - | - | - | - | 1 | 1.3 | - | - | - | - | |
| Anti-Aircraft Fire Directors |
1 | - | 1 | - | 2 ( 3 ( |
2 ( 3 ( |
- | - | 1 | 1.3 | - | - | - | - | |
| Anti-Air Guns |
1 | 1.2 | - | - | 4 ( 6 ( |
- | - | - | - | - | 2 | - | - | - | |
| Torpedoes |
- | 1.2 | 1 | - | - | - | - | - | - | 1.3 | 2 | - | - | - | |
| Midget Submarines |
- | - | 1 | - | - | - | - | - | - | 1.3 | - | - | - | - | |
| (Large) Carrier Recons/Large Flying Boats |
- | - | - | - | - | - | - | 1.2 | - | - | - | - | - | - | |
| LB Recons |
- | - | - | - | - | - | - | 1.2?[2] | - | - | - | - | - | - | |
| Seaplanes |
Recons | - | - | - | - | - | - | - | 1.2 | - | - | - | - | - | - |
| Bombers | - | - | - | - | - | - | - | 1.1 | - | - | - | - | - | - | |
| Rotorcraft/Liaison Aircraft |
- | - | - | Linear | - | - | - | 0 1 |
1?[5] | 1.3?[5] | - | - | - | - | |
| Night Planes |
- | - | 1[6] | - | - | - | - | - | - | - | - | - | - | - | |
| Land Based Bombers | Attackers/Assault/ASW/Heavy Bombers |
- | 0.7*both |
- | - | - | - | 0.5 | - | - | - | - | - | - | - |
Hayabusa bomber |
- | 0.7*only against DD and Installation [9] | - | - | - | - | - | - | - | - | - | - | - | ||
| Radars |
- | - | - | - | - | 0 1.5 |
- | 1.25 1.4 |
1 ( 1.7 ( |
1.3 ( 1.6 ( |
- | - | - | - | |
| Depth Charges |
0.75 | - | - | 0.67 | - | - | - | - | - | - | - | - | - | - | |
T95 DC & T2/K2 DC & T2/K2 DC  |
- | - | - | - | - | - | - | - | - | - | - | - | - | ||
| Sonars |
0.75 | - | - | 0.67 | - | - | - | - | - | - | - | 1.3 | - | 1.5 | |
| Engine Improvements |
- | - | - | - | - | - | - | - | - | - | - | - | 1.5 | ||
| Submarine Equipments |
- | - | - | - | - | - | - | - | - | - | - | - | 1.5[7] | - | |
| Shells/Searchlights/Lookouts/Landing Equipment Command Facilities/Aviation Personnels |
1 | - | 1 | - | - | - | - | - | 1 | 1.3 | - | - | - | - | |
| Anti-Ground Rockets Smoke Generators |
1 | - | 1 | - | - | - | - | - | 1?[5] | 1.3?[5] | - | - | - | - | |
Linear Bonus
Some bonuses have a linear growth. The bonus can be calculated by:
| [math]\displaystyle{ \text{Bonus}_\text{stat} = \sum_{\text{All equips}} \text{Mod}_\text{equip} \times \bigstar }[/math] |
- With
- [math]\displaystyle{ \bigstar }[/math] the improvement level of the equipment:
- [math]\displaystyle{ \text{Mod}_\text{equip} }[/math] the equipment modifier for that stat, described below:
| Equipment Type | Fighter Power | Dive Bomb | Torpedo | ASW | Armor | |
|---|---|---|---|---|---|---|
| Submarine Torpedoes |
- | - | 0.2 | - | - | |
| Fighters/SPF/LB Fighters |
0.2 | - | - | - | - | |
| Fighter-Bombers |
0.25 | - | - | - | - | |
Mod 64 Zero FB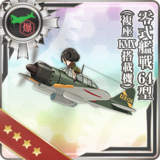  |
- | - | 0.2 | - | ||
| Dive Bombers (ex. FB) |
- | 0.2 | - | - | ||
| Torpedo Bombers |
- | - | 0.2 | - | ||
| Seaplane Bombers |
- | 0.2 | - | - | - | |
| Rotorcraft |
- | - | - | 0.2 ( 0.3 ( |
- | |
| Liaison Aircraft |
- | - | - | 0.2 ( 0.3 ( |
- | |
| Extra Armor |
Medium | - | - | - | - | 0.2 |
| Large | - | - | - | - | 0.3 | |
Averaged Bonus
The average is counted using all craft on the ship for anti-installation, and all "working" craft in the fleet for expeditions.
All the following bonuses are part of bigger formulas:
- See Anti-Installation for more details,
- See Expedition for more details.
| Equipment Type | Anti-Installation Bonuses[1][2] | Expedition Bonus | ||
|---|---|---|---|---|
| A1 | C | |||
| Landing Craft |
1 + (Average |
[1 + (Average |
1 + (Average | |
| Amphibious Vehicles |
Ka-Mi tank
|
1 + (Average |
1 + (Average | |
Ka-Tsu tanks 
|
1 + (Average |
[1 + (Average | ||
| Landing Forces |
- | |||
- ↑ The average stars are counted per ship on a per-category basis, with each 3 categories being counted separately.
- ↑ https://bbs.nga.cn/read.php?tid=39595977&rand=587
- ↑ Jump up to: 3.0 3.1 N = 1 for any Landing Craft/Ka-Tsu, +1 to N for each unique:
- ↑ Does not work for Type 3 Landing Tanks
Misc Bonuses
The following bonuses are part of bigger formulas:
- See Smoke Generators for more details,
- See Support Expeditions for more details.
| Equipment Type | Smoke Trigger Rate |
Smoke Level | Support Fleet Trigger Rate | |
|---|---|---|---|---|
| Smokes |
Smoke Generator (base)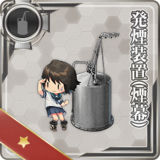
|
[math]\displaystyle{ \text{K} = +0.3 \times \bigstar }[/math] | Increased[1] | - |
Smoke Generator (Kai)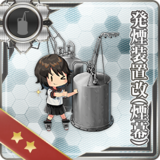
|
[math]\displaystyle{ \text{K} = +0.5 \times \bigstar }[/math] | |||
FCA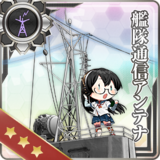 |
- | +2 %/ for the 2nd roll[2] | ||
The ![]() Type 96 150cm Searchlight
Type 96 150cm Searchlight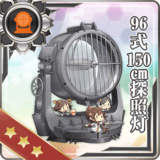 has a "Saury fishing" bonus at +8
 ![]() .
.
It is confirmed that none of the usual stats, probably nothing at all, is given to the following equipment types:
| Equipment Type | Effect |
|---|---|
| Combat Rations |
"Nothing"[3] |
- So far,
 Onigiri
 improvement only serves to upgrade into Special Onigiri
 .
.
- Since improving a Combat Ration
 up to +6★ cost 0 screw, it is possible to farm some screw by upgrading a ration once a day while doing quest Fd6.
- Since improving a Combat Ration
Myths
The following have been confirmed to be negative.
 on
on  Searchlights do NOT increase:
- Night Cut-In rate of neither fleets,
- Targeting rate.
 on
on  Lookouts do NOT increase Night Cut-In rate,
 on
on  Submarine Equipments do NOT increase Night Cut-In rate [4].
- ↑ 2 smokes at
 can trigger level 3 smoke[7]
- ↑ https://x.com/shiroos/status/1808545990217249165
- ↑ Morale gains might be affected.
- ↑ https://twitter.com/Divinity_123/status/1377666014834479104
Visible Fit Bonuses
The following equipment provide additional Visible Fit Bonuses to some ships when improved:
| Type | Equipment | ExpandNotes |
|---|
Equipability
The following equipment have enhanced equipability when improved:
| Type | Equipment | Minimum Level | RE Equipability |
|---|---|---|---|
Passive Radiolocator (E27) + Type 22 Surface Radar Kai 4 (Calibrated Late Model)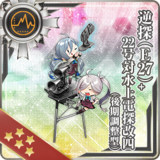
|
FBB: Kongou-class Kai Ni B/C DD: Kagerou-class, Yuugumo-class, Matsu-class, Shimakaze Kai, Shigure Kai San, Harusame Kai Ni | ||
FuMO25 Radar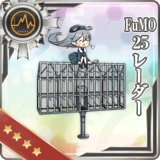
|
FBB: Bismarck-class CA: Admiral Hipper-class | ||
Arctic Camouflage (+ Arctic Equipment)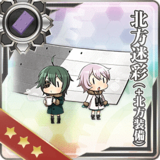
|
FBB: Gangut-class CL/T: Tama, Kiso, Abukuma, Gotland, Kirov-class DD: Tashkent AO: Ootomari |
Resource Node Bonus
Uniquely on the Resource Nodes of 1-6 and 3-5, improvements ![]() slightly increase resource gains.
slightly increase resource gains.
| ExpandSpecial Resource Nodes Gain Modifiers Type 2 |
|---|
Expeditions Bonus
For expedition stats requirements, improvements ![]() are globally simplified, overwriting the above-mentioned improvements.
are globally simplified, overwriting the above-mentioned improvements.
- See here for more details
See Also
- Akashi's Improvement Arsenal
- Improvement/Categories
- Improvement/Helper
- Help:Akashi Upgrades
- https://akashi-list.me/
| ||


