- Welcome to the Kancolle Wiki!
- If you have any questions regarding site content, account registration, etc., please visit the KanColle Wiki Discord
Difference between revisions of "Combat/Anti-Installation"
Jigaraphale (talk | contribs) m (→Calculation) |
Jigaraphale (talk | contribs) |
||
| (43 intermediate revisions by 3 users not shown) | |||
| Line 43: | Line 43: | ||
!width="480px"|Soft | !width="480px"|Soft | ||
!width="480px"|Soft (Supply Depot) | !width="480px"|Soft (Supply Depot) | ||
| + | |- | ||
| + | !CAV | ||
| + | |{{Enemy/Banner|Anti-Air Guns Imp}} | ||
| + | | | ||
| + | | | ||
|- | |- | ||
!BB | !BB | ||
| − | |{{Enemy/Banner|Artillery Imp}}{{Enemy/Banner|Isolated Island Princess V}} | + | |{{Enemy/Banner|Artillery Imp}}{{Enemy/Banner|Pillbox Imp}}{{Enemy/Banner|Isolated Island Princess V}}{{Enemy/Banner|Fortified Pillbox Princess}} |
|{{Enemy/Banner|Central Princess}} | |{{Enemy/Banner|Central Princess}} | ||
| − | |||
|{{ItemStack|item={{Enemy/Banner|Supply Depot Princess Vacation Mode Damaged}}|text=Vac DMG}}{{ItemStack|item={{Enemy/Banner|Supply Depot Princess B Vacation Mode Damaged}}|text=Mod B Vac DMG}}{{ItemStack|item={{Enemy/Banner|Supply Depot Princess B Summer Landing Mode Damaged}}|text=Mod B Summer Landing DMG}}{{ItemStack|item={{Enemy/Banner|Supply Depot Princess C Damaged}}|text=Mod C DMG}}{{ItemStack|item={{Enemy/Banner|Supply Depot Princess D Damaged}}|text=Mod D DMG}} | |{{ItemStack|item={{Enemy/Banner|Supply Depot Princess Vacation Mode Damaged}}|text=Vac DMG}}{{ItemStack|item={{Enemy/Banner|Supply Depot Princess B Vacation Mode Damaged}}|text=Mod B Vac DMG}}{{ItemStack|item={{Enemy/Banner|Supply Depot Princess B Summer Landing Mode Damaged}}|text=Mod B Summer Landing DMG}}{{ItemStack|item={{Enemy/Banner|Supply Depot Princess C Damaged}}|text=Mod C DMG}}{{ItemStack|item={{Enemy/Banner|Supply Depot Princess D Damaged}}|text=Mod D DMG}} | ||
|- | |- | ||
| Line 78: | Line 82: | ||
| | | | ||
* Uses the [[Damage_Calculations#Surface_Shelling|surface shelling formula]] for calculating damage. | * Uses the [[Damage_Calculations#Surface_Shelling|surface shelling formula]] for calculating damage. | ||
| − | * Uses the shelling attack animation in day and night | + | * Uses the shelling attack animation in day and night battles. |
* '''Can continue attacking''' when moderately damaged. | * '''Can continue attacking''' when moderately damaged. | ||
|- | |- | ||
!Aviation Battleship (BBV) | !Aviation Battleship (BBV) | ||
| | | | ||
| − | * Uses the [[Damage_Calculations# | + | * Uses the [[Damage_Calculations#Carrier Shelling Attacks|carrier attack formula]] for calculating damage. |
| − | * Uses the shelling attack animation in day and night | + | * Uses the shelling attack animation in day and night battles. |
* Cannot attack during the day if {{Tooltip|moderately damaged or if there are no planes left| some exceptions}}. | * Cannot attack during the day if {{Tooltip|moderately damaged or if there are no planes left| some exceptions}}. | ||
* Forced to attack submarines if they have equipment with {{ASW}}Anti-Submarine stat. | * Forced to attack submarines if they have equipment with {{ASW}}Anti-Submarine stat. | ||
| Line 103: | Line 107: | ||
!Soft Skin | !Soft Skin | ||
| | | | ||
| − | * Takes a lot of damage from {{ | + | * Takes a lot of damage from {{AA Shell}}{{Equipment/Link|Type 3 Shell|Type 3 Shell Kai|Type 3 Shell Kai Ni|text=AA Shells|link_category=Anti-Aircraft Shells}} and less from other Anti-Installation equipment. |
** This weakness allows battleships and heavy cruisers to easily deal with these installation types. | ** This weakness allows battleships and heavy cruisers to easily deal with these installation types. | ||
** Still takes a decent amount of damage from other anti-installation equipment. | ** Still takes a decent amount of damage from other anti-installation equipment. | ||
| Line 109: | Line 113: | ||
!Hard Skin | !Hard Skin | ||
| | | | ||
| − | * Takes more damage from Anti-Installation equipment like {{Landing Craft}}[[Landing Craft]], {{Amphibious Tank}}[[ | + | * Takes more damage from Anti-Installation equipment like {{Landing Craft}}[[Landing Craft]], {{Amphibious Tank}}[[Amphibious Vehicle]]s and {{AntiGroundArtillery}}[[Anti-Ground Rocket]]s |
|} | |} | ||
| Line 135: | Line 139: | ||
{{Category:Anti-Installation Dive Bombers}} | {{Category:Anti-Installation Dive Bombers}} | ||
| − | Submarines can only attack installations during the shelling if equipped with {{Amphibious Tank}} '''[[ | + | Submarines can only attack installations during the shelling if equipped with {{Amphibious Tank}} '''[[Amphibious Vehicle]]s'''. |
* They will only target installations during the shelling phases. | * They will only target installations during the shelling phases. | ||
* They will be able to attack installations at night regardless of equipment. | * They will be able to attack installations at night regardless of equipment. | ||
| Line 147: | Line 151: | ||
[[Special Attacks]] behave like normal against installation. | [[Special Attacks]] behave like normal against installation. | ||
| − | In general, using dedicated "[[Landing Equipment]]" or other "[[ | + | In general, using dedicated "[[Landing Equipment]]" or other "[[Anti-Installation Equipment]]" is recommended to deal the most dame against installations: |
{{:Category:Equipment with Anti-Installation Mechanics}} | {{:Category:Equipment with Anti-Installation Mechanics}} | ||
| Line 164: | Line 168: | ||
* Air night attacks ignore all anti-installation bonus | * Air night attacks ignore all anti-installation bonus | ||
** The attack can target installations even if no anti-installation dive bombers is equipped | ** The attack can target installations even if no anti-installation dive bombers is equipped | ||
| + | |||
| + | ==Barrage Balloon== | ||
| + | {{Category:Barrage Balloons}} | ||
=Damage Calculation= | =Damage Calculation= | ||
| Line 173: | Line 180: | ||
** However improvements that provide damage during Night Battle is taken into account during such. | ** However improvements that provide damage during Night Battle is taken into account during such. | ||
* [[Supply Depot Princess]] is the only known installation that takes post-cap damage from anti-installation equipment. | * [[Supply Depot Princess]] is the only known installation that takes post-cap damage from anti-installation equipment. | ||
| − | ** This makes her vulnerable to getting one shot by nuke setups. See [[# | + | ** This makes her vulnerable to getting one shot by nuke setups. ''See [[Help:Equipment Setup#Anti-Installation|here]] for details. |
* While dive bombers have a post-cap bonus during the air-strike, the low base damage means it is of limited effectiveness against high armor installations. | * While dive bombers have a post-cap bonus during the air-strike, the low base damage means it is of limited effectiveness against high armor installations. | ||
* The Armor Piercing modifier (post-cap) is effective against installation. | * The Armor Piercing modifier (post-cap) is effective against installation. | ||
| Line 190: | Line 197: | ||
# [[#Post-Cap Bonus|Post-cap bonuses]] against {{Enemy/Link|Supply Depot Princess}} | # [[#Post-Cap Bonus|Post-cap bonuses]] against {{Enemy/Link|Supply Depot Princess}} | ||
# [[#Airstrike and Land Base Bonus|Airstrike and Land Base]] special cases | # [[#Airstrike and Land Base Bonus|Airstrike and Land Base]] special cases | ||
| − | + | # [[#Installation-like warships|"Installation-like warships"]] special cases | |
*The bonuses' exact order is still under investigation and may be subject to changes. | *The bonuses' exact order is still under investigation and may be subject to changes. | ||
{|class="wikitable mw-collapsible mw-collapsed" width="100%" | {|class="wikitable mw-collapsible mw-collapsed" width="100%" | ||
| − | !Damage Bonuses Calculations | + | !colspan=2|Damage Bonuses Calculations |
|- | |- | ||
| + | !width=20px|<div style="-webkit-writing-mode:vertical-rl;-webkit-transform:rotate(180deg); text-align:left;">Pre-cap</div> | ||
| | | | ||
| − | ''' | + | '''Surface Shelling:''' |
| − | + | {|style="padding:10px; margin:20px; border:1px solid orange; border-radius:10px" | |
| + | |valign="center"| <math>\text{Atk}_\text{pre-cap} = \bigg( \bigg[ \bigg( \Big( \big[ \big( [ ( \text{Atk}_\text{base} {\color{tomato} \times \text{A0}} {\color{DeepSkyBlue} + \text{B0}} ) {\color{tomato} \times \text{A1}} {\color{DeepSkyBlue}} ] {\color{tomato} \times \text{A21}} {\color{DeepSkyBlue} + \text{B21}} \big) {\color{tomato} \times \text{A22}} {\color{DeepSkyBlue} + \text{B22}} \big] {\color{tomato} \times \text{A23}} {\color{DeepSkyBlue} + \text{B23}} \Big) {\color{tomato} \times \text{A24}} {\color{DeepSkyBlue} + \text{B24}} \bigg) {\color{tomato} \times \text{A25}} {\color{DeepSkyBlue} + \text{B25}} \bigg] {\color{tomato} \times \text{A26}} {\color{DeepSkyBlue} + \text{B26} + \text{B1}} \bigg) \times \text{Mod}_\text{others}</math> | ||
| + | |} | ||
| − | |||
| − | |||
| − | ''' | + | '''Carrier Shelling:''' |
| − | + | {|style="padding:10px; margin:20px; border:1px solid orange; border-radius:10px" | |
| + | |valign="center"| <math>\text{Atk}_\text{pre-cap} = \bigg( \Big[ \Big( \Big[ \Big( \big[ \big( [ \text{Atk}_\text{base} {\color{tomato} \times \text{A0} \times \text{A1}} ] {\color{tomato} \times \text{A21}} {\color{DeepSkyBlue} + \text{B21}} \big) {\color{tomato} \times \text{A22}} {\color{DeepSkyBlue} + \text{B22}} \big] {\color{tomato} \times \text{A23}} {\color{DeepSkyBlue} + \text{B23}} \Big) {\color{tomato} \times \text{A24}} {\color{DeepSkyBlue} + \text{B24}} \Big] {\color{tomato} \times \text{A25}} {\color{DeepSkyBlue} + \text{B25}} \Big) {\color{tomato} \times \text{A26}} {\color{DeepSkyBlue} + \text{B26} + \text{B1}} +(\text{DB} \times 1.3) + 15 \Big] \times 1.5 +25 \bigg) \times \text{Mod}_\text{others}</math> | ||
| + | |} | ||
| − | + | |- | |
| − | + | !width=20px|<div style="-webkit-writing-mode:vertical-rl;-webkit-transform:rotate(180deg); text-align:left;">Cap</div> | |
| + | | | ||
| + | {|style="padding:10px; margin:20px; border:1px solid orange; border-radius:10px" | ||
| + | |valign="center"| <math>\text{Atk}_\text{cap} = \text{Cap} + \sqrt{\text{Atk}_\text{pre-cap} - \text{Cap}}</math> | ||
| + | |} | ||
| − | + | |- | |
| + | !width=20px|<div style="-webkit-writing-mode:vertical-rl;-webkit-transform:rotate(180deg); text-align:left;">Post-Cap</div> | ||
| + | | | ||
| + | {|style="padding:10px; margin:20px; border:1px solid orange; border-radius:10px" | ||
| + | |valign="center"| <math>\text{Atk}_\text{post-cap} = \text{Atk}_\text{cap} \times \text{Mod}_\text{others} {\color{tomato} \times \text{C}} {\color{tomato} \times \text{C1} \times \text{Mod}_\text{Inst}} \times_\downarrow \text{Crit}</math> | ||
| + | |} | ||
| + | |||
| + | |- | ||
| + | |colspan=2| | ||
| + | ;With | ||
*<math>\text{Atk}_\text{base}</math> the base attack deffined [[Damage Calculations#Basic Attack Power Formulas|''here'']], | *<math>\text{Atk}_\text{base}</math> the base attack deffined [[Damage Calculations#Basic Attack Power Formulas|''here'']], | ||
* '''{{Color|tomato|A & C}}''' the Multiplicative bonuses, | * '''{{Color|tomato|A & C}}''' the Multiplicative bonuses, | ||
| Line 233: | Line 256: | ||
!style="font-size:125%; color:tomato" rowspan=2|A0 | !style="font-size:125%; color:tomato" rowspan=2|A0 | ||
|[[DD]] / [[CL]] | |[[DD]] / [[CL]] | ||
| − | |{{Enemy/ | + | |{{Enemy/Link|Artillery Imp|Pillbox Imp|Anti-Air Guns Imp|Fortified Pillbox Princess|link=Pillbox|text=Pillboxes}} |
| 1.4 | | 1.4 | ||
|- | |- | ||
| Line 258: | Line 281: | ||
|- | |- | ||
! width="130px" colspan=2| {{Enemy/Banner|Isolated Island Princess}} | ! width="130px" colspan=2| {{Enemy/Banner|Isolated Island Princess}} | ||
| − | ! width="130px" colspan=2| {{Enemy/ | + | ! width="130px" colspan=2| {{Enemy/Link|Artillery Imp|Pillbox Imp|Anti-Air Guns Imp|Fortified Pillbox Princess|link=Pillbox|text=Pillboxes}} |
! width="130px" colspan=2| {{Enemy/Banner|Harbour Summer Princess}} | ! width="130px" colspan=2| {{Enemy/Banner|Harbour Summer Princess}} | ||
|- | |- | ||
! colspan=2| Isolated Island Princess | ! colspan=2| Isolated Island Princess | ||
| − | ! colspan=2| | + | ! colspan=2| Pillboxes |
! colspan=2| Harbour Summer Princess | ! colspan=2| Harbour Summer Princess | ||
|- | |- | ||
| Line 271: | Line 294: | ||
! Single!! Multiple | ! Single!! Multiple | ||
|- | |- | ||
| − | | width="80px"|{{ | + | | width="80px"|{{AA Shell}} |
| width="200px"|{{Equipment/Link|Type 3 Shell|Type 3 Shell Kai|Type 3 Shell Kai Ni|text=AA Shells|link_category=Anti-Aircraft Shells}} | | width="200px"|{{Equipment/Link|Type 3 Shell|Type 3 Shell Kai|Type 3 Shell Kai Ni|text=AA Shells|link_category=Anti-Aircraft Shells}} | ||
|colspan=2|2.5 | |colspan=2|2.5 | ||
| Line 278: | Line 301: | ||
|colspan=2|1.75 | |colspan=2|1.75 | ||
|- | |- | ||
| − | |{{ | + | |{{AP Shell}} |
|{{Equipment/Link|Type 91 Armor Piercing Shell|Type 1 Armor Piercing Shell|Type 1 Armor Piercing Shell Kai|text=AP Shells|link_category=Armour-Piercing Shells}} | |{{Equipment/Link|Type 91 Armor Piercing Shell|Type 1 Armor Piercing Shell|Type 1 Armor Piercing Shell Kai|text=AP Shells|link_category=Armour-Piercing Shells}} | ||
!colspan=2| | !colspan=2| | ||
| Line 296: | Line 319: | ||
|{{ToolTip|1.68|1.4 * 1.2}} | |{{ToolTip|1.68|1.4 * 1.2}} | ||
|- | |- | ||
| − | |{{EquipmentLink|Shipborne Model Type 4 20cm Anti-ground Rocket Launcher|Type 4 20cm Anti-ground Rocket Launcher (Concentrated Deployment)|text=Anti-Ground | + | |{{EquipmentLink|Shipborne Model Type 4 20cm Anti-ground Rocket Launcher|Type 4 20cm Anti-ground Rocket Launcher (Concentrated Deployment)|text=Type 4 Anti-Ground Rockets}} |
|1.25 | |1.25 | ||
|{{ToolTip|1.875|1.25 * 1.5}} | |{{ToolTip|1.875|1.25 * 1.5}} | ||
| Line 306: | Line 329: | ||
|{{ToolTip|1.75|1.25 * 1.4}} | |{{ToolTip|1.75|1.25 * 1.4}} | ||
|- | |- | ||
| − | |{{ | + | |{{DCother}} |
|{{Equipment/Link|Type 2 12cm Mortar Kai|Type 2 12cm Mortar Kai (Concentrated Deployment)|text=ASW Mortars|link_category=ASW Mortars}} | |{{Equipment/Link|Type 2 12cm Mortar Kai|Type 2 12cm Mortar Kai (Concentrated Deployment)|text=ASW Mortars|link_category=ASW Mortars}} | ||
|1.2 | |1.2 | ||
| Line 317: | Line 340: | ||
|{{ToolTip|1.265|1.1 * 1.15}} | |{{ToolTip|1.265|1.1 * 1.15}} | ||
|- | |- | ||
| − | |colspan=2|{{LandingCraft}} [[ | + | |colspan=2|{{LandingCraft}} [[Landing Craft]] Type Multiplier |
|colspan=2|1.4 | |colspan=2|1.4 | ||
|colspan=2|1.8 | |colspan=2|1.8 | ||
| Line 327: | Line 350: | ||
|- | |- | ||
|rowspan=5|{{LandingCraft}} | |rowspan=5|{{LandingCraft}} | ||
| − | |{{EquipmentLink|Toku Daihatsu Landing Craft|text=Toku Daihatsu}} | + | |{{EquipmentLink|Toku Daihatsu Landing Craft|text=Toku Daihatsu}}<br>{{EquipmentLink|Toku Daihatsu Landing Craft + Panzer III (North African Specification)|text=Toku DLC + Panzer III}}<ref name="PanzerIII">https://twitter.com/Divinity_123/status/1695813425660661965</ref><br>{{EquipmentLink|Toku Daihatsu Landing Craft + Panzer III Ausf. J|text=Toku DLC + Panzer III J}} |
|colspan=2|1.15 | |colspan=2|1.15 | ||
|colspan=2|1.15 | |colspan=2|1.15 | ||
| Line 333: | Line 356: | ||
|colspan=2|1.2 | |colspan=2|1.2 | ||
|- | |- | ||
| − | |{{EquipmentLink|Daihatsu Landing Craft (Type 89 Medium Tank & Landing Force)|text=DLC + T89 tank}}<br>{{EquipmentLink|Toku Daihatsu Landing Craft + Type 1 Gun Tank|text=Toku DLC + Ho-Ni tank}}<br>'''Counts for Multiple only<ref>For example: vs Soft-Skin, 1 {{EquipmentLink|Toku Daihatsu Landing Craft + Chi-Ha|text=Chi-Ha}} = '''no bonus''', 2 {{EquipmentLink|Toku Daihatsu Landing Craft + Chi-Ha|text=Chi-Ha}} = '''1.3''' (1.95/1.5), 1 {{EquipmentLink|Daihatsu Landing Craft (Type 89 Medium Tank & Landing Force)|text=T89}} + 1 {{EquipmentLink|Toku Daihatsu Landing Craft + Chi-Ha|text=Chi-Ha}} = '''1.95'''</ref>:'''<br>{{EquipmentLink|Toku Daihatsu Landing Craft + Chi-Ha|text=Toku DLC + Chi-Ha}}<br>{{EquipmentLink|Toku Daihatsu Landing Craft + Chi-Ha Kai|text=Toku DLC + Chi-Ha Kai}}<ref name="chiha">https://docs.google.com/document/d/1y8kisQTFuAd57GFAQRpJzPOEk9kpUzoEf1sxmnywx3A/edit#heading=h.hycuzmt5tebu, TsunDB, confirmed except Harbour Summer Princess</ref> | + | |{{EquipmentLink|Daihatsu Landing Craft (Type 89 Medium Tank & Landing Force)|text=DLC + T89 tank}}<br>{{EquipmentLink|Toku Daihatsu Landing Craft + Type 1 Gun Tank|text=Toku DLC + Ho-Ni tank}}<br>{{EquipmentLink|Toku Daihatsu Landing Craft + Panzer III (North African Specification)|text=Toku DLC + Panzer III}}<ref name="PanzerIII"/><br>{{EquipmentLink|Toku Daihatsu Landing Craft + Panzer III Ausf. J|text=Toku DLC + Panzer III J}} |
| + | '''Counts for Multiple only | ||
| + | <ref>For example: vs Soft-Skin, 1 {{EquipmentLink|Toku Daihatsu Landing Craft + Chi-Ha|text=Chi-Ha}} = '''no bonus''', 2 {{EquipmentLink|Toku Daihatsu Landing Craft + Chi-Ha|text=Chi-Ha}} = '''1.3''' (1.95/1.5), 1 {{EquipmentLink|Daihatsu Landing Craft (Type 89 Medium Tank & Landing Force)|text=T89}} + 1 {{EquipmentLink|Toku Daihatsu Landing Craft + Chi-Ha|text=Chi-Ha}} = '''1.95'''</ref>: | ||
| + | '''<br>{{EquipmentLink|Toku Daihatsu Landing Craft + Chi-Ha|text=Toku DLC + Chi-Ha}}<br>{{EquipmentLink|Toku Daihatsu Landing Craft + Chi-Ha Kai|text=Toku DLC + Chi-Ha Kai}} | ||
| + | <ref name="chiha">https://docs.google.com/document/d/1y8kisQTFuAd57GFAQRpJzPOEk9kpUzoEf1sxmnywx3A/edit#heading=h.hycuzmt5tebu, TsunDB, confirmed except Harbour Summer Princess</ref> | ||
|1.5 | |1.5 | ||
|{{ToolTip|1.95|1.5 * 1.3}} | |{{ToolTip|1.95|1.5 * 1.3}} | ||
| Line 353: | Line 380: | ||
| {{ToolTip|2.4|1.6 * 1.5}} | | {{ToolTip|2.4|1.6 * 1.5}} | ||
|- | |- | ||
| − | |{{EquipmentLink|M4A1 DD}}<br>{{EquipmentLink|Toku Daihatsu Landing Craft + Chi-Ha Kai|text=Toku DLC + Chi-Ha Kai}}<ref name="chiha"></ref> | + | |{{EquipmentLink|M4A1 DD}}<br>{{EquipmentLink|Toku Daihatsu Landing Craft + Chi-Ha Kai|text=Toku DLC + Chi-Ha Kai}}<ref name="chiha"></ref><br>{{EquipmentLink|Toku Daihatsu Landing Craft + Panzer III Ausf. J|text=Toku DLC + Panzer III J}} |
|colspan=2|1.1 | |colspan=2|1.1 | ||
|colspan=2|1.8 | |colspan=2|1.8 | ||
| Line 381: | Line 408: | ||
|{{ToolTip|4.2|2.8 * 1.5}} | |{{ToolTip|4.2|2.8 * 1.5}} | ||
|- | |- | ||
| − | |colspan=2 |{{IM2}} | + | |colspan=2 |{{IM2}} Amphibious Vehicle Improvement Multiplier |
|colspan=8|1 + (Average {{Star}} /30)<br>({{MaxStar}} 1.33x) | |colspan=8|1 + (Average {{Star}} /30)<br>({{MaxStar}} 1.33x) | ||
|- | |- | ||
| − | |{{ | + | |{{Dive Bomber}} |
| − | |[[ | + | |[[Dive Bomber]]s |
!colspan=2| | !colspan=2| | ||
|1.4 | |1.4 | ||
| Line 394: | Line 421: | ||
|{{ToolTip|1.56|1.3 * 1.2}} | |{{ToolTip|1.56|1.3 * 1.2}} | ||
|- | |- | ||
| − | |{{ | + | |{{SPB}}{{SeaplaneFighter}} |
|Seaplane [[SPB|Bombers]]/[[SPF|Fighters]] | |Seaplane [[SPB|Bombers]]/[[SPF|Fighters]] | ||
|colspan=2|1.2 | |colspan=2|1.2 | ||
| Line 403: | Line 430: | ||
;Notes | ;Notes | ||
* The Improvement Bonus takes the average for all Landing Craft equipped on the ship. | * The Improvement Bonus takes the average for all Landing Craft equipped on the ship. | ||
| − | * The Improvement Bonus takes the average for all | + | * The Improvement Bonus takes the average for all Amphibious Vehicle equipped on the ship. |
<references/> | <references/> | ||
| Line 421: | Line 448: | ||
{{Landing Craft}}{{EquipmentLink|Toku Daihatsu Landing Craft + 11th Tank Regiment|text=Toku DLC + 11th Reg}}<br> | {{Landing Craft}}{{EquipmentLink|Toku Daihatsu Landing Craft + 11th Tank Regiment|text=Toku DLC + 11th Reg}}<br> | ||
{{Landing Craft}}{{EquipmentLink|Toku Daihatsu Landing Craft + Type 1 Gun Tank|text=Toku DLC + Ho-Ni tank}}<br> | {{Landing Craft}}{{EquipmentLink|Toku Daihatsu Landing Craft + Type 1 Gun Tank|text=Toku DLC + Ho-Ni tank}}<br> | ||
| − | {{Landing Craft}}{{EquipmentLink|Toku Daihatsu Landing Craft + Panzer III (North African Specification)|text=Toku DLC + Panzer III}} | + | {{Landing Craft}}{{EquipmentLink|Toku Daihatsu Landing Craft + Panzer III (North African Specification)|text=Toku DLC + Panzer III}}<br> |
| + | {{Landing Craft}}{{EquipmentLink|Toku Daihatsu Landing Craft + Panzer III Ausf. J|text=Toku DLC + Panzer III J}} | ||
| 1.8|| 25 | | 1.8|| 25 | ||
|- | |- | ||
| Line 468: | Line 496: | ||
!{{Landing Craft}}{{EquipmentLink|Armed Daihatsu}}<br>{{Landing Craft}}{{EquipmentLink|Soukoutei (Armored Boat Class)|text=Soukoutei}} | !{{Landing Craft}}{{EquipmentLink|Armed Daihatsu}}<br>{{Landing Craft}}{{EquipmentLink|Soukoutei (Armored Boat Class)|text=Soukoutei}} | ||
!Group 1<ref>{{Equipment/Link|Daihatsu Landing Craft}}, {{Equipment/Link|Toku Daihatsu Landing Craft}}, {{Equipment/Link|Daihatsu Landing Craft (Type 89 Medium Tank & Landing Force)|text=DLC + T89 tank}}, {{Equipment/Link|Toku Daihatsu Landing Craft + Type 1 Gun Tank|text=Toku DLC + Ho-Ni tank}}, {{Equipment/Link|Daihatsu Landing Craft (Panzer II/North African Specification)|text=DLC + Panzer}}</ref> | !Group 1<ref>{{Equipment/Link|Daihatsu Landing Craft}}, {{Equipment/Link|Toku Daihatsu Landing Craft}}, {{Equipment/Link|Daihatsu Landing Craft (Type 89 Medium Tank & Landing Force)|text=DLC + T89 tank}}, {{Equipment/Link|Toku Daihatsu Landing Craft + Type 1 Gun Tank|text=Toku DLC + Ho-Ni tank}}, {{Equipment/Link|Daihatsu Landing Craft (Panzer II/North African Specification)|text=DLC + Panzer}}</ref> | ||
| − | !Group 2<ref>{{Equipment/Link|Special Type 2 Amphibious Tank|text=Ka-Mi tank}}, {{Equipment/Link|Toku Daihatsu Landing Craft + 11th Tank Regiment|text=Toku DLC + 11th Reg}}, {{EquipmentLink|Toku Daihatsu Landing Craft + Panzer III (North African Specification)|text=Toku DLC+Panzer III}}, {{EquipmentLink|Toku Daihatsu Landing Craft + Chi-Ha||Toku Daihatsu Landing Craft + Chi-Ha Kai|text=Toku DLC+Chi-Ha (Kai)}}</ref> | + | !Group 2<ref>{{Equipment/Link|Special Type 2 Amphibious Tank|text=Ka-Mi tank}}, {{Equipment/Link|Toku Daihatsu Landing Craft + 11th Tank Regiment|text=Toku DLC + 11th Reg}}, {{EquipmentLink|Toku Daihatsu Landing Craft + Panzer III (North African Specification)|text=Toku DLC+Panzer III}}, {{EquipmentLink|Toku Daihatsu Landing Craft + Chi-Ha||Toku Daihatsu Landing Craft + Chi-Ha Kai|text=Toku DLC+Chi-Ha (Kai)}}{{EquipmentLink|Toku Daihatsu Landing Craft + Panzer III Ausf. J|text=Toku DLC + Panzer III J}}</ref> |
!Multiplicative bonus | !Multiplicative bonus | ||
!Flat Bonus | !Flat Bonus | ||
|- | |- | ||
| − | |Only one<ref>Due to | + | |Only one<ref>Due to a bug, using 2 Soukoutei or 2 Armed Daihatsu cancels the bonuses</ref> |
|colspan=2|1 of Any | |colspan=2|1 of Any | ||
| 1.2|| 10 | | 1.2|| 10 | ||
| Line 501: | Line 529: | ||
|75||110||140||160 | |75||110||140||160 | ||
|- | |- | ||
| − | |{{EquipmentLink|Shipborne Model Type 4 20cm Anti-ground Rocket Launcher|text=Anti-Ground | + | |{{EquipmentLink|Shipborne Model Type 4 20cm Anti-ground Rocket Launcher|text=Type 4 Anti-Ground Rockets}} |
|55||115||160||190 | |55||115||160||190 | ||
|- | |- | ||
| − | |{{EquipmentLink|Type 4 20cm Anti-ground Rocket Launcher (Concentrated Deployment)|text=Anti-Ground | + | |{{EquipmentLink|Type 4 20cm Anti-ground Rocket Launcher (Concentrated Deployment)|text=Type 4 Anti-Ground Rockets CD}} |
|80||170||230||260 | |80||170||230||260 | ||
|- | |- | ||
| − | |rowspan=2|{{ | + | |rowspan=2|{{DCother}} |
|{{EquipmentLink|Type 2 12cm Mortar Kai|text=ASW Mortar}} | |{{EquipmentLink|Type 2 12cm Mortar Kai|text=ASW Mortar}} | ||
|30||55||75||90 | |30||55||75||90 | ||
| Line 518: | Line 546: | ||
====Supply Depot Princess==== | ====Supply Depot Princess==== | ||
{{Enemy/Link|Supply Depot Princess}} and its variants are currently the only installations to have post-cap bonuses. | {{Enemy/Link|Supply Depot Princess}} and its variants are currently the only installations to have post-cap bonuses. | ||
| − | *These bonuses are applied after the damage soft-cap, and can reach the damage | + | *These bonuses are applied after the damage soft-cap, and can reach the damage display cap of '''9999'''. |
| + | ** If the damage displayed is 9999, the actual damage can be higher. | ||
*Supply Depot Princess is a '''soft-skinned''' installation for purposes of Pre-Cap Bonuses. | *Supply Depot Princess is a '''soft-skinned''' installation for purposes of Pre-Cap Bonuses. | ||
| Line 538: | Line 567: | ||
|{{ToolTip|1.625|1.25 * 1.3}} | |{{ToolTip|1.625|1.25 * 1.3}} | ||
|- | |- | ||
| − | |{{EquipmentLink|Shipborne Model Type 4 20cm Anti-ground Rocket Launcher|Type 4 20cm Anti-ground Rocket Launcher (Concentrated Deployment)|text=Anti-Ground | + | |{{EquipmentLink|Shipborne Model Type 4 20cm Anti-ground Rocket Launcher|Type 4 20cm Anti-ground Rocket Launcher (Concentrated Deployment)|text=Type 4 Anti-Ground Rockets}} |
|1.2 | |1.2 | ||
|{{ToolTip|1.68|1.2 * 1.4}} | |{{ToolTip|1.68|1.2 * 1.4}} | ||
|- | |- | ||
| − | |{{ | + | |{{DCother}} |
|{{Equipment/Link|Type 2 12cm Mortar Kai|Type 2 12cm Mortar Kai (Concentrated Deployment)|text=ASW Mortars|link_category=ASW Mortars}} | |{{Equipment/Link|Type 2 12cm Mortar Kai|Type 2 12cm Mortar Kai (Concentrated Deployment)|text=ASW Mortars|link_category=ASW Mortars}} | ||
|1.15 | |1.15 | ||
| Line 548: | Line 577: | ||
|- | |- | ||
|{{LandingCraft}} | |{{LandingCraft}} | ||
| − | |[[ | + | |[[Landing Craft]] Type Multiplier |
|colspan=2|1.7 | |colspan=2|1.7 | ||
|- | |- | ||
| Line 557: | Line 586: | ||
* N = 1 for any [[Landing Craft]] | * N = 1 for any [[Landing Craft]] | ||
* +1 to N for each unique: | * +1 to N for each unique: | ||
| − | **{{EquipmentLink|Daihatsu Landing Craft (Type 89 Medium Tank & Landing Force)|text=DLC + T89 tank}} OR {{EquipmentLink|Toku Daihatsu Landing Craft + Type 1 Gun Tank|text=Toku DLC + Ho-Ni}} | + | **{{EquipmentLink|Daihatsu Landing Craft (Type 89 Medium Tank & Landing Force)|text=DLC + T89 tank}} OR {{EquipmentLink|Toku Daihatsu Landing Craft + Type 1 Gun Tank|text=Toku DLC + Ho-Ni}} OR {{EquipmentLink|Toku Daihatsu Landing Craft + Panzer III (North African Specification)|text=Toku DLC + Panzer III}}<ref name="PanzerIII"/> |
**{{EquipmentLink|Daihatsu Landing Craft (Panzer II/North African Specification)|text=DLC + Panzer II}} | **{{EquipmentLink|Daihatsu Landing Craft (Panzer II/North African Specification)|text=DLC + Panzer II}} | ||
|- | |- | ||
|rowspan=5|{{LandingCraft}} | |rowspan=5|{{LandingCraft}} | ||
| − | |{{EquipmentLink|Toku Daihatsu Landing Craft|text=Toku Daihatsu}} | + | |{{EquipmentLink|Toku Daihatsu Landing Craft|text=Toku Daihatsu}}<br>{{EquipmentLink|Toku Daihatsu Landing Craft + Panzer III (North African Specification)|text=Toku DLC + Panzer III}}<ref name="PanzerIII">https://twitter.com/Divinity_123/status/1695813425660661965</ref><br>{{EquipmentLink|Toku Daihatsu Landing Craft + Panzer III Ausf. J|text=Toku DLC + Panzer III J}} |
|colspan=2|1.2 | |colspan=2|1.2 | ||
|- | |- | ||
| − | |{{EquipmentLink|Daihatsu Landing Craft (Type 89 Medium Tank & Landing Force)|text=DLC + T89 tank}}<br>{{EquipmentLink|Toku Daihatsu Landing Craft + Type 1 Gun Tank|text=Toku DLC + Ho-Ni tank}}<br>'''Counts for Multiple only<ref>For example: 1 {{EquipmentLink|Toku Daihatsu Landing Craft + Chi-Ha|text=Chi-Ha}} = '''no bonus''', 2 {{EquipmentLink|Toku Daihatsu Landing Craft + Chi-Ha|text=Chi-Ha}} = '''1.6''' (2.08/1.3), 1 {{EquipmentLink|Daihatsu Landing Craft (Type 89 Medium Tank & Landing Force)|text=T89}} + 1 {{EquipmentLink|Toku Daihatsu Landing Craft + Chi-Ha|text=Chi-Ha}} = '''2.08'''</ref>:'''<br>{{EquipmentLink|Toku Daihatsu Landing Craft + Chi-Ha|text=Toku DLC + Chi-Ha}}<br>{{EquipmentLink|Toku Daihatsu Landing Craft + Chi-Ha Kai|text=Toku DLC + Chi-Ha Kai}} | + | |{{EquipmentLink|Daihatsu Landing Craft (Type 89 Medium Tank & Landing Force)|text=DLC + T89 tank}}<br>{{EquipmentLink|Toku Daihatsu Landing Craft + Type 1 Gun Tank|text=Toku DLC + Ho-Ni tank}}<br>{{EquipmentLink|Toku Daihatsu Landing Craft + Panzer III (North African Specification)|text=Toku DLC + Panzer III}}<ref name="PanzerIII"/><br>{{EquipmentLink|Toku Daihatsu Landing Craft + Panzer III Ausf. J|text=Toku DLC + Panzer III J}} |
| + | '''Counts for Multiple only<ref>For example: 1 {{EquipmentLink|Toku Daihatsu Landing Craft + Chi-Ha|text=Chi-Ha}} = '''no bonus''', 2 {{EquipmentLink|Toku Daihatsu Landing Craft + Chi-Ha|text=Chi-Ha}} = '''1.6''' (2.08/1.3), 1 {{EquipmentLink|Daihatsu Landing Craft (Type 89 Medium Tank & Landing Force)|text=T89}} + 1 {{EquipmentLink|Toku Daihatsu Landing Craft + Chi-Ha|text=Chi-Ha}} = '''2.08'''</ref>: | ||
| + | '''<br>{{EquipmentLink|Toku Daihatsu Landing Craft + Chi-Ha|text=Toku DLC + Chi-Ha}}<br>{{EquipmentLink|Toku Daihatsu Landing Craft + Chi-Ha Kai|text=Toku DLC + Chi-Ha Kai}} | ||
|1.3 | |1.3 | ||
|{{ToolTip|2.08|1.3 * 1.6}} | |{{ToolTip|2.08|1.3 * 1.6}} | ||
| Line 572: | Line 603: | ||
|{{ToolTip|2.08|1.3 * 1.6}} | |{{ToolTip|2.08|1.3 * 1.6}} | ||
|- | |- | ||
| − | |{{EquipmentLink|M4A1 DD}}<br>{{EquipmentLink|Toku Daihatsu Landing Craft + Chi-Ha Kai|text=Toku DLC + Chi-Ha Kai}} | + | |{{EquipmentLink|M4A1 DD}}<br>{{EquipmentLink|Toku Daihatsu Landing Craft + Chi-Ha Kai|text=Toku DLC + Chi-Ha Kai}}<br>{{EquipmentLink|Toku Daihatsu Landing Craft + Panzer III Ausf. J|text=Toku DLC + Panzer III J}} |
|colspan=2|1.2 | |colspan=2|1.2 | ||
|- | |- | ||
| Line 584: | Line 615: | ||
|{{ToolTip|2.55|1.7 * 1.5}} | |{{ToolTip|2.55|1.7 * 1.5}} | ||
|- | |- | ||
| − | |colspan=2 |{{IM2}} | + | |colspan=2 |{{IM2}} Amphibious Vehicle Improvement Multiplier |
|colspan=2|1 + (Average {{Star}} /30)<br>({{MaxStar}} 1.33x) | |colspan=2|1 + (Average {{Star}} /30)<br>({{MaxStar}} 1.33x) | ||
|} | |} | ||
| Line 617: | Line 648: | ||
<references/> | <references/> | ||
;Notes: | ;Notes: | ||
| − | *A {{LandingCraft}} [[ | + | *A {{LandingCraft}} [[Landing Craft]] might be required to be equipped on the attacking ship for this bonus to be applied. |
*As it is the only post-cap bonus common to all installations, it has a great potential. | *As it is the only post-cap bonus common to all installations, it has a great potential. | ||
*Due to the limited nature of Rations, this bonus is mostly "Pay To Win", and so is not recommended. | *Due to the limited nature of Rations, this bonus is mostly "Pay To Win", and so is not recommended. | ||
| Line 686: | Line 717: | ||
! Single!! Multiple!! Single!! Multiple!! Single!! Multiple | ! Single!! Multiple!! Single!! Multiple!! Single!! Multiple | ||
|- | |- | ||
| − | | width="80px"|{{ | + | | width="80px"|{{AA Shell}} |
| width="200px"|{{Equipment/Link|Type 3 Shell|Type 3 Shell Kai|Type 3 Shell Kai Ni|text=AA Shells|link_category=Anti-Aircraft Shells}} | | width="200px"|{{Equipment/Link|Type 3 Shell|Type 3 Shell Kai|Type 3 Shell Kai Ni|text=AA Shells|link_category=Anti-Aircraft Shells}} | ||
|colspan=2|1.45 | |colspan=2|1.45 | ||
| Line 701: | Line 732: | ||
|{{ToolTip|1.625|1.25 * 1.3}} | |{{ToolTip|1.625|1.25 * 1.3}} | ||
|- | |- | ||
| − | |{{EquipmentLink|Shipborne Model Type 4 20cm Anti-ground Rocket Launcher|Type 4 20cm Anti-ground Rocket Launcher (Concentrated Deployment)|text=Anti-Ground | + | |{{EquipmentLink|Shipborne Model Type 4 20cm Anti-ground Rocket Launcher|Type 4 20cm Anti-ground Rocket Launcher (Concentrated Deployment)|text=Type 4 Anti-Ground Rockets}} |
|1.15 | |1.15 | ||
|{{ToolTip|1.61|1.15 * 1.4}} | |{{ToolTip|1.61|1.15 * 1.4}} | ||
| Line 708: | Line 739: | ||
|{{ToolTip|1.68|1.2 * 1.4}} | |{{ToolTip|1.68|1.2 * 1.4}} | ||
|- | |- | ||
| − | |{{ | + | |{{DCother}} |
|{{Equipment/Link|Type 2 12cm Mortar Kai|Type 2 12cm Mortar Kai (Concentrated Deployment)|text=ASW Mortars|link_category=ASW Mortars}} | |{{Equipment/Link|Type 2 12cm Mortar Kai|Type 2 12cm Mortar Kai (Concentrated Deployment)|text=ASW Mortars|link_category=ASW Mortars}} | ||
|1.1 | |1.1 | ||
| Line 716: | Line 747: | ||
|{{ToolTip|1.38|1.15 * 1.2}} | |{{ToolTip|1.38|1.15 * 1.2}} | ||
|- | |- | ||
| − | |colspan=2|{{LandingCraft}} [[ | + | |colspan=2|{{LandingCraft}} [[Landing Craft]] Type Multiplier |
|colspan=2|1.4 | |colspan=2|1.4 | ||
|colspan=2|1.1 | |colspan=2|1.1 | ||
| Line 781: | Line 812: | ||
|{{ToolTip|2.55|1.7 * 1.5}} | |{{ToolTip|2.55|1.7 * 1.5}} | ||
|- | |- | ||
| − | |colspan=2|{{IM2}} | + | |colspan=2|{{IM2}} Amphibious Vehicle Improvement Multiplier |
|colspan=6|1 + (Average {{Star}} /30)<br>({{MaxStar}} 1.33x) | |colspan=6|1 + (Average {{Star}} /30)<br>({{MaxStar}} 1.33x) | ||
|- | |- | ||
| − | |{{ | + | |{{Dive Bomber}} |
|[[Dive Bomber]]s | |[[Dive Bomber]]s | ||
|1.4 | |1.4 | ||
| Line 797: | Line 828: | ||
!colspan=2| | !colspan=2| | ||
|- | |- | ||
| − | |{{ | + | |{{SPB}}{{SPF}} |
|Seaplane [[SPB|Bombers]]/[[SPF|Fighters]] | |Seaplane [[SPB|Bombers]]/[[SPF|Fighters]] | ||
!colspan=2| | !colspan=2| | ||
| Line 809: | Line 840: | ||
!colspan=2| | !colspan=2| | ||
|} | |} | ||
| − | |||
<references/> | <references/> | ||
| − | = | + | ===LST & Landing Forces=== |
| − | + | ''The following are preliminary tests, lacking data to be accurate. | |
| − | + | {|class="wikitable" style="font-weight:bold; text-align:center" | |
| − | + | !colspan=5 style="font-size:150%; color:tomato"|C<ref>https://twitter.com/yukicacoon/status/1704153380913090880</ref> | |
| − | |||
| − | |||
| − | |||
| − | |||
| − | |||
| − | |||
| − | |||
| − | |||
| − | |||
| − | |||
| − | |||
| − | |||
| − | |||
| − | |||
| − | |||
| − | {|class="wikitable" | ||
| − | |||
| − | |||
| − | |||
| − | !colspan= | ||
| − | |||
| − | |||
| − | |||
| − | |||
| − | |||
| − | |||
| − | |||
| − | |||
| − | |||
| − | |||
| − | |||
| − | |||
| − | |||
| − | |||
| − | |||
| − | |||
| − | |||
| − | |||
| − | |||
|- | |- | ||
| − | !colspan=2| | + | ! rowspan=2; colspan=2| Installation Type |
| − | + | ! width="130px" colspan=3| {{Enemy/Banner|Supply Depot Princess}} | |
| − | |{{ | ||
| − | |||
|- | |- | ||
| − | + | ! colspan=3| Supply Depot Princesses | |
| − | | | ||
| − | |||
| − | |||
|- | |- | ||
| − | | | + | !colspan=2| Number Equipped |
| − | + | ! 1 | |
| − | + | ! 2 | |
| + | ! 3 | ||
|- | |- | ||
| − | !colspan=2|[[ | + | !colspan=2| {{Landing Forces}} [[Landing Force]]s Type Multiplier |
| − | | | + | |3.15||{{ToolTip|7.403|3.15 x 2.35}}||{{ToolTip|8.8883|3.15 x 2.35 x 1.2}} |
| − | |{{ | ||
| − | |{{ | ||
|- | |- | ||
| − | |{{ | + | !rowspan=2|{{Landing Forces}} |
| − | | | + | !{{EquipmentLink|Type 97 Medium Tank New Turret (Chi-Ha Kai)}}<br>{{EquipmentLink|Army Infantry Corps + Chi-Ha Kai}} |
| + | |colspan=3|1.2 | ||
|- | |- | ||
| − | ! | + | !{{EquipmentLink|Army Infantry Corps}}<br>{{EquipmentLink|Army Infantry Corps + Chi-Ha Kai}} |
| − | + | |colspan=3|1.55 | |
| − | |||
| − | |||
| − | |||
| − | |||
| − | |||
| − | |||
| − | |||
| − | | | ||
| − | | | ||
| − | |||
| − | |||
| − | |||
| − | |||
| − | |||
| − | |||
| − | |||
| − | |||
| − | |||
| − | |||
| − | |||
| − | |||
| − | |||
| − | |||
| − | |||
| − | |||
| − | |||
| − | |||
| − | |||
| − | |||
| − | |||
| − | |||
| − | |||
| − | |||
| − | |||
| − | |||
| − | | | ||
| − | |||
| − | |||
| − | |||
| − | |||
| − | |||
| − | |||
| − | |||
| − | |||
| − | |||
| − | |||
| − | |||
| − | |||
| − | |||
| − | |||
|} | |} | ||
| + | |||
| + | ;Note | ||
| + | *For now, the best set-up seems to be 2 {{Landing Forces}} and 1 {{Amphibious Tank}} {{EquipmentLink|Special Type 2 Amphibious Tank|text=Ka-Mi tank}}. | ||
| + | <references/> | ||
| + | |||
=Additional Information= | =Additional Information= | ||
| − | ==Landing Craft/ | + | ==Landing Craft/Amphibious Vehicles Capable Ships== |
{{Landing_Craft/Amphibious_Tank_Capable_Ships|uncollapsed=true}} | {{Landing_Craft/Amphibious_Tank_Capable_Ships|uncollapsed=true}} | ||
| Line 944: | Line 885: | ||
!colspan=2|Artillery {{AntiGroundArtillery}}/{{DCother}} | !colspan=2|Artillery {{AntiGroundArtillery}}/{{DCother}} | ||
|- | |- | ||
| − | |{{AntiGroundArtillery}} {{Equipment/Link|WG42 (Wurfgerät 42)|Shipborne Model Type 4 20cm Anti-ground Rocket Launcher|Type 4 20cm Anti-ground Rocket Launcher (Concentrated Deployment)|text=Anti-ground Rocket Launchers|link_category=Anti-Ground | + | |{{AntiGroundArtillery}} {{Equipment/Link|WG42 (Wurfgerät 42)|Shipborne Model Type 4 20cm Anti-ground Rocket Launcher|Type 4 20cm Anti-ground Rocket Launcher (Concentrated Deployment)|text=Anti-ground Rocket Launchers|link_category=Anti-Ground Rockets}}<br>{{DCother}} {{Equipment/Link|Type 2 12cm Mortar Kai|Type 2 12cm Mortar Kai (Concentrated Deployment)|text=ASW Mortar|link_category=ASW Mortars}} |
*Overrides the {{Landing Force}} [[Landing Force]] animation | *Overrides the {{Landing Force}} [[Landing Force]] animation | ||
|[[File:Bombardment.png|400x400px]] | |[[File:Bombardment.png|400x400px]] | ||
| Line 952: | Line 893: | ||
| | | | ||
Up to 2 tanks are shown in the animation<br>(see below with priority from top to bottom) | Up to 2 tanks are shown in the animation<br>(see below with priority from top to bottom) | ||
| − | *Overrides the {{Amphibious Tank}} [[Amphibious | + | *Overrides the {{Amphibious Tank}} [[Amphibious Vehicle]] animation |
|<div class="video" data-width="400" data-src="Army_Units_Animation.webp"></div> | |<div class="video" data-width="400" data-src="Army_Units_Animation.webp"></div> | ||
|- | |- | ||
| − | |{{Equipment/Card|Type 97 Medium Tank New Turret (Chi-Ha Kai)|size=70px}} {{EquipmentLink|Type 97 Medium Tank New Turret (Chi-Ha Kai) | + | |{{Equipment/Card|Type 97 Medium Tank New Turret (Chi-Ha Kai)|size=70px}} {{EquipmentLink|Type 97 Medium Tank New Turret (Chi-Ha Kai)|text=T97 Medium Tank Chi-Ha Kai}} |
| + | {{Landing Force}}{{EquipmentLink|Army Infantry Corps + Chi-Ha Kai}} | ||
|[[File:Chi-Ha Kai Tank Animation.png]] | |[[File:Chi-Ha Kai Tank Animation.png]] | ||
|- | |- | ||
| − | |{{Equipment/Card|Type 97 Medium Tank (Chi-Ha)|size=70px}} {{EquipmentLink|Type 97 Medium Tank (Chi-Ha)}} | + | |{{Equipment/Card|Type 97 Medium Tank (Chi-Ha)|size=70px}} {{EquipmentLink|Type 97 Medium Tank (Chi-Ha)|text=T97 Medium Tank Chi-Ha}} |
|[[File:Chi-Ha Tank Animation.png]] | |[[File:Chi-Ha Tank Animation.png]] | ||
|- | |- | ||
| Line 964: | Line 906: | ||
|(empty) | |(empty) | ||
|- | |- | ||
| − | !colspan=2|{{Landing Craft}} [[Landing Craft]] / {{Amphibious Tank}} | + | !colspan=2|{{Landing Craft}} [[Landing Craft]] / {{Amphibious Tank}} [[Amphibious Vehicle]] |
|- | |- | ||
|{{Equipment/Card|M4A1 DD|size=70px}} {{EquipmentLink|M4A1 DD}} | |{{Equipment/Card|M4A1 DD|size=70px}} {{EquipmentLink|M4A1 DD}} | ||
| Line 970: | Line 912: | ||
|- | |- | ||
|{{Equipment/Card|Toku Daihatsu Landing Craft + Type 1 Gun Tank|size=70px}} {{EquipmentLink|Toku Daihatsu Landing Craft + Type 1 Gun Tank|text=Toku DLC + Ho-Ni tank}}<br> | |{{Equipment/Card|Toku Daihatsu Landing Craft + Type 1 Gun Tank|size=70px}} {{EquipmentLink|Toku Daihatsu Landing Craft + Type 1 Gun Tank|text=Toku DLC + Ho-Ni tank}}<br> | ||
| − | {{LandingCraft}}{{EquipmentLink|Toku Daihatsu Landing Craft + Chi-Ha Kai|Toku Daihatsu Landing Craft + Chi-Ha|text=Toku dlc+Chi-Ha | + | {{LandingCraft}}{{EquipmentLink|Toku Daihatsu Landing Craft + Chi-Ha Kai|Toku Daihatsu Landing Craft + Chi-Ha|text=Toku dlc+Chi-Ha/Kai}} |
|[[File:honi_animation.png]] | |[[File:honi_animation.png]] | ||
|- | |- | ||
| Line 982: | Line 924: | ||
|[[File:armed_dcl_animation.png]] (round trip) | |[[File:armed_dcl_animation.png]] (round trip) | ||
|- | |- | ||
| − | |{{Equipment/Card|Special Type 2 Amphibious Tank|size=70px}} {{EquipmentLink|Special Type 2 Amphibious Tank}} | + | |{{Equipment/Card|Special Type 2 Amphibious Tank|size=70px}} {{EquipmentLink|Special Type 2 Amphibious Tank|text=Ka-Mi tank}} |
|[[File:kami_animation.png]] | |[[File:kami_animation.png]] | ||
| + | |- | ||
| + | |{{Equipment/Card|Toku Daihatsu Landing Craft + Panzer III (North African Specification)|size=70px}} {{EquipmentLink|Toku Daihatsu Landing Craft + Panzer III (North African Specification)|text=Toku DLC + Panzer III}}<br> | ||
| + | {{LandingCraft}}{{EquipmentLink|Toku Daihatsu Landing Craft + Panzer III Ausf. J|text=Toku DLC + Panzer III J}} | ||
| + | |[[File:panzerIII_animation.png]] | ||
|- | |- | ||
|{{Equipment/Card|Daihatsu Landing Craft (Panzer II/North African Specification)|size=70px}} {{EquipmentLink|Daihatsu Landing Craft (Panzer II/North African Specification)|text=DLC + Panzer II}} | |{{Equipment/Card|Daihatsu Landing Craft (Panzer II/North African Specification)|size=70px}} {{EquipmentLink|Daihatsu Landing Craft (Panzer II/North African Specification)|text=DLC + Panzer II}} | ||
| Line 993: | Line 939: | ||
|- | |- | ||
|colspan=2| | |colspan=2| | ||
| − | |||
| − | |||
| − | |||
|- | |- | ||
|''Unused (Transport DLC) | |''Unused (Transport DLC) | ||
| Line 1,004: | Line 947: | ||
*The animations for "artillery", "landing craft", and "airstrike", are compatible. | *The animations for "artillery", "landing craft", and "airstrike", are compatible. | ||
*If multiple landing craft are equipped on the same ship, only one animation will be shown (the above table is sorted in priority order). | *If multiple landing craft are equipped on the same ship, only one animation will be shown (the above table is sorted in priority order). | ||
| + | *A variation of the animation of the {{Amphibious Tank}} {{Equipment/Link|Special Type 4 Amphibious Tank|Special Type 4 Amphibious Tank Kai|text=Ka-Tsu tanks|link=Ka-Tsu}} is also played against [[Atoll Node]]s when applicable. | ||
*The animation of the {{IconText|{{Landing Craft}}|Armed}} {{Equipment/Link|Armed Daihatsu|Soukoutei (Armored Boat Class)|text=Armed Boats|link_category=Landing Craft}} is also played against {{Enemy/Link|PT Imp Pack|link=PT Imp Pack|text=PT-Imp}} when equiped. | *The animation of the {{IconText|{{Landing Craft}}|Armed}} {{Equipment/Link|Armed Daihatsu|Soukoutei (Armored Boat Class)|text=Armed Boats|link_category=Landing Craft}} is also played against {{Enemy/Link|PT Imp Pack|link=PT Imp Pack|text=PT-Imp}} when equiped. | ||
*These animations will be overridden by: | *These animations will be overridden by: | ||
| Line 1,010: | Line 954: | ||
=See Also= | =See Also= | ||
| + | *[[Help:Equipment Setup#Anti-Installation|Anti-Installation Setup]] | ||
*[[:Category:Abyssal Land Bases|Abyssal Land Bases List]] | *[[:Category:Abyssal Land Bases|Abyssal Land Bases List]] | ||
*[[:Category:Equipment with Anti-Installation Mechanics|Anti-Ground Equipment]] | *[[:Category:Equipment with Anti-Installation Mechanics|Anti-Ground Equipment]] | ||
{{Mechanics}} | {{Mechanics}} | ||
Revision as of 19:36, 19 March 2024
Installations are an enemy-type representing "land-based installations", and are characterized by high armor and high HP. They are difficult to handle using normal anti-ship setups and require specific setups in order to be destroyed. Installations are typically found as bosses or as boss escorts.
General Characteristics
- Installations cannot perform or benefit from flagship protection.
- They have different damage statuses instead of the normal ones used for ships.
- These statuses are merely cosmetic in nature and have no gameplay difference.
| Ship Damage Label | Installation Damage Label |
|---|---|
| Lightly Damaged (小破) |
Confused (混乱) |
| Moderately Damaged (中破) |
Damaged (損害) |
| Heavily Damaged (大破) |
Broken (損壊) |
| Sunk (撃沈) |
Destroyed (破壊) |
Installation Classification
Installations are classified by two categories: Ship Type (BB, BBV, or CV) and Toughness (Soft Skin or Hard Skin).
Installations Glossary
Here is a list of all "Installation type Abyssals" ever encountered in the game.
- Are listed the base forms of those installations, most coming in many variations often depending on the map difficulty, the map state (last-dance), and the event itself (most events bringing new variations).
- Some installation sub-forms of interest are also listed, those forms having special variations like a different type than the main form, of some special abilities.
- Note that some toughness characterization may be erroneous, since most of those installations were introduced before this system was defined.
- Some event-only installations might not fall in one of these categories.
| Installations Glossary | |||
|---|---|---|---|
| Type | Hard | Soft | Soft (Supply Depot) |
| CAV | 
|
||
| BB |    
|

|
 Vac DMG Vac DMG Mod B Vac DMG Mod B Vac DMG Mod B Summer Landing DMG Mod B Summer Landing DMG Mod C DMG Mod C DMG Mod D DMG Mod D DMG
|
| BBV |     
|
        
|
  Summer Summer Vac Vac Mod B Mod B Mod B Vac Mod B Vac Mod B Summer Landing Mod B Summer Landing Mod C Mod C Mod D Mod D
|
| CV | 
|

|
|
| "Installation-Like Warships" | |||

|

|
 Mod C Vac Mod C Vac Mod C Vac DMG Mod C Vac DMG
| |
| Those Abyssals are still considered surface ships, but receive bonus damage from anti-installation equipment, see here. | |||
- Ship Type
| Type | Characteristics |
|---|---|
| Battleship (BB) |
|
| Aviation Battleship (BBV) |
|
| Carrier (CV) |
|
- Skin Toughness
| Type | Characteristics |
|---|---|
| Soft Skin |
|
| Hard Skin |
|
- Notes
- The Northernmost Landing Princess is not immune to the Torpedo
 stat.
stat.
- This means that during a Night Battles, the full "Night Battle Power"
 is used to calculate damage against her.
 - She is still immune to torpedo-based attacks, which does not include airstrikes.
- This means that during a Night Battles, the full "Night Battle Power"
- The Harbour Water Demon cannot attack during day battles when "moderately damaged" (like carriers).
- Standard Night Battle rules still apply (she can attack even if moderately damaged).
- Supply Depot Princesses have extra "Post-Cap modifiers", and can launch torpedo attacks.
Attack Behavior
The targeting of installation follow some special rules.
Support Expedition
- Shelling Support expedition can attack installations.
- It's unknown if torpedo support and ASW support will target installations or not.
Air strike
- Air strikes can attack installations normally.
Shelling
Carriers can only attack installations if equipped with at least one anti-installation Dive Bombers with non-zero slot, or if equipped with only torpedo bombers (no dive bombers or jets).
- Carriers equipped with no anti-installation Dive Bombers and at least one Normal dive bomber or jet with non-zero slot can not attack installations.
|
Carriers will only attack installations in the shelling phase if equipped with Torpedo Bombers or Anti-Installation Dive Bombers.
| |||
|
AAR AAR AAR | |||
Submarines can only attack installations during the shelling if equipped with ![]() Amphibious Vehicles.
Amphibious Vehicles.
- They will only target installations during the shelling phases.
- They will be able to attack installations at night regardless of equipment.
- Their low firepower makes them poor anti-installation ships.
Carriers are unable to perform CVCI on installations, even if equipped with anti-installation dive bombers.
- Ise-class Kai Ni can still perform the Suisei-CI against installations.
"LST" type ships (No.101 Transport Ship so far) will focus on installations if any are present.
Special Attacks behave like normal against installation.
In general, using dedicated "Landing Equipment" or other "Anti-Installation Equipment" is recommended to deal the most dame against installations:
Torpedo
Opening Torpedo Salvos, Closing Torpedo Salvos, and Torpedo-based Cut-ins (like the TCI) cannot target installations.
- Those attacks will fail to trigger if only installation targets remain.
Night Battle
- The Torpedo
 stat is ignored when calculating night battle damage against installations. Please see Night Battle for more details.
- This makes destroyers, light cruisers, and heavy cruisers much weaker unless equipped with anti-installation equipment.
- When targeting installation the Cut-in choice will ignore any equipped torpedo.
- This means a ship with 2 mains guns + 1 torpedo, which would normally perform Mixed Torpedo Cut-in on surface targets, would perform Double Attack on installations instead.
- Exception for any DD Cut-ins: If the attacker has a main gun equipped, they can activate DD Cut-ins on installations, even if the main gun is not part of the cut-in's prerequisites (torpedo stat is still considered equal to 0).
- Night shelling Carrier Attacks will deal damage like they would to ships.
- This include Ark Royal's night swordfish attack.
- Air night attacks ignore all anti-installation bonus
- The attack can target installations even if no anti-installation dive bombers is equipped
Barrage Balloon
![]() Barrage Balloons can be deployed in certain situations during day battles.
Barrage Balloons can be deployed in certain situations during day battles.
- Barrage Balloons can only be deployed on certain combat nodes with Installations
| Compatible Nodes | |||
|---|---|---|---|
| Map | Node | Notes | |
| 3-5 | H | ||
| 4-3 | N | Boss | |
| 4-5 | T | Boss | |
| 6-4 | N | Boss | |
| Events | Refers to the current event page | ||
| references | [2][3][4][5] | ||
- Once deployed
- For every ship with a balloon equipped will boost the damage of the fleet and the LBAS (post-cap):
| Balloon Effects | |||
|---|---|---|---|
| 1 | 2 | 3 | |
| Allied Day Shelling Damage | |||
| Allied balloons [6] | 1.02 | 1.04 | 1.06 |
| Allied LBAS Damage | |||
| Allied balloons [7] | 1.02 | 1.04 | 1.06 |
| Enemy balloons [8] | 0.95 | 0.90 | 0.85 |
- The effect stacks up to 3 balloons, and up to 1 balloon per ship,
- The effect applies to LBAS and day shelling, with the enemy balloons also negatively affecting allied LBAS,
- The effect does not apply to torpedo phases or night battles,
- If the ship deploying it is sunk, the balloon is then removed, as well as its effects.
Damage Calculation
- During day, damage is capped at 220 so any ship with a proper anti-installation setup will be able to hit the cap.
- When facing hard-skinned installations, it is better for battleships to have AP shells instead of Type 3 because they will hit the day cap anyway.
- Anti-installation is very important during night battle when the cap is raised to 360.
- Torpedo stat is always counted as 0 when attacking installations. This applies to both airstrikes and night battles.
- However improvements that provide damage during Night Battle is taken into account during such.
- Supply Depot Princess is the only known installation that takes post-cap damage from anti-installation equipment.
- This makes her vulnerable to getting one shot by nuke setups. See here for details.
- While dive bombers have a post-cap bonus during the air-strike, the low base damage means it is of limited effectiveness against high armor installations.
- The Armor Piercing modifier (post-cap) is effective against installation.
Calculation
Installations generally have a lot of HP and/or armor. But multiple different cumulative bonuses exist against them, allowing for massive damage when using the right set-ups. These bonuses are divided into 5 groups and are calculated in the following order[1]:
- Ship type bonuses
- General multiplicative bonuses
- Specific equipment bonuses:
- 11th regiment bonuses
- M4A1 bonuses
- Ho-Ni bonuses
- Landing craft synergy bonuses
- General Flat bonuses
- Post-cap bonuses against Supply Depot Princess

- Airstrike and Land Base special cases
- "Installation-like warships" special cases
- The bonuses' exact order is still under investigation and may be subject to changes.
| Damage Bonuses Calculations | |||
|---|---|---|---|
Pre-cap
|
Surface Shelling:
| ||
Cap
|
| ||
Post-Cap
|
| ||
| |||
Bonuses
Ship type bonuses
| Ship type | Target | Bonuses | |
|---|---|---|---|
| A0 | DD / CL | Pillboxes   
|
1.4 |
| Akagi / Hiryuu / Souryuu[1] | 1.25 | ||
| B0 | SS / SSV | All installation | 30 |
- ↑ Kaga has been tested and no bonus has been found against the Harbour Summer Princess.
General multiplicative bonuses
These bonuses depend on the enemy targeted, as well as the equipment used.
| A1[1] | |||||||||
|---|---|---|---|---|---|---|---|---|---|
| Installation Type | Soft-Skinned | Hard-Skinned | |||||||

|
Pillboxes   
|

| |||||||
| Isolated Island Princess | Pillboxes | Harbour Summer Princess | |||||||
| Number Equipped | Single | Multiple | Single | Multiple | Single | Multiple | Single | Multiple | |
AA Shells  
|
2.5 | 1.75 | 1.75 | ||||||
AP Shells  
|
1.85 | 1.3 | |||||||
WG42 (Wurfgerät 42)
|
1.3 | 1.821.3 * 1.4 | 1.4 | 2.11.4 * 1.5 | 1.6 | 2.721.6 * 1.7 | 1.4 | 1.681.4 * 1.2 | |
Type 4 Anti-Ground Rockets 
|
1.25 | 1.8751.25 * 1.5 | 1.3 | 2.1451.3 * 1.65 | 1.5 | 2.71.5 * 1.8 | 1.25 | 1.751.25 * 1.4 | |
ASW Mortars 
|
1.2 | 1.561.2 * 1.3 | 1.2 | 1.681.2 * 1.4 | 1.3 | 1.951.3 * 1.5 | 1.1 | 1.2651.1 * 1.15 | |
| 1.4 | 1.8 | 1.8 | 1.7 | ||||||
| 1 + (Average ( | |||||||||
Toku Daihatsu Toku DLC + Panzer III  [2] [2]Toku DLC + Panzer III J 
|
1.15 | 1.15 | 1.15 | 1.2 | |||||
DLC + T89 tank Toku DLC + Ho-Ni tank  Toku DLC + Panzer III  [2] [2]Toku DLC + Panzer III J 
Counts for Multiple only
[3]:
|
1.5 | 1.951.5 * 1.3 | 1.2 | 1.681.2 * 1.4 | 1.5 | 2.11.5 * 1.4 | 1.6 | 2.41.6 * 1.5 | |
DLC + Panzer II
|
1.5 | 1.951.5 * 1.3 | 1.2 | 1.681.2 * 1.4 | 1.5 | 2.11.5 * 1.4 | 1.6 | 2.41.6 * 1.5 | |
M4A1 DD Toku DLC + Chi-Ha Kai  [4] [4]Toku DLC + Panzer III J 
|
1.1 | 1.8 | 2.0 | 2.0 | |||||
Armed Daihatsu Soukoutei 
☀ Day Only |
1.1 | 1.211.1 * 1.1 | 1.3 | 1.431.3 * 1.1 | 1.3 | 1.561.3 * 1.2 | 1.5 | 1.651.5 * 1.1 | |
Ka-Mi tank
|
1.5 | 1.81.5 * 1.2 | 2.4 | 3.242.4 * 1.35 | 2.4 | 3.242.4 * 1.35 | 2.8 | 4.22.8 * 1.5 | |
| 1 + (Average ( | |||||||||
| Dive Bombers | 1.4 | 2.451.4 * 1.75 | 1.5 | 3.01.5 * 2 | 1.3 | 1.561.3 * 1.2 | |||
| Seaplane Bombers/Fighters | 1.2 | 1.5 | 1.3 | ||||||
- Notes
- The Improvement Bonus takes the average for all Landing Craft equipped on the ship.
- The Improvement Bonus takes the average for all Amphibious Vehicle equipped on the ship.
- ↑ Last time updated: 09/10/2022, source:https://nga.178.com/read.php?tid=33769345&rand=329
- ↑ 2.0 2.1 https://twitter.com/Divinity_123/status/1695813425660661965
- ↑ For example: vs Soft-Skin, 1 Chi-Ha
 = no bonus, 2 Chi-Ha
 = 1.3 (1.95/1.5), 1 T89
 + 1 Chi-Ha
 = 1.95
- ↑ 4.0 4.1 https://docs.google.com/document/d/1y8kisQTFuAd57GFAQRpJzPOEk9kpUzoEf1sxmnywx3A/edit#heading=h.hycuzmt5tebu, TsunDB, confirmed except Harbour Summer Princess
Specific equipment bonuses
The following multipliers are pre-cap.
| Equipment | Multiplicative bonus | Flat Bonus | ||
|---|---|---|---|---|
| Toku DLC Tank Bonus | A21 | B21 | ||
|
|
1.8 | 25 | ||
| Sherman Bonus | A22 | B22 | ||

|
1.4 | 35 | ||
| Ho-Ni Tank Regiment Bonus | A23 | B23 | ||

|
1.3 | 42 | ||
| Chi-Ha (non-Kai) Bonus | A24 | B24 | ||

|
1.4 | 28 | ||
| Chi-Ha Kai Bonus | A25 | B25 | ||

|
1.5 | 33 | ||
| DLC Synergy Bonus[1] | A26 | B26 | ||
 
|
Group 1[2] | Group 2[3] | Multiplicative bonus | Flat Bonus |
| Only one[4] | 1 of Any | 1.2 | 10 | |
| Both | 1 | 0 | 1.3 | 15 |
| 0 | 1 | 1.4 | 20 | |
| 2 of any | 1.5 | 25 | ||
- ↑ https://twitter.com/oxke_admiral/status/1642326265364615168?cxt=HHwWgMDQxa7C28otAAAA
- ↑ Daihatsu Landing Craft
 , Toku Daihatsu Landing Craft
 , DLC + T89 tank
 , Toku DLC + Ho-Ni tank
 , DLC + Panzer
- ↑ Ka-Mi tank
 , Toku DLC + 11th Reg
 , Toku DLC+Panzer III
 , Toku DLC+Chi-Ha (Kai)
 Toku DLC + Panzer III J
- ↑ Due to a bug, using 2 Soukoutei or 2 Armed Daihatsu cancels the bonuses
Flat Damage Bonuses
| B1 | |||||||||
|---|---|---|---|---|---|---|---|---|---|
| Amount Equipped | 1 | 2 | 3 | 4+ | |||||
WG42
|
75 | 110 | 140 | 160 | |||||
Type 4 Anti-Ground Rockets
|
55 | 115 | 160 | 190 | |||||
Type 4 Anti-Ground Rockets CD
|
80 | 170 | 230 | 260 | |||||
ASW Mortar
|
30 | 55 | 75 | 90 | |||||
ASW Mortar CD
|
60 | 110 | 150 | 180 | |||||
Post-Cap Bonus
Supply Depot Princess
Supply Depot Princess and its variants are currently the only installations to have post-cap bonuses.
- These bonuses are applied after the damage soft-cap, and can reach the damage display cap of 9999.
- If the damage displayed is 9999, the actual damage can be higher.
- Supply Depot Princess is a soft-skinned installation for purposes of Pre-Cap Bonuses.
| C | |||
|---|---|---|---|
| Installation Type | 
| ||
| Supply Depot Princesses | |||
| Number Equipped | Single | Multiple | |
WG42
|
1.25 | 1.6251.25 * 1.3 | |
Type 4 Anti-Ground Rockets 
|
1.2 | 1.681.2 * 1.4 | |
ASW Mortars 
|
1.15 | 1.381.15 * 1.2 | |
| Landing Craft Type Multiplier | 1.7 | ||
| [1 + (Average | |||
| |||
Toku Daihatsu Toku DLC + Panzer III  [1] [1]Toku DLC + Panzer III J 
|
1.2 | ||
DLC + T89 tank Toku DLC + Ho-Ni tank  Toku DLC + Panzer III  [1] [1]Toku DLC + Panzer III J 
Counts for Multiple only[2]:
|
1.3 | 2.081.3 * 1.6 | |
DLC + Panzer II
|
1.3 | 2.081.3 * 1.6 | |
M4A1 DD Toku DLC + Chi-Ha Kai  Toku DLC + Panzer III J 
|
1.2 | ||
Armed Daihatsu Soukoutei 
|
1.5 | 1.651.5 * 1.1 | |
Ka-Mi tank
|
1.7 | 2.551.7 * 1.5 | |
| 1 + (Average ( | |||
Rations Bonuses
The developers have mentioned that ![]() Rations
Rations

 consumed by a girl "affect landing craft's morale"[1].
| C1 | |||
|---|---|---|---|
| Installation Type | All installations[2] | ||
| Number Equipped | Single | Multiple | |
Combat Ration
|
1.13 | ?? | |
Combat Ration (Special Onigiri)
|
?? | ?? | |
Canned Saury
|
?? | ?? | |
- Notes
- A
 Landing Craft might be required to be equipped on the attacking ship for this bonus to be applied.
 - As it is the only post-cap bonus common to all installations, it has a great potential.
- Due to the limited nature of Rations, this bonus is mostly "Pay To Win", and so is not recommended.
Airstrike and Land Base Bonus
For the damage formula, please refer to the LBAS and airstrike page. The multiplier is chosen randomly between two values. The chance is roughly 50%.
There are exceptions:
- For
 Torpedo Bomber:
- For

 Jets
Jets
 :
:
- There are inconsistencies with the bonuses.
- For the
 Land-Based Heavy Bombers
 :
:
- Could have a higher modifier than other planes.
| [math]\displaystyle{ {\color{tomato}\text{Mod}_\text{Inst}} }[/math][9] | ||||||||
|---|---|---|---|---|---|---|---|---|
| Installation (ID) | Airstrike | LBAS | ||||||
| Low mod | High mod | Low mod | High mod | |||||
 Isolated Island Princess (1671-1672) |
2 | |||||||
 Artillery Imp (1665-1667) |
1.3? | 1.7 | 1.6 | 2.5 | ||||
 "Old" Supply Depot Princesses (1653-1658) |
1.5 | 2.4 | 1.7 | 3.6? | ||||
 "New" Supply Depot Princesses (B, C, D, ...) (ID>1658) |
||||||||
 Harbour Summer Princess B (2023) |
? | ? | ? | ? | ||||
Installation-like warships
This section is for special ships with installation-like behaviors, taking additional damage from anti-installation equipment.
- Those bonuses are post-cap only, meaning none of the "anti-installation bonuses" previously mentioned are applied.
- Be aware that the sample is limited (event only) so the information may be inaccurate and/or old[1].
| Installation-like warships | |||||||
|---|---|---|---|---|---|---|---|
| C | |||||||
| Installation Type | 
|

|
 Mod C Mod C Mod C Mod C
| ||||
| Anchorage Water Demon Vacation Mode | Dock Princess | Supply Depot Princess C Vacation Mode | |||||
| Number Equipped | Single | Multiple | Single | Multiple | Single | Multiple | |
AA Shells  
|
1.45 | 1.3 | |||||
WG42 (Wurfgerät 42)
|
1.2 | 1.561.2 * 1.3 | 1.1 | 1.321.1 * 1.2 | 1.25 | 1.6251.25 * 1.3 | |
Type 4 Anti-Ground Rockets 
|
1.15 | 1.611.15 * 1.4 | ? | 1.2 | 1.681.2 * 1.4 | ||
ASW Mortars 
|
1.1 | ? | ? | 1.15 | 1.381.15 * 1.2 | ||
| 1.4 | 1.1 | 1.7 | |||||
| 1 + (Average ( |
[1 + (Average | ||||||
| |||||||
Toku Daihatsu
|
1.15 | 1.2 | |||||
DLC + T89 tank Toku DLC + Ho-Ni tank 
|
1.2 | 1.681.2 * 1.4 | 1.15 | 1.32251.15 * 1.15 | 1.3 | 2.081.3 * 1.6 | |
DLC + Panzer II
|
1.2 | 1.681.2 * 1.4 | 1.15 | 1.32251.15 * 1.15 | 1.3 | 2.081.3 * 1.6 | |
M4A1 DD
|
1.8 | 1.1 | 1.2 | ||||
Armed Daihatsu Soukoutei 
|
1.2 | 1.1 | 1.5 | 1.651.5 * 1.1 | |||
|
Toku DLC + 11th Reg |
1.4 | ||||||
Ka-Mi tank
|
2.4 | 3.242.4 * 1.35 | 1.2 | 1.441.2 * 1.2 | 1.7 | 2.551.7 * 1.5 | |
| 1 + (Average ( | |||||||
| Dive Bombers | 1.4 | 2.451.4 * 1.75 | 1.1 | 1.211.1 * 1.1 | |||
| Jets | 2.451.4 * 1.75 | ||||||
| Seaplane Bombers/Fighters | 1.1 | ||||||
| Ship | Nagato-class Yamato-class |
1.2 | |||||
- ↑ Updated the 08/09/2022 during the Summer 2022 Event [1].
LST & Landing Forces
The following are preliminary tests, lacking data to be accurate.
| C[1] | ||||
|---|---|---|---|---|
| Installation Type | 
| |||
| Supply Depot Princesses | ||||
| Number Equipped | 1 | 2 | 3 | |
| 3.15 | 7.4033.15 x 2.35 | 8.88833.15 x 2.35 x 1.2 | ||
Type 97 Medium Tank New Turret (Chi-Ha Kai) Army Infantry Corps + Chi-Ha Kai 
|
1.2 | |||
Army Infantry Corps Army Infantry Corps + Chi-Ha Kai 
|
1.55 | |||
- Note
- For now, the best set-up seems to be 2
 and 1
and 1  Ka-Mi tank
 .
.
Additional Information
Landing Craft/Amphibious Vehicles Capable Ships
| Ships that can equip Landing Craft / Amphibious Vehicles | |||||
|---|---|---|---|---|---|
| Type | Landing Craft |
Both |
Amphibious Vehicle | ||
| DD | |||||
| CL | |||||
| CAV | |||||
| (F)BB(V) | |||||
| CVL | |||||
| AV | |||||
| AO | |||||
| LHA | |||||
| SS(V) | All | ||||
| RE |
| ||||
| [edit] | |||||
Attack Animation
Some anti-installation equipment will add attack animation when targeting installation. There is no relation between the presence/absence of animation, and the presence/absence of anti-installation damage bonuses.
| Equipment | Animation |
|---|---|
| Artillery | |
    
|
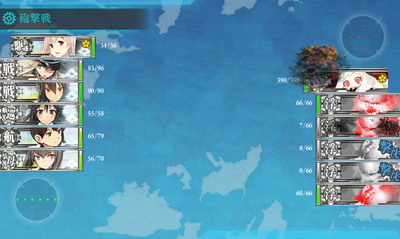
|
|
Up to 2 tanks are shown in the animation
|
|
 T97 Medium Tank Chi-Ha Kai T97 Medium Tank Chi-Ha Kai
|
|
 T97 Medium Tank Chi-Ha T97 Medium Tank Chi-Ha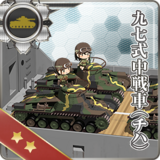
|
|
 Army Infantry Corps Army Infantry Corps
|
(empty) |
 M4A1 DD M4A1 DD
|
|
 Toku DLC + Ho-Ni tank Toku DLC + Ho-Ni tank |
|
 Toku DLC + 11th Reg Toku DLC + 11th Reg
|
|
 Soukoutei Soukoutei
|
|
 Armed Daihatsu Armed Daihatsu
|
|
 Ka-Mi tank Ka-Mi tank
|
|
 Toku DLC + Panzer III Toku DLC + Panzer III |
|
 DLC + Panzer II DLC + Panzer II
|
|
 DLC + T89 tank DLC + T89 tank
|
|
| Unused (Transport DLC) | |
- Notes
- The animations for "artillery", "landing craft", and "airstrike", are compatible.
- If multiple landing craft are equipped on the same ship, only one animation will be shown (the above table is sorted in priority order).
- A variation of the animation of the
 Ka-Tsu tanks
 is also played against Atoll Nodes when applicable.
 - The animation of the
 Armed Armed Boats
 is also played against PT-Imp
 when equiped.
 - These animations will be overridden by:
- Artillery spotting,
- Night cut-in.
See Also
| |||||||||||||||||||||||||||||||||||||


