 |
There is no such thing as a "perfect" or "universal" setup.
Each and every situation requires its own assortment of ships and equipment, with some setups being more common/effective than others. |
To observe what setups other players are using in any given situation, please see
KCnavThis article aims to cover the most commonly used equipment setups for each ship type. It is to give an idea of what are the most efficient load-outs to make ships effective in a particular role. This means that this article will not cover some niche setups that are too specific. For those equipment setups, please refer to the relevant pages.
- See here for a breakdown of all equipment types and their related mechanics.
- For more details on some mechanics, please see each relevant page.
- Please mind each individual plane slot size when applicable. Aircraft should be placed in the biggest slots available to be more effective.
Do note that the vast majority of the game mechanics are "equipment bases" and not "ship based", which means that most setup aspects are shared on all types of ships.
- In addition, if a ship can equip a setup viable on other ships, then it will generally be at viable too or at least not detrimental (unless specifically stated otherwise).
- If a setup is missing on this page, it is possible to extrapolate it from the knowledge of the general setup and equipment rules.
Standard Combat
"Standard combat" refers to most of the encountered engagements in the game, being surface battles in nature, with some air component.
For more information on this topic, see
Combat.
For more information on this topic, see
Day Battle.
When referring to "supporting equipment", the following are counted:
Light Cruisers (CL) are very flexible, utilizing  Medium Caliber Main Guns,
  Torpedoes,
  Recon Seaplane Recons, and
 ASW equipment, and having strong torpedo
  , ASW
, ASW  , and "night attack power
  " stats.
- 4 slots CL can mostly follow CA setups.
- Also applicable to CT to some extent for standard combat and ASW.
Misc
| Equipment Setup
|
Notes
|
| Minisub
|
The "cheat CLT setup" for Minisub minisub capable ships, allowing for an opening torpedo and night DA.
|
Minisub / + +
|
A setup for Yura Kai Ni and Yahagi Kai Ni B that allows her to provide either air support or artillery spotting, while maintaining night battle double attacks and opening torpedo. This requires a RE to fit the gun.
In the case of Yahagi, the 4th slot can bring any utility equipment like a sonar, another seaplane, or a radar.
|
Minisub   + +
|
An AACI setup for Yura Kai Ni. This requires a RE to fit the gun.
The wildcard should preferably be a to allow her to maintain night battle double attacks. If need be, the midget submarine can be swapped for a recon seaplane to allow her to perform daytime spotting.
|
| +
|
This is a setup to take advantage of Ooyodo/Agano-class Kai Ni/CT reinforcement expansion.
By placing a in it, it allows to perform artillery spotting and night battle double attacks while freeing up one/two slots for utility purposes. The wild cards can be anything that does not interfere with the special attacks. It can be night battle equipment or a Fleet Command Facility.
|
| Minisub
|
This is a unique setup for Yuubari Kai Ni Toku when she isn't running the full TCI setup.
The wild card can be a tank, landing craft, or anti-ground rocket for anti-installation warfare, or a sonar for ASW.
|
| Minisub
|
When night power is not needed, this setup is enough to deal good damage and trigger the oTorp. The wild cards are then used for general supporting, such as night equipment.
|
| Medium Medium Air
|
The AACI setup for Atlanta-class, the only viable setup for them, and the best AACI in the game.
|
RE recommendations:
Exotic Setups
Other setups that are used in specific situations and/or on specific ships.
- Usually, only a few ships in a fleet would use such setups.
- Those setups would not be discarded.
When a very high amount of Fighter Power is required on a specific node to reach air superiority (either for combat effectiveness or a gimmick), it is sometimes viable to sacrifice the attack power of a ship to focus it on bringing the most fighter power.
- As many as the best
 / fighters have to be used on a single ship.
- Such setup should not be used in the escort fleet of a combined fleet.
Special setups are required to counter the massive accuracy penalties against PT boats.
- DD and DE, and to some extent CL, should be fitted with such setups, as bigger ships do not benefit as much from them.
| ExpandAnti-PT boat
|
Unlike most standard Abyssals, "PT boats" (PT Imp Pack & Schnellboot Imp Pack & Schnellboot Imp Pack ) are "very small and fast". ) are "very small and fast".
- All ship types suffer a severe
 accuracy and accuracy and  firepower penalty against PT boats. firepower penalty against PT boats.
- Attacking them with larger guns is not very effective, smaller guns being recommended instead.
- Support Expeditions are not affect by any of the following[1].
| ExpandAttack formula against PT boats
|
The Attack formula against PT boats:[2][3]
- Jet Assault & Airstrike
- [math]\displaystyle{ \text{Damage}_\text{PT}= \text{Atk}_\text{post-cap} \times \text{Rand} [0.5 ; 0.8] }[/math]
- LBAS[4]
- [math]\displaystyle{ \text{Damage}_\text{PT}= \text{Atk}_\text{post-cap} \times \text{Rand} [0.4 ; 0.7] }[/math]
- Shelling
- [math]\displaystyle{ \text{Damage}_\text{PT}= ( 0.3 \times \text{Atk}_\text{post-cap} + \sqrt{\text{Atk}_\text{post-cap}} + 10 ) \times \prod^{All Equipment}{\text{Mod}_\text{EquipmentAtk}} }[/math]
- Opening & Closing Torpedo Salvos
- [math]\displaystyle{ \text{Damage}_\text{PT}= 0.3 \times \text{Atk}_\text{post-cap} + \sqrt{\text{Atk}_\text{post-cap}} + 10 }[/math]
- Night Battle
- Night Battle data are unclear yet.
- With
- [math]\displaystyle{ \text{Atk}_\text{post-cap} }[/math] the post cap attack power defined here,
- [math]\displaystyle{ \text{Mod}_\text{EquipmentAtk} }[/math] the bonuses given by equipment, described below.
|
| ExpandAccuracy formula against PT boats
|
The Accuracy formula against PT boats:[5][6][7][8]
| [math]\displaystyle{ \text{Hit Rate}_\text{vs.PT} \text{%} = \Big\lfloor ( 0.3 \times \text{Accuracy}_\text{Atk} + \sqrt{\text{Accuracy}_\text{Atk}} + 15 ) \times 1.2 \times \text{Mod}_\text{Ship} \times \Big( \prod^{All Equipment}{\text{Mod}_\text{EquipmentAcc}} \Big) \times \text{Mod}_\text{Night} \Big\rfloor - \text{EVA}_\text{PT} + 1 }[/math]
|
- With
- [math]\displaystyle{ \text{Acc}_\text{Atk} }[/math] the standard accuracy described here
- PT boats are "DDs" in the game, so the [math]\displaystyle{ \text{Mod}_\text{formation} }[/math] for vanguard is 1.1 during shelling, and 1.2 during the torpedo phase.
- Historical accuracy bonuses during Events are included in the Standard Accuracy Term, i.e. it is affected by the [math]\displaystyle{ \text{Mod}_\text{PT} }[/math] modifier.
- [math]\displaystyle{ \text{EVA}_\text{PT} }[/math] the PT estimated evasion
 described bellow, described bellow,
- The main Accuracy modifiers are
- [math]\displaystyle{ \text{Mod}_\text{Amagiri} }[/math] being include in [math]\displaystyle{ \text{Acc}_\text{Atk} }[/math]:
- [math]\displaystyle{ \text{Mod}_\text{Ship} }[/math] the bonus given by ship types, described below,
- [math]\displaystyle{ \text{Mod}_\text{EquipmentAcc} }[/math] the bonuses given by equipment, described below,
- [math]\displaystyle{ \text{Mod}_\text{Night} }[/math] being 0.7 during night battle, 1 during day battle.
|
Amagiri Kai Ni/D
 has the ability to prioritize focusing on attacking PT imps with significantly increased accuracy if any are present. has the ability to prioritize focusing on attacking PT imps with significantly increased accuracy if any are present.
- DD placed in the composition slots above and below her will gain a noticeable accuracy boost and will prioritize attacking PT boats if any are present.
- The PT boat targeting rate is 100% for all affected ships [9].
During Events, some special bonuses may be added, with "historical" ships and equipment gaining some accuracy bonuses[10].
| Ship Type |
[math]\displaystyle{ \text{Mod}_\text{Ship} }[/math]
|
| DD & DE |
1.0
|
| CL, CLT, & CT |
0.82
|
| All other types |
0.7
|
- Notes
- It is recommended to use anti-PT setups on DDs only, such setups compromising overall combat effectiveness.
- Having a Reinforcement Expansion is important because it can save a ship slot by containing a machine gun or skilled lookouts.
- Combining equipment is recommended to see significant boosts to accuracy.
- The
 Ka-Tsu Tanks Ka-Tsu Tanks
 bonus does not stack with the bonus does not stack with the  Armed Boats Armed Boats
 ones. ones.
- Using other setups improving accuracy is also advisable:
|
|
|
| [edit]
|
Transport Operations requires to bring as much "TP points" as possible per run to be completed:
- Notes
- The landing craft used does not matter to complete the phase, unless it involves anti-installation battles.
- CL, DD, and Aux should be the ones focussing on carrying the TP equipment, as they are the ship relatively losing the less combat effectiveness.
- Even so the
 Underway Replenishment
 icon is displayed on TP nodes, they do not contribute to TP gauge depletion.
Anti-Submarine
Are listed here some recommended equipment setups for ASW duties.
The equipment order is illustrative and does not reasonably matter.
As general rules:
- The first priority is to have an OASW, even at the expense of damage synergy (see the 2nd tab).
- Sonars are required to trigger most OASW as well as directly contributing to accuracy, and should not be discarded, and even stacked in some cases.
- To further maximize ASW effectiveness, regardless if an OASW is triggered or not, it is recommended to use the "damage synergy setup".
- Do note that DE also have an armor penetration bonus when using Depth Charges.
As already stated, in most cases, having a ship triggering an "opening ASW" takes priority over having the best damage setup.
When putting aside the "special OASW" that each have other characteristics (see OASW), the mains OASW are the:
- "Shelling OASW", where DD, CL, CLT, CT, and AO needs to reach 100 while carrying a Sonar.
- DE are great in the OASW role, only needing 60 when using a Sonar.
- "Carrier OASW", where a CVL, but more commonly a CVE is equipped with at least one ASW Aircraft.
- Other setups variations do exist but are detrimental to the regular carrier role.
- Because increase with levels, using high-level ships will help reach the required stat threshold,
- Many ships do notably reach 100+ ASW at higher levels once married.
In most cases, DD and CL are used for OASW due to their versatility, hence, their required setup are mostly as follow:
| Setup
|
Equipment
total ASW
|
Base ship ASW
required for OASW
|
Notes
|
 |
30 |
70 |
A setup focussing on OASW only, with no synergy.
|
  |
22 |
78 |
The base synergy setup, using buildable equipment only.
|
  |
27 |
72 |
A base synergy setup, using early obtainable equipment only.
|
  |
51 |
49 |
The best 3 slot synergy setup with obtainable equipment
|
 |
54 |
46 |
The best 3 slot synergy setup
|
- Those setups are further improved by:
- Using better ASW gears,
- A 4th ASW gear for 4 slots ships,
- Using other equipment giving stat, notably
 Lookouts on IJN ships.
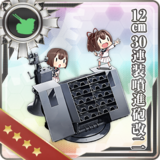
| Equipment Setup
|
Notes
|
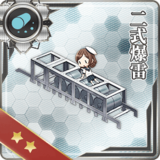
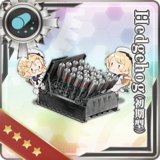
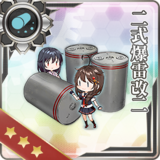
| Small DCP DCR
|
Best ASW damage setup utilizing synergy. DE should only utilize this setup as any other setup is not viable.
|
RE recommendations:
Anti-Installation
As a general rule, to engage in anti-installation warfare, a combination of regular setups (DA, AACI, ASW, ...), has to be mixed with the use of more or less "anti-installation equipment":
- Regarding
 Landing Equipment:
- These provide on average the highest flat/multiplier damage bonus against all installations.
- As Landing Craft, Amphibious Vehicles, and Landing Forces have separate multipliers, it is recommended to use them in tandem to maximize the effect.
- Only the following ships can equip those equipment, and so are particularly valuable in those situations:
- Regarding
 Anti-Ground Rockets:
- If a ship's base firepower is low or just cannot equip landing equipment, it can be viable to use Anti-Ground Rockets to provide a large flat damage increase to supplement the ship's anti-installation damage.
- Depending on whether one or more Anti-Ground Artilleries are to be equipped on a ship, it is recommended to use a WG42 for singular purposes, or Shipborne Model Type 4 20cm Anti-ground Rocket Launchers (or CD) if multiple are needed.
- ASW Mortar
 are inferior substitutes to regular Anti-Ground Rockets when lacking those.
- Regarding Shells:
 AP Shells are mostly effective against "Hard Skin Installations",
 AA Shells are mostly effective against "Soft Skin Installations".
Nuke Setup describes any setups using anti-installation equipment from multiple categories to multiplicatively amplify damage dealt to installations (dealing "nuclear-like damage").
- Such a setup has a strong anti-installation power against all installations but is hampered by the daytime damage cap.
- Nuke Setups are recommended to be used when dealing with Supply Depot Princess in particular, utilizing the high post-cap side of the bonuses to deal with her generally high HP pool.
- The setup's damage can be further improved by using multiple copies of those types of equipment where applicable.
- For example, equipping multiple Amphibious Vehicles or Landing Craft with unique bonuses instead of anti-ground rockets provides better damage output for the ship, however, it is advised to only do so if you have enough available for the other ships in your fleet that require them.
All "surface" anti-installation setups can be further enhanced by using them in Special Attacks, especially the Nelson-class's Touch.
In addition to the regular "supporting equipment" can also be added the
 Barrage Balloons
 for anti-installation only.
| Equipment Setup
|
Notes
|
| General anti-installation setups
|
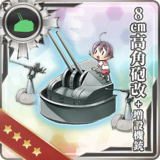
 + +
|
"Best of both worlds", one of the best setups for 4+RE or 5 slot battleships, being both good in regular combat a well as against most installations.
|
/
/
|
Haruna Kai Ni C, Nagato-class Kai Ni, & Yamato Kai Ni Juu only.
- Note that since they have high FP, they benefit less from precap modifiers, hence such setup sees little use in most cases.
- Keeping the seaplane allows to still perform artillery spotting to maintain enough effectiveness against other targets.
- Yamato can equip both & , and Yamato & Haruna can equip an additional in their RE if possible.
- This setup is most effective against SDP & installation-like warships.
|
| Anti-hard skins setups
|
|
|
The basic battleship setup. Because Battleships are not far away from the damage cap compared to other ship types, they do not benefit much from the high pre-cap multipliers that anti-installation equipment provides. The standard artillery spotting setup will allow them to utilize spotting attacks and AP Shell's post-cap bonuses against the installation, as well as be effective against all other targets in the enemy fleet.
|

|
Ise-class Kai Ni only, taking advantage of the dive bomber bonus, without being limited by the anti-installation DB.
|
| Anti-soft skins setups
|
|
|
This is an option when facing soft-skinned installations. Taking an AA shell will improve their damage against installations, but will also limit the battleship's effectiveness against all other targets by reducing their artillery spotting attack types.
|
| Anti-SDP setups
|
| +
|
Nuke Setup , Yamato Kai Ni Juu only.
|
| 4-5 x /
|
Mega Nuke Setup , Haruna Kai Ni C, Nagato-class Kai Ni, & Yamato Kai Ni Juu only.
- A setup for extreme cases, not recommended in most cases as it negatively affects the normal combat effectiveness.
|
| +
|
Haruna Kai Ni C & Yamato Kai Ni Juu only, DA Nuke, not recommended in most cases as it negatively affects the normal combat effectiveness.
|
| Anti-installation-like warships setups
|
|
|
Haruna Kai Ni C only.
|
|
|
Kongou-class Kai Ni B/C & Conte di Cavour Nuovo only.
|
RE recommendations:
- In most cases, are better by bringing additional bonuses, especially the Kai & Kai 2 variants, that brings
| Equipment Setup
|
Notes
|
| General anti-installation setups
|
Recon
Recon +
|
The only anti-installation equipment a regular CA can carry are AA shells, which is effective against all installations but Pillboxes, and very effective against soft-skinned installations.
- It allows artillery spotting and deals decent damage against installations.
|
Bomber/
Bomber/ +
|
Zara-class Kai/Due Only, with the SPB/SPF providing additional bonuses.
|
+
|
This is an alternative setup only for CAV.
- If no RE is available, it removes the ability to artillery spot, but for much more powerful damage at night.
|
| +
|
For the Mogami-class Kai Ni with an RE, this setup additionally maintains the artillery spotting.
|
| +
|
For the Mogami-class Kai Ni with an RE, a DA pseudo-nuke.
|
/
Minisub Bomber /+
|
This setup is for Mogami Kai Ni Toku, allowing for oTorp, artillery spotting, and DA with anti-installation bonuses.
- The seaplane can be a Bomber/ for further bonuses.
|
| Anti-SDP setups
|
+
+
|
DA Nuke Setup , Mogami Kai Ni Toku only.
- Uses Mogami's ability to carry 8cm High-angle Guns
 in her RE, making this a true nuke setup while keeping the Double Attack. in her RE, making this a true nuke setup while keeping the Double Attack.
|
/
|
Nuke Setup , Mogami Kai Ni Toku only.
- Not recommended as it loses the DA.
|
RE recommendations:
- In most cases, are better by bringing additional bonuses, with the Kai & Kai 2 variants also bringing additional .
CLT should not engage in anti-installation warfare.
- They should serve a support purpose (oTorp against regular ships, oasw, balloon, smoke, ...).
Other auxiliaries should not focus on the anti-installation role. However, they can still utilize anti-installation equipment, such as in TP phases.
Equipment Selection
While the above set-up guide recommends only types of equipment, this section gives the general rules on how to choose equipment within a given type.
Equipment of a same type are mainly differentiated by their "Stats" (, ,  , ...), including Fit Bonuses (both visible and invisible) and Improvements (
 ) stats, as well as some more specific attributes, like:
- Modifiers brought in certain mechanics, ranging from combat to routing,
- Special mechanics induced by certain equipment,
- Map "historical bonuses".
Equipment have a wide range of stats, however, not all stats are ranked the same way, some being more important than other, depending on the equipment type.
Here, equipment stats are dispatched into 3 categories:
- Primary Stats: stats that influence the effectiveness of the equipment in its main role, being the main choosing factor,
- Secondary Stats: stats that can influence the effectiveness of the equipment for other purposes, helping to choose between equipment sharing the same "Primary Stats".
- Bonus Stats: All the other stats. These stats do not influence the effectiveness of the equipment much, but are appreciable for the general stat stats of the equipping ship.
- Notes
- See here for anti-installation gears ranking.
 Range gained from certain equipment can either be advantageous or detrimental, depending on the situation, like for Special Attacks or when Leveling.
See Also
 Command Facilities,
 Smoke Generators,
  Night Recons,
  Searchlights,
  Star Shells,
 AA Guns &
  AAFD are good universal picks in general, bringing ship and fleet AA, as well as some general stat boosts for the equipping ship.
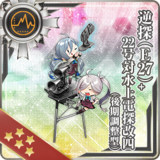


 will override Red T engagements and turn them into Head-on, see here