- Welcome to the Kancolle Wiki!
- If you have any questions regarding site content, account registration, etc., please visit the KanColle Wiki Discord
Difference between revisions of "Help:Equipment Setup"
m (→Exhautic Setups: typo s/Exhautic/Exotic/) |
|||
| Line 377: | Line 377: | ||
</tabber> | </tabber> | ||
| − | = | + | =Exotic Setups= |
<tabber> | <tabber> | ||
|-|Introduction= | |-|Introduction= | ||
Revision as of 01:24, 24 February 2024
|
|
There is no such thing as a "perfect" or "universal" setup. Each and every situation requires its own assortment of ships and equipment, with some setups being more common/effective than others. |
This article aims to cover the most commonly used equipment setups for each ship type. It is to give an idea of what are the most efficient load-outs to make ships effective in a particular role. This means that this article will not cover some niche setups that are too specific. For those equipment setups, please refer to the relevant pages.
- See here for a breakdown of all equipment types and their related mechanics.
- For more details on some mechanics, please see each relevant page.
- Please mind each individual plane slot size when applicable. Aircraft should be placed in the biggest slots available to be more effective.
Do note that the vast majority of the game mechanics are "equipment bases" and not "ship based", which means that most setup aspects are shared on all types of ships.
- In addition, if a ship can equip a setup viable on other ships, then it will generally be at viable too or at least not detrimental (unless specifically stated otherwise).
- If a setup is missing on this page, it is possible to extrapolate it from the knowledge of the general setup and equipment rules.
Standard Combat
"Standard combat" refers to most of the encountered engagements in the game, being surface battles in nature, with some air component.
- For more information on this topic, see Combat.
- For more information on this topic, see Day Battle.
- For more information on this topic, see Aerial Combat.
- For more information on this topic, see Night Battle.
 Command Facilities,
- Day only:
 Smoke Generators,
  /
/ ASW equipment,
 - Night only:
 Night Recons,
  Searchlights,
  Night Recons
 - RE only:
 AA Guns &
  AAFD are good universal picks in general, bringing ship and fleet AA, as well as some general stat boosts for the equipping ship.


Exotic Setups
Other setups that are used in specific situations and/or on specific ships.
- Usually, only a few ships in a fleet would use such setups.
- Those setups would not be discarded.


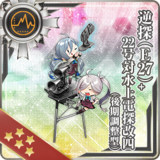
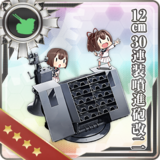
Anti-Submarine
- For more information on this topic, see Anti-Submarine Warfare.
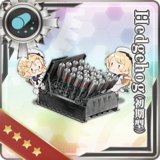
- The first priority is to have an OASW, even at the expense of damage synergy:
- Because
 increase with levels, using high-level ships will help reach the required stat threshold,
 - DE can OASW more easily than other ship types,
- Take note that DE also have an armor penetration bonus when using Depth Charges.
- Because
- Sonars are required to trigger most OASW as well as directly contributing to accuracy, and should not be discarded, and even stacked if possible.
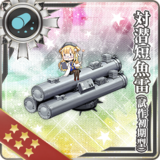
- To further maximize ASW effectiveness, regardless if an OASW is triggered or not, it is recommended to use the "damage synergy setup":
- Small + DCP + DCR
- This ASW setup maximizes the ASW by taking advantage of the synergy, and must include 1 Small Sonar, 1 Depth Charge Projector, and 1 Depth Charge (Racks).
| ExpandASW Damage Synergy |
|---|


Anti-Installation
- For more information on this topic, see Anti-Installation.
| ExpandAnti-Ground Equipment |
|---|


- Regarding


 Landing Equipment:
- These provide on average the highest flat/multiplier damage bonus against all installations.
- As Landing Craft, Amphibious Tanks, and Landing Forces have separate multipliers, it is recommended to use them in tandem to maximize the effect.
- Only the following ships can equip those equipment, and so are particularly valuable in those situations:
| ExpandShips that can equip Landing Craft / Amphibious Vehicles |
|---|


- Regarding
 Anti-Ground Rockets:
- If a ship's base firepower is low or just cannot equip landing equipment, it can be viable to use Anti-Ground Rockets to provide a large flat damage increase to supplement the ship's anti-installation damage.
- Depending on whether one or more Anti-Ground Artilleries are to be equipped on a ship, it is recommended to use a WG42 for singular purposes, or Shipborne Model Type 4 20cm Anti-ground Rocket Launchers (or CD) if multiple are needed.
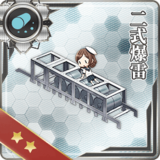
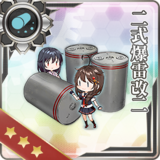
- ASW Mortar
 are inferior substitutes to regular Anti-Ground Artilleries when lacking those.
- Regarding

 Shells:
Nuke Setup describes any setups using anti-installation equipment from multiple categories to multiplicatively amplify damage dealt to installations (dealing "nuclear-like damage").
- Such a setup has a strong anti-installation power against all installations but is hampered by the daytime damage cap.
- Nuke Setups are recommended to be used when dealing with Supply Depot Princess in particular, utilizing the high post-cap side of the bonuses to deal with her generally high HP pool.
- The setup's damage can be further improved by using multiple copies of those types of equipment where applicable.
- For example, equipping multiple Special Amphibious Tanks
 or Landing Craft with unique bonuses instead of anti-ground rockets provides better damage output for the ship, however, it is advised to only do so if you have enough available for the other ships in your fleet that require them.
- For example, equipping multiple
All "surface" anti-installation setups can be further enhanced by using them in Special Attacks, especially the Nelson-class's Touch.
In addition to the regular "supporting equipment" can also bee added the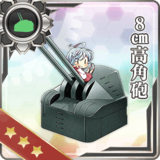

Equipment Selection
While the above set-up guide recommends only types of equipment, this section gives the general rules on how to choose equipment within a given type.
Equipment of a same type are mainly differentiated by their "Stats" (![]() ,
, ![]() ,
, ![]() , ...), including Fit Bonuses (both visible and invisible) and Improvements (
, ...), including Fit Bonuses (both visible and invisible) and Improvements (![]() ) stats, as well as some more specific attributes, like:
) stats, as well as some more specific attributes, like:
- Modifiers brought in certain mechanics, ranging from combat to routing,
- Special mechanics induced by certain equipment,
- Map "historical bonuses".
Equipment have a wide range of stats, however, not all stats are ranked the same way, some being more important than other, depending on the equipment type.
Here, equipment stats are dispatched into 3 categories:
- Primary Stats: stats that influence the effectiveness of the equipment in its main role, being the main choosing factor,
- Secondary Stats: stats that can influence the effectiveness of the equipment for other purposes, helping to choose between equipment sharing the same "Primary Stats".
- Bonus Stats: All the other stats. These stats do not influence the effectiveness of the equipment much, but are appreciable for the general stat stats of the equipping ship.
| Equipment Stats Category | |||||
|---|---|---|---|---|---|
| Main Armament | |||||
| Icon | Equipment Types | Primary Stats | Secondary Stats | Notes | |
| Main Gun & Secondary Gun |
| ||||
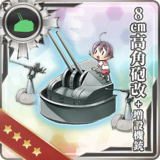
| High-Angle Gun | Having an good AACI takes priority over stats | ||||
| AA Gun |
| ||||
| Torpedo | For Sub torps, Late model ones unlock a better Cut-in | ||||
| Midget Submarine | |||||
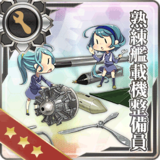
| Anti-submarine Weaponry |
| ||||
| Aircraft | |||||
| Icon | Equipment types | Primary stats | Secondary stats | Note | |
| Dive Bomber | AAR ❱❱ |
If the main purpose of the ship is ASW then naturally | |||
| Fighter-Bomber and Jets | |||||
| Torpedo Bomber | AAR ❱❱ |
If the main purpose of the ship is ASW then naturally | |||
| Fighter | ❱❱ |
||||
| Carrier Recon | Equipping a Saiun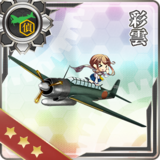 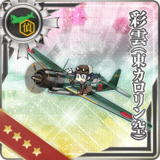  will override Red T engagements and turn them into Head-on, see here will override Red T engagements and turn them into Head-on, see here
| ||||
| Seaplane Recon | |||||
| Seaplane Bomber | ❱❱ AAR | Night Seaplane Bombers also unlock the night SPB CI. | |||
| Seaplane Fighter | ❱❱ | ||||
| ASW Aircraft | |||||
| Other Equipment | |||||
| Icon | Equipment types | Primary stats | Secondary stats | Note | |
| Surface Radar | Because of AACI priority, radar without | ||||
| Air Radar | |||||
| Anti-Installation Equipment | Anti-installation modifiers | The best equipment can change depending on the enemy installation | |||
| Extra Armor | The | ||||
| Engine Improvement | |||||
| All Other Equipment | Are chosen on a case-by-case basis, being often bounded to some specific mechanics | ||||
- Notes
 Range gained from certain equipment can either be advantageous or detrimental, depending on the situation, like for Special Attacks or when Leveling.
See Also
| ||