Summer 2024 Event/E-1
 
| |||||||||
|---|---|---|---|---|---|---|---|---|---|
 
2nd wave of Friendly Fleets has been released!
Time until event's end:
| |||||||||
Commence!
Operation Catapult
発動!カタパルト作戦
Operation Catapult
発動!カタパルト作戦
![]()


| Information | ||||
|---|---|---|---|---|
| Event Tag | ||||
| Boss Gauges | Hard (甲): 7750 HP | |||
| Medium (乙): ?? HP | ||||
| Easy (丙): ?? HP | ||||
| Casual (丁): ?? HP | ||||
| Map Bosses | Harbour Summer Princess B
| |||
| Rewards[edit] | ||||
|---|---|---|---|---|
| Choice | 丁 Casual |
丙 Easy |
乙 Medium |
甲 Hard |
Equipment Slots |
2 | 3 | 4 | 5 |
| OR | ||||
Development Material |
8 | 12 | 16 | 20 |
| Reward | 丁 Casual |
丙 Easy |
乙 Medium |
甲 Hard |
|---|---|---|---|---|
Food Supply Ship Mamiya |
1 | 1 | 2 | 3 |
Reinforcement Expansion |
1 | 1 | 1 | |
Medal |
1 | |||
Latest Overseas Warship Technology |
1 | |||
 13.8cm Twin Gun Mount |
1 (★0) | 1 (★0) | 1 (★1) | 1 (★2) |
 Type 281 Radar |
1 (★0) | 1 (★1) | 1 (★2) | |
 Communication Equipment & Personnel |
1 | 1 |

The event guides are to be constructed through the respective Event map page guide sandbox and reviewed by editors before being approved here.
- Do not update the guides through this page unless it is a minor fix. Please only update guides through their respective sandbox pages.
Branching Table
| E-1 Branching Rules ▼/▲ | ||
|---|---|---|
| Nodes | Rules | |
| Start | 1 |
|
2 |
| |
2 |
I |
|
J |
| |
A |
B |
|
C1 |
| |
D |
| |
C |
C1 |
Active Branching |
C2 | ||
C1 |
D |
|
E |
| |
C2 |
C1 |
|
L |
| |
E |
F |
Active Branching |
G | ||
G |
H |
|
K |
| |
L |
| |
* = Rule under review
? = Ship type/amount under review
Branching compositions are reported over the course of the event.
- Please refer to KCNav for up to date map content (fleets used, LoS/speed requirements/drops/LBAS ranges, ...)
Historical Bonuses
| Ship Damage Bonuses Stack with each other | ||||||||||||||||
|---|---|---|---|---|---|---|---|---|---|---|---|---|---|---|---|---|
| Ships [Toggle Names] |
Multipliers | |||||||||||||||
| Mapwide | Node L | Node M | ||||||||||||||
| Coastal Defense Ships (DE) | 1.12x | - | ||||||||||||||
| Destroyers (DD) | 1.03x | |||||||||||||||
| Light Cruisers (CL) NOT CLT |
1.04x | |||||||||||||||
| Seaplane Tenders (AV) | 1.08x | |||||||||||||||
| Light Carriers (CVL) | 1.04x | |||||||||||||||
|
1.13x | 1.06 | ||||||||||||||
|
1.03x | 1.08x | ||||||||||||||
|
1.11x | - | ||||||||||||||
|
1.03x | |||||||||||||||
| ||||||||||||||||
Gotland Andra |
1.24x | |||||||||||||||
Foreign Plane Bonuses have returned and should be examined when planning equipment setups. The following bonuses are applied:
- Ships using planes get bonuses based on the different categories of bonuses ɑ/β/γ, A, and B.
- The ɑ/β/γ groups are the general foreign plane bonuses, being divided into three "levels" (γ>β>ɑ) and being both map-wide and node-specific,
- Group A are French and British bonuses divided into three sub-categories:
- A1 are French seaplanes,
- A2 are British seaplanes,
- A3 are Swordfish.
- B# bonuses are primarily for LBAS (with ship-based & land-based planes), with the ship-based planes also providing the same bonuses to ships, and being divided into two "levels" (B2>B1)
 Heavy Bombers also have similar bonuses
- Notes
- These bonuses work for all ships and for all attack types, including: LBAS, jet assault, airstrikes, air/surface shelling, and night attacks.
- Bonuses from a same line or column do not stack.
- Map-wide bonuses and node-specific bonuses always stack.
- Bonuses still work for planes equipped in 0-slot for ships.
- Bonuses do not work on 0-slot for LBAS.
| Historical Plane Damage Bonuses | |||||
|---|---|---|---|---|---|
| Group | Multipliers | ||||
| Mapwide | Node I | Node L | Node M | ||
| ɑ | 1.03x | 1.03x | - | 1.05x | |
| β | 1.04x | ||||
| γ | 1.05x | ||||
| A | 1 | - | 1.03x | ||
| 2 | 1.02x | ||||
| 3 | 1.04x | ||||
| B | 1 | 1.04x | - | 1.04x | |
| 2 | 1.06x | 1.06x | |||
| - | - | ? | 1.16x | ||
| Ship Effects Carrier Planes | |||
|---|---|---|---|
| ɑ | β | γ | |
| 0 |
|
|
|
| A3 |
|
|
|
| B1 |
|
|
|
| B2 | - |
|
|


| Ship Effects Seaplanes | |||
|---|---|---|---|
| ɑ | β | γ | |
| 0 |
|
- | - |
| A1 | - | 
|
|
| A2 | - | 
|

|
| A3 |
|
- | - |
| B1 | - |
|
- |
| B2 | - | - |
|


- The Ar196 Kai
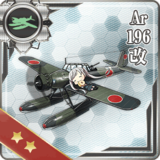 has no bonus.
 - The Loire 130M
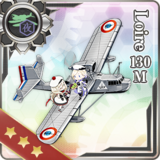 has both A1 and B2 bonus.
 - The Walrus
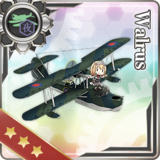 has both A2 and B1 bonus.
 - The Sea Otter
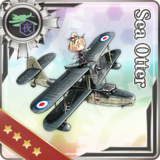 has both A2 and B2 bonus.
| Land-Based Effects | |||||||||||
|---|---|---|---|---|---|---|---|---|---|---|---|
| Group | LB Bombers | LB Fighters/Recons | Carrier Bombers | Carrier Fighters | Misc | ||||||
| 0 |
|
|
| ||||||||
| B1 |
|
|
|
| |||||||
| B2 |
|
|
|
|
| ||||||


- source: [2]
- On the 2024-07-31 update, the FR-1 Fireball
 /SB2C-5
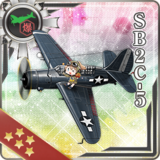 bug has been fixed and other bonuses have been added.
 - On the 2024-08-08 update, the new USN bonuses have been added on release.
- On the 2024-07-31 update, the FR-1 Fireball
- Tips
- Carriers:
- Try to equip one plane from each column and row
- For example: ɑ/A3 + β/B1 + γ/B2
- This also applies to ships that carry multiple plane types in normal setups.
- Other Ship Types:
- As only one seaplane is generally equipped on a ship, pick γ>β>ɑ and then the highest bonus among groups A or/and B depending on the node.
- For Group 1, Group 2, and Group 3 bonuses, having one equipment from the group is enough to have the bonus.
- Equipping a second gear from the same group will not provide any additional bonus.
- The bonus groups stack with each other.
- Do not confuse the balloon mechanic fleet-wide buff with this event bonus that only buffs the individual ship equipped with it.
| Equipment | Node I | ||
|---|---|---|---|
Group 1
|
Barrage Balloon Toku DLC + 11th  DLC + Panzer II  Toku DLC + Chi-Ha 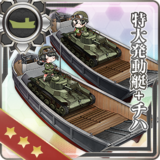 Toku DLC + Chi-Ha Kai 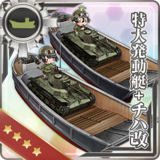 Ka-Mi tank  Ka-Tsu  14inch/45 Twin Gun  14inch/45 Triple Gun 
|
1.04x | |
Group 2
|
Toku DLC + Ho-Ni tank Toku DLC + Panzer III  M4A1 DD  Ka-Tsu Kai 
|
1.08x | |
Group 3
|
Toku DLC + Panzer III J
|
1.12x | |
- There is no bonus on the boss node.
Map Overview
Enemy Compositions

E-1 Hard A
| # | Empty Node | ||
|---|---|---|---|
| A | 気のせいだった。 Must be my imagination. | ||
| # | Empty Node | ||
E-1 Hard B: 深海大西洋艦隊 哨戒潜水艦 I群 (PoiDB)
| # | Formation | Normal Battle Node | AD/AP AS/AS+ |
|---|---|---|---|
| B | Echelon Line Abreast |
0/0 0/0 | |
| Echelon Line Abreast |
0/0 0/0 | ||
| Echelon Line Abreast |
0/0 0/0 | ||
| # | Formation | Normal Battle Node | AD/AP AS/AS+ |
E-1 Hard C
| # | Selection Node | ||
|---|---|---|---|
| C | 艦隊の針路を選択できます。提督、どちらの針路をとられますか? You can decide the fleet's course. Admiral, which heading should we take? | ||
| # | Selection Node | ||
E-1 Hard C1: 深海大西洋艦隊 警戒部隊 I群 (PoiDB)
| # | Formation | Normal Battle Node | AD/AP AS/AS+ |
|---|---|---|---|
| C1 | Line Ahead | 0/0 0/0 | |
| Line Ahead | 0/0 0/0 | ||
| Line Ahead | 0/0 0/0 | ||
| # | Formation | Normal Battle Node | AD/AP AS/AS+ |
E-1 Hard C2: 深海大西洋艦隊 警戒部隊 II群 (PoiDB)
| # | Formation | Normal Battle Node | AD/AP AS/AS+ |
|---|---|---|---|
| C2 | Echelon Vanguard |
0/0 0/0 | |
| Echelon Vanguard |
0/0 0/0 | ||
| # | Formation | Normal Battle Node | AD/AP AS/AS+ |
E-1 Hard D: 深海大西洋艦隊 叛乱強襲兵団 (PoiDB)
| # | Formation | Normal Battle Node | AD/AP AS/AS+ |
|---|---|---|---|
| D | Diamond | 0/0 0/0 | |
| Diamond | 0/0 0/0 | ||
| Diamond | 0/0 0/0 | ||
| # | Formation | Normal Battle Node | AD/AP AS/AS+ |
E-1 Hard E
| # | Selection Node | ||
|---|---|---|---|
| E | 艦隊の針路を選択できます。提督、どちらの針路をとられますか? You can decide the fleet's course. Admiral, which heading should we take? | ||
| # | Selection Node | ||
E-1 Hard F
| # | Resource Node | ||
|---|---|---|---|
| # | Resource Node | ||
E-1 Hard G: 深海大西洋方面 基地航空隊 (PoiDB)
| # | Formation | Air Defense Node | AD/AP AS/AS+ |
|---|---|---|---|
| G | Diamond | 34/67 149/297 | |
| Diamond | 45/89 198/396 | ||
| Diamond | 61/121 270/540 | ||
| # | Formation | Air Defense Node | AD/AP AS/AS+ |
E-1 Hard H
| # | Resource Node | ||
|---|---|---|---|
| # | Resource Node | ||
E-1 Hard I: 深海大西洋方面 沿岸防備堡塁群 (PoiDB)
| # | Formation | Normal Battle Node | AD/AP AS/AS+ |
|---|---|---|---|
| I | Double Line | 0/0 0/0 | |
| Double Line | 17/33 74/147 | ||
| Double Line | 0/0 0/0 | ||
| # | Formation | Normal Battle Node | AD/AP AS/AS+ |
E-1 Hard J: 深海大西洋艦隊 海峡封鎖部隊 (PoiDB)
| # | Formation | Normal Battle Node | AD/AP AS/AS+ |
|---|---|---|---|
| J | Line Ahead Double Line Echelon |
0/0 0/0 | |
| # | Formation | Normal Battle Node | AD/AP AS/AS+ |
E-1 Hard K: 深海大西洋艦隊 哨戒潜水艦 II群 (PoiDB)
| # | Formation | Normal Battle Node | AD/AP AS/AS+ |
|---|---|---|---|
| K | Echelon Line Abreast |
0/0 0/0 | |
| Echelon Line Abreast |
0/0 0/0 | ||
| Echelon Line Abreast |
0/0 0/0 | ||
| # | Formation | Normal Battle Node | AD/AP AS/AS+ |
E-1 Hard L: 深海大西洋艦隊 Brest港防衛隊 (PoiDB)
| # | Formation | Normal Battle Node | AD/AP AS/AS+ |
|---|---|---|---|
| L | Line Ahead Echelon Line Abreast |
0/0 0/0 | |
| # | Formation | Normal Battle Node | AD/AP AS/AS+ |
E-1 Hard M: 深海大西洋艦隊 占領Brest港 (PoiDB)
| # | Formation | Boss Battle Node | AD/AP AS/AS+ |
|---|---|---|---|
| M | Double Line | 33/65 144/288 | |
| Double Line | 33/65 144/288 | ||
| Double Line (Final)
|
33/65 144/288 | ||
| # | Formation | Boss Battle Node | AD/AP AS/AS+ |
E-1 Medium A
| # | Empty Node | ||
|---|---|---|---|
| A | 気のせいだった。 Must be my imagination. | ||
| # | Empty Node | ||
E-1 Medium B: 深海大西洋艦隊 哨戒潜水艦 I群 (PoiDB)
| # | Formation | Normal Battle Node | AD/AP AS/AS+ |
|---|---|---|---|
| B | Echelon Line Abreast |
0/0 0/0 | |
| Echelon Line Abreast |
0/0 0/0 | ||
| Echelon Line Abreast |
0/0 0/0 | ||
| # | Formation | Normal Battle Node | AD/AP AS/AS+ |
E-1 Medium C
| # | Selection Node | ||
|---|---|---|---|
| C | 艦隊の針路を選択できます。提督、どちらの針路をとられますか? You can decide the fleet's course. Admiral, which heading should we take? | ||
| # | Selection Node | ||
E-1 Medium C1: 深海大西洋艦隊 警戒部隊 I群 (PoiDB)
| # | Formation | Normal Battle Node | AD/AP AS/AS+ |
|---|---|---|---|
| C1 | Line Ahead | 0/0 0/0 | |
| Line Ahead | 0/0 0/0 | ||
| Line Ahead | 0/0 0/0 | ||
| # | Formation | Normal Battle Node | AD/AP AS/AS+ |
E-1 Medium C2: 深海大西洋艦隊 警戒部隊 II群 (PoiDB)
| # | Formation | Normal Battle Node | AD/AP AS/AS+ |
|---|---|---|---|
| C2 | Echelon Vanguard |
0/0 0/0 | |
| Echelon Vanguard |
0/0 0/0 | ||
| # | Formation | Normal Battle Node | AD/AP AS/AS+ |
E-1 Medium D: 深海大西洋艦隊 叛乱強襲兵団 (PoiDB)
| # | Formation | Normal Battle Node | AD/AP AS/AS+ |
|---|---|---|---|
| D | Diamond | 0/0 0/0 | |
| Diamond | 0/0 0/0 | ||
| Diamond | 0/0 0/0 | ||
| # | Formation | Normal Battle Node | AD/AP AS/AS+ |
E-1 Medium E
| # | Selection Node | ||
|---|---|---|---|
| E | 艦隊の針路を選択できます。提督、どちらの針路をとられますか? You can decide the fleet's course. Admiral, which heading should we take? | ||
| # | Selection Node | ||
E-1 Medium F
| # | Resource Node | ||
|---|---|---|---|
| # | Resource Node | ||
E-1 Medium G: 深海大西洋方面 基地航空隊 (PoiDB)
| # | Formation | Air Defense Node | AD/AP AS/AS+ |
|---|---|---|---|
| G | Diamond | 27/54 120/240 | |
| Diamond | 33/65 146/291 | ||
| Diamond | 44/88 197/393 | ||
| # | Formation | Air Defense Node | AD/AP AS/AS+ |
E-1 Medium H
| # | Resource Node | ||
|---|---|---|---|
| # | Resource Node | ||
E-1 Medium I: 深海大西洋方面 沿岸防備堡塁群 (PoiDB)
| # | Formation | Normal Battle Node | AD/AP AS/AS+ |
|---|---|---|---|
| I | Double Line | 0/0 0/0 | |
| Double Line | 16/31 69/138 | ||
| Double Line | 0/0 0/0 | ||
| # | Formation | Normal Battle Node | AD/AP AS/AS+ |
E-1 Medium J: 深海大西洋艦隊 海峡封鎖部隊 (PoiDB)
| # | Formation | Normal Battle Node | AD/AP AS/AS+ |
|---|---|---|---|
| J | Line Ahead Double Line Echelon |
0/0 0/0 | |
| # | Formation | Normal Battle Node | AD/AP AS/AS+ |
E-1 Medium K: 深海大西洋艦隊 哨戒潜水艦 II群 (PoiDB)
| # | Formation | Normal Battle Node | AD/AP AS/AS+ |
|---|---|---|---|
| K | Echelon Line Abreast |
0/0 0/0 | |
| Echelon Line Abreast |
0/0 0/0 | ||
| Echelon Line Abreast |
0/0 0/0 | ||
| # | Formation | Normal Battle Node | AD/AP AS/AS+ |
E-1 Medium L: 深海大西洋艦隊 Brest港防衛隊 (PoiDB)
| # | Formation | Normal Battle Node | AD/AP AS/AS+ |
|---|---|---|---|
| L | Line Ahead Echelon Line Abreast |
0/0 0/0 | |
| # | Formation | Normal Battle Node | AD/AP AS/AS+ |
E-1 Medium M: 深海大西洋艦隊 占領Brest港 (PoiDB)
| # | Formation | Boss Battle Node | AD/AP AS/AS+ |
|---|---|---|---|
| M | Double Line | 26/51 113/225 | |
| Double Line | 26/51 113/225 | ||
| Double Line (Final)
|
26/51 113/225 | ||
| # | Formation | Boss Battle Node | AD/AP AS/AS+ |
E-1 Easy A
| # | Empty Node | ||
|---|---|---|---|
| A | 気のせいだった。 Must be my imagination. | ||
| # | Empty Node | ||
E-1 Easy B: 深海大西洋艦隊 哨戒潜水艦 I群 (PoiDB)
| # | Formation | Normal Battle Node | AD/AP AS/AS+ |
|---|---|---|---|
| B | Echelon Line Abreast |
0/0 0/0 | |
| Echelon Line Abreast |
0/0 0/0 | ||
| Echelon Line Abreast |
0/0 0/0 | ||
| # | Formation | Normal Battle Node | AD/AP AS/AS+ |
E-1 Easy C
| # | Selection Node | ||
|---|---|---|---|
| C | 艦隊の針路を選択できます。提督、どちらの針路をとられますか? You can decide the fleet's course. Admiral, which heading should we take? | ||
| # | Selection Node | ||
E-1 Easy C1: 深海大西洋艦隊 警戒部隊 I群 (PoiDB)
| # | Formation | Normal Battle Node | AD/AP AS/AS+ |
|---|---|---|---|
| C1 | Line Ahead | 0/0 0/0 | |
| Line Ahead | 0/0 0/0 | ||
| Line Ahead | 0/0 0/0 | ||
| # | Formation | Normal Battle Node | AD/AP AS/AS+ |
E-1 Easy C2: 深海大西洋艦隊 警戒部隊 II群 (PoiDB)
| # | Formation | Normal Battle Node | AD/AP AS/AS+ |
|---|---|---|---|
| C2 | Echelon | 0/0 0/0 | |
| Echelon Vanguard |
0/0 0/0 | ||
| Echelon Vanguard |
0/0 0/0 | ||
| # | Formation | Normal Battle Node | AD/AP AS/AS+ |
E-1 Easy D: 深海大西洋艦隊 叛乱強襲兵団 (PoiDB)
| # | Formation | Normal Battle Node | AD/AP AS/AS+ |
|---|---|---|---|
| D | Diamond | 0/0 0/0 | |
| Diamond | 0/0 0/0 | ||
| Diamond | 0/0 0/0 | ||
| # | Formation | Normal Battle Node | AD/AP AS/AS+ |
E-1 Easy E
| # | Selection Node | ||
|---|---|---|---|
| E | 艦隊の針路を選択できます。提督、どちらの針路をとられますか? You can decide the fleet's course. Admiral, which heading should we take? | ||
| # | Selection Node | ||
E-1 Easy F
| # | Resource Node | ||
|---|---|---|---|
| # | Resource Node | ||
E-1 Easy G: 深海大西洋方面 基地航空隊 (PoiDB)
| # | Formation | Air Defense Node | AD/AP AS/AS+ |
|---|---|---|---|
| G | Diamond | 22/44 98/195 | |
| Diamond | 27/53 117/234 | ||
| Diamond | 33/65 146/291 | ||
| # | Formation | Air Defense Node | AD/AP AS/AS+ |
E-1 Easy H
| # | Resource Node | ||
|---|---|---|---|
| # | Resource Node | ||
E-1 Easy I: 深海大西洋方面 沿岸防備堡塁群 (PoiDB)
| # | Formation | Normal Battle Node | AD/AP AS/AS+ |
|---|---|---|---|
| I | Double Line | 0/0 0/0 | |
| Double Line | 14/27 60/120 | ||
| Double Line | 0/0 0/0 | ||
| # | Formation | Normal Battle Node | AD/AP AS/AS+ |
E-1 Easy J: 深海大西洋艦隊 海峡封鎖部隊 (PoiDB)
| # | Formation | Normal Battle Node | AD/AP AS/AS+ |
|---|---|---|---|
| J | Line Ahead Double Line Echelon |
0/0 0/0 | |
| # | Formation | Normal Battle Node | AD/AP AS/AS+ |
E-1 Easy K: 深海大西洋艦隊 哨戒潜水艦 II群 (PoiDB)
| # | Formation | Normal Battle Node | AD/AP AS/AS+ |
|---|---|---|---|
| K | Echelon Line Abreast |
0/0 0/0 | |
| Echelon Line Abreast |
0/0 0/0 | ||
| Echelon Line Abreast |
0/0 0/0 | ||
| # | Formation | Normal Battle Node | AD/AP AS/AS+ |
E-1 Easy L: 深海大西洋艦隊 Brest港防衛隊 (PoiDB)
| # | Formation | Normal Battle Node | AD/AP AS/AS+ |
|---|---|---|---|
| L | Line Ahead Echelon Line Abreast |
0/0 0/0 | |
| # | Formation | Normal Battle Node | AD/AP AS/AS+ |
E-1 Easy M: 深海大西洋艦隊 占領Brest港 (PoiDB)
| # | Formation | Boss Battle Node | AD/AP AS/AS+ |
|---|---|---|---|
| M | Double Line | 19/37 81/162 | |
| Double Line | 19/37 81/162 | ||
| Double Line (Final)
|
19/37 81/162 | ||
| # | Formation | Boss Battle Node | AD/AP AS/AS+ |
E-1 Casual A
| # | Empty Node | ||
|---|---|---|---|
| A | 気のせいだった。 Must be my imagination. | ||
| # | Empty Node | ||
E-1 Casual B: 深海大西洋艦隊 哨戒潜水艦 I群 (PoiDB)
| # | Formation | Normal Battle Node | AD/AP AS/AS+ |
|---|---|---|---|
| B | Echelon Line Abreast |
0/0 0/0 | |
| Echelon Line Abreast |
0/0 0/0 | ||
| # | Formation | Normal Battle Node | AD/AP AS/AS+ |
E-1 Casual C
| # | Selection Node | ||
|---|---|---|---|
| C | 艦隊の針路を選択できます。提督、どちらの針路をとられますか? You can decide the fleet's course. Admiral, which heading should we take? | ||
| # | Selection Node | ||
E-1 Casual C1: 深海大西洋艦隊 警戒部隊 I群 (PoiDB)
| # | Formation | Normal Battle Node | AD/AP AS/AS+ |
|---|---|---|---|
| C1 | Line Ahead | 0/0 0/0 | |
| Line Ahead | 0/0 0/0 | ||
| Line Ahead | 0/0 0/0 | ||
| # | Formation | Normal Battle Node | AD/AP AS/AS+ |
E-1 Casual C2: 深海大西洋艦隊 警戒部隊 II群 (PoiDB)
| # | Formation | Normal Battle Node | AD/AP AS/AS+ |
|---|---|---|---|
| C2 | Vanguard | 0/0 0/0 | |
| Echelon | 0/0 0/0 | ||
| Echelon Vanguard |
0/0 0/0 | ||
| # | Formation | Normal Battle Node | AD/AP AS/AS+ |
E-1 Casual D: 深海大西洋艦隊 叛乱強襲兵団 (PoiDB)
| # | Formation | Normal Battle Node | AD/AP AS/AS+ |
|---|---|---|---|
| D | Diamond | 0/0 0/0 | |
| Diamond | 0/0 0/0 | ||
| Diamond | 0/0 0/0 | ||
| # | Formation | Normal Battle Node | AD/AP AS/AS+ |
E-1 Casual E
| # | Selection Node | ||
|---|---|---|---|
| E | 艦隊の針路を選択できます。提督、どちらの針路をとられますか? You can decide the fleet's course. Admiral, which heading should we take? | ||
| # | Selection Node | ||
E-1 Casual F
| # | Resource Node | ||
|---|---|---|---|
| # | Resource Node | ||
E-1 Casual G: 深海大西洋方面 基地航空隊 (PoiDB)
| # | Formation | Air Defense Node | AD/AP AS/AS+ |
|---|---|---|---|
| G | Diamond | 16/31 69/138 | |
| Diamond | 27/54 120/240 | ||
| # | Formation | Air Defense Node | AD/AP AS/AS+ |
E-1 Casual H
| # | Resource Node | ||
|---|---|---|---|
| # | Resource Node | ||
E-1 Casual I: 深海大西洋方面 沿岸防備堡塁群 (PoiDB)
| # | Formation | Normal Battle Node | AD/AP AS/AS+ |
|---|---|---|---|
| I | Double Line | 6/11 24/48 | |
| Double Line | 0/0 0/0 | ||
| Double Line | 0/0 0/0 | ||
| # | Formation | Normal Battle Node | AD/AP AS/AS+ |
E-1 Casual J: 深海大西洋艦隊 海峡封鎖部隊 (PoiDB)
| # | Formation | Normal Battle Node | AD/AP AS/AS+ |
|---|---|---|---|
| J | Line Ahead Double Line Echelon |
0/0 0/0 | |
| # | Formation | Normal Battle Node | AD/AP AS/AS+ |
E-1 Casual K: 深海大西洋艦隊 哨戒潜水艦 II群 (PoiDB)
| # | Formation | Normal Battle Node | AD/AP AS/AS+ |
|---|---|---|---|
| K | Echelon Line Abreast |
0/0 0/0 | |
| Echelon Line Abreast |
0/0 0/0 | ||
| # | Formation | Normal Battle Node | AD/AP AS/AS+ |
E-1 Casual L: 深海大西洋艦隊 Brest港防衛隊 (PoiDB)
| # | Formation | Normal Battle Node | AD/AP AS/AS+ |
|---|---|---|---|
| L | Line Ahead Echelon Line Abreast |
0/0 0/0 | |
| # | Formation | Normal Battle Node | AD/AP AS/AS+ |
E-1 Casual M: 深海大西洋艦隊 占領Brest港 (PoiDB)
| # | Formation | Boss Battle Node | AD/AP AS/AS+ |
|---|---|---|---|
| M | Double Line | 19/37 81/162 | |
| Double Line | 19/37 81/162 | ||
| Double Line (Final)
|
19/37 81/162 | ||
| # | Formation | Boss Battle Node | AD/AP AS/AS+ |
Ship Drops
| Ship drops | |||||||||||||||||||||||||||||||||||||||||||||||||||||||||||||||||||||||||||||||||||||||||||||||||||
|---|---|---|---|---|---|---|---|---|---|---|---|---|---|---|---|---|---|---|---|---|---|---|---|---|---|---|---|---|---|---|---|---|---|---|---|---|---|---|---|---|---|---|---|---|---|---|---|---|---|---|---|---|---|---|---|---|---|---|---|---|---|---|---|---|---|---|---|---|---|---|---|---|---|---|---|---|---|---|---|---|---|---|---|---|---|---|---|---|---|---|---|---|---|---|---|---|---|---|---|
| Type | Ship? | D | J | L | M | ||||||||||||||||||||||||||||||||||||||||||||||||||||||||||||||||||||||||||||||||||||||||||||||
| DD | Mogador | Casual+ | |||||||||||||||||||||||||||||||||||||||||||||||||||||||||||||||||||||||||||||||||||||||||||||||||
| DD | Hatsuzuki | Casual+ | |||||||||||||||||||||||||||||||||||||||||||||||||||||||||||||||||||||||||||||||||||||||||||||||||
| DD | Z1 | Casual+ | Casual+ | Casual+ | |||||||||||||||||||||||||||||||||||||||||||||||||||||||||||||||||||||||||||||||||||||||||||||||
| DD | Z3 | Casual+ | Casual+ | Casual+ | |||||||||||||||||||||||||||||||||||||||||||||||||||||||||||||||||||||||||||||||||||||||||||||||
| DD | Tashkent | Casual+ | |||||||||||||||||||||||||||||||||||||||||||||||||||||||||||||||||||||||||||||||||||||||||||||||||
| CL | Sheffield | Casual+ | |||||||||||||||||||||||||||||||||||||||||||||||||||||||||||||||||||||||||||||||||||||||||||||||||
| CL | Gotland | Easy+ | |||||||||||||||||||||||||||||||||||||||||||||||||||||||||||||||||||||||||||||||||||||||||||||||||
| CA | Prinz Eugen | Casual+ | |||||||||||||||||||||||||||||||||||||||||||||||||||||||||||||||||||||||||||||||||||||||||||||||||
| FBB | Bismarck | Casual+ | |||||||||||||||||||||||||||||||||||||||||||||||||||||||||||||||||||||||||||||||||||||||||||||||||
| BB | Nevada | Casual+ | Casual+ | ||||||||||||||||||||||||||||||||||||||||||||||||||||||||||||||||||||||||||||||||||||||||||||||||
| CV | Graf Zeppelin | Casual+ | |||||||||||||||||||||||||||||||||||||||||||||||||||||||||||||||||||||||||||||||||||||||||||||||||
| CV | Ark Royal | Casual+ | |||||||||||||||||||||||||||||||||||||||||||||||||||||||||||||||||||||||||||||||||||||||||||||||||
| AV | Mizuho | Casual+ | |||||||||||||||||||||||||||||||||||||||||||||||||||||||||||||||||||||||||||||||||||||||||||||||||
| AV | Commandant Teste | Casual+ | |||||||||||||||||||||||||||||||||||||||||||||||||||||||||||||||||||||||||||||||||||||||||||||||||
| AS | Jingei | Casual+ | |||||||||||||||||||||||||||||||||||||||||||||||||||||||||||||||||||||||||||||||||||||||||||||||||
| AS | Chougei | Casual+ | |||||||||||||||||||||||||||||||||||||||||||||||||||||||||||||||||||||||||||||||||||||||||||||||||
| DD | Shimakaze | Casual+ | |||||||||||||||||||||||||||||||||||||||||||||||||||||||||||||||||||||||||||||||||||||||||||||||||
| CL | Kitakami | Casual+ | Hard+ | Casual+ | Casual+ | ||||||||||||||||||||||||||||||||||||||||||||||||||||||||||||||||||||||||||||||||||||||||||||||
| CL | Ooi | Medium+ | Casual+ | Casual+ | |||||||||||||||||||||||||||||||||||||||||||||||||||||||||||||||||||||||||||||||||||||||||||||||
| CL | Nagara | Casual+ | Medium+ | Casual+ | Casual+ | ||||||||||||||||||||||||||||||||||||||||||||||||||||||||||||||||||||||||||||||||||||||||||||||
| CL | Kinu | Casual+ | |||||||||||||||||||||||||||||||||||||||||||||||||||||||||||||||||||||||||||||||||||||||||||||||||
| CL | Abukuma | Casual+ | |||||||||||||||||||||||||||||||||||||||||||||||||||||||||||||||||||||||||||||||||||||||||||||||||
| CL | Sendai | Easy+ | Casual+ | ||||||||||||||||||||||||||||||||||||||||||||||||||||||||||||||||||||||||||||||||||||||||||||||||
| CL | Yuubari | Hard+ | Casual+ | Casual+ | |||||||||||||||||||||||||||||||||||||||||||||||||||||||||||||||||||||||||||||||||||||||||||||||
| CA | Kinugasa | Casual+ | |||||||||||||||||||||||||||||||||||||||||||||||||||||||||||||||||||||||||||||||||||||||||||||||||
| CA | Myoukou | Casual+ | |||||||||||||||||||||||||||||||||||||||||||||||||||||||||||||||||||||||||||||||||||||||||||||||||
| CA | Takao | Easy+ | Casual+ | Casual+ | |||||||||||||||||||||||||||||||||||||||||||||||||||||||||||||||||||||||||||||||||||||||||||||||
| CA | Atago | Casual+ | Casual+ | Casual+ | |||||||||||||||||||||||||||||||||||||||||||||||||||||||||||||||||||||||||||||||||||||||||||||||
| CA | Tone | Medium+ | Casual+ | Casual+ | |||||||||||||||||||||||||||||||||||||||||||||||||||||||||||||||||||||||||||||||||||||||||||||||
| CA | Chikuma | Easy+ | Casual+ | Casual+ | |||||||||||||||||||||||||||||||||||||||||||||||||||||||||||||||||||||||||||||||||||||||||||||||
| CVL | Hiyou | Casual+ | |||||||||||||||||||||||||||||||||||||||||||||||||||||||||||||||||||||||||||||||||||||||||||||||||
| CVL | Junyou | Casual+ | |||||||||||||||||||||||||||||||||||||||||||||||||||||||||||||||||||||||||||||||||||||||||||||||||
| FBB | Kongou | Casual+ | Casual+ | ||||||||||||||||||||||||||||||||||||||||||||||||||||||||||||||||||||||||||||||||||||||||||||||||
| FBB | Hiei | Hard+ | Casual+ | Casual+ | |||||||||||||||||||||||||||||||||||||||||||||||||||||||||||||||||||||||||||||||||||||||||||||||
| FBB | Haruna | Casual+ | |||||||||||||||||||||||||||||||||||||||||||||||||||||||||||||||||||||||||||||||||||||||||||||||||
| FBB | Kirishima | Casual+ | |||||||||||||||||||||||||||||||||||||||||||||||||||||||||||||||||||||||||||||||||||||||||||||||||
| BB | Fusou | Casual+ | |||||||||||||||||||||||||||||||||||||||||||||||||||||||||||||||||||||||||||||||||||||||||||||||||
| BB | Yamashiro | Casual+ | |||||||||||||||||||||||||||||||||||||||||||||||||||||||||||||||||||||||||||||||||||||||||||||||||
| BB | Ise | Casual+ | |||||||||||||||||||||||||||||||||||||||||||||||||||||||||||||||||||||||||||||||||||||||||||||||||
| BB | Hyuuga | Casual+ | |||||||||||||||||||||||||||||||||||||||||||||||||||||||||||||||||||||||||||||||||||||||||||||||||
| CV | Souryuu | Casual+ | |||||||||||||||||||||||||||||||||||||||||||||||||||||||||||||||||||||||||||||||||||||||||||||||||
| CV | Hiryuu | Casual+ | |||||||||||||||||||||||||||||||||||||||||||||||||||||||||||||||||||||||||||||||||||||||||||||||||
|
| |||||||||
|---|---|---|---|---|---|---|---|---|---|
|
2nd wave of Friendly Fleets has been released!
Time until event's end:
| |||||||||
Trivia
- M Node is Brest, during WW2 it was the home port for the French Navy and was where the famous Force de Raid was based and sortied from until their transfer to Mers El Kebir during the French capitulation. Then it fell under German control and was used from 1941 as the dock and home port for the German Surface fleet including Scharnhorst, Gneisenau, Prinz Eugen, U-Boats, S-Boats, and more. It was also the site of a major engagement named "Battle for Brest" which lasted more than 2 months and resulted in massive destruction of the city.
- B Node is in the area of the Celtic Sea. During WW2 this site was a common area passed by merchant shipping and also a hunting ground for German U-Boats which could explain the abyssal submarine presence in the node.
- F Node is in Plymouth which is a major Naval Port in Great Britain. In the context of Operation Catapult, it was also the site of an incident wherein the British Forces forcefully boarded the French Vessels that escaped the Fall of France that were docked there. This led to the death of several French and Royal Navy personnel. The same happened in Portsmouth and Alexandria. This seizing of French Vessels was part of the lead-up to the Attack on Mers El Kebir.
- H Node is Portsmouth a major port and base for the Royal Navy during WW2 and launch point for major Operations in the English Channel, Atlantic, and Normandy as well as a prime target for the German Forces during the war resulting in multiple raids on the port city.
- I Node is in the area of Le Touquet, which was originally an area where the Allied Forces were stationed until the Fall of France. Under German occupation, it became a garrison and was a staging ground for Operation Sealion. It also boasted extensive German bunkers and fortifications which could explain the presence of Abyssal Pillbox Imps. It was also the target for diversion operations such as Operation Starkey and Operation Glimmer.
- K Node is around the Channel Isles: Jersey and Guernsey which were occupied by the Germans and had immense fortifications as well as constant German surface and subsurface patrols. Which could explain the abyssal Submarines.
- Nodes G and J are on the English Channel, during WW2 this was patrolled by German surface and subsurface forces along with the threat of Air Raids from German Aibases in Northern France. These were a common threat for Merchant Shipping and Allied Forces until the Invasion of Normandy.
- AirBase in Southern England is situated around London. This could be any number of Airfields such as Hendon, Northol, Fairlop, Heston, Croydon, Biggin Hill, Kenley, Hornchurch, or Gravesend.