- Welcome to the Kancolle Wiki!
- If you have any questions regarding site content, account registration, etc., please visit the KanColle Wiki Discord
Difference between revisions of "Sortie"
Jigaraphale (talk | contribs) m (→Maps unlocking) |
Jigaraphale (talk | contribs) |
||
| (18 intermediate revisions by 3 users not shown) | |||
| Line 1: | Line 1: | ||
| − | + | {{HomePortPortal}} | |
| − | The {{color|red|'''Sortie (出撃)'''}} menu is where | + | |
| + | |||
| + | The {{color|red|'''Sortie (出撃)'''}} menu is where fleets are sent tout to battle the [[Abyssal]]s. It can be accessed from the '''Sortie (出撃)''' button on the [[Home Port|main menu]]. | ||
*Even so Sorties are by definition "PVE", it is nonetheless the core of the game. | *Even so Sorties are by definition "PVE", it is nonetheless the core of the game. | ||
=Menu Functions= | =Menu Functions= | ||
| − | [[File:Sortie_Example.png|thumb|right|World 5, | + | [[File:Sortie_Example.png|thumb|right|World 5's page, with the 5-4 map is not unlocked yet]] |
| − | * '''Map Selection''' - Displays all the maps | + | |
| − | ** Maps | + | * '''Area Selction''' - Displays all of the operation areas (worlds) in the game. It is possible to select areas with no maps unlocked yet, but without the possibility to sortie. |
| − | ** Maps | + | ** 7 Worlds are currently available in the game, with an 8th "Event World" appearing during [[Events]]. |
| − | * '''Difficulty Indication''' - Displays a rough indication of the map difficulty. It currently runs from 1 ~ | + | ** The 7 Worlds have names corresponding to different Naval Theatres, but are mostly referred to by their number of introduction, being from left to right: W1, W2, W3, W7, W4, W5, & W6. |
| − | * | + | * '''Map Selection''' - Displays all the maps where it is possible to sortie. |
| − | * ''' | + | ** Maps not yet unlocked are tagged '''Clear Operation Areas to Unlock (作戦海域攻略で開放されます)''', greyed out, and have a padlock icon. |
| − | + | ** Maps not yet implemented are tagged '''Coming Soon (近日開放予定です)''' and have a padlock icon. | |
| + | |||
| + | * '''Extra Operation''' - Allows accessing "Extra Operation" (EO) maps for that particular area. | ||
| + | ** If Extra Operations are available and unlocked, click on the Red {{color|red|'''▶'''}} labeled "Extra Operation" in the World Selection Screen. | ||
| + | |||
| + | * '''Difficulty Indication''' - Displays a rough indication of the map difficulty. It currently runs from 1 ~ 13 stars. Large stars are equivalent to 10 small stars. | ||
| + | ** Those indications are very vague, and should not be taken as the main difficulty metric. | ||
| + | |||
| + | *'''[[Land-Based Air Squadron]]''' - Some maps allow Land-Based Air Squadrons to be deployed, either via the main World's button, or via each individual Map's button if said map can deploy it. | ||
| + | |||
| + | [[Events]] may have additional functions like the "difficulty section" menu. | ||
=How to Sortie= | =How to Sortie= | ||
| + | Please refer to [[Combat/Map Mechanics and Nodes|Map Mechanics and Nodes]] for a description of all node types. | ||
| − | + | # To begin a sortie, simply select the map to sortie on from the sortie menu. | |
| − | * Do take note that certain maps may have branching requirements so ensure that | + | #* Do take note that certain maps may have branching requirements so ensure that the fleet meets those requirements. Check the map details on the area page for details. |
| − | + | # At each path splitting, it will be needed to spin a compass or to select a node to go to. | |
| − | + | #* Depending on the path, the compass spin can be, fixed, random, or a mix of both. | |
| − | * Please refer to [[Combat#Formation_Selection|Formation Selection]] for details on formations and what they do. | + | # When encountering a combat node, a formation will be asked to be chosen. |
| − | * | + | #* Please refer to [[Combat#Formation_Selection|Formation Selection]] for details on formations and what they do. |
| − | + | #* When selecting the formation, it is possible to hide the UI in order to view the map, by clicking anywhere else on the screen. | |
| − | + | #** When the map is visible, it is then possible to click on the current node to get a glips of the enemy fleet (limited to the surface battle nodes). | |
| − | * It is important '''not to advance''' if | + | # For most combat nodes, if not all enemies are sunk, it will be asked to enter night battle or not. Please see [[Night Battle]] for details. |
| − | ** | + | # Once the battle has concluded, it will be asked to '''advance (進撃)''' or to '''retreat (撤退)''', provided it is not the last node of the map. |
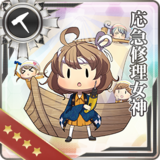
| + | #* Bringing a {{EmergencyRepair}} {{EquipmentLink|Emergency Repair Personnel|Emergency Repair Goddess|text=Repair Personnel|link_category=Repair Personnel}} or {{CommandFacility}} {{Equipment/Link|Fleet Command Facility|Striking Force Fleet Command Facility|Elite Torpedo Squadron Command Facility|text=Command Facilities|link_category=Command Facilities}} may replace those buttons in certain situations. | ||
| + | #* It is important '''not to advance''' if any ship girl is {{color|red|'''heavily damaged (大破)'''}}. She will be at risk of sinking in subsequent battles. Sunk ship girls are {{color|red|'''lost forever'''}}. | ||
| + | #** {{EmergencyRepair}} {{EquipmentLink|Emergency Repair Personnel|Emergency Repair Goddess|text=Repair Personnel|link_category=Repair Personnel}} and {{CommandFacility}} {{Equipment/Link|Fleet Command Facility|Striking Force Fleet Command Facility|Elite Torpedo Squadron Command Facility|text=Command Facilities|link_category=Command Facilities}} can be used to prevent girls from sinking '''once''' in the right circonstances (''see each pages for conplete information''). | ||
| + | |||
| + | Some specific [[Nodes]] may use additional mechanics and animations depending on the situation. | ||
=Maps unlocking= | =Maps unlocking= | ||
Excepted for [[1-1]], no map is available from the start, and so needs to be unlocked by clearing other previous maps. | Excepted for [[1-1]], no map is available from the start, and so needs to be unlocked by clearing other previous maps. | ||
| − | "Cleared" here means either scoring a victory (B+ rank) on the final boss node of the map, | + | "Cleared" here means either scoring a victory (B+ rank) on the final boss node of the map, depleting the HP bar of the map (by killing the boss several times), or depleting the TP bar of the map (only for [[1-6]]). |
*Note that several maps are not available in the game yet, and will be introduced in later updates. | *Note that several maps are not available in the game yet, and will be introduced in later updates. | ||
| − | {| class="wikitable | + | {|class="wikitable" |
| − | ! colspan= | + | ! colspan=2| map |
! requirement | ! requirement | ||
| − | ! colspan= | + | ! colspan=2| map |
! requirement | ! requirement | ||
| − | ! colspan= | + | ! colspan=2| map |
! requirement | ! requirement | ||
| − | ! colspan= | + | ! colspan=2| map |
! requirement | ! requirement | ||
| − | ! colspan= | + | ! colspan=2| map |
! requirement | ! requirement | ||
| − | ! colspan= | + | ! colspan=2| map |
! requirement | ! requirement | ||
| − | ! colspan= | + | ! colspan=2| map |
! requirement | ! requirement | ||
|- | |- | ||
| − | ! rowspan= | + | ! rowspan=7| W1 |
| [[1-1]]||unlocked by default | | [[1-1]]||unlocked by default | ||
| − | ! rowspan= | + | ! rowspan=7| W2 |
| [[2-1]]||clear [[1-4]] | | [[2-1]]||clear [[1-4]] | ||
| − | ! rowspan= | + | ! rowspan=7| W3 |
| [[3-1]]||clear [[2-4]] | | [[3-1]]||clear [[2-4]] | ||
| − | ! rowspan= | + | ! rowspan=7| W7 |
| [[7-1]]||clear [[2-4]] | | [[7-1]]||clear [[2-4]] | ||
| − | ! rowspan= | + | ! rowspan=7| W4 |
| [[4-1]]||clear [[2-4]] | | [[4-1]]||clear [[2-4]] | ||
| − | ! rowspan= | + | ! rowspan=7| W5 |
| [[5-1]]||clear [[3-4]] | | [[5-1]]||clear [[3-4]] | ||
| − | ! rowspan= | + | ! rowspan=7| W6 |
| − | | [[6-1]]||clear [[5- | + | | [[6-1]]||clear [[5-4]] HP bar |
|- | |- | ||
| [[1-2]]||clear [[1-1]] | | [[1-2]]||clear [[1-1]] | ||
| Line 68: | Line 86: | ||
| [[4-2]]||clear [[4-1]] & [[7-1]] HP bar | | [[4-2]]||clear [[4-1]] & [[7-1]] HP bar | ||
| [[5-2]]||clear [[4-4]] HP bar & [[5-1]] | | [[5-2]]||clear [[4-4]] HP bar & [[5-1]] | ||
| − | | [[6-2]]||clear [[ | + | | [[6-2]]||clear [[6-1]]<ref>If [[6-1]] was unlocked during phase 1, then clearing [[5-4]] HP bar is also required.</ref> |
|- | |- | ||
| [[1-3]]||clear [[1-2]] | | [[1-3]]||clear [[1-2]] | ||
| Line 89: | Line 107: | ||
| [[2-5]]||clear [[2-4]] | | [[2-5]]||clear [[2-4]] | ||
| [[3-5]]||clear [[3-4]] | | [[3-5]]||clear [[3-4]] | ||
| − | | 7-5|| | + | | [[7-5]]||clear [[7-4]] HP bar once |
| − | | [[4-5]]|| clear [[4-4]] HP bar & [[5-1]] | + | | [[4-5]]||clear [[4-4]] HP bar & [[5-1]] |
| − | | [[5-5]]|| clear [[5-4]] HP bar & [[6-1]] | + | | [[5-5]]||clear [[5-4]] HP bar & [[6-1]] |
| [[6-5]]||clear [[6-4]] HP bar and [[Quests#F43|F43]] | | [[6-5]]||clear [[6-4]] HP bar and [[Quests#F43|F43]] | ||
|- | |- | ||
| [[1-6]]||clear [[1-5]] HP bar each month | | [[1-6]]||clear [[1-5]] HP bar each month | ||
| − | | 2-6||rowspan= | + | | 2-6||rowspan=2|not available yet |
| − | | 3-6||rowspan= | + | | 3-6||rowspan=2|not available yet |
| − | | 7-6 | + | | 7-6||rowspan=2|not available yet |
| − | | 4-6||rowspan= | + | | 4-6||rowspan=2|not available yet |
| − | | 5-6||rowspan= | + | | 5-6||rowspan=2|not available yet |
| − | | 6-6||rowspan= | + | | 6-6||rowspan=2|not available yet |
|- | |- | ||
| 1-7|| not available yet | | 1-7|| not available yet | ||
| Line 110: | Line 128: | ||
| 6-7 | | 6-7 | ||
|} | |} | ||
| + | <references/> | ||
| + | |||
| + | ==Map Regeneration== | ||
| + | Some maps will be reset at the end of each month, resetting all progress done regarding their HP/TP bar depletion. | ||
| + | *The reset happened at '''23h59 JST on the last day of the month''', | ||
| + | *All EOs, namely [[1-5]], [[1-6]], [[2-5]], [[3-5]], [[7-5]], [[4-5]], [[5-5]], and [[6-5]], are reset each month, | ||
| + | **This implies [[1-6]] lock until [[1-5]] is cleared again, | ||
| + | **This make all completion rewards available again, namely, {{Medal}} [[Medal]]s, {{Item/Icon|Ranking Point Reward|size=25px}} [[Ranking]] points, and {{PBox}} [[Present Box]]. | ||
| + | *[[7-2]], [[7-3]], and [[7-4]] are also reset at the same time, | ||
| + | **This includes all phases of [[7-2]], [[7-3]], and [[7-5]], | ||
| + | **Unlike EOs, no map is locked behind the previous one, so for instance, [[7-3]] does not have to be cleared again to sortie on [[7-4]]. | ||
| + | In addition to map progress, enemy formations are also reset to their pre-clear form. | ||
| + | *This does not matter in most cases, | ||
| + | *On [[7-4]], the Last Dance enemy compositions are stronger, making farming on the map less reliable, | ||
| + | *On [[5-5]], the cleared enemy compositions are the weakest, so clearing the map again beforehand is advised when trying to complete quests on this map. | ||
| + | |||
| + | =Error Messages= | ||
| + | {{/Error Messages}} | ||
=Sortie List= | =Sortie List= | ||
| Line 118: | Line 154: | ||
[[Category:Sortie]] | [[Category:Sortie]] | ||
[[Category:World Map]] | [[Category:World Map]] | ||
| − | |||
| − | |||
Revision as of 18:07, 11 September 2023
| Home Port Portal | ||
|---|---|---|
| Military Record · Friendly Fleet · Library · Inventory · Furniture · Quests · Shop | ||
|
| ||


The Sortie (出撃) menu is where fleets are sent tout to battle the Abyssals. It can be accessed from the Sortie (出撃) button on the main menu.
- Even so Sorties are by definition "PVE", it is nonetheless the core of the game.
Menu Functions

- Area Selction - Displays all of the operation areas (worlds) in the game. It is possible to select areas with no maps unlocked yet, but without the possibility to sortie.
- 7 Worlds are currently available in the game, with an 8th "Event World" appearing during Events.
- The 7 Worlds have names corresponding to different Naval Theatres, but are mostly referred to by their number of introduction, being from left to right: W1, W2, W3, W7, W4, W5, & W6.
- Map Selection - Displays all the maps where it is possible to sortie.
- Maps not yet unlocked are tagged Clear Operation Areas to Unlock (作戦海域攻略で開放されます), greyed out, and have a padlock icon.
- Maps not yet implemented are tagged Coming Soon (近日開放予定です) and have a padlock icon.
- Extra Operation - Allows accessing "Extra Operation" (EO) maps for that particular area.
- If Extra Operations are available and unlocked, click on the Red ▶ labeled "Extra Operation" in the World Selection Screen.
- Difficulty Indication - Displays a rough indication of the map difficulty. It currently runs from 1 ~ 13 stars. Large stars are equivalent to 10 small stars.
- Those indications are very vague, and should not be taken as the main difficulty metric.
- Land-Based Air Squadron - Some maps allow Land-Based Air Squadrons to be deployed, either via the main World's button, or via each individual Map's button if said map can deploy it.
Events may have additional functions like the "difficulty section" menu.
How to Sortie
Please refer to Map Mechanics and Nodes for a description of all node types.
- To begin a sortie, simply select the map to sortie on from the sortie menu.
- Do take note that certain maps may have branching requirements so ensure that the fleet meets those requirements. Check the map details on the area page for details.
- At each path splitting, it will be needed to spin a compass or to select a node to go to.
- Depending on the path, the compass spin can be, fixed, random, or a mix of both.
- When encountering a combat node, a formation will be asked to be chosen.
- Please refer to Formation Selection for details on formations and what they do.
- When selecting the formation, it is possible to hide the UI in order to view the map, by clicking anywhere else on the screen.
- When the map is visible, it is then possible to click on the current node to get a glips of the enemy fleet (limited to the surface battle nodes).
- For most combat nodes, if not all enemies are sunk, it will be asked to enter night battle or not. Please see Night Battle for details.
- Once the battle has concluded, it will be asked to advance (進撃) or to retreat (撤退), provided it is not the last node of the map.
- Bringing a
 Repair Personnel
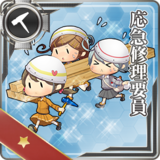
 or
or  Command Facilities

 may replace those buttons in certain situations.
 - It is important not to advance if any ship girl is heavily damaged (大破). She will be at risk of sinking in subsequent battles. Sunk ship girls are lost forever.
- Repair Personnel and Command Facilities can be used to prevent girls from sinking once in the right circonstances (see each pages for conplete information).
- Bringing a
Some specific Nodes may use additional mechanics and animations depending on the situation.
Maps unlocking
Excepted for 1-1, no map is available from the start, and so needs to be unlocked by clearing other previous maps. "Cleared" here means either scoring a victory (B+ rank) on the final boss node of the map, depleting the HP bar of the map (by killing the boss several times), or depleting the TP bar of the map (only for 1-6).
- Note that several maps are not available in the game yet, and will be introduced in later updates.
| map | requirement | map | requirement | map | requirement | map | requirement | map | requirement | map | requirement | map | requirement | |||||||
|---|---|---|---|---|---|---|---|---|---|---|---|---|---|---|---|---|---|---|---|---|
| W1 | 1-1 | unlocked by default | W2 | 2-1 | clear 1-4 | W3 | 3-1 | clear 2-4 | W7 | 7-1 | clear 2-4 | W4 | 4-1 | clear 2-4 | W5 | 5-1 | clear 3-4 | W6 | 6-1 | clear 5-4 HP bar |
| 1-2 | clear 1-1 | 2-2 | clear 2-1 | 3-2 | clear 3-1 & 1-5 HP bar once | 7-2 | clear 7-1 HP bar | 4-2 | clear 4-1 & 7-1 HP bar | 5-2 | clear 4-4 HP bar & 5-1 | 6-2 | clear 6-1[1] | |||||||
| 1-3 | clear 1-2 | 2-3 | clear 2-2 | 3-3 | clear 3-2 | 7-3 | clear 7-2 HP bar once | 4-3 | clear 4-2 | 5-3 | clear 5-2 HP bar | 6-3 | clear 6-2 HP bar | |||||||
| 1-4 | clear 1-3 | 2-4 | clear 2-3 | 3-4 | clear 3-3 | 7-4 | clear 7-3 HP bar once | 4-4 | clear 4-3 | 5-4 | clear 5-3 HP bar | 6-4 | clear 6-3 HP bar | |||||||
| 1-5 | clear 1-4 | 2-5 | clear 2-4 | 3-5 | clear 3-4 | 7-5 | clear 7-4 HP bar once | 4-5 | clear 4-4 HP bar & 5-1 | 5-5 | clear 5-4 HP bar & 6-1 | 6-5 | clear 6-4 HP bar and F43 | |||||||
| 1-6 | clear 1-5 HP bar each month | 2-6 | not available yet | 3-6 | not available yet | 7-6 | not available yet | 4-6 | not available yet | 5-6 | not available yet | 6-6 | not available yet | |||||||
| 1-7 | not available yet | 2-7 | 3-7 | 7-7 | 4-7 | 5-7 | 6-7 | |||||||||||||
Map Regeneration
Some maps will be reset at the end of each month, resetting all progress done regarding their HP/TP bar depletion.
- The reset happened at 23h59 JST on the last day of the month,
- All EOs, namely 1-5, 1-6, 2-5, 3-5, 7-5, 4-5, 5-5, and 6-5, are reset each month,
- This implies 1-6 lock until 1-5 is cleared again,
- This make all completion rewards available again, namely,
 Medals,
  Ranking points, and
  Present Box.
- 7-2, 7-3, and 7-4 are also reset at the same time,
In addition to map progress, enemy formations are also reset to their pre-clear form.
- This does not matter in most cases,
- On 7-4, the Last Dance enemy compositions are stronger, making farming on the map less reliable,
- On 5-5, the cleared enemy compositions are the weakest, so clearing the map again beforehand is advised when trying to complete quests on this map.
Error Messages
Some error messages you may encounter.
- Do note that:
- Most errors are "general" and can be seen in many situations,
- Some errors are event only, being liked to event maps/locks/mechanics.
| Original message | Translation |
|---|---|
 |

|
 |

|
 |

|
 |

|
 |

|
 |

|
 |

|
 |

|
 |

|
 |

|
 |

|
 |

|
 |

|
 |

|
 |

|
 |

|
 |

|
 |

|
 |

|
 |

|
 |

|
 |

|
 |

|
 |

|
 |

|
 |

|
 |

|
 |

|
 |

|
 |

|
 |

|
 |

|
 |

|
 |

|
 |

|
 |

|
 |

|
 |

|
 |

|
 |

|
 |

|
 |

|
 |

|
 |

|
 |

|
 |

|
 |

|
 |

|
 |

|
 |

|
 |
|
 |

|
 |

|
 |

|
 |

|
 |

|
 |

|
 |

|
Sortie List
| |||||||||||||||||||||||
See Also
| |||||||||||||||||||||||||||||||||||||