- Welcome to the Kancolle Wiki!
- If you have any questions regarding site content, account registration, etc., please visit the KanColle Wiki Discord
Early Spring 2023 Event/E-6
 
| ||||||||
|---|---|---|---|---|---|---|---|---|
|
Time remaining until Event ends [1]:
| ||||||||
| ||||||||
決戦!硫黄島逆上陸作戦
![]()
![]()
![]()
![]()


| Information | ||||
|---|---|---|---|---|
| Event Tag | ||||
| Boss Gauges | Hard (甲): ? HP + ? TP + ? HP + ? HP | |||
| Medium (乙): ? HP + ? TP + ? HP + ? HP | ||||
| Easy (丙): ? HP + ? TP + ? HP + ? HP | ||||
| Casual (丁): ? HP + ? TP + ? HP + ? HP | ||||
| Map Bosses | Fast Light Carrier Water Demon
| |||
Modernized Battleship Princess
| ||||
Supply Depot Princess D
| ||||
Abyssal Stranded Landing Princess
| ||||
| Rewards[edit] | ||||
|---|---|---|---|---|
| Ship |  No.101 Transport Ship | |||
| Choice | 丁 Casual |
丙 Easy |
乙 Medium |
甲 Hard |
 GFCS Mk.37 |
1 | 1 | ||
| OR | ||||
Improvement Material |
7 | 10 | ||
| Reward | 丁 Casual |
丙 Easy |
乙 Medium |
甲 Hard |
|---|---|---|---|---|
Improvement Material |
5 | |||
Medal |
1 | 2 | 3 | |
Action Report |
1 | 1 | ||
First Class Medal |
1 | |||
 Type 97 Medium Tank (Chi-Ha) |
1 | 1 (★2) | 1 (★4) | |
 Type 97 Medium Tank New Turret (Chi-Ha Kai) |
1 | 1 (★4) | ||
 Army Infantry Corps + Chi-Ha Kai |
1 |

The event guides are to be constructed through the respective Event map page guide sandbox and reviewed by editors before being approved here.
- Do not update the guides through this page unless it is a minor fix. Please only update guides through their respective sandbox pages.
Branching Table
| E-6 Branching Rules (Start Points) | ||
|---|---|---|
| Nodes | Rules | |
| Start | 1 |
|
2 |
| |
3 |
| |
4 |
| |
| E-6 Branching Rules (Start Point 1) | ||
|---|---|---|
| Nodes | Rules | |
A |
B |
|
C |
| |
B |
C |
|
E |
| |
C |
D |
|
E |
| |
D |
E |
|
I |
| |
E |
F |
|
G |
| |
K |
L |
??? |
M |
??? | |
M |
N |
|
O |
| |
| E-6 Branching Rules (Start Point 2) | ||
|---|---|---|
| Nodes | Rules | |
H |
H1 |
|
H2 |
| |
H1 |
H2 |
|
I |
| |
K |
L |
|
M |
| |
M |
N |
|
O |
| |
| E-6 Branching Rules (Start Point 3 & 4) | ||
|---|---|---|
| Nodes | Rules | |
3 |
P |
|
Q |
| |
4 |
Q |
|
R |
| |
R |
S |
|
T |
| |
Y |
| |
T |
U |
|
V |
| |
V |
W |
|
X |
| |
Y |
Y1 |
|
Z |
| |
Y1 |
Y2 |
|
Z |
| |
Z |
W |
|
Z1 |
| |
Z2 |
| |
Branching compositions were reported over the course of the event. (NGA and KCNav)
Historical Bonuses
DISCLAIMER: This information is based on user-submitted data and is subject to revisions as more data is gathered. Any version of the ship receives the bonus regardless of remodel.
Ship Bonuses
| Ships | Damage | Accuracy/Evasion | |||||||||||||||||||||
|---|---|---|---|---|---|---|---|---|---|---|---|---|---|---|---|---|---|---|---|---|---|---|---|
| Map-wide | P1/P2Nodes G/O | P3Nodes V/X | P4Node Z2 | Map-wide | P1/P2Nodes G/O | P3Nodes V/X | P4Node Z2 | ||||||||||||||||
| All DE | 1.15 | - | - | - | - | 1.07 | - | 1.07 | |||||||||||||||
| All DD | 1.04 | 1.06 | 1.08 | 1.04 | |||||||||||||||||||
| All CL, CT? | 1.03 | 1.06 | 1.07 | 1.03 | |||||||||||||||||||
| ALL CLT | 1.03 | 1.06 | |||||||||||||||||||||
| All CA | 1.02 | 1.06 | 1.07 | 1.02 | |||||||||||||||||||
| All CAV | 1.03 | 1.06 | |||||||||||||||||||||
| All CV, CVL | - | - | 1.05 | - | - | ||||||||||||||||||
| All FBB, BBV, BB | 1.03 | ||||||||||||||||||||||
| All SS, SSV, AS? | 1.15 | - | - | ||||||||||||||||||||
|
1.07 | - | - | - | 1.07 | - | - | - | |||||||||||||||
| 1.13 | 1.13 | ||||||||||||||||||||||
| 1.03 | 1.13 | ||||||||||||||||||||||
| 1.08 | |||||||||||||||||||||||
| 1.09 | 1.09 | ||||||||||||||||||||||
| 1.211.09*1.11 | 1.26 | ||||||||||||||||||||||
| 1.11 | 1.18 | ||||||||||||||||||||||
| 1.09 | - | - | - | ? | - | - | - | ||||||||||||||||
| 2.55 | 1.7 | ||||||||||||||||||||||
| - | - | 1.14 | - | - | - | 1.07 | - | ||||||||||||||||
- Notes
- Damage bonuses given by types stack with named ships.
- Accuracy or Evasion bonuses given by types do not stack with named ships.
- Evasion bonus is only roughly checked as it is hard to estimate. The info will be updated if an inconsistency is found (@Divinity_123).
Equipment Bonuses
| Equipment | LBAS (Map-wide) |
|---|---|
|
1.05x each |
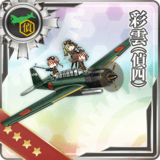
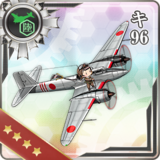
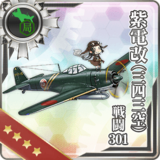 · 701st · 701st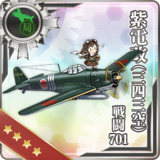 · 407th · 407th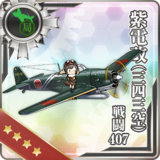
| |
 · Hien (244th) · Hien (244th)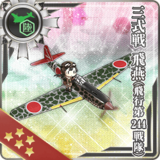
| |
| |
 · (Sk.FB) · (Sk.FB) · (ASFS) · (ASFS)
| |
 · (Sk) · (Sk)
|
1.11x each |
 · Hiryuu (Sk) · Hiryuu (Sk)
| |
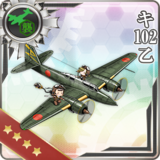 · Ki-102 + Missile · Ki-102 + Missile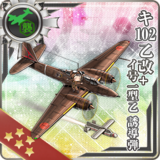
| |
 · III K (Sk/20th) · III K (Sk/20th)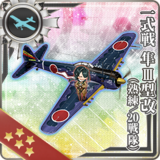
| |
|
1.175x each |
| |
Those bonuses only apply to planes in LBAS.
- All 4 planes in the base will gain the bonus provided by any bonus plane within their base
- Bonuses will stack with each other (within the same base)
Debuff
| Ships | Node Z2 |
|---|---|
| -42 | |
| -16 |
Map Overview
E-6 consists of 4 main phases and requires the use of Single Fleets, Striking Forces, and Combined Fleets.
- This map uses 4 to 6 locks:
 2nd Torpedo Squadron (from E-2, E-3, & E-5),
 Supporting Combined Fleet (from E-2),
 Combined Fleet (from E-3),
 Operation I-go Fleet (from E-4 & E-5),
 Counter Landing Force
 Decisive Combined Fleet
- Some tags can be mixed in all difficulties , see here.
- Initially, no LBAS is available to be sortied to this map,
- Clearing Phase 2 allows 1 Land Base to be sortied,
- Unlocking Phase 3 allows 2 Land Bases to be sortied and 1 to defend,
- Clearing Phase 3 allows 3 Land Bases to be sortied.
- "Airstrike Supported Battle" nodes are present on B Y2
- "Night Battle" nodes are present on H2 T
- "Enemy Ambush" node is present on S
Phase 1
- Striking Force: "1FBB, 1FBB/CV, 0-1CVL/CAV/CLT, 1CL, 3DD"

- Route: 1 A C E G
- This fleet can utilize a Kongou-class Touch.
Phase 2 - TP
Phase 2 is a "Transport Operation":
- TCF: "1LHA/CL/AV, 1AV, 4DD + 1-2CAV, 1-2CL, 3-4DD "

- Route: 2 H H2 J K M O
- LoS check: 75 Cn3 (Hard)
- A CVE can be used instead of the LHA/CL/AV, adding an extra node (L).
Phase 2.5 - Gimmick
| U | |
|---|---|
| Hard | S x3 |
| Medium | S x2 |
| Easy | A+ x2 |
| Casual | A+ |
- Use #Phase 3's fleet
Phase 3
- Strinking Force: "1CAV, 1CL, 5DD" (Fast)

- Locking Notes: Forced Ship Locking wherein all ships must be the E2 Yellow Tag (used in E2) to start on western side. APPLIES ON ALL DIFFICULTY
- If any other tagged ship is on the fleet you will automatically start on the east side of the map.
- Route: 3 Q R T V X
- LBAS: Range 1, AP/AS ??/??
- At least 5/3/2/1 (H/M/E/C) ships need to be equipped with
 Surface Surface Radars to avoid the "Enemy Ambush" node on S.
 - The use of the
 SFFCF Striking Force Fleet Command Facility
 (SFFCF) is recommended
 - The boss is an Installation and requires appropriate gear to be defeated,
- She is especially weak to "Nuke" setups
- The boss fleet includes one or two PT Imp Packs, requiring appropriate gear to be defeated (these can be ignored as S-rank is optional):
- At least 5/3/2/1 (H/M/E/C) ships need to be equipped with
| Anti-PT boat | |||||||||||||||||||||||||||||||||||||||||||||||||||||||||||||||||||||||||||||||||||||||||||||||||||||||||||||||||||||||||||||||||||||||||||
|---|---|---|---|---|---|---|---|---|---|---|---|---|---|---|---|---|---|---|---|---|---|---|---|---|---|---|---|---|---|---|---|---|---|---|---|---|---|---|---|---|---|---|---|---|---|---|---|---|---|---|---|---|---|---|---|---|---|---|---|---|---|---|---|---|---|---|---|---|---|---|---|---|---|---|---|---|---|---|---|---|---|---|---|---|---|---|---|---|---|---|---|---|---|---|---|---|---|---|---|---|---|---|---|---|---|---|---|---|---|---|---|---|---|---|---|---|---|---|---|---|---|---|---|---|---|---|---|---|---|---|---|---|---|---|---|---|---|---|---|
Unlike most standard Abyssals, "PT boats" (PT Imp Pack & Schnellboot Imp Pack & Schnellboot Imp Pack ) are "very small and fast". ) are "very small and fast".
During Events, some special bonuses may be added, with "historical" ships and equipment gaining some accuracy bonuses[10].
| |||||||||||||||||||||||||||||||||||||||||||||||||||||||||||||||||||||||||||||||||||||||||||||||||||||||||||||||||||||||||||||||||||||||||||
| [edit] | |||||||||||||||||||||||||||||||||||||||||||||||||||||||||||||||||||||||||||||||||||||||||||||||||||||||||||||||||||||||||||||||||||||||||||


Phase 3.5 - Gimmick: Unlocking the shortcut
The following steps have to be performed to unlock the Shortcut (can be done right from the start of P4):
| G | Z1 | LBAS | |
|---|---|---|---|
| Hard | S x2 | AS | ASx2 |
| Medium | A+ x2 | AS | ASx2 |
| Easy | A+ x2 | - | AS |
| Casual | A+ x2 | - | - |
- Use #Phase 1's fleet
- AV no longer allowed due to Branching Rules at Phase 2+
- Use #Phase 4's fleet
- AP/AS: 321/722 (Hard)
- AP/AS: 284/638 (Hard)
Phase 4
- STF: "2FBB, 1CV, 2CA, 1CL + 0-1CLT, 1CL, 3DD, 1-2SS" (Fast)


- Route: 4 R Y Z Z2
- CTF: "2FBB, 2CV, 2CA + 0-1CVL, 1CL, 3DD, 1-2SS" (Fast)
- Route: 4 R Y Y1 Z Z2
- This fleet is not recommended due to the preboss
- STF: "4(F)BB(V), 1CV, 0-1CL, 0-1AS + 0-1AS, 0-1CVL/CLT, 1CL, 2DD, 2SS"
- Route: 4 Q R Y Y1 Z Z2 Z2
- The strongest fleet, bringing very high firepower as well as air power.
- One AS is required for this routing, being either:
- The escort fleet's flagship, rendering it retreat-proof,
- Alternatively in the main fleet, allowing to bring a stronger ship for the night battle.
- The BB should be both the Yamato-class Kai Ni and the Ise-class Kai Ni, to bring the strongest Touch and great air power.
- LBAS: Range 4, 168/335 AD/AP (Hard)
- A minimum of 2CA (not CAV), 2CL (for STF), and 3DD is needed to take the shortest path.
- A fast fleet with 2 Yamato-class would additionally take Y1.
- The I-201-class

 have outstanding historical bonuses in this situation.
 - 6/4/3/2 Surface Radars are required to route to Y on (H/M/E/C).
Debuff
Once LD has been reached, the following steps have to be performed to debuff the boss:
| G | O | L | X | Z1 | LBAS | |
|---|---|---|---|---|---|---|
| Hard | S | S | S | S | AS | AS x2 |
| Medium | S | S | - | S | - | AS |
| Easy | A+ | A+ | - | A+ | - | AS |
| Casual | A+ | A+ | - | - | - | ? |
- Use #Phase 1's fleet
- AV no longer allowed due to Branching Rules at Phase 2+
- Use #Phase 2 - TP's fleet
- Can be done at the same time as node L
- Use #Phase 2 - TP's fleet with 1CVE.
- Can be done at the same time as node O
- Use #Phase 3's fleet
- Use #Phase 3.5 - Gimmick: Unlocking the shortcut's fleet
- This step can be accomplished by sending 1 SS(V) until the Air Raid is triggered.
- Numbers may be different due to the presence of unknown elements
| AP | AS | |
|---|---|---|
| Hard | 281 | 632 |
| Medium | 262 | 588 |
| Easy | 251 | 564 |
| Casual | 91 | 204 |
Once Debuff is complete the CG will change to the following:
| Abyssal Stranded Landing Princess |
|---|
|


Enemy Compositions
| Type | Ships |
|---|---|
| DD |
| Type | Ships |
|---|---|
| DD | |
| CL | |
| CVL | |
| BB |
| Type | Ships |
|---|---|
| DD |
| Type | Ships |
|---|---|
| DD | |
| CL |
| Type | Ships |
|---|---|
| DD | |
| CL |
| Type | Ships |
|---|---|
| DD |
| Type | Ships |
|---|---|
| DD |
| Type | Ships |
|---|---|
| DD | |
| CL | |
| FBB | |
| BB |
| Type | Ships |
|---|---|
| DD | |
| CL |
| Type | Ships |
|---|---|
| DE | |
| DD | |
| CL | |
| CA | |
| FBB | |
| BB |
| Type | Ships |
|---|---|
| DD |
| # | Formation | Air Raids | AD/AP AS/AS+ |
|---|---|---|---|
| AB | Diamond | 92/183 411/822 | |
| Diamond | 137/273 614/1227 | ||
| Diamond | 142/284 638/1275 | ||
| # | Formation | Air Raids | AD/AP AS/AS+ |
| # | Formation | Normal Battle Node | AD/AP AS/AS+ |
|---|---|---|---|
| A | Echelon Line Abreast Phases: 1, 4 |
0/0 0/0 | |
| Echelon Line Abreast Phases: 1, 4 |
0/0 0/0 | ||
| Echelon Line Abreast Phases: 1, 4 |
0/0 0/0 | ||
| # | Formation | Normal Battle Node | AD/AP AS/AS+ |
| # | Formation | Supported Battle Node | AD/AP AS/AS+ |
|---|---|---|---|
| B | Echelon Line Abreast |
46/91 204/408 | |
| Echelon Line Abreast Phases: 1 |
50/100 224/447 | ||
| Echelon Line Abreast Phases: 4 |
50/100 224/447 | ||
| # | Formation | Supported Battle Node | AD/AP AS/AS+ |
| # | Formation | Normal Battle Node | AD/AP AS/AS+ |
|---|---|---|---|
| C | Line Ahead Double Line Phases: 1, 4 |
0/0 0/0 | |
| Line Ahead Phases: 1, 4 |
0/0 0/0 | ||
| # | Formation | Normal Battle Node | AD/AP AS/AS+ |
| # | Formation | Air Defense Node | AD/AP AS/AS+ |
|---|---|---|---|
| D | Diamond Phases: 1, 4 |
96/192 431/861 | |
| Diamond | 102/203 455/909 | ||
| Diamond | 117/233 522/1044 | ||
| # | Formation | Air Defense Node | AD/AP AS/AS+ |
| # | Formation | Normal Battle Node | AD/AP AS/AS+ |
|---|---|---|---|
| E | Line Ahead Double Line Vanguard Phases: 1, 4 |
0/0 0/0 | |
| # | Formation | Normal Battle Node | AD/AP AS/AS+ |
| # | Empty Node | ||
|---|---|---|---|
| F | 敵影を見ず。 No enemy spotted. | ||
| # | Empty Node | ||
| # | Formation | Boss Battle Node | AD/AP AS/AS+ |
|---|---|---|---|
| G | Diamond Phases: 1, 4 |
102/203 455/909 | |
| Diamond Phases: 1, 4 |
106/211 474/948 | ||
| Diamond Phases: 1 (Final)
|
117/233 522/1044 | ||
| # | Formation | Boss Battle Node | AD/AP AS/AS+ |
| # | Formation | Air Defense Node | AD/AP AS/AS+ |
|---|---|---|---|
| H | Diamond Phases: 2, 4 |
111/221 495/990 | |
| Diamond Phases: 2, 4 |
116/231 519/1038 | ||
| Diamond Phases: 2, 4 |
127/253 567/1134 | ||
| # | Formation | Air Defense Node | AD/AP AS/AS+ |
| # | Formation | Normal Battle Node | AD/AP AS/AS+ |
|---|---|---|---|
| # | Formation | Normal Battle Node | AD/AP AS/AS+ |
| # | Formation | Night Battle Node | AD/AP AS/AS+ |
|---|---|---|---|
| H2 | Line Ahead Echelon Vanguard Phases: 2, 4 |
0/0 0/0 | |
| # | Formation | Night Battle Node | AD/AP AS/AS+ |
| # | Formation | Normal Battle Node | AD/AP AS/AS+ |
|---|---|---|---|
| # | Formation | Normal Battle Node | AD/AP AS/AS+ |
| # | Formation | Air Defense Node | AD/AP AS/AS+ |
|---|---|---|---|
| J | Diamond Phases: 2, 4 |
111/221 495/990 | |
| Diamond Phases: 2, 4 |
116/231 519/1038 | ||
| Diamond Phases: 2, 4 |
127/253 567/1134 | ||
| # | Formation | Air Defense Node | AD/AP AS/AS+ |
| # | Formation | Supported Battle Node | AD/AP AS/AS+ |
|---|---|---|---|
| K | Echelon Line Abreast Phases: 2, 4 |
46/91 204/408 | |
| Echelon Line Abreast Phases: 2, 4 |
50/100 224/447 | ||
| Echelon Line Abreast Phases: 2, 4 |
50/100 224/447 | ||
| # | Formation | Supported Battle Node | AD/AP AS/AS+ |
| # | Formation | Normal Battle Node | AD/AP AS/AS+ |
|---|---|---|---|
| L | Diamond Phases: 4 |
116/231 519/1038 | |
| Diamond Phases: 4 |
120/240 539/1077 | ||
| Diamond Phases: 4 |
127/253 567/1134 | ||
| # | Formation | Normal Battle Node | AD/AP AS/AS+ |
| # | Landing Node | ||
|---|---|---|---|
| M | 輸送物資の揚陸地点に到達しました。本海域の輸送作戦は無事完了しています。 The landing point of the convoy has been reached. The transport operation here has already been completed successfully. | ||
| # | Landing Node | ||
| # | Empty Node | ||
|---|---|---|---|
| N | 敵影を見ず。 No enemy spotted. | ||
| # | Empty Node | ||
| # | Formation | Boss Battle Node | AD/AP AS/AS+ |
|---|---|---|---|
| O | Cruising Formation 3 Phases: 2, 4 |
90/180 404/807 | |
| Cruising Formation 3 Phases: 2 (Final)
|
100/199 447/894 | ||
| # | Formation | Boss Battle Node | AD/AP AS/AS+ |
| # | Formation | Supported Battle Node | AD/AP AS/AS+ |
|---|---|---|---|
| # | Formation | Supported Battle Node | AD/AP AS/AS+ |
| # | Formation | Normal Battle Node | AD/AP AS/AS+ |
|---|---|---|---|
| Q | Echelon Line Abreast Phases: 3, 4 |
0/0 0/0 | |
| Echelon Line Abreast Phases: 3, 4 |
0/0 0/0 | ||
| Echelon Line Abreast Phases: 3, 4 |
0/0 0/0 | ||
| # | Formation | Normal Battle Node | AD/AP AS/AS+ |
| # | Formation | Air Defense Node | AD/AP AS/AS+ |
|---|---|---|---|
| R | Diamond Phases: 3, 4 |
105/210 471/942 | |
| Diamond Phases: 3, 4 |
145/290 651/1302 | ||
| Diamond Phases: 3, 4 |
149/298 669/1338 | ||
| # | Formation | Air Defense Node | AD/AP AS/AS+ |
| # | Formation | Ambush Battle Node | AD/AP AS/AS+ |
|---|---|---|---|
| S | Line Ahead Double Line Phases: 3, 4 |
0/0 0/0 | |
| Line Ahead | 0/0 0/0 | ||
| # | Formation | Ambush Battle Node | AD/AP AS/AS+ |
| # | Formation | Night Battle Node | AD/AP AS/AS+ |
|---|---|---|---|
| T | Line Ahead Echelon Phases: 3, 4 |
0/0 0/0 | |
| Line Ahead Phases: 3 |
0/0 0/0 | ||
| # | Formation | Night Battle Node | AD/AP AS/AS+ |
| # | Formation | Normal Battle Node | AD/AP AS/AS+ |
|---|---|---|---|
| U | Line Ahead Double Line Vanguard Phases: 3 |
0/0 0/0 | |
| # | Formation | Normal Battle Node | AD/AP AS/AS+ |
| # | Formation | Normal Battle Node | AD/AP AS/AS+ |
|---|---|---|---|
| V | Diamond Phases: 3, 4 |
105/210 471/942 | |
| Diamond Phases: 3, 4 |
145/290 651/1302 | ||
| Diamond Phases: 3 |
149/298 669/1338 | ||
| # | Formation | Normal Battle Node | AD/AP AS/AS+ |
| # | Empty Node | ||
|---|---|---|---|
| W | 敵影を見ず。 No enemy spotted. | ||
| # | Empty Node | ||
| # | Formation | Boss Battle Node | AD/AP AS/AS+ |
|---|---|---|---|
| X | Cruising Formation 2 Phases: 3, 4 |
33/65 144/288 | |
| Cruising Formation 2 Phases: 3 (Final)
|
10/19 42/84 | ||
| # | Formation | Boss Battle Node | AD/AP AS/AS+ |
| # | Formation | Normal Battle Node | AD/AP AS/AS+ |
|---|---|---|---|
| Y | Echelon Line Abreast Phases: 4 |
0/0 0/0 | |
| Echelon Line Abreast Phases: 4 |
0/0 0/0 | ||
| Echelon Line Abreast Phases: 4 |
0/0 0/0 | ||
| # | Formation | Normal Battle Node | AD/AP AS/AS+ |
| # | Formation | Normal Battle Node | AD/AP AS/AS+ |
|---|---|---|---|
| Y1 | Vanguard Phases: 4 |
0/0 0/0 | |
| Vanguard Phases: 4 |
0/0 0/0 | ||
| Vanguard Phases: 4 |
0/0 0/0 | ||
| # | Formation | Normal Battle Node | AD/AP AS/AS+ |
| # | Formation | Supported Battle Node | AD/AP AS/AS+ |
|---|---|---|---|
| Y2 | Echelon Line Abreast |
50/100 224/447 | |
| Echelon Line Abreast Phases: 4 |
91/182 408/816 | ||
| # | Formation | Supported Battle Node | AD/AP AS/AS+ |
| # | Formation | Normal Battle Node | AD/AP AS/AS+ |
|---|---|---|---|
| Z | Line Ahead Double Line Phases: 4 |
0/0 0/0 | |
| Line Ahead Phases: 4 |
0/0 0/0 | ||
| # | Formation | Normal Battle Node | AD/AP AS/AS+ |
| # | Formation | Air Defense Node | AD/AP AS/AS+ |
|---|---|---|---|
| Z1 | Diamond Phases: 4 |
146/292 656/1311 | |
| Diamond Phases: 4 |
142/283 635/1269 | ||
| Diamond Phases: 4 |
162/323 726/1452 | ||
| # | Formation | Air Defense Node | AD/AP AS/AS+ |
| # | Formation | Boss Battle Node | AD/AP AS/AS+ |
|---|---|---|---|
| Z2 | Cruising Formation 4 Phases: 4 |
156/312 701/1401 | |
| Cruising Formation 4 Phases: 4 (Final)
|
195/389 873/1746 | ||
| # | Formation | Boss Battle Node | AD/AP AS/AS+ |
| Type | Ships |
|---|---|
| DD |
| Type | Ships |
|---|---|
| DD |
| Type | Ships |
|---|---|
| DD |
| Type | Ships |
|---|---|
| DD |
| Type | Ships |
|---|---|
| DD |
| Type | Ships |
|---|---|
| DD |
| Type | Ships |
|---|---|
| DD | |
| CL | |
| CA | |
| FBB | |
| BB |
| Type | Ships |
|---|---|
| DD |
| # | Formation | Air Raids | AD/AP AS/AS+ |
|---|---|---|---|
| AB | Diamond | 86/172 386/771 | |
| Diamond | 126/251 564/1128 | ||
| Diamond | 131/262 588/1176 | ||
| # | Formation | Air Raids | AD/AP AS/AS+ |
| # | Formation | Normal Battle Node | AD/AP AS/AS+ |
|---|---|---|---|
| A | Echelon Line Abreast Phases: 1, 4 |
0/0 0/0 | |
| Echelon Line Abreast Phases: 1, 4 |
0/0 0/0 | ||
| Echelon Line Abreast Phases: 1, 4 |
0/0 0/0 | ||
| # | Formation | Normal Battle Node | AD/AP AS/AS+ |
| # | Formation | Supported Battle Node | AD/AP AS/AS+ |
|---|---|---|---|
| B | Line Abreast | 41/81 180/360 | |
| Echelon Line Abreast |
41/81 180/360 | ||
| Echelon | 46/91 204/408 | ||
| # | Formation | Supported Battle Node | AD/AP AS/AS+ |
| # | Formation | Normal Battle Node | AD/AP AS/AS+ |
|---|---|---|---|
| C | Line Ahead Double Line Phases: 1, 4 |
0/0 0/0 | |
| Line Ahead Phases: 1, 4 |
0/0 0/0 | ||
| # | Formation | Normal Battle Node | AD/AP AS/AS+ |
| # | Formation | Air Defense Node | AD/AP AS/AS+ |
|---|---|---|---|
| D | Diamond Phases: 1 |
62/123 276/552 | |
| Diamond Phases: 1 |
94/187 420/840 | ||
| # | Formation | Air Defense Node | AD/AP AS/AS+ |
| # | Formation | Normal Battle Node | AD/AP AS/AS+ |
|---|---|---|---|
| E | Line Ahead Double Line Vanguard Phases: 1, 4 |
0/0 0/0 | |
| # | Formation | Normal Battle Node | AD/AP AS/AS+ |
| # | Empty Node | ||
|---|---|---|---|
| F | 敵影を見ず。 No enemy spotted. | ||
| # | Empty Node | ||
| # | Formation | Boss Battle Node | AD/AP AS/AS+ |
|---|---|---|---|
| G | Diamond Phases: 1, 4 |
94/187 420/840 | |
| Diamond Phases: 1, 4 |
99/198 444/888 | ||
| Diamond Phases: 1 (Final)
|
104/207 464/927 | ||
| # | Formation | Boss Battle Node | AD/AP AS/AS+ |
| # | Formation | Air Defense Node | AD/AP AS/AS+ |
|---|---|---|---|
| H | Diamond Phases: 2 |
86/171 384/768 | |
| Diamond Phases: 2 |
91/182 408/816 | ||
| Diamond Phases: 2 |
96/191 428/855 | ||
| # | Formation | Air Defense Node | AD/AP AS/AS+ |
| # | Formation | Normal Battle Node | AD/AP AS/AS+ |
|---|---|---|---|
| # | Formation | Normal Battle Node | AD/AP AS/AS+ |
| # | Formation | Night Battle Node | AD/AP AS/AS+ |
|---|---|---|---|
| H2 | Line Ahead Echelon Vanguard Phases: 2 |
0/0 0/0 | |
| # | Formation | Night Battle Node | AD/AP AS/AS+ |
| # | Formation | Normal Battle Node | AD/AP AS/AS+ |
|---|---|---|---|
| # | Formation | Normal Battle Node | AD/AP AS/AS+ |
| # | Formation | Air Defense Node | AD/AP AS/AS+ |
|---|---|---|---|
| J | Diamond Phases: 2 |
86/171 384/768 | |
| Diamond Phases: 2 |
91/182 408/816 | ||
| Diamond Phases: 2 |
96/191 428/855 | ||
| # | Formation | Air Defense Node | AD/AP AS/AS+ |
| # | Formation | Supported Battle Node | AD/AP AS/AS+ |
|---|---|---|---|
| K | Echelon Line Abreast Phases: 2 |
41/81 180/360 | |
| Echelon Line Abreast Phases: 2 |
41/81 180/360 | ||
| Echelon Line Abreast Phases: 2 |
46/91 204/408 | ||
| # | Formation | Supported Battle Node | AD/AP AS/AS+ |
| # | Formation | Normal Battle Node | AD/AP AS/AS+ |
|---|---|---|---|
| L | Diamond | 86/171 384/768 | |
| Diamond | 90/180 404/807 | ||
| # | Formation | Normal Battle Node | AD/AP AS/AS+ |
| # | Landing Node | ||
|---|---|---|---|
| M | 輸送物資の揚陸地点に到達しました。本海域の輸送作戦は無事完了しています。 The landing point of the convoy has been reached. The transport operation here has already been completed successfully. | ||
| # | Landing Node | ||
| # | Empty Node | ||
|---|---|---|---|
| N | 敵影を見ず。 No enemy spotted. | ||
| # | Empty Node | ||
| # | Formation | Boss Battle Node | AD/AP AS/AS+ |
|---|---|---|---|
| O | Cruising Formation 3 Phases: 2 |
86/171 384/768 | |
| Cruising Formation 3 Phases: 2 (Final)
|
91/182 408/816 | ||
| # | Formation | Boss Battle Node | AD/AP AS/AS+ |
| # | Formation | Supported Battle Node | AD/AP AS/AS+ |
|---|---|---|---|
| # | Formation | Supported Battle Node | AD/AP AS/AS+ |
| # | Formation | Normal Battle Node | AD/AP AS/AS+ |
|---|---|---|---|
| Q | Echelon Line Abreast Phases: 3, 4 |
0/0 0/0 | |
| Echelon Line Abreast Phases: 3, 4 |
0/0 0/0 | ||
| Echelon Line Abreast Phases: 3 |
0/0 0/0 | ||
| # | Formation | Normal Battle Node | AD/AP AS/AS+ |
| # | Formation | Air Defense Node | AD/AP AS/AS+ |
|---|---|---|---|
| R | Diamond Phases: 3, 4 |
97/193 432/864 | |
| Diamond Phases: 3, 4 |
113/226 507/1014 | ||
| Diamond Phases: 3, 4 |
145/290 651/1302 | ||
| # | Formation | Air Defense Node | AD/AP AS/AS+ |
| # | Formation | Ambush Battle Node | AD/AP AS/AS+ |
|---|---|---|---|
| # | Formation | Ambush Battle Node | AD/AP AS/AS+ |
| # | Formation | Night Battle Node | AD/AP AS/AS+ |
|---|---|---|---|
| T | Line Ahead Echelon Phases: 3 |
0/0 0/0 | |
| Line Ahead Phases: 3 |
0/0 0/0 | ||
| # | Formation | Night Battle Node | AD/AP AS/AS+ |
| # | Formation | Normal Battle Node | AD/AP AS/AS+ |
|---|---|---|---|
| U | Line Ahead Double Line Vanguard Phases: 3 |
0/0 0/0 | |
| # | Formation | Normal Battle Node | AD/AP AS/AS+ |
| # | Formation | Normal Battle Node | AD/AP AS/AS+ |
|---|---|---|---|
| V | Diamond Phases: 3 |
97/193 432/864 | |
| Diamond Phases: 3 |
113/226 507/1014 | ||
| Diamond Phases: 3 |
145/290 651/1302 | ||
| # | Formation | Normal Battle Node | AD/AP AS/AS+ |
| # | Empty Node | ||
|---|---|---|---|
| W | 敵影を見ず。 No enemy spotted. | ||
| # | Empty Node | ||
| # | Formation | Boss Battle Node | AD/AP AS/AS+ |
|---|---|---|---|
| X | Cruising Formation 2 Phases: 3 |
30/60 134/267 | |
| Cruising Formation 2 Phases: 3 (Final)
|
10/19 41/81 | ||
| # | Formation | Boss Battle Node | AD/AP AS/AS+ |
| # | Formation | Normal Battle Node | AD/AP AS/AS+ |
|---|---|---|---|
| Y | Echelon Line Abreast Phases: 4 |
0/0 0/0 | |
| Echelon Line Abreast Phases: 4 |
0/0 0/0 | ||
| Echelon Line Abreast Phases: 4 |
0/0 0/0 | ||
| # | Formation | Normal Battle Node | AD/AP AS/AS+ |
| # | Formation | Normal Battle Node | AD/AP AS/AS+ |
|---|---|---|---|
| Y1 | Vanguard | 0/0 0/0 | |
| Vanguard | 0/0 0/0 | ||
| Vanguard | 0/0 0/0 | ||
| # | Formation | Normal Battle Node | AD/AP AS/AS+ |
| # | Formation | Supported Battle Node | AD/AP AS/AS+ |
|---|---|---|---|
| Y2 | Echelon Line Abreast |
41/81 180/360 | |
| Echelon Line Abreast |
46/91 204/408 | ||
| # | Formation | Supported Battle Node | AD/AP AS/AS+ |
| # | Formation | Normal Battle Node | AD/AP AS/AS+ |
|---|---|---|---|
| Z | Line Ahead Double Line Phases: 4 |
0/0 0/0 | |
| Line Ahead Phases: 4 |
0/0 0/0 | ||
| # | Formation | Normal Battle Node | AD/AP AS/AS+ |
| # | Formation | Air Defense Node | AD/AP AS/AS+ |
|---|---|---|---|
| Z1 | Diamond Phases: 4 |
136/271 608/1215 | |
| Diamond Phases: 4 |
134/267 600/1200 | ||
| Diamond | 144/287 644/1287 | ||
| # | Formation | Air Defense Node | AD/AP AS/AS+ |
| # | Formation | Boss Battle Node | AD/AP AS/AS+ |
|---|---|---|---|
| Z2 | Cruising Formation 4 Phases: 4 |
135/269 605/1209 | |
| Cruising Formation 4 Phases: 4 (Final)
|
161/321 722/1443 | ||
| # | Formation | Boss Battle Node | AD/AP AS/AS+ |
| Type | Ships |
|---|---|
| DD |
| Type | Ships |
|---|---|
| DD |
| Type | Ships |
|---|---|
| DD |
| Type | Ships |
|---|---|
| DD |
| Type | Ships |
|---|---|
| DD |
| Type | Ships |
|---|---|
| DD |
| Type | Ships |
|---|---|
| DD |
| Type | Ships |
|---|---|
| DD | |
| FBB |
| Type | Ships |
|---|---|
| DD |
| Type | Ships |
|---|---|
| DD | |
| BB |
| Type | Ships |
|---|---|
| DD |
| # | Formation | Air Raids | AD/AP AS/AS+ |
|---|---|---|---|
| AB | Diamond | 81/161 362/723 | |
| Diamond | 83/166 372/744 | ||
| Diamond | 126/251 564/1128 | ||
| # | Formation | Air Raids | AD/AP AS/AS+ |
| # | Formation | Normal Battle Node | AD/AP AS/AS+ |
|---|---|---|---|
| A | Echelon Line Abreast Phases: 1, 3 |
0/0 0/0 | |
| Echelon Line Abreast Phases: 1, 3 |
0/0 0/0 | ||
| Echelon Line Abreast Phases: 1, 3 |
0/0 0/0 | ||
| # | Formation | Normal Battle Node | AD/AP AS/AS+ |
| # | Formation | Supported Battle Node | AD/AP AS/AS+ |
|---|---|---|---|
| B | Echelon | 41/81 180/360 | |
| Line Abreast Phases: 3 |
41/81 180/360 | ||
| # | Formation | Supported Battle Node | AD/AP AS/AS+ |
| # | Formation | Normal Battle Node | AD/AP AS/AS+ |
|---|---|---|---|
| C | Line Ahead Double Line Phases: 1, 3 |
0/0 0/0 | |
| Line Ahead Phases: 1, 3 |
0/0 0/0 | ||
| # | Formation | Normal Battle Node | AD/AP AS/AS+ |
| # | Formation | Air Defense Node | AD/AP AS/AS+ |
|---|---|---|---|
| D | Diamond | 57/113 252/504 | |
| Diamond Phases: 3 |
62/123 276/552 | ||
| # | Formation | Air Defense Node | AD/AP AS/AS+ |
| # | Formation | Normal Battle Node | AD/AP AS/AS+ |
|---|---|---|---|
| E | Line Ahead Double Line Vanguard Phases: 1, 3 |
0/0 0/0 | |
| # | Formation | Normal Battle Node | AD/AP AS/AS+ |
| # | Empty Node | ||
|---|---|---|---|
| F | 敵影を見ず。 No enemy spotted. | ||
| # | Empty Node | ||
| # | Formation | Boss Battle Node | AD/AP AS/AS+ |
|---|---|---|---|
| G | Diamond Phases: 1, 3 |
57/113 252/504 | |
| Diamond Phases: 1 |
62/123 276/552 | ||
| Diamond Phases: 1 (Final)
|
99/198 444/888 | ||
| # | Formation | Boss Battle Node | AD/AP AS/AS+ |
| # | Formation | Air Defense Node | AD/AP AS/AS+ |
|---|---|---|---|
| H | Diamond Phases: 2, 3 |
81/161 360/720 | |
| Diamond Phases: 2, 3 |
86/171 384/768 | ||
| Diamond Phases: 2 |
91/182 408/816 | ||
| # | Formation | Air Defense Node | AD/AP AS/AS+ |
| # | Formation | Normal Battle Node | AD/AP AS/AS+ |
|---|---|---|---|
| # | Formation | Normal Battle Node | AD/AP AS/AS+ |
| # | Formation | Night Battle Node | AD/AP AS/AS+ |
|---|---|---|---|
| H2 | Line Ahead Echelon Vanguard Phases: 2, 3 |
0/0 0/0 | |
| # | Formation | Night Battle Node | AD/AP AS/AS+ |
| # | Formation | Normal Battle Node | AD/AP AS/AS+ |
|---|---|---|---|
| I | Line Ahead | 0/0 0/0 | |
| # | Formation | Normal Battle Node | AD/AP AS/AS+ |
| # | Formation | Air Defense Node | AD/AP AS/AS+ |
|---|---|---|---|
| J | Diamond Phases: 2, 3 |
81/161 360/720 | |
| Diamond Phases: 2 |
86/171 384/768 | ||
| Diamond Phases: 2, 3 |
91/182 408/816 | ||
| # | Formation | Air Defense Node | AD/AP AS/AS+ |
| # | Formation | Supported Battle Node | AD/AP AS/AS+ |
|---|---|---|---|
| K | Echelon Line Abreast Phases: 2, 3 |
3/6 12/24 | |
| Echelon Line Abreast Phases: 2, 3 |
41/81 180/360 | ||
| Echelon Line Abreast Phases: 2, 3 |
41/81 180/360 | ||
| # | Formation | Supported Battle Node | AD/AP AS/AS+ |
| # | Formation | Normal Battle Node | AD/AP AS/AS+ |
|---|---|---|---|
| L | Diamond Phases: 2 |
81/161 360/720 | |
| Diamond | 91/182 408/816 | ||
| # | Formation | Normal Battle Node | AD/AP AS/AS+ |
| # | Landing Node | ||
|---|---|---|---|
| M | 輸送物資の揚陸地点に到達しました。本海域の輸送作戦は無事完了しています。 The landing point of the convoy has been reached. The transport operation here has already been completed successfully. | ||
| # | Landing Node | ||
| # | Empty Node | ||
|---|---|---|---|
| N | 敵影を見ず。 No enemy spotted. | ||
| # | Empty Node | ||
| # | Formation | Boss Battle Node | AD/AP AS/AS+ |
|---|---|---|---|
| O | Cruising Formation 3 Phases: 2, 3 |
49/97 216/432 | |
| Cruising Formation 3 Phases: 2 (Final)
|
81/161 360/720 | ||
| # | Formation | Boss Battle Node | AD/AP AS/AS+ |
| # | Formation | Supported Battle Node | AD/AP AS/AS+ |
|---|---|---|---|
| # | Formation | Supported Battle Node | AD/AP AS/AS+ |
| # | Formation | Normal Battle Node | AD/AP AS/AS+ |
|---|---|---|---|
| Q | Echelon Line Abreast Phases: 3 |
0/0 0/0 | |
| Echelon Line Abreast Phases: 3 |
0/0 0/0 | ||
| Echelon Line Abreast Phases: 3 |
0/0 0/0 | ||
| # | Formation | Normal Battle Node | AD/AP AS/AS+ |
| # | Formation | Air Defense Node | AD/AP AS/AS+ |
|---|---|---|---|
| R | Diamond Phases: 3 |
13/25 54/108 | |
| Diamond Phases: 3 |
59/118 264/528 | ||
| Diamond Phases: 4 |
65/129 288/576 | ||
| # | Formation | Air Defense Node | AD/AP AS/AS+ |
| # | Formation | Ambush Battle Node | AD/AP AS/AS+ |
|---|---|---|---|
| S | Line Ahead Double Line Phases: 3 |
0/0 0/0 | |
| # | Formation | Ambush Battle Node | AD/AP AS/AS+ |
| # | Formation | Night Battle Node | AD/AP AS/AS+ |
|---|---|---|---|
| T | Line Ahead Echelon Phases: 3 |
0/0 0/0 | |
| Line Ahead | 0/0 0/0 | ||
| # | Formation | Night Battle Node | AD/AP AS/AS+ |
| # | Formation | Normal Battle Node | AD/AP AS/AS+ |
|---|---|---|---|
| U | Line Ahead Double Line Vanguard Phases: 3 |
0/0 0/0 | |
| # | Formation | Normal Battle Node | AD/AP AS/AS+ |
| # | Formation | Normal Battle Node | AD/AP AS/AS+ |
|---|---|---|---|
| V | Diamond Phases: 3 |
13/25 54/108 | |
| Diamond Phases: 3 |
59/118 264/528 | ||
| Diamond | 65/129 288/576 | ||
| # | Formation | Normal Battle Node | AD/AP AS/AS+ |
| # | Empty Node | ||
|---|---|---|---|
| W | 敵影を見ず。 No enemy spotted. | ||
| # | Empty Node | ||
| # | Formation | Boss Battle Node | AD/AP AS/AS+ |
|---|---|---|---|
| X | Cruising Formation 2 Phases: 3 |
16/32 71/141 | |
| Cruising Formation 2 (Final)
|
10/19 41/81 | ||
| # | Formation | Boss Battle Node | AD/AP AS/AS+ |
| # | Formation | Normal Battle Node | AD/AP AS/AS+ |
|---|---|---|---|
| Y | Echelon Line Abreast |
0/0 0/0 | |
| Echelon Line Abreast Phases: 4 |
0/0 0/0 | ||
| Echelon Line Abreast |
0/0 0/0 | ||
| # | Formation | Normal Battle Node | AD/AP AS/AS+ |
| # | Formation | Normal Battle Node | AD/AP AS/AS+ |
|---|---|---|---|
| Y1 | Vanguard | 0/0 0/0 | |
| Vanguard | 0/0 0/0 | ||
| Vanguard | 0/0 0/0 | ||
| # | Formation | Normal Battle Node | AD/AP AS/AS+ |
| # | Formation | Supported Battle Node | AD/AP AS/AS+ |
|---|---|---|---|
| Y2 | Line Abreast | 3/6 12/24 | |
| Echelon | 41/81 180/360 | ||
| # | Formation | Supported Battle Node | AD/AP AS/AS+ |
| # | Formation | Normal Battle Node | AD/AP AS/AS+ |
|---|---|---|---|
| Z | Line Ahead Double Line |
0/0 0/0 | |
| Line Ahead Phases: 4 |
0/0 0/0 | ||
| # | Formation | Normal Battle Node | AD/AP AS/AS+ |
| # | Formation | Air Defense Node | AD/AP AS/AS+ |
|---|---|---|---|
| Z1 | Diamond | 89/177 396/792 | |
| Diamond | 94/187 420/840 | ||
| # | Formation | Air Defense Node | AD/AP AS/AS+ |
| # | Formation | Boss Battle Node | AD/AP AS/AS+ |
|---|---|---|---|
| Z2 | Cruising Formation 4 | 122/244 548/1095 | |
| Cruising Formation 4 (Final)
|
150/300 674/1347 | ||
| # | Formation | Boss Battle Node | AD/AP AS/AS+ |
| # | Formation | Air Raids | AD/AP AS/AS+ |
|---|---|---|---|
| AB | Diamond | 42/83 186/372 | |
| Diamond | 44/88 197/393 | ||
| Diamond | 46/91 204/408 | ||
| # | Formation | Air Raids | AD/AP AS/AS+ |
| # | Formation | Normal Battle Node | AD/AP AS/AS+ |
|---|---|---|---|
| A | Echelon Line Abreast Phases: 1, 3, 4 |
0/0 0/0 | |
| Echelon Line Abreast Phases: 1, 3, 4 |
0/0 0/0 | ||
| # | Formation | Normal Battle Node | AD/AP AS/AS+ |
| # | Formation | Supported Battle Node | AD/AP AS/AS+ |
|---|---|---|---|
| # | Formation | Supported Battle Node | AD/AP AS/AS+ |
| # | Formation | Normal Battle Node | AD/AP AS/AS+ |
|---|---|---|---|
| C | Line Ahead Double Line Phases: 1, 4 |
0/0 0/0 | |
| Line Ahead Phases: 1, 3, 4 |
0/0 0/0 | ||
| # | Formation | Normal Battle Node | AD/AP AS/AS+ |
| # | Formation | Air Defense Node | AD/AP AS/AS+ |
|---|---|---|---|
| # | Formation | Air Defense Node | AD/AP AS/AS+ |
| # | Formation | Normal Battle Node | AD/AP AS/AS+ |
|---|---|---|---|
| E | Line Ahead Double Line Phases: 1, 4 |
0/0 0/0 | |
| Line Ahead Phases: 1, 4 |
0/0 0/0 | ||
| # | Formation | Normal Battle Node | AD/AP AS/AS+ |
| # | Empty Node | ||
|---|---|---|---|
| F | 敵影を見ず。 No enemy spotted. | ||
| # | Empty Node | ||
| # | Formation | Boss Battle Node | AD/AP AS/AS+ |
|---|---|---|---|
| G | Diamond Phases: 1, 4 |
54/107 240/480 | |
| Diamond Phases: 1, 4 |
57/113 252/504 | ||
| Diamond Phases: 1 (Final)
|
62/123 276/552 | ||
| # | Formation | Boss Battle Node | AD/AP AS/AS+ |
| # | Formation | Air Defense Node | AD/AP AS/AS+ |
|---|---|---|---|
| H | Diamond Phases: 2 |
43/86 192/384 | |
| Diamond Phases: 2 |
49/97 216/432 | ||
| Diamond Phases: 2 |
81/161 360/720 | ||
| # | Formation | Air Defense Node | AD/AP AS/AS+ |
| # | Formation | Normal Battle Node | AD/AP AS/AS+ |
|---|---|---|---|
| # | Formation | Normal Battle Node | AD/AP AS/AS+ |
| # | Formation | Night Battle Node | AD/AP AS/AS+ |
|---|---|---|---|
| H2 | Line Ahead Echelon Vanguard Phases: 2 |
0/0 0/0 | |
| # | Formation | Night Battle Node | AD/AP AS/AS+ |
| # | Formation | Normal Battle Node | AD/AP AS/AS+ |
|---|---|---|---|
| # | Formation | Normal Battle Node | AD/AP AS/AS+ |
| # | Formation | Air Defense Node | AD/AP AS/AS+ |
|---|---|---|---|
| J | Diamond Phases: 2 |
43/86 192/384 | |
| Diamond Phases: 2 |
49/97 216/432 | ||
| Diamond Phases: 2 |
81/161 360/720 | ||
| # | Formation | Air Defense Node | AD/AP AS/AS+ |
| # | Formation | Supported Battle Node | AD/AP AS/AS+ |
|---|---|---|---|
| K | Echelon Line Abreast Phases: 2 |
3/6 12/24 | |
| Echelon Line Abreast Phases: 2 |
41/81 180/360 | ||
| # | Formation | Supported Battle Node | AD/AP AS/AS+ |
| # | Formation | Normal Battle Node | AD/AP AS/AS+ |
|---|---|---|---|
| # | Formation | Normal Battle Node | AD/AP AS/AS+ |
| # | Landing Node | ||
|---|---|---|---|
| M | 輸送物資の揚陸地点に到達しました。本海域の輸送作戦は無事完了しています。 The landing point of the convoy has been reached. The transport operation here has already been completed successfully. | ||
| # | Landing Node | ||
| # | Empty Node | ||
|---|---|---|---|
| N | 敵影を見ず。 No enemy spotted. | ||
| # | Empty Node | ||
| # | Formation | Boss Battle Node | AD/AP AS/AS+ |
|---|---|---|---|
| O | Cruising Formation 3 Phases: 2 |
6/11 24/48 | |
| Cruising Formation 3 Phases: 2 (Final)
|
43/86 192/384 | ||
| # | Formation | Boss Battle Node | AD/AP AS/AS+ |
| # | Formation | Supported Battle Node | AD/AP AS/AS+ |
|---|---|---|---|
| # | Formation | Supported Battle Node | AD/AP AS/AS+ |
| # | Formation | Normal Battle Node | AD/AP AS/AS+ |
|---|---|---|---|
| Q | Echelon Line Abreast Phases: 3, 4 |
0/0 0/0 | |
| Echelon Line Abreast Phases: 3, 4 |
0/0 0/0 | ||
| # | Formation | Normal Battle Node | AD/AP AS/AS+ |
| # | Formation | Air Defense Node | AD/AP AS/AS+ |
|---|---|---|---|
| R | Diamond Phases: 3 |
12/24 53/105 | |
| Diamond Phases: 3, 4 |
13/25 54/108 | ||
| Diamond Phases: 3, 4 |
18/35 78/156 | ||
| # | Formation | Air Defense Node | AD/AP AS/AS+ |
| # | Formation | Ambush Battle Node | AD/AP AS/AS+ |
|---|---|---|---|
| S | Line Ahead Double Line Phases: 3, 4 |
0/0 0/0 | |
| # | Formation | Ambush Battle Node | AD/AP AS/AS+ |
| # | Formation | Night Battle Node | AD/AP AS/AS+ |
|---|---|---|---|
| T | Line Ahead Echelon Phases: 3, 4 |
0/0 0/0 | |
| Line Ahead Phases: 3 |
0/0 0/0 | ||
| # | Formation | Night Battle Node | AD/AP AS/AS+ |
| # | Formation | Normal Battle Node | AD/AP AS/AS+ |
|---|---|---|---|
| U | Line Ahead Double Line Vanguard Phases: 3 |
0/0 0/0 | |
| # | Formation | Normal Battle Node | AD/AP AS/AS+ |
| # | Formation | Normal Battle Node | AD/AP AS/AS+ |
|---|---|---|---|
| V | Diamond Phases: 3, 4 |
12/24 53/105 | |
| Diamond Phases: 3, 4 |
13/25 54/108 | ||
| Diamond Phases: 3 |
18/35 78/156 | ||
| # | Formation | Normal Battle Node | AD/AP AS/AS+ |
| # | Empty Node | ||
|---|---|---|---|
| W | 敵影を見ず。 No enemy spotted. | ||
| # | Empty Node | ||
| # | Formation | Boss Battle Node | AD/AP AS/AS+ |
|---|---|---|---|
| X | Cruising Formation 2 Phases: 3, 4 |
13/25 56/111 | |
| Cruising Formation 2 Phases: 3 (Final)
|
4/7 15/30 | ||
| # | Formation | Boss Battle Node | AD/AP AS/AS+ |
| # | Formation | Normal Battle Node | AD/AP AS/AS+ |
|---|---|---|---|
| Y | Echelon Line Abreast Phases: 4 |
0/0 0/0 | |
| Echelon Line Abreast Phases: 4 |
0/0 0/0 | ||
| # | Formation | Normal Battle Node | AD/AP AS/AS+ |
| # | Formation | Normal Battle Node | AD/AP AS/AS+ |
|---|---|---|---|
| Y1 | Vanguard Phases: 4 |
0/0 0/0 | |
| Vanguard Phases: 4 |
0/0 0/0 | ||
| Vanguard Phases: 4 |
0/0 0/0 | ||
| # | Formation | Normal Battle Node | AD/AP AS/AS+ |
| # | Formation | Supported Battle Node | AD/AP AS/AS+ |
|---|---|---|---|
| Y2 | Echelon Line Abreast Phases: 4 |
3/6 12/24 | |
| Line Abreast Phases: 4 |
41/81 180/360 | ||
| # | Formation | Supported Battle Node | AD/AP AS/AS+ |
| # | Formation | Normal Battle Node | AD/AP AS/AS+ |
|---|---|---|---|
| Z | Line Ahead Double Line Phases: 4 |
0/0 0/0 | |
| Line Ahead Phases: 4 |
0/0 0/0 | ||
| # | Formation | Normal Battle Node | AD/AP AS/AS+ |
| # | Formation | Air Defense Node | AD/AP AS/AS+ |
|---|---|---|---|
| Z1 | Diamond Phases: 4 |
49/97 216/432 | |
| Diamond Phases: 4 |
57/113 252/504 | ||
| Diamond Phases: 4 |
94/187 420/840 | ||
| # | Formation | Air Defense Node | AD/AP AS/AS+ |
| # | Formation | Boss Battle Node | AD/AP AS/AS+ |
|---|---|---|---|
| Z2 | Cruising Formation 4 Phases: 4 |
82/163 365/729 | |
| Cruising Formation 4 Phases: 4 (Final)
|
133/265 596/1191 | ||
| # | Formation | Boss Battle Node | AD/AP AS/AS+ |
Ship Drops
| Ship drops | |||||||||||||||||||||||||||||||||||||||||||||||||||||||||||||||||||||||||||||||||||||||||||||||||||
|---|---|---|---|---|---|---|---|---|---|---|---|---|---|---|---|---|---|---|---|---|---|---|---|---|---|---|---|---|---|---|---|---|---|---|---|---|---|---|---|---|---|---|---|---|---|---|---|---|---|---|---|---|---|---|---|---|---|---|---|---|---|---|---|---|---|---|---|---|---|---|---|---|---|---|---|---|---|---|---|---|---|---|---|---|---|---|---|---|---|---|---|---|---|---|---|---|---|---|---|
| Type | Ship? | E | G | L | O | T | U | V | X | Y1 | Z | Z2 | |||||||||||||||||||||||||||||||||||||||||||||||||||||||||||||||||||||||||||||||||||||||
| DE | Noumi | Medium+ | Hard+ | Hard+ | |||||||||||||||||||||||||||||||||||||||||||||||||||||||||||||||||||||||||||||||||||||||||||||||
| DE | Etorofu | Hard+ | |||||||||||||||||||||||||||||||||||||||||||||||||||||||||||||||||||||||||||||||||||||||||||||||||
| DD | Heywood L. Edwards | Hard+ | |||||||||||||||||||||||||||||||||||||||||||||||||||||||||||||||||||||||||||||||||||||||||||||||||
| DD | Harusame | Easy+ | Casual+ | Medium+ | Medium+ | Casual+ | Easy+ | Medium+ | Casual+ | ||||||||||||||||||||||||||||||||||||||||||||||||||||||||||||||||||||||||||||||||||||||||||
| DD | Yamakaze | Medium+ | Hard+ | Hard+ | Hard+ | ||||||||||||||||||||||||||||||||||||||||||||||||||||||||||||||||||||||||||||||||||||||||||||||
| DD | Oyashio | Easy+ | Hard+ | ||||||||||||||||||||||||||||||||||||||||||||||||||||||||||||||||||||||||||||||||||||||||||||||||
| DD | Hatsukaze | Hard+ | Casual+ | Easy+ | Casual+ | Hard+ | Easy+ | Easy+ | Hard+ | Casual+ | |||||||||||||||||||||||||||||||||||||||||||||||||||||||||||||||||||||||||||||||||||||||||
| DD | Amatsukaze | Casual+ | |||||||||||||||||||||||||||||||||||||||||||||||||||||||||||||||||||||||||||||||||||||||||||||||||
| DD | Tokitsukaze | Hard+ | |||||||||||||||||||||||||||||||||||||||||||||||||||||||||||||||||||||||||||||||||||||||||||||||||
| DD | Isokaze | Casual+ | Easy+ | Medium+ | |||||||||||||||||||||||||||||||||||||||||||||||||||||||||||||||||||||||||||||||||||||||||||||||
| DD | Nowaki | Easy+ | Hard+ | Hard+ | Hard+ | ||||||||||||||||||||||||||||||||||||||||||||||||||||||||||||||||||||||||||||||||||||||||||||||
| DD | Arashi | Hard+ | Hard+ | Easy+ | Hard+ | ||||||||||||||||||||||||||||||||||||||||||||||||||||||||||||||||||||||||||||||||||||||||||||||
| DD | Hagikaze | Easy+ | Easy+ | Hard+ | Hard+ | Easy+ | |||||||||||||||||||||||||||||||||||||||||||||||||||||||||||||||||||||||||||||||||||||||||||||
| DD | Maikaze | Casual+ | Hard+ | Easy+ | Easy+ | Medium+ | Easy+ | Casual+ | Hard+ | Casual+ | |||||||||||||||||||||||||||||||||||||||||||||||||||||||||||||||||||||||||||||||||||||||||
| DD | Takanami | Easy+ | |||||||||||||||||||||||||||||||||||||||||||||||||||||||||||||||||||||||||||||||||||||||||||||||||
| DD | Akizuki | Casual+ | Casual+ | Hard+ | |||||||||||||||||||||||||||||||||||||||||||||||||||||||||||||||||||||||||||||||||||||||||||||||
| DD | Fletcher | Casual+ | Medium+ | Easy+ | |||||||||||||||||||||||||||||||||||||||||||||||||||||||||||||||||||||||||||||||||||||||||||||||
| CL | Brooklyn | Casual+ | |||||||||||||||||||||||||||||||||||||||||||||||||||||||||||||||||||||||||||||||||||||||||||||||||
| CL | Noshiro | Hard+ | |||||||||||||||||||||||||||||||||||||||||||||||||||||||||||||||||||||||||||||||||||||||||||||||||
| CL | Yahagi | Casual+ | |||||||||||||||||||||||||||||||||||||||||||||||||||||||||||||||||||||||||||||||||||||||||||||||||
| CL | Sakawa | Casual+ | |||||||||||||||||||||||||||||||||||||||||||||||||||||||||||||||||||||||||||||||||||||||||||||||||
| CL | Honolulu | Casual+ | |||||||||||||||||||||||||||||||||||||||||||||||||||||||||||||||||||||||||||||||||||||||||||||||||
| CL | Helena | Hard+ | Hard+ | Hard+ | |||||||||||||||||||||||||||||||||||||||||||||||||||||||||||||||||||||||||||||||||||||||||||||||
| CL | Atlanta | Hard+ | Hard+ | Hard+ | |||||||||||||||||||||||||||||||||||||||||||||||||||||||||||||||||||||||||||||||||||||||||||||||
| CA | Mikuma | Casual+ | |||||||||||||||||||||||||||||||||||||||||||||||||||||||||||||||||||||||||||||||||||||||||||||||||
| CA | Northampton | Medium+ | |||||||||||||||||||||||||||||||||||||||||||||||||||||||||||||||||||||||||||||||||||||||||||||||||
| CVL | Langley | Hard+ | Casual+ | ||||||||||||||||||||||||||||||||||||||||||||||||||||||||||||||||||||||||||||||||||||||||||||||||
| FBB | Massachusetts | Hard+ | |||||||||||||||||||||||||||||||||||||||||||||||||||||||||||||||||||||||||||||||||||||||||||||||||
| FBB | Washington | Easy+ | Medium+ | ||||||||||||||||||||||||||||||||||||||||||||||||||||||||||||||||||||||||||||||||||||||||||||||||
| FBB | Iowa | Medium+ | |||||||||||||||||||||||||||||||||||||||||||||||||||||||||||||||||||||||||||||||||||||||||||||||||
| BB | Maryland | Hard+ | Hard+ | Easy+ | |||||||||||||||||||||||||||||||||||||||||||||||||||||||||||||||||||||||||||||||||||||||||||||||
| DD | Yukikaze | Hard+ | |||||||||||||||||||||||||||||||||||||||||||||||||||||||||||||||||||||||||||||||||||||||||||||||||
| DD | Akigumo | Casual+ | Easy+ | Hard+ | Hard+ | Medium+ | Hard+ | Hard+ | Medium+ | Casual+ | |||||||||||||||||||||||||||||||||||||||||||||||||||||||||||||||||||||||||||||||||||||||||
| DD | Naganami | Casual+ | |||||||||||||||||||||||||||||||||||||||||||||||||||||||||||||||||||||||||||||||||||||||||||||||||
| CL | Kitakami | Casual+ | Casual+ | Medium+ | Hard+ | Easy+ | Casual+ | Medium+ | Hard+ | Casual+ | |||||||||||||||||||||||||||||||||||||||||||||||||||||||||||||||||||||||||||||||||||||||||
| CL | Ooi | Easy+ | Casual+ | Hard+ | Hard+ | Casual+ | Casual+ | Casual+ | Easy+ | ||||||||||||||||||||||||||||||||||||||||||||||||||||||||||||||||||||||||||||||||||||||||||
| CL | Kinu | Casual+ | |||||||||||||||||||||||||||||||||||||||||||||||||||||||||||||||||||||||||||||||||||||||||||||||||
| CL | Abukuma | Hard+ | |||||||||||||||||||||||||||||||||||||||||||||||||||||||||||||||||||||||||||||||||||||||||||||||||
| CL | Sendai | Hard+ | Easy+ | Easy+ | Easy+ | Easy+ | Medium+ | Hard+ | Casual+ | ||||||||||||||||||||||||||||||||||||||||||||||||||||||||||||||||||||||||||||||||||||||||||
| CL | Yuubari | Hard+ | |||||||||||||||||||||||||||||||||||||||||||||||||||||||||||||||||||||||||||||||||||||||||||||||||
| CA | Myoukou | Casual+ | |||||||||||||||||||||||||||||||||||||||||||||||||||||||||||||||||||||||||||||||||||||||||||||||||
| CA | Atago | Casual+ | |||||||||||||||||||||||||||||||||||||||||||||||||||||||||||||||||||||||||||||||||||||||||||||||||
| CA | Mogami | Easy+ | Casual+ | Hard+ | Easy+ | Casual+ | |||||||||||||||||||||||||||||||||||||||||||||||||||||||||||||||||||||||||||||||||||||||||||||
| CA | Suzuya | Medium+ | |||||||||||||||||||||||||||||||||||||||||||||||||||||||||||||||||||||||||||||||||||||||||||||||||
| CA | Kumano | Hard+ | |||||||||||||||||||||||||||||||||||||||||||||||||||||||||||||||||||||||||||||||||||||||||||||||||
| CA | Tone | Medium+ | Casual+ | Easy+ | Hard+ | Medium+ | Casual+ | ||||||||||||||||||||||||||||||||||||||||||||||||||||||||||||||||||||||||||||||||||||||||||||
| CA | Chikuma | Casual+ | Easy+ | Hard+ | Easy+ | Medium+ | Easy+ | Hard+ | |||||||||||||||||||||||||||||||||||||||||||||||||||||||||||||||||||||||||||||||||||||||||||
| CVL | Zuihou | Easy+ | Easy+ | Casual+ | |||||||||||||||||||||||||||||||||||||||||||||||||||||||||||||||||||||||||||||||||||||||||||||||
| FBB | Kongou | Casual+ | |||||||||||||||||||||||||||||||||||||||||||||||||||||||||||||||||||||||||||||||||||||||||||||||||
| FBB | Hiei | Easy+ | |||||||||||||||||||||||||||||||||||||||||||||||||||||||||||||||||||||||||||||||||||||||||||||||||
| FBB | Haruna | Hard+ | |||||||||||||||||||||||||||||||||||||||||||||||||||||||||||||||||||||||||||||||||||||||||||||||||
| FBB | Kirishima | Medium+ | Casual+ | Medium+ | |||||||||||||||||||||||||||||||||||||||||||||||||||||||||||||||||||||||||||||||||||||||||||||||
| BB | Ise | Casual+ | |||||||||||||||||||||||||||||||||||||||||||||||||||||||||||||||||||||||||||||||||||||||||||||||||
| BB | Hyuuga | Medium+ | |||||||||||||||||||||||||||||||||||||||||||||||||||||||||||||||||||||||||||||||||||||||||||||||||
| BB | Nagato | Casual+ | |||||||||||||||||||||||||||||||||||||||||||||||||||||||||||||||||||||||||||||||||||||||||||||||||
| BB | Mutsu | Hard+ | Casual+ | ||||||||||||||||||||||||||||||||||||||||||||||||||||||||||||||||||||||||||||||||||||||||||||||||
| CV | Kaga | Casual+ | |||||||||||||||||||||||||||||||||||||||||||||||||||||||||||||||||||||||||||||||||||||||||||||||||
| CV | Shoukaku | Hard+ | Casual+ | ||||||||||||||||||||||||||||||||||||||||||||||||||||||||||||||||||||||||||||||||||||||||||||||||
|
| ||||||||
|---|---|---|---|---|---|---|---|---|
|
Time remaining until Event ends [12]:
| ||||||||
KC anniversary maintenance has started, time remaining until maintenance ends [13]:
(~4h event pause)
| ||||||||
| ||||||||