- Welcome to the Kancolle Wiki!
- If you have any questions regarding site content, account registration, etc., please visit the KanColle Wiki Discord
Difference between revisions of "Help:Resource Farming"
m (Fixed some typos and grammar.) |
Jigaraphale (talk | contribs) |
||
| (49 intermediate revisions by 2 users not shown) | |||
| Line 19: | Line 19: | ||
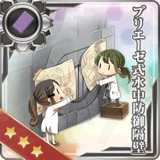
* For resource nodes, using appropriate gear ({{Landing Craft}}/{{Amphibious Tank}}/{{Drum}}) is essential to maximize gains: | * For resource nodes, using appropriate gear ({{Landing Craft}}/{{Amphibious Tank}}/{{Drum}}) is essential to maximize gains: | ||
{{Gain Modifier}} | {{Gain Modifier}} | ||
| − | * '''A battle has to be completed (win or loss) after the resource node''' in order to claim the resources. | + | {{Gain Modifier Sp}} |
| + | {{Gain Modifier Sp2}} | ||
| + | * '''A battle has to be completed (win or loss) after the resource node''' in order to claim the resources (refreshing the game will not work). | ||
** Exceptions are resource nodes that are dead-end nodes. | ** Exceptions are resource nodes that are dead-end nodes. | ||
| − | *In the following guide, {{Landing Craft}} and {{Amphibious Tank}} are fully interchangeable, and | + | ** Items are rewarded in any situation, so refreshing the game is fine to farm them. |
| + | *In the following guide, {{Landing Craft}} and {{Amphibious Tank}} are fully interchangeable, and refer to "type A craft" | ||
| + | |||
| + | ====1-6 Special Case==== | ||
| + | [[1-6]] is a unique case for farming, not listed in the following guide. Unlike all other node types, the final node {{MapRoute|N}} in 1-6 rewards great amount of all four resources {{Fuel}}{{Ammo}}{{Steel}}{{Bauxite}}, but only for the 7 clearing runs. | ||
| + | *It is therefore highly encouraged to clear 1-6 each month to earn those easy to get resources, | ||
| + | *1-6 additionally reward a {{PBox}} [[Present Box]] which is a nice asset for emergency situations. | ||
| + | |||
| + | ====6-3 Special Case==== | ||
| + | [[6-3]] has ''"Aerial Reconnaissance Nodes"''' and not "resource nodes", being a special kind of nodes only seen here, giving ammo {{Ammo}}, bauxite {{Bauxite}}, and DevMats {{DM}}. | ||
| + | *''See [[Air Reconnaissance|here]] for more details. | ||
===Expedition Tips=== | ===Expedition Tips=== | ||
| Line 29: | Line 41: | ||
**Some expeditions will reward a '''"high"''' amount of resources, but on a '''long timer''', being great on an "absolute gain" perspective, being more suited alongside '''AFK periods'''. | **Some expeditions will reward a '''"high"''' amount of resources, but on a '''long timer''', being great on an "absolute gain" perspective, being more suited alongside '''AFK periods'''. | ||
*Regarding consumables: | *Regarding consumables: | ||
| − | **Some expeditions will reward a "fixed" consumable, being rewarded 50% of the time, | + | **Some expeditions will reward a "fixed" consumable, being rewarded 50 % of the time, |
**Some expeditions will reward a "GS" consumable, being rewarded with "Great Success" only, | **Some expeditions will reward a "GS" consumable, being rewarded with "Great Success" only, | ||
**Since no expedition rewards more than very few consumables, there is no "long timer" expedition adequate for farming, unless the consumable is a side reward of other resources. | **Since no expedition rewards more than very few consumables, there is no "long timer" expedition adequate for farming, unless the consumable is a side reward of other resources. | ||
| Line 42: | Line 54: | ||
===Landing Craft Carriers=== | ===Landing Craft Carriers=== | ||
Here is a list of the Landing Equipment {{Landing Craft}}/{{Amphibious Tank}} capable ships, used in sorties and expeditions. | Here is a list of the Landing Equipment {{Landing Craft}}/{{Amphibious Tank}} capable ships, used in sorties and expeditions. | ||
| − | *Note that {{Ship/Link|Kinu/Kai Ni}} | + | *Note that {{Ship/Link|Kinu/Kai Ni}} has special behaviours in those cases. |
{{Landing_Craft/Amphibious_Tank_Capable_Ships}} | {{Landing_Craft/Amphibious_Tank_Capable_Ships}} | ||
| Line 53: | Line 65: | ||
Node {{MapRoute|D|green}} is a "normal resource node" rewarding 10~20 {{fuel}} | Node {{MapRoute|D|green}} is a "normal resource node" rewarding 10~20 {{fuel}} | ||
| − | *The maximum possible {{LandingCraft}} [[Landing Craft]] and {{Amphibious Tank}} | + | *The maximum possible {{LandingCraft}} [[Landing Craft]] and {{Amphibious Tank}} [[Amphibious Vehicle]]s should be equipped to maximize fuel gain. |
**{{Drum}} {{EquipmentLink|Drum Canister (Transport Use)|text=Drums}} work as an inferior substitute. | **{{Drum}} {{EquipmentLink|Drum Canister (Transport Use)|text=Drums}} work as an inferior substitute. | ||
**Only using those equipment in the fleet is a viable solution. | **Only using those equipment in the fleet is a viable solution. | ||
| − | *When lacking enough Amphibious | + | *When lacking enough Amphibious Vehicles for SS(V), Drum-capable SS are recommended as a substitute. |
| − | *When using an AO, the reach rate is 100%, but is only 80% when using an AV instead. | + | *When using an AO, the reach rate is 100 %, but is only 80 % when using an AV instead. |
*Once the first battle is complete, "retreat" and "[[resupply]]" before going back out. | *Once the first battle is complete, "retreat" and "[[resupply]]" before going back out. | ||
If done correctly, this can result in an outstanding fuel gain that can surpass [[expedition]] gains. | If done correctly, this can result in an outstanding fuel gain that can surpass [[expedition]] gains. | ||
| Line 80: | Line 92: | ||
! SS(V) | ! SS(V) | ||
| {{Amphibious Tank}}{{Amphibious Tank}} | | {{Amphibious Tank}}{{Amphibious Tank}} | ||
| − | | {{TorpedoWeapon}} are also viable options when lacking enough Amphibious | + | | {{TorpedoWeapon}} are also viable options when lacking enough Amphibious Vehicles. |
| − | * | + | *Drum-capable SS are also recommended as a substitute. |
|} | |} | ||
| Line 191: | Line 203: | ||
<tabber> | <tabber> | ||
Sortie= | Sortie= | ||
| + | ==[[2-4]]== | ||
| + | Node {{MapRoute|N|green}} is a "normal resource node" rewarding 20~60 {{Ammo}} | ||
| + | |||
| + | When doing {{DM}} DevMat farming, it is possible to further advance to node {{MapRoute|N|green}} with some fleets. | ||
| + | *''See below for more details. | ||
| + | |||
| + | ;Recommended Fleets | ||
| + | *'''1-2AO, 1AV/AS, 1-2CVL, 1-3CL(T), 0-2SS(V) | ||
| + | *Route = {{MapRoute|B|red|C|purple|G|green|H|blue|I|red|K|blue|N|green}} / {{MapRoute|B|red|G|green|H|blue|I|red|K|blue|N|green}} (not 100% routing) | ||
| + | **It is recommended to use CVL instead of CV(B) for 60 % of avoiding the maelstrom node. | ||
| + | |||
==[[3-2]]== | ==[[3-2]]== | ||
Node {{MapRoute|B|green}} is a "normal resource node" rewarding 50~150 {{Ammo}} | Node {{MapRoute|B|green}} is a "normal resource node" rewarding 50~150 {{Ammo}} | ||
| − | It is recommended to use a '''throwaway DD''' equipped with {{Landing Craft}}/{{Drum}}, and one {{EquipmentLink|Emergency Repair Personnel|Emergency Repair Goddess|text= | + | It is recommended to use a '''throwaway DD''' equipped with {{Landing Craft}}/{{Drum}}, and one {{EquipmentLink|Emergency Repair Personnel|Emergency Repair Goddess|text=Repair Personnel}}. |
*This saves on spending resources while completing the sortie. Alternatively, a set of good DD can be used, but they will need to be repaired, slowing down the farming rate. | *This saves on spending resources while completing the sortie. Alternatively, a set of good DD can be used, but they will need to be repaired, slowing down the farming rate. | ||
*If the battle on {{MapRoute|A|red}} critically damages the DD, select to use the Repair Personnel and continue onward. | *If the battle on {{MapRoute|A|red}} critically damages the DD, select to use the Repair Personnel and continue onward. | ||
| − | *'''The | + | *'''The Repair Personnel is not consumed while doing this process. |
| − | *Once complete, remove the | + | *Once complete, remove the Repair Personnel from the DD, that can now be scrapped, and repeat. |
Another method is to send a fleet of 3-6SS(V) using {{Amphibious Tank}}. This method brings a bit greater return at a higher risk and has steeper requirements. | Another method is to send a fleet of 3-6SS(V) using {{Amphibious Tank}}. This method brings a bit greater return at a higher risk and has steeper requirements. | ||
{{color|red|Doing this farming will bring a lot of "losses", which can impact the overall win rate and so the "event eligibility".}} | {{color|red|Doing this farming will bring a lot of "losses", which can impact the overall win rate and so the "event eligibility".}} | ||
| − | |||
;Recommended Fleet | ;Recommended Fleet | ||
| Line 221: | Line 243: | ||
! SS(V) | ! SS(V) | ||
| {{Amphibious Tank}}{{Amphibious Tank}} | | {{Amphibious Tank}}{{Amphibious Tank}} | ||
| − | | {{TorpedoWeapon}} are also viable options when lacking enough Amphibious | + | | {{TorpedoWeapon}} are also viable options when lacking enough Amphibious Vehicles. |
| − | * | + | *Drum-capable SS are also recommended as a substitute. |
|} | |} | ||
| Line 234: | Line 256: | ||
!Side<br>Resource | !Side<br>Resource | ||
|- | |- | ||
| − | | | + | | 02|| 00:30|| 200||{{Steel}}{{IR}} |
|- | |- | ||
| 05|| 01:30|| 133||{{Fuel}}{{Steel}}{{Bauxite}} | | 05|| 01:30|| 133||{{Fuel}}{{Steel}}{{Bauxite}} | ||
| Line 265: | Line 287: | ||
==[[1-4]]== | ==[[1-4]]== | ||
Node {{MapRoute|C|green}} is a "normal resource node" rewarding 10~20 {{Steel}} | Node {{MapRoute|C|green}} is a "normal resource node" rewarding 10~20 {{Steel}} | ||
| − | *Also | + | *Also rewads the same quantity of {{Ammo}}. |
Not a great place to farm {{Steel}}. This is mitigated by the easy route, low cost, and the other resources gained. | Not a great place to farm {{Steel}}. This is mitigated by the easy route, low cost, and the other resources gained. | ||
;Recommended Fleets | ;Recommended Fleets | ||
* 0-1AV, 1-2CVL, 3DD, 1SS(V) | * 0-1AV, 1-2CVL, 3DD, 1SS(V) | ||
| − | *Route = {{MapRoute|B|red|C|green|F|blue| | + | *Route = {{MapRoute|B|red|C|green|F|blue|E|green|H|red}} |
**There is a random chance to go on the South route instead. | **There is a random chance to go on the South route instead. | ||
| Line 290: | Line 312: | ||
! SS(V) | ! SS(V) | ||
| {{Amphibious Tank}}{{Amphibious Tank}} | | {{Amphibious Tank}}{{Amphibious Tank}} | ||
| − | | {{TorpedoWeapon}} are also viable options when lacking enough Amphibious | + | | {{TorpedoWeapon}} are also viable options when lacking enough Amphibious Vehicles. |
| − | * | + | *Drum-capable SS are also recommended as a substitute. |
|- | |- | ||
! AV | ! AV | ||
| Line 439: | Line 461: | ||
|- | |- | ||
| 15|| 12:00|| 400||{{Steel}}{{FBlarge}}{{DM}} | | 15|| 12:00|| 400||{{Steel}}{{FBlarge}}{{DM}} | ||
| + | |- | ||
| + | | 45|| 3:20|| 220||{{Fuel}}{{FBmedium}} | ||
|- | |- | ||
| 35|| 07:00|| 280||{{Steel}}{{FBsmall}}{{DM}} | | 35|| 07:00|| 280||{{Steel}}{{FBsmall}}{{DM}} | ||
| Line 451: | Line 475: | ||
==[[2-4]]== | ==[[2-4]]== | ||
Node {{MapRoute|A|green}} is a "special resource node" rewarding 1 {{IR}}. | Node {{MapRoute|A|green}} is a "special resource node" rewarding 1 {{IR}}. | ||
| − | *Using 4 {{LandingCraft}} [[Landing Craft]] and/or {{Amphibious Tank}} | + | *Using 4 {{LandingCraft}} [[Landing Craft]] and/or {{Amphibious Tank}} [[Amphibious Vehicle]]s give a 33 % chance of rewarding 2 {{IR}}. |
*Using more than 4 will not increase this rate. | *Using more than 4 will not increase this rate. | ||
| Line 461: | Line 485: | ||
* 3CV, 2-3CA(V)/CL/SS(V), 0-1DD | * 3CV, 2-3CA(V)/CL/SS(V), 0-1DD | ||
*Route = {{MapRoute|B|red|C|purple|F|red|A|green}} | *Route = {{MapRoute|B|red|C|purple|F|red|A|green}} | ||
| − | **50% chance to route to {{MapRoute|A|green}}, 50% to {{MapRoute|G|green}} | + | **50 % chance to route to {{MapRoute|A|green}}, 50 % to {{MapRoute|G|green}} |
| − | **No CVL allowed and 1DD max, otherwise | + | **No CVL allowed and 1DD max, otherwise, the routing to {{MapRoute|A|green}} becomes even worse. |
;Equipment Setups | ;Equipment Setups | ||
| Line 480: | Line 504: | ||
| {{BluePlane}}{{RedPlane}}{{GreenPlane}}{{Radar}}<br>{{BluePlane}}{{BluePlane}}{{RedPlane}}{{Radar}} | | {{BluePlane}}{{RedPlane}}{{GreenPlane}}{{Radar}}<br>{{BluePlane}}{{BluePlane}}{{RedPlane}}{{Radar}} | ||
| At least 144 fighter power is needed for AS+ on node F. When enough fighters are used to reach this value, the other planes can be bombers to maximize damage. | | At least 144 fighter power is needed for AS+ on node F. When enough fighters are used to reach this value, the other planes can be bombers to maximize damage. | ||
| − | *It is recommended to use carriers with at least "'''[[Range|medium range]]'''", so that their attack takes priority over the other ships. ''See [[Range]] for more details. | + | *It is recommended to use carriers with at least "'''[[Range|medium range]]'''", so that their attack takes priority over the other ships. ''See [[Range]] for more details. |
*The [[Radar]] can be used to block the largest slot and limit bauxite losses. | *The [[Radar]] can be used to block the largest slot and limit bauxite losses. | ||
|- | |- | ||
| Line 500: | Line 524: | ||
!colspan=5|Short | !colspan=5|Short | ||
|- | |- | ||
| − | | 02|| 00: | + | | 02|| 00:30|| 1|| 0||{{Ammo}}{{Steel}} |
|- | |- | ||
| 04|| 00:50|| 1|| 0||{{Ammo}}{{FBsmall}} | | 04|| 00:50|| 1|| 0||{{Ammo}}{{FBsmall}} | ||
| Line 532: | Line 556: | ||
|{{Q|Bd8}}||1 | |{{Q|Bd8}}||1 | ||
|- | |- | ||
| − | |{{Q| | + | |{{Q|Ed1}}||{{Qsupply}}||2 |
|- | |- | ||
| − | |{{Q| | + | |{{Q|Fd2}}||rowspan=3|{{Qfactory}}||1 |
|- | |- | ||
| − | |{{Q| | + | |{{Q|Fd5}}||1 |
|- | |- | ||
| − | |{{Q| | + | |{{Q|Fd8}}||1 |
|- | |- | ||
|{{Q|G2}}||{{Qmodernization}}||1 | |{{Q|G2}}||{{Qmodernization}}||1 | ||
| Line 557: | Line 581: | ||
|{{Q|Bw8}}||1 | |{{Q|Bw8}}||1 | ||
|- | |- | ||
| − | |{{Q| | + | |{{Q|Fw3}}||rowspan=2|{{Qfactory}}||1 |
|- | |- | ||
| − | |{{Q| | + | |{{Q|Fw4}}||5 |
|} | |} | ||
| Line 574: | Line 598: | ||
|{{Q|Bm8}}||4||Choice | |{{Q|Bm8}}||4||Choice | ||
|- | |- | ||
| − | |{{Q| | + | |{{Q|Cm1}}||rowspan=2|{{Qpvp}}||2 |
|- | |- | ||
| − | |{{Q| | + | |{{Q|Cm2}}||2||Choice |
|} | |} | ||
| Line 591: | Line 615: | ||
|{{Q|Bq13}}||10||Choice | |{{Q|Bq13}}||10||Choice | ||
|- | |- | ||
| − | |{{Q| | + | |{{Q|Cq4}}||{{Qpvp}}||4||Choice |
|} | |} | ||
| Line 602: | Line 626: | ||
!Notes | !Notes | ||
|- | |- | ||
| − | |{{Q| | + | |{{Q|Cs2}}||{{Qpvp}}||5||Choice |
| − | |||
| − | |||
|} | |} | ||
| Line 625: | Line 647: | ||
|{{Q|By12}}||9||Choice | |{{Q|By12}}||9||Choice | ||
|- | |- | ||
| − | |{{Q| | + | |{{Q|Cy1}}||rowspan=6|{{Qpvp}}||5||Choice |
|- | |- | ||
| − | |{{Q| | + | |{{Q|Cy2}}||4||Choice |
|- | |- | ||
| − | |{{Q| | + | |{{Q|Cy3}}||3||Choice |
|- | |- | ||
| − | |{{Q| | + | |{{Q|Cy4}}||4||Choice |
|- | |- | ||
| − | |{{Q| | + | |{{Q|Cy11}}||3||Choice |
|- | |- | ||
| − | |{{Q| | + | |{{Q|Cy12}}||2||Choice |
|- | |- | ||
| − | |{{Q| | + | |{{Q|Dy1}}||rowspan=4|{{Qexpedition}}||5||Choice |
|- | |- | ||
| − | |{{Q| | + | |{{Q|Dy2}}||4||Choice |
|- | |- | ||
| − | |{{Q| | + | |{{Q|Dy5}}||6||Choice |
|- | |- | ||
| − | |{{Q| | + | |{{Q|Dy8}}||5||Choice |
|- | |- | ||
| − | |{{Q| | + | |{{Q|Gy1}}||rowspan=3|{{Qmodernization}}||1||Choice |
| + | |- | ||
| + | |{{Q|Gy2}}||2||Choice | ||
| + | |- | ||
| + | |{{Q|Gy3}}||2||Choice | ||
|} | |} | ||
| Line 719: | Line 745: | ||
|{{Q|Bd7}}||{{Qsortie}}||1 | |{{Q|Bd7}}||{{Qsortie}}||1 | ||
|- | |- | ||
| − | |{{Q| | + | |{{Q|Cd1}}||{{Qpvp}}||1 |
|- | |- | ||
| − | |{{Q| | + | |{{Q|Ed2}}||{{Qsupply}}||1 |
|- | |- | ||
| − | |{{Q| | + | |{{Q|Fd1}}||rowspan=2|{{Qfactory}}||1 |
|- | |- | ||
| − | |{{Q| | + | |{{Q|Fd4}}||1 |
|} | |} | ||
| Line 738: | Line 764: | ||
|{{Q|Bw1}}||{{Qsortie}}||2 | |{{Q|Bw1}}||{{Qsortie}}||2 | ||
|- | |- | ||
| − | |{{Q| | + | |{{Q|Gw1}}||{{Qmodernization}}||1 |
|} | |} | ||
</tabber> | </tabber> | ||
| Line 753: | Line 779: | ||
*It is recommended to farm for {{IR}} Buckets too, as they are rewarded on the off-route path (see above). | *It is recommended to farm for {{IR}} Buckets too, as they are rewarded on the off-route path (see above). | ||
*It is additionally recommended to bring 1 {{Surface Radar}} [[Surface Radar]] on each girl to diminish the resource losses on the storm maelstrom. | *It is additionally recommended to bring 1 {{Surface Radar}} [[Surface Radar]] on each girl to diminish the resource losses on the storm maelstrom. | ||
| + | *After reaching node {{MapRoute|G|green}}, '''it is possible to refresh the game to save time and resources'''. | ||
;Recommended Fleets | ;Recommended Fleets | ||
* '''3CV, 2-3CA(V)/CL/SS(V), 0-1DD | * '''3CV, 2-3CA(V)/CL/SS(V), 0-1DD | ||
| − | * 3CV | + | * 3CV(L), 1AO, 2SS(V) |
*Route = {{MapRoute|B|red|C|purple|G|green|H|blue|I|red}} | *Route = {{MapRoute|B|red|C|purple|G|green|H|blue|I|red}} | ||
| − | **50% chance to route to {{MapRoute|A|green}}, 50% to {{MapRoute|G|green}} | + | **50 % chance to route to {{MapRoute|A|green}}, 50 % to {{MapRoute|G|green}} |
| − | **When farming for buckets too, no CVL allowed and 1DD max, | + | **When farming for buckets too, no CVL allowed and 1DD max, otherwise, the routing to {{MapRoute|A|green}} becomes even worse. |
| + | |||
| + | *'''1AO, 2CVL, 3CL(T) | ||
| + | *1-2AO, 0-1AV/AS, 1-2CVL, 1-3CL(T), 0-2SS(V) | ||
| + | *Route = {{MapRoute|B|red|C|purple|G|green|H|blue|I|red}} / {{MapRoute|B|red|G|green|H|blue|I|red}} | ||
| + | **It is recommended to use CVL instead of CV(B) for 60 % of avoiding the maelstrom node. | ||
| + | **The AV/AS are only needed to reach node {{MapRoute|N|green}} for {{Ammo}} farming (not 100% routing). | ||
;Equipment Setups | ;Equipment Setups | ||
| Line 786: | Line 819: | ||
*{{Amphibious Tank}} are only useful when trying to farm for buckets as well. | *{{Amphibious Tank}} are only useful when trying to farm for buckets as well. | ||
|- | |- | ||
| − | ! AO | + | ! AO/AS |
| {{WildCard}}{{WildCard}}{{Radar}} | | {{WildCard}}{{WildCard}}{{Radar}} | ||
| − | | Because of their nature, AO do not have a standard setup. The general rule is to make them as less of a dead weight as possible, usually giving them guns, planes, or armor. | + | | Because of their nature, AO/AS do not have a standard setup. The general rule is to make them as less of a dead weight as possible, usually giving them guns, planes, or armor. |
|} | |} | ||
| Line 868: | Line 901: | ||
|{{Q|Bd6}}||2 | |{{Q|Bd6}}||2 | ||
|- | |- | ||
| − | |{{Q| | + | |{{Q|Cd2}}||{{Qpvp}}||1 |
|- | |- | ||
| − | |{{Q| | + | |{{Q|Dd1}}||{{Qexpedition}}||1 |
|- | |- | ||
| − | |{{Q| | + | |{{Q|Ed2}}||{{Qsupply}}||1 |
|- | |- | ||
| − | |{{Q| | + | |{{Q|Fd1}}||rowspan=6|{{Qfactory}}||1 |
|- | |- | ||
| − | |{{Q| | + | |{{Q|Fd2}}||1 |
|- | |- | ||
| − | |{{Q| | + | |{{Q|Fd3}}||2 |
|- | |- | ||
| − | |{{Q| | + | |{{Q|Fd4}}||2 |
|- | |- | ||
| − | |{{Q| | + | |{{Q|Fd7}}||1 |
|- | |- | ||
| − | |{{Q| | + | |{{Q|Fd8}}||1 |
|} | |} | ||
| Line 909: | Line 942: | ||
|{{Q|Bw9}}||2 | |{{Q|Bw9}}||2 | ||
|- | |- | ||
| − | |{{Q| | + | |{{Q|Cw1}}||{{Qpvp}}||2 |
|- | |- | ||
| − | |{{Q| | + | |{{Q|Dw1}}||rowspan=2|{{Qexpedition}}||3 |
|- | |- | ||
| − | |{{Q| | + | |{{Q|Dw3}}||2 |
|- | |- | ||
| − | |{{Q| | + | |{{Q|Fw2}}||rowspan=2|{{Qfactory}}||2 |
|- | |- | ||
| − | |{{Q| | + | |{{Q|Fw3}}||7 |
|- | |- | ||
| − | |{{Q| | + | |{{Q|Gw1}}||{{Qmodernization}}||2 |
|} | |} | ||
| Line 940: | Line 973: | ||
|{{Q|Bm8}}||4||Choice | |{{Q|Bm8}}||4||Choice | ||
|- | |- | ||
| − | |{{Q| | + | |{{Q|Cm2}}||{{Qpvp}}||2||Choice |
|} | |} | ||
| Line 955: | Line 988: | ||
|{{Q|Bq9}}||4||Choice | |{{Q|Bq9}}||4||Choice | ||
|- | |- | ||
| − | |{{Q| | + | |{{Q|Cq1}}||rowspan=3|{{Qpvp}}||3||Choice |
|- | |- | ||
| − | |{{Q| | + | |{{Q|Cq3}}||8||Choice |
|- | |- | ||
| − | |{{Q| | + | |{{Q|Cq4}}||4||Choice |
|- | |- | ||
| − | |{{Q| | + | |{{Q|Dq1}}||{{Qexpedition}}||4 |
|- | |- | ||
| − | |{{Q| | + | |{{Q|Fq2}}||rowspan=5|{{Qfactory}}||2 |
|- | |- | ||
| − | |{{Q| | + | |{{Q|Fq3}}||3 |
|- | |- | ||
| − | |{{Q| | + | |{{Q|Fq4}}||4 |
|- | |- | ||
| − | |{{Q| | + | |{{Q|Fq5}}||8||Choice |
|- | |- | ||
| − | |{{Q| | + | |{{Q|Fq6}}||6||Choice |
|} | |} | ||
| Line 994: | Line 1,027: | ||
|{{Q|By11}}||8||Choice | |{{Q|By11}}||8||Choice | ||
|- | |- | ||
| − | |{{Q| | + | |{{Q|Cy1}}||rowspan=7|{{Qpvp}}||4||Choice |
| + | |- | ||
| + | |{{Q|Cy2}}||6||Choice | ||
| + | |- | ||
| + | |{{Q|Cy8}}||4||Choice | ||
|- | |- | ||
| − | |{{Q| | + | |{{Q|Cy9}}||6||Choice |
|- | |- | ||
| − | |{{Q| | + | |{{Q|Cy10}}||6||Choice |
|- | |- | ||
| − | |{{Q| | + | |{{Q|Cy11}}||3||Choice |
|- | |- | ||
| − | |{{Q| | + | |{{Q|Cy12}}||7||Choice |
|- | |- | ||
| − | |{{Q| | + | |{{Q|Dy3}}||rowspan=5|{{Qexpedition}}||7||Choice |
|- | |- | ||
| − | |{{Q| | + | |{{Q|Dy4}}||5||Choice |
|- | |- | ||
| − | |{{Q| | + | |{{Q|Dy5}}||4||Choice |
|- | |- | ||
| − | |{{Q| | + | |{{Q|Dy7}}||6||Choice |
|- | |- | ||
| − | |{{Q| | + | |{{Q|Dy8}}||6||Choice |
|- | |- | ||
| − | |{{Q| | + | |{{Q|Fy1}}||rowspan=6|{{Qfactory}}||10 |
|- | |- | ||
| − | |{{Q| | + | |{{Q|Fy3}}||10||Choice |
|- | |- | ||
| − | |{{Q| | + | |{{Q|Fy5}}||5||Choice |
|- | |- | ||
| − | |{{Q| | + | |{{Q|Fy6}}||5||Choice |
|- | |- | ||
| − | |{{Q| | + | |{{Q|Fy7}}||10||Choice |
|- | |- | ||
| − | |{{Q| | + | |{{Q|Fy9}}||8||Choice |
|- | |- | ||
| − | |{{Q| | + | |{{Q|Gy1}}||rowspan=4|{{Qmodernization}}||2||Choice |
|- | |- | ||
| − | |{{Q| | + | |{{Q|Gy2}}||3||Choice |
|- | |- | ||
| − | |{{Q| | + | |{{Q|Gy3}}||3||Choice |
| + | |- | ||
| + | |{{Q|Gy4}}||4||Choice | ||
|} | |} | ||
</tabber> | </tabber> | ||
| Line 1,078: | Line 1,117: | ||
!Notes | !Notes | ||
|- | |- | ||
| − | |{{Q| | + | |{{Q|Fd6}}||{{Qfactory}}||1 |
|} | |} | ||
| Line 1,099: | Line 1,138: | ||
|{{Q|Bw10}}||3 | |{{Q|Bw10}}||3 | ||
|- | |- | ||
| − | |{{Q| | + | |{{Q|Cw1}}||{{Qpvp}}||1 |
|- | |- | ||
| − | |{{Q| | + | |{{Q|Dw3}}||{{Qexpedition}}||1 |
|- | |- | ||
| − | |{{Q| | + | |{{Q|Fw2}}||{{Qfactory}}||1 |
|} | |} | ||
| Line 1,147: | Line 1,186: | ||
|{{Q|Bq11}}||2||Choice | |{{Q|Bq11}}||2||Choice | ||
|- | |- | ||
| − | |{{Q| | + | |{{Q|Cq2}}||rowspan=2|{{Qpvp}}||3||Choice |
|- | |- | ||
| − | |{{Q| | + | |{{Q|Cq3}}||3||Choice |
|- | |- | ||
| − | |{{Q| | + | |{{Q|Fq1}}||rowspan=2|{{Qfactory}}||3 |
|- | |- | ||
| − | |{{Q| | + | |{{Q|Fq4}}||4||Choice |
|} | |} | ||
| Line 1,164: | Line 1,203: | ||
!Notes | !Notes | ||
|- | |- | ||
| − | |{{Q|By1}}||rowspan= | + | |{{Q|By1}}||rowspan=8|{{Qsortie}}||4||Choice |
|- | |- | ||
|{{Q|By4}}||4||Choice | |{{Q|By4}}||4||Choice | ||
| Line 1,174: | Line 1,213: | ||
|{{Q|By12}}||4||Choice | |{{Q|By12}}||4||Choice | ||
|- | |- | ||
| − | |{{Q| | + | |{{Q|By13}}||2||Choice |
|- | |- | ||
| − | |{{Q| | + | |{{Q|By14}}||3||Choice |
|- | |- | ||
| − | |{{Q| | + | |{{Q|By15}}||5||Choice |
|- | |- | ||
| − | |{{Q| | + | |{{Q|Cy3}}||rowspan=6|{{Qpvp}}||3||Choice |
|- | |- | ||
| − | |{{Q| | + | |{{Q|Cy7}}||3||Choice |
|- | |- | ||
| − | |{{Q| | + | |{{Q|Cy8}}||3||Choice |
|- | |- | ||
| − | |{{Q| | + | |{{Q|Cy9}}||4||Choice |
|- | |- | ||
| − | |{{Q| | + | |{{Q|Cy10}}||4||Choice |
|- | |- | ||
| − | |{{Q| | + | |{{Q|Cy12}}||2||Choice |
|- | |- | ||
| − | |{{Q| | + | |{{Q|Dy1}}||rowspan=5|{{Qexpedition}}||3||Choice |
|- | |- | ||
| − | |{{Q| | + | |{{Q|Dy3}}||3||Choice |
|- | |- | ||
| − | |{{Q| | + | |{{Q|Dy4}}||4||Choice |
|- | |- | ||
| − | |{{Q| | + | |{{Q|Dy7}}||3||Choice |
|- | |- | ||
| − | |{{Q| | + | |{{Q|Dy8}}||4||Choice |
|- | |- | ||
| − | |{{Q| | + | |{{Q|Fy1}}||rowspan=8|{{Qfactory}}||5||Choice |
|- | |- | ||
| − | |{{Q| | + | |{{Q|Fy3}}||5||Choice |
|- | |- | ||
| − | |{{Q| | + | |{{Q|Fy4}}||4||Choice |
|- | |- | ||
| − | |{{Q| | + | |{{Q|Fy5}}||2||Choice |
|- | |- | ||
| − | |{{Q| | + | |{{Q|Fy6}}||2||Choice |
| + | |- | ||
| + | |{{Q|Fy7}}||8||Choice | ||
| + | |- | ||
| + | |{{Q|Fy8}}||3||Choice | ||
| + | |- | ||
| + | |{{Q|Fy9}}||3||Choice | ||
| + | |- | ||
| + | |{{Q|Gy2}}||rowspan=2|{{Qmodernization}}||2||Choice | ||
| + | |- | ||
| + | |{{Q|Gy4}}||2||Choice | ||
|} | |} | ||
| + | |||
| + | ;{{Q|Fd6}} Special Case | ||
| + | Unlike all other quests, Fd6 requires to perform an [[improvement]] in order to be completed, meaning that screws have to be consumed. | ||
| + | *This quest is then to be taken as a "daily improvement 1 screw discount" for any improvement, saving screws in the long term. | ||
| + | *In addition, as upgrading {{Rations}} {{EquipmentLink|Combat Ration|text=Onigiris}} up to +6★ cost '''0''' screw, it is possible to farm some screw by upgrading a ration once a day while doing this quest. | ||
| + | |||
</tabber> | </tabber> | ||
</div> | </div> | ||
| + | |||
| + | =Kuso Strat= | ||
| + | Sinking a ship loses it definitely, but also gives back all its current {{fuel}} fuel & {{ammo}} ammo (''see [[Resources#Sinking_Ship_Girls|here]]''). | ||
| + | *Therefore, when only looking for fuel & ammo, and not for steel, sinking ships will bring more resources than scrapping them. | ||
| + | |||
| + | This start revolves around the fact of dropping ships, unequipping them to scrap their stock equipment, and then sending them on regular farming locations to purposefully sink them and gain their resources. | ||
| + | *If done right, this can bring some extra resources from ship drops. | ||
=Other Consumables= | =Other Consumables= | ||
| Line 1,230: | Line 1,292: | ||
*{{AvMat}} [[New Model Aerial Armament Material]]s, | *{{AvMat}} [[New Model Aerial Armament Material]]s, | ||
*{{RocketMat}} [[New Model Rocket Development Material]]s, | *{{RocketMat}} [[New Model Rocket Development Material]]s, | ||
| − | *{{ArmMat}} [[New Model Armament Material]]s. | + | *{{ArmMat}} [[New Model Armament Material]]s, |
| + | *{{Item/Icon|Latest Overseas Warship Technology|size=25px}} [[Latest Overseas Warship Technology]]. | ||
=See Also= | =See Also= | ||
{{Help}} | {{Help}} | ||
Revision as of 20:18, 21 November 2024
This article aims to provide advice on the better ways to farm the main resources (![]()
![]()
![]()
![]() ) and consumables (
) and consumables (![]()
![]()
![]()
![]() ).
).
- As some general rules
- Expeditions are the best way to gain most resources, with the advantage of being AFK compatible,
- Quests are often the better way to farm consumables, especially screws
 ,
, - Sorties generally provide the greatest hourly gain for any resource/consumable, but at the cost of more active playtime and some other resources.
- Notes
- Special resources are not detailed here, as they are difficult to "farm", please refer to each individual page for more details.
- Only repeatable quests are listed on this page, as they are the most relevant in a "farming mindset",
- One-time quests can also be a major source of resources. Please refer to Quests for more details.
- Except for screws, monthly expeditions are also omitted here, as while they reward great amounts of resources and consumables, they are incompatible with a "farming mindset",
- Events and limited-time quests are often a great way to gain all types of consumables, with some events introducing great resource farming spots.
- Please refer to the current event's page for more details on such addition.
General Tips
Sortie Tips
Resources in sorties are gained from Resource Nodes and Scraping dropped ships.
- Using the lightest possible fleet is recommended to reduce the average sortie costs and so maximize gains.
- For resource nodes, using appropriate gear (
 /
/ /
/ ) is essential to maximize gains:
| ExpandNormal Resource Nodes Gain Modifiers |
|---|


| ExpandSpecial Resource Nodes Gain Modifiers Type 1 |
|---|


| ExpandSpecial Resource Nodes Gain Modifiers Type 2 |
|---|
- A battle has to be completed (win or loss) after the resource node in order to claim the resources (refreshing the game will not work).
- Exceptions are resource nodes that are dead-end nodes.
- Items are rewarded in any situation, so refreshing the game is fine to farm them.
- In the following guide, and are fully interchangeable, and refer to "type A craft"
1-6 Special Case
1-6 is a unique case for farming, not listed in the following guide. Unlike all other node types, the final node N in 1-6 rewards great amount of all four resources ![]()
![]()
![]()
![]() , but only for the 7 clearing runs.
, but only for the 7 clearing runs.
- It is therefore highly encouraged to clear 1-6 each month to earn those easy to get resources,
- 1-6 additionally reward a
 Present Box which is a nice asset for emergency situations.
6-3 Special Case
6-3 has "Aerial Reconnaissance Nodes"' and not "resource nodes", being a special kind of nodes only seen here, giving ammo ![]() , bauxite
, bauxite ![]() , and DevMats
, and DevMats ![]() .
.
- See here for more details.
Expedition Tips
Expeditions come in various types and forms, being each more or less suited for some resources or even farming methods.
- Regarding resources:
- Some expeditions will reward a "modest" amount of resources, but on a short timer, being great on an "hourly gain" perspective, being more suited alongside active gameplay,
- Some expeditions will reward a "high" amount of resources, but on a long timer, being great on an "absolute gain" perspective, being more suited alongside AFK periods.
- Regarding consumables:
- Some expeditions will reward a "fixed" consumable, being rewarded 50 % of the time,
- Some expeditions will reward a "GS" consumable, being rewarded with "Great Success" only,
- Since no expedition rewards more than very few consumables, there is no "long timer" expedition adequate for farming, unless the consumable is a side reward of other resources.
- For most expeditions, having a "Great Success" is advisable, especially for "short timer" ones.
- This mostly requires sparkling ships, which is time-consuming, but still worth it when trying to reach greater hourly gains,
- See Success Conditions for more details.
Quest Tips
Quests are mostly used to farm consumables (![]()
![]()
![]()
![]() ).
).
- While it is ideal to use the lightest fleets possible to maximize primary resource gains, it is more important to use fleets that reliably clear the quests.
Landing Craft Carriers
Here is a list of the Landing Equipment ![]() /
/![]() capable ships, used in sorties and expeditions.
capable ships, used in sorties and expeditions.
- Note that Kinu Kai Ni
 has special behaviours in those cases.
| ExpandShips that can equip Landing Craft / Amphibious Vehicles |
|---|


 FuelExpand
 AmmunitionsExpand


 SteelExpand
 BauxiteExpand
 Instant Repair MaterialsExpand
 Instant Construction MaterialsExpand
 Development MaterialsExpand
Improvement MaterialsExpand

Kuso Strat
Sinking a ship loses it definitely, but also gives back all its current ![]() fuel &
fuel & ![]() ammo (see here).
ammo (see here).
- Therefore, when only looking for fuel & ammo, and not for steel, sinking ships will bring more resources than scrapping them.
This start revolves around the fact of dropping ships, unequipping them to scrap their stock equipment, and then sending them on regular farming locations to purposefully sink them and gain their resources.
- If done right, this can bring some extra resources from ship drops.
Other Consumables
Special resources are not detailed on this page, as they are difficult to "farm", please refer to each individual page for more details:
 Irako,
 Mamiya,

 Furniture Boxes,
- Present Boxes,
 Reinforcement Expansions,
 Skilled Crew Members,
 Medals,
 Remodel Blueprints,
 Action Reports,
 Prototype Flight Deck Catapults,
 New Model Gun Mount Improvement Materials,
 New Model Aerial Armament Materials,
 New Model Rocket Development Materials,
 New Model Armament Materials,
 Latest Overseas Warship Technology.
See Also
| ||