|
Time remaining until Event ends:
October 14 2022 11:00:00 +0900
The Summer 2022 Event has ended.
|
The Winds of Alexandria
アレクサンドリアの風
| Rewards
|
| All
|

|
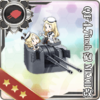
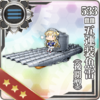
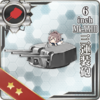
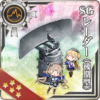
| Equipment/Item
|
丁
Casual
|
丙
Easy
|
乙
Medium
|
甲
Hard
|
|
|
|
|
|
|
|
|
|
|
|
|
|
|
|
|
|
|
|
|
|
|
|
|
|
|
|
|
|
|
|
|
|
|
|
|
|
|
|
|
|
|
|
|
|
|
|
|
|
|
|
|
|
|
|
|
|
|
|
|
|
|
|
|
|
|
The event guides are to be constructed through the respective Event map page guide sandbox and reviewed by editors before being approved here.
- Do not update the guides through this page unless it is a minor fix. Please only update guides through their respective sandbox pages.
Branching Table
| E-3 Start Point
|
| Nodes |
Rules
|
| Start
|
|
|
|
|
|
| E-3 Branching Rules (Start Point 1)
|
| Nodes |
Rules
|
|
|
|
- Meet ALL of the following requirements:
- Fleet is Fast
- Amount of CV(B) ≤ 1
- Amount of CL ≥ 1
- Amount of DD ≥ 2
|
|
|
- Does not meet the requirements to go to A
|
|
|
|
- Meet ALL of the following requirements:
- Amount of CV(B) ≤ 1
- Amount of DD ≥ 2
|
|
|
- Does not meet the requirements to go to A
|
|
|
|
Choose your own adventure!
|
|
|
|
|
|
- Meet ANY of the following requirements:
|
|
|
- Does not meet the requirements to go to D
|
| E-3 Branching Rules (Start Point 2)
|
| Nodes |
Rules
|
|
|
|
- Does not meet the requirements to go to F2
|
|
|
- Meet ALL of the following requirements:
- Fleet is Fast or TCF with (F)BB(V) = 0
- Amount of (F)BB(V) ≤ 1
- Amount of DD ≥ 3
- Amount of SS(V) = 0
|
|
|
|
|
|
|
- Does not meet the requirements to go to H
|
|
|
- Meet ALL of the following requirements:
- Amount of SS(V) = 0
- Amount of CV(B) ≤ 1
- Amount of CV(L/B) ≤ 3
- Amount of (F)BB(V) ≤ 3
- Amount of (F)BB(V) + CV(B) ≤ 4
- Amount of (F)BB(V) + CV(L/B) ≤ 5
|
|
|
|
- Meet ALL of the following requirements:
- Amount of SS(V) = 0
- Amount of CV(B) ≤ 2
- Amount of (F)BB(V) ≤ 2(?)
- Amount of (F)BB(V) + CV(L/B) ≤ 4
|
|
|
- Does not meet the requirements to go to H
|
|
|
|
Choose your own adventure!
|
|
|
|
|
|
Choose your own adventure!
|
|
|
|
|
|
|
|
|
|
|
|
|
- Does not meet the requirements to go to N or M2
|
|
|
- Meet ALL of the following requirements:
- Does not meet the requirements to go to N
- Fleet is Fast
- Amount of CL + DD = 4
|
|
|
- Meet ALL of the following requirements:
- Fleet is Fast
- Amount of CL + DD ≥ 5
- Amount of (F)BB(V) + CV(L/B) ≤ 4
|
|
|
|
Force R if fail LoS Check
|
|
|
- Meet ALL of the following requirements:
|
|
|
- Meet ALL of the following requirements:
- Does not meet the requirements to go to T
- Pass the LoS Check (CnX = ? on Hard)
- Amount of (F)BB(V) ≤ 3
- Amount of CVL ≤ 2
- Fleet contains AV or amount of CL + DD ≥ 5
|
|
|
- Meet ALL of the following requirements:
- Does not meet the requirements to go to T or U
- Pass the LoS Check (CnX = ? on Hard)
|
Branching compositions were reported over the course of the event. (NGA and KCNav)
Ship Bonuses
DISCLAIMER: This information is based on user submitted data and is subject to revisions as more data is gathered. Any version of the ship receives the bonus regardless of remodel.
Ship Bonuses
Node U Bonuses
(Stacks with above)
|
Multiplier
|
| Ships
|
Boss Debuff (Against
Enemy Flagship Only) Only)
|
| All Ships
|
1.1x
|
Equipment Bonuses
- Aircraft Bonuses
Plane bonuses similar to the Summer 2021 event have returned and should be examined when planning equipment setups. The following bonuses are applied:
- Carriers using planes get bonuses based on the numbers 1, 2, 3, and 4,
- Land-Bases using planes get bonuses applied to all bombers in the individual base, based on both the numbers 1, 2, 3, and 4 as well as the letters A, B, and C,
- In order to get the best out of carriers, it is needed to arm them with planes from different number categories (e.g.: C4 + B3 + B2 or C4 + B3 + A2 or C4 + B2 + A3 grants 2*3*4).
- In order to get high bonuses out of land-bases, it is needed to arm them with planes from different letter and number categories (e.g. B2 + B3 + C4 grants B*C*2*3*4), as allowed by range considerations
| Aircraft Damage Bonuses[2]
|
|
|
Aircraft Groups
|
Multipliers
(Ships and Land-bases)
|
| A
|
B
|
C
|
Map-wide
|
Node L
|
Node U
|
Aircraft Groups
|
1
|
-
|
 Fw 190 D-9  PBY-5A Catalina |
 Spitfire Mk.I  Spitfire Mk.V  Spitfire Mk.IX (Skilled) |
-
|
-
|
-
|
| 2
|
 B-25  Swordfish  TBF  TBM-3D  F4U-1D  FM-2  F4F-3  F4F-4  F6F-3  F6F-3N  F6F-5 |
 Bf 109T Kai  Fw 190T Kai  Fw 190 A-5 Kai (Skilled) |
-
|
1.04x
|
1.0712x
|
1.092x
|
| 3
|
 SM.79  SM.79 bis  Swordfish Mk.II (Skilled)  Re.2001 G Kai  Re.2001 CB Kai  Skua  Ju 87C Kai  Ju 87C Kai Ni (w/ KMX)  Ju 87C Kai Ni (w/ KMX/Skilled)  FR-1 Fireball |
 Re.2001 OR Kai  Fulmar |
 F4U-2 Night Corsair  F4U-4 |
1.05x
|
1.092x
|
1.113x
|
| 4
|
 Do 217 E-5 + Hs293 Initial Model  SM.79 bis (Skilled)  Swordfish Mk.III (Skilled)  Barracuda Mk.II  Barracuda Mk.III |
 Re.2005 Kai |
 Corsair Mk.II  Corsair Mk.II (Ace)  Seafire Mk.III Kai  Fulmar (Reconnaissance Fighter/Skilled)  Mosquito FB Mk.VI |
1.06x
|
1.113x
|
1.1342x
|
LBAS only
Multipliers
(Mapwide)
|
-
|
1.07x
|
1.1x
|
|
Historical Aircraft
Damage Bonuses
|
| Group
|
Multipliers
|
| Map-wide
|
Nodes L
|
Node U
|
| LBAS A
|
1x |
1x |
1x
|
| LBAS B
|
1.07x |
1.07x |
1.07x
|
| LBAS C
|
1.1x |
1.1x |
1.1x
|
| 1
|
1x |
1x |
1x
|
| 2
|
1.04x |
1.0712x |
1.092x
|
| 3
|
1.05x |
1.092x |
1.113x
|
| 4
|
1.06x |
1.113x |
1.1342x
|
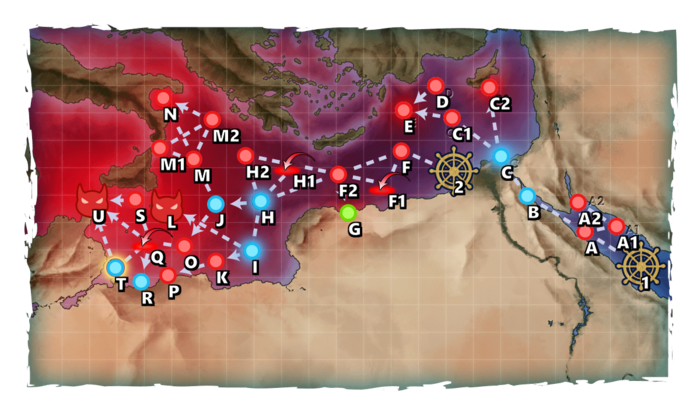
Map overview
E3 is a two-phase map using both Single Fleets and Combined Fleets.
- This map uses two locks:
 Expeditionary Fleet Advance Team (Single Fleets)
 Mediterranean Combined Fleet (Combined Fleets)
- Multiple LBAS will be available to sortie after completing their unlock requirements, 1 LBAS will be available to sortie along with a second base only usable in defense.
- 1 LBAS will be available to Sortie after completing Phase 0.5
- A second LBAS will be available to Sortie partway through Phase 1.66
- Air raids will occur on this map.
Friend Fleets are available at boss node U
Phase 0.5 - Unlock the Boss Node
The following steps have to be performed to unlock the first boss:
|
E |
C2
|
| Hard |
S x2 |
S
|
| Medium |
A+ x2 |
A+
|
| Easy |
A+ |
A+
|
| Casual |
A+ |
A+
|
- Single Fleet: 0-1CV(L/B), 0-2(F)BB(V), 0-3XX, 1-2CL, 2-3DD (Fast)

- Route: 1 A B C C1 E
- Bringing a Slow fleet with multiple heavier ships such as (F)BB(V) or CV(B) will encounter extra battles
- AD/AP at node E is 50/100 on Hard
- In-route Support Expedition is highly recommended.
- Have the DD run TCI or GTRL set up to secure the kill against Ne-Kai
- For the fleet used, refer to Node E as it is the same fleet.
- Route: 1 A B C C2
- Anti-installation equipment are required to clear this node.
- 1-2 ships setup for anti-intallation is enough to secure the S rank
- Node C2 contains PT Imps along with other surface ships
- In-route Support Expedition is recommended to help secure the kill.
| Anti-PT boat
|
Unlike most standard Abyssals, "PT boats" (PT Imp Pack & Schnellboot Imp Pack & Schnellboot Imp Pack ) are "very small and fast". ) are "very small and fast".
- All ship types suffer a severe
 accuracy and accuracy and  firepower penalty against PT boats. firepower penalty against PT boats.
- Attacking them with larger guns is not very effective, smaller guns being recommended instead.
- Support Expeditions are not affect by any of the following[1].
| Attack formula against PT boats
|
The Attack formula against PT boats:[2][3]
- Jet Assault & Airstrike
- [math]\displaystyle{ \text{Damage}_\text{PT}= \text{Atk}_\text{post-cap} \times \text{Rand} [0.5 ; 0.8] }[/math]
- LBAS[4]
- [math]\displaystyle{ \text{Damage}_\text{PT}= \text{Atk}_\text{post-cap} \times \text{Rand} [0.4 ; 0.7] }[/math]
- Shelling
- [math]\displaystyle{ \text{Damage}_\text{PT}= ( 0.3 \times \text{Atk}_\text{post-cap} + \sqrt{\text{Atk}_\text{post-cap}} + 10 ) \times \prod^{All Equipment}{\text{Mod}_\text{EquipmentAtk}} }[/math]
- Opening & Closing Torpedo Salvos
- [math]\displaystyle{ \text{Damage}_\text{PT}= 0.3 \times \text{Atk}_\text{post-cap} + \sqrt{\text{Atk}_\text{post-cap}} + 10 }[/math]
- Night Battle
- Night Battle data are unclear yet.
- With
- [math]\displaystyle{ \text{Atk}_\text{post-cap} }[/math] the post cap attack power defined here,
- [math]\displaystyle{ \text{Mod}_\text{EquipmentAtk} }[/math] the bonuses given by equipment, described below.
|
| Accuracy formula against PT boats
|
The Accuracy formula against PT boats:[5][6][7][8]
| [math]\displaystyle{ \text{Hit Rate}_\text{vs.PT} \text{%} = \Big\lfloor ( 0.3 \times \text{Accuracy}_\text{Atk} + \sqrt{\text{Accuracy}_\text{Atk}} + 15 ) \times 1.2 \times \text{Mod}_\text{Ship} \times \Big( \prod^{All Equipment}{\text{Mod}_\text{EquipmentAcc}} \Big) \times \text{Mod}_\text{Night} \Big\rfloor - \text{EVA}_\text{PT} + 1 }[/math]
|
- With
- [math]\displaystyle{ \text{Acc}_\text{Atk} }[/math] the standard accuracy described here
- PT boats are "DDs" in the game, so the [math]\displaystyle{ \text{Mod}_\text{formation} }[/math] for vanguard is 1.1 during shelling, and 1.2 during the torpedo phase.
- Historical accuracy bonuses during Events are included in the Standard Accuracy Term, i.e. it is affected by the [math]\displaystyle{ \text{Mod}_\text{PT} }[/math] modifier.
- [math]\displaystyle{ \text{EVA}_\text{PT} }[/math] the PT estimated evasion
 described bellow, described bellow,
- The main Accuracy modifiers are
- [math]\displaystyle{ \text{Mod}_\text{Amagiri} }[/math] being include in [math]\displaystyle{ \text{Acc}_\text{Atk} }[/math]:
- [math]\displaystyle{ \text{Mod}_\text{Ship} }[/math] the bonus given by ship types, described below,
- [math]\displaystyle{ \text{Mod}_\text{EquipmentAcc} }[/math] the bonuses given by equipment, described below,
- [math]\displaystyle{ \text{Mod}_\text{Night} }[/math] being 0.7 during night battle, 1 during day battle.
|
Amagiri Kai Ni/D
 has the ability to prioritize focusing on attacking PT imps with significantly increased accuracy if any are present. has the ability to prioritize focusing on attacking PT imps with significantly increased accuracy if any are present.
- DD placed in the composition slots above and below her will gain a noticeable accuracy boost and will prioritize attacking PT boats if any are present.
- The PT boat targeting rate is 100% for all affected ships [9].
During Events, some special bonuses may be added, with "historical" ships and equipment gaining some accuracy bonuses[10].
| Ship Type |
[math]\displaystyle{ \text{Mod}_\text{Ship} }[/math]
|
| DD & DE |
1.0
|
| CL, CLT, & CT |
0.82
|
| All other types |
0.7
|
- Notes
- It is recommended to use anti-PT setups on DDs only, such setups compromising overall combat effectiveness.
- Having a Reinforcement Expansion is important because it can save a ship slot by containing a machine gun or skilled lookouts.
- Combining equipment is recommended to see significant boosts to accuracy.
- The
 Ka-Tsu Tanks Ka-Tsu Tanks
 bonus does not stack with the bonus does not stack with the  Armed Boats Armed Boats
 ones. ones.
- Using other setups improving accuracy is also advisable:
|
|
|
| [edit]
|
After completion, 1 LBAS will be available to Sortie
Phase 1 - Ruin the French Battleship's Vacation
- CTF: 1(F)BB(V), 1CV, 2CVL, 2CA(V) + 1CL, 1CA(V), 1CLT, 3DD (Fast)

- Route: 2 F F2 H I L
- Shortest route that reaches the boss.
- 1CVL may be swapped for 1CV(B) but will face an extra Air Node at H1
- STF/CTF: 2-3(F)BB(V), 0-1CV(B), 0-2CVL, 0-2XX + 1CL, 2-3DD, 2-3XX
- Route: 2 F F1 F2 H I L
- XX cannot be a SS(V) (?)
- Bringing 5 or more (F)BB(V)+CV(B) will encounter extra battles at: H1 H2
- Will face an extra Air Node at F1 in exchange for allowing a heavier fleet and disregarding speed.
- LBAS: Range 6 to L, 60/160 AD/AP on Hard (138/276 on Last Dance)
- It is recommended to bring AACI.
Phase 1.33 - Open a Path to J
This phase has only 1 requirement: Reach node G
- This requirement is only needed for Hard & Medium. Casual and Easy do not have to do this requirement.
- TCF: 0-2CAV, 0-2CL, 4-6DD + 1-2CL, 3-5DD, 0-2CA(V)
- Route: 2 F F2 G
- Proceeding from F2 with Taiha is safe as G is a non-combat node
- Lock Notes: 4 DD + 1 CL, 3 DD combined fleet can be used to save ships from locking in this phase and map.
- A second LBAS will be available to sortie once this phase is completed.
Phase 1.66 - Clear a Path to the Boss
The following steps have to be performed to unlock the final boss of E3:
|
P |
N
|
| Hard |
S x2 |
S x2
|
| Medium |
A+ x2 |
A+ x2
|
| Easy |
A+ |
A+ x2
|
| Casual |
A+ |
A+ x2
|
- For the fleet used, refer to Phase 1 as it is the same fleet.
- Route: 2 F F2 H I K P
- The Heavy Fleet from Phase 1 will encounter an extra Air Node at F1
- Anti-installation equipment are required to clear this node.
- Node P contains PT Imps along with other surface ships
- CTF: 1(F)BB(V), 0-1CV, 1-2CVL, 1-2CA(V), 0-1CL, 0-1DD + 1CL, 0-2CA(V), 0-2CLT, 3-4DD (Fast)
- Route: 2 F F2 H J M N
- The amount of CL + DD in the fleet must be ≥ 5 to avoid an extra battle at M2
- 1CVL may be swapped for 1CV(B) but will face an extra Air Node at H1
- Anti-installation equipment are required to clear this node.
- Node N contains PT Imps along with other surface ships
| Anti-PT boat
|
Unlike most standard Abyssals, "PT boats" (PT Imp Pack & Schnellboot Imp Pack) are "very small and fast".
- All ship types suffer a severe accuracy and firepower penalty against PT boats.
- Attacking them with larger guns is not very effective, smaller guns being recommended instead.
- Support Expeditions are not affect by any of the following[1].
| Attack formula against PT boats
|
The Attack formula against PT boats:[2][3]
- Jet Assault & Airstrike
- [math]\displaystyle{ \text{Damage}_\text{PT}= \text{Atk}_\text{post-cap} \times \text{Rand} [0.5 ; 0.8] }[/math]
- LBAS[4]
- [math]\displaystyle{ \text{Damage}_\text{PT}= \text{Atk}_\text{post-cap} \times \text{Rand} [0.4 ; 0.7] }[/math]
- Shelling
- [math]\displaystyle{ \text{Damage}_\text{PT}= ( 0.3 \times \text{Atk}_\text{post-cap} + \sqrt{\text{Atk}_\text{post-cap}} + 10 ) \times \prod^{All Equipment}{\text{Mod}_\text{EquipmentAtk}} }[/math]
- Opening & Closing Torpedo Salvos
- [math]\displaystyle{ \text{Damage}_\text{PT}= 0.3 \times \text{Atk}_\text{post-cap} + \sqrt{\text{Atk}_\text{post-cap}} + 10 }[/math]
- Night Battle
- Night Battle data are unclear yet.
- With
- [math]\displaystyle{ \text{Atk}_\text{post-cap} }[/math] the post cap attack power defined here,
- [math]\displaystyle{ \text{Mod}_\text{EquipmentAtk} }[/math] the bonuses given by equipment, described below.
|
| Accuracy formula against PT boats
|
The Accuracy formula against PT boats:[5][6][7][8]
| [math]\displaystyle{ \text{Hit Rate}_\text{vs.PT} \text{%} = \Big\lfloor ( 0.3 \times \text{Accuracy}_\text{Atk} + \sqrt{\text{Accuracy}_\text{Atk}} + 15 ) \times 1.2 \times \text{Mod}_\text{Ship} \times \Big( \prod^{All Equipment}{\text{Mod}_\text{EquipmentAcc}} \Big) \times \text{Mod}_\text{Night} \Big\rfloor - \text{EVA}_\text{PT} + 1 }[/math]
|
- With
- [math]\displaystyle{ \text{Acc}_\text{Atk} }[/math] the standard accuracy described here
- PT boats are "DDs" in the game, so the [math]\displaystyle{ \text{Mod}_\text{formation} }[/math] for vanguard is 1.1 during shelling, and 1.2 during the torpedo phase.
- Historical accuracy bonuses during Events are included in the Standard Accuracy Term, i.e. it is affected by the [math]\displaystyle{ \text{Mod}_\text{PT} }[/math] modifier.
- [math]\displaystyle{ \text{EVA}_\text{PT} }[/math] the PT estimated evasion described bellow,
- The main Accuracy modifiers are
- [math]\displaystyle{ \text{Mod}_\text{Amagiri} }[/math] being include in [math]\displaystyle{ \text{Acc}_\text{Atk} }[/math]:
- [math]\displaystyle{ \text{Mod}_\text{Ship} }[/math] the bonus given by ship types, described below,
- [math]\displaystyle{ \text{Mod}_\text{EquipmentAcc} }[/math] the bonuses given by equipment, described below,
- [math]\displaystyle{ \text{Mod}_\text{Night} }[/math] being 0.7 during night battle, 1 during day battle.
|
Amagiri Kai Ni/D
has the ability to prioritize focusing on attacking PT imps with significantly increased accuracy if any are present.
- DD placed in the composition slots above and below her will gain a noticeable accuracy boost and will prioritize attacking PT boats if any are present.
- The PT boat targeting rate is 100% for all affected ships [9].
During Events, some special bonuses may be added, with "historical" ships and equipment gaining some accuracy bonuses[10].
| Ship Type |
[math]\displaystyle{ \text{Mod}_\text{Ship} }[/math]
|
| DD & DE |
1.0
|
| CL, CLT, & CT |
0.82
|
| All other types |
0.7
|
- Notes
- It is recommended to use anti-PT setups on DDs only, such setups compromising overall combat effectiveness.
- Having a Reinforcement Expansion is important because it can save a ship slot by containing a machine gun or skilled lookouts.
- Combining equipment is recommended to see significant boosts to accuracy.
- The Ka-Tsu Tanks
bonus does not stack with the Armed Boats
ones.
- Using other setups improving accuracy is also advisable:
|
|
|
| [edit]
|
Phase 2 - Boot the Boss from the Mediteranean
- STF: 3(F)BB(V), 0-1CV, 0-2CVL, 0-1XX, 1 AV/Akitsushima Kai/Akashi Kai + 1CL, 0-1CVL, 0-2CA(V), 0-2CLT, 2-3DD
- Route: 2 F F1 F2 H J O Q U
- There is a LoS check to enter node U
- LBAS: Range 8 to U, 184/367 AD/AP on Hard (255/509 on Last Dance)
- It is recommended to bring AACI.
- If a CVL is in use, have her setup with Night cut in to hit the fleet at night battle.
- Nodes F2 O are Submarine nodes
- Bring 1-2 OASW capable ships and/or use 1 LBAS with ASW Patrol Craft only if neccesary.
- Otherwise have all LBAS goes to the boss.
- Support Expedition for both In-route and Boss to secure the kill. Especially on Last Dance.
- Special Attacks BB is highly recommended to kill the boss.
- Note: Plan carefully on who to use here because later maps will need BB to use their special attacks, especially for players playing on high difficulties.
Phase 2.5: Debuff
Once Last Dance is reached, the following steps can be performed to debuff the boss.
- The following requirements are needed to complete the debuffing process.
|
P |
N |
S |
LBAS |
M
|
| Hard |
S |
S |
S |
AS |
S
|
| Medium |
A+ |
S |
S |
AS |
-
|
| Easy |
A+ |
A+ |
- |
- |
-
|
| Casual |
A+ |
A+ |
- |
- |
-
|
- For the fleet used, refer to Phase 1.66 as it is the same fleet.
- For the fleet used, refer to Phase 1.66 as it is the same fleet.
- STF: 1-3(F)BB(V), 0-1CV, 0-2CVL, 0-3XX + 1CL, 0-2CA(V), 0-2CLT, 2-3DD
- Route: 2 F F1 F2 H J O Q S
- Fleet must have no AV in order to route to S
- LBAS: Air Defense
- This can be done passively since getting AS on the air raid requires an LBAS set on "defense" with a strong enough air-defense
- For the fleet used, refer to Phase 1.66 Node N as it is the same fleet.
Enemy Compositions
E-3 Hard AB
| #
|
Formation
|
Air Raids
|
AD/AP
AS/AS+
|
| AB
|
Diamond
|
   
|
39/78
174/348
|
| Diamond
|
|
51/101
225/450
|
| Diamond
|
|
57/114
255/510
|
| Diamond
|
|
62/123
276/552
|
| Diamond
|
|
69/137
306/612
|
| #
|
Formation
|
Air Raids
|
AD/AP
AS/AS+
|
E-3 Hard A: 深海任務部隊 スエズ湾阻止線 (
PoiDB)
| #
|
Formation
|
Normal Battle Node
|
AD/AP
AS/AS+
|
| A
|
Line Ahead
Double Line
Vanguard
Phases: 1, 2
|
   
|
0/0
0/0
|
| #
|
Formation
|
Normal Battle Node
|
AD/AP
AS/AS+
|
E-3 Hard A1: 紅海阻止線 深海挺身突撃隊 (
PoiDB)
| #
|
Formation
|
Normal Battle Node
|
AD/AP
AS/AS+
|
| A1
|
Line Ahead
Double Line
Vanguard
Phases: 1, 2
|
 
|
0/0
0/0
|
| #
|
Formation
|
Normal Battle Node
|
AD/AP
AS/AS+
|
E-3 Hard A2: 紅海配備 深海魚雷艇 再編梯団 (
PoiDB)
| #
|
Formation
|
Normal Battle Node
|
AD/AP
AS/AS+
|
| A2
|
Line Ahead
Echelon
Vanguard
Phases: 1, 2
|
 
|
0/0
0/0
|
| #
|
Formation
|
Normal Battle Node
|
AD/AP
AS/AS+
|
E-3 Hard B
| #
|
Empty Node
|
| B
|
気のせいだった。
スエズ運河を越え、地中海に進出せよ!
Must be my imagination.
Cross the Suez Canal and enter the Mediterranean!
|
| #
|
Empty Node
|
E-3 Hard C
| #
|
Selection Node
|
| C
|
スエズ運河を越え、地中海に進出せよ!
Cross the Suez Canal and enter the Mediterranean!
|
| #
|
Selection Node
|
E-3 Hard C1: 深海地中海艦隊 軽空母戦隊 (
PoiDB)
| #
|
Formation
|
Normal Battle Node
|
AD/AP
AS/AS+
|
| C1
|
Diamond
Phases: 1, 2
|
 
|
57/113
252/504
|
Diamond
Phases: 1, 2
|

|
102/203
456/912
|
Diamond
Phases: 1, 2
|
|
106/212
476/951
|
| #
|
Formation
|
Normal Battle Node
|
AD/AP
AS/AS+
|
E-3 Hard C2: 深海上陸橋頭堡 物資集積地 (
PoiDB)
| #
|
Formation
|
Normal Battle Node
|
AD/AP
AS/AS+
|
| C2
|
Double Line
Phases: 1
|
  
|
16/31
69/138
|
Double Line
Phases: 1
|
|
16/31
69/138
|
Double Line
Phases: 1
|

|
17/33
74/147
|
| #
|
Formation
|
Normal Battle Node
|
AD/AP
AS/AS+
|
E-3 Hard D: 深海地中海艦隊 兵站輸送船団 (
PoiDB)
| #
|
Formation
|
Normal Battle Node
|
AD/AP
AS/AS+
|
| D
|
Double Line
Diamond
Phases: 1
|
|
0/0
0/0
|
| Vanguard
|
|
0/0
0/0
|
| #
|
Formation
|
Normal Battle Node
|
AD/AP
AS/AS+
|
E-3 Hard E: 深海地中海艦隊 前衛偵察艦隊 (
PoiDB)
| #
|
Formation
|
Normal Battle Node
|
AD/AP
AS/AS+
|
| E
|
Line Ahead
Double Line
Vanguard
Phases: 1
|
  
|
50/100
224/447
|
| #
|
Formation
|
Normal Battle Node
|
AD/AP
AS/AS+
|
E-3 Hard F: 深海地中海艦隊 強行偵察戦隊 (
PoiDB)
| #
|
Formation
|
Normal Battle Node
|
AD/AP
AS/AS+
|
| F
|
Line Ahead
Echelon
Vanguard
Phases: 1, 2
|
|
0/0
0/0
|
| #
|
Formation
|
Normal Battle Node
|
AD/AP
AS/AS+
|
E-3 Hard F1: 深海地中海方面 基地航空隊 (
PoiDB)
| #
|
Formation
|
Air Defense Node
|
AD/AP
AS/AS+
|
| F1
|
Diamond
Phases: 1, 2
|

|
81/161
360/720
|
Diamond
Phases: 1, 2
|
|
90/179
402/804
|
Diamond
Phases: 1, 2
|
|
99/198
444/888
|
Diamond
Phases: 2
|
|
105/209
468/936
|
| #
|
Formation
|
Air Defense Node
|
AD/AP
AS/AS+
|
E-3 Hard F2: 深海潜水艦隊 地中海哨戒線 (
PoiDB)
| #
|
Formation
|
Normal Battle Node
|
AD/AP
AS/AS+
|
| F2
|
Echelon
Line Abreast
Phases: 1, 2
|
  
|
0/0
0/0
|
Echelon
Line Abreast
Phases: 1, 2
|
|
0/0
0/0
|
Echelon
Line Abreast
Phases: 1, 2
|
|
0/0
0/0
|
| #
|
Formation
|
Normal Battle Node
|
AD/AP
AS/AS+
|
E-3 Hard G
| #
|
Resource Node
|
| #
|
Resource Node
|
E-3 Hard H
| #
|
Selection Node
|
| H
|
艦隊の針路を選択できます。提督、どちらの針路をとられますか?
You can decide the fleet's course. Admiral, which heading should we take?
|
| #
|
Selection Node
|
E-3 Hard H1: 深海地中海方面 基地航空隊 (
PoiDB)
| #
|
Formation
|
Air Defense Node
|
AD/AP
AS/AS+
|
| H1
|
Diamond
Phases: 1, 2
|
|
81/161
360/720
|
Diamond
Phases: 1, 2
|
|
90/179
402/804
|
Diamond
Phases: 1, 2
|
|
99/198
444/888
|
Diamond
Phases: 1, 2
|
|
105/209
468/936
|
| #
|
Formation
|
Air Defense Node
|
AD/AP
AS/AS+
|
E-3 Hard H2: 深海地中海艦隊 増援軽空母戦隊 (
PoiDB)
| #
|
Formation
|
Normal Battle Node
|
AD/AP
AS/AS+
|
| H2
|
Diamond
Phases: 2
|
|
57/113
252/504
|
Diamond
Phases: 2
|
|
102/203
456/912
|
Diamond
Phases: 1, 2
|
|
106/212
476/951
|
| #
|
Formation
|
Normal Battle Node
|
AD/AP
AS/AS+
|
E-3 Hard I
| #
|
Selection Node
|
| I
|
艦隊の針路を選択できます。提督、どちらの針路をとられますか?
You can decide the fleet's course. Admiral, which heading should we take?
|
| #
|
Selection Node
|
E-3 Hard J
| #
|
Empty Node
|
| J
|
気のせいだった。
敵機動部隊、接近中!警戒を厳にせよ!
Must be my imagination.
Enemy task force approaching! Maintain high vigilance!
|
| #
|
Empty Node
|
E-3 Hard K: 深海地中海艦隊 低速戦艦戦隊 (
PoiDB)
| #
|
Formation
|
Normal Battle Node
|
AD/AP
AS/AS+
|
| K
|
Line Ahead
Double Line
Phases: 1, 2
|

|
0/0
0/0
|
Line Ahead
Phases: 2
|
 
|
36/72
161/321
|
| #
|
Formation
|
Normal Battle Node
|
AD/AP
AS/AS+
|
E-3 Hard L: 深海地中海艦隊 マルタ島迎撃線 (
PoiDB)
E-3 Hard M: 深海地中海艦隊 高速戦艦戦隊 (
PoiDB)
| #
|
Formation
|
Normal Battle Node
|
AD/AP
AS/AS+
|
| M
|
Line Ahead
Double Line
Phases: 2
|

|
57/113
252/504
|
Diamond
Phases: 2
|
|
57/113
252/504
|
| #
|
Formation
|
Normal Battle Node
|
AD/AP
AS/AS+
|
E-3 Hard M1: 地中海配備 深海魚雷艇戦隊 (
PoiDB)
| #
|
Formation
|
Normal Battle Node
|
AD/AP
AS/AS+
|
| M1
|
Line Ahead
Echelon
Vanguard
Phases: 2
|
|
0/0
0/0
|
| #
|
Formation
|
Normal Battle Node
|
AD/AP
AS/AS+
|
E-3 Hard M2: 深海潜水艦隊 タラント沖哨戒線 (
PoiDB)
| #
|
Formation
|
Normal Battle Node
|
AD/AP
AS/AS+
|
| M2
|
Echelon
Line Abreast
Phases: 2
|
 
|
0/0
0/0
|
Echelon
Line Abreast
Phases: 2
|
|
0/0
0/0
|
Echelon
Line Abreast
Phases: 2
|
|
0/0
0/0
|
| #
|
Formation
|
Normal Battle Node
|
AD/AP
AS/AS+
|
E-3 Hard N: 深海地中海艦隊 タラント軍港 (
PoiDB)
| #
|
Formation
|
Normal Battle Node
|
AD/AP
AS/AS+
|
| N
|
Double Line
Phases: 2
|

|
84/167
375/750
|
Double Line
Phases: 2
|

|
84/167
375/750
|
Double Line
Phases: 2
|

|
57/113
252/504
|
| #
|
Formation
|
Normal Battle Node
|
AD/AP
AS/AS+
|
E-3 Hard O: 深海潜水艦隊 マルタ島沖防衛線 (
PoiDB)
| #
|
Formation
|
Normal Battle Node
|
AD/AP
AS/AS+
|
| O
|
Echelon
Phases: 2
|
|
0/0
0/0
|
Echelon
Phases: 2
|
|
0/0
0/0
|
Echelon
Phases: 2
|
|
0/0
0/0
|
Echelon
Phases: 2
|
|
0/0
0/0
|
Echelon
Phases: 2
|
|
0/0
0/0
|
Echelon
Phases: 2
|
|
0/0
0/0
|
| #
|
Formation
|
Normal Battle Node
|
AD/AP
AS/AS+
|
E-3 Hard P: 深海北アフリカ物資集積地 (
PoiDB)
| #
|
Formation
|
Normal Battle Node
|
AD/AP
AS/AS+
|
| P
|
Double Line
Phases: 2
|

|
77/153
342/684
|
Double Line
Phases: 2
|
|
78/155
347/693
|
Double Line
Phases: 2
|

|
46/91
204/408
|
| #
|
Formation
|
Normal Battle Node
|
AD/AP
AS/AS+
|
E-3 Hard Q: 深海地中海艦隊 空母艦載機群 (
PoiDB)
| #
|
Formation
|
Air Defense Node
|
AD/AP
AS/AS+
|
| Q
|
Diamond
Phases: 2
|
 
|
187/373
837/1674
|
Diamond
Phases: 2
|
|
197/393
882/1764
|
Diamond
Phases: 2
|

|
261/521
1170/2340
|
| #
|
Formation
|
Air Defense Node
|
AD/AP
AS/AS+
|
E-3 Hard R
| #
|
Empty Node
|
| R
|
敵影を見ず。
敵機動部隊、接近中!警戒を厳にせよ!
No enemy spotted.
Enemy task force approaching! Maintain high vigilance!
|
| #
|
Empty Node
|
E-3 Hard S: 深海空母機動部隊 前衛護衛戦隊 (
PoiDB)
| #
|
Formation
|
Normal Battle Node
|
AD/AP
AS/AS+
|
| S
|
Line Ahead
Double Line
Echelon
Phases: 2
|
|
0/0
0/0
|
| #
|
Formation
|
Normal Battle Node
|
AD/AP
AS/AS+
|
E-3 Hard T
| #
|
Repair Node
|
| #
|
Repair Node
|
E-3 Hard U: 深海地中海艦隊 高速機動部隊 (
PoiDB)
E-3 Medium AB
| #
|
Formation
|
Air Raids
|
AD/AP
AS/AS+
|
| AB
|
Diamond
|
|
28/55
123/246
|
| Diamond
|
|
33/65
144/288
|
| Diamond
|
|
39/78
174/348
|
| Diamond
|
|
44/87
195/390
|
| #
|
Formation
|
Air Raids
|
AD/AP
AS/AS+
|
E-3 Medium A: 深海任務部隊 スエズ湾阻止線 (
PoiDB)
| #
|
Formation
|
Normal Battle Node
|
AD/AP
AS/AS+
|
| A
|
Line Ahead
Double Line
Vanguard
Phases: 1, 2
|

|
0/0
0/0
|
| #
|
Formation
|
Normal Battle Node
|
AD/AP
AS/AS+
|
E-3 Medium A1: 紅海阻止線 深海挺身突撃隊 (
PoiDB)
| #
|
Formation
|
Normal Battle Node
|
AD/AP
AS/AS+
|
| A1
|
Line Ahead
Double Line
Vanguard
Phases: 1, 2
|

|
0/0
0/0
|
| #
|
Formation
|
Normal Battle Node
|
AD/AP
AS/AS+
|
E-3 Medium A2: 紅海配備 深海魚雷艇 再編梯団 (
PoiDB)
| #
|
Formation
|
Normal Battle Node
|
AD/AP
AS/AS+
|
| A2
|
Line Ahead
Echelon
Vanguard
Phases: 1, 2
|
|
0/0
0/0
|
| #
|
Formation
|
Normal Battle Node
|
AD/AP
AS/AS+
|
E-3 Medium B
| #
|
Empty Node
|
| B
|
気のせいだった。
スエズ運河を越え、地中海に進出せよ!
Must be my imagination.
Cross the Suez Canal and enter the Mediterranean!
|
| #
|
Empty Node
|
E-3 Medium C
| #
|
Selection Node
|
| C
|
スエズ運河を越え、地中海に進出せよ!
Cross the Suez Canal and enter the Mediterranean!
|
| #
|
Selection Node
|
E-3 Medium C1: 深海地中海艦隊 軽空母戦隊 (
PoiDB)
| #
|
Formation
|
Normal Battle Node
|
AD/AP
AS/AS+
|
| C1
|
Diamond
Phases: 1, 2
|

|
50/100
224/447
|
Diamond
Phases: 1, 2
|
|
90/180
404/807
|
Diamond
Phases: 1, 2
|
|
96/191
428/855
|
| #
|
Formation
|
Normal Battle Node
|
AD/AP
AS/AS+
|
E-3 Medium C2: 深海上陸橋頭堡 物資集積地 (
PoiDB)
| #
|
Formation
|
Normal Battle Node
|
AD/AP
AS/AS+
|
| C2
|
Double Line
Phases: 1
|

|
14/27
60/120
|
Double Line
Phases: 1
|
|
14/27
60/120
|
Double Line
Phases: 1
|
|
16/31
69/138
|
| #
|
Formation
|
Normal Battle Node
|
AD/AP
AS/AS+
|
E-3 Medium D: 深海地中海艦隊 兵站輸送船団 (
PoiDB)
| #
|
Formation
|
Normal Battle Node
|
AD/AP
AS/AS+
|
| D
|
Double Line
Diamond
Phases: 1
|

|
0/0
0/0
|
| #
|
Formation
|
Normal Battle Node
|
AD/AP
AS/AS+
|
E-3 Medium E: 深海地中海艦隊 前衛偵察艦隊 (
PoiDB)
| #
|
Formation
|
Normal Battle Node
|
AD/AP
AS/AS+
|
| E
|
Line Ahead
Double Line
Vanguard
Phases: 1, 2
|
|
41/81
180/360
|
| #
|
Formation
|
Normal Battle Node
|
AD/AP
AS/AS+
|
E-3 Medium F: 深海地中海艦隊 強行偵察戦隊 (
PoiDB)
| #
|
Formation
|
Normal Battle Node
|
AD/AP
AS/AS+
|
| F
|
Line Ahead
Echelon
Vanguard
Phases: 1, 2
|

|
0/0
0/0
|
| #
|
Formation
|
Normal Battle Node
|
AD/AP
AS/AS+
|
E-3 Medium F1: 深海地中海方面 基地航空隊 (
PoiDB)
| #
|
Formation
|
Air Defense Node
|
AD/AP
AS/AS+
|
| F1
|
Diamond
Phases: 1, 2
|
|
55/110
246/492
|
Diamond
Phases: 1, 2
|
|
60/119
267/534
|
Diamond
Phases: 1, 2
|
|
74/147
330/660
|
Diamond
Phases: 1, 2
|
|
61/122
273/546
|
Diamond
Phases: 2
|
|
81/161
360/720
|
| #
|
Formation
|
Air Defense Node
|
AD/AP
AS/AS+
|
E-3 Medium F2: 深海潜水艦隊 地中海哨戒線 (
PoiDB)
| #
|
Formation
|
Normal Battle Node
|
AD/AP
AS/AS+
|
| F2
|
Echelon
Line Abreast
Phases: 1, 2
|

|
0/0
0/0
|
Echelon
Line Abreast
Phases: 1, 2
|
|
0/0
0/0
|
Echelon
Line Abreast
Phases: 1, 2
|
|
0/0
0/0
|
| #
|
Formation
|
Normal Battle Node
|
AD/AP
AS/AS+
|
E-3 Medium G
| #
|
Resource Node
|
| #
|
Resource Node
|
E-3 Medium H
| #
|
Selection Node
|
| H
|
艦隊の針路を選択できます。提督、どちらの針路をとられますか?
You can decide the fleet's course. Admiral, which heading should we take?
|
| #
|
Selection Node
|
E-3 Medium H1: 深海地中海方面 基地航空隊 (
PoiDB)
| #
|
Formation
|
Air Defense Node
|
AD/AP
AS/AS+
|
| H1
|
Diamond
Phases: 2
|
|
55/110
246/492
|
Diamond
Phases: 1, 2
|
|
60/119
267/534
|
Diamond
Phases: 1, 2
|
|
74/147
330/660
|
Diamond
Phases: 1, 2
|
|
61/122
273/546
|
Diamond
Phases: 1, 2
|
|
81/161
360/720
|
| #
|
Formation
|
Air Defense Node
|
AD/AP
AS/AS+
|
E-3 Medium H2: 深海地中海艦隊 増援軽空母戦隊 (
PoiDB)
| #
|
Formation
|
Normal Battle Node
|
AD/AP
AS/AS+
|
| H2
|
Diamond
Phases: 2
|
|
50/100
224/447
|
Diamond
Phases: 1, 2
|
|
90/180
404/807
|
Diamond
Phases: 1, 2
|
|
96/191
428/855
|
| #
|
Formation
|
Normal Battle Node
|
AD/AP
AS/AS+
|
E-3 Medium I
| #
|
Selection Node
|
| I
|
艦隊の針路を選択できます。提督、どちらの針路をとられますか?
You can decide the fleet's course. Admiral, which heading should we take?
|
| #
|
Selection Node
|
E-3 Medium J
| #
|
Empty Node
|
| J
|
気のせいだった。
敵機動部隊、接近中!警戒を厳にせよ!
Must be my imagination.
Enemy task force approaching! Maintain high vigilance!
|
| #
|
Empty Node
|
E-3 Medium K: 深海地中海艦隊 低速戦艦戦隊 (
PoiDB)
| #
|
Formation
|
Normal Battle Node
|
AD/AP
AS/AS+
|
| K
|
Line Ahead
Double Line
Phases: 2
|

|
0/0
0/0
|
Line Ahead
Phases: 2
|
|
36/72
161/321
|
| #
|
Formation
|
Normal Battle Node
|
AD/AP
AS/AS+
|
E-3 Medium L: 深海地中海艦隊 マルタ島迎撃線 (
PoiDB)
E-3 Medium M: 深海地中海艦隊 高速戦艦戦隊 (
PoiDB)
| #
|
Formation
|
Normal Battle Node
|
AD/AP
AS/AS+
|
| M
|
Line Ahead
Double Line
Phases: 2
|

|
46/91
204/408
|
Diamond
Phases: 2
|
|
46/91
204/408
|
| #
|
Formation
|
Normal Battle Node
|
AD/AP
AS/AS+
|
E-3 Medium M1: 地中海配備 深海魚雷艇戦隊 (
PoiDB)
| #
|
Formation
|
Normal Battle Node
|
AD/AP
AS/AS+
|
| M1
|
Line Ahead
Echelon
Vanguard
Phases: 2
|
|
0/0
0/0
|
| #
|
Formation
|
Normal Battle Node
|
AD/AP
AS/AS+
|
E-3 Medium M2: 深海潜水艦隊 タラント沖哨戒線 (
PoiDB)
| #
|
Formation
|
Normal Battle Node
|
AD/AP
AS/AS+
|
| M2
|
Echelon
Line Abreast
Phases: 2
|
|
0/0
0/0
|
Echelon
Line Abreast
Phases: 2
|
|
0/0
0/0
|
Echelon
Line Abreast
Phases: 2
|
|
0/0
0/0
|
| #
|
Formation
|
Normal Battle Node
|
AD/AP
AS/AS+
|
E-3 Medium N: 深海地中海艦隊 タラント軍港 (
PoiDB)
| #
|
Formation
|
Normal Battle Node
|
AD/AP
AS/AS+
|
| N
|
Double Line
Phases: 2
|
|
70/139
312/624
|
Double Line
Phases: 2
|
|
70/139
312/624
|
Double Line
Phases: 2
|
|
46/91
204/408
|
| #
|
Formation
|
Normal Battle Node
|
AD/AP
AS/AS+
|
E-3 Medium O: 深海潜水艦隊 マルタ島沖防衛線 (
PoiDB)
| #
|
Formation
|
Normal Battle Node
|
AD/AP
AS/AS+
|
| O
|
Echelon
Phases: 2
|
|
0/0
0/0
|
Echelon
Phases: 2
|
|
0/0
0/0
|
Echelon
Phases: 2
|
|
0/0
0/0
|
Echelon
Phases: 2
|
|
0/0
0/0
|
Echelon
Phases: 2
|
|
0/0
0/0
|
Echelon
Phases: 2
|
|
0/0
0/0
|
| #
|
Formation
|
Normal Battle Node
|
AD/AP
AS/AS+
|
E-3 Medium P: 深海北アフリカ物資集積地 (
PoiDB)
| #
|
Formation
|
Normal Battle Node
|
AD/AP
AS/AS+
|
| P
|
Double Line
Phases: 2
|
|
63/126
282/564
|
Double Line
Phases: 2
|
|
65/130
291/582
|
Double Line
Phases: 2
|
|
37/73
162/324
|
| #
|
Formation
|
Normal Battle Node
|
AD/AP
AS/AS+
|
E-3 Medium Q: 深海地中海艦隊 空母艦載機群 (
PoiDB)
| #
|
Formation
|
Air Defense Node
|
AD/AP
AS/AS+
|
| Q
|
Diamond
Phases: 2
|
|
168/336
755/1509
|
Diamond
Phases: 2
|
|
181/361
812/1623
|
Diamond
Phases: 2
|
|
241/481
1082/2163
|
| #
|
Formation
|
Air Defense Node
|
AD/AP
AS/AS+
|
E-3 Medium R
| #
|
Empty Node
|
| R
|
敵影を見ず。
敵機動部隊、接近中!警戒を厳にせよ!
No enemy spotted.
Enemy task force approaching! Maintain high vigilance!
|
| #
|
Empty Node
|
E-3 Medium S: 深海空母機動部隊 前衛護衛戦隊 (
PoiDB)
| #
|
Formation
|
Normal Battle Node
|
AD/AP
AS/AS+
|
| S
|
Line Ahead
Double Line
Echelon
Phases: 2
|

|
0/0
0/0
|
| #
|
Formation
|
Normal Battle Node
|
AD/AP
AS/AS+
|
E-3 Medium T
| #
|
Repair Node
|
| #
|
Repair Node
|
E-3 Medium U: 深海地中海艦隊 高速機動部隊 (
PoiDB)
E-3 Easy AB
| #
|
Formation
|
Air Raids
|
AD/AP
AS/AS+
|
| AB
|
Diamond
|
|
17/33
72/144
|
| Diamond
|
|
23/46
102/204
|
| Diamond
|
|
28/55
123/246
|
| #
|
Formation
|
Air Raids
|
AD/AP
AS/AS+
|
E-3 Easy A: 深海任務部隊 スエズ湾阻止線 (
PoiDB)
| #
|
Formation
|
Normal Battle Node
|
AD/AP
AS/AS+
|
| A
|
Line Ahead
Double Line
Vanguard
Phases: 1, 2
|
|
0/0
0/0
|
| #
|
Formation
|
Normal Battle Node
|
AD/AP
AS/AS+
|
E-3 Easy A1: 紅海阻止線 深海挺身突撃隊 (
PoiDB)
| #
|
Formation
|
Normal Battle Node
|
AD/AP
AS/AS+
|
| A1
|
Line Ahead
Double Line
Vanguard
Phases: 1, 2
|

|
0/0
0/0
|
| #
|
Formation
|
Normal Battle Node
|
AD/AP
AS/AS+
|
E-3 Easy A2: 紅海配備 深海魚雷艇 再編梯団 (
PoiDB)
| #
|
Formation
|
Normal Battle Node
|
AD/AP
AS/AS+
|
| A2
|
Line Ahead
Echelon
Vanguard
Phases: 1, 2
|
|
0/0
0/0
|
| #
|
Formation
|
Normal Battle Node
|
AD/AP
AS/AS+
|
E-3 Easy B
| #
|
Empty Node
|
| B
|
気のせいだった。
スエズ運河を越え、地中海に進出せよ!
Must be my imagination.
Cross the Suez Canal and enter the Mediterranean!
|
| #
|
Empty Node
|
E-3 Easy C
| #
|
Selection Node
|
| C
|
スエズ運河を越え、地中海に進出せよ!
Cross the Suez Canal and enter the Mediterranean!
|
| #
|
Selection Node
|
E-3 Easy C1: 深海地中海艦隊 軽空母戦隊 (
PoiDB)
| #
|
Formation
|
Normal Battle Node
|
AD/AP
AS/AS+
|
| C1
|
Diamond
Phases: 1
|
|
41/81
180/360
|
Diamond
Phases: 1, 2
|
|
81/161
360/720
|
Diamond
Phases: 1
|
|
91/182
408/816
|
| #
|
Formation
|
Normal Battle Node
|
AD/AP
AS/AS+
|
E-3 Easy C2: 深海上陸橋頭堡 物資集積地 (
PoiDB)
| #
|
Formation
|
Normal Battle Node
|
AD/AP
AS/AS+
|
| C2
|
Double Line
Phases: 1
|
|
12/23
51/102
|
Double Line
Phases: 1
|
|
12/23
51/102
|
Double Line
Phases: 1
|
|
14/27
60/120
|
| #
|
Formation
|
Normal Battle Node
|
AD/AP
AS/AS+
|
E-3 Easy D: 深海地中海艦隊 兵站輸送船団 (
PoiDB)
| #
|
Formation
|
Normal Battle Node
|
AD/AP
AS/AS+
|
| D
|
Vanguard
|

|
0/0
0/0
|
Double Line
Diamond
|
|
0/0
0/0
|
| #
|
Formation
|
Normal Battle Node
|
AD/AP
AS/AS+
|
E-3 Easy E: 深海地中海艦隊 前衛偵察艦隊 (
PoiDB)
| #
|
Formation
|
Normal Battle Node
|
AD/AP
AS/AS+
|
| E
|
Line Ahead
Double Line
Vanguard
Phases: 1
|
 
|
43/85
189/378
|
| #
|
Formation
|
Normal Battle Node
|
AD/AP
AS/AS+
|
E-3 Easy F: 深海地中海艦隊 強行偵察戦隊 (
PoiDB)
| #
|
Formation
|
Normal Battle Node
|
AD/AP
AS/AS+
|
| F
|
Line Ahead
Echelon
Vanguard
Phases: 1, 2
|
|
0/0
0/0
|
| #
|
Formation
|
Normal Battle Node
|
AD/AP
AS/AS+
|
E-3 Easy F1: 深海地中海方面 基地航空隊 (
PoiDB)
| #
|
Formation
|
Air Defense Node
|
AD/AP
AS/AS+
|
| F1
|
Diamond
Phases: 1, 2
|
|
35/69
153/306
|
Diamond
Phases: 1, 2
|
|
44/87
195/390
|
Diamond
Phases: 1, 2
|
|
46/91
204/408
|
Diamond
Phases: 1, 2
|
|
55/110
246/492
|
Diamond
Phases: 2
|
|
60/119
267/534
|
| #
|
Formation
|
Air Defense Node
|
AD/AP
AS/AS+
|
E-3 Easy F2: 深海潜水艦隊 地中海哨戒線 (
PoiDB)
| #
|
Formation
|
Normal Battle Node
|
AD/AP
AS/AS+
|
| F2
|
Echelon
Line Abreast
Phases: 1, 2
|
|
0/0
0/0
|
Echelon
Line Abreast
Phases: 1, 2
|
|
0/0
0/0
|
Echelon
Line Abreast
Phases: 1, 2
|
|
0/0
0/0
|
| #
|
Formation
|
Normal Battle Node
|
AD/AP
AS/AS+
|
E-3 Easy G
| #
|
Resource Node
|
| #
|
Resource Node
|
E-3 Easy H
| #
|
Selection Node
|
| H
|
艦隊の針路を選択できます。提督、どちらの針路をとられますか?
You can decide the fleet's course. Admiral, which heading should we take?
|
| #
|
Selection Node
|
E-3 Easy H1: 深海地中海方面 基地航空隊 (
PoiDB)
| #
|
Formation
|
Air Defense Node
|
AD/AP
AS/AS+
|
| H1
|
Diamond
Phases: 1, 2
|
|
35/69
153/306
|
Diamond
Phases: 1, 2
|
|
44/87
195/390
|
Diamond
Phases: 1, 2
|
|
46/91
204/408
|
Diamond
Phases: 1, 2
|
|
55/110
246/492
|
Diamond
Phases: 2
|
|
60/119
267/534
|
| #
|
Formation
|
Air Defense Node
|
AD/AP
AS/AS+
|
E-3 Easy H2: 深海地中海艦隊 増援軽空母戦隊 (
PoiDB)
| #
|
Formation
|
Normal Battle Node
|
AD/AP
AS/AS+
|
| H2
|
Diamond
Phases: 2
|
|
41/81
180/360
|
Diamond
Phases: 2
|
|
81/161
360/720
|
Diamond
Phases: 2
|
|
91/182
408/816
|
| #
|
Formation
|
Normal Battle Node
|
AD/AP
AS/AS+
|
E-3 Easy I
| #
|
Selection Node
|
| I
|
艦隊の針路を選択できます。提督、どちらの針路をとられますか?
You can decide the fleet's course. Admiral, which heading should we take?
|
| #
|
Selection Node
|
E-3 Easy J
| #
|
Empty Node
|
| J
|
気のせいだった。
敵機動部隊、接近中!警戒を厳にせよ!
Must be my imagination.
Enemy task force approaching! Maintain high vigilance!
|
| #
|
Empty Node
|
E-3 Easy K: 深海地中海艦隊 低速戦艦戦隊 (
PoiDB)
| #
|
Formation
|
Normal Battle Node
|
AD/AP
AS/AS+
|
| K
|
Line Ahead
Double Line
Phases: 1, 2
|
|
0/0
0/0
|
Line Ahead
Phases: 2
|

|
32/63
141/282
|
| #
|
Formation
|
Normal Battle Node
|
AD/AP
AS/AS+
|
E-3 Easy L: 深海地中海艦隊 マルタ島迎撃線 (
PoiDB)
E-3 Easy M: 深海地中海艦隊 高速戦艦戦隊 (
PoiDB)
| #
|
Formation
|
Normal Battle Node
|
AD/AP
AS/AS+
|
| M
|
Line Ahead
Double Line
Phases: 2
|

|
41/81
180/360
|
Diamond
Phases: 2
|
|
41/81
180/360
|
| #
|
Formation
|
Normal Battle Node
|
AD/AP
AS/AS+
|
E-3 Easy M1: 地中海配備 深海魚雷艇戦隊 (
PoiDB)
| #
|
Formation
|
Normal Battle Node
|
AD/AP
AS/AS+
|
| M1
|
Line Ahead
Echelon
Vanguard
Phases: 2
|
|
0/0
0/0
|
| #
|
Formation
|
Normal Battle Node
|
AD/AP
AS/AS+
|
E-3 Easy M2: 深海潜水艦隊 タラント沖哨戒線 (
PoiDB)
| #
|
Formation
|
Normal Battle Node
|
AD/AP
AS/AS+
|
| M2
|
Echelon
Line Abreast
Phases: 2
|
|
0/0
0/0
|
Echelon
Line Abreast
Phases: 2
|
|
0/0
0/0
|
Echelon
Line Abreast
Phases: 2
|
|
0/0
0/0
|
| #
|
Formation
|
Normal Battle Node
|
AD/AP
AS/AS+
|
E-3 Easy N: 深海地中海艦隊 タラント軍港 (
PoiDB)
| #
|
Formation
|
Normal Battle Node
|
AD/AP
AS/AS+
|
| N
|
Double Line
Phases: 2
|
|
65/129
288/576
|
Double Line
Phases: 2
|
|
63/125
279/558
|
Double Line
Phases: 2
|
|
41/81
180/360
|
| #
|
Formation
|
Normal Battle Node
|
AD/AP
AS/AS+
|
E-3 Easy O: 深海潜水艦隊 マルタ島沖防衛線 (
PoiDB)
| #
|
Formation
|
Normal Battle Node
|
AD/AP
AS/AS+
|
| O
|
Echelon
Phases: 2
|
|
0/0
0/0
|
Echelon
Phases: 2
|
|
0/0
0/0
|
Echelon
Phases: 2
|
|
0/0
0/0
|
Echelon
Phases: 2
|
|
0/0
0/0
|
Echelon
Phases: 2
|
|
0/0
0/0
|
Echelon
Phases: 2
|
|
0/0
0/0
|
| #
|
Formation
|
Normal Battle Node
|
AD/AP
AS/AS+
|
E-3 Easy P: 深海北アフリカ物資集積地 (
PoiDB)
| #
|
Formation
|
Normal Battle Node
|
AD/AP
AS/AS+
|
| P
|
Double Line
Phases: 2
|
|
51/101
225/450
|
Double Line
Phases: 2
|
|
53/105
234/468
|
Double Line
Phases: 2
|
|
24/47
105/210
|
| #
|
Formation
|
Normal Battle Node
|
AD/AP
AS/AS+
|
E-3 Easy Q: 深海地中海艦隊 空母艦載機群 (
PoiDB)
| #
|
Formation
|
Air Defense Node
|
AD/AP
AS/AS+
|
| Q
|
Diamond
Phases: 2
|
|
102/203
456/912
|
Diamond
Phases: 2
|
|
115/230
516/1032
|
Diamond
Phases: 2
|
|
166/331
744/1488
|
| #
|
Formation
|
Air Defense Node
|
AD/AP
AS/AS+
|
E-3 Easy R
| #
|
Empty Node
|
| R
|
敵影を見ず。
敵機動部隊、接近中!警戒を厳にせよ!
No enemy spotted.
Enemy task force approaching! Maintain high vigilance!
|
| #
|
Empty Node
|
E-3 Easy S: 深海空母機動部隊 前衛護衛戦隊 (
PoiDB)
| #
|
Formation
|
Normal Battle Node
|
AD/AP
AS/AS+
|
| S
|
Line Ahead
Double Line
Echelon
Phases: 2
|
|
0/0
0/0
|
| #
|
Formation
|
Normal Battle Node
|
AD/AP
AS/AS+
|
E-3 Easy T
| #
|
Repair Node
|
| #
|
Repair Node
|
E-3 Easy U: 深海地中海艦隊 高速機動部隊 (
PoiDB)
E-3 Casual AB
| #
|
Formation
|
Air Raids
|
AD/AP
AS/AS+
|
| AB
|
Diamond
|
|
12/23
51/102
|
| Diamond
|
|
17/33
72/144
|
| Diamond
|
|
23/46
102/204
|
| #
|
Formation
|
Air Raids
|
AD/AP
AS/AS+
|
E-3 Casual A: 深海任務部隊 スエズ湾阻止線 (
PoiDB)
| #
|
Formation
|
Normal Battle Node
|
AD/AP
AS/AS+
|
| A
|
Line Ahead
Double Line
Vanguard
Phases: 1, 2
|
|
0/0
0/0
|
| #
|
Formation
|
Normal Battle Node
|
AD/AP
AS/AS+
|
E-3 Casual A1: 紅海阻止線 深海挺身突撃隊 (
PoiDB)
| #
|
Formation
|
Normal Battle Node
|
AD/AP
AS/AS+
|
| A1
|
Line Ahead
Double Line
Vanguard
Phases: 1, 2
|
|
0/0
0/0
|
| #
|
Formation
|
Normal Battle Node
|
AD/AP
AS/AS+
|
E-3 Casual A2: 紅海配備 深海魚雷艇 再編梯団 (
PoiDB)
| #
|
Formation
|
Normal Battle Node
|
AD/AP
AS/AS+
|
| A2
|
Line Ahead
Echelon
Vanguard
Phases: 1
|
|
0/0
0/0
|
| #
|
Formation
|
Normal Battle Node
|
AD/AP
AS/AS+
|
E-3 Casual B
| #
|
Empty Node
|
| B
|
気のせいだった。
スエズ運河を越え、地中海に進出せよ!
Must be my imagination.
Cross the Suez Canal and enter the Mediterranean!
|
| #
|
Empty Node
|
E-3 Casual C
| #
|
Selection Node
|
| C
|
スエズ運河を越え、地中海に進出せよ!
Cross the Suez Canal and enter the Mediterranean!
|
| #
|
Selection Node
|
E-3 Casual C1: 深海地中海艦隊 軽空母戦隊 (
PoiDB)
| #
|
Formation
|
Normal Battle Node
|
AD/AP
AS/AS+
|
| C1
|
Diamond
Phases: 1
|
|
43/85
189/378
|
Diamond
Phases: 1, 2
|
|
43/85
189/378
|
Diamond
Phases: 1, 2
|

|
45/90
201/402
|
| #
|
Formation
|
Normal Battle Node
|
AD/AP
AS/AS+
|
E-3 Casual C2: 深海上陸橋頭堡 物資集積地 (
PoiDB)
| #
|
Formation
|
Normal Battle Node
|
AD/AP
AS/AS+
|
| C2
|
Double Line
Phases: 1
|
|
12/23
51/102
|
Double Line
Phases: 1
|
|
12/23
51/102
|
Double Line
Phases: 1
|
|
14/27
60/120
|
| #
|
Formation
|
Normal Battle Node
|
AD/AP
AS/AS+
|
E-3 Casual D: 深海地中海艦隊 兵站輸送船団 (
PoiDB)
| #
|
Formation
|
Normal Battle Node
|
AD/AP
AS/AS+
|
| D
|
Vanguard
|
|
0/0
0/0
|
Double Line
Diamond
|
|
0/0
0/0
|
| #
|
Formation
|
Normal Battle Node
|
AD/AP
AS/AS+
|
E-3 Casual E: 深海地中海艦隊 前衛偵察艦隊 (
PoiDB)
| #
|
Formation
|
Normal Battle Node
|
AD/AP
AS/AS+
|
| E
|
Line Ahead
Double Line
Vanguard
Phases: 1, 2
|
|
9/17
36/72
|
| #
|
Formation
|
Normal Battle Node
|
AD/AP
AS/AS+
|
E-3 Casual F: 深海地中海艦隊 強行偵察戦隊 (
PoiDB)
| #
|
Formation
|
Normal Battle Node
|
AD/AP
AS/AS+
|
| F
|
Line Ahead
Echelon
Vanguard
Phases: 1, 2
|
|
0/0
0/0
|
| #
|
Formation
|
Normal Battle Node
|
AD/AP
AS/AS+
|
E-3 Casual F1: 深海地中海方面 基地航空隊 (
PoiDB)
| #
|
Formation
|
Air Defense Node
|
AD/AP
AS/AS+
|
| F1
|
Diamond
Phases: 1, 2
|
|
24/47
105/210
|
Diamond
Phases: 1, 2
|
|
35/69
153/306
|
Diamond
Phases: 1, 2
|
|
44/87
195/390
|
Diamond
Phases: 2
|
|
46/91
204/408
|
| #
|
Formation
|
Air Defense Node
|
AD/AP
AS/AS+
|
E-3 Casual F2: 深海潜水艦隊 地中海哨戒線 (
PoiDB)
| #
|
Formation
|
Normal Battle Node
|
AD/AP
AS/AS+
|
| F2
|
Echelon
Line Abreast
Phases: 1, 2
|
|
0/0
0/0
|
Echelon
Line Abreast
Phases: 1, 2
|
|
0/0
0/0
|
| #
|
Formation
|
Normal Battle Node
|
AD/AP
AS/AS+
|
E-3 Casual G
| #
|
Resource Node
|
| #
|
Resource Node
|
E-3 Casual H
| #
|
Selection Node
|
| H
|
艦隊の針路を選択できます。提督、どちらの針路をとられますか?
You can decide the fleet's course. Admiral, which heading should we take?
|
| #
|
Selection Node
|
E-3 Casual H1: 深海地中海方面 基地航空隊 (
PoiDB)
| #
|
Formation
|
Air Defense Node
|
AD/AP
AS/AS+
|
| H1
|
Diamond
Phases: 1, 2
|
|
24/47
105/210
|
Diamond
Phases: 1, 2
|
|
35/69
153/306
|
Diamond
Phases: 1, 2
|
|
44/87
195/390
|
Diamond
Phases: 2
|
|
46/91
204/408
|
| #
|
Formation
|
Air Defense Node
|
AD/AP
AS/AS+
|
E-3 Casual H2: 深海地中海艦隊 増援軽空母戦隊 (
PoiDB)
| #
|
Formation
|
Normal Battle Node
|
AD/AP
AS/AS+
|
| H2
|
Diamond
Phases: 2
|
|
43/85
189/378
|
Diamond
Phases: 2
|
|
43/85
189/378
|
Diamond
Phases: 1, 2
|
|
45/90
201/402
|
| #
|
Formation
|
Normal Battle Node
|
AD/AP
AS/AS+
|
E-3 Casual I
| #
|
Selection Node
|
| I
|
艦隊の針路を選択できます。提督、どちらの針路をとられますか?
You can decide the fleet's course. Admiral, which heading should we take?
|
| #
|
Selection Node
|
E-3 Casual J
| #
|
Empty Node
|
| J
|
気のせいだった。
敵機動部隊、接近中!警戒を厳にせよ!
Must be my imagination.
Enemy task force approaching! Maintain high vigilance!
|
| #
|
Empty Node
|
E-3 Casual K: 深海地中海艦隊 低速戦艦戦隊 (
PoiDB)
| #
|
Formation
|
Normal Battle Node
|
AD/AP
AS/AS+
|
| K
|
Line Ahead
Double Line
Phases: 1, 2
|

|
0/0
0/0
|
Line Ahead
Phases: 2
|
|
32/63
141/282
|
| #
|
Formation
|
Normal Battle Node
|
AD/AP
AS/AS+
|
E-3 Casual L: 深海地中海艦隊 マルタ島迎撃線 (
PoiDB)
E-3 Casual M: 深海地中海艦隊 高速戦艦戦隊 (
PoiDB)
| #
|
Formation
|
Normal Battle Node
|
AD/AP
AS/AS+
|
| M
|
Line Ahead
Double Line
Phases: 2
|
|
43/85
189/378
|
Diamond
Phases: 2
|
|
43/85
189/378
|
| #
|
Formation
|
Normal Battle Node
|
AD/AP
AS/AS+
|
E-3 Casual M1: 地中海配備 深海魚雷艇戦隊 (
PoiDB)
| #
|
Formation
|
Normal Battle Node
|
AD/AP
AS/AS+
|
| M1
|
Line Ahead
Echelon
Vanguard
Phases: 2
|
|
0/0
0/0
|
| #
|
Formation
|
Normal Battle Node
|
AD/AP
AS/AS+
|
E-3 Casual M2: 深海潜水艦隊 タラント沖哨戒線 (
PoiDB)
| #
|
Formation
|
Normal Battle Node
|
AD/AP
AS/AS+
|
| M2
|
Echelon
Line Abreast
Phases: 2
|
|
0/0
0/0
|
Echelon
Line Abreast
Phases: 2
|
|
0/0
0/0
|
| #
|
Formation
|
Normal Battle Node
|
AD/AP
AS/AS+
|
E-3 Casual N: 深海地中海艦隊 タラント軍港 (
PoiDB)
| #
|
Formation
|
Normal Battle Node
|
AD/AP
AS/AS+
|
| N
|
Double Line
Phases: 2
|
|
31/61
135/270
|
Double Line
Phases: 2
|
|
65/129
288/576
|
Double Line
Phases: 2
|
|
43/85
189/378
|
| #
|
Formation
|
Normal Battle Node
|
AD/AP
AS/AS+
|
E-3 Casual O: 深海潜水艦隊 マルタ島沖防衛線 (
PoiDB)
| #
|
Formation
|
Normal Battle Node
|
AD/AP
AS/AS+
|
| O
|
Echelon
Phases: 2
|
|
0/0
0/0
|
Echelon
Phases: 2
|
|
0/0
0/0
|
Echelon
Phases: 2
|
|
0/0
0/0
|
Echelon
Phases: 2
|
|
0/0
0/0
|
| #
|
Formation
|
Normal Battle Node
|
AD/AP
AS/AS+
|
E-3 Casual P: 深海北アフリカ物資集積地 (
PoiDB)
| #
|
Formation
|
Normal Battle Node
|
AD/AP
AS/AS+
|
| P
|
Double Line
Phases: 2
|
|
35/69
153/306
|
Double Line
Phases: 2
|
|
43/85
189/378
|
Double Line
Phases: 2
|
|
24/47
105/210
|
| #
|
Formation
|
Normal Battle Node
|
AD/AP
AS/AS+
|
E-3 Casual Q: 深海地中海艦隊 空母艦載機群 (
PoiDB)
| #
|
Formation
|
Air Defense Node
|
AD/AP
AS/AS+
|
| Q
|
Diamond
Phases: 2
|
|
43/86
192/384
|
Diamond
Phases: 2
|
|
81/161
360/720
|
Diamond
Phases: 2
|
|
94/187
420/840
|
| #
|
Formation
|
Air Defense Node
|
AD/AP
AS/AS+
|
E-3 Casual R
| #
|
Empty Node
|
| R
|
敵影を見ず。
敵機動部隊、接近中!警戒を厳にせよ!
No enemy spotted.
Enemy task force approaching! Maintain high vigilance!
|
| #
|
Empty Node
|
E-3 Casual S: 深海空母機動部隊 前衛護衛戦隊 (
PoiDB)
| #
|
Formation
|
Normal Battle Node
|
AD/AP
AS/AS+
|
| S
|
Line Ahead
Double Line
Echelon
Phases: 2
|

|
0/0
0/0
|
| #
|
Formation
|
Normal Battle Node
|
AD/AP
AS/AS+
|
E-3 Casual T
| #
|
Repair Node
|
| #
|
Repair Node
|
E-3 Casual U: 深海地中海艦隊 高速機動部隊 (
PoiDB)
Ship Drops
|
|
Time remaining until Event ends:
October 14 2022 11:00:00 +0900
The Summer 2022 Event has ended.
|