Help:Equipment Setup
|
|
There is no such thing as a "perfect" or "universal" setup. Each and every situation requires its own assortment of ships and equipment, with some setups being more common/effective than others. |
This article aims to cover the most commonly used equipment setups for each ship type. It is to give an idea of what are the most efficient load-outs to make ships effective in a particular role. This means that this article will not cover some niche setups that are too specific. For those equipment setups, please refer to the relevant pages.
- See here for a breakdown of all equipment types and their related mechanics.
- For more details on some mechanics, please see each relevant page.
- Please mind each individual plane slot size when applicable. Aircraft should be placed in the biggest slots available to be more effective.
Do note that the vast majority of the game mechanics are "equipment bases" and not "ship based", which means that most setup aspects are shared on all types of ships.
- In addition, if a ship can equip a setup viable on other ships, then it will generally be at viable too or at least not detrimental (unless specifically stated otherwise).
- If a setup is missing on this page, it is possible to extrapolate it from the knowledge of the general setup and equipment rules.
Standard Combat
"Standard combat" refers to most of the encountered engagements in the game, being surface battles in nature, with some air component.
- For more information on this topic, see Combat.
- For more information on this topic, see Day Battle.
- For more information on this topic, see Aerial Combat.
- For more information on this topic, see Night Battle.
Battleships (BB) notably utilize ![]() Large Caliber Main Guns,
Large Caliber Main Guns, ![]() Recon Seaplane Recons, and
Recon Seaplane Recons, and ![]() AP Shells, having heavy firepower
AP Shells, having heavy firepower ![]() and armor
and armor ![]() , but lacking torpedo & ASW stats. They:
, but lacking torpedo & ASW stats. They:
- Are required to unlock the "Second Shelling Phase".
- Must be "Fast+" to be placed in the Escort of a Combined Fleet.
| Equipment Setup | Notes |
|---|---|
| This is the most basic combat setup for BBs. The AP shell enables the most powerful artillery spotting attack and provides bonus damage. This setup should be run the majority of the time. | |
| This is the most basic combat setup for BBs under air incapacity. being similar to the regular one, but lacking the artillery spotting as it cannot be achieved in this circumstance.
This setup is also good to maximize Special Attacks damage. | |
| This is the most basic combat setup for BBVs, with the seaplane mix that can be adapted by using more of less SPB or SPF | |
| The "triple gun cutin", a relatively bad cutin in general, but that can be valuable against enemies with very high |
Misc
| Equipment Setup | Notes |
|---|---|
| This is a setup for the Yamato-class Kai Ni and requires a reinforcement expansion. It also has a higher trigger rate of artillery spotting because the equipment setup fulfills the trigger requirements for a wider array of special attacks. | |
| This is a setup for the Yamato-class Kai Ni and requires a reinforcement expansion. This setup should also only be used in a main fleet of a combined fleet as it can trigger main/secondary cut-in at night. This setup allows to perform AACI. It also has a higher trigger rate of artillery spotting because the equipment setup fulfills the trigger requirements for a wider array of special attacks. | |
| This is a setup for the Ise-class Kai Ni, having artillery spotting and DA, with great fighter power. | |
| This is a setup for the Ise-class Kai Ni, having artillery spotting and DA, with additional opening airstrike power (it can allow suisei/zuiun CI). |
Standard Aircraft Carriers (CV) notably utilize ![]() Dive Bombers,
Dive Bombers, ![]() Torpedo Bombers,
Torpedo Bombers, ![]() Fighters, required to take part in both Aerial Combat and regular Combat, with their "plane slot"
Fighters, required to take part in both Aerial Combat and regular Combat, with their "plane slot" ![]() stat being the most important. They:
stat being the most important. They:
- Must equip
 /
/ bombers to be able to carry any attack.
 - Cannot attack during Night Battle without the right equipment.
- Bombers in top slots,
- Torpedo bomber in largest slot,
- Fighters in the smaller slots,
- Recons and mics equipment in the smallest slots.
| Equipment Setup | Notes |
|---|---|
| This is the basic setup for CV/Ls. It balances striking power with fighter power. The amount of |
Misc
| Equipment Setup | Notes |
|---|---|
This setup is to allow CV/Ls to perform night battle attacks. Since the CV/L will lose 1 slot to fit the NOAP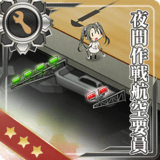 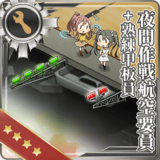 , careful consideration needs to be taken when running this setup. , careful consideration needs to be taken when running this setup.
| |
| This setup is only for CVN as they are able to perform night battle special attacks without the NOAP. The |
Heavy Cruisers (CA) are relatively flexible, utilizing ![]() Medium Caliber Main Guns,
Medium Caliber Main Guns, ![]() Torpedoes, and
Torpedoes, and ![]() Recon Seaplane Recons, and having strong firepower
Recon Seaplane Recons, and having strong firepower ![]() , torpedo
, torpedo ![]() , and "night attack power
, and "night attack power ![]() " stats, but no ASW.
" stats, but no ASW.
| Equipment Setup | Notes |
|---|---|
| This is the most basic combat setup for most heavy cruisers. It provides both day and night double attacks. The wild card can be anything that does not interfere with the double attack setup. The wild card is usually a RADAR of some sort to increase the artillery spotting trigger rate. | |
This is an alternative setup for CAs in the main fleet of a combined fleet. Do not use this setup if CAs are expected to engage in night battle. This setup gives them extra hitting power for artillery spotting at the expense of having a terrible night battle cut in. If applicable, on 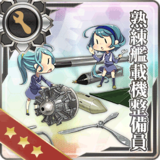 to gain the firepower without losing the DA. to gain the firepower without losing the DA.
| |
| This is an alternative combat setup where CAs are expected to be fighting without artillery spotting. The extra secondary guns will give them extra firepower in the daytime without interfering with night battle double attacks. Any secondary gun can be used but yellow ones are preferred for the higher firepower. The wild card can be anything that doesn't interfere with night battle attacks. It will typically be night battle equipment or an additional yellow gun. | |
| This is the standard CA setup for Torpedo Cut-In (TCI). Since any CA that can TCI or should be luck-modded to be capable of TCI can already hit the cap with two torpedoes, it is better to have a main gun over a 3rd torpedo. This will allow them to be somewhat effective during the day and gain the bonus accuracy from equipping an IJN 20.3. The wild card can be anything that doesn't interfere with this setup. It will typically be night battle equipment. |
Misc
| Equipment Setup | Notes |
|---|---|
| This is a unique setup for Maya Kai Ni. This is the typical setup that allows her to perform artillery spotting, night battle double attacks, and AACI. There are several variants to this setup depending on what role she needs to be specialized in. Trading a | |
| This setup is for the Mogami-class Kai Ni. It maximizes the air power they can bring to bear while maintaining nighttime double attacks. One SPF can be swapped out for a recon seaplane if you need them to perform daytime spotting as well. |
Light Cruisers (CL) are very flexible, utilizing ![]() Medium Caliber Main Guns,
Medium Caliber Main Guns, ![]() Torpedoes,
Torpedoes, ![]() Recon Seaplane Recons, and
Recon Seaplane Recons, and ![]()
![]() ASW equipment, and having strong torpedo
ASW equipment, and having strong torpedo ![]() , ASW
, ASW ![]() , and "night attack power
, and "night attack power ![]() " stats.
" stats.
- Also applicable to CT to some extent for standard combat and ASW.
| Equipment Setup | Notes |
|---|---|
| This is the most basic combat setup for most light cruisers. The exception would be light cruisers that have 0 plane slots. In that case, swap the seaplane for any utility equipment that won't interfere with the double attack setup. | |
| Template:Green Med Gun |
The basic AACI setup for light cruisers. It is not particularly recommended, unless the CL is incapable of doing artillery spotting or no other other ship in the fleet is fitted to carry the AACI. |
The "cheat CLT setup" for
| |
| This setup is the standard Torpedo Cut-In (TCI) setup.
One |
Misc
| Equipment Setup | Notes |
|---|---|
| A setup for Yura Kai Ni and Yahagi Kai Ni B that allows her to provide either air support or artillery spotting, while maintaining night battle double attacks and opening torpedo. This requires a RE to fit the gun.
In the case of Yahagi, the 4th slot can bring any utility equipment like a sonar, another seaplane, or a radar. | |
| An AACI setup for Yura Kai Ni. This requires a RE to fit the gun.
The wildcard should preferably be a | |
| This is a setup to take advantage of Ooyodo/Agano-class Kai Ni/CT reinforcement expansion.
By placing a | |
| This is a unique setup for Yuubari Kai Ni Toku when she isn't running the full TCI setup.
The wild card can be a tank, landing craft, or anti-ground rocket for anti-installation warfare, or a sonar for ASW. |
Torpedo Cruisers (CLT) have a very high torpedo ![]() stat, having the strongest "night attack power
stat, having the strongest "night attack power ![]() " in the game. They:
" in the game. They:
- Can equip
 Minisub Midget Submarines and carry out Opening Torpedo Salvo,
 - Should utilize Torpedoes or
 Secondary Guns.
| Equipment Setup | Notes |
|---|---|
This is the most basic combat setup for Kai Ni torpedo cruisers, opening torpedo + night double attack.
| |
| This setup is the standard Torpedo Cut-In (TCI) setup.
Two |
Destroyers (DD) are very versatile, utilizing ![]() Small Caliber Main Guns,
Small Caliber Main Guns, ![]() Torpedoes, and
Torpedoes, and ![]()
![]() ASW equipment, and having high torpedo
ASW equipment, and having high torpedo ![]() , ASW
, ASW ![]() , and evasion
, and evasion ![]() , and good "night attack power
, and good "night attack power ![]() " stats, to the detriment of firepower and armor. They:
" stats, to the detriment of firepower and armor. They:
- Have lower resource consumption,
- Very permissive Routings.
- Have access to special Night Cut-Ins.
| Equipment Setup | Notes |
|---|---|
| This is the most basic combat setup for all destroyers. Dual-purpose high-angle guns contribute to Fleet Anti-Air (FAA) while allowing them to perform night battle double attacks. Most light guns do not provide enough firepower to allow them to contribute much to day combat. The extra FAA from dual-purpose guns will help more by mitigating airstrike damage. The wildcard can be anything that does not interfere with double attacks. In most cases, this will be an | |
| This is an alternative setup for maps with minimal enemy airpower. This setup should only be used for destroyers with fit bonuses. It is for maximizing firepower just to squeeze out every last bit of damage. | |
| This setup is the standard Torpedo Cut-In (TCI) setup. It should only be used on destroyers with at least 50 | |
| This setup is an alternative TCI setup. This setup is typically used for either destroyers with powerful yasen (how can reach the night cap with 2 torpedoes), or low luck (<30 In the case of powerful destroyers, the wild card can be night battle equipment or a utility one like a radar or sonar. For low-luck destroyers, the wild card should be a | |
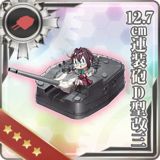
| The "GTRL", a night cutin setup that has a great trigger rate, even for ships with relatively low luck.
The gun should ideally be a 12.7 cm Mod D K2 | |
| The "DTRL", a niche night cutin setup that has a great trigger rate, even for ships with relatively low luck, that should only be utilized for routing reasons.
The gun should ideally be a 12.7 cm Mod D K2 | |
The "super mixed cutin", a niche night cutin setup that has the best potential damage output, at the cost of an inferior trigger rate.
|

Coastal Defense Ships (DE) are weak ships with high ASW ![]() stat, utilizing
stat, utilizing ![]()
![]() ASW equipment. They:
ASW equipment. They:
- Can perform special OASW with lower ASW
 stat,
stat, - Provide
 HP Modernization,
  Luck Modernization, or ASW Modernization,
 - Cannot equip
 Engine Improvements, and so cannot be Speed Modded.
| Equipment Setup | Notes |
|---|---|
| DE are primarily used for ASW. In the event they are used for combat, high-angle guns contribute to Fleet Anti-Air (FAA) while allowing them to perform night battle double attacks. Most light guns do not provide enough firepower to allow them to contribute in combat. The extra FAA from dual-purpose guns will help more by mitigating airstrike damage. The wildcard can be anything that does not interfere with double attacks. In most cases, this will be an |
Submarines (SS) have high torpedo ![]() stats, and are limited to the Opening Torpedo Salvo, the Closing Torpedo Salvo, and Night Battle. They:
stats, and are limited to the Opening Torpedo Salvo, the Closing Torpedo Salvo, and Night Battle. They:
- Are only vulnerable to ASW only.
- Utilize Torpedoes and Sub Submarine Torpedoes.
- Can inately trigger Opening Torpedo Salvos after reaching level 10.
- Have access to special Night Cut-Ins.
| Equipment Setup | Notes |
|---|---|
| This is the standard setup for SS. This setup aims to maximize their opening and closing torpedo power. Any TCI that manages to trigger in night battle is just a bonus. SS with 3 slots can either take another Two | |
| By combining Late Model Submarine Torpedoes with | |
Misc
| Equipment Setup | Notes |
|---|---|
| This setup is used when taking SSV for air support. |
Seaplane Tenders (AV) notably utilize ![]() Recon/
Recon/![]() Bomber/
Bomber/![]() seaplane Recons/Bombers/Fighters, as well as some Main Guns and
seaplane Recons/Bombers/Fighters, as well as some Main Guns and ![]() Minisub Midget Submarines, participating in most Combat stages, given the correct setup.
They can also be used for an Anti-Installation role, as they can carry most Anti-Ground Equipment.
Minisub Midget Submarines, participating in most Combat stages, given the correct setup.
They can also be used for an Anti-Installation role, as they can carry most Anti-Ground Equipment.
| Equipment Setup | Notes |
|---|---|
| This is the most basic combat setup for most seaplane tenders. Provides maximum potential opening damage.
AV that cannot equip | |
This setup is for 4 slots AV. The seaplane bombers give a decent airstrike and allow to perform Artillery Spotting with the double guns.
|
Most of the other Auxiliary ships are not combat-focused, and so their set-ups are heavily dependent on special mechanics, or can serve for "stat mulling" such as fighter mulling.
Anti-Submarine
- For more information on this topic, see Anti-Submarine Warfare.
- The first priority is to have an OASW, even at the expense of damage synergy:
- Because increase with levels, using high-level ships will help reach the required stat threshold,
- DE can OASW more easily than other ship types,
- Take note that DE also have an armor penetration bonus when using Depth Charges.
- Because
- To further maximize ASW effectiveness, regardless if an OASW is triggered or not, it is recommended to use the "damage synergy setup":
 Small +
  DCP + DCR
- This ASW setup maximizes the ASW by taking advantage of the synergy, and must include 1 Small Sonar, 1 Depth Charge Projector, and 1 Depth Charge (Racks).
| ASW Damage Synergy | |||
|---|---|---|---|
 Type 93 Passive Sonar  Type 4 Passive Sonar  Type 3 Active Sonar  Type 3 Active Sonar Kai  Type124 ASDIC  Type144/147 ASDIC  HF/DF + Type144/147 ASDIC | |||
 Type 0 Passive Sonar | |||
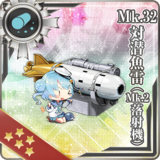
 Type 94 Depth Charge Projector  Type 3 Depth Charge Projector  Type 3 Depth Charge Projector (Concentrated Deployment)  Prototype 15cm 9-tube ASW Rocket Launcher  RUR-4A Weapon Alpha Kai  Mk.32 ASW Torpedo (Mk.2 Thrower) | |||
 Type 95 Depth Charge  Type 2 Depth Charge  Lightweight ASW Torpedo (Initial Test Model)  Hedgehog (Initial Model)  Type 2 Depth Charge Kai Ni | |||
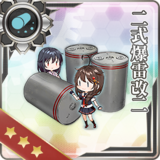
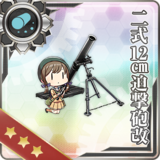
 Type 2 12cm Mortar Kai  Type 2 12cm Mortar Kai (Concentrated Deployment) | |||
| ASW Damage Modifiers: [math]\displaystyle{ \text{Mod}_\text{synergy} = {Mod}_\text{1} \times {Mod}_\text{2} }[/math] | |||
| [math]\displaystyle{ {Mod}_\text{1} }[/math] | (Any Sonar + Any Depth Charge) |
1.15 | |
| [math]\displaystyle{ {Mod}_\text{2} }[/math] | 1.1 | ||
| 1.25 | |||
| Examples | |||
| [math]\displaystyle{ \text{Mod}_\text{synergy} }[/math] | 1.4375[math]\displaystyle{ 1.15 \times 1.25 }[/math] | ||
| 1.265[math]\displaystyle{ 1.15 \times 1.1 }[/math] | |||
| Armor Penetration | |||
Indepentant of synergies, some equipment provides additional armor penetration to ASW attacks.
The flat armor penetration value is calculated as follows:
| |||

| Equipment Setup | Notes |
|---|---|
| Best ASW damage setup utilizing synergy.
Do note that reaching the OASW threshold takes precedence over everything, and if not reached, then any ASW equipment giving enough ASW to reach 100 should be used instead. | |
| A setup keeping a DA, while unlocking OASW for ships with enough ASW.
For ships with innate OASW, the sonar should be replaced with any depth charge with armor penetration. | |
| A setup keeping a TCI, while unlocking OASW for ships with enough ASW.
For ships with innate OASW, the sonar should be replaced with any depth charge with armor penetration. |
| Equipment Setup | Notes |
|---|---|
| Best ASW damage setup utilizing synergy. DE should only utilize this setup as any other setup is not viable. |
Only CVE & Kaga Kai Ni Go should be considered for this task, as other CV/CVB cannot attack submarines, and other CVL lack sufficient ASW stats.
- The use of ASW Aircraft is recommended or even mandatory, in order to unlock certain OASW.
| Equipment Setup | Notes |
|---|---|
| When the right OASW conditions are met, using a regular CVCI setup is recommended when other surface targets are also present. | |
| When the right OASW conditions are not met, using an additional ASW Aircraft just to trigger the OASW is recommended, usually put in the smallest slot for the ones immune to shutdown. | |
| When focusing on submarines only, using an assortment of ASW Aircraft/Sonar/Depth Charge is enough, as a CVCI cannot trigger against submarines. |
| Equipment Setup | Notes |
|---|---|
Setup unique to Hyuuga Kai Ni which allows her to do an OASW with a decent base ASW, while keeping some surface combat capabilities like Artillery Spotting. which allows her to do an OASW with a decent base ASW, while keeping some surface combat capabilities like Artillery Spotting.
The | |
Setup for Yamashio Maru Kai to allows her to do an OASW, while keeping some utilities by using to allows her to do an OASW, while keeping some utilities by using |

Anti-Installation
- For more information on this topic, see Anti-Installation.


- Regarding


 Landing Equipment:
- These provide on average the highest flat/multiplier damage bonus against all installations.
- As Landing Craft, Amphibious Tanks, and Landing Forces have separate multipliers, it is recommended to use them in tandem to maximize the effect.
- Only the following ships can equip those equipment, and so are particularly valuable in those situations:
| Ships that can equip Landing Craft / Amphibious Vehicles | |||||
|---|---|---|---|---|---|
| Type | Landing Craft |
Both |
Amphibious Vehicle | ||
| DD | |||||
| CL | |||||
| CAV | |||||
| (F)BB(V) | |||||
| CVL | |||||
| AV | |||||
| AO | |||||
| LHA | |||||
| SS(V) | All | ||||
| RE |
| ||||
| [edit] | |||||


- Regarding
 Anti-Ground Rockets:
- If a ship's base firepower is low or just cannot equip landing equipment, it can be viable to use Anti-Ground Rockets to provide a large flat damage increase to supplement the ship's anti-installation damage.
- Depending on whether one or more Anti-Ground Artilleries are to be equipped on a ship, it is recommended to use a WG42 for singular purposes, or Shipborne Model Type 4 20cm Anti-ground Rocket Launchers (or CD) if multiple are needed.
- ASW Mortar
 are inferior substitutes to regular Anti-Ground Artilleries when lacking those.
- Regarding

 Shells:
Nuke Setup describes any setups using anti-installation equipment from multiple categories to multiplicatively amplify damage dealt to installations (dealing "nuclear-like damage").
- Such a setup has a strong anti-installation power against all installations but is hampered by the daytime damage cap.
- Nuke Setups are recommended to be used when dealing with Supply Depot Princess in particular, utilizing the high post-cap side of the bonuses to deal with her generally high HP pool.
- The setup's damage can be further improved by using multiple copies of those types of equipment where applicable.
- For example, equipping multiple Special Amphibious Tanks
 or Landing Craft with unique bonuses instead of anti-ground rockets provides better damage output for the ship, however, it is advised to only do so if you have enough available for the other ships in your fleet that require them.
- For example, equipping multiple
All "surface" anti-installation setups can be further enhanced by using them in Special Attacks, especially the Nelson-class's Touch.
| Equipment Setup | Notes |
|---|---|
| General anti-installation setups | |
| The basic battleship setup. Because Battleships are not far away from the damage cap compared to other ship types, they do not benefit much from the high pre-cap multipliers that anti-installation equipment provides. The standard artillery spotting setup will allow them to utilize spotting attacks and AP Shell's post-cap bonuses against the installation, as well as be effective against all other targets in the enemy fleet. | |
| This is an option when facing soft-skinned installations. Taking an AA shell will slightly improve their damage versus installations, but will also limit the battleship's effectiveness against all other targets by reducing their artillery spotting attack types. | |
Yamato-class Kai Ni & Ise-class Kai Ni only.
| |
Nagato-class Kai Ni & Yamato Kai Ni Juu only.
| |
| Anti-SDP setups | |
or |
Nuke Setup , Yamato Kai Ni Juu only.
|
| Equipment Setup | Notes |
|---|---|
| General anti-installation setups | |
| This is only to be used when having anti-installation dive bombers. It will allow the carrier to still perform CVCI against other targets. | |
| The number of torpedo bombers and fighters in this setup can be varied depending on the amount of fighter power required. This is the standard carrier anti-installation setup. While it does sacrifice CVCI, the carrier shelling formula, and proficiency bonuses, it still ensures that carriers will do significant damage to installations and other targets. | |
| Anti-SDP setups | |
CV-Nuke Setup , Gambier Bay Mk.II & Unyou Kai/Ni only.
| |
Nuke Setup , Houshou Kai Ni Sen, Gambier Bay Mk.II & Unyou Kai/Ni only.
| |
| Equipment Setup | Notes |
|---|---|
| General anti-installation setups | |
| The standard anti-installation setup for heavy cruisers. It allows artillery spotting and deals decent damage against installations. | |
or |
|
| Anti-SDP setups | |
Nuke Setup , Mogami Kai Ni Toku only.
| |
| Equipment Setup | Notes |
|---|---|
| General anti-installation setups | |
| A setup for 4-slot light cruisers. This preserves their ability to double attack at night while giving them significant anti-installation power. | |
| Anti-SDP setups | |
| Nuke Setup | |
CLT should not engage in anti-installation warfare.
| Equipment Setup | Notes |
|---|---|
| General anti-installation setups | |
| Setups that keep the Double Attack while maintaining decent anti-installation power, allowing reasonable effectiveness against installation and other targets at night. | |
Tashkent only.
| |
| Anti-SDP setups | |
| Nuke Setup | |
Mini-Nuke Setup
| |
| Anti-installation-like warships setups | |
| GTR+anti-installation setup (only for high-luck DD that can carry radar in RE). | |
| TCI+anti-installation setup (lookout in RE helps trigger rate but is optional). | |
DE should not engage in anti-installation warfare.
| Equipment Setup | Notes |
|---|---|
| General anti-installation setups | |
| Equipping either is required for SS/V to attack installations during shelling. | |
| Equipment Setup | Notes |
|---|---|
| Anti-SDP setups | |
Nuke Setup
| |
Double Nuke Setup
| |
| Equipment Setup | Notes |
|---|---|
| Anti-SDP setups | |
Nuke Setup
| |
Mega-Nuke Setup , Shinshuu Maru Kai only.
| |
Omega-Nuke Setup , No.101 Transport Ship Kai only.
| |
Double Nuke Setup
| |

Other auxiliaries should not focus on the anti-installation role. However, they can still utilize anti-installation equipment, such as in TP phases.
Exhautic Setups
Other setups that are used in specific situations and/or on specific ships.
When a very high amount of Fighter Power is required on a specific node to reach air superiority (either for combat effectiveness or a gimmick), it is sometimes viable to sacrifice the attack power of a ship to focus it on bringing the most fighter power.
- As many as the best
 /
/ fighters have to be used on a single ship.
| Equipment Setup | Notes |
|---|---|
| A setup reserved for CV/CVB/CVL and other | |
| A setup reserved for BBV/CAV/AV and other |
Special setups are required to counter the massive accuracy penalties against PT boats.
- DD and smaller ships in general should be fitted with such setups, as bigger ships do benefit as much from them.
| Anti-PT boat | |||||||||||||||||||||||||||||||||||||||||||||||||||||||||||||||||||||||||||||||||||||||||||||||||||||||||||||||||||||||||||||||||||||||||||
|---|---|---|---|---|---|---|---|---|---|---|---|---|---|---|---|---|---|---|---|---|---|---|---|---|---|---|---|---|---|---|---|---|---|---|---|---|---|---|---|---|---|---|---|---|---|---|---|---|---|---|---|---|---|---|---|---|---|---|---|---|---|---|---|---|---|---|---|---|---|---|---|---|---|---|---|---|---|---|---|---|---|---|---|---|---|---|---|---|---|---|---|---|---|---|---|---|---|---|---|---|---|---|---|---|---|---|---|---|---|---|---|---|---|---|---|---|---|---|---|---|---|---|---|---|---|---|---|---|---|---|---|---|---|---|---|---|---|---|---|
Unlike most standard Abyssals, "PT boats" (PT Imp Pack & Schnellboot Imp Pack & Schnellboot Imp Pack ) are "very small and fast". ) are "very small and fast".
During Events, some special bonuses may be added, with "historical" ships and equipment gaining some accuracy bonuses[10].
| |||||||||||||||||||||||||||||||||||||||||||||||||||||||||||||||||||||||||||||||||||||||||||||||||||||||||||||||||||||||||||||||||||||||||||
| [edit] | |||||||||||||||||||||||||||||||||||||||||||||||||||||||||||||||||||||||||||||||||||||||||||||||||||||||||||||||||||||||||||||||||||||||||||


| Equipment Setup | Notes |
|---|---|
| The combination of equipment greatly negates the accuracy penalty and increases the damage potential, almost guaranteeing one hit kills. It does mean that the destroyer's combat effectiveness is reduced against other targets. Therefore, it is highly recommended to use Reinforcement Expansions to fit the | |
| Utilises the same principles as above, with the greater bonus of the This setup has also some effectiveness against Installations. |
Transport Operations requires to bring as much "TP points" per run to be completed:
- Notes
- The landing craft used does not matter to complete the phase, unless it involves anti-installation battles.
- DD should be the ones focussing on carrying the TP equipment, as they are the ship relatively losing the less combat effectiveness.
- Even so the
 Underway Replenishment
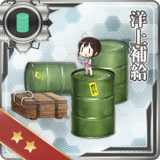 icon is displayed on TP nodes, they do not contribute to TP gauge depletion.
| Equipment Setup | Notes |
|---|---|
| CAV/CL/DD/AV/LHA/AO | |
| As much of those equipment must be equipped in the fleet.
| |
| The main setup that still keeps a DA for boss clearing. | |
| Any "normal" setup | In some cases, it is better to keep normal combat setups (on some or all ships) in order to clear the boss or prolong as much the phase to drop some looked-after ships. |
Equipment Selection
While the above set-up guide recommends only types of equipment, this section gives the general rules on how to choose equipment within a given type.
Equipment of a same type are mainly differentiated by their "Stats" (![]() ,
, ![]() ,
, ![]() , ...), including Fit Bonuses (both visible and invisible) and Improvements (
, ...), including Fit Bonuses (both visible and invisible) and Improvements (![]() ) stats, as well as some more specific attributes, like:
) stats, as well as some more specific attributes, like:
- Modifiers brought in certain mechanics, ranging from combat to routing,
- Special mechanics induced by certain equipment,
- Map "historical bonuses".
Equipment have a wide range of stats, however, not all stats are ranked the same way, some being more important than other, depending on the equipment type.
Here, equipment stats are dispatched into 3 categories:
- Primary Stats: stats that influence the effectiveness of the equipment in its main role, being the main choosing factor,
- Secondary Stats: stats that can influence the effectiveness of the equipment for other purposes, helping to choose between equipment sharing the same "Primary Stats".
- Bonus Stats: All the other stats. These stats do not influence the effectiveness of the equipment much, but are appreciable for the general stat stats of the equipping ship.
| Equipment Stats Category | |||||
|---|---|---|---|---|---|
| Main Armament | |||||
| Icon | Equipment Types | Primary Stats | Secondary Stats | Notes | |
| Main Gun & Secondary Gun |
| ||||
| High-Angle Gun | Having an good AACI takes priority over stats | ||||
| AA Gun |
| ||||
| Torpedo | For Sub torps, Late model ones unlock a better Cut-in | ||||
| Midget Submarine | |||||
| Anti-submarine Weaponry |
| ||||
| Aircraft | |||||
| Icon | Equipment types | Primary stats | Secondary stats | Note | |
| Dive Bomber | AAR ❱❱ |
If the main purpose of the ship is ASW then naturally | |||
| Fighter-Bomber and Jets | |||||
| Torpedo Bomber | AAR ❱❱ |
If the main purpose of the ship is ASW then naturally | |||
| Fighter | ❱❱ |
||||
| Carrier Recon | Equipping a Saiun   will override Red T engagements and turn them into Head-on, see here will override Red T engagements and turn them into Head-on, see here
| ||||
| Seaplane Recon | |||||
| Seaplane Bomber | ❱❱ AAR | Night Seaplane Bombers also unlock the night SPB CI. | |||
| Seaplane Fighter | ❱❱ | ||||
| ASW Aircraft | |||||
| Other Equipment | |||||
| Icon | Equipment types | Primary stats | Secondary stats | Note | |
| Surface Radar | Because of AACI priority, radar without | ||||
| Air Radar | |||||
| Anti-Installation Equipment | Anti-installation modifiers | The best equipment can change depending on the enemy installation | |||
| Extra Armor | The | ||||
| Engine Improvement | |||||
| All Other Equipment | Are chosen on a case-by-case basis, being often bounded to some specific mechanics | ||||
- Notes
 Range gained from certain equipment can either be advantageous or detrimental, depending on the situation, like for Special Attacks or when Leveling.