- Welcome to the Kancolle Wiki!
- If you have any questions regarding site content, account registration, etc., please visit the KanColle Wiki Discord
Difference between revisions of "Winter 2022 Event/Info"
(→Quick Info Table: Fixed wrong point) |
Jigaraphale (talk | contribs) m (→Mechanics) |
||
| (43 intermediate revisions by 6 users not shown) | |||
| Line 1: | Line 1: | ||
| − | '''Winter 2022 Event''' also known under the title of ''' | + | '''Winter 2022 Event''' also known under the title of '''Announcement! Operation Sho-Go 3 Alert!''', is a "medium-scale event" that is set to be launched in '''February 22, 2022''' |
The exact scale of this event is 3 Main Operations and an unknown amount of Extra Operations. | The exact scale of this event is 3 Main Operations and an unknown amount of Extra Operations. | ||
| Line 7: | Line 7: | ||
The exact contents of the Extra Operations are unknown. | The exact contents of the Extra Operations are unknown. | ||
| − | For additional information regarding event-related subjects and content, please refer to | + | For additional information regarding event-related subjects and content, please refer to [[Winter 2022 Event/Info#Mechanics|Mechanics]]. |
| − | + | ||
| − | |||
| − | |||
| − | |||
| − | |||
| − | |||
| − | |||
| − | |||
| − | |||
| − | |||
| Line 23: | Line 14: | ||
'''The following operation is based on a hypothetical operation that did not take place in Japan, but was however planned as one of four defense operation plans Japan had to defend thier area. Below is some details regarding the Defense Operation Plan: | '''The following operation is based on a hypothetical operation that did not take place in Japan, but was however planned as one of four defense operation plans Japan had to defend thier area. Below is some details regarding the Defense Operation Plan: | ||
| − | '''Operation Sho-Go 3 | + | '''Operation Sho-Go 3 |
Sho-Go 3 was the specialized defense operation that planned to defend Japan along with areas of Honshu, Shikoku, Kyushu, and the Ogasawara Islands. | Sho-Go 3 was the specialized defense operation that planned to defend Japan along with areas of Honshu, Shikoku, Kyushu, and the Ogasawara Islands. | ||
| Line 32: | Line 23: | ||
=== Related Historical Campaigns=== | === Related Historical Campaigns=== | ||
| − | + | <div class="mw-collapsible mw-collapsed"> | |
| − | '''31st Squadron | + | '''31st Squadron |
One of the planned squadron members planned for various Sho-Go Operations with Sho-Go 3 being among one of their plans. | One of the planned squadron members planned for various Sho-Go Operations with Sho-Go 3 being among one of their plans. | ||
| Line 44: | Line 35: | ||
DD: [[Uzuki]], [[Satsuki]], [[Matsu]], [[Ume]], [[Take]], [[Momo]] | DD: [[Uzuki]], [[Satsuki]], [[Matsu]], [[Ume]], [[Take]], [[Momo]] | ||
| − | '''Hi Convoy Transportation | + | '''Hi Convoy Transportation |
A Transport line that was used over the majority of the war as a major transportation of supplies and later on planes going from Japan to Taiwan and ultimately to the Philippines. | A Transport line that was used over the majority of the war as a major transportation of supplies and later on planes going from Japan to Taiwan and ultimately to the Philippines. | ||
| Line 57: | Line 48: | ||
DD: [[Amatsukaze]], [[Shigure]], [[Isokaze]], [[Hamakaze]], [[Fujinami]], [[Shikinami]], [[Asakaze]], [[Hatakaze]] | DD: [[Amatsukaze]], [[Shigure]], [[Isokaze]], [[Hamakaze]], [[Fujinami]], [[Shikinami]], [[Asakaze]], [[Hatakaze]] | ||
| − | '''Kyushu Shore Air Defense | + | '''Kyushu Shore Air Defense |
The major defense line that would serve as Japan's last major line of defense between the sea and the Japanese homeland during 1945 in the Kyushu area. This defense line would serve as one of the last major stands as Japan fought against the continuous assault from P-37s and B-29 Flying Fortresses that would cause destruction to Japan's major production line in the late part of the war. This would also serve as the prelude to one of Japan's last major iconic battle - Operation Ten-Go. | The major defense line that would serve as Japan's last major line of defense between the sea and the Japanese homeland during 1945 in the Kyushu area. This defense line would serve as one of the last major stands as Japan fought against the continuous assault from P-37s and B-29 Flying Fortresses that would cause destruction to Japan's major production line in the late part of the war. This would also serve as the prelude to one of Japan's last major iconic battle - Operation Ten-Go. | ||
| Line 69: | Line 60: | ||
CAV: [[Tone]]<br> | CAV: [[Tone]]<br> | ||
CL: [[Ooyodo]]<br> | CL: [[Ooyodo]]<br> | ||
| − | DD: [[Suzutsuki]], | + | DD: [[Suzutsuki]], [[Fuyutsuki]]<br> |
SSV: [[I-400]] | SSV: [[I-400]] | ||
| + | </div> | ||
==Information== | ==Information== | ||
| Line 83: | Line 75: | ||
! |Friendly Fleet | ! |Friendly Fleet | ||
! |Fleet Tag | ! |Fleet Tag | ||
| − | ! |Notes | + | ! style="width: 400px; |Notes |
|- | |- | ||
| rowspan="3" style="text-align:center;"|'''[[Winter_2022_Event/Main Operation|Main Operation]] | | rowspan="3" style="text-align:center;"|'''[[Winter_2022_Event/Main Operation|Main Operation]] | ||
! |[[Winter_2022_Event/Main Operation#E-1|E-1]] | ! |[[Winter_2022_Event/Main Operation#E-1|E-1]] | ||
| − | | style="text-align:center;"|'''Patrol the Nansei Islands | + | | style="text-align:center;"|'''Patrol the Nansei Islands |
| − | | style="text-align:center;"|'''Single | + | | style="text-align:center;"|'''Single |
| − | | style="text-align:center;"|'''1 | + | | style="text-align:center;"|'''1 |
| − | | style="text-align:center;"|'''TBD | + | | style="text-align:center;"|'''TBD |
| style="text-align:center; max-width: 8em;"| [[File:Winter2022EventTag1.png]] <br> '''South-Western fleet | | style="text-align:center; max-width: 8em;"| [[File:Winter2022EventTag1.png]] <br> '''South-Western fleet | ||
|- | |- | ||
! |[[Winter_2022_Event/Main Operation#E-2|E-2]] | ! |[[Winter_2022_Event/Main Operation#E-2|E-2]] | ||
| − | | style="text-align:center;"|'''Aparri Defense Transport | + | | style="text-align:center;"|'''Aparri Defense Transport |
| − | | style="text-align:center;"|'''Single | + | | style="text-align:center;"|'''Single |
| − | | style="text-align:center;"|'''2 | + | | style="text-align:center;"|'''2 |
| − | | style="text-align:center;"|'''TBD | + | | style="text-align:center;"|'''TBD |
| style="text-align:center; max-width: 8em;"| [[File:Winter2022EventTag1.png]] <br> '''South-Western fleet''' <br> [[File:Winter2022EventTag2.png]] <br> '''31st Squadron | | style="text-align:center; max-width: 8em;"| [[File:Winter2022EventTag1.png]] <br> '''South-Western fleet''' <br> [[File:Winter2022EventTag2.png]] <br> '''31st Squadron | ||
| + | | '''{{color|red|Ship locks affect routing on ALL difficulty}} | ||
|- | |- | ||
! |[[Winter_2022_Event/Main Operation#E-3|E-3]] | ! |[[Winter_2022_Event/Main Operation#E-3|E-3]] | ||
| − | | style="text-align:center;"|'''Commence! Operation Sho-Go 3! | + | | style="text-align:center;"|'''Commence! Operation Sho-Go 3! |
| − | | style="text-align:center;"|''' | + | | style="text-align:center;"|'''Combined |
| − | | style="text-align:center;"|''' | + | | style="text-align:center;"|'''3 |
| − | | style="text-align:center;"|'''TBD | + | | style="text-align:center;"|'''TBD |
| − | | style="text-align:center; max-width: 8em;"| [[File:Winter2022EventTag3.png]] <br>'''Transport Unit '''<br> [[File:Winter2022EventTag4.png]] <br> '''Combined Fleet | + | | style="text-align:center; max-width: 8em;"| [[File:Winter2022EventTag3.png]] <br>'''Transport Unit'''<br> [[File:Winter2022EventTag4.png]] <br> '''Combined Fleet |
|- | |- | ||
| − | | rowspan="2" style="text-align:center;"|'''[[ | + | | rowspan="2" style="text-align:center;"|'''[[Winter_2022_Event/Extra Operation|Extra Operation]] |
! |[[Winter_2022_Event/Extra Operation#E-4|E-4]] | ! |[[Winter_2022_Event/Extra Operation#E-4|E-4]] | ||
| − | | style="text-align:center;"|''' | + | | style="text-align:center;"|'''Shi-Ma Convoy Escort Operation |
| − | | style="text-align:center;"|''' | + | | style="text-align:center;"|'''Single |
| − | | style="text-align:center;"|''' | + | | style="text-align:center;"|'''3 |
| − | | style="text-align:center;"|''' | + | | style="text-align:center;"|'''TBD |
| − | | style="text-align:center; max-width: 8em;"| [[File:Winter2022EventTag5.png]] <br> ''' | + | | style="text-align:center; max-width: 8em;"| [[File:Winter2022EventTag1.png]] <br> '''South-Western fleet''' <br> [[File:Winter2022EventTag5.png]] <br> '''16th Squadron''' <br> [[File:Winter2022EventTag6.png]] <br> '''Shima Convoy Escort |
| + | | | ||
| + | *'''{{color|red|Ship locks affect routing on ALL difficulty}} | ||
| + | *'''{{color|lime|Combining the "South-Western fleet" & the "Shima Convoy Escort" locks is possible in any difficulty}} | ||
|- | |- | ||
! |[[Winter_2022_Event/Extra Operation#E-5|E-5]] | ! |[[Winter_2022_Event/Extra Operation#E-5|E-5]] | ||
| − | | style="text-align:center;"|''' | + | | style="text-align:center;"|'''Kitakyushu Air Defense |
| − | | style="text-align:center;"|''' | + | | style="text-align:center;"|'''Single/Combined |
| − | | style="text-align:center;"|''' | + | | style="text-align:center;"|'''3 |
| − | | style="text-align:center;"|''' | + | | style="text-align:center;"|'''TBD |
| − | | style="text-align:center; max-width: 8em;"| | + | | style="text-align:center; max-width: 8em;"| [[File:Winter2022EventTag4.png]] <br> '''Combined Fleet''' <br> [[File:Winter2022EventTag7.png]] <br> '''Striking Force Fleet''' <br> [[File:Winter2022EventTag8.png]] <br> '''Decisive Battle Fleet |
| − | | | + | | |
| + | *'''Lock limited to Hard Only | ||
| + | *'''{{color|red|Ship locks affect routing on ALL difficulty}} | ||
| + | *'''{{color|red|New LBAS mechanic!}} | ||
| + | |- | ||
| + | |} | ||
| + | |||
| + | |||
| + | '''Fleet Locking Table:''' | ||
| + | {| class="wikitable" border="0" cellpadding="1" cellspacing="1" style="width: 650px;" | ||
| + | |- | ||
| + | | style="width: 180px;" | | ||
| + | !style="width: 100px; scope="col"|[[Winter_2022_Event/Main Operation#E-1|E-1]] | ||
| + | !style="width: 100px; scope="col"|[[Winter_2022_Event/Main Operation#E-2|E-2]] | ||
| + | !style="width: 100px; scope="col"|[[Winter_2022_Event/Main Operation#E-3|E-3]] | ||
| + | !style="width: 100px; scope="col"|[[Winter_2022_Event/Extra Operation#E-4|E-4]] | ||
| + | !style="width: 100px; scope="col"|[[Winter_2022_Event/Extra Operation#E-5|E-5]]<br>(Hard Only) | ||
| + | |- | ||
| + | ! scope="col" |[[File:Winter2022EventTag1.png]] <br> '''South-Western fleet | ||
| + | | style="background:lime" span | | ||
| + | | style="background:lime" span | | ||
| + | | | ||
| + | | style="background:lime" span | | ||
| + | | | ||
| + | |- | ||
| + | ! scope="col" |[[File:Winter2022EventTag2.png]] <br> '''31st Squadron | ||
| + | | | ||
| + | | style="background:#830b37" span | | ||
| + | | | ||
| + | | | ||
| + | | | ||
| + | |- | ||
| + | ! scope="col" |[[File:Winter2022EventTag3.png]] <br>'''Transport Unit | ||
| + | | | ||
| + | | | ||
| + | | style="background:#f3da74" span | | ||
| + | | | ||
| + | | | ||
| + | |- | ||
| + | ! scope="col" |[[File:Winter2022EventTag4.png]] <br> '''Combined Fleet | ||
| + | | | ||
| + | | | ||
| + | | style="background:blue" span | | ||
| + | | | ||
| + | | style="background:blue" span | | ||
| + | |- | ||
| + | ! scope="col" |[[File:Winter2022EventTag5.png]] <br> '''16th Squadron | ||
| + | | | ||
| + | | | ||
| + | | | ||
| + | | style="background:Purple" span | | ||
| + | | | ||
| + | |- | ||
| + | ! scope="col" |[[File:Winter2022EventTag6.png]] <br> '''Shima Convoy Escort | ||
| + | | | ||
| + | | | ||
| + | | | ||
| + | | style="background:grey" span | | ||
| + | | | ||
| + | |- | ||
| + | ! scope="col" |[[File:Winter2022EventTag7.png]] <br> '''Striking Force Fleet | ||
| + | | | ||
| + | | | ||
| + | | | ||
| + | | | ||
| + | | style="background:Gold" span | | ||
| + | |- | ||
| + | ! scope="col" |[[File:Winter2022EventTag8.png]] <br> '''Decisive Battle Fleet | ||
| + | | | ||
| + | | | ||
| + | | | ||
| + | | | ||
| + | | style="background:Green" span | | ||
|- | |- | ||
|} | |} | ||
===New Mechanics=== | ===New Mechanics=== | ||
| + | New "very high bombers" interception on [[Winter_2022_Event/Extra Operation#E-5|E-5]]. | ||
===New Ships=== | ===New Ships=== | ||
| Line 131: | Line 200: | ||
* [[Ume|Matsu-class Ume]] | * [[Ume|Matsu-class Ume]] | ||
* [[Yamashio Maru|2TL type Yamashio Maru]] (a CVE/AO) | * [[Yamashio Maru|2TL type Yamashio Maru]] (a CVE/AO) | ||
| − | * [[ | + | * [[Tamanami|Yugumo-class Tamanami]] |
| + | * [[Fuyutsuki|Akizuki-class Fuyutsuki]] | ||
===Returning Ships=== | ===Returning Ships=== | ||
| Line 143: | Line 213: | ||
**[[Hornet]] on E3 | **[[Hornet]] on E3 | ||
**[[Washington]] on E3 | **[[Washington]] on E3 | ||
| + | **[[South Dakota]] on E4 | ||
| + | **[[Katsuragi]] on E4 | ||
| + | **[[Victorious ]] on E5 | ||
| + | **[[Atlanta]] on E5 | ||
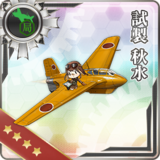
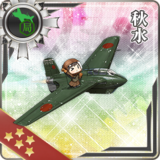
===New Equipment=== | ===New Equipment=== | ||
| Line 148: | Line 222: | ||
*[[Type 3 Command Liaison Aircraft Kai]] | *[[Type 3 Command Liaison Aircraft Kai]] | ||
*[[Ki-96]] | *[[Ki-96]] | ||
| + | *[[Ki-102 B]] | ||
===New Enemy Vessels=== | ===New Enemy Vessels=== | ||
| + | *[[Abyssal Plum Princess]] (E2 boss) | ||
| + | *[[Yokohama Wharf Princess]] (E3 boss) | ||
| + | *[[Abyssal Jade Princess]] (E4 boss) | ||
| + | *[[Entombed Anti-Air Guardian Winter Princess]] (E5 boss) | ||
| + | *[[Super Heavy Bomber Airfield Princess]] (E5 new gimmick LBAS) | ||
===New Enemy Equipment=== | ===New Enemy Equipment=== | ||
*[[Abyssal Quadruple (Oxygen) Torpedo Mount Late Model]] | *[[Abyssal Quadruple (Oxygen) Torpedo Mount Late Model]] | ||
| + | *[[Abyssal Sky Super Fortress]] | ||
| + | *[[Abyssal Sky Super Fortress Kai]] | ||
| − | == | + | ==Friendly Fleet== |
===Fleet Formations=== | ===Fleet Formations=== | ||
| − | + | Friendly Fleets (FF) come with a function that allows players to choose if they want to use a FF to aid them in battle or not. It is possible to choose between using "normal only" or "normal and powerful" FF. Powerful FF have an additional cost of '''6 Instant Constructions''' [[File:Instant_construction-0.jpg]] for each time they are deployed in a battle (the blowtorches won't be consumed unless a powerful FF appears). | |
| − | |||
{{:{{BASEPAGENAME}}/Friend Fleets}} | {{:{{BASEPAGENAME}}/Friend Fleets}} | ||
| Line 165: | Line 246: | ||
==Mechanics== | ==Mechanics== | ||
| − | + | {{Template:Event Mechanics}} | |
| − | |||
| − | |||
| − | |||
| − | |||
| − | |||
| − | |||
| − | |||
| − | |||
| − | |||
| − | |||
| − | |||
| − | |||
| − | |||
| − | |||
| − | |||
| − | |||
| − | |||
| − | |||
| − | |||
| − | |||
| − | |||
| − | |||
| − | |||
| − | |||
| − | |||
| − | |||
| − | |||
| − | |||
| − | |||
| − | |||
| − | |||
| − | |||
| − | |||
| − | |||
| − | |||
| − | |||
| − | |||
| − | |||
| − | |||
| − | |||
| − | |||
| − | |||
| − | |||
| − | |||
| − | |||
| − | |||
| − | |||
| − | |||
| − | |||
| − | |||
| − | |||
| − | |||
| − | |||
| − | |||
| − | |||
| − | |||
| − | |||
| − | |||
| − | |||
| − | |||
| − | |||
| − | |||
| − | |||
| − | |||
| − | |||
| − | |||
| − | |||
| − | |||
| − | |||
| − | |||
| − | |||
| − | |||
| − | |||
| − | |||
| − | |||
| − | |||
| − | |||
| − | |||
| − | |||
Revision as of 13:39, 21 April 2024
Winter 2022 Event also known under the title of Announcement! Operation Sho-Go 3 Alert!, is a "medium-scale event" that is set to be launched in February 22, 2022
The exact scale of this event is 3 Main Operations and an unknown amount of Extra Operations.
The main operation area will take as a defense operation starting from Nansei Island Area, then taking place along the transport route in Aparri, then finally finishing in Kyushuu, Japan.
The exact contents of the Extra Operations are unknown.
For additional information regarding event-related subjects and content, please refer to Mechanics.
Historical Background
The following operation is based on a hypothetical operation that did not take place in Japan, but was however planned as one of four defense operation plans Japan had to defend thier area. Below is some details regarding the Defense Operation Plan:
Operation Sho-Go 3
Sho-Go 3 was the specialized defense operation that planned to defend Japan along with areas of Honshu, Shikoku, Kyushu, and the Ogasawara Islands.
Operation Sho-Go 3 never got activated since the Americans chose to attack from Okinawa from the Philippines (Sho-Go 1) making this event partially a hypothetical operation.
Do note however, that certain key ships were planned for the defense operation plan and some routes will hold importance due to actual campaigns and locations of interest which will be listed below in the Related historical Campaign section.
Related Historical CampaignsExpand
Information
Quick Info Table
| Classification | Map | Name | Fleet Type | LBAS | Friendly Fleet | Fleet Tag | Notes |
|---|---|---|---|---|---|---|---|
| Main Operation | E-1 | Patrol the Nansei Islands | Single | 1 | TBD | South-Western fleet | |
| E-2 | Aparri Defense Transport | Single | 2 | TBD | South-Western fleet 31st Squadron |
Ship locks affect routing on ALL difficulty | |
| E-3 | Commence! Operation Sho-Go 3! | Combined | 3 | TBD | Transport Unit Combined Fleet | ||
| Extra Operation | E-4 | Shi-Ma Convoy Escort Operation | Single | 3 | TBD | South-Western fleet 16th Squadron Shima Convoy Escort |
|
| E-5 | Kitakyushu Air Defense | Single/Combined | 3 | TBD | Combined Fleet Striking Force Fleet Decisive Battle Fleet |
|
Fleet Locking Table:
| E-1 | E-2 | E-3 | E-4 | E-5 (Hard Only) | |
|---|---|---|---|---|---|
South-Western fleet |
|||||
31st Squadron |
|||||
Transport Unit |
|||||
Combined Fleet |
|||||
16th Squadron |
|||||
Shima Convoy Escort |
|||||
Striking Force Fleet |
|||||
Decisive Battle Fleet |
New Mechanics
New "very high bombers" interception on E-5.
New Ships
Returning Ships
Please refer to drop databases for the most updated lists of event drops, such as TsunDB or Poi-Statistics (or via Discord).
- Some notable returning ships are :
- Yamato on E1
- Musashi on E3
- Unryuu on E1
- Colorado on E3
- Iowa on E3
- Hornet on E3
- Washington on E3
- South Dakota on E4
- Katsuragi on E4
- Victorious on E5
- Atlanta on E5
New Equipment
New Enemy Vessels
- Abyssal Plum Princess (E2 boss)
- Yokohama Wharf Princess (E3 boss)
- Abyssal Jade Princess (E4 boss)
- Entombed Anti-Air Guardian Winter Princess (E5 boss)
- Super Heavy Bomber Airfield Princess (E5 new gimmick LBAS)
New Enemy Equipment
- Abyssal Quadruple (Oxygen) Torpedo Mount Late Model
- Abyssal Sky Super Fortress
- Abyssal Sky Super Fortress Kai
Friendly Fleet
Fleet Formations
Friendly Fleets (FF) come with a function that allows players to choose if they want to use a FF to aid them in battle or not. It is possible to choose between using "normal only" or "normal and powerful" FF. Powerful FF have an additional cost of 6 Instant Constructions ![]() for each time they are deployed in a battle (the blowtorches won't be consumed unless a powerful FF appears).
for each time they are deployed in a battle (the blowtorches won't be consumed unless a powerful FF appears).
| ExpandE-3 Z |
|---|


| ExpandE-4 O2 |
|---|

| ExpandE-4 X |
|---|

| ExpandE-5 N |
|---|


| ExpandE-5 Y |
|---|
| ExpandAppearance |
|---|
Voice Lines
Friend Fleet Voice Lines
| Ship | Japanese/English | ExpandNotes |
|---|
Mechanics
Participation requirements
To take part in any event, a player MUST HAVE at least:
- A 75% sortie win ratio.
- 5 empty ship slots.
- 20 empty equipment slots.
Special Mechanics
In addition to regular Sortie mechanics, events often involve some specific or rarer mechanics :
| Map Clearing Medals | |||
|---|---|---|---|
Hard
|
Medium
|
Easy
|
Casual
|
Depending of the HQ level, it is possible to choose between:
- Hard ("operation A", 甲), at HQ 80+
- Medium ("operation B", 乙), at HQ 35+
- Easy ("operation C", 丙), at HQ 1+
- Casual ("operation D", 丁), at HQ 1+
The map difficulty will directly affect the enemy encounters, making them more numerous, with higher stats, or even replacing weaker ships with stonger ones. Additionaly, will vary:
- The maps' phases' gauges (HP/TP),
- The amount of map gimmicks to complete,
- The LoS requirements,
- The maps' rewards,
- The ship Drops.
Changing difficulty is possible but limited:
- When switching from any "lower" difficulty to any "higher" difficulty, the map will fully be reset.
- When switching from any "higher" difficulty to any "lower" difficulty, the map will stay in the very same state it was previously, with only +25% of TP/HP being reset on the current phase's TP/HP bar.
- Gimmicks might also be reset when applicable, notably the debuffs.
Beginning with the second map, difficulty progression rules apply.
- In order to play a map on Hard difficulty, the prior map must have been completed on either Medium or Hard.
- In order to play a map on Medium difficulty, the prior map must have been completed on either Easy, Medium, or Hard.
To simulate simultaneity of battles in different locations, Fleet Tags conditions & deployment restrictions are employed.
- Ships not already tagged will be tagged with the associated tag of the map phase when deployed. This tag will be applied regardless of the difficulty and can't be removed by any measure before the end of the event.
- One map can use multiple tags, usually separated by phases or fleets.
- Several maps can share one or more tags.
- On Medium or Hard difficulty, ships must have either the same tag as the map/phase they are being deployed to, or have no tag at all.
- This requirement is sometimes waived on certain maps, mostly on the last map of the event where tags only matter on Hard.
- Once the event is cleared (last map of the EO), all tag restrictions stop getting enforced on every map (tag routing will still apply).


