- Welcome to the Kancolle Wiki!
- If you have any questions regarding site content, account registration, etc., please visit the KanColle Wiki Discord
Difference between revisions of "Line of Sight"
>SlashZero |
Jigaraphale (talk | contribs) |
||
| (63 intermediate revisions by 15 users not shown) | |||
| Line 1: | Line 1: | ||
| − | + | '''Line of Sight''' (LoS) is a stat that will indirectly affect several mechanics, being: | |
| − | * | + | * [[#Effective Line of Sight|Effective Line of Sight]] for map [[routing]], |
| − | * | + | * [[#Detection|Detection]] success rate, |
| − | * | + | * [[#Contact|Contact]] trigger rate, for airstrike damage, |
| + | * [[#LBAS LoS|Reconnaissance Defense Bonus]] for LBAS Defense Fighter-Power, | ||
| + | * [[#Artillery Spotting|Artillery Spotting]] trigger rate. | ||
| − | + | For details on the LoS {{LOS}} stat growth please see ''[[Stats#Stat Growth|Stats]]''. | |
| − | |||
| − | |||
| − | |||
| − | |||
| − | |||
| − | + | =Effective Line of Sight= | |
| − | + | "'''Effective Line of Sight'''" (ELoS, also called "Fleet LoS") is the Line of Sight (LoS) that affect certain maps' [[routing]]. Certain branching requirements in sorties are affected by the LoS of the entire fleet, this total LoS following unintuitive behaviors. | |
| + | *As a general rule: '''equipment LoS is more impactful than ship LoS''' when determining ELoS. | ||
| − | * | + | ==Formula 33== |
| − | === ( | + | The Formula 33, sometimes referred to as F33, is the most accurate "Fleet LoS" calculation formula known. It is described as follows<ref>http://ja.kancolle.wikia.com/wiki/%E3%83%9E%E3%83%83%E3%83%97%E7%B4%A2%E6%95%B5</ref>: |
| − | + | {{Formula | |
| − | [[ | + | |Title=LoS Formula 33 |
| + | |Math= \text{LoS}_\text{Fleet} = \sum_{\text{All Ships} } \sqrt{LoS_\text{Ship} } + C_{n} \times \sum_{\text{All Equipment} } C_{e} \times ( \text{LoS}_{e} + C_{\star} \times \sqrt{\bigstar} ) - \lceil Q \times Lv_\text{HQ} \rceil + 2M | ||
| + | |Var=<math>\text{LoS}_\text{Ship}</math> the ship's base LoS {{LOS}}. | ||
| + | **Total LoS {{LOS}} of [[Visible Fit Bonuses]] should be added to this part, unlike equipment improvement bonuses. | ||
| + | *<math>C_{n}</math> the Node factor, it represents the weighting of the formula that is '''known to vary''' across different maps and nodes (''see [[#Estimated LoS|below]]''), | ||
| + | *<math>C_{e}</math> the equipment multiplier (''see [[#Equipment Types|below]]''), | ||
| + | *<math>LoS_{e}</math> the equipment's base LoS {{LOS}}, excluding visible fit bonus, | ||
| + | *<math>C_{\star}</math> is the [[improvement]] modifier of the equipment (''see [[#Equipment Types|below]]''), | ||
| + | *<math>\bigstar</math> the equipment's [[improvement]] {{Star}} level, | ||
| + | *<math>Q</math> the HQ level modifier, varying depending on the map: | ||
| + | ** '''0.35''' on [[5-2]] and [[6-3]]. | ||
| + | ** '''0.4''' otherwise. | ||
| + | *<math>Lv_\text{HQ}</math> the [[HQ]] level. | ||
| + | |||
| + | *<math>M</math> the number of empty ship slots in the fleet: | ||
| + | **'''0''' for 6 ships fleet, | ||
| + | **'''+1''' increase per missing ship, | ||
| + | ***This value can increase mid-sortie if a ship is ''sunk'' or ''[[Evacuation|evacuated]]''. | ||
| + | **'''-1''' for a full [[Striking Force Fleet]] (7 ships). | ||
| + | |Notes=Equipment LoS weight more than ship LoS. | ||
| + | }} | ||
| + | |||
| + | ==Equipment LoS Weighting Modifier== | ||
| + | The node factor <math>C_{n}</math> affects the weighting of equipment LoS. | ||
| + | * It depends on the map (''see the [[#Estimated LoS|below]]''). | ||
| + | The equipment and improvement multiplier <math>C_{e}</math> and <math>C_{\star}</math> will affect the "real" LoS given per equipment. | ||
| + | * It depends on the equipment type (''see the [[#Equipment Types|below]]''). | ||
| + | |||
| + | Because of those factors: | ||
| + | *Some equipment are more efficient to provide LoS, | ||
| + | *Ship LoS is less relevant, notably in maps with higher node factors. | ||
| + | |||
| + | ===Equipment Types=== | ||
| + | {|class="wikitable" style="text-align:center" | ||
| + | !colspan=2|Equipment type | ||
| + | !width=50px|<math>C_{e}</math> | ||
| + | !width=50px|<math>C_{\star}</math> | ||
| + | |- | ||
| + | !{{SPR}}!![[Seaplane Recon]]s | ||
| + | |1.2 | ||
| + | |1.2 | ||
| + | |- | ||
| + | !{{SPB}}!![[Seaplane Bomber]]s | ||
| + | |1.1 | ||
| + | |1.1 | ||
| + | |- | ||
| + | !{{Carrier Recon}}!![[Carrier Recon]]s | ||
| + | |1 | ||
| + | |1.2 | ||
| + | |- | ||
| + | !{{Torpedo Bomber}}!![[Torpedo Bomber]]s | ||
| + | |0.8 | ||
| + | |0 | ||
| + | |- | ||
| + | !{{LFB}}!![[Large Flying Boat]]s | ||
| + | |rowspan=6|0.6 | ||
| + | |1.2 | ||
| + | |- | ||
| + | !{{Small Radar}}!![[Small Radar]]s | ||
| + | |1.25 | ||
| + | |- | ||
| + | !{{Large Radar}}!![[Large Radar]]s | ||
| + | |1.4 | ||
| + | |- | ||
| + | !{{ASWPlane}}||[[Liaison Aircraft]] | ||
| + | |1 | ||
| + | |- | ||
| + | !colspan=2| | ||
| + | {|class="wikitable mw-collapsible mw-collapsed" | ||
| + | !colspan=2|All other equipment types: | ||
| + | |- | ||
| + | |{{Fighter}}||[[Fighter]]s | ||
| + | |- | ||
| + | |{{Dive Bomber}}||[[Dive Bomber]]s | ||
| + | |- | ||
| + | |{{SPF}}||[[Seaplane Fighter]]s | ||
| + | |- | ||
| + | |{{Autogyro}}||[[Rotorcraft]] | ||
| + | |- | ||
| + | |{{Sonar}}||[[Sonar]]s | ||
| + | |- | ||
| + | |{{Searchlight}}||[[Searchlights]] | ||
| + | |- | ||
| + | |{{SurfaceShipPersonnel}}||[[Lookout]]s | ||
| + | |- | ||
| + | |{{Aviation Personnel}}||[[Aviation Personnel]] | ||
| + | |- | ||
| + | |{{FCF}}||[[Command Facilities]] | ||
| + | |- | ||
| + | |{{SubmarineRadar}}||[[Submarine Equipment]] | ||
| + | |- | ||
| + | |{{Landing Craft}}||[[Landing Craft]] | ||
| + | |- | ||
| + | |{{Minisub}}||[[Midget Submarine]]s | ||
| + | |- | ||
| + | |{{Light Gun}}||[[Small Caliber Main Gun]]s | ||
| + | |- | ||
| + | |{{Med Gun}}||[[Medium Caliber Main Gun]]s | ||
| + | |} | ||
| + | |0 | ||
| + | |} | ||
| + | Other equipment types are speculated to be:<ref>Default based on Vita datamine</ref> | ||
| + | *<math>C_{e}=0.6</math> | ||
| + | *<math>C_{\star}=0</math> | ||
| + | |||
| + | ===Estimated LoS=== | ||
| + | ''Data sourced from [http://kc.piro.moe/nav/#/ TsunDB]. Values are the lowest and highest reported LoS for routing. Please note that there may be some margin of error due to random routing.'' | ||
| + | |||
| + | {|class="wikitable" style="text-align: center" | ||
| + | !Map!!C<sub>n</sub>!!Origin Node!!Lower Threshold!!Upper Threshold!!Destination Node!!Fail Destination!!Notes | ||
| + | |- | ||
| + | ![[1-6]] | ||
| + | | 3|| M|| 29.7|| 159.6|| J||L | ||
| + | |Not meeting composition requirements also routes to L. | ||
| + | |- | ||
| + | !rowspan=3| [[2-5]] | ||
| + | |rowspan=3| 1 | ||
| + | | G|| 37.3|| 87.8|| L||K | ||
| + | |- | ||
| + | | I|| 31.2|| 59.4|| O|| H | ||
| + | |- | ||
| + | | J|| 42.4|| 91.2|| O|| H | ||
| + | |- | ||
| + | !rowspan=2| [[3-5]] | ||
| + | |rowspan=2| 4 | ||
| + | | G|| 24|| 337|| K|| I | ||
| + | |- | ||
| + | | H|| 39.1|| 321.4|| K|| J | ||
| + | |- | ||
| + | !rowspan=2| [[7-2]] | ||
| + | | ??|| E|| -32.1|| 136.5|| G||F | ||
| + | | Appears to be fixed routing based on composition but still plays the LoS routing animation. | ||
| + | |- | ||
| + | | 4|| I|| 66.1|| 294.5|| M|| L | ||
| + | |- | ||
| + | !rowspan=3| [[7-4]] | ||
| + | | ??|| G|| ??|| ??|| L||F | ||
| + | |- | ||
| + | | ??|| E|| ??|| ??|| K/P||L | ||
| + | |Not meeting composition requirements also routes to L. | ||
| + | |- | ||
| + | | 4|| M|| 50?|| ??|| O||N | ||
| + | |Not meeting composition requirements also routes to N or P. | ||
| + | |- | ||
| + | !rowspan=2| [[7-5]] | ||
| + | |rowspan=2|4 || O|| 57|| ??|| M||L | ||
| + | |- | ||
| + | | P|| 58|| ??|| T/R||S | ||
| + | |Composition determines the T/R route. | ||
| + | |- | ||
| + | !rowspan=3| [[4-5]] | ||
| + | |rowspan=2| 2 | ||
| + | | K|| 64.8|| 146.5|| T|| L | ||
| + | |- | ||
| + | | Q|| 62|| 167|| N/O|| P | ||
| + | | '''Low number of reports.''' | ||
| + | |- | ||
| + | | ??|| O|| 62|| 167|| T|| N | ||
| + | | Appears to be fixed routing based on composition but still plays the LoS routing animation. | ||
| + | |- | ||
| + | !rowspan=2| [[5-2]] | ||
| + | |rowspan=2| 2 | ||
| + | | F|| 64|| 147|| O|| H | ||
| + | |- | ||
| + | | L|| 73.8|| 81|| K|| N | ||
| + | | '''Low number of reports.''' | ||
| + | |- | ||
| + | !rowspan=2| [[5-4]] | ||
| + | |rowspan=2| 2 | ||
| + | | L|| 57|| 185|| P|| N | ||
| + | |- | ||
| + | | M|| 42.3|| 150.1|| P|| O | ||
| + | |- | ||
| + | !rowspan=2| [[5-5]] | ||
| + | |rowspan=2| 2 | ||
| + | | O|| 63.8|| 134.5|| S|| R | ||
| + | |- | ||
| + | | P|| 74.4|| 167.7|| S|| Q | ||
| + | |- | ||
| + | !rowspan=3| [[6-1]] | ||
| + | |rowspan=3| 4 | ||
| + | | G|| 16.7|| 218.1|| H|| I | ||
| + | |- | ||
| + | | H|| 25.4|| 201.4 | ||
| + | |rowspan=2| K | ||
| + | |rowspan=2| E | ||
| + | |With [[AS]] | ||
| + | |- | ||
| + | | H|| 23.3|| 218.1 | ||
| + | |Without [[AS]] | ||
| + | |- | ||
| + | !rowspan=3| [[6-2]] | ||
| + | |rowspan=3| 3 | ||
| + | | E|| 46|| 179.8|| J|| I | ||
| + | |- | ||
| + | | H|| 42.8|| 42.8|| K|| G | ||
| + | | '''Low number of reports.''' | ||
| + | |- | ||
| + | | I|| 35.7|| 205.8|| K|| G | ||
| + | |- | ||
| + | ![[6-3]] | ||
| + | | 3|| E|| 19.4|| 180|| G|| F | ||
| + | | Routing is heavily influenced by composition as well. | ||
| + | |- | ||
| + | !rowspan=2| [[6-5]] | ||
| + | | 3|| G|| 56.3|| 196.2|| M|| K | ||
| + | |- | ||
| + | | ??|| J|| 37.2|| 193|| M|| L | ||
| + | | Appears to be fixed routing based on composition but still plays the LoS routing animation. | ||
| + | |} | ||
| + | |||
| + | ===Events=== | ||
| + | In [[events]], LoS cheks are also performed following the same rules, but will additionally vary with difficulties, higher difficulties recruiting higher LoS. | ||
| + | |||
| + | ===FAQ=== | ||
| + | '''Q: Why do I keep getting offrouted?''' | ||
| + | |||
| + | '''A:''' Double check that your fleet LoS according to relevant formula meets the LoS threshold for the map. Viewers such as KanColle Command Center Kai, Poi Viewer, KCANotify, KanColle Viewer and Electronic Observer can calculate your fleet's LoS easily for you. | ||
| + | |||
| + | |||
| + | '''Q: How do I increase my LoS?''' | ||
| + | |||
| + | '''A:''' Reconnaissance seaplanes are the fastest way to raise LoS. The other easy way is to stack radars. Upgrades to reconnaissance seaplanes are also a good way to increase LoS when slots are limited. It is not recommended to stack carrier-based recons or seaplane bombers because too many can compromise the combat ability of your fleet. | ||
| + | Another way is to level your ships. Because LoS increases as you level, marrying your ships means their LoS stat can go even higher. | ||
| + | |||
| + | |||
| + | '''Q: I had enough LoS, how did I get off routed?''' | ||
| + | |||
| + | '''A:''' Planes that are wiped out no longer contribute to LoS. If you were depending on bombers to hit the LoS threshold, you can fall under the threshold when encountering heavy enemy anti-air. | ||
| + | |||
| + | <references/> | ||
| + | |||
| + | =Detection= | ||
| + | {{details|Detection}} | ||
| + | |||
| + | At the start of any [[Day Battle]], "detection" will be attempted by the fleet. Detection is required to take part in the [[Aerial Combat]] phase. | ||
| + | |||
| + | Only the Ship's LoS and the LoS from the participating planes is taken into account for the trigger rate: | ||
| + | * {{Carrier Recon}}{{Large Recon}} [[Carrier Recon]]s, | ||
| + | * {{SPR}}/{{Night Recon}} [[Seaplane Recon]]s, | ||
| + | * {{SPB}}/{{Night SPB}} [[Seaplane Bomber]]s, | ||
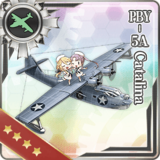
| + | * {{LFB}} {{Equipment/Link|Type 2 Large Flying Boat|PBY-5A Catalina|text=Large Flying Boats|link_category=Large Flying Boat}}. | ||
| + | |||
| + | =Contact= | ||
| + | {{details|Contact}} | ||
| + | |||
| + | At the start of any [[Airstrike]] phase, "contact" may be triggered, increasing the airstrike power if triggered. | ||
| + | |||
| + | Only the LoS from the participating planes is taken into account for the trigger rate (step 1): | ||
| + | * {{Carrier Recon}}{{Large Recon}} [[Carrier Recon]]s, | ||
| + | * {{SPR}}/{{Night Recon}} [[Seaplane Recon]]s, | ||
| + | * {{LFB}} {{Equipment/Link|Type 2 Large Flying Boat|PBY-5A Catalina|text=Large Flying Boats|link_category=Large Flying Boats}}, | ||
| + | |||
| + | Only the LoS from the participating planes is taken into account for the plane selection (step 2): | ||
| + | * {{Carrier Recon}}{{Large Recon}} [[Carrier Recon]]s, | ||
| + | * {{SPR}}/{{Night Recon}} [[Seaplane Recon]]s, | ||
| + | * {{LFB}} {{Equipment/Link|Type 2 Large Flying Boat|PBY-5A Catalina|text=Large Flying Boats|link_category=Large Flying Boats}}, | ||
| + | * {{Torpedo Bomber}}/{{Night Torpedo Bomber}} [[Torpedo Bomber]]s. | ||
| + | |||
| + | =LBAS LoS= | ||
| + | {{details|LBAS#Defense Fighter-Power|l1=LBAS Defense Fighter-Power}} | ||
| + | |||
| + | Unlike ship mechanics, [[LBAS]] do not need/utilize the LoS stat and so this stat is mostly useless. | ||
| + | |||
| + | The only use for LoS is for "[[LBAS#Defense Fighter-Power|Defense Fighter-Power]]" in air defense mode, where it determines the "Reconnaissance Defense Bonus" (<math>\text{Mod}_\text{recon}</math>) for {{SPR}} [[Seaplane Recon]]s, {{LFB}} [[Large Flying Boat]]s, {{Carrier Recon}} [[Carrier Recon]]s, and {{LB Recon}} [[Land-based Recon]]s: | ||
| + | |||
| + | {|class="wikitable" style="text-align:center" | ||
| + | !colspan=4|Reconnaissance Defense Bonus | ||
| + | |- | ||
| + | !LoS | ||
| + | !{{SPR}}Seaplane<br>{{LFB}}Large Flying Boat | ||
| + | !{{Carrier Recon}}Carrier-based | ||
| + | !{{Land-Based Recon}}Land-Based | ||
| + | |- | ||
| + | |≥9||1.16||1.3||1.24 | ||
| + | |- | ||
| + | |8||1.13|| -||1.18 | ||
| + | |- | ||
| + | |≤7||1.1||1.2|| - | ||
| + | |} | ||
| + | |||
| + | The LoS on all other aircraft or in other LBAS modes is not counted. | ||
| + | |||
| + | =Artillery Spotting= | ||
| + | {{details|Artillery Spotting}} | ||
| + | |||
| + | Artillery Spotting attacks require the use of recons/bombers. | ||
| + | |||
| + | Only the Ship's LoS and the LoS from the participating planes is taken into account for the trigger rate: | ||
| + | * {{SPR}}/{{Night Recon}} [[Seaplane Recon]]s, | ||
| + | * {{SPB}}/{{Night SPB}} [[Seaplane Bomber]]s, | ||
| + | * {{Torpedo Bomber}}/{{Night Torpedo Bomber}} [[Torpedo Bomber]]s, | ||
| + | * {{Dive Bomber}} [[Dive Bomber]]s. | ||
| + | |||
| + | =See Also= | ||
| + | {{Mechanics}} | ||
Latest revision as of 17:34, 23 November 2024
Line of Sight (LoS) is a stat that will indirectly affect several mechanics, being:
- Effective Line of Sight for map routing,
- Detection success rate,
- Contact trigger rate, for airstrike damage,
- Reconnaissance Defense Bonus for LBAS Defense Fighter-Power,
- Artillery Spotting trigger rate.
For details on the LoS ![]() stat growth please see Stats.
stat growth please see Stats.
Effective Line of Sight
"Effective Line of Sight" (ELoS, also called "Fleet LoS") is the Line of Sight (LoS) that affect certain maps' routing. Certain branching requirements in sorties are affected by the LoS of the entire fleet, this total LoS following unintuitive behaviors.
- As a general rule: equipment LoS is more impactful than ship LoS when determining ELoS.
Formula 33
The Formula 33, sometimes referred to as F33, is the most accurate "Fleet LoS" calculation formula known. It is described as follows[1]:
| LoS Formula 33 | |
|---|---|
| |
|
Equipment LoS Weighting Modifier
The node factor [math]\displaystyle{ C_{n} }[/math] affects the weighting of equipment LoS.
- It depends on the map (see the below).
The equipment and improvement multiplier [math]\displaystyle{ C_{e} }[/math] and [math]\displaystyle{ C_{\star} }[/math] will affect the "real" LoS given per equipment.
- It depends on the equipment type (see the below).
Because of those factors:
- Some equipment are more efficient to provide LoS,
- Ship LoS is less relevant, notably in maps with higher node factors.
Equipment Types
| Equipment type | [math]\displaystyle{ C_{e} }[/math] | [math]\displaystyle{ C_{\star} }[/math] | |
|---|---|---|---|
| Seaplane Recons | 1.2 | 1.2 | |
| Seaplane Bombers | 1.1 | 1.1 | |
| Carrier Recons | 1 | 1.2 | |
| Torpedo Bombers | 0.8 | 0 | |
| Large Flying Boats | 0.6 | 1.2 | |
| Small Radars | 1.25 | ||
| Large Radars | 1.4 | ||
| Liaison Aircraft | 1 | ||
| 0 | |||
Other equipment types are speculated to be:[2]
- [math]\displaystyle{ C_{e}=0.6 }[/math]
- [math]\displaystyle{ C_{\star}=0 }[/math]
Estimated LoS
Data sourced from TsunDB. Values are the lowest and highest reported LoS for routing. Please note that there may be some margin of error due to random routing.
| Map | Cn | Origin Node | Lower Threshold | Upper Threshold | Destination Node | Fail Destination | Notes |
|---|---|---|---|---|---|---|---|
| 1-6 | 3 | M | 29.7 | 159.6 | J | L | Not meeting composition requirements also routes to L. |
| 2-5 | 1 | G | 37.3 | 87.8 | L | K | |
| I | 31.2 | 59.4 | O | H | |||
| J | 42.4 | 91.2 | O | H | |||
| 3-5 | 4 | G | 24 | 337 | K | I | |
| H | 39.1 | 321.4 | K | J | |||
| 7-2 | ?? | E | -32.1 | 136.5 | G | F | Appears to be fixed routing based on composition but still plays the LoS routing animation. |
| 4 | I | 66.1 | 294.5 | M | L | ||
| 7-4 | ?? | G | ?? | ?? | L | F | |
| ?? | E | ?? | ?? | K/P | L | Not meeting composition requirements also routes to L. | |
| 4 | M | 50? | ?? | O | N | Not meeting composition requirements also routes to N or P. | |
| 7-5 | 4 | O | 57 | ?? | M | L | |
| P | 58 | ?? | T/R | S | Composition determines the T/R route. | ||
| 4-5 | 2 | K | 64.8 | 146.5 | T | L | |
| Q | 62 | 167 | N/O | P | Low number of reports. | ||
| ?? | O | 62 | 167 | T | N | Appears to be fixed routing based on composition but still plays the LoS routing animation. | |
| 5-2 | 2 | F | 64 | 147 | O | H | |
| L | 73.8 | 81 | K | N | Low number of reports. | ||
| 5-4 | 2 | L | 57 | 185 | P | N | |
| M | 42.3 | 150.1 | P | O | |||
| 5-5 | 2 | O | 63.8 | 134.5 | S | R | |
| P | 74.4 | 167.7 | S | Q | |||
| 6-1 | 4 | G | 16.7 | 218.1 | H | I | |
| H | 25.4 | 201.4 | K | E | With AS | ||
| H | 23.3 | 218.1 | Without AS | ||||
| 6-2 | 3 | E | 46 | 179.8 | J | I | |
| H | 42.8 | 42.8 | K | G | Low number of reports. | ||
| I | 35.7 | 205.8 | K | G | |||
| 6-3 | 3 | E | 19.4 | 180 | G | F | Routing is heavily influenced by composition as well. |
| 6-5 | 3 | G | 56.3 | 196.2 | M | K | |
| ?? | J | 37.2 | 193 | M | L | Appears to be fixed routing based on composition but still plays the LoS routing animation. |
Events
In events, LoS cheks are also performed following the same rules, but will additionally vary with difficulties, higher difficulties recruiting higher LoS.
FAQ
Q: Why do I keep getting offrouted?
A: Double check that your fleet LoS according to relevant formula meets the LoS threshold for the map. Viewers such as KanColle Command Center Kai, Poi Viewer, KCANotify, KanColle Viewer and Electronic Observer can calculate your fleet's LoS easily for you.
Q: How do I increase my LoS?
A: Reconnaissance seaplanes are the fastest way to raise LoS. The other easy way is to stack radars. Upgrades to reconnaissance seaplanes are also a good way to increase LoS when slots are limited. It is not recommended to stack carrier-based recons or seaplane bombers because too many can compromise the combat ability of your fleet. Another way is to level your ships. Because LoS increases as you level, marrying your ships means their LoS stat can go even higher.
Q: I had enough LoS, how did I get off routed?
A: Planes that are wiped out no longer contribute to LoS. If you were depending on bombers to hit the LoS threshold, you can fall under the threshold when encountering heavy enemy anti-air.
- ↑ http://ja.kancolle.wikia.com/wiki/%E3%83%9E%E3%83%83%E3%83%97%E7%B4%A2%E6%95%B5
- ↑ Default based on Vita datamine
Detection
- For more information on this topic, see Detection.
At the start of any Day Battle, "detection" will be attempted by the fleet. Detection is required to take part in the Aerial Combat phase.
Only the Ship's LoS and the LoS from the participating planes is taken into account for the trigger rate:
 Sp Carrier Recons,
 Recon/
 Seaplane Recons,
- Bomber/
 Seaplane Bombers,
  Large Flying Boats
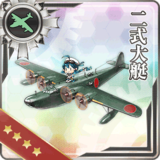
 .
.
Contact
- For more information on this topic, see Contact.
At the start of any Airstrike phase, "contact" may be triggered, increasing the airstrike power if triggered.
Only the LoS from the participating planes is taken into account for the trigger rate (step 1):
- Sp Carrier Recons,
- Recon/ Seaplane Recons,
- Large Flying Boats,
Only the LoS from the participating planes is taken into account for the plane selection (step 2):
- Sp Carrier Recons,
- Recon/ Seaplane Recons,
- Large Flying Boats,
 /
/ Torpedo Bombers.
LBAS LoS
- For more information on this topic, see LBAS Defense Fighter-Power.
Unlike ship mechanics, LBAS do not need/utilize the LoS stat and so this stat is mostly useless.
The only use for LoS is for "Defense Fighter-Power" in air defense mode, where it determines the "Reconnaissance Defense Bonus" ([math]\displaystyle{ \text{Mod}_\text{recon} }[/math]) for ![]() Recon Seaplane Recons,
Recon Seaplane Recons, ![]() Large Flying Boats,
Large Flying Boats, ![]() Carrier Recons, and
Carrier Recons, and ![]() LB Land-based Recons:
LB Land-based Recons:
| Reconnaissance Defense Bonus | |||
|---|---|---|---|
| LoS | |||
| ≥9 | 1.16 | 1.3 | 1.24 |
| 8 | 1.13 | - | 1.18 |
| ≤7 | 1.1 | 1.2 | - |
The LoS on all other aircraft or in other LBAS modes is not counted.
Artillery Spotting
- For more information on this topic, see Artillery Spotting.
Artillery Spotting attacks require the use of recons/bombers.
Only the Ship's LoS and the LoS from the participating planes is taken into account for the trigger rate:
- Recon/ Seaplane Recons,
- Bomber/ Seaplane Bombers,
- / Torpedo Bombers,
 Dive Bombers.
See Also
| |||||||||||||||||||||||||||||||||||||||||||||