- Welcome to the Kancolle Wiki!
- If you have any questions regarding site content, account registration, etc., please visit the KanColle Wiki Discord
Difference between revisions of "Support Expedition"
Jigaraphale (talk | contribs) |
|||
| (52 intermediate revisions by 8 users not shown) | |||
| Line 1: | Line 1: | ||
| − | + | {{CombatPortal}} | |
| − | + | On certain maps, it is possible to call "support expeditions" to help the fleet during battles. These expeditions are deployed like normal resource expeditions and have a chance of appearing at certain nodes or at the boss. | |
| − | + | *Currently, these are only available in [[World 5]] and [[Events]]. | |
| − | Currently these are only available in World 5 and | ||
=Overview= | =Overview= | ||
| + | ===Expedition List=== | ||
| + | Areas that have support expeditions available for use have support expeditions listed under the expedition tab for the corresponding area: | ||
| + | *[[World 5]]: | ||
| + | **Node support | ||
| + | **Boss support | ||
| + | *[[Events]]: | ||
| + | **Node support | ||
| + | **Boss support | ||
| − | + | It behaves differently than other expeditions: | |
| + | *Instead of the normal 3 morale reduction for normal expeditions, the morale loss from support expeditions varies: | ||
| + | ** Node support: 1-5 | ||
| + | ** Boss support: 1-10 | ||
| + | *The resource cost is '''rounded up''' instead of down. | ||
| − | + | {|width=100% | |
| + | |style="width:50px"|[[File:IcoArea5.png]] | ||
| + | |<div style="width:95%;background:#9999cc;padding-left:10px;border-top-right-radius:10px;color:black">'''南方海域 - Southern Waters'''</div> | ||
| + | |} | ||
| + | <div style="background:#9999cc;width:98%;border-radius:10px;padding:10px"> | ||
| − | 3 | + | {|class="wikitable" width="100%" style="text-align:center" |
| − | + | !# | |
| + | !width="25%"|Name | ||
| + | !Time | ||
| + | !width="1%"| | ||
| + | !Σ(Lv) | ||
| + | ![[File:Flagship icon.png]] | ||
| + | !width="1%"| | ||
| + | !Minimum Fleet | ||
| + | !width="10%"|Requirements | ||
| + | !width="1%"| | ||
| + | !{{Fuel}} | ||
| + | !{{Ammo}} | ||
| + | |- | ||
| + | |colspan=14 style="background:#9999cc"| | ||
| + | |- | ||
| + | !33 | ||
| + | |前衛支援任務<br>'''Vanguard Support Mission'''<br>''"Node Support" | ||
| + | |00:15 | ||
| + | |rowspan=3 style="background:#9999cc"| | ||
| + | | - | ||
| + | | - | ||
| + | |rowspan=3 style="background:#9999cc"| | ||
| + | |2DD 4XX | ||
| + | | | ||
| + | |rowspan=3 style="background:#9999cc"| | ||
| + | | -5 | ||
| + | | -4<br>(Airstrike/ASW)<br>-8<br>(Shelling/Torpedo) | ||
| + | |- | ||
| + | |colspan=14 style="background:#9999cc"| | ||
| + | |- | ||
| + | !34 | ||
| + | |艦隊決戦支援任務<br>'''Decisive Battle Fleet Support Mission'''<br>''"Boss Support" | ||
| + | |00:30 | ||
| + | | - | ||
| + | | - | ||
| + | |2DD 4XX | ||
| + | | | ||
| + | | -5 | ||
| + | | -4<br>(Airstrike/ASW)<br>-8<br>(Shelling/Torpedo) | ||
| + | |}</div> | ||
| − | |||
| − | |||
| − | + | {|width=100% | |
| − | + | |style="width:50px"| | |
| + | |<div style="width:95%;background:#FF2200;padding-left:10px;border-top-right-radius:10px;color:black">'''Event Expeditions'''</div> | ||
| + | |} | ||
| + | <div style="background:#FF2200;width:98%;border-radius:10px;padding:10px"> | ||
| − | + | {|class="wikitable" width="100%" style="text-align:center" | |
| − | + | !# | |
| − | + | !width="25%"|Name | |
| − | + | !Time | |
| − | + | !width="1%"| | |
| − | + | !Σ(Lv) | |
| + | ![[File:Flagship icon.png]] | ||
| + | !width="1%"| | ||
| + | !Minimum Fleet | ||
| + | !width="10%"|Requirements | ||
| + | !width="1%"| | ||
| + | !{{Fuel}} | ||
| + | !{{Ammo}} | ||
| + | |- | ||
| + | |colspan=14 style="background:#FF2200"| | ||
| + | |- | ||
| + | !S1 | ||
| + | |前衛支援任務<br>'''Vanguard Support Mission'''<br>''"Node Support" | ||
| + | |00:15 | ||
| + | |rowspan=3 style="background:#FF2200"| | ||
| + | | - | ||
| + | | - | ||
| + | |rowspan=3 style="background:#FF2200"| | ||
| + | |2DD 4XX | ||
| + | | | ||
| + | |rowspan=3 style="background:#FF2200"| | ||
| + | | -5 | ||
| + | | -4<br>(Airstrike/ASW)<br>-8<br>(Shelling/Torpedo) | ||
| + | |- | ||
| + | |colspan=14 style="background:#FF2200"| | ||
| + | |- | ||
| + | !S2 | ||
| + | |艦隊決戦支援任務<br>'''Decisive Battle Fleet Support Mission'''<br>''"Boss Support" | ||
| + | |00:30 | ||
| + | | - | ||
| + | | - | ||
| + | |2DD 4XX | ||
| + | | | ||
| + | | -5 | ||
| + | | -4<br>(Airstrike/ASW)<br>-8<br>(Shelling/Torpedo) | ||
| + | |} | ||
| + | </div> | ||
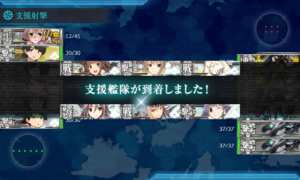
| − | + | [[File:Support_Expedition.png|thumb|right|A shelling Support Expedition appears in a night battle node]] | |
| − | + | ===Steps=== | |
| − | + | #Deploy the support fleet in the expedition menu, | |
| + | #Send another fleet in sortie, | ||
| + | #The support expedition will come back automatically once the sortie ends, even if she did not show up. | ||
| + | Support expeditions will always consume resources, '''regardless of whether they have performed a support attack'''. | ||
| − | + | ===Node=== | |
| + | {{Details|Nodes}} | ||
| + | * Nose support may appear on most battle nodes. But not on boss nodes. | ||
| + | ** Note that only aerial support can appear on Submarine Nodes or Airstrike Supported Battle. | ||
| + | ** Note that aerial support cannot appear during [[night battle]]. | ||
| + | * Boss support can appear only on boss nodes. | ||
| − | + | ===Support type=== | |
| − | * | + | There are 4 types of support which are determined by the fleet composition: |
| − | * | + | * Shelling support, |
| − | + | * Aerial supports: | |
| − | + | ** Airstrike support, | |
| + | ** ASW support, | ||
| + | * Torpedo support, | ||
===Trigger Rate=== | ===Trigger Rate=== | ||
| − | |||
The trigger rate differs between node support and boss support. | The trigger rate differs between node support and boss support. | ||
| + | {|class="wikitable mw-collapsible mw-collapsed" width="100%" | ||
| + | !Trigger Rate Formula | ||
| + | |- | ||
| + | |The base trigger rate for each support is as follow: | ||
| + | {|style="padding:10px; margin:20px; border:1px solid orange; border-radius:10px" | ||
| + | |valign="center"| <math>\begin{align} | ||
| + | \text{Node %} &= 51 + \text{Mod}_\text{flag} + 5 \times \text{N}_\text{escort} \\ | ||
| + | \text{Boss %} &= 86 + \text{Mod}_\text{flag} + 5 \times \text{N}_\text{escort} | ||
| + | \end{align}</math> | ||
| + | |} | ||
| − | <math> | + | ;With |
| + | *<math>\text{Mod}_\text{flag}</math> being '''15''' if the flagship is sparkled . | ||
| + | *<math>\text{N}_\text{escort}</math> the number of non-flagship sparkled ships. | ||
| + | |- | ||
| + | | | ||
| + | {{Color|red|'''The following is still under investigation, being approximative}} | ||
| − | <math>\text{ | + | When a {{FCF}} {{Equipment/Link|Fleet Communication Antenna}} (FCA) is used, a second trigger roll will be held if the 1st one failed: |
| + | {|style="padding:10px; margin:20px; border:1px solid orange; border-radius:10px" | ||
| + | |valign="center"| <math>\text{2nd Roll %} = 5 + 5 \times \text{N} + \text{Mod}_\text{CEP} + 2 \times \bigstar</math> | ||
| + | |} | ||
| + | ;With | ||
| + | *<math>\text{N}</math> the number of sparkled ships, | ||
| + | * <math>\text{Mod}_\text{CEP}</math> being '''20''' when using a {{FCF}} {{Equipment/Link|Communication Equipment & Personnel|text=CEP}}, | ||
| + | * <math>\bigstar</math> the {{Star}} [[improvement]] level of the {{FCF}} {{Equipment/Link|Fleet Communication Antenna|text=FCA}}. | ||
| − | + | [https://x.com/shiroos/status/1808545990217249165] | |
| − | + | |} | |
| − | |||
| − | ''' | + | ;Notes |
| − | * The flagship affects trigger rate disproportionately. | + | * The {{FCF}} {{Equipment/Link|Fleet Communication Antenna|Communication Equipment & Personnel|text=Communication equipment}} give a bonus '''only''' when equipped on the '''first or second ship''' of the support fleet. |
| − | ** Always place a sparkled ship as | + | ** All related bonuses are unclear yet. |
| − | * The maximum chance for node support to trigger is '''91%''' and the lowest is '''51%'''. | + | * The flagship affects the trigger rate disproportionately. |
| − | ** It is recommended | + | ** Always place a sparkled ship as flagship. |
| + | * The maximum chance for node support to trigger with no communication equipment is '''91 %''' and the lowest is '''51 %'''. | ||
| + | **With {{FCF}} communication equipment, it can reach ~96 % | ||
| + | ** It is recommended to sparkle all the ships for node support in order to get the maximum trigger chance. | ||
* Boss support can reach '''100%''' trigger chance with only the flagship sparkled. | * Boss support can reach '''100%''' trigger chance with only the flagship sparkled. | ||
| − | ** It is recommended | + | ** It is recommended to at least sparkle the four heavy hitters in order to maximize accuracy. |
| − | == | + | ==Attack Specification== |
| + | The support fleet will appear between the [[Aerial Combat]] and the [[Battle Opening]] phase during day battles. | ||
| + | * The exception is night-day nodes where airstrike/ASW support arrives after [[LBAS]] but before [[Aerial Combat]], | ||
| + | * The ships attack random targets in the fleet order. | ||
| + | ** To maximize the [[Scratch Damage]], the weakest ships (usually DD) should be placed first. | ||
| − | + | ===Damage=== | |
| − | + | {{Details|Damage Calculations}} | |
| − | + | Supports use slightly different formulas than regular shelling attacks. | |
| − | + | * Only '''visible stats''' are taken into account, | |
| − | + | ** This means [[Hidden Fit Bonuses]] and [[Improvement]] bonuses are ignored, | |
| − | + | ** [[Plane Proficiency]] is ignored, | |
| − | + | ** For ASW support only, the ASW [[Visible Fit Bonuses]] are also ignored. | |
| − | + | * The damage cap for supports is '''170''' in all cases, | |
| − | + | ** This means that even if a support shows up in night battle, it does not get the advantage of the 360 damage cap, | |
| − | + | * The only modifier are the [[engagement]] and the [[formation]], even in night battles, | |
| − | + | * Misses are also displayed on ships that are not targeted. | |
| − | |||
| − | |||
| − | |||
| − | |||
| − | |||
| − | |||
| − | |||
| − | |||
| − | |||
| − | |||
| − | |||
| − | |||
| − | |||
| − | |||
| − | |||
| − | |||
| − | |||
| − | |||
| − | |||
| − | |||
| − | |||
| − | |||
| − | |||
| − | |||
| − | |||
| − | |||
| − | |||
| − | |||
| − | |||
| − | |||
| − | |||
| − | |||
| − | |||
| − | |||
| − | |||
| − | |||
| − | |||
| − | |||
| − | |||
| − | + | * [[AO]] use the surface shelling formula instead of the carrier attack formula for support even when equipped with torpedo bombers. | |
| − | + | ** Enemy ships sunk in earlier combat phases '''are still counted''' towards contesting air control for airstrike support. | |
| − | |||
| − | |||
| − | |||
| − | |||
| − | |||
| − | |||
| − | |||
| − | |||
| − | |||
| − | |||
| − | |||
| − | |||
| − | |||
| − | |||
| − | |||
| − | |||
| − | |||
| − | |||
| − | |||
| − | |||
| − | |||
| − | |||
| − | |||
| − | |||
| − | |||
| − | |||
| − | |||
| − | |||
| − | |||
| − | |||
| − | |||
| − | |||
| − | |||
| − | |||
| − | |||
| − | |||
| − | |||
| − | |||
| − | |||
| − | |||
| − | |||
| − | |||
| − | |||
| − | |||
| − | |||
| − | |||
| − | |||
| − | |||
| − | = | + | ===Accuracy=== |
| − | == | + | {{Details|Accuracy}} |
| + | * Only '''base stats''' are taken into account. | ||
| + | ** This means [[Hidden Fit Bonuses]] and [[Improvement]] bonuses are ignored. | ||
| + | ** Unlike damage, Accuracy [[Visible Fit Bonuses]] do not work. | ||
| + | * The only modifier are the [[morale]] and the [[formation]]. | ||
| + | '''As a consequence, contrary to the rest of the battle, here the accuracy needs to be balanced with the attack power. | ||
| − | + | ===Fleet composition=== | |
| + | <tabber> | ||
| + | |-|Shelling Support= | ||
| + | Meet '''all''' of the following requirements: | ||
| + | * 2 or more (F)BB(V) '''OR''' 4 CA(V), | ||
| + | * No more than 1 CV(B/L)/AV/LHA. | ||
| + | ;Recommended Composition | ||
| + | * 2DD, 3(F)BB(V), 1CV(B) | ||
| + | ** Note that using 3BBV will trigger Aerial Support. To avoid Aerial Support, use at least one (F)BB. | ||
| − | ''' | + | Ship should be chosen based on '''firepower'''{{firepower}}, '''level''' and '''luck'''{{Luck}}. |
| − | |||
| − | |||
| − | |||
| − | |||
| + | |-|Airstrike Support= | ||
| + | Meet '''one''' of the following requirements: | ||
| + | * At least 2 or more CV(B/L)/AV/LHA in the fleet, | ||
| + | * 1 or more CV(B/L)/AV/LHA and no (F)BB(V)/CA/CAV, | ||
| + | * 2 or more BBV/CAV/AV/LHA/AO and no (F)BB/CA. | ||
| − | + | ;Recommended Composition | |
| − | * | + | * 2DD, 4CV(B/L) |
| + | Ship should only be chosen based on plane slots. | ||
| + | |-|ASW Support= | ||
| + | Meet '''all''' of the following requirements: | ||
| + | * At least 1CVL present. | ||
| + | * At least 1 additional CVL/AV/AO/LHA/CL/CT or 2DE | ||
| − | + | ;Recommended Composition | |
| − | * | + | * 2DD, 2CVL, 2CV(B) |
| − | + | Carriers should only be chosen based on plane slots. | |
| − | + | </tabber> | |
| − | |||
| − | |||
| + | ;Notes | ||
| + | <tabber> | ||
| + | |-|Shelling Support= | ||
| + | The attack works similarly to the [[shelling]] phase. | ||
| + | *This support cost huge amount of fuel{{Fuel}} and ammo{{Ammo}} | ||
| − | + | |-|Airstrike Support= | |
| − | + | The attack will go through the normal [[Aerial Combat]] phases. | |
| − | * | + | * This means that damage can be reduced by plane losses through the air control and anti-air fire phases. |
| − | * | + | * Planes in airstrike support appear to have some shoot-down resistance that helps them survive anti-air fire. |
| − | ** | + | ** But the required fighter power for obtaining air control is reduced by planes lost in earlier air control phases. |
| − | * | + | * Airstrike support '''costs bauxite {{bauxite}}''' on top of the normal resupply costs because lost planes need to be resupplied. |
| − | + | * Taking [[jets]] on airstrike support still costs steel {{steel}} but does not trigger a jet assault phase. | |
| − | * | + | * Ships that cannot launch bombers '''will not participate in airstrike support'''. |
| − | ** | + | ;Bug |
| + | *The {{Item/Icon|Provisional Resupply|size=50px}} Provisional Resupply will not resupply aircraft. | ||
| + | |-|ASW Support= | ||
| + | * All planes with an ASW stat will participate in support. | ||
| + | ** Fighters, Carrier Recons, and Jets are excluded. | ||
| + | ** They will not even contribute to determining air control, but they will not be shot down. | ||
| + | ** Seaplane fighters and fighter bombers will participate. | ||
| + | * Although DDs and DEs are included in the fleet, they '''do not participate''' since it is a variant of airstrike support. | ||
| + | * It only takes into account '''plane ASW''', equipping sonars and depth charges will be a waste. | ||
| + | ** However the [[Damage_Calculations#Anti-Submarine_Warfare|armor penetration]] mechanic from [[Depth Charge]]s still works.{{cite}} | ||
| + | ;Bug | ||
| + | *The {{Item/Icon|Provisional Resupply|size=50px}} Provisional Resupply will not resupply aircraft. | ||
| + | </tabber> | ||
| − | + | ===Equipment Setups=== | |
| − | + | <tabber> | |
| − | Any eligible ship type not mentioned in this table is subpar '''not recommended''' for use in support. The order of the equipment is for illustrative purposes only. | + | |-|Shelling Support= |
| − | {| class="wikitable" style="width | + | Any eligible ship type not mentioned in this table is subpar '''not recommended''' for use in support. The order of the equipment is for illustrative purposes only. Can be placed in any order. |
| + | {|class="wikitable" width="75%" style="margin:auto" | ||
| + | !width="160px"|Equipment Setup | ||
| + | !Notes | ||
| + | |- | ||
| + | !colspan=3|Destroyers | ||
| + | |- | ||
| + | |{{Equipment/Card|Fleet Communication Antenna|size=60px}}{{Equipment/Card|Communication Equipment & Personnel|size=60px}}{{Radar}} | ||
| + | |As DD contribute very little to the damage, they are the best suited to equip the {{FCF}} {{Equipment/Link|Fleet Communication Antenna|Communication Equipment & Personnel|text=Communication equipment}} and increase the trigger rate of the support without loosing too much damage. | ||
| + | |- | ||
| + | |{{RedGunLight}}{{RedGunLight}}{{Radar}} | ||
| + | |When running a gun on a destroyer, '''ensure that it is a gun with bonus fit firepower''' to maximize her damage potential. | ||
|- | |- | ||
| − | + | |{{RedGunLight}}{{Radar}}{{Radar}} | |
| + | |For all other destroyers that don't have a fit gun, this setup ensures that they have the maximum chance to land a hit. | ||
|- | |- | ||
| − | ! | + | !colspan=3|Battleships |
| − | |||
|- | |- | ||
|{{RedGunHeavy}}{{Radar}}{{Radar}}{{Radar}} | |{{RedGunHeavy}}{{Radar}}{{Radar}}{{Radar}} | ||
| − | |This is for high firepower battleships like the | + | |This is for high firepower battleships (>140) like the {{Class|Yamato}} who can hit the attack cap in parallel with a single high-firepower gun. Stacking all the extra radars will increase the accuracy. |
| + | |- | ||
| + | |{{RedGunHeavy}}{{RedGunHeavy}}{{RedGunHeavy}}{{RedGunHeavy}} | ||
| + | |This setup should only be used if all guns have at least 4 {{Hit}}. It allows high firepower without sacrificing accuracy. | ||
| + | |- | ||
| + | |{{RedGunHeavy}}{{RedGunHeavy}}{{RedGunHeavy}}{{Radar}} | ||
| + | |This setup should only be used if all guns have at least 3 {{Hit}}. It allows decent firepower without sacrificing accuracy. | ||
|- | |- | ||
|{{RedGunHeavy}}{{RedGunHeavy}}{{Radar}}{{Radar}} | |{{RedGunHeavy}}{{RedGunHeavy}}{{Radar}}{{Radar}} | ||
| − | | | + | |Without high-accuracy guns use this balanced setup. |
| − | |||
| − | |||
|- | |- | ||
| − | ! | + | !colspan=3|Carriers |
| − | |||
|- | |- | ||
| − | |||
| − | |||
| − | |||
|{{RedPlane}}{{RedPlane}}{{Radar}}{{Radar}} | |{{RedPlane}}{{RedPlane}}{{Radar}}{{Radar}} | ||
| − | | | + | |Carriers that have '''above 52 firepower'''{{Firepower}} can hit the parallel attack cap with just two 10{{Dive}} plane. Using planes with a decent power and high accuracy {{Hit}} is recommended. |
| − | |||
| − | |||
| − | |||
| − | |||
| − | |||
| − | |||
| − | |||
| − | |||
| − | |||
| − | |||
| − | |||
|- | |- | ||
| + | |{{AnyBomber}}{{AnyBomber}}{{Radar}}{{Radar}} | ||
| + | |This is for carriers that have '''bellow 52 firepower'''{{Firepower}}. To compensate, planes with high "shelling power" (base attack power given by a plane following the [[Damage_Calculations#Carrier_Shelling_Attacks|carrier shelling formula]]) should be used. Using planes with a decent power and high accuracy {{Hit}} is recommended. | ||
|} | |} | ||
| − | + | |-|Airstrike Support= | |
| − | + | '''Bombers should be placed in the largest slots'''. | |
| − | + | {|class="wikitable" width="75%" style="margin:auto" | |
| − | + | !width="160px"|Equipment Setup | |
| − | + | !Notes | |
| − | |||
| − | |||
| − | |||
| − | |||
| − | |||
| − | |||
| − | |||
| − | |||
| − | |||
| − | |||
| − | |||
| − | |||
| − | |||
| − | |||
| − | |||
| − | |||
| − | |||
| − | |||
| − | |||
| − | |||
| − | |||
| − | |||
| − | |||
| − | |||
| − | |||
| − | |||
| − | |||
| − | |||
| − | |||
| − | |||
| − | |||
| − | |||
| − | |||
| − | |||
| − | |||
| − | |||
| − | |||
| − | |||
| − | |||
| − | |||
| − | |||
| − | |||
| − | |||
| − | |||
| − | |||
| − | |||
| − | |||
| − | |||
| − | |||
| − | |||
| − | |||
| − | |||
| − | |||
| − | |||
| − | {| class="wikitable" style="width | ||
|- | |- | ||
| − | ! | + | !colspan=3|Destroyers |
| + | |- | ||
| + | |{{Equipment/Card|Fleet Communication Antenna|size=60px}}{{Equipment/Card|Communication Equipment & Personnel|size=60px}}{{Radar}} | ||
| + | |As DD cannot contribute to the damage, they are the best suited to equip the {{FCF}} {{Equipment/Link|Fleet Communication Antenna|Communication Equipment & Personnel|text=Communication equipment}} and increase the trigger rate of the support without loosing any damage. | ||
|- | |- | ||
| − | ! | + | !colspan=3| Carriers |
| − | |||
|- | |- | ||
|{{BluePlane}}{{BluePlane}}{{BluePlane}}{{GreenPlane}} | |{{BluePlane}}{{BluePlane}}{{BluePlane}}{{GreenPlane}} | ||
| − | |This is the standard airstrike support setup. Because torpedo bombers have the best airstrike damage, it is best | + | |This is the standard airstrike support setup. Because torpedo bombers have the best airstrike damage, it is best to just stack them. The fighter is along to help with air control and reduce the bomber losses. It is not recommended to run airstrike support with more than 1 fighter because it is better to run shelling support when encountering that much enemy airpower. |
| − | |||
| − | |||
| − | |||
| − | |||
| − | |||
| − | |||
| − | |||
| − | |||
|} | |} | ||
| − | + | |-|ASW Support= | |
| − | + | '''Bombers should be placed in the largest slots'''. | |
| − | |||
| − | |||
| − | |||
| − | |||
| − | |||
| − | |||
| − | |||
| − | |||
| − | |||
| − | |||
| − | |||
| − | |||
| − | |||
| − | |||
| − | |||
| − | |||
| − | |||
| − | |||
| − | |||
| − | |||
| − | |||
| − | |||
| − | |||
| − | |||
| − | |||
| − | |||
| − | |||
| − | |||
| − | |||
| − | ''' | ||
| − | |||
| − | |||
| − | |||
| − | |||
| − | |||
| − | |||
| − | |||
| − | |||
| − | |||
| − | |||
| − | {| class="wikitable" style="width | + | {|class="wikitable" width="75%" style="margin:auto" |
| + | !width="160px"|Equipment Setup | ||
| + | !Notes | ||
|- | |- | ||
| − | ! | + | !colspan=3|Destroyers/Coastal Defense Ships |
| − | |- | + | |- |
| − | + | |{{Equipment/Card|Fleet Communication Antenna|size=60px}}{{Equipment/Card|Communication Equipment & Personnel|size=60px}}{{Radar}} | |
| − | + | |As DD cannot contribute to the damaged (except [[Samuel B. Roberts Mk.II]]), they are the best suited to equip the {{FCF}} {{Equipment/Link|Fleet Communication Antenna|Communication Equipment & Personnel|text=Communication equipment}} and increase the trigger rate of the support without loosing any damage. | |
|- | |- | ||
| − | | | + | |{{Autogyro}}{{Autogyro}}{{Autogyro}} |
| − | | | + | |For [[Samuel B. Roberts Mk.II]] only. |
| − | |||
| − | |||
|- | |- | ||
| − | ! | + | !colspan=3|Carriers |
| − | |||
|- | |- | ||
|N/A | |N/A | ||
| − | | | + | |There isn't any fixed setup for ASW support. Just put the aircraft with the highest base '''ASW'''{{ASW}}stat into the largest slots (see [[ASW Aircraft]]). Fighters can be included if facing some '''surface battles''' with enemy airpower. |
| + | *Do not take into account the '''ASW''' [[Visible Fit Bonuses]]. | ||
|} | |} | ||
| + | </tabber> | ||
==Long Range Torpedo Support== | ==Long Range Torpedo Support== | ||
| + | It is the cheapest support but also by far the weakest. In addition, there is a bug that massively reduced the accuracy of this support<ref>Source: https://discord.com/channels/118339803660943369/178613137430282240/1138501373625909338 Serverlink: https://discord.gg/RtSadWM</ref>. | ||
| + | ;Trigger Requirements | ||
| + | * Do not meet any of the requirements for shelling, airstrike, or ASW support. | ||
| − | + | ;Notes | |
| − | + | * Do not bother using this type of support, since it is by design inferior to the previously mentioned ones. | |
| − | |||
| − | |||
| − | |||
| − | |||
| − | |||
| − | |||
=FAQ= | =FAQ= | ||
| − | + | <div class="mw-collapsible mw-collapsed"> | |
| − | + | '''Q: Why didn't my support show up? | |
| − | '''Q: Why didn't my support show up? | ||
'''A:''' Double check that you have: | '''A:''' Double check that you have: | ||
| − | # Sent | + | # Sent the support to the right area. |
| − | # Sparkled | + | # Sparkled a sufficient number of ships. |
# Have the correct composition for support to appear. | # Have the correct composition for support to appear. | ||
# You resupplied the fleet before sending them off. | # You resupplied the fleet before sending them off. | ||
| Line 408: | Line 381: | ||
| − | '''Q: I used 4BBV, why didn't support show up? | + | '''Q: I used 4BBV, why didn't support show up? |
'''A:''' Because that triggers airstrike support. If you had no seaplane bombers, that causes airstrike support to fail. | '''A:''' Because that triggers airstrike support. If you had no seaplane bombers, that causes airstrike support to fail. | ||
| − | '''Q: Does support work in night battle nodes? | + | '''Q: Does support work in night battle nodes? |
'''A:''' Yes, but only shelling support. | '''A:''' Yes, but only shelling support. | ||
| − | '''Q: Which support should I use? | + | '''Q: Which support should I use? |
'''A:''' Generally shelling. Airstrike and ASW support only have niche uses. | '''A:''' Generally shelling. Airstrike and ASW support only have niche uses. | ||
| − | '''Q: Why isn't XX composition listed as recommended? | + | '''Q: Why isn't XX composition listed as recommended? |
'''A:''' Because it is subpar and not worth your time. You're generally running support if there are tough things en-route that you need taken out. There's no point in cheaping out and increasing the randomness of the outcome. | '''A:''' Because it is subpar and not worth your time. You're generally running support if there are tough things en-route that you need taken out. There's no point in cheaping out and increasing the randomness of the outcome. | ||
| − | '''Q: Can I use XX ship with more guns/dive bombers for shelling instead? | + | '''Q: Can I use XX ship with more guns/dive bombers for shelling instead? |
| + | '''A:''' It is advisable not to use ships that require too many guns or dive bombers to take to the parallel or head-on cap. Support requires all the accuracy it can muster to be effective. | ||
| − | |||
| − | + | '''Q: Do I really have to sparkle everyone? | |
| − | '''Q: Do I really have to sparkle everyone? | ||
'''A:''' You should have at least 4 ships sparkled for node support and the flagship sparkled for boss support. It is still recommended to sparkle the 4 heavy hitters for boss support because sparkling helps accuracy. | '''A:''' You should have at least 4 ships sparkled for node support and the flagship sparkled for boss support. It is still recommended to sparkle the 4 heavy hitters for boss support because sparkling helps accuracy. | ||
| − | '''Q: Why is my morale going down so fast? | + | '''Q: Why is my morale going down so fast? |
| − | |||
'''A:''' Node support costs 1-5 morale and boss support costs 1-10. | '''A:''' Node support costs 1-5 morale and boss support costs 1-10. | ||
| − | '''Q: Can I try torpedo support? | + | '''Q: Can I try torpedo support? |
'''A:''' No. | '''A:''' No. | ||
| + | </div> | ||
| + | |||
| + | =See Also= | ||
| + | *[http://wikiwiki.jp/kancolle/?%BB%D9%B1%E7%B4%CF%C2%E2 Wikiwiki link for support fleet] | ||
{{Mechanics}} | {{Mechanics}} | ||
| + | [[Category:Sortie]] | ||
Latest revision as of 17:16, 24 August 2024
On certain maps, it is possible to call "support expeditions" to help the fleet during battles. These expeditions are deployed like normal resource expeditions and have a chance of appearing at certain nodes or at the boss.
Overview
Expedition List
Areas that have support expeditions available for use have support expeditions listed under the expedition tab for the corresponding area:
It behaves differently than other expeditions:
- Instead of the normal 3 morale reduction for normal expeditions, the morale loss from support expeditions varies:
- Node support: 1-5
- Boss support: 1-10
- The resource cost is rounded up instead of down.
南方海域 - Southern Waters
|
Event Expeditions
|
Steps
- Deploy the support fleet in the expedition menu,
- Send another fleet in sortie,
- The support expedition will come back automatically once the sortie ends, even if she did not show up.
Support expeditions will always consume resources, regardless of whether they have performed a support attack.
Node
- For more information on this topic, see Nodes.
- Nose support may appear on most battle nodes. But not on boss nodes.
- Note that only aerial support can appear on Submarine Nodes or Airstrike Supported Battle.
- Note that aerial support cannot appear during night battle.
- Boss support can appear only on boss nodes.
Support type
There are 4 types of support which are determined by the fleet composition:
- Shelling support,
- Aerial supports:
- Airstrike support,
- ASW support,
- Torpedo support,
Trigger Rate
The trigger rate differs between node support and boss support.
| Trigger Rate Formula | |
|---|---|
The base trigger rate for each support is as follow:
| |
|
The following is still under investigation, being approximative When a
|
- Notes
- The
 Communication equipment
 give a bonus only when equipped on the first or second ship of the support fleet.
- All related bonuses are unclear yet.
- The flagship affects the trigger rate disproportionately.
- Always place a sparkled ship as flagship.
- The maximum chance for node support to trigger with no communication equipment is 91 % and the lowest is 51 %.
- Boss support can reach 100% trigger chance with only the flagship sparkled.
- It is recommended to at least sparkle the four heavy hitters in order to maximize accuracy.
Attack Specification
The support fleet will appear between the Aerial Combat and the Battle Opening phase during day battles.
- The exception is night-day nodes where airstrike/ASW support arrives after LBAS but before Aerial Combat,
- The ships attack random targets in the fleet order.
- To maximize the Scratch Damage, the weakest ships (usually DD) should be placed first.
Damage
- For more information on this topic, see Damage Calculations.
Supports use slightly different formulas than regular shelling attacks.
- Only visible stats are taken into account,
- This means Hidden Fit Bonuses and Improvement bonuses are ignored,
- Plane Proficiency is ignored,
- For ASW support only, the ASW Visible Fit Bonuses are also ignored.
- The damage cap for supports is 170 in all cases,
- This means that even if a support shows up in night battle, it does not get the advantage of the 360 damage cap,
- The only modifier are the engagement and the formation, even in night battles,
- Misses are also displayed on ships that are not targeted.
- AO use the surface shelling formula instead of the carrier attack formula for support even when equipped with torpedo bombers.
- Enemy ships sunk in earlier combat phases are still counted towards contesting air control for airstrike support.
Accuracy
- For more information on this topic, see Accuracy.
- Only base stats are taken into account.
- This means Hidden Fit Bonuses and Improvement bonuses are ignored.
- Unlike damage, Accuracy Visible Fit Bonuses do not work.
- The only modifier are the morale and the formation.
As a consequence, contrary to the rest of the battle, here the accuracy needs to be balanced with the attack power.
Fleet composition
Meet all of the following requirements:
- 2 or more (F)BB(V) OR 4 CA(V),
- No more than 1 CV(B/L)/AV/LHA.
- Recommended Composition
- 2DD, 3(F)BB(V), 1CV(B)
- Note that using 3BBV will trigger Aerial Support. To avoid Aerial Support, use at least one (F)BB.
Meet one of the following requirements:
- At least 2 or more CV(B/L)/AV/LHA in the fleet,
- 1 or more CV(B/L)/AV/LHA and no (F)BB(V)/CA/CAV,
- 2 or more BBV/CAV/AV/LHA/AO and no (F)BB/CA.
- Recommended Composition
- 2DD, 4CV(B/L)
Meet all of the following requirements:
- At least 1CVL present.
- At least 1 additional CVL/AV/AO/LHA/CL/CT or 2DE
- Recommended Composition
- 2DD, 2CVL, 2CV(B)
- Notes
The attack works similarly to the shelling phase.
The attack will go through the normal Aerial Combat phases.
- This means that damage can be reduced by plane losses through the air control and anti-air fire phases.
- Planes in airstrike support appear to have some shoot-down resistance that helps them survive anti-air fire.
- But the required fighter power for obtaining air control is reduced by planes lost in earlier air control phases.
- Airstrike support costs bauxite
 on top of the normal resupply costs because lost planes need to be resupplied.
 - Taking jets on airstrike support still costs steel
 but does not trigger a jet assault phase.
 - Ships that cannot launch bombers will not participate in airstrike support.
- Bug
- All planes with an ASW stat will participate in support.
- Fighters, Carrier Recons, and Jets are excluded.
- They will not even contribute to determining air control, but they will not be shot down.
- Seaplane fighters and fighter bombers will participate.
- Although DDs and DEs are included in the fleet, they do not participate since it is a variant of airstrike support.
- It only takes into account plane ASW, equipping sonars and depth charges will be a waste.
- However the armor penetration mechanic from Depth Charges still works.[citation needed]
- Bug
Equipment Setups
Any eligible ship type not mentioned in this table is subpar not recommended for use in support. The order of the equipment is for illustrative purposes only. Can be placed in any order.
| Equipment Setup | Notes | |
|---|---|---|
| Destroyers | ||
  |
As DD contribute very little to the damage, they are the best suited to equip the   and increase the trigger rate of the support without loosing too much damage. and increase the trigger rate of the support without loosing too much damage.
| |
| When running a gun on a destroyer, ensure that it is a gun with bonus fit firepower to maximize her damage potential. | ||
| For all other destroyers that don't have a fit gun, this setup ensures that they have the maximum chance to land a hit. | ||
| Battleships | ||
| This is for high firepower battleships (>140) like the Yamato-class who can hit the attack cap in parallel with a single high-firepower gun. Stacking all the extra radars will increase the accuracy. | ||
| This setup should only be used if all guns have at least 4 | ||
| This setup should only be used if all guns have at least 3 | ||
| Without high-accuracy guns use this balanced setup. | ||
| Carriers | ||
| Carriers that have above 52 firepower | ||
| This is for carriers that have bellow 52 firepower | ||
Bombers should be placed in the largest slots.
| Equipment Setup | Notes | |
|---|---|---|
| Destroyers | ||
  |
As DD cannot contribute to the damage, they are the best suited to equip the   and increase the trigger rate of the support without loosing any damage. and increase the trigger rate of the support without loosing any damage.
| |
| Carriers | ||
| This is the standard airstrike support setup. Because torpedo bombers have the best airstrike damage, it is best to just stack them. The fighter is along to help with air control and reduce the bomber losses. It is not recommended to run airstrike support with more than 1 fighter because it is better to run shelling support when encountering that much enemy airpower. | ||
Bombers should be placed in the largest slots.
| Equipment Setup | Notes | |
|---|---|---|
| Destroyers/Coastal Defense Ships | ||
  |
As DD cannot contribute to the damaged (except Samuel B. Roberts Mk.II), they are the best suited to equip the   and increase the trigger rate of the support without loosing any damage. and increase the trigger rate of the support without loosing any damage.
| |
| For Samuel B. Roberts Mk.II only. | ||
| Carriers | ||
| N/A | There isn't any fixed setup for ASW support. Just put the aircraft with the highest base ASW
| |
Long Range Torpedo Support
It is the cheapest support but also by far the weakest. In addition, there is a bug that massively reduced the accuracy of this support[1].
- Trigger Requirements
- Do not meet any of the requirements for shelling, airstrike, or ASW support.
- Notes
- Do not bother using this type of support, since it is by design inferior to the previously mentioned ones.
FAQ
Q: Why didn't my support show up?
A: Double check that you have:
- Sent the support to the right area.
- Sparkled a sufficient number of ships.
- Have the correct composition for support to appear.
- You resupplied the fleet before sending them off.
If all those are checked, it was just bad luck.
Q: I used 4BBV, why didn't support show up?
A: Because that triggers airstrike support. If you had no seaplane bombers, that causes airstrike support to fail.
Q: Does support work in night battle nodes?
A: Yes, but only shelling support.
Q: Which support should I use?
A: Generally shelling. Airstrike and ASW support only have niche uses.
Q: Why isn't XX composition listed as recommended?
A: Because it is subpar and not worth your time. You're generally running support if there are tough things en-route that you need taken out. There's no point in cheaping out and increasing the randomness of the outcome.
Q: Can I use XX ship with more guns/dive bombers for shelling instead?
A: It is advisable not to use ships that require too many guns or dive bombers to take to the parallel or head-on cap. Support requires all the accuracy it can muster to be effective.
Q: Do I really have to sparkle everyone?
A: You should have at least 4 ships sparkled for node support and the flagship sparkled for boss support. It is still recommended to sparkle the 4 heavy hitters for boss support because sparkling helps accuracy.
Q: Why is my morale going down so fast?
A: Node support costs 1-5 morale and boss support costs 1-10.
Q: Can I try torpedo support?
A: No.
See Also
| |||||||||||||||||||||||||||||||||||||||||||||
