- Welcome to the Kancolle Wiki!
- If you have any questions regarding site content, account registration, etc., please visit the KanColle Wiki Discord
Difference between revisions of "User:Nekomahjong"
Jump to navigation
Jump to search
>Nekomahjong |
>Nekomahjong |
||
| Line 596: | Line 596: | ||
! colspan="8" style="background-color:silver;" |Light Guns | ! colspan="8" style="background-color:silver;" |Light Guns | ||
|- | |- | ||
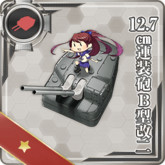
| − | | colspan="2" |[[File:Equipment63-1.png|165px|link=12.7cm Twin Mount Type-B Kai 2]] | + | | colspan="2" style="width: 165px;" |[[File:Equipment63-1.png|165px|link=12.7cm Twin Mount Type-B Kai 2]] |
| − | | colspan="2" |[[File:Equipment78b-1.png|165px|link=12.7cm Naval Gun]] | + | | colspan="2" style="width: 165px;" |[[File:Equipment78b-1.png|165px|link=12.7cm Naval Gun]] |
| − | | colspan="2" |[[File:Equipment3-1.png|165px|link=10cm Twin High-angle Mount]] | + | | colspan="2" style="width: 165px;" |[[File:Equipment3-1.png|165px|link=10cm Twin High-angle Mount]] |
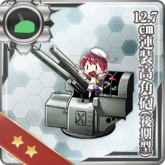
| − | | colspan="2" |[[File:12.7cm_late_3.png|165px|link=12.7cm Twin High-angle Mount (Late Model)]] | + | | colspan="2" style="width: 165px;" |[[File:12.7cm_late_3.png|165px|link=12.7cm Twin High-angle Mount (Late Model)]] |
|- | |- | ||
| Amount | | Amount | ||
| Line 610: | Line 610: | ||
| style="text-align:right;" |4 | | style="text-align:right;" |4 | ||
|- | |- | ||
| − | | colspan="2" |Just one extra firepower not help that much. Let's Akashi-san improve them. | + | | colspan="2" style="width: 165px;" |Just one extra firepower not help that much. Let's Akashi-san improve them. |
| − | | colspan="2" |At least they're unbuildable... | + | | colspan="2" style="width: 165px;" |At least they're unbuildable... |
| − | | colspan="2" |Easy to obtain and really useful for anti air. | + | | colspan="2" style="width: 165px;" |Easy to obtain and really useful for anti air. |
| − | | colspan="2" |Overall good status but pain to obtain... | + | | colspan="2" style="width: 165px;" |Overall good status but pain to obtain... |
|} | |} | ||
{| class="mw-collapsible mw-collapsed wikitable" | {| class="mw-collapsible mw-collapsed wikitable" | ||
! colspan="8" style="background-color:silver;" |Medium Guns | ! colspan="8" style="background-color:silver;" |Medium Guns | ||
|- | |- | ||
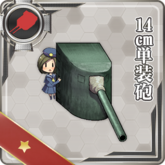
| − | | colspan="2" |[[File:Equipment4-1.png|165px|link=14cm Naval Gun]] | + | | colspan="2" style="width: 165px;" |[[File:Equipment4-1.png|165px|link=14cm Naval Gun]] |
| − | | colspan="2" |[[File:Equipment119-1.png|165px|link=14cm Twin Gun Mount]] | + | | colspan="2" style="width: 165px;" |[[File:Equipment119-1.png|165px|link=14cm Twin Gun Mount]] |
| − | | colspan="2" |[[File:Equipment65-1.png|165px|link=15.2cm Twin Gun Mount]] | + | | colspan="2" style="width: 165px;" |[[File:Equipment65-1.png|165px|link=15.2cm Twin Gun Mount]] |
| − | | colspan="2" |[[File:Equipment5-1.png|165px|link=15.5cm Triple Gun Mount (Main)]] | + | | colspan="2" style="width: 165px;" |[[File:Equipment5-1.png|165px|link=15.5cm Triple Gun Mount (Main)]] |
|- | |- | ||
| Amount | | Amount | ||
| Line 632: | Line 632: | ||
| style="text-align:right;" |2 | | style="text-align:right;" |2 | ||
|- | |- | ||
| − | | colspan="2" |Spare them for upgrade [[14cm Twin Gun Mount]] | + | | colspan="2" style="width: 165px;" |Spare them for upgrade [[14cm Twin Gun Mount]] |
| − | | colspan="2" |Just obtain one for Melon-chan. At least Akashi-san can improve them. | + | | colspan="2" style="width: 165px;" |Just obtain one for Melon-chan. At least Akashi-san can improve them. |
| − | | colspan="2" |Best gun for CL. | + | | colspan="2" style="width: 165px;" |Best gun for CL. |
| − | | colspan="2" |Just keep them for Ooyodo... | + | | colspan="2" style="width: 165px;" |Just keep them for Ooyodo... |
|- | |- | ||
| − | | colspan="2" |[[File:Equipment6-1.png|165px|link=20.3cm Twin Gun Mount]] | + | | colspan="2" style="width: 165px;" |[[File:Equipment6-1.png|165px|link=20.3cm Twin Gun Mount]] |
| − | | colspan="2" |[[File:Equipment90-1.png|165px|link=20.3cm(no.2) Twin Gun Mount]] | + | | colspan="2" style="width: 165px;" |[[File:Equipment90-1.png|165px|link=20.3cm(no.2) Twin Gun Mount]] |
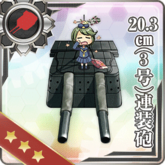
| − | | colspan="2" |[[File:Equipment50-1.png|165px|link=20.3cm(no.3) Twin Gun Mount]] | + | | colspan="2" style="width: 165px;" |[[File:Equipment50-1.png|165px|link=20.3cm(no.3) Twin Gun Mount]] |
|- | |- | ||
| Amount | | Amount | ||
| Line 648: | Line 648: | ||
| style="text-align:right;" |6 | | style="text-align:right;" |6 | ||
|- | |- | ||
| − | | colspan="2" |Spare them for CA. | + | | colspan="2" style="width: 165px;" |Spare them for CA. |
| − | | colspan="2" |Not bad for an extra accuracy. | + | | colspan="2" style="width: 165px;" |Not bad for an extra accuracy. |
| − | | colspan="2" |Best gun for CA. | + | | colspan="2" style="width: 165px;" |Best gun for CA. |
|} | |} | ||
{| class="mw-collapsible mw-collapsed wikitable" | {| class="mw-collapsible mw-collapsed wikitable" | ||
! colspan="8" style="background-color:silver;" |Heavy Guns | ! colspan="8" style="background-color:silver;" |Heavy Guns | ||
|- | |- | ||
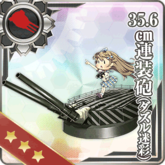
| − | | colspan="2" |[[File:Equipment104-1.png|165px|link=35.6cm Twin Gun Mount (Dazzle Camouflage)]] | + | | colspan="2" style="width: 165px;" |[[File:Equipment104-1.png|165px|link=35.6cm Twin Gun Mount (Dazzle Camouflage)]] |
| − | | colspan="2" |[[File:Equipment103-1.png|165px|link=Prototype 35.6cm Triple Gun Mount]] | + | | colspan="2" style="width: 165px;" |[[File:Equipment103-1.png|165px|link=Prototype 35.6cm Triple Gun Mount]] |
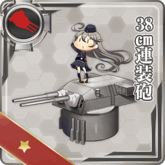
| − | | colspan="2" |[[File:Equipment76-1.png|165px|link=38cm Twin Gun Mount]] | + | | colspan="2" style="width: 165px;" |[[File:Equipment76-1.png|165px|link=38cm Twin Gun Mount]] |
| − | | colspan="2" |[[File:Equipment114_1.png|165px|link=38cm Twin Gun Mount Kai]] | + | | colspan="2" style="width: 165px;" |[[File:Equipment114_1.png|165px|link=38cm Twin Gun Mount Kai]] |
|- | |- | ||
| Amount | | Amount | ||
| Line 669: | Line 669: | ||
| style="text-align:right;" |2 | | style="text-align:right;" |2 | ||
|- | |- | ||
| − | | colspan="2" |Extra evasion and accuracy. | + | | colspan="2" style="width: 165px;" |Extra evasion and accuracy. |
| − | | colspan="2" |Best gun for Kongou-Sisters but cost [[File:Improvement Materials.png|25px]] a lot. | + | | colspan="2" style="width: 165px;" |Best gun for Kongou-Sisters but cost [[File:Improvement Materials.png|25px]] a lot. |
| − | | colspan="2" |Just keep them because they're unbuildable... | + | | colspan="2" style="width: 165px;" |Just keep them because they're unbuildable... |
| − | | colspan="2" |Best accuracy but suck in AA. | + | | colspan="2" style="width: 165px;" |Best accuracy but suck in AA. |
|- | |- | ||
| − | | colspan="2" |[[File:Equipment8-1b.png|165px|link=41cm Twin Gun Mount]] | + | | colspan="2" style="width: 165px;" |[[File:Equipment8-1b.png|165px|link=41cm Twin Gun Mount]] |
| − | | colspan="2" |[[File:Equipment105-1.png|165px|link=Prototype 41cm Triple Cannon]] | + | | colspan="2" style="width: 165px;" |[[File:Equipment105-1.png|165px|link=Prototype 41cm Triple Cannon]] |
| − | | colspan="2" |[[File:Equipment9-1b.png|165px|link=46cm Triple Gun Mount]] | + | | colspan="2" style="width: 165px;" |[[File:Equipment9-1b.png|165px|link=46cm Triple Gun Mount]] |
|- | |- | ||
| Amount | | Amount | ||
| Line 685: | Line 685: | ||
| style="text-align:right;" |6 | | style="text-align:right;" |6 | ||
|- | |- | ||
| − | | colspan="2" |Spare them for shelling support. | + | | colspan="2" style="width: 165px;" |Spare them for shelling support. |
| − | | colspan="2" |Hope that Yamashiro kai ni come with them like her Onee-sama. | + | | colspan="2" style="width: 165px;" |Hope that Yamashiro kai ni come with them like her Onee-sama. |
| − | | colspan="2" |Best firepower as ever. | + | | colspan="2" style="width: 165px;" |Best firepower as ever. |
|} | |} | ||
{| class="mw-collapsible mw-collapsed wikitable" | {| class="mw-collapsible mw-collapsed wikitable" | ||
! colspan="8" style="background-color:silver;" |Secondary Guns | ! colspan="8" style="background-color:silver;" |Secondary Guns | ||
|- | |- | ||
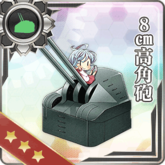
| − | | colspan="2" |[[File:Equipment66-1.png|165px|link=8cm Twin High-angle Mount]] | + | | colspan="2" style="width: 165px;" |[[File:Equipment66-1.png|165px|link=8cm Twin High-angle Mount]] |
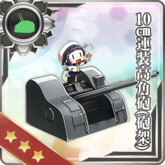
| − | | colspan="2" |[[File:Equipment71-1.png|165px|link=10cm Twin High-angle Carriage Mount]] | + | | colspan="2" style="width: 165px;" |[[File:Equipment71-1.png|165px|link=10cm Twin High-angle Carriage Mount]] |
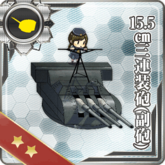
| − | | colspan="2" |[[File:Equipment12-1.png|165px|link=15.5cm Triple Gun Mount (Secondary)]] | + | | colspan="2" style="width: 165px;" |[[File:Equipment12-1.png|165px|link=15.5cm Triple Gun Mount (Secondary)]] |
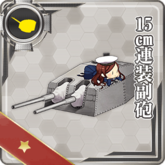
| − | | colspan="2" |[[File:Equipment77-1.png|165px|link=15cm Twin Gun Mount]] | + | | colspan="2" style="width: 165px;" |[[File:Equipment77-1.png|165px|link=15cm Twin Gun Mount]] |
|- | |- | ||
| Amount | | Amount | ||
| Line 706: | Line 706: | ||
| style="text-align:right;" |0 | | style="text-align:right;" |0 | ||
|- | |- | ||
| − | | colspan="2" |Keep them because of | + | | colspan="2" style="width: 165px;" |Keep them because of S-Holo. |
| − | | colspan="2" |Keep them because of | + | | colspan="2" style="width: 165px;" |Keep them because of S-Holo. |
| − | | colspan="2" |Best secondary guns. | + | | colspan="2" style="width: 165px;" |Best secondary guns. |
| − | | colspan="2" |Scrap all of them by accident dammit! | + | | colspan="2" style="width: 165px;" |Scrap all of them by accident dammit! |
|} | |} | ||
{| class="mw-collapsible mw-collapsed wikitable" | {| class="mw-collapsible mw-collapsed wikitable" | ||
! colspan="8" style="background-color:silver;" |Anti-Air Guns | ! colspan="8" style="background-color:silver;" |Anti-Air Guns | ||
|- | |- | ||
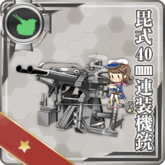
| − | | colspan="2" |[[File:Slotitem_092.png|165px|link=HI-type 40mm Twin Machine Gun]] | + | | colspan="2" style="width: 165px;" |[[File:Slotitem_092.png|165px|link=HI-type 40mm Twin Machine Gun]] |
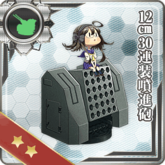
| − | | colspan="2" |[[File:Equipment51-1.png|165px|link=12cm 30-tube Rocket Launcher]] | + | | colspan="2" style="width: 165px;" |[[File:Equipment51-1.png|165px|link=12cm 30-tube Rocket Launcher]] |
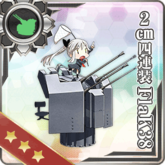
| − | | colspan="2" |[[File:Equipment84-1.png|165px|link=2cm Flakvierling 38]] | + | | colspan="2" style="width: 165px;" |[[File:Equipment84-1.png|165px|link=2cm Flakvierling 38]] |
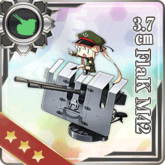
| − | | colspan="2" |[[File:Equipment85-1.png|165px|link=3.7cm FlaK M42]] | + | | colspan="2" style="width: 165px;" |[[File:Equipment85-1.png|165px|link=3.7cm FlaK M42]] |
|- | |- | ||
| Amount | | Amount | ||
| Line 728: | Line 728: | ||
| style="text-align:right;" |3 | | style="text-align:right;" |3 | ||
|- | |- | ||
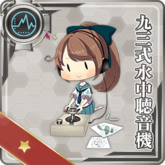
| − | | colspan="2" | | + | | colspan="2" style="width: 165px;" | |
| − | | colspan="2" | | + | | colspan="2" style="width: 165px;" | |
| − | | colspan="2" |Unbuildable and S-Holo. | + | | colspan="2" style="width: 165px;" |Unbuildable and S-Holo. |
| − | | colspan="2" |Best AA Guns. | + | | colspan="2" style="width: 165px;" |Best AA Guns. |
|} | |} | ||
{| class="mw-collapsible mw-collapsed wikitable" | {| class="mw-collapsible mw-collapsed wikitable" | ||
! colspan="8" style="background-color:silver;" |Shells | ! colspan="8" style="background-color:silver;" |Shells | ||
|- | |- | ||
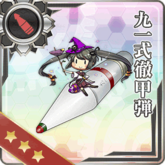
| − | | colspan="2" |[[File:Equipment36-1.png|165px|link=Type 91 Armor-Piercing (AP) Shell]] | + | | colspan="2" style="width: 165px;" |[[File:Equipment36-1.png|165px|link=Type 91 Armor-Piercing (AP) Shell]] |
| − | | colspan="2" |[[File:116_card.png|165px|link=Type 1 Armor-Piercing (AP) Shell]] | + | | colspan="2" style="width: 165px;" |[[File:116_card.png|165px|link=Type 1 Armor-Piercing (AP) Shell]] |
| − | | colspan="2" |[[File:Equipment35-1.png|165px|link=Type 3 Shell]] | + | | colspan="2" style="width: 165px;" |[[File:Equipment35-1.png|165px|link=Type 3 Shell]] |
|- | |- | ||
| Amount | | Amount | ||
| Line 747: | Line 747: | ||
| style="text-align:right;" |5 | | style="text-align:right;" |5 | ||
|- | |- | ||
| − | | colspan="2" | | + | | colspan="2" style="width: 165px;" | |
| − | | colspan="2" |How can I obtain more | + | | colspan="2" style="width: 165px;" |How can I obtain more of this one? |
| − | | colspan="2" |Eat this! Hoppou-chan! | + | | colspan="2" style="width: 165px;" |Eat this! Hoppou-chan! |
|} | |} | ||
| Line 776: | Line 776: | ||
! colspan="8" style="background-color:silver;" |Fighter | ! colspan="8" style="background-color:silver;" |Fighter | ||
|- | |- | ||
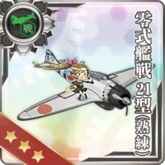
| − | | colspan="2" |[[File:Slotitem_096.png|165px|link=Type 21 Zero Fighter (Skilled)]] | + | | colspan="2" style="width: 165px;" |[[File:Slotitem_096.png|165px|link=Type 21 Zero Fighter (Skilled)]] |
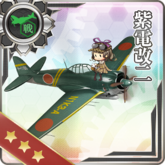
| − | | colspan="2" |[[File:Equipment55-1.png|165px|link=Shiden Kai 2 (Violet Lightning)]] | + | | colspan="2" style="width: 165px;" |[[File:Equipment55-1.png|165px|link=Shiden Kai 2 (Violet Lightning)]] |
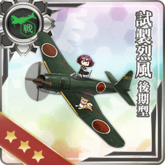
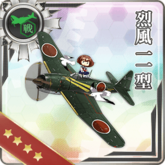
| − | | colspan="2" |[[File:Equipment22-1.png|165px|link=Reppuu (Strong Gale)]] | + | | colspan="2" style="width: 165px;" |[[File:Equipment22-1.png|165px|link=Reppuu (Strong Gale)]] |
| − | | colspan="2" |[[File:Equipment110-1.png|165px|link=Reppuu (601 Air Group)]] | + | | colspan="2" style="width: 165px;" |[[File:Equipment110-1.png|165px|link=Reppuu (601 Air Group)]] |
|- | |- | ||
| Amount | | Amount | ||
| Line 790: | Line 790: | ||
| style="text-align:right;" |1 | | style="text-align:right;" |1 | ||
|- | |- | ||
| − | | colspan="2" |Extra evasion and accuracy. | + | | colspan="2" style="width: 165px;" |Extra evasion and accuracy. |
| − | | colspan="2" |Second best buildable fighter. | + | | colspan="2" style="width: 165px;" |Second best buildable fighter. |
| − | | colspan="2" |Best buildable fighter. | + | | colspan="2" style="width: 165px;" |Best buildable fighter. |
| − | | colspan="2" |Quit painful to lost two reppuus for this one. | + | | colspan="2" style="width: 165px;" |Quit painful to lost two reppuus for this one. |
|- | |- | ||
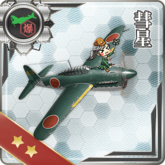
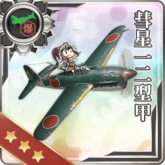
| − | | colspan="2" |[[File:Equipment53-1.png|165px|link=Reppuu Kai (Strong Gale)]] | + | | colspan="2" style="width: 165px;" |[[File:Equipment53-1.png|165px|link=Reppuu Kai (Strong Gale)]] |
|- | |- | ||
| Amount | | Amount | ||
| style="text-align:right;" |1 | | style="text-align:right;" |1 | ||
|- | |- | ||
| − | | colspan="2" |Second best fighter. | + | | colspan="2" style="width: 165px;" |Second best fighter. I want the best one! Dev, please! |
|} | |} | ||
{| class="mw-collapsible mw-collapsed wikitable" | {| class="mw-collapsible mw-collapsed wikitable" | ||
! colspan="8" style="background-color:silver;" |Dive Bomber | ! colspan="8" style="background-color:silver;" |Dive Bomber | ||
|- | |- | ||
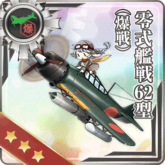
| − | | colspan="2" |[[File:Equipment60-1.png|165px|link=Type 62 Zero Fighter-bomber]] | + | | colspan="2" style="width: 165px;" |[[File:Equipment60-1.png|165px|link=Type 62 Zero Fighter-bomber]] |
| − | | colspan="2" |[[File:Equipment24-1.png|165px|link=Suisei (Comet)]] | + | | colspan="2" style="width: 165px;" |[[File:Equipment24-1.png|165px|link=Suisei (Comet)]] |
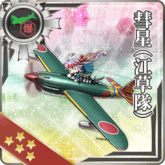
| − | | colspan="2" |[[File:Equipment57-1.png|165px|link=Suisei (Comet) Model 12A]] | + | | colspan="2" style="width: 165px;" |[[File:Equipment57-1.png|165px|link=Suisei (Comet) Model 12A]] |
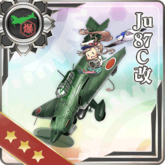
| − | | colspan="2" |[[File:Equipment64-1.png|165px|link=Ju 87C Kai]] | + | | colspan="2" style="width: 165px;" |[[File:Equipment64-1.png|165px|link=Ju 87C Kai]] |
|- | |- | ||
| Amount | | Amount | ||
| Line 819: | Line 819: | ||
| style="text-align:right;" |2 | | style="text-align:right;" |2 | ||
|- | |- | ||
| − | | colspan="2" |Hybrid fighter. | + | | colspan="2" style="width: 165px;" |Hybrid fighter. |
| − | | colspan="2" |Keep them until get enough Model 12A. | + | | colspan="2" style="width: 165px;" |Keep them until get enough Model 12A. |
| − | | colspan="2" |For shelling support. | + | | colspan="2" style="width: 165px;" |For shelling support. |
| − | | colspan="2" |Keep them because unbuildable. | + | | colspan="2" style="width: 165px;" |Keep them because unbuildable. |
|- | |- | ||
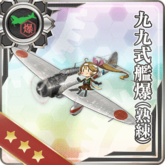
| − | | colspan="2" |[[File:Slotitem_097.png|165px|link=Type 99 Dive Bomber (Skilled)]] | + | | colspan="2" style="width: 165px;" |[[File:Slotitem_097.png|165px|link=Type 99 Dive Bomber (Skilled)]] |
| − | | colspan="2" |[[File:Equipment099-1.png|165px|link=Type 99 Dive Bomber (Egusa Squadron)]] | + | | colspan="2" style="width: 165px;" |[[File:Equipment099-1.png|165px|link=Type 99 Dive Bomber (Egusa Squadron)]] |
| − | | colspan="2" |[[File:Equipment111-1.png|165px|link=Suisei (601 Air Group)]] | + | | colspan="2" style="width: 165px;" |[[File:Equipment111-1.png|165px|link=Suisei (601 Air Group)]] |
| − | | colspan="2" |[[File:Equipment100-1.png|165px|link=Suisei (Comet) (Egusa Squadron)]] | + | | colspan="2" style="width: 165px;" |[[File:Equipment100-1.png|165px|link=Suisei (Comet) (Egusa Squadron)]] |
|- | |- | ||
| Amount | | Amount | ||
| Line 838: | Line 838: | ||
| style="text-align:right;" |1 | | style="text-align:right;" |1 | ||
|- | |- | ||
| − | | colspan="2" | | + | | colspan="2" style="width: 165px;" | |
| − | | colspan="2" |Same powerful as Model 12A plus many buff. | + | | colspan="2" style="width: 165px;" |Same powerful as Model 12A plus many buff. |
| − | | colspan="2" |Second powerful dive bomber. | + | | colspan="2" style="width: 165px;" |Second powerful dive bomber. |
| − | | colspan="2" |Best dive bomber. | + | | colspan="2" style="width: 165px;" |Best dive bomber. |
|} | |} | ||
{| class="mw-collapsible mw-collapsed wikitable" | {| class="mw-collapsible mw-collapsed wikitable" | ||
! colspan="8" style="background-color:silver;" |Torpedo Bomber | ! colspan="8" style="background-color:silver;" |Torpedo Bomber | ||
|- | |- | ||
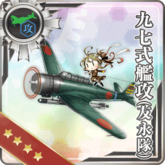
| − | | colspan="2" |[[File:Equipment098-1.png|165px|link=Type 97 Torpedo Bomber (Skilled)]] | + | | colspan="2" style="width: 165px;" |[[File:Equipment098-1.png|165px|link=Type 97 Torpedo Bomber (Skilled)]] |
| − | | colspan="2" |[[File:Equipment82-1.png|165px|link=Type 97 Torpedo Bomber (931 Air Group)]] | + | | colspan="2" style="width: 165px;" |[[File:Equipment82-1.png|165px|link=Type 97 Torpedo Bomber (931 Air Group)]] |
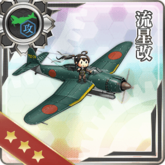
| − | | colspan="2" |[[File:Equipment18-1.png|165px|link=Ryuusei (Shooting Star)]] | + | | colspan="2" style="width: 165px;" |[[File:Equipment18-1.png|165px|link=Ryuusei (Shooting Star)]] |
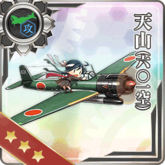
| − | | colspan="2" |[[File:Equipment112-1.png|165px|link=Tenzan (601 Air Group)]] | + | | colspan="2" style="width: 165px;" |[[File:Equipment112-1.png|165px|link=Tenzan (601 Air Group)]] |
|- | |- | ||
| Amount | | Amount | ||
| Line 860: | Line 860: | ||
| style="text-align:right;" |1 | | style="text-align:right;" |1 | ||
|- | |- | ||
| − | | colspan="2" | | + | | colspan="2" style="width: 165px;" | |
| − | | colspan="2" |Second best ASW torpedo bomber. | + | | colspan="2" style="width: 165px;" |Second best ASW torpedo bomber. |
| − | | colspan="2" |Keep them until get enough of their kai version. | + | | colspan="2" style="width: 165px;" |Keep them until get enough of their kai version. |
| − | | colspan="2" |I wonder when they add a quest to convert this one to [[Ryuusei (601 Air Group)|Ryuusei 601]]. | + | | colspan="2" style="width: 165px;" |I wonder when they add a quest to convert this one to [[Ryuusei (601 Air Group)|Ryuusei 601]]. |
|- | |- | ||
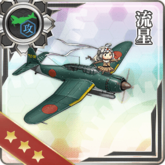
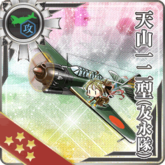
| − | | colspan="2" |[[File:Equipment52-1.png|165px|link=Ryuusei Kai (Shooting Star)]] | + | | colspan="2" style="width: 165px;" |[[File:Equipment52-1.png|165px|link=Ryuusei Kai (Shooting Star)]] |
| − | | colspan="2" |[[File:Slotitem_093.png|165px|link=Type 97 Torpedo Bomber (Tomonaga Squadron)]] | + | | colspan="2" style="width: 165px;" |[[File:Slotitem_093.png|165px|link=Type 97 Torpedo Bomber (Tomonaga Squadron)]] |
| − | | colspan="2" |[[File:Slotitem_094.png|165px|link=Tenzan Model 12 (Tomonaga Squadron)]] | + | | colspan="2" style="width: 165px;" |[[File:Slotitem_094.png|165px|link=Tenzan Model 12 (Tomonaga Squadron)]] |
|- | |- | ||
| Amount | | Amount | ||
| Line 876: | Line 876: | ||
| style="text-align:right;" |1 | | style="text-align:right;" |1 | ||
|- | |- | ||
| − | | colspan="2" |Most powerful buildable torpedo bomber. | + | | colspan="2" style="width: 165px;" |Most powerful buildable torpedo bomber. |
| − | | colspan="2" |Third powerful with extra buff. | + | | colspan="2" style="width: 165px;" |Third powerful with extra buff. |
| − | | colspan="2" |Need to say? | + | | colspan="2" style="width: 165px;" |Need to say? |
|} | |} | ||
{| class="mw-collapsible mw-collapsed wikitable" | {| class="mw-collapsible mw-collapsed wikitable" | ||
! colspan="8" style="background-color:silver;" |Seaplane | ! colspan="8" style="background-color:silver;" |Seaplane | ||
|- | |- | ||
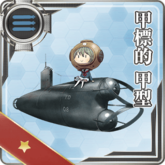
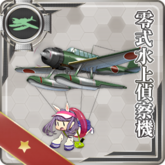
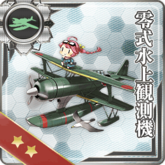
| − | | colspan="2" |[[File:Slotitem 025.png|165px|link=Type 0 Recon Seaplane]] | + | | colspan="2" style="width: 165px;" |[[File:Slotitem 025.png|165px|link=Type 0 Recon Seaplane]] |
| − | | colspan="2" |[[File:Equipment59-1.png|165px|link=Type 0 Observation Seaplane]] | + | | colspan="2" style="width: 165px;" |[[File:Equipment59-1.png|165px|link=Type 0 Observation Seaplane]] |
| − | | colspan="2" |[[File:Equipment115_1.png|165px|link=Ar196 Kai]] | + | | colspan="2" style="width: 165px;" |[[File:Equipment115_1.png|165px|link=Ar196 Kai]] |
| − | | colspan="2" |[[File:118_card.png|165px|link=Shiun]] | + | | colspan="2" style="width: 165px;" |[[File:118_card.png|165px|link=Shiun]] |
|- | |- | ||
| Amount | | Amount | ||
| Line 897: | Line 897: | ||
| style="text-align:right;" |1 | | style="text-align:right;" |1 | ||
|- | |- | ||
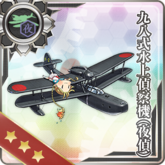
| − | | colspan="2" | | + | | colspan="2" style="width: 165px;" | |
| − | | colspan="2" |Why is this thing really hard to get. -_- | + | | colspan="2" style="width: 165px;" |Why is this thing really hard to get. -_- |
| − | | colspan="2" | | + | | colspan="2" style="width: 165px;" | |
| − | | colspan="2" |Most LOS seaplane. It's not that necessary thought. | + | | colspan="2" style="width: 165px;" |Most LOS seaplane. It's not that necessary thought. |
|- | |- | ||
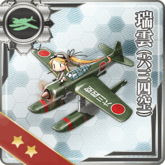
| − | | colspan="2" |[[File:Equipment102-1.png|165px|link=Type 98 Recon Seaplane (Night Scout)]] | + | | colspan="2" style="width: 165px;" |[[File:Equipment102-1.png|165px|link=Type 98 Recon Seaplane (Night Scout)]] |
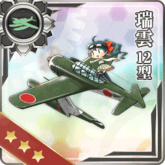
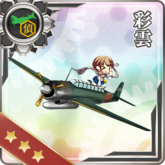
| − | | colspan="2" |[[File:Equipment26-1.png|165px|link=Zuiun (Auspicious Clouds)]] | + | | colspan="2" style="width: 165px;" |[[File:Equipment26-1.png|165px|link=Zuiun (Auspicious Clouds)]] |
| − | | colspan="2" |[[File:Equipment79-1.png|165px|link=Zuiun (634 Air Group)]] | + | | colspan="2" style="width: 165px;" |[[File:Equipment79-1.png|165px|link=Zuiun (634 Air Group)]] |
| − | | colspan="2" |[[File:Equipment80-1.png|165px|link=Zuiun Model 12]] | + | | colspan="2" style="width: 165px;" |[[File:Equipment80-1.png|165px|link=Zuiun Model 12]] |
|- | |- | ||
| Amount | | Amount | ||
| Line 916: | Line 916: | ||
| style="text-align:right;" |2 | | style="text-align:right;" |2 | ||
|- | |- | ||
| − | | colspan="2" |Should it increase chance to appear in night battle if I equip more than one? | + | | colspan="2" style="width: 165px;" |Should it increase chance to appear in night battle if I equip more than one? |
| − | | colspan="2" | | + | | colspan="2" style="width: 165px;" | |
| − | | colspan="2" | | + | | colspan="2" style="width: 165px;" | |
| − | | colspan="2" |I'm glad they come with Fusou kai ni. | + | | colspan="2" style="width: 165px;" |I'm glad they come with Fusou kai ni. |
|} | |} | ||
{| class="mw-collapsible mw-collapsed wikitable" | {| class="mw-collapsible mw-collapsed wikitable" | ||
! colspan="8" style="background-color:silver;" |Other Aircraft | ! colspan="8" style="background-color:silver;" |Other Aircraft | ||
|- | |- | ||
| − | | colspan="2" |[[File:Equipment54-1.png|165px|link=Saiun (Iridescent Cloud)]] | + | | colspan="2" style="width: 165px;" |[[File:Equipment54-1.png|165px|link=Saiun (Iridescent Cloud)]] |
| − | | colspan="2" |[[File:Equipment61-1.png|165px|link=Type 2 Recon Aircraft]] | + | | colspan="2" style="width: 165px;" |[[File:Equipment61-1.png|165px|link=Type 2 Recon Aircraft]] |
| − | | colspan="2" |[[File:Equipment69-1.png|165px|link=Ka-type Observation Autogyro]] | + | | colspan="2" style="width: 165px;" |[[File:Equipment69-1.png|165px|link=Ka-type Observation Autogyro]] |
| − | | colspan="2" |[[File:Equipment70-1.png|165px|link=Type 3 Spotter/Liaison (ASW)]] | + | | colspan="2" style="width: 165px;" |[[File:Equipment70-1.png|165px|link=Type 3 Spotter/Liaison (ASW)]] |
|- | |- | ||
| Amount | | Amount | ||
| Line 938: | Line 938: | ||
| style="text-align:right;" |8 | | style="text-align:right;" |8 | ||
|- | |- | ||
| − | | colspan="2" | | + | | colspan="2" style="width: 165px;" | |
| − | | colspan="2" |Love this one more than saiun because they have more accuracy. | + | | colspan="2" style="width: 165px;" |Love this one more than saiun because they have more accuracy. |
| − | | colspan="2" |Army... We need to talk... | + | | colspan="2" style="width: 165px;" |Army... We need to talk... |
| − | | colspan="2" |With 8 Autogyro, look like there's no point to keep this one now... | + | | colspan="2" style="width: 165px;" |With 8 Autogyro, look like there's no point to keep this one now... |
|} | |} | ||
| Line 949: | Line 949: | ||
! colspan="8" style="background-color:silver;" |Depth Charge and Sonar | ! colspan="8" style="background-color:silver;" |Depth Charge and Sonar | ||
|- | |- | ||
| − | | colspan="2" |[[File:Equipment44-1.png|165px|link=Type 94 Depth Charge]] | + | | colspan="2" style="width: 165px;" |[[File:Equipment44-1.png|165px|link=Type 94 Depth Charge]] |
| − | | colspan="2" |[[File:Equipment45-1.png|165px|link=Type 3 Depth Charge]] | + | | colspan="2" style="width: 165px;" |[[File:Equipment45-1.png|165px|link=Type 3 Depth Charge]] |
| − | | colspan="2" |[[File:Equipment46-1.png|165px|link=Type 93 SONAR]] | + | | colspan="2" style="width: 165px;" |[[File:Equipment46-1.png|165px|link=Type 93 SONAR]] |
| − | | colspan="2" |[[File:Equipment47-1.png|165px|link=Type 3 SONAR]] | + | | colspan="2" style="width: 165px;" |[[File:Equipment47-1.png|165px|link=Type 3 SONAR]] |
|- | |- | ||
| Amount | | Amount | ||
| Line 963: | Line 963: | ||
| style="text-align:right;" |8 | | style="text-align:right;" |8 | ||
|- | |- | ||
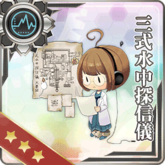
| − | | colspan="2" | | + | | colspan="2" style="width: 165px;" | |
| − | | colspan="2" |Now this thing can be improve. | + | | colspan="2" style="width: 165px;" |Now this thing can be improve. |
| − | | colspan="2" | | + | | colspan="2" style="width: 165px;" | |
| − | | colspan="2" | | + | | colspan="2" style="width: 165px;" | |
|} | |} | ||
| Line 974: | Line 974: | ||
! colspan="8" style="background-color:silver;" |Radar | ! colspan="8" style="background-color:silver;" |Radar | ||
|- | |- | ||
| − | | colspan="2" |[[File:Equipment28-1.png|165px|link=Type 22 Surface RADAR]] | + | | colspan="2" style="width: 165px;" |[[File:Equipment28-1.png|165px|link=Type 22 Surface RADAR]] |
| − | | colspan="2" |[[File:Equipment88-1.png|165px|link=Type 22 Surface RADAR Kai 4]] | + | | colspan="2" style="width: 165px;" |[[File:Equipment88-1.png|165px|link=Type 22 Surface RADAR Kai 4]] |
| − | | colspan="2" |[[File:Equipment29-1.png|165px|link=Type 33 Surface RADAR]] | + | | colspan="2" style="width: 165px;" |[[File:Equipment29-1.png|165px|link=Type 33 Surface RADAR]] |
| − | | colspan="2" |[[File:Equipment106-1.png|165px|link=Type 13 Air RADAR Kai]] | + | | colspan="2" style="width: 165px;" |[[File:Equipment106-1.png|165px|link=Type 13 Air RADAR Kai]] |
|- | |- | ||
| Amount | | Amount | ||
| Line 988: | Line 988: | ||
| style="text-align:right;" |4 | | style="text-align:right;" |4 | ||
|- | |- | ||
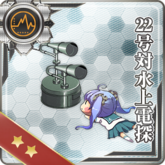
| − | | colspan="2" | | + | | colspan="2" style="width: 165px;" | |
| − | | colspan="2" |Best accuracy for DDs. | + | | colspan="2" style="width: 165px;" |Best accuracy for DDs. |
| − | | colspan="2" |Best LOS for DDs. | + | | colspan="2" style="width: 165px;" |Best LOS for DDs. |
| − | | colspan="2" |Same as [[Type 21 Air RADAR|Type 21]] plus 1 extra evasion, and DDs can equip them. | + | | colspan="2" style="width: 165px;" |Same as [[Type 21 Air RADAR|Type 21]] plus 1 extra evasion, and DDs can equip them. |
|- | |- | ||
| − | | colspan="2" |[[File:Equipment31-1.png|165px|link=Type 32 Surface RADAR]] | + | | colspan="2" style="width: 165px;" |[[File:Equipment31-1.png|165px|link=Type 32 Surface RADAR]] |
| − | | colspan="2" |[[File:Equipment32-1.png|165px|link=Type 14 Air RADAR]] | + | | colspan="2" style="width: 165px;" |[[File:Equipment32-1.png|165px|link=Type 14 Air RADAR]] |
|- | |- | ||
| Amount | | Amount | ||
| Line 1,001: | Line 1,001: | ||
| style="text-align:right;" |6 | | style="text-align:right;" |6 | ||
|- | |- | ||
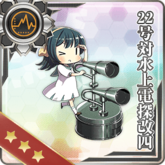
| − | | colspan="2" | | + | | colspan="2" style="width: 165px;" | |
| − | | colspan="2" |Try to get Type 32 but this one keep coming instead. -_- | + | | colspan="2" style="width: 165px;" |Try to get Type 32 but this one keep coming instead. -_- |
|} | |} | ||
{| class="mw-collapsible mw-collapsed wikitable" | {| class="mw-collapsible mw-collapsed wikitable" | ||
! colspan="8" style="background-color:silver;" |Engine | ! colspan="8" style="background-color:silver;" |Engine | ||
|- | |- | ||
| − | | colspan="2" |[[File:Equipment34-1.png|165px|link=Enhanced Steam Boiler]] | + | | colspan="2" style="width: 165px;" |[[File:Equipment34-1.png|165px|link=Enhanced Steam Boiler]] |
| − | | colspan="2" |[[File:Equipment87-1.png|165px|link=New High Pressure-Temperature Steam Boiler]] | + | | colspan="2" style="width: 165px;" |[[File:Equipment87-1.png|165px|link=New High Pressure-Temperature Steam Boiler]] |
|- | |- | ||
| Amount | | Amount | ||
| Line 1,015: | Line 1,015: | ||
| style="text-align:right;" |4 | | style="text-align:right;" |4 | ||
|- | |- | ||
| − | | colspan="2" | | + | | colspan="2" style="width: 165px;" | |
| − | | colspan="2" |Amatsukaze-chan keep | + | | colspan="2" style="width: 165px;" |Amatsukaze-chan keep coming in summer event lol. |
|} | |} | ||
{| class="mw-collapsible mw-collapsed wikitable" | {| class="mw-collapsible mw-collapsed wikitable" | ||
! colspan="8" style="background-color:silver;" |Anti-torpedo Bulge | ! colspan="8" style="background-color:silver;" |Anti-torpedo Bulge | ||
|- | |- | ||
| − | | colspan="2" |[[File:Equipment72-1.png|165px|link=Anti-torpedo Bulge (Medium)]] | + | | colspan="2" style="width: 165px;" |[[File:Equipment72-1.png|165px|link=Anti-torpedo Bulge (Medium)]] |
| − | | colspan="2" |[[File:Equipment73-1.png|165px|link=Anti-torpedo Bulge (large)]] | + | | colspan="2" style="width: 165px;" |[[File:Equipment73-1.png|165px|link=Anti-torpedo Bulge (large)]] |
|- | |- | ||
| Amount | | Amount | ||
| Line 1,029: | Line 1,029: | ||
| style="text-align:right;" |2 | | style="text-align:right;" |2 | ||
|- | |- | ||
| − | | colspan="2" | | + | | colspan="2" style="width: 165px;" | |
| − | | colspan="2" |I want to set two Yamato- | + | | colspan="2" style="width: 165px;" |I want to set two Yamato-class as AFK fleet with this equip in all 4 slot for both of them... |
|} | |} | ||
{| class="mw-collapsible mw-collapsed wikitable" | {| class="mw-collapsible mw-collapsed wikitable" | ||
! colspan="8" style="background-color:silver;" |Night Warfare | ! colspan="8" style="background-color:silver;" |Night Warfare | ||
|- | |- | ||
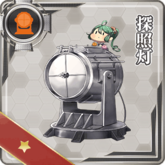
| − | | colspan="2" |[[File:Equipment74-1.png|165px|link=Searchlight]] | + | | colspan="2" style="width: 165px;" |[[File:Equipment74-1.png|165px|link=Searchlight]] |
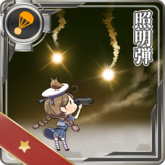
| − | | colspan="2" |[[File:Equipment101-1.png|165px|link=Star Shell]] | + | | colspan="2" style="width: 165px;" |[[File:Equipment101-1.png|165px|link=Star Shell]] |
|- | |- | ||
| Amount | | Amount | ||
| Line 1,043: | Line 1,043: | ||
| style="text-align:right;" |3 | | style="text-align:right;" |3 | ||
|- | |- | ||
| − | | colspan="2" |This icon look like angry | + | | colspan="2" style="width: 165px;" |This icon look like angry squid for me at first sign... |
| − | | colspan="2" | | + | | colspan="2" style="width: 165px;" | |
|} | |} | ||
{| class="mw-collapsible mw-collapsed wikitable" | {| class="mw-collapsible mw-collapsed wikitable" | ||
! colspan="8" style="background-color:silver;" |Other Equipment | ! colspan="8" style="background-color:silver;" |Other Equipment | ||
|- | |- | ||
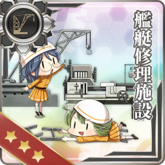
| − | | colspan="2" |[[File:Equipment86-1.png|165px|link=Ship Repair Facility]] | + | | colspan="2" style="width: 165px;" |[[File:Equipment86-1.png|165px|link=Ship Repair Facility]] |
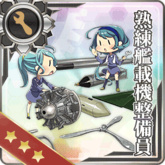
| − | | colspan="2" |[[File:Equipment108-1.png|165px|link=Skilled Carrier-based Aircraft Maintenance Personnel]] | + | | colspan="2" style="width: 165px;" |[[File:Equipment108-1.png|165px|link=Skilled Carrier-based Aircraft Maintenance Personnel]] |
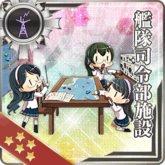
| − | | colspan="2" |[[File:Equipment107-1.png|165px|link=Fleet Command Facility]] | + | | colspan="2" style="width: 165px;" |[[File:Equipment107-1.png|165px|link=Fleet Command Facility]] |
|- | |- | ||
| Amount | | Amount | ||
| Line 1,060: | Line 1,060: | ||
| style="text-align:right;" |1 | | style="text-align:right;" |1 | ||
|- | |- | ||
| − | | colspan="2" |One more! Just one more! | + | | colspan="2" style="width: 165px;" |One more! Just one more! |
| − | | colspan="2" | | + | | colspan="2" style="width: 165px;" | |
| − | | colspan="2" |Is it just me or glasses fairy | + | | colspan="2" style="width: 165px;" |Is it just me or glasses fairy look like mini [[Ooyodo]]? |
|} | |} | ||
{| class="mw-collapsible mw-collapsed wikitable" | {| class="mw-collapsible mw-collapsed wikitable" | ||
! colspan="8" style="background-color:silver;" |Expedition Support | ! colspan="8" style="background-color:silver;" |Expedition Support | ||
|- | |- | ||
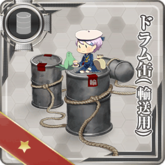
| − | | colspan="2" |[[File:Equipment75-1.png|165px|link=Drum Canister]] | + | | colspan="2" style="width: 165px;" |[[File:Equipment75-1.png|165px|link=Drum Canister]] |
| − | | colspan="2" |[[File:Equipment68-1.png|165px|link=Daihatsu-class Landing Craft]] | + | | colspan="2" style="width: 165px;" |[[File:Equipment68-1.png|165px|link=Daihatsu-class Landing Craft]] |
|- | |- | ||
| Amount | | Amount | ||
| Line 1,075: | Line 1,075: | ||
| style="text-align:right;" |8 | | style="text-align:right;" |8 | ||
|- | |- | ||
| − | | colspan="2" | | + | | colspan="2" style="width: 165px;" | |
| − | | colspan="2" |Four more and I will get | + | | colspan="2" style="width: 165px;" |Four more and I will get enough of this... |
|} | |} | ||
| − | |||
| − | |||
| − | |||
| − | |||
==Joined Event== | ==Joined Event== | ||
Revision as of 14:24, 9 November 2014


| |||||
|---|---|---|---|---|---|
| ミサカ10777号 | HQ 107 | ||||
| Konoya Airfield | 83,000 | 88,000 | |||
| 116,400 | 82,000 | 89,000 | |||
| 532 | 452 | 338 | 3 | 1 |
| 3 | 7 | 14 | 2 | 0 |
Last updated 2014/11/09
| Improvement Record | |||
|---|---|---|---|

|
Maingun | Fail | |
| 14cm Naval Gun ★+2 | - | 2 | |
| 14cm Naval Gun ★Max (Converted) | 1 | 17 | |
| 14cm Twin Gun Mount ★+6 | - | 6 | |
| 20.3cm(no.3) Twin Gun Mount ★+1 | - | 2 | |
| Prototype 35.6cm Triple Gun Mount | 2 | 34 | |
| Torpedo | Fail | ||
| 61cm Quint O2 Torpedo Mount ★+1 | - | 3 | |
| 61cm Quint O2 Torpedo Mount ★+1 | - | 3 | |
| Total | 67 | ||
Missing Ship: Kiyoshimo, Isokaze, Sakawa, I-401, Yamato, Taihou
Missing CG: Akashi non Kai, Nagara Kai, Natori Kai
Missing Equipment: 25mm Autocannon, Shinden Kai, Prototype Seiran, 53cm Hull-mount O2 Torpedoes, Zuiun Model 12 (634 Air Group), Tenzan (931 Air Group), Type 21 Air RADAR Kai, 46cm Twin Gun Mount Prototype
Fleet
| Destroyers | ||
|---|---|---|
| Ship | Level | Admiral's Note |
| 82 | (Can't be help that I want to pat her head every time I see her.) | |
| 99 | You may look cool and mature but that not mean you can drink vodka you know? | |
| 82 | Kaminari-chan. Huh? That's not your name? | |
| 82 | (She's my first secretary ship.) Stop bulling Akatsuki? What do you mean? | |
| Ship | Level | Admiral's Note |
| 85 | Stop running in hallway!! | |
| 85 | (I wonder would her luck tranfer to me if I hug her long enough...) | |
| 85 | (Look like a tsundere at first glance but she quite modest and cute.) | |
| 85 | (So noisy sometime but cute...) | |
| Ship | Level | Admiral's Note |
| 86 | (I know she's a girl but it's kind of fun to tease her.) | |
| 86 | (Is she what they call nadeshiko? Wait, she's not even japanese...) | |
| Ship | Level | Admiral's Note |
| 81 | ||
| 81 | (Look like her alias there's nothing to do with her pesonality poi...) | |
| 81 | (Sometime her modest personality make me to respect her. I wonder why...) | |
| 80 | What's kind of shampoo you use? | |
| Ship | Level | Admiral's Note |
| 81 | Congratulation for Kai Ni!! | |
| 42 | Can you share me some? What? Akagi already eat them all? | |
| 39 | (Somehow it's scary when she stare at me...) | |
| Ship | Level | Admiral's Note |
| 71 | ||
| 72 | ||
| 68 | (I confuse her with hacchan sometime.) | |
| 68 | ||
| 68 | ||
| 67 | ||
| 68 | (She always act like it's annoyed to work but she done it well everytime.) | |
| 72 | (Cool and cute, but I like to see her smile once.) | |
| 73 | ||
| Light Cruisers | ||
|---|---|---|
| Ship | Level | Admiral's Note |
| 130 | Thank for hard work! Event though the most of your work is carries 4 drum... | |
| 92 | You're the same girl that always give me quest right? | |
| 78 | Ryuujou always stare at you? Well I think I know why. | |
| Ship | Level | Admiral's Note |
| 88 | Can you keep your voice down? Everyone can't sleep. | |
| 88 | ||
| 88 | ||
| Ship | Level | Admiral's Note |
| 65 | ||
| 65 | ||
| 65 | Ask for Yamato? Sorry but I want to restock my resource for next event. | |
| Ship | Level | Admiral's Note |
| 54 | (She's ready to kai but I need her to stay this form because it's save my ammo...) | |
| 54 | (I'm glad that her target is only Tenryuu...) | |
| Torpedo Cruisers | ||
|---|---|---|
| Ship | Level | Admiral's Note |
| 95 | (Look like there's a very thin line between badass and chuunibyou.) | |
| 94 | (She can say scary thing sometime... or maybe it's just my imagine?) | |
| 94 | Why I have you take care the flower you ask? Hmm... I wonder why? | |
| Heavy Cruisers | ||
|---|---|---|
| Ship | Level | Admiral's Note |
| 92 | ||
| Ship | Level | Admiral's Note |
| 93 | ||
| 93 | ||
| 93 | (Even though she's a good girl, I don't know why I can't relax when she's around...) | |
| 93 | ||
| Ship | Level | Admiral's Note |
| 92 | ||
| 92 | ||
| 91 | ||
| 91 | (Sometime I feel like her eyes absorb my soul...) | |
| Ship | Level | Admiral's Note |
| 94 | You really wear one right? RIGHT? | |
| 94 | (She has onee-san aura even though she's an imouto.) | |
| Battle Ships | ||
|---|---|---|
| Ship | Level | Admiral's Note |
| 95 | Your love is so noisy. | |
| 95 | (Must make her stay away from the kitchen.) | |
| 95 | (She's really an goddess.) | |
| 95 | ||
| Ship | Level | Admiral's Note |
| 97 | Sorry to keep you waiting for three month. And now you look cool in drei form! | |
| Ship | Level | Admiral's Note |
| 95 | Why? Why are you always got red from Hoppou-chan? | |
| 95 | ||
| Ship | Level | Admiral's Note |
| 95 | ||
| Ship | Level | Admiral's Note |
| 93 | ||
| 93 | ||
| 92 | You're ready for kai ni but I'm really sorry, I don't have enough medals for now. | |
| 92 | ||
| Carriers | ||
|---|---|---|
| Ship | Level | Admiral's Note |
| 96 | ||
| 96 | Thank to craft 8 reppuu for me. And please don't spoil Akagi too much. | |
| Ship | Level | Admiral's Note |
| 93 | ||
| 93 | ||
| 91 | ||
| Ship | Level | Admiral's Note |
| 92 | ||
| 92 | ||
| Ship | Level | Admiral's Note |
| 87 | I know you're tired of flat joke but even flats have their own charm you know? | |
| 86 | (Her voice really cute...) | |
| Ship | Level | Admiral's Note |
| 86 | ||
| 86 | (At least her favorite is not my resource...) | |
| Ship | Level | Admiral's Note |
| 86 | (She's remind me to someone I know...) | |
| Ship | Level | Admiral's Note |
| 61 | ||
| 61 | ||
| Submarines | ||
|---|---|---|
| Ship | Level | Admiral's Note |
| 99 | ||
| 99 | ||
| 99 | (I see topedos pop out from her book and I wonder how's that work...) | |
| 99 | (Should I do something about her lew joke...?) | |
| 41 | ||
| Auxiliary Ships | ||
|---|---|---|
| Ship | Level | Admiral's Note |
| 72 | (Maybe I should talk with Army...) | |
| 78 | Everyone look so happy in morning. Thank for your hard work whole night! | |
Equipment
Artillery
| Light Guns | |||||||
|---|---|---|---|---|---|---|---|
|
165px | 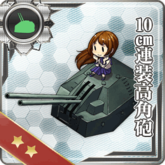
|
| ||||
| Amount | 4 | Amount | 6 | Amount | 18 | Amount | 4 |
| Just one extra firepower not help that much. Let's Akashi-san improve them. | At least they're unbuildable... | Easy to obtain and really useful for anti air. | Overall good status but pain to obtain... | ||||
| Medium Guns | |||||||
|---|---|---|---|---|---|---|---|
|

|
|
| ||||
| Amount | 6 | Amount | 1 | Amount | 10 | Amount | 2 |
| Spare them for upgrade 14cm Twin Gun Mount | Just obtain one for Melon-chan. At least Akashi-san can improve them. | Best gun for CL. | Just keep them for Ooyodo... | ||||
|
|
| |||||
| Amount | 6 | Amount | 4 | Amount | 6 | ||
| Spare them for CA. | Not bad for an extra accuracy. | Best gun for CA. | |||||
| Heavy Guns | |||||||
|---|---|---|---|---|---|---|---|
|

|
|
165px | ||||
| Amount | 4 | Amount | 4 | Amount | 3 | Amount | 2 |
| Extra evasion and accuracy. | Best gun for Kongou-Sisters but cost |
Just keep them because they're unbuildable... | Best accuracy but suck in AA. | ||||
| 165px | 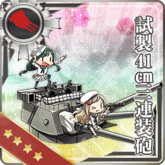
|
165px | |||||
| Amount | 20 | Amount | 1 | Amount | 6 | ||
| Spare them for shelling support. | Hope that Yamashiro kai ni come with them like her Onee-sama. | Best firepower as ever. | |||||
| Secondary Guns | |||||||
|---|---|---|---|---|---|---|---|
|
|
|
| ||||
| Amount | 5 | Amount | 2 | Amount | 7 | Amount | 0 |
| Keep them because of S-Holo. | Keep them because of S-Holo. | Best secondary guns. | Scrap all of them by accident dammit! | ||||
| Anti-Air Guns | |||||||
|---|---|---|---|---|---|---|---|
|
|
|
| ||||
| Amount | 2 | Amount | 4 | Amount | 2 | Amount | 3 |
| Unbuildable and S-Holo. | Best AA Guns. | ||||||
| Shells | |||||||
|---|---|---|---|---|---|---|---|
|
165px | 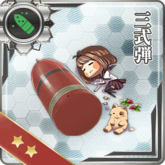
| |||||
| Amount | 4 | Amount | 2 | Amount | 5 | ||
| How can I obtain more of this one? | Eat this! Hoppou-chan! | ||||||
Torpedo
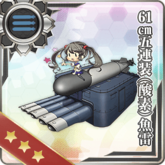
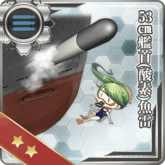
| Torpedos | |||||||
|---|---|---|---|---|---|---|---|
|
|
| |||||
| Amount | 10 | Amount | 2 | Amount | 8 | ||
| Second best torpedos. When the best one can be obtain...? | I want more for my sub-girls. | ||||||
Aircraft
| Fighter | |||||||
|---|---|---|---|---|---|---|---|
|
|
|

| ||||
| Amount | 6 | Amount | 10 | Amount | 9 | Amount | 1 |
| Extra evasion and accuracy. | Second best buildable fighter. | Best buildable fighter. | Quit painful to lost two reppuus for this one. | ||||
| |||||||
| Amount | 1 | ||||||
| Second best fighter. I want the best one! Dev, please! | |||||||
| Dive Bomber | |||||||
|---|---|---|---|---|---|---|---|
|
|
|
| ||||
| Amount | 10 | Amount | 10 | Amount | 10 | Amount | 2 |
| Hybrid fighter. | Keep them until get enough Model 12A. | For shelling support. | Keep them because unbuildable. | ||||
|
165px | 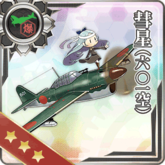
|
| ||||
| Amount | 3 | Amount | 2 | Amount | 1 | Amount | 1 |
| Same powerful as Model 12A plus many buff. | Second powerful dive bomber. | Best dive bomber. | |||||
| Torpedo Bomber | |||||||
|---|---|---|---|---|---|---|---|
| 165px | 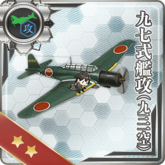
|
|
| ||||
| Amount | 3 | Amount | 2 | Amount | 6 | Amount | 1 |
| Second best ASW torpedo bomber. | Keep them until get enough of their kai version. | I wonder when they add a quest to convert this one to Ryuusei 601. | |||||
|
|
| |||||
| Amount | 8 | Amount | 2 | Amount | 1 | ||
| Most powerful buildable torpedo bomber. | Third powerful with extra buff. | Need to say? | |||||
| Seaplane | |||||||
|---|---|---|---|---|---|---|---|
|
|
165px | 165px | ||||
| Amount | 5 | Amount | 3 | Amount | 1 | Amount | 1 |
| Why is this thing really hard to get. -_- | Most LOS seaplane. It's not that necessary thought. | ||||||
|

|
|
| ||||
| Amount | 2 | Amount | 6 | Amount | 4 | Amount | 2 |
| Should it increase chance to appear in night battle if I equip more than one? | I'm glad they come with Fusou kai ni. | ||||||
| Other Aircraft | |||||||
|---|---|---|---|---|---|---|---|
|
|
|
| ||||
| Amount | 6 | Amount | 4 | Amount | 8 | Amount | 8 |
| Love this one more than saiun because they have more accuracy. | Army... We need to talk... | With 8 Autogyro, look like there's no point to keep this one now... | |||||
Anti Submarine Warfare
| Depth Charge and Sonar | |||||||
|---|---|---|---|---|---|---|---|
|

|
|
| ||||
| Amount | 5 | Amount | 5 | Amount | 5 | Amount | 8 |
| Now this thing can be improve. | |||||||
Supportive Warfare
| Radar | |||||||
|---|---|---|---|---|---|---|---|
|
|
|
| ||||
| Amount | 10 | Amount | 2 | Amount | 1 | Amount | 4 |
| Best accuracy for DDs. | Best LOS for DDs. | Same as Type 21 plus 1 extra evasion, and DDs can equip them. | |||||
|
| ||||||
| Amount | 2 | Amount | 6 | ||||
| Try to get Type 32 but this one keep coming instead. -_- | |||||||
| Engine | |||||||
|---|---|---|---|---|---|---|---|
|
| ||||||
| Amount | 6 | Amount | 4 | ||||
| Amatsukaze-chan keep coming in summer event lol. | |||||||
| Anti-torpedo Bulge | |||||||
|---|---|---|---|---|---|---|---|
|
| ||||||
| Amount | 6 | Amount | 2 | ||||
| I want to set two Yamato-class as AFK fleet with this equip in all 4 slot for both of them... | |||||||
| Night Warfare | |||||||
|---|---|---|---|---|---|---|---|
|
| ||||||
| Amount | 5 | Amount | 3 | ||||
| This icon look like angry squid for me at first sign... | |||||||
| Other Equipment | |||||||
|---|---|---|---|---|---|---|---|
|
|
| |||||
| Amount | 3 | Amount | 1 | Amount | 1 | ||
| One more! Just one more! | Is it just me or glasses fairy look like mini Ooyodo? | ||||||
| Expedition Support | |||||||
|---|---|---|---|---|---|---|---|
|

| ||||||
| Amount | 32 | Amount | 8 | ||||
| Four more and I will get enough of this... | |||||||
Joined Event
Spring Event 2014

| E-1 - Southwest of Samewani Sea - Battle of Samewani Sea | ||
|---|---|---|
| File:Spring-2014-E1-banner.png | ||
| Clear! | ||
| Reward |  | |
| Spoil of War | ||
| E-2 - Southwest of Zunda Strait - Across The Zunda Strait | |||
|---|---|---|---|

|
|||
| Clear! | |||
| Reward | |||
| Spoil of War | |||
| E-3 - Port Wine Area - Assault! Destroy Port Wine Operation | ||
|---|---|---|

| ||
| Clear! | ||
| Reward | ||
| Spoil of War | - | |
| E-4 - Central Pacific Sea - Sweep Against Subs in the Frontline | ||
|---|---|---|

| ||
| Clear! | ||
| Reward |   | |
| Spoil of War | - | |
| E-5 - North Pacific Sea - Capture Peacock Island Operation | ||
|---|---|---|

| ||
| - | ||
| Defeated | ||
| Reward | - | |
| Spoil of War | - | |
Summer Event 2014

| E-1 - Advance to the northern AL area! | ||
|---|---|---|

|
||
| Clear! | ||
| Reward | ||
| Spoil of War | - | |
| E-2 - Diversionary tactics! Wreck the northern harbour! | ||
|---|---|---|

|
||
| Clear! | ||
| Reward | ||
| Spoil of War | ||
| E-3 - The Decisive Battle! Starting Operation MI | |||
|---|---|---|---|

| |||
| Clear! | |||
| Reward |   
|
Spoil of War | - |
| E-4 - Invasion of Midway Island | |||
|---|---|---|---|
|
| |||
| Clear! | |||
| Reward | Spoil of War | ||
| E-5 - Securing the Midway Islands | |||
|---|---|---|---|

| |||
| Clear! | |||
| Reward | Spoil of War | - | |
| E-6 - Counter Attack to AL/MI Operation | ||
|---|---|---|

|
||
| Defeated | ||
| Reward | - | |
| Spoil of War | ||