- Welcome to the Kancolle Wiki!
- If you have any questions regarding site content, account registration, etc., please visit the KanColle Wiki Discord
Difference between revisions of "Help:Equipment Setup"
Jigaraphale (talk | contribs) |
Jigaraphale (talk | contribs) |
||
| Line 334: | Line 334: | ||
All "surface" anti-installation setups can be further enhanced by using them in '''[[Special Attacks]]''', especially [[Nelson]]'s Touch. | All "surface" anti-installation setups can be further enhanced by using them in '''[[Special Attacks]]''', especially [[Nelson]]'s Touch. | ||
| + | <!-- | ||
| + | |||
| + | |||
| + | !colspan=2|Anti-hard skins setups | ||
| + | |- | ||
| + | !colspan=2|Anti-soft skins setups | ||
| + | |||
| + | --> | ||
|-|FBB/BB/BBV= | |-|FBB/BB/BBV= | ||
| Line 339: | Line 347: | ||
!Equipment Setup | !Equipment Setup | ||
!width="800px"|Notes | !width="800px"|Notes | ||
| − | |- | + | |- |
| − | !colspan=2| | + | !colspan=2|General anti-installation setups |
|- | |- | ||
|{{Large Gun}}{{Large Gun}}{{Seaplane}}{{AP Shell}} | |{{Large Gun}}{{Large Gun}}{{Seaplane}}{{AP Shell}} | ||
| Line 348: | Line 356: | ||
|This is an option when facing soft-skinned installations. Taking an AA shell will slightly improve their damage versus installations, but will also limit the battleship's effectiveness against all other targets by reducing their artillery spotting attack types. | |This is an option when facing soft-skinned installations. Taking an AA shell will slightly improve their damage versus installations, but will also limit the battleship's effectiveness against all other targets by reducing their artillery spotting attack types. | ||
|- | |- | ||
| − | |{{Large Gun}}{{Large Gun}}{{Seaplane}}{{AA Shell}}{{AP Shell}} | + | |{{Large Gun}} {{Large Gun}} {{Seaplane}} {{AA Shell}} {{AP Shell}} |
|{{Class|Yamato|Kai Ni}} & {{Class|Ise|Kai Ni}} only. | |{{Class|Yamato|Kai Ni}} & {{Class|Ise|Kai Ni}} only. | ||
*"Best of both worlds" for 5-slot battleships. | *"Best of both worlds" for 5-slot battleships. | ||
|- | |- | ||
| − | |{{Large Gun}}{{Large Gun}}{{Seaplane}}{{Landing Craft}}<br>{{Large Gun}}{{Large Gun}}{{Seaplane}}{{Amphibious Tank}} | + | |{{Large Gun}} {{Large Gun}} {{Seaplane}} {{Landing Craft}}<br>{{Large Gun}} {{Large Gun}} {{Seaplane}} {{Amphibious Tank}} |
|{{Class|Nagato|Kai Ni}} & [[Yamato Kai Ni Juu]] only. | |{{Class|Nagato|Kai Ni}} & [[Yamato Kai Ni Juu]] only. | ||
*The landing craft/special amphibious tank will make their [[Special Attacks]] deal significantly more damage to installation enemies. Keeping the seaplane allows to still perform artillery spotting to maintain enough effectiveness against other targets. | *The landing craft/special amphibious tank will make their [[Special Attacks]] deal significantly more damage to installation enemies. Keeping the seaplane allows to still perform artillery spotting to maintain enough effectiveness against other targets. | ||
|- | |- | ||
| − | |{{Large Gun}}{{Seaplane}}{{AntiGroundArtillery}}{{Landing Craft}}{{Amphibious Tank}}+{{Sec Gun}}<div style="text-align:center;">'''or'''</div>{{Large Gun}}{{Seaplane}}{{AP Shell}}{{Landing Craft}}{{Amphibious Tank}}+{{Sec Gun}} | + | !colspan=2|Anti-SDP setups |
| + | |- | ||
| + | |{{Large Gun}} {{Seaplane}} {{AntiGroundArtillery}} {{Landing Craft}} {{Amphibious Tank}}+{{Sec Gun}}<div style="text-align:center;">'''or'''</div>{{Large Gun}} {{Seaplane}} {{AP Shell}} {{Landing Craft}} {{Amphibious Tank}}+{{Sec Gun}} | ||
|{{TextGlow|'''Nuke Setup'''|black|text-colour=#A9F377|glow-size=2px}}, [[Yamato Kai Ni Juu]] only. | |{{TextGlow|'''Nuke Setup'''|black|text-colour=#A9F377|glow-size=2px}}, [[Yamato Kai Ni Juu]] only. | ||
*A proper nuke setup keeping the Double Attack and artillery spotting, that uses Yamato's ability to carry [[Secondary Gun]]s in her [[RE]], also taking advantage of her [[Special Attack]]. | *A proper nuke setup keeping the Double Attack and artillery spotting, that uses Yamato's ability to carry [[Secondary Gun]]s in her [[RE]], also taking advantage of her [[Special Attack]]. | ||
| Line 366: | Line 376: | ||
!Equipment Setup | !Equipment Setup | ||
!width="800px"|Notes | !width="800px"|Notes | ||
| − | |- | + | |- |
| − | !colspan=2| | + | !colspan=2|General anti-installation setups |
| − | |- | + | |- |
| − | |{{Dive Bomber}}{{Torpedo Bomber}}{{Fighter}} | + | |{{Dive Bomber}} {{Torpedo Bomber}} {{Fighter}} |
|This is only to be used when having [[:Category:Anti-Installation Dive Bombers|anti-installation dive bombers]]. It will allow the carrier to still perform CVCI against other targets. | |This is only to be used when having [[:Category:Anti-Installation Dive Bombers|anti-installation dive bombers]]. It will allow the carrier to still perform CVCI against other targets. | ||
|- | |- | ||
| − | |{{Torpedo Bomber}}{{Torpedo Bomber}}{{Fighter}} | + | |{{Torpedo Bomber}} {{Torpedo Bomber}} {{Fighter}} |
| − | |The | + | |The number of torpedo bombers and fighters in this setup can be varied depending on the amount of fighter power required. This is the standard carrier anti-installation setup. While it does sacrifice CVCI, the carrier shelling formula, and proficiency bonuses, it still ensures that carriers will do significant damage to installations and other targets. |
|- | |- | ||
| − | |{{Dive Bomber}}{{Torpedo Bomber}}{{Landing Craft}}{{Landing Craft}} | + | !colspan=2|Anti-SDP setups |
| + | |- | ||
| + | |{{Dive Bomber}} {{Torpedo Bomber}} {{Landing Craft}} {{Landing Craft}} | ||
|{{TextGlow|'''CV-Nuke Setup'''|black|text-colour=#A9F377|glow-size=2px}}, [[Gambier Bay Mk.II]] & [[Unyou|Unyou Kai/Ni]] only. | |{{TextGlow|'''CV-Nuke Setup'''|black|text-colour=#A9F377|glow-size=2px}}, [[Gambier Bay Mk.II]] & [[Unyou|Unyou Kai/Ni]] only. | ||
*A setup combining CVCI with landing craft bonuses ([[:Category:Anti-Installation Dive Bombers|anti-installation dive bomber]] still required). | *A setup combining CVCI with landing craft bonuses ([[:Category:Anti-Installation Dive Bombers|anti-installation dive bomber]] still required). | ||
|- | |- | ||
| − | |{{Dive Bomber}}{{Landing Craft}}{{Amphibious Tank}}{{WildCard}} | + | |{{Dive Bomber}} {{Landing Craft}} {{Amphibious Tank}} {{WildCard}} |
|{{TextGlow|'''Nuke Setup'''|black|text-colour=#A9F377|glow-size=2px}}, [[Houshou Kai Ni Sen]], [[Gambier Bay Mk.II]] & [[Unyou|Unyou Kai/Ni]] only. | |{{TextGlow|'''Nuke Setup'''|black|text-colour=#A9F377|glow-size=2px}}, [[Houshou Kai Ni Sen]], [[Gambier Bay Mk.II]] & [[Unyou|Unyou Kai/Ni]] only. | ||
*Sacrifices CVCI for larger "nuke" bonuses (requires [[:Category:Anti-Installation Dive Bombers|anti-installation dive bomber]]). | *Sacrifices CVCI for larger "nuke" bonuses (requires [[:Category:Anti-Installation Dive Bombers|anti-installation dive bomber]]). | ||
| Line 389: | Line 401: | ||
!Equipment Setup | !Equipment Setup | ||
!width="800px"|Notes | !width="800px"|Notes | ||
| − | |- | + | |- |
| − | !colspan=2| | + | !colspan=2|General anti-installation setups |
| − | |- | + | |- |
|{{Med Gun}}{{Med Gun}}{{Seaplane}}{{AA Shell}} | |{{Med Gun}}{{Med Gun}}{{Seaplane}}{{AA Shell}} | ||
|The standard anti-installation setup for heavy cruisers. It allows artillery spotting and deals decent damage against installations. | |The standard anti-installation setup for heavy cruisers. It allows artillery spotting and deals decent damage against installations. | ||
| Line 399: | Line 411: | ||
*This is an alternative setup only for '''aviation cruisers'''. It removes the ability to artillery spot for much more powerful anti-installation damage at night. | *This is an alternative setup only for '''aviation cruisers'''. It removes the ability to artillery spot for much more powerful anti-installation damage at night. | ||
*For Mogami-class Cruisers with a Reinforcement Expansion, an option to equip 8cm High Angle Guns in the expansion slot in order to retain a weaker variant of artillery spotting is a viable alternative. | *For Mogami-class Cruisers with a Reinforcement Expansion, an option to equip 8cm High Angle Guns in the expansion slot in order to retain a weaker variant of artillery spotting is a viable alternative. | ||
| + | |- | ||
| + | !colspan=2|Anti-SDP setups | ||
|- | |- | ||
|{{AntiGroundArtillery}}{{AntiGroundArtillery}}{{Landing Craft}}{{Amphibious Tank}}<br>{{Med Gun}}{{Med Gun}}{{Landing Craft}}{{Amphibious Tank}}<br>{{Med Gun}}{{AntiGroundArtillery}}{{Landing Craft}}{{Amphibious Tank}}+{{Green Gun}} | |{{AntiGroundArtillery}}{{AntiGroundArtillery}}{{Landing Craft}}{{Amphibious Tank}}<br>{{Med Gun}}{{Med Gun}}{{Landing Craft}}{{Amphibious Tank}}<br>{{Med Gun}}{{AntiGroundArtillery}}{{Landing Craft}}{{Amphibious Tank}}+{{Green Gun}} | ||
| Line 409: | Line 423: | ||
!Equipment Setup | !Equipment Setup | ||
!width="800px"|Notes | !width="800px"|Notes | ||
| − | |- | + | |- |
| − | !colspan=2| | + | !colspan=2|General anti-installation setups |
| − | |||
| − | |||
| − | |||
|- | |- | ||
|{{Med Gun}}{{Med Gun}}{{AntiGroundArtillery}}{{AntiGroundArtillery}} | |{{Med Gun}}{{Med Gun}}{{AntiGroundArtillery}}{{AntiGroundArtillery}} | ||
|A setup for 4-slot light cruisers. This preserves their ability to double attack at night while giving them significant anti-installation power. | |A setup for 4-slot light cruisers. This preserves their ability to double attack at night while giving them significant anti-installation power. | ||
| + | |- | ||
| + | !colspan=2|Anti-SDP setups | ||
| + | |- | ||
| + | |{{Landing Craft}}{{Landing Craft}}{{Amphibious Tank}}<br>{{AntiGroundArtillery}}{{Landing Craft}}{{Amphibious Tank}} | ||
| + | |{{TextGlow|'''Nuke Setup'''|black|text-colour=#A9F377|glow-size=2px}} | ||
|} | |} | ||
| Line 426: | Line 442: | ||
!Equipment Setup | !Equipment Setup | ||
!width="800px"|Notes | !width="800px"|Notes | ||
| − | |||
| − | |||
| − | |||
| − | |||
| − | |||
|- | |- | ||
| − | + | !colspan=2|General anti-installation setups | |
| − | |||
| − | |||
|- | |- | ||
|{{Light Gun}}{{Light Gun}}{{Landing Craft}}<br>{{Light Gun}}{{Light Gun}}{{Amphibious Tank}} | |{{Light Gun}}{{Light Gun}}{{Landing Craft}}<br>{{Light Gun}}{{Light Gun}}{{Amphibious Tank}} | ||
| Line 442: | Line 451: | ||
|[[Tashkent]] only. | |[[Tashkent]] only. | ||
*Functions much like the light cruiser setup with a powerful night battle double attack. | *Functions much like the light cruiser setup with a powerful night battle double attack. | ||
| + | |- | ||
| + | !colspan=2|Anti-SDP setups | ||
| + | |- | ||
| + | |{{Landing Craft}}{{Landing Craft}}{{Amphibious Tank}}<br>{{AntiGroundArtillery}}{{Landing Craft}}{{Amphibious Tank}} | ||
| + | |{{TextGlow|'''Nuke Setup'''|black|text-colour=#A9F377|glow-size=2px}} | ||
| + | |- | ||
| + | |{{AntiGroundArtillery}}{{AntiGroundArtillery}}{{Landing Craft}}<br>{{AntiGroundArtillery}}{{AntiGroundArtillery}}{{Amphibious Tank}}<br>{{AntiGroundArtillery}}{{Landing Craft}}{{Landing Craft}} | ||
| + | |{{TextGlow|'''Mini-Nuke Setup'''|black|text-colour=#A9F377|glow-size=2px}} | ||
| + | *Substitute nuke setups to use ONLY when lacking Landing Craft or Special Amphibious Tanks. | ||
| + | |- | ||
| + | !colspan=2|Anti-installation-like warships setups | ||
|- | |- | ||
|{{Light Gun}}{{TorpedoWeapon}}{{Landing Craft}}{{Radar}}<br>{{Light Gun}}{{TorpedoWeapon}}{{Amphibious Tank}}{{Radar}} | |{{Light Gun}}{{TorpedoWeapon}}{{Landing Craft}}{{Radar}}<br>{{Light Gun}}{{TorpedoWeapon}}{{Amphibious Tank}}{{Radar}} | ||
| − | |GTR+anti-installation setup (only for high luck DD that can carry radar in RE). | + | |GTR+anti-installation setup (only for high-luck DD that can carry radar in RE). |
|- | |- | ||
|{{TorpedoWeapon}}{{TorpedoWeapon}}{{Landing Craft}}{{Skilled Lookout}}<br>{{TorpedoWeapon}}{{TorpedoWeapon}}{{Amphibious Tank}}{{Skilled Lookout}} | |{{TorpedoWeapon}}{{TorpedoWeapon}}{{Landing Craft}}{{Skilled Lookout}}<br>{{TorpedoWeapon}}{{TorpedoWeapon}}{{Amphibious Tank}}{{Skilled Lookout}} | ||
|TCI+anti-installation setup (useful against Installation-like warships). | |TCI+anti-installation setup (useful against Installation-like warships). | ||
| + | |||
|} | |} | ||
| Line 458: | Line 479: | ||
!width=12%|Equipment | !width=12%|Equipment | ||
!Notes | !Notes | ||
| − | |- | + | |- |
| + | !colspan=2|General anti-installation setups | ||
| + | |- | ||
|{{Amphibious Tank}} / {{AntiGroundArtillery}} | |{{Amphibious Tank}} / {{AntiGroundArtillery}} | ||
|Equipping either is required for SS/V to attack installations during shelling. | |Equipping either is required for SS/V to attack installations during shelling. | ||
| Line 467: | Line 490: | ||
!Equipment Setup | !Equipment Setup | ||
!width="800px"|Notes | !width="800px"|Notes | ||
| − | |- | + | |- |
| − | !colspan=2| | + | !colspan=2|Anti-SDP setups |
| − | |- | + | |- |
|{{Landing Craft}}{{Landing Craft}}{{Amphibious Tank}}<br>{{AntiGroundArtillery}}{{Landing Craft}}{{Amphibious Tank}} | |{{Landing Craft}}{{Landing Craft}}{{Amphibious Tank}}<br>{{AntiGroundArtillery}}{{Landing Craft}}{{Amphibious Tank}} | ||
|{{TextGlow|'''Nuke Setup'''|black|text-colour=#A9F377|glow-size=2px}} | |{{TextGlow|'''Nuke Setup'''|black|text-colour=#A9F377|glow-size=2px}} | ||
| Line 483: | Line 506: | ||
!Equipment Setup | !Equipment Setup | ||
!width="800px"|Notes | !width="800px"|Notes | ||
| − | |- | + | |- |
| − | !colspan=2| | + | !colspan=2|Anti-SDP setups |
| − | |- | + | |- |
|{{Landing Craft}}{{Landing Craft}}{{Amphibious Tank}}{{Amphibious Tank}}<br>{{AntiGroundArtillery}}{{AntiGroundArtillery}}{{Landing Craft}}{{Amphibious Tank}}<br>{{AntiGroundArtillery}}{{Landing Craft}}{{Landing Craft}}{{Amphibious Tank}} | |{{Landing Craft}}{{Landing Craft}}{{Amphibious Tank}}{{Amphibious Tank}}<br>{{AntiGroundArtillery}}{{AntiGroundArtillery}}{{Landing Craft}}{{Amphibious Tank}}<br>{{AntiGroundArtillery}}{{Landing Craft}}{{Landing Craft}}{{Amphibious Tank}} | ||
|{{TextGlow|'''Nuke Setup'''|black|text-colour=#A9F377|glow-size=2px}} | |{{TextGlow|'''Nuke Setup'''|black|text-colour=#A9F377|glow-size=2px}} | ||
*LHAs can carry some of the strongest 4 slots nuke configurations. | *LHAs can carry some of the strongest 4 slots nuke configurations. | ||
| − | |- | + | |- |
|{{Landing Craft}}{{Landing Craft}}{{Amphibious Tank}}{{Amphibious Tank}}+{{Landing Craft}}<br>{{AntiGroundArtillery}}{{AntiGroundArtillery}}{{Landing Craft}}{{Amphibious Tank}}+{{Landing Craft}} | |{{Landing Craft}}{{Landing Craft}}{{Amphibious Tank}}{{Amphibious Tank}}+{{Landing Craft}}<br>{{AntiGroundArtillery}}{{AntiGroundArtillery}}{{Landing Craft}}{{Amphibious Tank}}+{{Landing Craft}} | ||
|{{TextGlow|'''Mega-Nuke Setup'''|black|text-colour=#A9F377|glow-size=2px}}, [[Shinshuu Maru Kai]] only. | |{{TextGlow|'''Mega-Nuke Setup'''|black|text-colour=#A9F377|glow-size=2px}}, [[Shinshuu Maru Kai]] only. | ||
*Uses Shinshuu Maru's unique ability to carry a {{Equipment/Link|Soukoutei (Armored Boat Class)}} in her [[RE]] to further improve the LHA setup. | *Uses Shinshuu Maru's unique ability to carry a {{Equipment/Link|Soukoutei (Armored Boat Class)}} in her [[RE]] to further improve the LHA setup. | ||
*The other Landing Craft should be the {{Equipment/Link|Daihatsu Landing Craft (Type 89 Medium Tank & Landing Force)}} for optimum effectiveness. | *The other Landing Craft should be the {{Equipment/Link|Daihatsu Landing Craft (Type 89 Medium Tank & Landing Force)}} for optimum effectiveness. | ||
| − | |- | + | |- |
|{{Landing Forces}}{{Landing Forces}}{{Amphibious Tank}} | |{{Landing Forces}}{{Landing Forces}}{{Amphibious Tank}} | ||
|{{TextGlow|'''Omega-Nuke Setup'''|black|text-colour=#A9F377|glow-size=2px}}, [[No.101 Transport Ship Kai]] only. | |{{TextGlow|'''Omega-Nuke Setup'''|black|text-colour=#A9F377|glow-size=2px}}, [[No.101 Transport Ship Kai]] only. | ||
Revision as of 22:46, 21 February 2024
|
|
There is no such thing as a "perfect" or "universal" setup. Each and every situation requires its own assortment of ships and equipment, with some setups being more common/effective than others. |
This article aims to cover the most commonly used equipment setups for each ship type. It is to give an idea of what are the most efficient load-outs to make ships effective in a particular role. This means that this article will not cover some niche setups that are too specific. For those equipment setups, please refer to the relevant pages.
- See here for a breakdown of all equipment types and their related mechanics.
- For more details on some mechanics, please see each relevant page.
- Please mind each individual plane slot size when applicable. Aircraft should be placed in the biggest slots available to be more effective.
Standard Combat
"Standard combat" refers to most of the encountered engagements in the game, being surface battles in nature, with some air component.
- For more information on this topic, see Combat.
- For more information on this topic, see Day Battle.
- For more information on this topic, see Aerial Combat.
- For more information on this topic, see Night Battle.
Anti-Submarine
- For more information on this topic, see Anti-Submarine Warfare.
- The first priority is to have an OASW, even at the expense of damage synergy:
- Because
 increase with levels, using high-level ships will help reach the required stat threshold,
 - DE can OASW more easily than other ship types,
- Take note that DE also have an armor penetration bonus when using Depth Charges.
- Because
- To further maximize ASW effectiveness, regardless if an OASW is triggered or not, it is recommended to use the "damage synergy setup":
 Small +
  DCP + DCR
- This ASW setup maximizes the ASW by taking advantage of the synergy, and must include 1 Small Sonar, 1 Depth Charge Projector, and 1 Depth Charge (Racks).


Anti-Installation
- For more information on this topic, see Anti-Installation.
- Regarding
 :
:
- If a ship's base firepower is low, it can be viable to use Anti-Ground Rockets to provide a large flat damage increase to supplement the ship's anti-installation damage.
- Depending on whether one or more Anti-Ground Artilleries are to be equipped on a ship, it is recommended to use a WG42 for singular purposes, or Shipborne Model Type 4 20cm Anti-ground Rocket Launchers (or CD) if multiple are needed.
- ASW Mortar
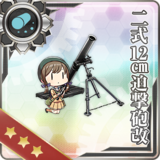
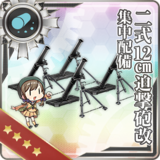 are inferior substitutes to regular Anti-Ground Artilleries when lacking those.
- Regarding
 and
and  :
:
- These provide a high damage multiplier against Installations. Some specialized variants also provide an additional flat damage increase that is multiplicative with certain modifiers.
- As Landing Craft and Special Amphibious Tanks have separate multipliers, it is recommended to use them in tandem to maximize the effect.
- Such a setup has a strong anti-installation power against all installations but is hampered by the daytime damage cap.
- Nuke Setups are recommended to be used when dealing with Supply Depot Princess in particular, utilizing the high post-cap side of the bonuses to deal with her generally high HP pool.
- The setup's damage can be further improved by using multiple copies of those types of equipment where applicable.
- For example, equipping multiple Special Amphibious Tanks
 or Landing Craft with unique bonuses instead of anti-ground rockets provides better damage output for the ship, however, it is advised to only do so if you have enough available for the other ships in your fleet that require them.
- For example, equipping multiple


Exhautic Setups
Other setups that are used in specific situations and/or on specific ships.


Equipment Selection
While the above set-up guide recommends only types of equipment, this section gives the general rules on how to choose equipment within a given type.
Equipment of a same type are mainly differentiated by their "Stats" (![]() ,
, ![]() ,
, ![]() , ...), including Fit Bonuses (both visible and invisible) and Improvements (
, ...), including Fit Bonuses (both visible and invisible) and Improvements (![]() ) stats, as well as some more specific attributes, like:
) stats, as well as some more specific attributes, like:
- Modifiers brought in certain mechanics, ranging from combat to routing,
- Special mechanics induced by certain equipment...
Equipment have a wide range of stats, however, not all stats are ranked the same way, some being more important than other, depending on the equipment type.
Here, equipment stats are dispatched into 3 categories:
- Primary Stats: stats that influence the effectiveness of the equipment in its main role, being the main choosing factor,
- Secondary Stats: stats that can influence the effectiveness of the equipment for other purposes, helping to choose between equipment sharing the same "Primary Stats".
- Bonus Stats: All the other stats. These stats do not influence the effectiveness of the equipment much, but are appreciable for the general stat stats of the equipping ship.
| Equipment Stats Category | |||||
|---|---|---|---|---|---|
| Main Armament | |||||
| Icon | Equipment Types | Primary Stats | Secondary Stats | Notes | |
| Main Gun & Secondary Gun |
| ||||
| High-Angle Gun |
| ||||
| AA Gun |
| ||||
| Torpedo |
| ||||
| Midget Submarine | |||||
| Anti-submarine Weaponry |
| ||||
| Aircraft | |||||
| Icon | Equipment types | Primary stats | Secondary stats | Note | |
| Dive Bomber | AAR ❱❱ |
| |||
| Fighter-Bomber and Jets | |||||
| Torpedo Bomber | AAR ❱❱ |
| |||
| Fighter | ❱❱ |
||||
| Carrier Recon | |||||
| Seaplane Recon | |||||
| Seaplane Bomber | ❱❱ AAR | ||||
| Seaplane Fighter | ❱❱ | ||||
| ASW Aircraft | |||||
| Other Equipment | |||||
| Icon | Equipment types | Primary stats | Secondary stats | Note | |
| Surface Radar |
| ||||
| Air Radar | |||||
| Anti-Installation Equipment | Anti-installation modifiers |
| |||
| Extra Armor |
| ||||
| Engine Improvement |
| ||||
| All Other Equipment | Are chosen on a case-by-case basis, being often bounded to some specific mechanics | ||||
- Notes
 Range gained from certain equipment can either be advantageous or detrimental, depending on the situation, like for Special Attacks or when Leveling.
See Also
| |||||||||||||||||