- Welcome to the Kancolle Wiki!
- If you have any questions regarding site content, account registration, etc., please visit the KanColle Wiki Discord
Difference between revisions of "World 3/3-5"
< World 3
Jump to navigation
Jump to search
Jigaraphale (talk | contribs) |
Jigaraphale (talk | contribs) |
||
| (3 intermediate revisions by the same user not shown) | |||
| Line 1: | Line 1: | ||
{{World/Hub}} | {{World/Hub}} | ||
| − | + | =World 3-5 Extra Operation: 北方AL海域 - [[wikipedia:en:Aleutian Islands Campaign|AL Area in Northern Sea]]= | |
{{LabSortieworld | {{LabSortieworld | ||
| page = World 3/3-5 | | page = World 3/3-5 | ||
| Line 9: | Line 9: | ||
| jptext =北方海域に敵増援の動きがある。中規模の水上打撃部隊を派遣し、敵増援を捕捉、これを撃破せよ! | | jptext =北方海域に敵増援の動きがある。中規模の水上打撃部隊を派遣し、敵増援を捕捉、これを撃破せよ! | ||
| entext = There is a movement of enemy reinforcements to the northern sea. Dispatch a medium size fleet, intercept the enemy reinforcements, and destroy it! | | entext = There is a movement of enemy reinforcements to the northern sea. Dispatch a medium size fleet, intercept the enemy reinforcements, and destroy it! | ||
| + | | aircon = | ||
| + | {{AirConKai | ||
| + | |AS=0 | ||
| + | |ASr=381 | ||
| + | }} | ||
}} | }} | ||
| Line 115: | Line 120: | ||
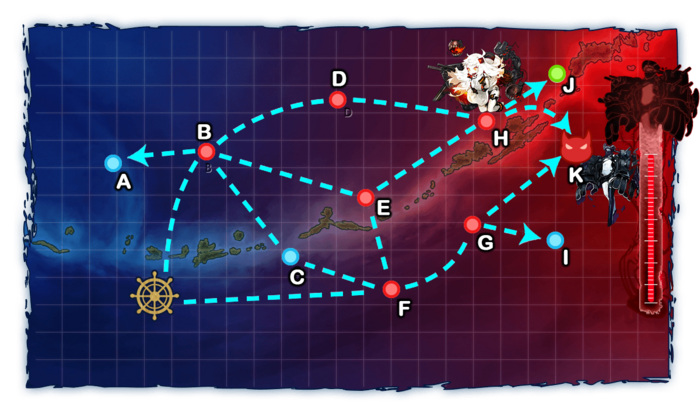
| Route = {{MapRoute|F|red|G|red|K|red}} | | Route = {{MapRoute|F|red|G|red|K|red}} | ||
| AS = 35 | | AS = 35 | ||
| − | | Note = This solution requires more advanced gears, and might be out of reach of new players. {{color|red|'''It is required to bring'''}} an {{ | + | | Note = This solution requires more advanced gears, and might be out of reach of new players. {{color|red|'''It is required to bring'''}} an {{Command Facility}} FCF capable CL as flagship, preferably an {{Class|Agano|Kai+}}, equipped with: |
*2 {{Med Gun}} [[Main Gun]]s, | *2 {{Med Gun}} [[Main Gun]]s, | ||
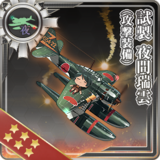
*1 {{Night SPB}} {{EquipmentLink|Prototype Night Zuiun (Attack Equipment)}}, | *1 {{Night SPB}} {{EquipmentLink|Prototype Night Zuiun (Attack Equipment)}}, | ||
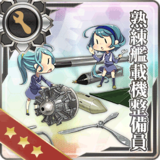
| − | *'''And''' the {{IconText|{{ | + | *'''And''' the {{IconText|{{Command Facility}}|ETSCF}} {{EquipmentLink|Elite Torpedo Squadron Command Facility}} (preferably in the [[RE]]). |
The best comp for farming boss node, having the highest pass rate thanks to the usage of [[ETSCF]] in case a ship got heavily damaged. | The best comp for farming boss node, having the highest pass rate thanks to the usage of [[ETSCF]] in case a ship got heavily damaged. | ||
Latest revision as of 08:37, 9 March 2025
World 3-5 Extra Operation: 北方AL海域 - AL Area in Northern Sea

| Strategy Name | 北方海域戦闘哨戒 Northern Sea Combat Patrol |
|---|---|
| Difficulty | ☆ ☆ ☆ ☆ ☆ ☆ ☆ ☆ ☆ |
| Item | |
| Strategy Content | 北方海域に敵増援の動きがある。中規模の水上打撃部隊を派遣し、敵増援を捕捉、これを撃破せよ! There is a movement of enemy reinforcements to the northern sea. Dispatch a medium size fleet, intercept the enemy reinforcements, and destroy it! |
| Boss Air Control | |||
|---|---|---|---|
| AD | AP | AS | AS+ |
| 0 | 0 | 0 | 0 |
| Boss Route Air Control | |||
| AD | AP | AS | AS+ |
| 113 | 170 | 381 | 762 |
| 3-5 Unlocking & Progression | ||||
|---|---|---|---|---|
| Unlock conditions | 3-5 is unlocked after clearing 3-4 | |||
| Clear conditions | To clear the map: the boss's flagship must be sunk 4 times | |||
| Clearing rewards | 150 | |||
| Map reset | Resets at midnight JST at the beginning of every month | |||
Stage Guide
| 3-5 Branching Rules |
|---|
Tips
The map will stay in Last Dance once cleared, until the next month's reset. Therefore, it is recommended to do quests during pre-clear for an easier time, as doing them post-clear can make the job harder.
Node H is an installation node, where ![]() Balloons can be deployed.
Balloons can be deployed.
Routes passing through node E are not recommended, as they require awkward compositions (either 1 CL, 2 DD in a heavy fleet or 1 BB/CV in a light one), the node has two Ru-Flags that can potentially damage any of the ships.
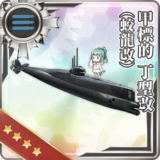
This map is the best spot to farm Maruyu drops (see here).
Recommended Fleets
| ExpandTrue-South route |
|---|
| ExpandTorpedo Squadron |
|---|

| ExpandNorth Route |
|---|
| ExpandSouth Route |
|---|
| ExpandLight AO Fleet |
|---|

| ExpandMedium AO Fleet |
|---|
Resource Nodes
J is a "Special Resource Node" rewarding ammo ![]() .
.
- See here for more details.
Enemy CompositionsCollapse
3-5 A
| # | Empty Node | ||
|---|---|---|---|
| A | 気のせいだった。/敵影を見ず。/穏やかな海です。/穏やかな海峡です。/警戒が必要です。/静かな海です。 Must be my imagination./No enemy spotted./Calm seas./Calm straits./Be alert./Peaceful seas. | ||
| # | Empty Node | ||
3-5 B: 北方前衛警戒部隊 (PoiDB)
| # | Enemy Form. |
Base EXP | Normal Battle Node | AD/AP AS/AS+ |
|---|---|---|---|---|
| B | Line Ahead HQ Lvl 100 - 120 |
300 | 0/0 0/0 | |
| Line Ahead HQ Lvl 1 - 99 |
300 | 0/0 0/0 | ||
| Line Ahead Double Line HQ Lvl 1-120 |
300 | 0/0 0/0 | ||
| # | Enemy Form. |
Base EXP | Normal Battle Node | AD/AP AS/AS+ |
3-5 C
| # | Empty Node | ||
|---|---|---|---|
| C | 気のせいだった。/敵影を見ず。/穏やかな海です。/穏やかな海峡です。/警戒が必要です。/静かな海です。 Must be my imagination./No enemy spotted./Calm seas./Calm straits./Be alert./Peaceful seas. | ||
| # | Empty Node | ||
3-5 D: 北方派遣任務部隊 (PoiDB)
| # | Enemy Form. |
Base EXP | Normal Battle Node | AD/AP AS/AS+ |
|---|---|---|---|---|
| D | Diamond HQ Lvl 90 - 120 |
430 | 38/75 168/336 | |
| Diamond HQ Lvl 90 - 120 |
450 | 72/143 321/642 | ||
| Diamond HQ Lvl 1 - 89 |
400 | 38/75 168/336 | ||
| Diamond HQ Lvl 1 - 89 |
430 | 63/125 279/558 | ||
| Diamond HQ Lvl 1 - 120 |
410 | 38/75 168/336 | ||
| # | Enemy Form. |
Base EXP | Normal Battle Node | AD/AP AS/AS+ |
3-5 E: 北方遊撃部隊 (PoiDB)
| # | Enemy Form. |
Base EXP | Normal Battle Node | AD/AP AS/AS+ |
|---|---|---|---|---|
| E | Double Line HQ Lvl 85 - 120 |
400 | 0/0 0/0 | |
| Double Line HQ Lvl 85 - 120 (Final)
|
400 | 8/16 35/69 | ||
| Double Line HQ Lvl 1 - 84 (Final)
|
400 | 8/16 35/69 | ||
| Double Line HQ Lvl 1 - 120 |
400 | 0/0 0/0 | ||
| # | Enemy Form. |
Base EXP | Normal Battle Node | AD/AP AS/AS+ |
3-5 F: 北方増援部隊前衛A (PoiDB)
| # | Enemy Form. |
Base EXP | Normal Battle Node | AD/AP AS/AS+ |
|---|---|---|---|---|
| F | Line Ahead HQ Lvl 85 - 120 |
340 | 0/0 0/0 | |
| Line Ahead HQ Lvl 85 - 120 (Final)
|
360 | 0/0 0/0 | ||
| Line Ahead HQ Lvl 1 - 84 |
310 | 0/0 0/0 | ||
| Line Ahead HQ Lvl 1 - 120 |
320 | 0/0 0/0 | ||
| # | Enemy Form. |
Base EXP | Normal Battle Node | AD/AP AS/AS+ |
3-5 G: 北方増援部隊前衛B (PoiDB)
| # | Enemy Form. |
Base EXP | Normal Battle Node | AD/AP AS/AS+ |
|---|---|---|---|---|
| G | Line Ahead Double Line HQ Lvl 1 - 120 |
400 | 0/0 0/0 | |
| Diamond HQ Lvl 100 - 120 (Final)
|
420 | 8/16 35/69 | ||
| Double Line HQ Lvl 1 - 99 |
390 | 0/0 0/0 | ||
| Diamond HQ Lvl 1 - 99 (Final)
|
410 | 8/16 35/69 | ||
| # | Enemy Form. |
Base EXP | Normal Battle Node | AD/AP AS/AS+ |
3-5 H: 北方AL泊地 (PoiDB)
| # | Enemy Form. |
Base EXP | Normal Battle Node | AD/AP AS/AS+ |
|---|---|---|---|---|
| H | Diamond HQ Lvl 85 - 120 |
600 | 45/90 201/402 | |
| Diamond HQ Lvl 85 - 120 |
600 | 74/148 332/663 | ||
| Diamond HQ Lvl 85 - 120 (Final)
|
600 | 85/170 381/762 | ||
| Diamond HQ Lvl 1 - 84 |
600 | 44/87 195/390 | ||
| Diamond HQ Lvl 1 - 84 |
600 | 73/145 326/651 | ||
| Diamond HQ Lvl 1 - 84 (Final)
|
600 | 84/167 375/750 | ||
| # | Enemy Form. |
Base EXP | Normal Battle Node | AD/AP AS/AS+ |
3-5 I
| # | Empty Node | ||
|---|---|---|---|
| I | 気のせいだった。/敵影を見ず。/穏やかな海です。/穏やかな海峡です。/警戒が必要です。/静かな海です。 Must be my imagination./No enemy spotted./Calm seas./Calm straits./Be alert./Peaceful seas. | ||
| # | Empty Node | ||
3-5 J
| # | Resource Node | ||
|---|---|---|---|
| J | Gained 50 | ||
| # | Resource Node | ||
3-5 K: 北方増援部隊主力 (PoiDB)
| # | Enemy Form. |
Base EXP | Boss Battle Node | AD/AP AS/AS+ |
|---|---|---|---|---|
| K | Double Line HQ Lvl 90 - 120 |
500 | 0/0 0/0 | |
| Line Ahead HQ Lvl 90 - 120 (Final)
|
550 | 0/0 0/0 | ||
| Double Line HQ Lvl 1 - 89 |
500 | 0/0 0/0 | ||
| Line Ahead HQ Lvl 1 - 89 (Final)
|
? | 0/0 0/0 | ||
| Line Ahead HQ Lvl 1 - 120 |
520 | 0/0 0/0 | ||
| # | Enemy Form. |
Base EXP | Boss Battle Node | AD/AP AS/AS+ |
Ship Drops
☒ All drops (disabled, only rare drops)
| ExpandShip drops |
|---|
| ||