• Welcome to the Kancolle Wiki!
  • If you have any questions regarding site content, account registration, etc., please visit the KanColle Wiki Discord

Spring 2025 Event/E-2

From Kancolle Wiki
Jump to navigation Jump to search
Spring 2025 EventSpring 2025 Event Banner.png
Spring 2025 EventSpring 2025 Event Banner EO.png
The 2nd Stage Operations have been released!
FF release: TBA
Approximate time until the end of the event: ([3] KC 12th anniversary)

23 days, 14 hours, 12 minutes and 34 seconds

Spring 2025 Event Hub Overview
Introduction & Overview 1st Stage Operations 2nd Stage Operations
E-1 | E-2 | E-3 E-4 | E-5 | E-6
Information
Event Tag Spring 2025 Event Tag 2.png 1st Fleet
Spring 2025 Event Tag 3.png 5th Fleet
Boss Gauges Hard (): 960 TP + 3234 HP
Medium (): 680 TP + 2648 HP
Easy (): 600 TP + 2648 HP
Casual (): 480 TP + 1584 HP
Map Bosses Destroyer Ra-Class Initial ModelDestroyer Ra-Class Initial Model
Submarine Seerfish Water DemonSubmarine Seerfish Water Demon
Rewards[edit]
Ship Ship Banner Wahoo.png
Wahoo
Choice
Casual

Easy

Medium

Hard
Item Icon Equipment Slots.png
Equipment Slots
3 4 5
OR
Item Icon Improvement Material.png
Improvement Material
3 4 5
Reward
Casual

Easy

Medium

Hard
Item Icon Food Supply Ship Mamiya.png
Food Supply Ship Mamiya
1 2 3
Item Icon Reinforcement Expansion.png
Reinforcement Expansion
1 1 1
Item Icon Remodel Blueprint.png
Remodel Blueprint
1 1
Item Icon Medal.png
Medal
2
Equipment Card Type 97 Torpedo Bomber Kai (Northeastern Air Group).png
Type 97 Torpedo Bomber Kai (Northeastern Air Group)
1 (★2) 1 (★4) 1 (★8)
Equipment Card 21inch 6-tube Bow Torpedo Launcher (Late Model).png
21inch 6-tube Bow Torpedo Launcher (Late Model)
1 (★2)
Rewards
All
Equipment/Item
Casual

Easy

Medium

Hard
440px

The event guides are to be constructed through the respective Event map page guide sandbox and reviewed by editors before being approved here.

  • Do not update the guides through this page unless it is a minor fix. Please only update guides through their respective sandbox pages.

Branching Table

E-2 Branching Rules (Start Points) ▼/▲
E-2 Branching Rules (Start Point 1) ▼/▲
E-2 Branching Rules (Start Point 2) ▼/▲

* = Rule under review

? = Ship type/amount under review

Branching compositions are reported over the course of the event.

  • Please refer to KCNav for up to date map content (fleets used, LoS/speed requirements/drops/LBAS ranges, ...)

Historical Bonuses

Do note that several of the 5th fleet members will have historical significance in the "2nd Stage Operations"!

Ships [1]
[Toggle Names]
Map-wide 1st Fleet
Gimmick
NodesC/D/F1/F2/H/I/K (A1 unconfirmed)
5th Fleet
Node U
5th Fleet
Node V
5th Fleet
Node W
Damage Damage Damage Damage Damage
Coastal Defense Ships (DE) 1.12x -
Destroyers (DD) 1.03x
Light Cruisers (CL)
NOT CLT
1.04x
Seaplane Tenders (AV) 1.08x
Submarine Tenders (AS) 1.08x
Ship Banner Souya (AGS).png
Ship Banner Ootomari.png
1.28x - -
5th Fleet 1.16x 5th Fleet
CA
Ship Banner Ashigara.png
Ship Banner Nachi.png
1.12x 1.06x 1.16x
CL(T)
Ship Banner Abukuma.png
Ship Banner Kiso.png
Ship Banner Tama.png
1.08x 1.05x 1.12x
DD
Ship Banner Akebono.png
Ship Banner Kasumi.png
Ship Banner Shiranui.png
Ship Banner Hatsushimo.png
Ship Banner Wakaba.png
Ship Banner Ushio.png
Ship Banner Hatsuharu.png
Ship Banner Usugumo.png
1.06x 1.04x 1.08x
Soviet Ships
Ship Banner Gangut.png
Ship Banner Kirov.png
Ship Banner Tashkent.png
Ship Banner Verniy.png
1.12x -
1st Fleet
Ship Banner Nagato.png
Ship Banner Mutsu.png
Ship Banner Fusou.png
Ship Banner Yamashiro.png
Ship Banner Ise.png
Ship Banner Hyuuga.png
Ship Banner Kako.png
Ship Banner Furutaka.png
Ship Banner Aoba.png
Ship Banner Kinugasa.png
Ship Banner Kitakami.png
Ship Banner Ooi.png
Ship Banner Tatsuta.png
Ship Banner Sendai.png
Ship Banner Fubuki.png
Ship Banner Shirayuki.png
Ship Banner Hatsuyuki.png
Ship Banner Isonami.png
Ship Banner Uranami.png
Ship Banner Ayanami.png
Ship Banner Shikinami.png
Ship Banner Amagiri.png
Ship Banner Sagiri.png
Ship Banner Akatsuki.png
Ship Banner Hibiki.png
Ship Banner Ikazuchi.png
Ship Banner Inazuma.png
Ship Banner Nenohi.png
Ship Banner Asashio.png
Ship Banner Yamagumo.png
Ship Banner Tamanami.png
Ship Banner Suzunami.png
Ship Banner Hayanami.png
Ship Banner Okinami.png
Ship Banner Kishinami.png
- 1.16x

Map Overview

E2 is a single and combined fleet, two-phase map consisting of one transport and one boss phase.

  • 2 LBAS is available to sortie on this map
  • This map uses 2 locks:
    • Spring 2025 Event Tag 2.png 1st Fleet, Starting point 1 (reused from E-1)
    • Spring 2025 Event Tag 3.png 5th Fleet, Starting point 2 (reused in E-3)

The use of Aviation PersonnelAGDP AGDPArctic Gear & Deck Personnel on CV(B/L), Ise-class Kai Ni, Akitsu Maru Kai, Kumano Maru, and Yamashio Maru, is required to sortie these ships on the map.

Gimmick 1 - Unlock

To unlock the next part of the map, the following steps have to be performed:

F1 F2 C
Hard A+ x2 A+ x2 S x2
Medium A+ A+ S x2
Easy ? ? ?
Casual ? ? ?
Nodes C, F1 & F2
Fleet Info
Single Striking: 0-1 (F)BB(V), 1 CV(B/L), 1 CL, 0-1 CLT, 3-4 DD Spring 2025 Event Tag 2.png
LoS Any
Speed Any
RouteNode Types:
RED: Battle
PURPLE: Night Battle
PINK: Air Raid/Battle
ORANGE: Enemy Ambush/ASS
BLUE: Empty/Choice
Light Blue: Emergency Anchorage Repair
GREEN: Resource/TP
VIOLET: Maelstrom
1 A A2 B D E F1

1 A A2 B D E F F2

1 A A2 B C

Air State (C / E / M / H)
AD AP AS AS+
32 / 47 / 47 / 68 48 / 71 / 71 / 101 107 / 158 / 158 / 227 214 / 316 / 316 / 454
LBAS
Range AS Sortie AS Defense
Node C: 7 ; Node F1: 4 ; Node F2: 3 141 / 141 / 141 / 161 158 / 209 / 230 / 281
Fleet Notes
All relevant nodes are surface combat one.
  • Bringing an AACI is recommended to pass the air nodes
LBAS Notes
Sending all LBAS on the relevant nodes is advised.

Gimmick 2 - Unlock

To unlock the 1st phase, the following steps have to be performed:

K F
Hard A+ x3 AS
Medium A+ x3 -
Easy A+ x3 -
Casual A+ x3? -
Node K
Fleet Info
Single Striking: 0-1 (F)BB(V), 1 CV(B/L), 1 CL, 0-1 CLT, 3-4 DD Spring 2025 Event Tag 2.png
LoS Any
Speed Any
RouteNode Types:
RED: Battle
PURPLE: Night Battle
PINK: Air Raid/Battle
ORANGE: Enemy Ambush/ASS
BLUE: Empty/Choice
Light Blue: Emergency Anchorage Repair
GREEN: Resource/TP
VIOLET: Maelstrom
1 A A2 B C H I K
Air State (C / E / M / H)
AD AP AS AS+
56 / 56 / 48 / 59 84 / 84 / 71 / 88 189 / 189 / 159 / 198 378 / 378 / 318 / 396
LBAS
Range AS Sortie AS Defense
Node K: 6 ; Node I: 7 192 / 197 / 167 / 206 158 / 209 / 230 / 281
Fleet Notes
The node is surface combat.
  • Bringing AACI and some ASW is advised to reach the node.
LBAS Notes
Sending half the LBAS to node I and the other to node K is advised to improve the passing rate
Node F
  • AS requirement for Hard is 230 (other difficulties do not need to achieve AS here).
  • Refer to #Gimmick 1 - Unlock's fleets for composition and routing (node F2's path).

Phase 1 - TP

Phase 1 is a new kind of Transport Operation, where "tanks" do work better:

Landing Operation - Equipment [4]
Type Equipment S-Rank A-Rank
Landing Craft Daihatsu Landing CraftDaihatsu Landing Craft
Toku Daihatsu Landing CraftToku Daihatsu Landing Craft
Armed DaihatsuArmed Daihatsu
SoukouteiSoukoutei (Armored Boat Class)
5.2 3.64
DLC + T89 TankDaihatsu Landing Craft (Type 89 Medium Tank & Landing Force) 14.2 9.94
DLC + Panzer IIDaihatsu Landing Craft (Panzer II/North African Specification) 21.2 14.84
Toku DLC + Ho-Ni TankToku Daihatsu Landing Craft + Type 1 Gun Tank 40.2 28.14
Toku DLC + 11th RegToku Daihatsu Landing Craft + 11th Tank Regiment 46.2 32.34
M4A1 DDM4A1 DD 24.2 16.94
Toku DLC + Panzer IIIToku Daihatsu Landing Craft + Panzer III (North African Specification) 27.2 19.04
Toku DLC + Chi-HaToku Daihatsu Landing Craft + Chi-Ha 22.2 15.54
Toku DLC + Chi-Ha KaiToku Daihatsu Landing Craft + Chi-Ha Kai 28.2 19.74
Toku DLC + Panzer III JToku Daihatsu Landing Craft + Panzer III Ausf J 32.2 22.54
Amphibious Vehicle Ka-Mi tankSpecial Type 2 Amphibious Tank 9.3 6.51
Ka-Tsu tankSpecial Type 4 Amphibious Tank 6.3 4.41
Ka-Tsu tank KaiSpecial Type 4 Amphibious Tank Kai 8.3 5.81
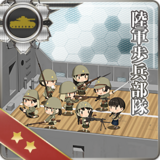
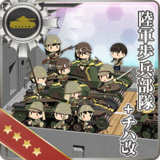
Landing Forces Army Infantry CorpsArmy Infantry Corps 15.0 10.50
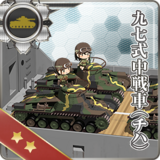
Chi-HaType 97 Medium Tank (Chi-Ha) 17.0 11.90
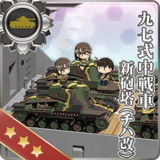
Chi-Ha KaiType 97 Medium Tank New Turret (Chi-Ha Kai) 23.0 16.10
Infantry + Chi-Ha KaiArmy Infantry Corps + Chi-Ha Kai 38.0 26.60
Drum Canister Drum CanistersDrum Canister (Transport Use) 3.25 2.275
Ration RationsCombat Ration
Combat Ration (Special Onigiri)
Canned Saury
0.65 0.455
Landing Operation - Ship [5]
Ship Type S-Rank A-Rank
AO Fleet Oiler 9.75 6.825
LHA Amphibious Assault Ship 7.8 5.46
Kinu Kai NiKinu Kai Ni 8 5.6
AV Seaplane Tender 5.85 4.095
BBV Aviation Battleship 4.55 3.185
AS Submarine Tender
CT Training Cruiser 3.90 2.730
DD Destroyer 3.25 2.275
CAV Aviation Cruiser 2.60 1.820
CL Light Cruiser 1.30 0.910
SSV Aircraft Carrying Submarine 0.65 0.455
BB Battleship 0.0 0.0
FBB Fast Battleship
CV Standard Carrier
CVB Armored Carrier
CVL Light Carrier
CA Heavy Cruiser
CLT Torpedo Cruiser
DE Coastal Defense Ships
SS Submarine
Notes
  • The total amount of TP is computed separately for each fleet in a combined fleet, with a rounding down on each.
STF
Fleet Info
Main 1 CVL/CA, 2 CA, 1-2 CL, 1-2 DD Spring 2025 Event Tag 3.png
Escort 1 CL, 5 DD Spring 2025 Event Tag 3.png
LoS Any
Speed Fast
RouteNode Types:
RED: Battle
PURPLE: Night Battle
PINK: Air Raid/Battle
ORANGE: Enemy Ambush/ASS
BLUE: Empty/Choice
Light Blue: Emergency Anchorage Repair
GREEN: Resource/TP
VIOLET: Maelstrom
2 L M N P R T U
Air State (C / E / M / H)
AD AP AS AS+
56 / 56 / 0 / 59 84 / 84 / 0 / 88 189 / 189 / 0 / 198 378 / 378 / 0 / 396
LBAS
Range AS Sortie AS Defense
Node U: 3 0 / 0 / 0 / 0 158 / 209 / 230 / 281
Fleet Notes
Bringing an AACI and some ASW is advised to reach the boss.

Having 1 or 2 good night cut-ins is recommended to farm for S rank.

LBAS Notes
All LBAS should be sent on the boss.
  • It is recommended to field between 3-5 DD that can carry Landing Craft to drain the TP Gauge.
    • Please refer to the Landing Craft table above for what Landing craft to use to maximize TP Drain per run.

Phase 2 - Boss

STF
Fleet Info
Main 1 CVL, 1-2 CA, 1-2 CL, 1-3 DD Spring 2025 Event Tag 3.png
Escort 0-1 CA, 1 CL, 4-5 DD Spring 2025 Event Tag 3.png
LoS Cn3: 70 / 55 / 75 / 95 (C/E/M/H)
Speed Any
RouteNode Types:
RED: Battle
PURPLE: Night Battle
PINK: Air Raid/Battle
ORANGE: Enemy Ambush/ASS
BLUE: Empty/Choice
Light Blue: Emergency Anchorage Repair
GREEN: Resource/TP
VIOLET: Maelstrom
2 L M N O Q V V1 W
Air State (C / E / M / H)
AD AP AS AS+
0 / 0 / 0 / 50 0 / 0 / 0 / 75 0 / 0 / 0 / 167 0 / 0 / 0 / 334
LBAS
Range AS Sortie AS Defense
Node W : 5, Node V : 4 0 / 0 / 0 / 180 158 / 209 / 230 / 281
Fleet Notes
The boss is a submarine, it is required to bring very strong ASW and OASW to kill it.
  • Only sniping the boss is the recommended way to clear the map.
LBAS Notes
Toukai LBAS is recommended to help chip the boss.
  • Smoke Generator Smokes are highly recommended for V to avoid taking damage.
  • Using the Command FacilityFCF FCFFleet Command Facility can help increase the reach rate.

Gimmick 3 - Debuff

Once LD has been reached, the following steps have to be performed to debuff the boss.

F1 F2 K U LBAS
Hard A+ x2 A+ x2 A+ x2 A+ x2 AS x2
Medium - A+ x2 A+ x2 A+ x2 AS
Easy - A+ x2 A+ x2 A+ x2 AS
Casual - A+ x2 A+ x2 A+ x2 AS

Refer to #Gimmick 1 - Unlock's fleets for composition and routing.

Once on LD, the CG will change to the following:

Submarine Seerfish Water Demon

Enemy Compositions

Spring 2025 Event E-2 Map Phase 2.png
TypeShips
DEShip Banner Kaiboukan No.22.png
DDShip Banner Ume.png
TypeShips
DEShip Banner Etorofu.pngShip Banner Kaiboukan No.22.pngShip Banner Kunashiri.png
DDShip Banner Take.pngShip Banner Ume.png
AOShip Banner Ootomari.pngShip Banner Yamashio Maru.png
TypeShips
DEShip Banner Etorofu.pngShip Banner Kaiboukan No.22.pngShip Banner Kunashiri.png
DDShip Banner Asashimo.pngShip Banner Kishinami.pngShip Banner Take.png
Ship Banner Ume.pngShip Banner Uranami.png
AOShip Banner Ootomari.pngShip Banner Yamashio Maru.png
TypeShips
DEShip Banner Etorofu.pngShip Banner Kaiboukan No.22.pngShip Banner Kunashiri.png
DDShip Banner Asashimo.pngShip Banner Kishinami.pngShip Banner Take.png
Ship Banner Ume.pngShip Banner Uranami.png
AOShip Banner Ootomari.pngShip Banner Yamashio Maru.png
TypeShips
DEShip Banner Etorofu.pngShip Banner Kaiboukan No.22.pngShip Banner Kunashiri.png
DDShip Banner Asashimo.pngShip Banner Take.pngShip Banner Ume.png
AOShip Banner Ootomari.pngShip Banner Yamashio Maru.png
TypeShips
DEShip Banner Etorofu.pngShip Banner Kaiboukan No.22.pngShip Banner Kunashiri.png
DDShip Banner Asashimo.pngShip Banner Fuyutsuki.pngShip Banner Kishinami.png
Ship Banner Take.pngShip Banner Ume.pngShip Banner Uranami.png
Ship Banner Usugumo.png
LHAShip Banner No.101 Transport Ship.png
AOShip Banner Ootomari.pngShip Banner Yamashio Maru.png
TypeShips
DEShip Banner Kaiboukan No.22.png
DDShip Banner Ume.png
TypeShips
DEShip Banner Etorofu.pngShip Banner Kaiboukan No.22.pngShip Banner Kunashiri.png
DDShip Banner Asashimo.pngShip Banner Take.pngShip Banner Ume.png
Ship Banner Uranami.png
AOShip Banner Ootomari.pngShip Banner Yamashio Maru.png
TypeShips
DEShip Banner Kaiboukan No.22.pngShip Banner Kunashiri.png
DDShip Banner Asashimo.pngShip Banner Take.pngShip Banner Uranami.png
TypeShips
DEShip Banner Etorofu.pngShip Banner Kaiboukan No.22.pngShip Banner Kunashiri.png
DDShip Banner Asashimo.pngShip Banner Fuyutsuki.pngShip Banner Kaya.png
Ship Banner Kishinami.pngShip Banner Take.pngShip Banner Ume.png
Ship Banner Uranami.pngShip Banner Usugumo.png
LHAShip Banner No.101 Transport Ship.png
AOShip Banner Ootomari.pngShip Banner Yamashio Maru.png
TypeShips
DEShip Banner Etorofu.pngShip Banner Kaiboukan No.22.png
DDShip Banner Asashimo.pngShip Banner Kishinami.pngShip Banner Ume.png
Ship Banner Uranami.pngShip Banner Usugumo.png
LHAShip Banner No.101 Transport Ship.png
TypeShips
DEShip Banner Etorofu.pngShip Banner Kaiboukan No.22.pngShip Banner Kunashiri.png
DDShip Banner Kiyoshimo.pngShip Banner Tashkent.pngShip Banner Uranami.png
Ship Banner Usugumo.pngShip Banner Uzuki.png
CVLShip Banner Langley.png
SSShip Banner Scamp.png
SSVShip Banner I-36.png
AOShip Banner Ootomari.pngShip Banner Souya (AGS).pngShip Banner Yamashio Maru.png
E-2 Hard A
# Empty Node
A 気のせいだった。
Must be my imagination.
# Empty Node
E-2 Hard A1: 深海潜水艦隊 択捉島沖哨戒群 (PoiDB)
# Formation Normal Battle Node AD/AP
AS/AS+
A1 Echelon
Line Abreast
Submarine Yo-Class Flagship (1535): 36 Armor, 44 HPBattle Card Flagship Icon.png Submarine Ka-Class Elite (1532): 21 Armor, 27 HP Submarine Ka-Class Elite (1532): 21 Armor, 27 HP 0/0
0/0
Echelon
Line Abreast
Submarine Yo-Class Flagship (1535): 36 Armor, 44 HPBattle Card Flagship Icon.png Submarine Ka-Class Flagship (1534): 30 Armor, 37 HP Submarine Ka-Class Elite (1532): 21 Armor, 27 HP 0/0
0/0
Echelon
Line Abreast
Submarine Yo-Class Flagship (1535): 36 Armor, 44 HPBattle Card Flagship Icon.png Submarine Ka-Class Flagship (1534): 30 Armor, 37 HP Submarine Ka-Class Flagship (1534): 30 Armor, 37 HP 0/0
0/0
# Formation Normal Battle Node AD/AP
AS/AS+
E-2 Hard A2: 深海極東方面 基地航空隊 (PoiDB)
# Formation Air Defense Node AD/AP
AS/AS+
A2 Diamond
(HA)
Airfield Princess X (1891): 140 Armor, 500 HP, 140 APAbyssal Sky Fortress Ace (Reconnaissance Model) 595 Equipment.pngAbyssal Sky Fortress Ace (Reconnaissance Model) 595 Equipment.pngBattle Card Flagship Icon.png 47/94
210/420
Diamond Airfield Princess V (1650): 140 Armor, 500 HP, 34 APAbyssal Liberation Land-based Dive Bomber 561 Equipment.pngBattle Card Flagship Icon.png Airfield Princess XVI (2094): 120 Armor, 300 HP, 32 AP 23/45
99/198
Diamond Airfield Princess VI (1651): 140 Armor, 500 HP, 48 APAbyssal Liberation Land-based Dive Bomber Ace 562 Equipment.pngAbyssal Liberation Land-based Dive Bomber 561 Equipment.pngBattle Card Flagship Icon.png Airfield Princess XVI (2094): 120 Armor, 300 HP, 32 AP 27/54
120/240
Diamond
(HA)
Airfield Princess VI (1651): 140 Armor, 500 HP, 48 APAbyssal Liberation Land-based Dive Bomber Ace 562 Equipment.pngAbyssal Liberation Land-based Dive Bomber 561 Equipment.pngBattle Card Flagship Icon.png Airfield Princess XVI (2094): 120 Armor, 300 HP, 32 AP Airfield Princess VIII (1889): 140 Armor, 500 HP, 71 APAbyssal Sky Fortress (Reconnaissance Model) 594 Equipment.png 51/101
227/453
# Formation Air Defense Node AD/AP
AS/AS+
E-2 Hard B
# Selection Node
B 艦隊の針路を選択できます。提督、どちらの針路をとられますか?
You can decide the fleet's course. Admiral, which heading should we take?
# Selection Node
E-2 Hard C: 深海極東艦隊 高速巡洋艦戦隊 (PoiDB)
# Formation Normal Battle Node AD/AP
AS/AS+
C Line Ahead
Echelon
Vanguard
Heavy Cruiser Ri-Class Flagship (1527): 70 Armor, 76 HPBattle Card Flagship Icon.png Torpedo Cruiser Chi-Class Flagship (1559): 60 Armor, 70 HP Torpedo Cruiser Chi-Class Flagship (1559): 60 Armor, 70 HP Light Cruiser Tsu-Class (1591): 55 Armor, 48 HP Destroyer I-Class Late Model (1575): 22 Armor, 35 HP Destroyer I-Class Late Model (1575): 22 Armor, 35 HP
0/0
0/0
# Formation Normal Battle Node AD/AP
AS/AS+
E-2 Hard D: 深海極東艦隊 重巡洋艦戦隊 (PoiDB)
# Formation Normal Battle Node AD/AP
AS/AS+
D Line Ahead Heavy Cruiser Ri-Class Flagship (1527): 70 Armor, 76 HPBattle Card Flagship Icon.png Heavy Cruiser Ne-Class Elite (1595): 89 Armor, 88 HP Heavy Cruiser Ne-Class (1594): 82 Armor, 80 HP Light Cruiser Tsu-Class (1591): 55 Armor, 48 HP Destroyer I-Class Late Model (1575): 22 Armor, 35 HP Destroyer I-Class Late Model (1575): 22 Armor, 35 HP
0/0
0/0
Line Ahead Heavy Cruiser Ri-Class Flagship (1527): 70 Armor, 76 HPBattle Card Flagship Icon.png Heavy Cruiser Ne-Class Elite (1595): 89 Armor, 88 HP Heavy Cruiser Ne-Class Elite (1595): 89 Armor, 88 HP Light Cruiser Tsu-Class (1591): 55 Armor, 48 HP Destroyer I-Class Late Model (1575): 22 Armor, 35 HP Destroyer I-Class Late Model (1575): 22 Armor, 35 HP
0/0
0/0
Line Ahead Heavy Cruiser Ri-Class Flagship (1527): 70 Armor, 76 HPBattle Card Flagship Icon.png Heavy Cruiser Ne-Class Elite (1595): 89 Armor, 88 HP Heavy Cruiser Ne-Class Elite (1595): 89 Armor, 88 HP Light Cruiser Tsu-Class Elite (1592): 68 Armor, 66 HP Destroyer I-Class Late Model (1575): 22 Armor, 35 HP Destroyer I-Class Late Model (1575): 22 Armor, 35 HP
0/0
0/0
# Formation Normal Battle Node AD/AP
AS/AS+
E-2 Hard E
# Selection Node
E 艦隊の針路を選択できます。提督、どちらの針路をとられますか?
You can decide the fleet's course. Admiral, which heading should we take?
# Selection Node
E-2 Hard F: 深海極東方面 基地航空隊 (PoiDB)
# Formation Air Defense Node AD/AP
AS/AS+
F Diamond
(HA)
Airfield Princess X (1891): 140 Armor, 500 HP, 140 APAbyssal Sky Fortress Ace (Reconnaissance Model) 595 Equipment.pngAbyssal Sky Fortress Ace (Reconnaissance Model) 595 Equipment.pngBattle Card Flagship Icon.png 47/94
210/420
Diamond
(HA)
Airfield Princess V (1650): 140 Armor, 500 HP, 34 APAbyssal Liberation Land-based Dive Bomber 561 Equipment.pngBattle Card Flagship Icon.png Airfield Princess IX (1890): 140 Armor, 500 HP, 105 APAbyssal Sky Fortress Ace (Reconnaissance Model) 595 Equipment.pngAbyssal Sky Fortress (Reconnaissance Model) 594 Equipment.png 47/93
209/417
Diamond
(HA)
Airfield Princess VI (1651): 140 Armor, 500 HP, 48 APAbyssal Liberation Land-based Dive Bomber Ace 562 Equipment.pngAbyssal Liberation Land-based Dive Bomber 561 Equipment.pngBattle Card Flagship Icon.png Airfield Princess IX (1890): 140 Armor, 500 HP, 105 APAbyssal Sky Fortress Ace (Reconnaissance Model) 595 Equipment.pngAbyssal Sky Fortress (Reconnaissance Model) 594 Equipment.png 52/103
230/459
Diamond
(HA)
Airfield Princess XVI (2094): 120 Armor, 300 HP, 32 APBattle Card Flagship Icon.png Airfield Princess IX (1890): 140 Armor, 500 HP, 105 APAbyssal Sky Fortress Ace (Reconnaissance Model) 595 Equipment.pngAbyssal Sky Fortress (Reconnaissance Model) 594 Equipment.png 46/92
206/411
Diamond
(HA)
Airfield Princess V (1650): 140 Armor, 500 HP, 34 APAbyssal Liberation Land-based Dive Bomber 561 Equipment.pngBattle Card Flagship Icon.png Airfield Princess XVI (2094): 120 Armor, 300 HP, 32 AP Airfield Princess VIII (1889): 140 Armor, 500 HP, 71 APAbyssal Sky Fortress (Reconnaissance Model) 594 Equipment.png 46/92
206/411
Diamond
(HA)
Airfield Princess VI (1651): 140 Armor, 500 HP, 48 APAbyssal Liberation Land-based Dive Bomber Ace 562 Equipment.pngAbyssal Liberation Land-based Dive Bomber 561 Equipment.pngBattle Card Flagship Icon.png Airfield Princess XVI (2094): 120 Armor, 300 HP, 32 AP Airfield Princess VIII (1889): 140 Armor, 500 HP, 71 APAbyssal Sky Fortress (Reconnaissance Model) 594 Equipment.png 51/101
227/453
# Formation Air Defense Node AD/AP
AS/AS+
E-2 Hard F1: 深海極東艦隊 特殊遊撃部隊 (PoiDB)
# Formation Normal Battle Node AD/AP
AS/AS+
F1 Line Ahead
Double Line
Diamond
Battleship Re-Class Elite (1562): 130 Armor, 270 HP, 107 APBattle Card Flagship Icon.png Heavy Cruiser Ne-Class Elite (1595): 89 Armor, 88 HP Heavy Cruiser Ne-Class Elite (1595): 89 Armor, 88 HP Light Cruiser Tsu-Class Elite (1592): 68 Armor, 66 HP Destroyer I-Class Late Model (1575): 22 Armor, 35 HP Destroyer I-Class Late Model (1575): 22 Armor, 35 HP
36/72
161/321
# Formation Normal Battle Node AD/AP
AS/AS+
E-2 Hard F2: 深海任務部隊 極東艦隊支援 III群 (PoiDB)
# Formation Normal Battle Node AD/AP
AS/AS+
F2 Line Ahead Destroyer Ra-Class II (2264): 158 Armor, 690 HPBattle Card Flagship Icon.png Light Cruiser Tsu-Class (1591): 55 Armor, 48 HP Destroyer Ro-Class Late Model (1576): 26 Armor, 37 HP Destroyer I-Class Late Model (1575): 22 Armor, 35 HP Destroyer I-Class Late Model (1575): 22 Armor, 35 HP Destroyer I-Class Late Model (1575): 22 Armor, 35 HP
0/0
0/0
Line Ahead Destroyer Ra-Class II (2264): 158 Armor, 690 HPBattle Card Flagship Icon.png Light Cruiser Tsu-Class Elite (1592): 68 Armor, 66 HP Destroyer Ro-Class Late Model (1576): 26 Armor, 37 HP Destroyer Ro-Class Late Model (1576): 26 Armor, 37 HP Destroyer I-Class Late Model (1575): 22 Armor, 35 HP Destroyer I-Class Late Model (1575): 22 Armor, 35 HP
0/0
0/0
Line Ahead Destroyer Ra-Class II (2264): 158 Armor, 690 HPBattle Card Flagship Icon.png Light Cruiser Tsu-Class Elite (1592): 68 Armor, 66 HP Destroyer Ro-Class Late Model Elite (1622): 36 Armor, 43 HP Destroyer Ro-Class Late Model (1576): 26 Armor, 37 HP Destroyer I-Class Late Model (1575): 22 Armor, 35 HP Destroyer I-Class Late Model (1575): 22 Armor, 35 HP
0/0
0/0
# Formation Normal Battle Node AD/AP
AS/AS+
E-2 Hard G: 深海極東方面 基地航空隊 (PoiDB)
# Formation Air Defense Node AD/AP
AS/AS+
G Diamond
(HA)
Airfield Princess X (1891): 140 Armor, 500 HP, 140 APAbyssal Sky Fortress Ace (Reconnaissance Model) 595 Equipment.pngAbyssal Sky Fortress Ace (Reconnaissance Model) 595 Equipment.pngBattle Card Flagship Icon.png 47/94
210/420
Diamond Airfield Princess V (1650): 140 Armor, 500 HP, 34 APAbyssal Liberation Land-based Dive Bomber 561 Equipment.pngBattle Card Flagship Icon.png Airfield Princess XVI (2094): 120 Armor, 300 HP, 32 AP 23/45
99/198
Diamond
(HA)
Airfield Princess VI (1651): 140 Armor, 500 HP, 48 APAbyssal Liberation Land-based Dive Bomber Ace 562 Equipment.pngAbyssal Liberation Land-based Dive Bomber 561 Equipment.pngBattle Card Flagship Icon.png Airfield Princess XVI (2094): 120 Armor, 300 HP, 32 AP Airfield Princess VIII (1889): 140 Armor, 500 HP, 71 APAbyssal Sky Fortress (Reconnaissance Model) 594 Equipment.png 51/101
227/453
# Formation Air Defense Node AD/AP
AS/AS+
E-2 Hard H: 深海潜水艦隊 千島列島阻止線 (PoiDB)
# Formation Normal Battle Node AD/AP
AS/AS+
H Echelon
Line Abreast
Submarine Yo-Class Flagship (1535): 36 Armor, 44 HPBattle Card Flagship Icon.png Submarine Ka-Class Elite (1532): 21 Armor, 27 HP Submarine Ka-Class Elite (1532): 21 Armor, 27 HP Submarine Ka-Class Elite (1532): 21 Armor, 27 HP 0/0
0/0
Echelon
Line Abreast
Submarine Yo-Class Flagship (1535): 36 Armor, 44 HPBattle Card Flagship Icon.png Submarine Ka-Class Flagship (1534): 30 Armor, 37 HP Submarine Ka-Class Elite (1532): 21 Armor, 27 HP Submarine Ka-Class Elite (1532): 21 Armor, 27 HP 0/0
0/0
Echelon
Line Abreast
Submarine Yo-Class Flagship (1535): 36 Armor, 44 HPBattle Card Flagship Icon.png Submarine Ka-Class Flagship (1534): 30 Armor, 37 HP Submarine Ka-Class Flagship (1534): 30 Armor, 37 HP Submarine Ka-Class Flagship (1534): 30 Armor, 37 HP 0/0
0/0
# Formation Normal Battle Node AD/AP
AS/AS+
E-2 Hard I: 極東艦隊支援 前衛空母群 II群 (PoiDB)
# Formation Normal Battle Node AD/AP
AS/AS+
I Diamond Light Carrier Nu-Class Kai Flagship II (1766): 93 Armor, 118 HP, 132 APAbyssal Patrolling Attack Hawk 574 Equipment.pngAbyssal Cat Fighter Kai 556 Equipment.pngBattle Card Flagship Icon.png Heavy Cruiser Ri-Class Flagship (1527): 70 Armor, 76 HP Heavy Cruiser Ri-Class Flagship (1527): 70 Armor, 76 HP Light Cruiser Ho-Class Flagship (1554): 36 Armor, 53 HP Destroyer I-Class Late Model (1575): 22 Armor, 35 HP Destroyer I-Class Late Model (1575): 22 Armor, 35 HP
45/89
198/396
Diamond Light Carrier Nu-Class Kai Flagship II (1766): 93 Armor, 118 HP, 132 APAbyssal Patrolling Attack Hawk 574 Equipment.pngAbyssal Cat Fighter Kai 556 Equipment.pngBattle Card Flagship Icon.png Heavy Cruiser Ri-Class Flagship (1527): 70 Armor, 76 HP Heavy Cruiser Ri-Class Flagship (1527): 70 Armor, 76 HP Light Cruiser Ho-Class Flagship (1554): 36 Armor, 53 HP Destroyer Ro-Class Late Model (1576): 26 Armor, 37 HP Destroyer Ro-Class Late Model (1576): 26 Armor, 37 HP
45/89
198/396
Diamond Light Carrier Nu-Class Kai Flagship II (1766): 93 Armor, 118 HP, 132 APAbyssal Patrolling Attack Hawk 574 Equipment.pngAbyssal Cat Fighter Kai 556 Equipment.pngBattle Card Flagship Icon.png Heavy Cruiser Ri-Class Flagship (1527): 70 Armor, 76 HP Heavy Cruiser Ri-Class Flagship (1527): 70 Armor, 76 HP Light Cruiser He-Class Flagship (1555): 39 Armor, 57 HP Destroyer Ro-Class Late Model (1576): 26 Armor, 37 HP Destroyer Ro-Class Late Model (1576): 26 Armor, 37 HP
45/89
198/396
# Formation Normal Battle Node AD/AP
AS/AS+
E-2 Hard J
# Empty Node
J 敵影を見ず。
No enemy spotted.
# Empty Node
E-2 Hard K: 深海任務部隊 極東艦隊支援 II群 (PoiDB)
# Formation Normal Battle Node AD/AP
AS/AS+
K Line Ahead Destroyer Ra-Class IV (2272): 167 Armor, 690 HPBattle Card Flagship Icon.png Heavy Cruiser Ne-Class Elite (1595): 89 Armor, 88 HP Heavy Cruiser Ne-Class (1594): 82 Armor, 80 HP Light Cruiser Tsu-Class (1591): 55 Armor, 48 HP Destroyer Ro-Class Late Model (1576): 26 Armor, 37 HP Destroyer Ro-Class Late Model (1576): 26 Armor, 37 HP
0/0
0/0
Line Ahead Destroyer Ra-Class IV (2272): 167 Armor, 690 HPBattle Card Flagship Icon.png Heavy Cruiser Ne-Class Elite (1595): 89 Armor, 88 HP Heavy Cruiser Ne-Class Elite (1595): 89 Armor, 88 HP Light Cruiser Tsu-Class (1591): 55 Armor, 48 HP Destroyer Ro-Class Late Model (1576): 26 Armor, 37 HP Destroyer Ro-Class Late Model (1576): 26 Armor, 37 HP
0/0
0/0
Line Ahead Destroyer Ra-Class IV (2272): 167 Armor, 690 HPBattle Card Flagship Icon.png Heavy Cruiser Ne-Class Elite (1595): 89 Armor, 88 HP Heavy Cruiser Ne-Class Elite (1595): 89 Armor, 88 HP Light Cruiser Tsu-Class Elite (1592): 68 Armor, 66 HP Destroyer Ro-Class Late Model (1576): 26 Armor, 37 HP Destroyer Ro-Class Late Model (1576): 26 Armor, 37 HP
0/0
0/0
# Formation Normal Battle Node AD/AP
AS/AS+
E-2 Hard L
# Empty Node
L 気のせいだった。
Must be my imagination.
# Empty Node
E-2 Hard M: 極東艦隊支援 前衛空母群 I群 (PoiDB)
# Formation Normal Battle Node AD/AP
AS/AS+
M Diamond Light Carrier Nu-Class Kai Flagship II (1766): 93 Armor, 118 HP, 132 APAbyssal Patrolling Attack Hawk 574 Equipment.pngAbyssal Cat Fighter Kai 556 Equipment.pngBattle Card Flagship Icon.png Heavy Cruiser Ri-Class Flagship (1527): 70 Armor, 76 HP Heavy Cruiser Ri-Class Flagship (1527): 70 Armor, 76 HP Light Cruiser Ho-Class Flagship (1554): 36 Armor, 53 HP Destroyer Ro-Class Late Model (1576): 26 Armor, 37 HP Destroyer Ro-Class Late Model (1576): 26 Armor, 37 HP
45/89
198/396
Diamond Light Carrier Nu-Class Kai Flagship II (1766): 93 Armor, 118 HP, 132 APAbyssal Patrolling Attack Hawk 574 Equipment.pngAbyssal Cat Fighter Kai 556 Equipment.pngBattle Card Flagship Icon.png Heavy Cruiser Ri-Class Flagship (1527): 70 Armor, 76 HP Heavy Cruiser Ri-Class Flagship (1527): 70 Armor, 76 HP Light Cruiser He-Class Flagship (1555): 39 Armor, 57 HP Destroyer Ro-Class Late Model (1576): 26 Armor, 37 HP Destroyer Ro-Class Late Model (1576): 26 Armor, 37 HP
45/89
198/396
Diamond Light Carrier Nu-Class Kai Flagship II (1766): 93 Armor, 118 HP, 132 APAbyssal Patrolling Attack Hawk 574 Equipment.pngAbyssal Cat Fighter Kai 556 Equipment.pngBattle Card Flagship Icon.png Heavy Cruiser Ri-Class Flagship (1527): 70 Armor, 76 HP Heavy Cruiser Ri-Class Flagship (1527): 70 Armor, 76 HP Light Cruiser To-Class Flagship (1998): 69 Armor, 73 HP Destroyer Ro-Class Late Model (1576): 26 Armor, 37 HP Destroyer Ro-Class Late Model (1576): 26 Armor, 37 HP
45/89
198/396
# Formation Normal Battle Node AD/AP
AS/AS+
E-2 Hard N
# Selection Node
N 艦隊の針路を選択できます。提督、どちらの針路をとられますか?
You can decide the fleet's course. Admiral, which heading should we take?
# Selection Node
E-2 Hard O: 深海極東方面 基地航空隊 (PoiDB)
# Formation Air Defense Node AD/AP
AS/AS+
O Diamond
(HA)
Airfield Princess X (1891): 140 Armor, 500 HP, 140 APAbyssal Sky Fortress Ace (Reconnaissance Model) 595 Equipment.pngAbyssal Sky Fortress Ace (Reconnaissance Model) 595 Equipment.pngBattle Card Flagship Icon.png 47/94
210/420
Diamond
(HA)
Airfield Princess V (1650): 140 Armor, 500 HP, 34 APAbyssal Liberation Land-based Dive Bomber 561 Equipment.pngBattle Card Flagship Icon.png Airfield Princess IX (1890): 140 Armor, 500 HP, 105 APAbyssal Sky Fortress Ace (Reconnaissance Model) 595 Equipment.pngAbyssal Sky Fortress (Reconnaissance Model) 594 Equipment.png 47/93
209/417
Diamond
(HA)
Airfield Princess VI (1651): 140 Armor, 500 HP, 48 APAbyssal Liberation Land-based Dive Bomber Ace 562 Equipment.pngAbyssal Liberation Land-based Dive Bomber 561 Equipment.pngBattle Card Flagship Icon.png Airfield Princess IX (1890): 140 Armor, 500 HP, 105 APAbyssal Sky Fortress Ace (Reconnaissance Model) 595 Equipment.pngAbyssal Sky Fortress (Reconnaissance Model) 594 Equipment.png 52/103
230/459
Diamond
(HA)
Airfield Princess XVI (2094): 120 Armor, 300 HP, 32 APBattle Card Flagship Icon.png Airfield Princess IX (1890): 140 Armor, 500 HP, 105 APAbyssal Sky Fortress Ace (Reconnaissance Model) 595 Equipment.pngAbyssal Sky Fortress (Reconnaissance Model) 594 Equipment.png 46/92
206/411
Diamond
(HA)
Airfield Princess V (1650): 140 Armor, 500 HP, 34 APAbyssal Liberation Land-based Dive Bomber 561 Equipment.pngBattle Card Flagship Icon.png Airfield Princess XVI (2094): 120 Armor, 300 HP, 32 AP Airfield Princess VIII (1889): 140 Armor, 500 HP, 71 APAbyssal Sky Fortress (Reconnaissance Model) 594 Equipment.png 46/92
206/411
Diamond
(HA)
Airfield Princess VI (1651): 140 Armor, 500 HP, 48 APAbyssal Liberation Land-based Dive Bomber Ace 562 Equipment.pngAbyssal Liberation Land-based Dive Bomber 561 Equipment.pngBattle Card Flagship Icon.png Airfield Princess XVI (2094): 120 Armor, 300 HP, 32 AP Airfield Princess VIII (1889): 140 Armor, 500 HP, 71 APAbyssal Sky Fortress (Reconnaissance Model) 594 Equipment.png 51/101
227/453
# Formation Air Defense Node AD/AP
AS/AS+
E-2 Hard P: 深海潜水艦隊 逆上陸警戒阻止線 (PoiDB)
# Formation Normal Battle Node AD/AP
AS/AS+
P Echelon
Line Abreast
Submarine Yo-Class Flagship (1535): 36 Armor, 44 HPBattle Card Flagship Icon.png Submarine Ka-Class Elite (1532): 21 Armor, 27 HP Submarine Ka-Class Elite (1532): 21 Armor, 27 HP Submarine Ka-Class Elite (1532): 21 Armor, 27 HP Submarine Ka-Class Elite (1532): 21 Armor, 27 HP 0/0
0/0
Echelon
Line Abreast
Submarine Yo-Class Flagship (1535): 36 Armor, 44 HPBattle Card Flagship Icon.png Submarine Ka-Class Flagship (1534): 30 Armor, 37 HP Submarine Ka-Class Elite (1532): 21 Armor, 27 HP Submarine Ka-Class Elite (1532): 21 Armor, 27 HP Submarine Ka-Class Elite (1532): 21 Armor, 27 HP 0/0
0/0
Echelon
Line Abreast
Submarine Yo-Class Flagship (1535): 36 Armor, 44 HPBattle Card Flagship Icon.png Submarine Ka-Class Flagship (1534): 30 Armor, 37 HP Submarine Ka-Class Flagship (1534): 30 Armor, 37 HP Submarine Ka-Class Elite (1532): 21 Armor, 27 HP Submarine Ka-Class Elite (1532): 21 Armor, 27 HP 0/0
0/0
# Formation Normal Battle Node AD/AP
AS/AS+
E-2 Hard Q: 深海潜水艦隊 樺太沖哨戒警戒線 (PoiDB)
# Formation Normal Battle Node AD/AP
AS/AS+
Q Echelon
Line Abreast
New Submarine Princess Flagship (1736): 37 Armor, 177 HPBattle Card Flagship Icon.png Submarine Yo-Class Flagship (1535): 36 Armor, 44 HP Submarine Ka-Class Elite (1532): 21 Armor, 27 HP Submarine Ka-Class Elite (1532): 21 Armor, 27 HP 0/0
0/0
Echelon
Line Abreast
New Submarine Princess Flagship (1736): 37 Armor, 177 HPBattle Card Flagship Icon.png Submarine Yo-Class Flagship (1535): 36 Armor, 44 HP Submarine Ka-Class Flagship (1534): 30 Armor, 37 HP Submarine Ka-Class Flagship (1534): 30 Armor, 37 HP 0/0
0/0
# Formation Normal Battle Node AD/AP
AS/AS+
E-2 Hard R: 深海極東艦隊 北海道東部哨戒線 (PoiDB)
# Formation Normal Battle Node AD/AP
AS/AS+
R Line Ahead
Double Line
Vanguard
Light Cruiser To-Class Flagship (1998): 69 Armor, 73 HPBattle Card Flagship Icon.png Heavy Cruiser Ri-Class Flagship (1527): 70 Armor, 76 HP Heavy Cruiser Ri-Class Flagship (1527): 70 Armor, 76 HP Light Cruiser Tsu-Class (1591): 55 Armor, 48 HP Destroyer Ro-Class Late Model (1576): 26 Armor, 37 HP Destroyer Ro-Class Late Model (1576): 26 Armor, 37 HP
0/0
0/0
# Formation Normal Battle Node AD/AP
AS/AS+
E-2 Hard S: 深海極東艦隊 北海道北部哨戒線 (PoiDB)
# Formation Normal Battle Node AD/AP
AS/AS+
S Line Ahead
Double Line
Vanguard
Light Cruiser To-Class Flagship (1998): 69 Armor, 73 HPBattle Card Flagship Icon.png Heavy Cruiser Ri-Class Flagship (1527): 70 Armor, 76 HP Heavy Cruiser Ri-Class Flagship (1527): 70 Armor, 76 HP Light Cruiser Tsu-Class (1591): 55 Armor, 48 HP Destroyer Ro-Class Late Model (1576): 26 Armor, 37 HP Destroyer Ro-Class Late Model (1576): 26 Armor, 37 HP
0/0
0/0
# Formation Normal Battle Node AD/AP
AS/AS+
E-2 Hard T
# Landing Node
T 輸送物資の揚陸地点に到達しました。本海域の輸送作戦は無事完了しています。
The landing point of the convoy has been reached. The transport operation here has already been completed successfully.
# Landing Node
E-2 Hard U: 深海任務部隊 極東艦隊支援 I群 (PoiDB)
# Formation Boss Battle Node AD/AP
AS/AS+
U Line Ahead
Double Line
Echelon
Destroyer Ra-Class II (2264): 158 Armor, 690 HPBattle Card Flagship Icon.png Heavy Cruiser Ne-Class (1594): 82 Armor, 80 HP Heavy Cruiser Ne-Class (1594): 82 Armor, 80 HP Light Cruiser Tsu-Class (1591): 55 Armor, 48 HP Destroyer Ro-Class Late Model (1576): 26 Armor, 37 HP Destroyer Ro-Class Late Model (1576): 26 Armor, 37 HP
0/0
0/0
# Formation Boss Battle Node AD/AP
AS/AS+
E-2 Hard V: 深海極東艦隊 宗谷沖機動部隊 (PoiDB)
# Formation Normal Battle Node AD/AP
AS/AS+
V Line Ahead Heavy Cruiser Ne-Class Kai (1895): 144 Armor, 330 HPBattle Card Flagship Icon.png Standard Carrier Wo-Class Kai Flagship III (1617): 120 Armor, 160 HP, 126 APHell plane 2.pngAbyssal Revenge Torpedo Bomber Kai.png Heavy Cruiser Ne-Class Elite (1595): 89 Armor, 88 HP Light Cruiser Tsu-Class (1591): 55 Armor, 48 HP Destroyer Ro-Class Late Model (1576): 26 Armor, 37 HP Destroyer Ro-Class Late Model (1576): 26 Armor, 37 HP
43/85
189/378
Line Ahead Heavy Cruiser Ne-Class Kai (1895): 144 Armor, 330 HPBattle Card Flagship Icon.png Standard Carrier Wo-Class Kai Flagship III (1617): 120 Armor, 160 HP, 126 APHell plane 2.pngAbyssal Revenge Torpedo Bomber Kai.png Heavy Cruiser Ne-Class Elite (1595): 89 Armor, 88 HP Light Cruiser Tsu-Class Elite (1592): 68 Armor, 66 HP Destroyer Ro-Class Late Model (1576): 26 Armor, 37 HP Destroyer Ro-Class Late Model (1576): 26 Armor, 37 HP
43/85
189/378
Line Ahead Heavy Cruiser Ne-Class Kai II (1896): 222 Armor, 360 HPBattle Card Flagship Icon.png Standard Carrier Wo-Class Kai Flagship IV (1618): 120 Armor, 160 HP, 132 APAbyssal Hell Dive Bomber Kai.pngAbyssal Revenge Torpedo Bomber Kai.png Heavy Cruiser Ne-Class Elite (1595): 89 Armor, 88 HP Light Cruiser Tsu-Class Elite (1592): 68 Armor, 66 HP Destroyer Ro-Class Late Model Elite (1622): 36 Armor, 43 HP Destroyer Ro-Class Late Model Elite (1622): 36 Armor, 43 HP
45/89
198/396
# Formation Normal Battle Node AD/AP
AS/AS+
E-2 Hard V1
# Empty Node
V1 気のせいだった。
Must be my imagination.
# Empty Node
E-2 Hard V2
# Empty Node
V2 敵影を見ず。
No enemy spotted.
# Empty Node
E-2 Hard W: 深海極東艦隊 稚内上陸侵攻部隊 (PoiDB)
# Formation Boss Battle Node AD/AP
AS/AS+
W Cruising Formation 1 Submarine Seerfish Water Demon III (2278): 83 Armor, 588 HPBattle Card Flagship Icon.png Transport Ship Wa-Class B (Landing) Flagship (2269): 68 Armor, 480 HP Transport Ship Wa-Class B (Landing) Flagship (2269): 68 Armor, 480 HP Battleship Ru-Class Flagship (1529): 99 Armor, 98 HP Battleship Ru-Class Flagship (1529): 99 Armor, 98 HP Submarine Princess Kai Flagship III (1917): 69 Armor, 490 HP
Light Cruiser Tsu-Class Elite (1592): 68 Armor, 66 HP Destroyer Ra-Class Initial Model (2262): 79 Armor, 290 HP Destroyer Ha-Class Late Model (1577): 29 Armor, 38 HP Destroyer Ha-Class Late Model (1577): 29 Armor, 38 HP PT Imp Pack IV (1640): 39 Armor, 18 HP Submarine So-Class Flagship (1572): 42 Armor, 48 HP
0/0
0/0
Cruising Formation 1
(Final)
Submarine Seerfish Water Demon Damaged III (2281): 93 Armor, 588 HPBattle Card Flagship Icon.png Transport Ship Wa-Class B (Landing) Flagship (2269): 68 Armor, 480 HP Transport Ship Wa-Class B (Landing) Flagship (2269): 68 Armor, 480 HP Battleship Ru-Class Kai Flagship (1567): 110 Armor, 130 HP Battleship Ru-Class Kai Flagship (1567): 110 Armor, 130 HP Submarine Princess Kai Flagship Damaged III (1920): 74 Armor, 490 HP
Light Cruiser Tsu-Class Elite (1592): 68 Armor, 66 HP Light Carrier Nu-Class Kai Flagship (1735): 93 Armor, 118 HP, 111 APAbyssal Patrolling Attack Hawk 574 Equipment.png Destroyer Ra-Class Initial Model II (2270): 77 Armor, 290 HP Destroyer Ra-Class Initial Model (2262): 79 Armor, 290 HP PT Imp Pack IV (1640): 39 Armor, 18 HP New Submarine Princess Flagship (1736): 37 Armor, 177 HP
38/75
167/333
# Formation Boss Battle Node AD/AP
AS/AS+

Ship Drops

Ship drops
Type Ship? C D F1 F2 I K M R S U V W
DE Kaiboukan No.22 Medium+ Easy+ Casual+ Casual+ Casual+ Casual+ Easy+ Casual+ Casual+ Casual+ Casual+ Casual+
DE Kunashiri Medium+ Casual+ Casual+ Casual+ Casual+ Casual+ Casual+ Casual+ Casual+ Casual+
DE Etorofu Easy+ Casual+ Easy+ Casual+ Casual+ Casual+ Casual+ Casual+ Casual+ Casual+
DD Kaya Easy+
DD Ume Hard+ Easy+ Easy+ Easy+ Casual+ Casual+ Medium+ Casual+ Casual+ Casual+ Casual+
DD Fuyutsuki Medium+ Casual+
DD Shirakumo Easy+
DD Uzuki Casual+
DD Usugumo Easy+ Casual+ Easy+ Casual+
DD Uranami Easy+ Easy+ Casual+ Hard+ Hard+ Casual+ Casual+ Casual+
DD Kishinami Medium+ Medium+ Casual+ Casual+ Casual+
DD Asashimo Easy+ Easy+ Medium+ Casual+ Hard+ Hard+ Casual+ Casual+ Casual+
DD Kiyoshimo Casual+
DD Take Medium+ Easy+ Casual+ Easy+ Casual+ Casual+ Casual+ Casual+ Casual+
DD Tashkent Casual+
CVL Langley Casual+
SS Scamp Casual+
SSV I-36 Casual+
LHA No.101 Transport Ship Easy+ Casual+ Easy+ Casual+
AS Taigei Casual+
AO Ootomari Hard+ Casual+ Casual+ Easy+ Easy+ Easy+ Easy+ Casual+ Casual+ Casual+
AO Yamashio Maru Hard+ Easy+ Casual+ Casual+ Casual+ Casual+ Casual+ Casual+ Casual+ Casual+
AO Souya Casual+
CL Kitakami Medium+ Casual+ Casual+
CL Ooi Hard+ Easy+ Easy+ Easy+ Casual+ Casual+ Casual+ Casual+ Casual+ Casual+
CL Kinu Hard+ Medium+ Casual+ Casual+ Casual+ Casual+
CL Abukuma Medium+ Medium+ Casual+ Casual+ Casual+ Casual+
CL Sendai Easy+ Easy+ Medium+ Casual+ Medium+ Medium+ Casual+ Casual+ Casual+
CA Kinugasa Casual+
CA Takao Casual+
CA Atago Casual+
CA Suzuya Casual+
CA Kumano Casual+
CA Tone Casual+
CA Chikuma Casual+
CVL Zuihou Casual+
FBB Kongou Casual+
FBB Hiei Casual+
FBB Haruna Casual+
FBB Kirishima Casual+
BB Ise Casual+
BB Hyuuga Casual+
SS I-8 Casual+
SS I-19 Casual+


Trivia

  • The Transport Phase and the TP bar are historical references to the tanks that played a role in the planned Hokkaido Defense Operation. The Type 97 Shinhōtō Chi-Ha (colloquially named Type 97 Kai or Chi-Ha Kai), Type 1 Ho-Ni I, and the Imperial Japanese Army 11th Tank Regiment units all were key players in the planned Hokkaido Defense should the Soviet Union have implemented their northern invasion operation. This is why these 3 units give the most TP points on this map.
  • The plan of Japanese Military was to reserve their best units in the defense of the mainland and they did have a number of both these armored vehicles and they were to supplement other more advanced weaponry that were still being produced such as the Type 3 Chi-Nu, Type 1 Chi-He, Type 4 Chi-To, Type 1 Ho-Ni II, and the Type 3 Ho-Ni III.
  • The 11th Tank Regiment did engage the Soviets in the Kuriles, and they proved that they were a match with their Type 97 Shinhōtō Chi-Ha's against the Soviet T-34 tanks. This was also the case in Manchuria, where the Soviets thought they would face an inferior force but were met with heavy resistance from the Type 97 Shinhōtō Chi-Ha and Type 1 Ho-Ni I. All of which were already proven against American tanks in the engagements in the Philippines, Iwo Jima, and Okinawa, albeit they were ultimately defeated and captured due to smaller numbers.
  • The Air Base we are using is still Misawa Airbase same as E-1
  • Node W is at Cape Soya, this is also the final known location for USS Wahoo and where her wreck was found in 2006. There was a video released in 2024 from the Russian Geographical Society on the wreck. They installed a memorial plaque and a wreathe with the inscription "Russians Remember".
Spring 2025 EventSpring 2025 Event Banner.png
Spring 2025 EventSpring 2025 Event Banner EO.png
The 2nd Stage Operations have been released!
FF release: TBA
Approximate time until the end of the event: ([6] KC 12th anniversary)

23 days, 14 hours, 12 minutes and 34 seconds

Spring 2025 Event Hub Overview
Introduction & Overview 1st Stage Operations 2nd Stage Operations
E-1 | E-2 | E-3 E-4 | E-5 | E-6