- Welcome to the Kancolle Wiki!
- If you have any questions regarding site content, account registration, etc., please visit the KanColle Wiki Discord
Difference between revisions of "World 1/1-3"
< World 1
Jump to navigation
Jump to search
Jigaraphale (talk | contribs) |
Jigaraphale (talk | contribs) m |
||
| Line 83: | Line 83: | ||
*Once the first battle is complete, "retreat" and "[[resupply]]" before going back out. | *Once the first battle is complete, "retreat" and "[[resupply]]" before going back out. | ||
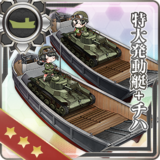
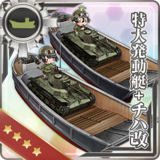
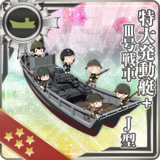
| − | As many {{ | + | As many {{Landing Craft}} [[Landing Craft]] and {{Amphibious Tank}} {{EquipmentLink|Special Type 2 Amphibious Tank|text=Amphibious Tanks}} should be equipped as possible to maximize fuel gain (+3 per craft). |
*{{Drum}} {{EquipmentLink|Drum Canister (Transport Use)|text=Drums}} works as an inferior substitute (+2 per drum). | *{{Drum}} {{EquipmentLink|Drum Canister (Transport Use)|text=Drums}} works as an inferior substitute (+2 per drum). | ||
*Using the aforementioned equipment in the fleet is necessary to outweigh the resource cost of the fleet. | *Using the aforementioned equipment in the fleet is necessary to outweigh the resource cost of the fleet. | ||
Revision as of 14:21, 9 February 2025
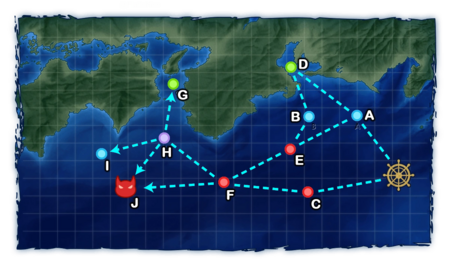
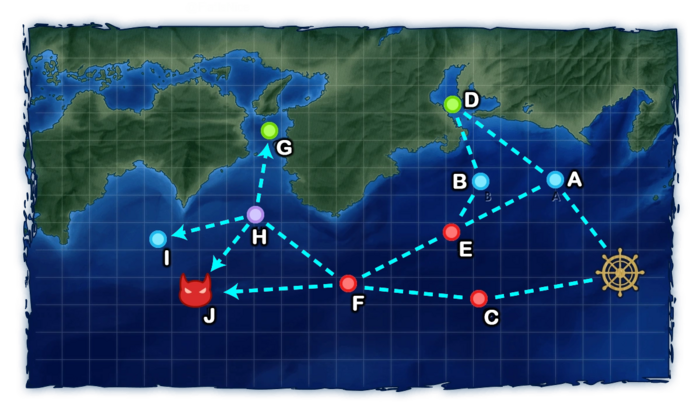
World 1-3: 製油所地帯沿岸 - Coastal Refinery Zone
| Strategy Name | 海上護衛作戦 Maritime Escort Operation |
|---|---|
| Difficulty | ☆ ☆ |
| Item | |
| Strategy Content | 製油所地帯沿岸部の海上輸送ラインを防衛せよ! Protect the supply lines around our coastal refineries! |
| 1-3 Unlocking & Progression | ||||
|---|---|---|---|---|
| Unlock conditions | 1-3 is unlocked after clearing 1-2 | |||
| Clear conditions | To clear the map: the boss's flagship must be sunk once | |||
Stage Guide
| 1-3 Branching Rules |
|---|
Tips
This map is the first one to have an enemy battleship, which will enforce a second shelling phase during the day battle.
- It is important to bring strong enough ships to defeat this BB flagship.
This map is also great for farming fuel.
Recommended Fleet
| ExpandStandard Fleets |
|---|
Resource Nodes
D G are "Normal Resource Nodes" rewarding both Fuel ![]() .
.
- See here for more details.
Fuel Farming
Node D is a good spot to farm fuel ![]() , the base gain being 10/15/20.
, the base gain being 10/15/20.
- Recommended fleets


Enemy CompositionsCollapse
1-3 A
| # | Empty Node | ||
|---|---|---|---|
| A | 気のせいだった。/敵影を見ず。/穏やかな海です。/穏やかな海峡です。/警戒が必要です。/静かな海です。 Must be my imagination./No enemy spotted./Calm seas./Calm straits./Be alert./Peaceful seas. | ||
| # | Empty Node | ||
1-3 B
| # | Empty Node | ||
|---|---|---|---|
| B | 気のせいだった。/敵影を見ず。/穏やかな海です。/穏やかな海峡です。/警戒が必要です。/静かな海です。 Must be my imagination./No enemy spotted./Calm seas./Calm straits./Be alert./Peaceful seas. | ||
| # | Empty Node | ||
1-3 C: 敵前衛艦隊 (PoiDB)
| # | Enemy Form. |
Base EXP | Normal Battle Node | AD/AP AS/AS+ |
|---|---|---|---|---|
| C | Line Ahead | 50 | 0/0 0/0 | |
| Line Ahead | 60 | 0/0 0/0 | ||
| Line Ahead | 70 | 0/0 0/0 | ||
| Line Ahead | 70 | 0/0 0/0 | ||
| Line Ahead | 80 | 0/0 0/0 | ||
| Line Ahead | 90 | 0/0 0/0 | ||
| # | Enemy Form. |
Base EXP | Normal Battle Node | AD/AP AS/AS+ |
1-3 D
| # | Resource Node | ||
|---|---|---|---|
| D | Gained 10~20 | ||
| # | Resource Node | ||
1-3 E: 敵前衛艦隊 (PoiDB)
| # | Enemy Form. |
Base EXP | Normal Battle Node | AD/AP AS/AS+ |
|---|---|---|---|---|
| E | Line Ahead | 50 | 0/0 0/0 | |
| Line Ahead | 60 | 0/0 0/0 | ||
| Line Ahead | 70 | 0/0 0/0 | ||
| Line Ahead | 70 | 0/0 0/0 | ||
| Line Ahead | 80 | 0/0 0/0 | ||
| Line Ahead | 90 | 0/0 0/0 | ||
| # | Enemy Form. |
Base EXP | Normal Battle Node | AD/AP AS/AS+ |
1-3 F: 敵支援艦隊 (PoiDB)
| # | Enemy Form. |
Base EXP | Normal Battle Node | AD/AP AS/AS+ |
|---|---|---|---|---|
| F | Line Ahead Double Line |
65 | 0/0 0/0 | |
| Line Ahead Double Line |
80 | 0/0 0/0 | ||
| Line Ahead Double Line |
85 | 0/0 0/0 | ||
| Line Ahead Double Line |
90 | 0/0 0/0 | ||
| # | Enemy Form. |
Base EXP | Normal Battle Node | AD/AP AS/AS+ |
1-3 G
| # | Resource Node | ||
|---|---|---|---|
| G | Gained 10~30 | ||
| # | Resource Node | ||
1-3 H
| # | Maelstrom Node | ||
|---|---|---|---|
| H | Lost Strong | ||
| # | Maelstrom Node | ||
1-3 I
| # | Empty Node | ||
|---|---|---|---|
| I | 気のせいだった。/敵影を見ず。/穏やかな海です。/穏やかな海峡です。/警戒が必要です。/静かな海です。 Must be my imagination./No enemy spotted./Calm seas./Calm straits./Be alert./Peaceful seas. | ||
| # | Empty Node | ||
1-3 J: 敵主力艦隊 (PoiDB)
| # | Enemy Form. |
Base EXP | Boss Battle Node | AD/AP AS/AS+ |
|---|---|---|---|---|
| J | Line Ahead Double Line |
110 | 0/0 0/0 | |
| Line Ahead Double Line |
120 | 0/0 0/0 | ||
| Line Ahead Double Line |
130 | 0/0 0/0 | ||
| # | Enemy Form. |
Base EXP | Boss Battle Node | AD/AP AS/AS+ |
Ship Drops
This map currently has "limited-time" drops that don't appear in the table below, see Drop List for more info.
☒ All drops (disabled, only rare drops)
| ExpandShip drops |
|---|
| ||