- Welcome to the Kancolle Wiki!
- If you have any questions regarding site content, account registration, etc., please visit the KanColle Wiki Discord
Difference between revisions of "Early Spring 2023 Event/E-3"
(Created page with "{{:{{ROOTPAGENAME}}/Hub}} {{EventInfoBox |title_en= ?? |title_jp= ?? |tag= [[File:{{ROOTPAGENAME}} Tag 1.png]] |header_thumb=[[File:{{ROOTPAGENAME}} E-3 Boss Thumb.png]] |tag_...") |
(→Debuff) |
||
| (71 intermediate revisions by 11 users not shown) | |||
| Line 1: | Line 1: | ||
{{:{{ROOTPAGENAME}}/Hub}} | {{:{{ROOTPAGENAME}}/Hub}} | ||
{{EventInfoBox | {{EventInfoBox | ||
| − | |title_en= | + | |title_en= Destroy the Enemy Air Raid Force! |
| − | |title_jp= | + | |title_jp= 敵空襲部隊を討て! |
| − | |tag= [[File:{{ROOTPAGENAME}} Tag | + | |tag= [[File:{{ROOTPAGENAME}} Tag 2.png]] |
| + | |tag2= [[File:{{ROOTPAGENAME}} Tag 4.png]] | ||
| + | |tag3= [[File:{{ROOTPAGENAME}} Tag 5.png]] | ||
|header_thumb=[[File:{{ROOTPAGENAME}} E-3 Boss Thumb.png]] | |header_thumb=[[File:{{ROOTPAGENAME}} E-3 Boss Thumb.png]] | ||
| − | |tag_text= {{Shiplock|{{ROOTPAGENAME}} Tag | + | |tag_text= '''{{Shiplock|{{ROOTPAGENAME}} Tag 2}} 2nd Torpedo Squadron<br>{{Shiplock|{{ROOTPAGENAME}} Tag 4}} Combined Fleet<br>{{Shiplock|{{ROOTPAGENAME}} Tag 5}}Carrier Task Force |
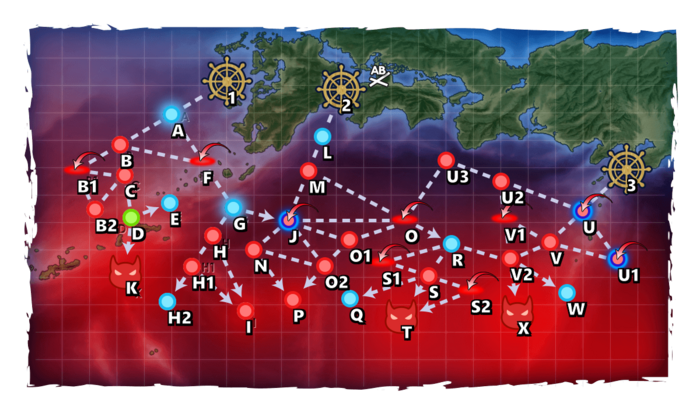
|map_1=[[File:{{ROOTPAGENAME}} E-3 Map.png|450px]] | |map_1=[[File:{{ROOTPAGENAME}} E-3 Map.png|450px]] | ||
|map_1_text=Map | |map_1_text=Map | ||
|map_2=[[File:{{ROOTPAGENAME}} E-3 Map Phase 1.png|450px]] | |map_2=[[File:{{ROOTPAGENAME}} E-3 Map Phase 1.png|450px]] | ||
|map_2_text=Phase 1 | |map_2_text=Phase 1 | ||
| − | |map_3=[[File:{{ROOTPAGENAME}} E-3 Map Phase | + | |map_3=[[File:{{ROOTPAGENAME}} E-3 Map Phase 1.3.png|450px]] |
| − | |map_3_text=Phase | + | |map_3_text=Phase 1.3 & 1.7 |
| − | |map_4=[[File:{{ROOTPAGENAME}} E-3 Map.png|450px]] | + | |map_4=[[File:{{ROOTPAGENAME}} E-3 Map Phase 2.png|450px]] |
| − | |map_4_text=Phase 3 | + | |map_4_text=Phase 2 |
| − | |boss_hard= | + | |map_5=[[File:{{ROOTPAGENAME}} E-3 Map.png|450px]] |
| − | |boss_medium= | + | |map_5_text=Phase 3 |
| − | |boss_easy= | + | |map_6=[[File:{{ROOTPAGENAME}} E-3 LBAS Range.png|450px]] |
| − | |boss_casual= | + | |map_6_text=LBAS 1 |
| + | |map_7=[[File:{{ROOTPAGENAME}} E-3 LBAS Range 2.png|450px]] | ||
| + | |map_7_text=LBAS 2 | ||
| + | |boss_hard= 800 TP + 3600 HP + 6180 HP | ||
| + | |boss_medium= 600 TP + 3000HP + 5580 HP | ||
| + | |boss_easy= 450TP + 3000HP + 4980 HP | ||
| + | |boss_casual= 400TP + 2950HP + 4980 HP | ||
|reward_all= | |reward_all= | ||
| − | |phase_1_boss= | + | |phase_1_boss= {{EnemyLink|Standard Carrier Wo-Class Kai Flagship|text =Standard Carrier Wo-Class Kai B Flagship}} |
| − | |phase_2_boss= | + | |phase_2_boss= {{EnemyLink|Aircraft Carrier Princess B}} |
| − | |phase_3_boss= | + | |phase_3_boss= {{EnemyLink|Remodeled Wartime Cargo Princess}} |
|phase_4_boss= | |phase_4_boss= | ||
|phase_5_boss= | |phase_5_boss= | ||
| Line 34: | Line 42: | ||
==Branching Table== | ==Branching Table== | ||
{{MapBranchingTable | {{MapBranchingTable | ||
| − | |title = E-3 Branching Rules | + | |title = E-3 Branching Rules (Start Points) |
| − | |id = ??? | + | |id = 56-3a |
| − | | | + | |0 -> 1 = * Single Fleet/Striking Force Fleet |
| − | |?? -> | + | * 2nd Torpedo Squadron tag [[File:{{ROOTPAGENAME}} Tag 2.png|30px]] only ('''Normal / Hard''') |
| + | |0 -> 2 = * Phase 2: Combined Fleet | ||
| + | * Phase 3: STF | ||
| + | * Combined Fleet tag [[File:{{ROOTPAGENAME}} Tag 4.png|30px]] only ('''Normal / Hard''') | ||
| + | |0 -> 3 = * Phase 3: CTF or TCF | ||
| + | * Carrier Task Force tag [[File:{{ROOTPAGENAME}} Tag 5.png|30px]] only ('''Normal / Hard''') | ||
| + | }} | ||
| + | |||
| + | {{MapBranchingTable | ||
| + | |title = E-3 Branching Rules (Single / Striking Force Fleet) | ||
| + | |id = 56-3b | ||
| + | |order = A,B,B1,D,G,H,H1,J,N,O,O2,R,S,S1,S2,T | ||
| + | |A/empty -> B,F/pink = Active Branching | ||
| + | |B -> B1 = Does not meet the requirements to go to C or F | ||
| + | |B -> C = * Meet '''ALL''' of the following requirements: | ||
| + | ** Single Fleet | ||
| + | ** Fleet is at least Fast+ | ||
| + | ** Fleet does not contain (F)BB(V), CVL, or SS(V) | ||
| + | ** ??? | ||
| + | |B -> F/pink = * Meet '''ANY''' of the following requirements: | ||
| + | ** Striking Force Fleet | ||
| + | ** Fleet contains CV(B) | ||
| + | |B1/pink -> B2 = Does not meet the requirements to go to C | ||
| + | |B1/pink -> C = * Meet '''ALL''' of the following requirements: | ||
| + | ** Amount of CL + DD ≥ 5 | ||
| + | ** If fleet contains (F)BB(V), amount of CL ≥ 1 | ||
| + | ** If slow: | ||
| + | *** Amount of (F)BB(V) = 0 | ||
| + | *** Amount of DD ≥ 5 | ||
| + | |D/resource -> E/empty = * Fail the LoS check | ||
| + | |D/resource -> K = * Pass the LoS check (Cn4=74~76 '''Hard''') | ||
| + | |G/empty -> H,J = Active Branching | ||
| + | |H -> H1 = Does not meet the requirements to go to I | ||
| + | |H -> I = * Meet '''ALL''' of the following requirements: | ||
| + | ** Fast Fleet | ||
| + | ** Amount of (F)BB(V) + CV(B) ≤ 1 | ||
| + | ** Amount of CL ≥ 1 | ||
| + | ** Amount of DD ≥ 4 | ||
| + | ** Pass the LoS check (Cn4=80~85 '''Hard''') | ||
| + | |H1 -> H2/empty = * Fail the LoS check | ||
| + | |H1 -> I = * Pass the LoS check | ||
| + | |J/red/darkorange -> N = * Does not meet the requirements to go to O or O2 | ||
| + | |J/red/darkorange -> O = * Meet '''ALL''' of the following requirements: | ||
| + | ** Path to O is unlocked | ||
| + | ** Amount of CV(B) ≥ 1 | ||
| + | ** Amount of DD ≤ 3 | ||
| + | |J/red/darkorange -> O1 = No path | ||
| + | |J/red/darkorange -> O2 = * Meet '''ALL''' of the following requirements: | ||
| + | ** Fast fleet | ||
| + | ** Amount of (F)BB(V) + CV(B) + CA(V) ≥ 2 | ||
| + | ** Amount of CL ≥ 1 | ||
| + | ** Amount of DD ≥ 4 | ||
| + | |N -> O2 = Does not meet the requirements to go to P | ||
| + | |N -> P = * Meet '''ALL''' of the following requirements: | ||
| + | ** Fast Fleet | ||
| + | ** Amount of CL ≤ 1 | ||
| + | ** Amount of CV(B) = 0 | ||
| + | *** If CL = 1, Amount of CV(B) ≤ 1 | ||
| + | ** Amount of DD ≥ 4 | ||
| + | ** Pass the LoS check (Cn4=87~90 '''Hard''') | ||
| + | |O2 -> Q/empty = * Fail the LoS check | ||
| + | |O2 -> P = * Pass the LoS check | ||
| + | |R/empty -> S1/pink = Fixed Routing | ||
| + | |S -> S2/pink = * Meet '''ALL''' of the following requirements: | ||
| + | ** Pass the LoS check | ||
| + | ** Does not meet the requirements to go to T | ||
| + | ** ??? | ||
| + | |S -> T = * Meet '''ALL''' of the following requirements: | ||
| + | ** Amount of (F)BB(V) + CV(B/L) ≤ 6(?) | ||
| + | *** If slow, amount of (F)BB(V) + CV(B/L) ≤ 5 | ||
| + | ** Pass the LoS check | ||
| + | ** ??? | ||
| + | |S -> Q/empty = * Fail the LoS check | ||
| + | }} | ||
| + | {{MapBranchingTable | ||
| + | |title = E-3 Branching Rules (Combined Fleet) | ||
| + | |id = 56-3c | ||
| + | |order = J,M,N,O1,O2,R,S,U,U2,V,V1,V2 | ||
| + | |J/red/darkorange -> N = * Does not meet the requirements to go to O or O1 | ||
| + | |J/red/darkorange -> O1 = * Route to O is locked: | ||
| + | ** Meet '''ANY''' of the following requirements: | ||
| + | *** Amount of (F)BB(V) ≥ 3 | ||
| + | *** Amount of CV(B) ≥ 2 | ||
| + | **** If Slow, amount of CV(B) ≥ 1 | ||
| + | **** If CL ≥ 2, amount of CV(B) ≥ 1 | ||
| + | * Route to O is unlocked: | ||
| + | ** Does not meet the requirements to go to O | ||
| + | ** Meet '''ANY''' of the following requirements: | ||
| + | *** Amount of (F)BB(V) ≥ 3 | ||
| + | *** Amount of CV(B) ≥ 1 | ||
| + | |J/red/darkorange -> O/pink = * Meet '''ALL''' of the following requirements: | ||
| + | ** Route to O is unlocked | ||
| + | ** Amount of CV(B) ≥ 1 | ||
| + | ** Amount of DD ≥ 4 | ||
| + | |M -> J/red/darkorange = Does not meet the requirements to go to O | ||
| + | |M -> O/pink = * Meet '''ALL''' of the following requirements: | ||
| + | ** Fast Fleet | ||
| + | ** Amount of CV(B) ≥ 1 | ||
| + | ** Amount of CL ≥ 2 | ||
| + | ** Amount of DD ≥ 5 | ||
| + | |N -> O2 = * Fixed Routing ? | ||
| + | |O1 -> O/pink = * Amount of CV(B) ≥ 1 | ||
| + | |O1 -> O2 = Does not meet the requirements to go to O | ||
| + | |O2 -> Q/empty = * Fail the LoS check | ||
| + | |O2 -> P = * Pass the LoS check | ||
| + | |R/empty -> S1/pink = Does not meet the requirements to go to S or V2 | ||
| + | |R/empty -> S = * Meet '''ALL''' of the following requirements: | ||
| + | ** Does not meet requirements to go to V2 | ||
| + | ** Amount of (F)BB(V) + CV(B/L) ≤ 4 | ||
| + | ** Amount of DD ≥ 4 | ||
| + | |R -> V2 = * Node V2 is unlocked | ||
| + | * Start from Point 3 | ||
| + | |S -> S2 = * Pass the LoS check | ||
| + | * Does not meet the requirements to go to T | ||
| + | |S -> T = Meet '''ALL''' of the following requirements: | ||
| + | * Amount of (F)BB(V) + CV(B/L) ≤ 6(?) | ||
| + | ** If slow, amount of (F)BB(V) + CV(B/L) ≤ 5 | ||
| + | * Pass the LoS check | ||
| + | |S -> Q = * Fail the LoS check | ||
| + | |U/red/darkorange -> U1/red/darkorange = * Does not meet the requirements to go to U2 or V | ||
| + | |U/red/darkorange -> U2 = * Meet '''ALL''' of the following requirements: | ||
| + | ** Amount of CV(B/L) ≤ 3 | ||
| + | ** Amount of CL ≥ 2 | ||
| + | ** Amount of DD ≥ 4 | ||
| + | |U/red/darkorange -> V = * Meet '''ALL''' of the following requirements: | ||
| + | ** Amount of LHA = 0 | ||
| + | ** Amount of (F)BB(V) ≤ 2? | ||
| + | ** Amount of CV(B/L) ≤ 3 | ||
| + | ** Amount of CL ≤ 1 or amount of DD ≤ 3 | ||
| + | ** If fleet contains SS(V), amount of AS ≥ 1 | ||
| + | |U2 -> U3 = ??? | ||
| + | |U2 -> V1/pink = ??? | ||
| + | |V -> V2 = * Meet '''ALL''' of the following requirements: | ||
| + | ** Amount of (F)BB(V) + CV(B) ≤ 5 | ||
| + | *** If amount of CL ≤ 1, amount of (F)BB(V) + CV(B) ≤ 4 | ||
| + | ** Amount of CV(B/L) ≤ 3 | ||
| + | |V -> V1/pink = Does not meet the requirements to go to V2 | ||
| + | |V1/pink -> U2 = ??? | ||
| + | |V1/pink -> V2 = ??? | ||
| + | |V2 -> W/empty = * Fail the LoS check | ||
| + | |V2 -> X = * Pass the LoS check | ||
}} | }} | ||
| + | |||
Branching compositions were reported over the course of the event. ([https://bbs.nga.cn/read.php?pid=514129578 NGA] and [https://tsunkit.net/nav/#/ KCNav]) | Branching compositions were reported over the course of the event. ([https://bbs.nga.cn/read.php?pid=514129578 NGA] and [https://tsunkit.net/nav/#/ KCNav]) | ||
| − | ==Ship | + | ==Historical Bonuses== |
| − | {{/ | + | {{/Historical Bonuses}} |
| + | |||
| + | ==Map Overview== | ||
| + | E-3 consists of 3 main phases and requires the use of Single Fleets, Striking Forces, and Combined Fleets. | ||
| + | |||
| + | '''{{color|red|Ship locks affect routing on ALL difficulties}}''', see ''[[#Branching Table|here]]''. | ||
| + | * This map uses 3 locks: | ||
| + | ** [[File:{{ROOTPAGENAME}} Tag 2.png]] '''2nd Torpedo Squadron''' (from E-2), 1st starting point, | ||
| + | ** [[File:{{ROOTPAGENAME}} Tag 4.png]] '''Combined Fleet''', 2nd starting point, in theory optional, but highly recommended, | ||
| + | ** [[File:{{ROOTPAGENAME}} Tag 5.png]] '''Carrier Task Force''', 3rd starting point. | ||
| + | * 2 [[LBAS]] are available to sortie into this map. | ||
| + | ** After phase 1.7, the LBAS is relocated closer to the final boss. | ||
| + | * '''[[Early Spring 2023 Event#New Mechanics|"Airstrike Supported Battle" nodes]]''' are present on {{MapRoute|J|darkorange|U|darkorange|U1|darkorange}} | ||
| + | |||
| + | ==Phase 1 - TP== | ||
| + | Phase 1 is a '''"[[Transport Operation]]"''': | ||
| + | |||
| + | * Single Fleet: '''0-1CAV/CL(T)/AV, 1CL, 4-5DD''' (Fast) [[File:{{ROOTPAGENAME}} Tag 2.png|30px]] | ||
| + | ** Note that this is a single fleet of 6 ships, not a Strike Force. | ||
| + | * Route: {{MapRoute|1||A|blue|B|red|B1|pink|C|red|D|green|K|red}} | ||
| + | **LoS check: 55 Cn3 ? | ||
| + | **AP/AS: '''332/746''' (Hard) | ||
| + | **LBAS range: '''7''', then '''9''' after phase 1.7 | ||
| + | **Using a '''Fast+''' fleet will skip node {{MapRoute|B1|pink}}. | ||
| + | |||
| + | ==Phase 1.3 - Gimmick 1== | ||
| + | The following steps have to be performed to unlock the 2nd start point: | ||
| + | {|class="wikitable" | ||
| + | ! !! I!! J | ||
| + | |- | ||
| + | |Hard || S x2|| A+ x2 | ||
| + | |- | ||
| + | |Medium|| S x2|| - | ||
| + | |- | ||
| + | |Easy || A+? x2|| - | ||
| + | |- | ||
| + | |Casual|| A+? x2|| - | ||
| + | |} | ||
| + | |||
| + | <tabber> | ||
| + | |-|Node J= | ||
| + | * Striking Force: '''"any fleet"''' [[File:{{ROOTPAGENAME}} Tag 2.png|30px]] | ||
| + | * Route: {{MapRoute|1||A|blue|F|pink|G|blue|J|darkorange}} | ||
| + | ** The route only takes "Active Branching" nodes, and so any fleet can route to {{MapRoute|J|darkorange}} | ||
| + | *** It is recommended to only used already locked ships. | ||
| + | ** [[ASW]] Is needed for node {{MapRoute|J|darkorange}}. | ||
| + | ** Bringing an [[AACI]] capable ship is recommended to pass through the air node. | ||
| + | **AP/AS: '''85/189''' (Hard) | ||
| + | **LBAS range: '''3''', then '''6''' after phase 1.7 | ||
| + | |||
| + | |-|Node I= | ||
| + | * Striking Force: '''"0-1FBB/CV(L), 0-1CAV, 1-2CL, 4-5DD (Fast)"''' [[File:{{ROOTPAGENAME}} Tag 2.png|30px]] | ||
| + | * Route: {{MapRoute|1||A|blue|F|pink|G|blue|H|red|I|red}} | ||
| + | ** Bringing an [[AACI]] capable ship is recommended to pass through the air node. | ||
| + | **LoS check: 80-90 Cn4 (Hard) | ||
| + | **AP/AS: '''349/785''' (Hard) | ||
| + | **LBAS range: '''6''', then '''8''' after phase 1.7 | ||
| + | </tabber> | ||
| + | |||
| + | ==Phase 1.7 - Gimmick 2== | ||
| + | The following steps have to be performed to unlock the 2nd boss: | ||
| + | {|class="wikitable" | ||
| + | ! !! P !! R | ||
| + | |- | ||
| + | |Hard || S x3|| Reach | ||
| + | |- | ||
| + | |Medium|| A+? x3|| Reach | ||
| + | |- | ||
| + | |Easy || A+ x2|| Reach | ||
| + | |- | ||
| + | |Casual|| A+? || Reach | ||
| + | |} | ||
| + | |||
| + | <tabber> | ||
| + | |||
| + | |-|Node P - SF= | ||
| + | * Striking Force: '''"0-1CVL, 0-1CAV/FBB, 1-2CL(T), 4-5DD" (Fast)''' [[File:{{ROOTPAGENAME}} Tag 2.png|30px]] | ||
| + | * Route: {{MapRoute|1||A|blue|F|pink|G|blue|J|darkorange|N|red|P|red}} | ||
| + | **Striking Force is recommended over combined fleets alternatives for this node. | ||
| + | |||
| + | |-|Node P - CTF= | ||
| + | * CTF: '''"1-2FBB, 2CV(L), 1-2CA(V), 0-1CL, 0-AV + 1CL, 0-2CLT, 3-5DD"''' [[File:{{ROOTPAGENAME}} Tag 4.png|30px]] | ||
| + | * Route: {{MapRoute|2||L|blue|M|red|J|darkorange|N|red|O2|red|P|red}} | ||
| + | |||
| + | |-|Node P - STF= | ||
| + | * STF: '''"2FBB, 1CV(L), 1-2CA(V), 0-1CL + 1CL, 0-2CLT, 3-5DD"''' [[File:{{ROOTPAGENAME}} Tag 4.png|30px]] | ||
| + | * Route: {{MapRoute|2||L|blue|M|red|J|darkorange|N|red|O2|red|P|red}} | ||
| + | * Main Fleet should be 5 ships only if using a CV in fleet. | ||
| + | ** Otherwise, use 2 CVL instead. | ||
| + | |||
| + | |-|Node R= | ||
| + | *Use [[#Phase 2]]'s fleet | ||
| + | ** Bringing an [[AACI]] capable ship is recommended to pass through the air node. | ||
| + | </tabber> | ||
| + | |||
| + | ;Node P | ||
| + | *AP/AS: '''349/785''' (Hard) | ||
| + | *LBAS range: '''5''', then '''7''' after phase 1.7 | ||
| + | *Bringing an [[AACI]] capable ship is recommended to reach and defeat the node. | ||
| + | * If opting for the Combined Fleet option, the fleet must have '''EITHER''': | ||
| + | **'''1CV Max, | ||
| + | **'''No CV, 2(F)BB(V) Max, 2CA(V) Max. | ||
| + | |||
| + | ==Phase 2== | ||
| + | <tabber> | ||
| + | |-|CTF= | ||
| + | * CTF: '''0-2FBB, 2-4CV, 0-1AV/CA(V)/DD, 1CL + 1CL, 0-1CLT/SS(V), 4-5DD''' (Fast) [[File:{{ROOTPAGENAME}} Tag 4.png|30px]] | ||
| + | * Route: {{MapRoute|2||L|blue|M|red|O|pink|R|blue|S|red|T|red}} | ||
| + | ** A total of 5 DD is required for routing. | ||
| + | |||
| + | |-|STF= | ||
| + | * STF: '''3(F)BB, 1CV, 0-1CAV/DD, 1CL + 1CL, 4-5DD, 0-1SS(V)''' (Fast) [[File:{{ROOTPAGENAME}} Tag 4.png|30px]] | ||
| + | * Route: {{MapRoute|2||L|blue|M|red|O|pink|R|blue|S|red|T|red}} | ||
| + | ** A total of 5 DD is required for routing. | ||
| + | |||
| + | |-|Striking Force= | ||
| + | * Striking Force: '''1FBB, 1CV, 1CL, 3DD, 1SS''' [[File:{{ROOTPAGENAME}} Tag 2.png|30px]] | ||
| + | * Route: {{MapRoute|1||A|blue|F|ping|G|blue|J|darkorange|O|pink|R|blue|S|red|T|red}} | ||
| + | ** A weak fleet skipping the [[File:{{ROOTPAGENAME}} Tag 4.png|30px]] lock entirely. | ||
| + | ** Using {{Surface Radar}} [[Surface Radar]]s affect routing: | ||
| + | *** Using zero Surface Radar will guaranty routing to {{MapRoute|O|pink}}, and each additional one increases the chances of off-routing to {{MapRoute|N|red}}. | ||
| + | ** This comp is not recommended. | ||
| + | |||
| + | </tabber> | ||
| + | |||
| + | *LoS check: ?? Cn? (Hard) | ||
| + | *AP/AS: '''371/833 | ||
| + | *LBAS range: '''5 | ||
| + | * Bringing an [[AACI]] capable ship is recommended to pass through the air node and against the boss. | ||
| + | * Bringing an [[OASW]] capable ship is recommended to pass through the submarine node. | ||
| + | * The {{Ship/Link|I-201|I-203|text=''I-201''-class|link_category=I-201 Class}} have outstanding historical bonuses in this situation. | ||
| + | |||
| + | ==Phase 3== | ||
| + | <tabber> | ||
| + | |-|South= | ||
| + | * CTF: '''2(F)BB, 2-3CV, 0-1CVL, 1CL + 0-1CA, 1CL, 1-2CLT, 2-3DD''' [[File:{{ROOTPAGENAME}} Tag 5.png|30px]] | ||
| + | * Route: {{MapRoute|3||U|darkorange|V|red|V2|red|X|red}} | ||
| + | **Most direct route to the boss. | ||
| + | |||
| + | |-|North= | ||
| + | * CTF: '''2(F)BB, 2-3CV, 0-1CVL, 1CL + 1CL, 1-2CLT, 3-4DD''' [[File:{{ROOTPAGENAME}} Tag 5.png|30px]] | ||
| + | * Route: {{MapRoute|3||U|darkorange|U2|red|U3|red|O|pink|R|blue|V2|red|X|red}} | ||
| + | **A route skipping node {{MapRoute|V|red}}. | ||
| + | **Pass through 2 weak submarine nodes on {{MapRoute|U2|red|U3|red}}. | ||
| + | **Even so the route is longer, the fleet only faces minor resource penalty compared to the South route, as it passes through "cheaper" nodes. | ||
| + | </tabber> | ||
| + | |||
| + | *LoS check: ?? Cn? (Hard) | ||
| + | *AP/AS: '''516/1160''' (Hard) (''numbers may be different due to the presence of unknown elements'') | ||
| + | *LBAS range: '''4 | ||
| + | |||
| + | * Bringing an [[AACI]] capable ship is recommended against the boss. | ||
| + | * Bringing an [[OASW]] capable ship is recommended to reach the boss, especially for the North route. | ||
| + | * [[Special Attacks#Big Seven Touch|''Nagato''-class Touch]] is recommended due to her historical bonus on this node. | ||
| + | * As achieving AS on hard last dance might not be achievable, aiming for AD instead to retain night contact might be preferred. | ||
| + | * Using multiple [[Jets]] can be critical, helping killing weaker enemies during the [[Jet Assault]]. | ||
| + | |||
| + | ==Debuff== | ||
| + | Once LD has been reached, the following steps have to be performed to debuff the boss. | ||
| + | |||
| + | {{color|red|'''Dropping difficulty will reset the debuff state.'''}} | ||
| + | |||
| + | {|class="wikitable" | ||
| + | ! !! K !! I!! P!! T !! S2!! V1!! LBAS | ||
| + | |- | ||
| + | |Hard || S || S|| S|| A+|| AS|| AS|| AS x2 | ||
| + | |- | ||
| + | |Medium|| A+|| -|| -|| A+|| AS|| AS|| AS | ||
| + | |- | ||
| + | |Easy || A+|| -|| -|| A+|| - || AS|| AS | ||
| + | |- | ||
| + | |Casual|| ? || -|| -|| ? || - || ? || ? | ||
| + | |} | ||
| + | |||
| + | <tabber> | ||
| + | |-|Node K= | ||
| + | *Use [[#Phase 1 - TP]]'s fleet | ||
| + | *'''Single fleet''' and not Striking Force. | ||
| + | |||
| + | |-|Node I= | ||
| + | *Use [[#Phase 1.3 - Gimmick 1]]'s fleet | ||
| + | |||
| + | |-|Node P= | ||
| + | *Use [[#Phase 1.7 - Gimmick 2]]'s fleet | ||
| + | |||
| + | |-|Node T= | ||
| + | * STF using [[File:{{ROOTPAGENAME}} Tag 4.png|30px]] ships | ||
| + | |||
| + | '''OR''' | ||
| + | |||
| + | * Striking Force: '''2-3CV, 1CVL, 2-3(F)BB(V), 1DD''' (Slow) [[File:{{ROOTPAGENAME}} Tag 2.png|30px]] | ||
| + | * Route: {{MapRoute|1||A|blue|F|pink|G|blue|J|darkorange|O|pink|R|blue|S1|pink|S|red|S2|pink|T|red}} | ||
| + | |||
| + | * Notes: | ||
| + | ** This fleet is capable of achieving both the T and S2 Node requirement in a single sortie | ||
| + | ** Splitting LBAS between S2 and T is recommended | ||
| + | |||
| + | |-|Node S2= | ||
| + | * STF: '''4(F)BB(V), 1CV(B), 1CA(V) + 1FBB, 1CL, 4DD''' (Slow) [[File:{{ROOTPAGENAME}} Tag 4.png|30px]] | ||
| + | * Route: {{MapRoute|2||L|blue|M|red|J|orange|O|pink|R|blue|S1|pink|S|red|S2|pink|T|red}} | ||
| + | |||
| + | '''OR''' | ||
| + | |||
| + | * Striking Force: '''2-3CV, 1CVL, 2-3(F)BB(V), 1DD''' (Slow) [[File:{{ROOTPAGENAME}} Tag 2.png|30px]] | ||
| + | * Route: {{MapRoute|1||A|blue|F|pink|G|blue|J|darkorange|O|pink|R|blue|S1|pink|S|red|S2|pink|T|red}} | ||
| + | |||
| + | * Notes: | ||
| + | ** This fleet is capable of achieving both the T and S2 Node requirement in a single sortie | ||
| + | ** Splitting LBAS between S2 and T is recommended | ||
| + | |||
| + | {|class="wikitable" | ||
| + | ! !! AP!! AS | ||
| + | |- | ||
| + | |Hard || 349|| 785 | ||
| + | |- | ||
| + | |Medium|| ?|| ? | ||
| + | |} | ||
| + | |||
| + | |-|Node V1= | ||
| + | *Use [[#Phase 3]]'s fleet with 1CL max. | ||
| + | **An AV can replace one of the CL. | ||
| + | |||
| + | {|class="wikitable" | ||
| + | ! !! AP!! AS | ||
| + | |- | ||
| + | |Hard || 531|| 1193 | ||
| + | |- | ||
| + | |Medium|| 469|| 1055 | ||
| + | |- | ||
| + | |Easy || 443|| 995 | ||
| + | |- | ||
| + | |Casual|| ?|| ? | ||
| + | |} | ||
| + | |||
| + | |-|LBAS AS= | ||
| + | *This step can be accomplished by sending 1 SS(V) until the Air Raid is triggered. | ||
| + | * Multiple compositions can be rolled, which is why 2 Airpower values are given. | ||
| + | {|class="wikitable" | ||
| + | ! !! AS | ||
| + | |- | ||
| + | |Hard || 783 or 1094 | ||
| + | |- | ||
| + | |Medium|| 675 or 966 | ||
| + | |- | ||
| + | |Easy || 656 or 908 | ||
| + | |- | ||
| + | |Casual|| 632 or 704 | ||
| + | |} | ||
| + | </tabber> | ||
| + | |||
| − | = | + | Once Debuff is complete the CG will change to the following: |
| − | + | {|class="wikitable" | |
| + | ![[Remodeled Wartime Cargo Princess]] | ||
| + | |- | ||
| + | |<gallery> | ||
| + | Enemy Full Remodeled Wartime Cargo Princess.png|Regular | ||
| + | Enemy Full Remodeled Wartime Cargo Princess Damaged.png|Last Dance | ||
| + | Enemy Full Remodeled Wartime Cargo Princess Damaged Debuffed.png|Last Dance Debuffed | ||
| + | Enemy Full Remodeled Wartime Cargo Princess Debuffed.png|Post Clear | ||
| + | </gallery> | ||
| + | |} | ||
==Enemy Compositions== | ==Enemy Compositions== | ||
Latest revision as of 17:29, 22 April 2023
 
| ||||||||
|---|---|---|---|---|---|---|---|---|
|
Time remaining until Event ends [1]:
| ||||||||
| ||||||||
敵空襲部隊を討て!
![]()
![]()


| Information | ||||
|---|---|---|---|---|
| Event Tag | ||||
| Boss Gauges | Hard (甲): 800 TP + 3600 HP + 6180 HP | |||
| Medium (乙): 600 TP + 3000HP + 5580 HP | ||||
| Easy (丙): 450TP + 3000HP + 4980 HP | ||||
| Casual (丁): 400TP + 2950HP + 4980 HP | ||||
| Map Bosses | Standard Carrier Wo-Class Kai B Flagship
| |||
Aircraft Carrier Princess B
| ||||
Remodeled Wartime Cargo Princess
| ||||
| Rewards[edit] | ||||
|---|---|---|---|---|
| Ship |  Kumano Maru | |||
| Choice | 丁 Casual |
丙 Easy |
乙 Medium |
甲 Hard |
Food Supply Ship Mamiya |
10 | |||
| OR | ||||
 Kyoufuu Kai Ni |
1 | |||
| THEN | ||||
Remodel Blueprint |
1 | 1 | ||
| OR | ||||
Prototype Flight Deck Catapult |
1 | 1 | ||
| THEN | ||||
 Toku Daihatsu Landing Craft + Type 1 Gun Tank |
1 | |||
| OR | ||||
 Ryuusei Kai (Skilled) |
2 | |||
| THEN | ||||
 Type 3 Command Liaison Aircraft Kai |
1 (★3) | 1 (★5) | 1 (★7) | |
| OR | ||||
 Skilled Deck Personnel |
1 | 1 | 1 | |
| THEN | ||||
Improvement Material |
5 | |||
| OR | ||||
 Kyoufuu Kai |
1 | |||
| Reward | 丁 Casual |
丙 Easy |
乙 Medium |
甲 Hard |
|---|---|---|---|---|
Emergency Repair Material |
4 | 4 | 5 | |
Medal |
1 | 1 | 2 | |
Improvement Material |
7 |

The event guides are to be constructed through the respective Event map page guide sandbox and reviewed by editors before being approved here.
- Do not update the guides through this page unless it is a minor fix. Please only update guides through their respective sandbox pages.
Branching Table
| E-3 Branching Rules (Start Points) | ||
|---|---|---|
| Nodes | Rules | |
| Start | 1 |
|
2 |
| |
3 |
| |
| E-3 Branching Rules (Single / Striking Force Fleet) | ||
|---|---|---|
| Nodes | Rules | |
A |
B |
Active Branching |
F | ||
B |
B1 |
Does not meet the requirements to go to C or F |
C |
| |
F |
| |
B1 |
B2 |
Does not meet the requirements to go to C |
C |
| |
D |
E |
|
K |
| |
G |
H |
Active Branching |
J | ||
H |
H1 |
Does not meet the requirements to go to I |
I |
| |
H1 |
H2 |
|
I |
| |
J |
N |
|
O |
| |
O1 |
No path | |
O2 |
| |
N |
O2 |
Does not meet the requirements to go to P |
P |
| |
O2 |
P |
|
Q |
| |
R |
S1 |
Fixed Routing |
S |
Q |
|
S2 |
| |
T |
| |
| E-3 Branching Rules (Combined Fleet) | ||
|---|---|---|
| Nodes | Rules | |
J |
N |
|
O |
| |
O1 |
| |
M |
J |
Does not meet the requirements to go to O |
O |
| |
N |
O2 |
|
O1 |
O |
|
O2 |
Does not meet the requirements to go to O | |
O2 |
P |
|
Q |
| |
R |
S |
|
S1 |
Does not meet the requirements to go to S or V2 | |
V2 |
| |
S |
Q |
|
S2 |
| |
T |
Meet ALL of the following requirements:
| |
U |
U1 |
|
U2 |
| |
V |
| |
U2 |
U3 |
??? |
V1 |
??? | |
V |
V1 |
Does not meet the requirements to go to V2 |
V2 |
| |
V1 |
U2 |
??? |
V2 |
??? | |
V2 |
W |
|
X |
| |
Branching compositions were reported over the course of the event. (NGA and KCNav)
Historical Bonuses
DISCLAIMER: This information is based on user-submitted data and is subject to revisions as more data is gathered. Any version of the ship receives the bonus regardless of remodel.
Ship Bonuses
| Ships | Damage | Acc/Eva | |||||||||||||
|---|---|---|---|---|---|---|---|---|---|---|---|---|---|---|---|
| Mapwide | Phase 1 | Phase 2 | Phase 3 | Phases 1 & 2 | Phase 3 | ||||||||||
| B/B2/C/H/H1/K | J/M/N/O1/O2/S | I/P/T | U/U1/U2/U3/V/V2 | X | |||||||||||
| All CV, CVB, CVL, CA, CAV, CL, CLT, DD (that do no appear below) | - | 1.05x | |||||||||||||
| All CA, CAV, CL, CLT, DD (stacks with below) | 1.03x | - | - | - | - | ||||||||||
| All DE (stacks with below) | 1.12x | - | - | - | - | ||||||||||
| 1.08x | 1.25x1.16x1.08 | 1.25x1.16x1.08 | 1.27x1.18x1.08 | 1.08x | 1.20~1.25x | ||||||||||
| 1.04x | 1.21x1.16x1.04 | 1.21x1.16x1.04 | 1.23x1.18x1.04 | 1.04x | |||||||||||
| - | 1.16x | 1.16x | 1.18x | - | 1.15x | ||||||||||
| 1.15x | 1.45x | ||||||||||||||
| 2.5x | - | 2.85x1.14x2.5 | 2.875x1.15x2.5 | - | 1.2x | ? | |||||||||
| - | 1.14x | 1.15x | |||||||||||||
| 1.15x | 1.45x | 1.25x | |||||||||||||
| - | - | - | 1.05x | 1.2x | |||||||||||
| 1.24x1.15x1.08 | 1.67x1.45x1.15 | ||||||||||||||
Equipment Bonuses
| Equipment | LBAS (Map-wide) |
|---|---|
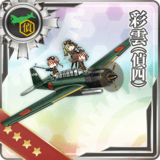
|
1.14x each |
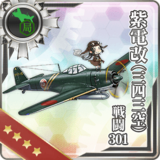 · 701st · 701st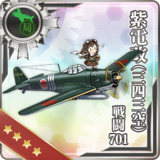 · 407th · 407th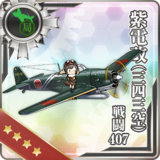
| |
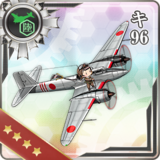
| |
 · (Sk) · (Sk)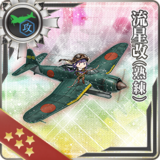
|
1.11x each |
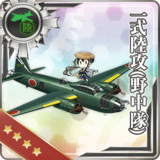 · Ginga (Egusa) · Ginga (Egusa)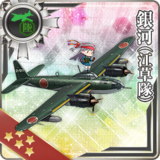
| |
 · Ki-102 + Missile · Ki-102 + Missile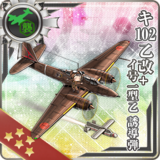
|
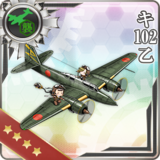
Those bonuses only apply to planes in LBAS.
- All 4 planes in the base will gain the bonus provided by any bonus plane,
- Bonuses will stack between each other.
Debuff
| Ships | Node X |
|---|---|
| -49 | |
| -19 |
Map Overview
E-3 consists of 3 main phases and requires the use of Single Fleets, Striking Forces, and Combined Fleets.
Ship locks affect routing on ALL difficulties, see here.
- This map uses 3 locks:
 2nd Torpedo Squadron (from E-2), 1st starting point,
 Combined Fleet, 2nd starting point, in theory optional, but highly recommended,
 Carrier Task Force, 3rd starting point.
- 2 LBAS are available to sortie into this map.
- After phase 1.7, the LBAS is relocated closer to the final boss.
- "Airstrike Supported Battle" nodes are present on J U U1
Phase 1 - TP
Phase 1 is a "Transport Operation":
- Single Fleet: 0-1CAV/CL(T)/AV, 1CL, 4-5DD (Fast)

- Note that this is a single fleet of 6 ships, not a Strike Force.
- Route: 1 A B B1 C D K
- LoS check: 55 Cn3 ?
- AP/AS: 332/746 (Hard)
- LBAS range: 7, then 9 after phase 1.7
- Using a Fast+ fleet will skip node B1.
Phase 1.3 - Gimmick 1
The following steps have to be performed to unlock the 2nd start point:
| I | J | |
|---|---|---|
| Hard | S x2 | A+ x2 |
| Medium | S x2 | - |
| Easy | A+? x2 | - |
| Casual | A+? x2 | - |
- Striking Force: "any fleet"
- Route: 1 A F G J
- Striking Force: "0-1FBB/CV(L), 0-1CAV, 1-2CL, 4-5DD (Fast)"
- Route: 1 A F G H I
- Bringing an AACI capable ship is recommended to pass through the air node.
- LoS check: 80-90 Cn4 (Hard)
- AP/AS: 349/785 (Hard)
- LBAS range: 6, then 8 after phase 1.7
Phase 1.7 - Gimmick 2
The following steps have to be performed to unlock the 2nd boss:
| P | R | |
|---|---|---|
| Hard | S x3 | Reach |
| Medium | A+? x3 | Reach |
| Easy | A+ x2 | Reach |
| Casual | A+? | Reach |
- Striking Force: "0-1CVL, 0-1CAV/FBB, 1-2CL(T), 4-5DD" (Fast)
- Route: 1 A F G J N P
- Striking Force is recommended over combined fleets alternatives for this node.
- CTF: "1-2FBB, 2CV(L), 1-2CA(V), 0-1CL, 0-AV + 1CL, 0-2CLT, 3-5DD"

- Route: 2 L M J N O2 P
- STF: "2FBB, 1CV(L), 1-2CA(V), 0-1CL + 1CL, 0-2CLT, 3-5DD"
- Route: 2 L M J N O2 P
- Main Fleet should be 5 ships only if using a CV in fleet.
- Otherwise, use 2 CVL instead.
- Node P
- AP/AS: 349/785 (Hard)
- LBAS range: 5, then 7 after phase 1.7
- Bringing an AACI capable ship is recommended to reach and defeat the node.
- If opting for the Combined Fleet option, the fleet must have EITHER:
- 1CV Max,
- No CV, 2(F)BB(V) Max, 2CA(V) Max.
Phase 2
- CTF: 0-2FBB, 2-4CV, 0-1AV/CA(V)/DD, 1CL + 1CL, 0-1CLT/SS(V), 4-5DD (Fast)
- Route: 2 L M O R S T
- A total of 5 DD is required for routing.
- STF: 3(F)BB, 1CV, 0-1CAV/DD, 1CL + 1CL, 4-5DD, 0-1SS(V) (Fast)
- Route: 2 L M O R S T
- A total of 5 DD is required for routing.
- Striking Force: 1FBB, 1CV, 1CL, 3DD, 1SS
- Route: 1 A F G J O R S T
- A weak fleet skipping the lock entirely.
- Using
 Surface Surface Radars affect routing:
- Using zero Surface Radar will guaranty routing to O, and each additional one increases the chances of off-routing to N.
- This comp is not recommended.
- A weak fleet skipping the
- LoS check: ?? Cn? (Hard)
- AP/AS: 371/833
- LBAS range: 5
- Bringing an AACI capable ship is recommended to pass through the air node and against the boss.
- Bringing an OASW capable ship is recommended to pass through the submarine node.
- The I-201-class

 have outstanding historical bonuses in this situation.
Phase 3
- CTF: 2(F)BB, 2-3CV, 0-1CVL, 1CL + 0-1CA, 1CL, 1-2CLT, 2-3DD

- Route: 3 U V V2 X
- Most direct route to the boss.
- CTF: 2(F)BB, 2-3CV, 0-1CVL, 1CL + 1CL, 1-2CLT, 3-4DD
- Route: 3 U U2 U3 O R V2 X
- A route skipping node V.
- Pass through 2 weak submarine nodes on U2 U3.
- Even so the route is longer, the fleet only faces minor resource penalty compared to the South route, as it passes through "cheaper" nodes.
- LoS check: ?? Cn? (Hard)
- AP/AS: 516/1160 (Hard) (numbers may be different due to the presence of unknown elements)
- LBAS range: 4
- Bringing an AACI capable ship is recommended against the boss.
- Bringing an OASW capable ship is recommended to reach the boss, especially for the North route.
- Nagato-class Touch is recommended due to her historical bonus on this node.
- As achieving AS on hard last dance might not be achievable, aiming for AD instead to retain night contact might be preferred.
- Using multiple Jets can be critical, helping killing weaker enemies during the Jet Assault.
Debuff
Once LD has been reached, the following steps have to be performed to debuff the boss.
Dropping difficulty will reset the debuff state.
| K | I | P | T | S2 | V1 | LBAS | |
|---|---|---|---|---|---|---|---|
| Hard | S | S | S | A+ | AS | AS | AS x2 |
| Medium | A+ | - | - | A+ | AS | AS | AS |
| Easy | A+ | - | - | A+ | - | AS | AS |
| Casual | ? | - | - | ? | - | ? | ? |
- Use #Phase 1 - TP's fleet
- Single fleet and not Striking Force.
- Use #Phase 1.3 - Gimmick 1's fleet
- Use #Phase 1.7 - Gimmick 2's fleet
- STF using ships
- Striking Force: 2-3CV, 1CVL, 2-3(F)BB(V), 1DD (Slow)
- Route: 1 A F G J O R S1 S S2 T
- Notes:
- This fleet is capable of achieving both the T and S2 Node requirement in a single sortie
- Splitting LBAS between S2 and T is recommended
- STF: 4(F)BB(V), 1CV(B), 1CA(V) + 1FBB, 1CL, 4DD (Slow)
- Route: 2 L M J O R S1 S S2 T
- Striking Force: 2-3CV, 1CVL, 2-3(F)BB(V), 1DD (Slow)
- Route: 1 A F G J O R S1 S S2 T
- Notes:
- This fleet is capable of achieving both the T and S2 Node requirement in a single sortie
- Splitting LBAS between S2 and T is recommended
| AP | AS | |
|---|---|---|
| Hard | 349 | 785 |
| Medium | ? | ? |
- Use #Phase 3's fleet with 1CL max.
- An AV can replace one of the CL.
| AP | AS | |
|---|---|---|
| Hard | 531 | 1193 |
| Medium | 469 | 1055 |
| Easy | 443 | 995 |
| Casual | ? | ? |
- This step can be accomplished by sending 1 SS(V) until the Air Raid is triggered.
- Multiple compositions can be rolled, which is why 2 Airpower values are given.
| AS | |
|---|---|
| Hard | 783 or 1094 |
| Medium | 675 or 966 |
| Easy | 656 or 908 |
| Casual | 632 or 704 |
Once Debuff is complete the CG will change to the following:
| Remodeled Wartime Cargo Princess |
|---|
|


Enemy Compositions
| Type | Ships |
|---|---|
| DD |
| Type | Ships |
|---|---|
| DE | |
| DD | |
| SS | |
| SSV | |
| AV |
| Type | Ships |
|---|---|
| DE | |
| DD | |
| SS | |
| SSV | |
| AV |
| Type | Ships |
|---|---|
| DD |
| Type | Ships |
|---|---|
| DD |
| Type | Ships |
|---|---|
| DE | |
| DD | |
| SS | |
| SSV | |
| AV |
| Type | Ships |
|---|---|
| DD |
| Type | Ships |
|---|---|
| DE | |
| DD | |
| SS | |
| SSV | |
| AV |
| Type | Ships |
|---|---|
| DD | |
| SS | |
| SSV |
| Type | Ships |
|---|---|
| DD |
| Type | Ships |
|---|---|
| DE | |
| DD | |
| CL | |
| CV | |
| SS |
| # | Formation | Air Raids | AD/AP AS/AS+ |
|---|---|---|---|
| AB | Diamond | 162/323 725/1449 | |
| Diamond | 244/488 1097/2193 | ||
| Diamond | 176/352 791/1581 | ||
| # | Formation | Air Raids | AD/AP AS/AS+ |
| # | Selection Node | ||
|---|---|---|---|
| A | 艦隊の針路を選択できます。提督、どちらの針路をとられますか? You can decide the fleet's course. Admiral, which heading should we take? | ||
| # | Selection Node | ||
| # | Formation | Normal Battle Node | AD/AP AS/AS+ |
|---|---|---|---|
| B | Echelon Line Abreast Phases: 1, 2, 3 |
0/0 0/0 | |
| Echelon Line Abreast Phases: 1, 2, 3 |
0/0 0/0 | ||
| Echelon Line Abreast Phases: 1, 2, 3 |
0/0 0/0 | ||
| # | Formation | Normal Battle Node | AD/AP AS/AS+ |
| # | Formation | Air Defense Node | AD/AP AS/AS+ |
|---|---|---|---|
| B1 | Diamond Phases: 1, 2, 3 |
112/223 500/999 | |
| Diamond Phases: 1, 2, 3 |
157/313 704/1407 | ||
| Diamond Phases: 1, 2, 3 |
166/331 744/1488 | ||
| # | Formation | Air Defense Node | AD/AP AS/AS+ |
| # | Formation | Normal Battle Node | AD/AP AS/AS+ |
|---|---|---|---|
| B2 | Line Ahead Echelon Phases: 1, 2, 3 |
0/0 0/0 | |
| Line Ahead Phases: 1 |
0/0 0/0 | ||
| # | Formation | Normal Battle Node | AD/AP AS/AS+ |
| # | Formation | Normal Battle Node | AD/AP AS/AS+ |
|---|---|---|---|
| C | Line Ahead Echelon Phases: 1, 2, 3 |
0/0 0/0 | |
| Line Ahead Phases: 1, 2, 3 |
0/0 0/0 | ||
| # | Formation | Normal Battle Node | AD/AP AS/AS+ |
| # | Landing Node | ||
|---|---|---|---|
| D | 輸送物資の揚陸地点に到達しました。本海域の輸送作戦は無事完了しています。 The landing point of the convoy has been reached. The transport operation here has already been completed successfully. | ||
| # | Landing Node | ||
| # | Empty Node | ||
|---|---|---|---|
| E | 敵影を見ず。 No enemy spotted. | ||
| # | Empty Node | ||
| # | Formation | Air Defense Node | AD/AP AS/AS+ |
|---|---|---|---|
| F | Diamond Phases: 1, 2, 3 |
112/223 500/999 | |
| Diamond Phases: 1, 2, 3 |
157/313 704/1407 | ||
| Diamond Phases: 1, 2, 3 |
166/331 744/1488 | ||
| # | Formation | Air Defense Node | AD/AP AS/AS+ |
| # | Selection Node | ||
|---|---|---|---|
| G | 艦隊の針路を選択できます。提督、どちらの針路をとられますか? You can decide the fleet's course. Admiral, which heading should we take? | ||
| # | Selection Node | ||
| # | Formation | Normal Battle Node | AD/AP AS/AS+ |
|---|---|---|---|
| H | Echelon Line Abreast Phases: 1, 2, 3 |
0/0 0/0 | |
| Echelon Line Abreast Phases: 1, 2, 3 |
0/0 0/0 | ||
| Echelon Line Abreast Phases: 1, 2, 3 |
0/0 0/0 | ||
| # | Formation | Normal Battle Node | AD/AP AS/AS+ |
| # | Formation | Normal Battle Node | AD/AP AS/AS+ |
|---|---|---|---|
| H1 | Line Ahead Double Line Vanguard Phases: 1, 2, 3 |
0/0 0/0 | |
| # | Formation | Normal Battle Node | AD/AP AS/AS+ |
| # | Empty Node | ||
|---|---|---|---|
| H2 | 敵影を見ず。 No enemy spotted. | ||
| # | Empty Node | ||
| # | Formation | Normal Battle Node | AD/AP AS/AS+ |
|---|---|---|---|
| I | Cruising Formation 3 Phases: 1, 2, 3 |
160/319 717/1434 | |
| Cruising Formation 3 Phases: 1, 2, 3 |
175/349 783/1566 | ||
| # | Formation | Normal Battle Node | AD/AP AS/AS+ |
| # | Formation | Supported Battle Node | AD/AP AS/AS+ |
|---|---|---|---|
| J | Echelon Line Abreast Phases: 1, 2, 3 |
43/85 189/378 | |
| Echelon Line Abreast Phases: 1, 2, 3 |
43/85 189/378 | ||
| Echelon Line Abreast Phases: 1, 2, 3 |
43/85 189/378 | ||
| # | Formation | Supported Battle Node | AD/AP AS/AS+ |
| # | Formation | Boss Battle Node | AD/AP AS/AS+ |
|---|---|---|---|
| K | Cruising Formation 3 Phases: 1, 2, 3 |
157/313 704/1407 | |
| Cruising Formation 3 Phases: 1, 2, 3 (Final)
|
166/332 746/1491 | ||
| # | Formation | Boss Battle Node | AD/AP AS/AS+ |
| # | Empty Node | ||
|---|---|---|---|
| L | 気のせいだった。 Must be my imagination. | ||
| # | Empty Node | ||
| # | Formation | Normal Battle Node | AD/AP AS/AS+ |
|---|---|---|---|
| M | Echelon Line Abreast Phases: 2, 3 |
0/0 0/0 | |
| Echelon Line Abreast Phases: 2, 3 |
0/0 0/0 | ||
| Echelon Line Abreast Phases: 2, 3 |
0/0 0/0 | ||
| # | Formation | Normal Battle Node | AD/AP AS/AS+ |
| # | Formation | Normal Battle Node | AD/AP AS/AS+ |
|---|---|---|---|
| N | Line Ahead Phases: 2, 3 |
0/0 0/0 | |
| Line Ahead Double Line Phases: 2, 3 |
0/0 0/0 | ||
| # | Formation | Normal Battle Node | AD/AP AS/AS+ |
| # | Formation | Air Defense Node | AD/AP AS/AS+ |
|---|---|---|---|
| O | Diamond Phases: 2, 3 |
115/229 513/1026 | |
| Diamond Phases: 2, 3 |
160/319 717/1434 | ||
| Diamond Phases: 2, 3 |
175/349 783/1566 | ||
| # | Formation | Air Defense Node | AD/AP AS/AS+ |
| # | Formation | Normal Battle Node | AD/AP AS/AS+ |
|---|---|---|---|
| O1 | Diamond Phases: 2, 3 |
71/142 318/636 | |
| Diamond Phases: 2, 3 |
80/159 357/714 | ||
| Diamond Phases: 2 |
89/177 396/792 | ||
| # | Formation | Normal Battle Node | AD/AP AS/AS+ |
| # | Formation | Normal Battle Node | AD/AP AS/AS+ |
|---|---|---|---|
| O2 | Line Ahead Double Line Vanguard Phases: 2, 3 |
0/0 0/0 | |
| # | Formation | Normal Battle Node | AD/AP AS/AS+ |
| # | Formation | Normal Battle Node | AD/AP AS/AS+ |
|---|---|---|---|
| P | Cruising Formation 3 Phases: 2, 3 |
160/319 717/1434 | |
| Cruising Formation 3 Phases: 2, 3 |
175/349 783/1566 | ||
| # | Formation | Normal Battle Node | AD/AP AS/AS+ |
| # | Empty Node | ||
|---|---|---|---|
| Q | 敵影を見ず。 No enemy spotted. | ||
| # | Empty Node | ||
| # | Empty Node | ||
|---|---|---|---|
| R | 気のせいだった。 Must be my imagination. | ||
| # | Empty Node | ||
| # | Formation | Normal Battle Node | AD/AP AS/AS+ |
|---|---|---|---|
| S | Double Line Diamond Phases: 2, 3 |
45/89 198/396 | |
| Diamond Phases: 2 |
89/177 396/792 | ||
| # | Formation | Normal Battle Node | AD/AP AS/AS+ |
| # | Formation | Air Defense Node | AD/AP AS/AS+ |
|---|---|---|---|
| S1 | Diamond Phases: 3 |
115/229 513/1026 | |
| Diamond Phases: 3 |
160/319 717/1434 | ||
| Diamond Phases: 3 |
175/349 783/1566 | ||
| # | Formation | Air Defense Node | AD/AP AS/AS+ |
| # | Formation | Air Defense Node | AD/AP AS/AS+ |
|---|---|---|---|
| S2 | Diamond Phases: 3 |
115/229 513/1026 | |
| Diamond Phases: 3 |
160/319 717/1434 | ||
| Diamond Phases: 3 |
175/349 783/1566 | ||
| # | Formation | Air Defense Node | AD/AP AS/AS+ |
| # | Formation | Boss Battle Node | AD/AP AS/AS+ |
|---|---|---|---|
| T | Cruising Formation 3 Phases: 2, 3 |
181/362 813/1626 | |
| Cruising Formation 3 Phases: 2 (Final)
|
185/370 831/1662 | ||
| # | Formation | Boss Battle Node | AD/AP AS/AS+ |
| # | Formation | Supported Battle Node | AD/AP AS/AS+ |
|---|---|---|---|
| U | Echelon Line Abreast Phases: 3 |
43/85 189/378 | |
| Echelon Line Abreast Phases: 3 |
36/71 159/318 | ||
| Echelon Line Abreast Phases: 3 |
36/71 159/318 | ||
| # | Formation | Supported Battle Node | AD/AP AS/AS+ |
| # | Formation | Supported Battle Node | AD/AP AS/AS+ |
|---|---|---|---|
| U1 | Line Abreast | 36/71 159/318 | |
| Echelon Line Abreast Phases: 3 |
36/71 159/318 | ||
| # | Formation | Supported Battle Node | AD/AP AS/AS+ |
| # | Formation | Normal Battle Node | AD/AP AS/AS+ |
|---|---|---|---|
| U2 | Echelon Line Abreast Phases: 3 |
0/0 0/0 | |
| Echelon Line Abreast Phases: 3 |
0/0 0/0 | ||
| Echelon Line Abreast Phases: 3 |
0/0 0/0 | ||
| # | Formation | Normal Battle Node | AD/AP AS/AS+ |
| # | Formation | Normal Battle Node | AD/AP AS/AS+ |
|---|---|---|---|
| U3 | Echelon Line Abreast Phases: 3 |
0/0 0/0 | |
| Echelon Line Abreast Phases: 3 |
0/0 0/0 | ||
| Echelon Line Abreast Phases: 3 |
0/0 0/0 | ||
| # | Formation | Normal Battle Node | AD/AP AS/AS+ |
| # | Formation | Normal Battle Node | AD/AP AS/AS+ |
|---|---|---|---|
| V | Diamond Phases: 3 |
71/142 318/636 | |
| Diamond Phases: 3 |
80/159 357/714 | ||
| Diamond Phases: 3 |
89/177 396/792 | ||
| # | Formation | Normal Battle Node | AD/AP AS/AS+ |
| # | Formation | Air Defense Node | AD/AP AS/AS+ |
|---|---|---|---|
| V1 | Diamond Phases: 3 |
161/321 722/1443 | |
| Diamond Phases: 3 |
251/501 1125/2250 | ||
| Diamond Phases: 3 |
182/363 816/1632 | ||
| # | Formation | Air Defense Node | AD/AP AS/AS+ |
| # | Formation | Normal Battle Node | AD/AP AS/AS+ |
|---|---|---|---|
| V2 | Line Ahead Phases: 3 |
0/0 0/0 | |
| Line Ahead Double Line Phases: 3 |
0/0 0/0 | ||
| # | Formation | Normal Battle Node | AD/AP AS/AS+ |
| # | Empty Node | ||
|---|---|---|---|
| W | 敵影を見ず。 No enemy spotted. | ||
| # | Empty Node | ||
| # | Formation | Boss Battle Node | AD/AP AS/AS+ |
|---|---|---|---|
| X | Cruising Formation 4 Phases: 3 |
230/459 1031/2061 | |
| Cruising Formation 4 Phases: 3 (Final)
|
327/654 1470/2940 | ||
| # | Formation | Boss Battle Node | AD/AP AS/AS+ |
| Type | Ships |
|---|---|
| DD |
| Type | Ships |
|---|---|
| DD | |
| SS | |
| AV |
| Type | Ships |
|---|---|
| DE | |
| DD | |
| SS | |
| SSV | |
| AV |
| Type | Ships |
|---|---|
| DD |
| Type | Ships |
|---|---|
| DD |
| Type | Ships |
|---|---|
| DE | |
| DD | |
| SS | |
| SSV | |
| AV |
| Type | Ships |
|---|---|
| DD |
| Type | Ships |
|---|---|
| DE | |
| DD | |
| SS | |
| SSV | |
| AV |
| Type | Ships |
|---|---|
| DD | |
| SS |
| Type | Ships |
|---|---|
| DD |
| Type | Ships |
|---|---|
| DE | |
| DD | |
| CL | |
| CV | |
| SS |
| # | Formation | Air Raids | AD/AP AS/AS+ |
|---|---|---|---|
| AB | Diamond | 140/280 629/1257 | |
| Diamond | 214/428 962/1923 | ||
| Diamond | 150/300 674/1347 | ||
| # | Formation | Air Raids | AD/AP AS/AS+ |
| # | Selection Node | ||
|---|---|---|---|
| A | 艦隊の針路を選択できます。提督、どちらの針路をとられますか? You can decide the fleet's course. Admiral, which heading should we take? | ||
| # | Selection Node | ||
| # | Formation | Normal Battle Node | AD/AP AS/AS+ |
|---|---|---|---|
| B | Echelon Line Abreast Phases: 1, 2, 3 |
0/0 0/0 | |
| Echelon Line Abreast Phases: 1, 2, 3 |
0/0 0/0 | ||
| Echelon Line Abreast Phases: 1, 2, 3 |
0/0 0/0 | ||
| # | Formation | Normal Battle Node | AD/AP AS/AS+ |
| # | Formation | Air Defense Node | AD/AP AS/AS+ |
|---|---|---|---|
| B1 | Diamond Phases: 1, 2, 3 |
106/211 474/948 | |
| Diamond Phases: 1, 2, 3 |
114/227 510/1020 | ||
| Diamond Phases: 1, 2, 3 |
123/245 551/1101 | ||
| # | Formation | Air Defense Node | AD/AP AS/AS+ |
| # | Formation | Normal Battle Node | AD/AP AS/AS+ |
|---|---|---|---|
| B2 | Line Ahead Echelon Phases: 1, 3 |
0/0 0/0 | |
| Line Ahead Phases: 3 |
0/0 0/0 | ||
| # | Formation | Normal Battle Node | AD/AP AS/AS+ |
| # | Formation | Normal Battle Node | AD/AP AS/AS+ |
|---|---|---|---|
| C | Line Ahead Echelon Phases: 1, 2, 3 |
0/0 0/0 | |
| Line Ahead Phases: 1, 2, 3 |
0/0 0/0 | ||
| # | Formation | Normal Battle Node | AD/AP AS/AS+ |
| # | Landing Node | ||
|---|---|---|---|
| D | 輸送物資の揚陸地点に到達しました。本海域の輸送作戦は無事完了しています。 The landing point of the convoy has been reached. The transport operation here has already been completed successfully. | ||
| # | Landing Node | ||
| # | Empty Node | ||
|---|---|---|---|
| E | 敵影を見ず。 No enemy spotted. | ||
| # | Empty Node | ||
| # | Formation | Air Defense Node | AD/AP AS/AS+ |
|---|---|---|---|
| F | Diamond Phases: 1, 2, 3 |
106/211 474/948 | |
| Diamond Phases: 1, 2, 3 |
114/227 510/1020 | ||
| Diamond Phases: 1, 2, 3 |
123/245 551/1101 | ||
| # | Formation | Air Defense Node | AD/AP AS/AS+ |
| # | Selection Node | ||
|---|---|---|---|
| G | 艦隊の針路を選択できます。提督、どちらの針路をとられますか? You can decide the fleet's course. Admiral, which heading should we take? | ||
| # | Selection Node | ||
| # | Formation | Normal Battle Node | AD/AP AS/AS+ |
|---|---|---|---|
| H | Echelon Line Abreast Phases: 2 |
0/0 0/0 | |
| Echelon Line Abreast Phases: 1, 2 |
0/0 0/0 | ||
| Echelon Line Abreast Phases: 1, 2 |
0/0 0/0 | ||
| # | Formation | Normal Battle Node | AD/AP AS/AS+ |
| # | Formation | Normal Battle Node | AD/AP AS/AS+ |
|---|---|---|---|
| H1 | Line Ahead Double Line Vanguard Phases: 1, 2 |
0/0 0/0 | |
| # | Formation | Normal Battle Node | AD/AP AS/AS+ |
| # | Empty Node | ||
|---|---|---|---|
| H2 | 敵影を見ず。 No enemy spotted. | ||
| # | Empty Node | ||
| # | Formation | Normal Battle Node | AD/AP AS/AS+ |
|---|---|---|---|
| I | Cruising Formation 3 Phases: 1, 2 |
145/290 651/1302 | |
| Cruising Formation 3 Phases: 1, 2 |
114/228 512/1023 | ||
| # | Formation | Normal Battle Node | AD/AP AS/AS+ |
| # | Formation | Supported Battle Node | AD/AP AS/AS+ |
|---|---|---|---|
| J | Echelon Line Abreast Phases: 1, 2, 3 |
9/17 36/72 | |
| Echelon Line Abreast Phases: 2, 3 |
43/85 189/378 | ||
| Echelon Line Abreast Phases: 1, 2, 3 |
43/85 189/378 | ||
| # | Formation | Supported Battle Node | AD/AP AS/AS+ |
| # | Formation | Boss Battle Node | AD/AP AS/AS+ |
|---|---|---|---|
| K | Cruising Formation 3 Phases: 1, 2, 3 |
114/227 510/1020 | |
| Cruising Formation 3 Phases: 1, 2, 3 (Final)
|
123/245 551/1101 | ||
| # | Formation | Boss Battle Node | AD/AP AS/AS+ |
| # | Empty Node | ||
|---|---|---|---|
| L | 気のせいだった。 Must be my imagination. | ||
| # | Empty Node | ||
| # | Formation | Normal Battle Node | AD/AP AS/AS+ |
|---|---|---|---|
| M | Echelon Line Abreast Phases: 2, 3 |
0/0 0/0 | |
| Echelon Line Abreast Phases: 2, 3 |
0/0 0/0 | ||
| Echelon Line Abreast Phases: 2, 3 |
0/0 0/0 | ||
| # | Formation | Normal Battle Node | AD/AP AS/AS+ |
| # | Formation | Normal Battle Node | AD/AP AS/AS+ |
|---|---|---|---|
| N | Line Ahead Phases: 2 |
0/0 0/0 | |
| Line Ahead Double Line Phases: 2, 3 |
0/0 0/0 | ||
| # | Formation | Normal Battle Node | AD/AP AS/AS+ |
| # | Formation | Air Defense Node | AD/AP AS/AS+ |
|---|---|---|---|
| O | Diamond Phases: 2, 3 |
105/210 471/942 | |
| Diamond Phases: 2, 3 |
145/290 651/1302 | ||
| Diamond Phases: 2, 3 |
114/228 512/1023 | ||
| # | Formation | Air Defense Node | AD/AP AS/AS+ |
| # | Formation | Normal Battle Node | AD/AP AS/AS+ |
|---|---|---|---|
| O1 | Diamond Phases: 2, 3 |
78/155 348/696 | |
| Diamond Phases: 2 |
51/101 225/450 | ||
| Diamond Phases: 2 |
85/169 378/756 | ||
| # | Formation | Normal Battle Node | AD/AP AS/AS+ |
| # | Formation | Normal Battle Node | AD/AP AS/AS+ |
|---|---|---|---|
| O2 | Line Ahead Double Line Vanguard Phases: 2, 3 |
0/0 0/0 | |
| # | Formation | Normal Battle Node | AD/AP AS/AS+ |
| # | Formation | Normal Battle Node | AD/AP AS/AS+ |
|---|---|---|---|
| P | Cruising Formation 3 Phases: 2 |
145/290 651/1302 | |
| Cruising Formation 3 Phases: 2, 3 |
114/228 512/1023 | ||
| # | Formation | Normal Battle Node | AD/AP AS/AS+ |
| # | Empty Node | ||
|---|---|---|---|
| Q | 敵影を見ず。 No enemy spotted. | ||
| # | Empty Node | ||
| # | Empty Node | ||
|---|---|---|---|
| R | 気のせいだった。 Must be my imagination. | ||
| # | Empty Node | ||
| # | Formation | Normal Battle Node | AD/AP AS/AS+ |
|---|---|---|---|
| S | Double Line Diamond Phases: 2, 3 |
36/71 159/318 | |
| Diamond Phases: 2 |
71/142 318/636 | ||
| # | Formation | Normal Battle Node | AD/AP AS/AS+ |
| # | Formation | Air Defense Node | AD/AP AS/AS+ |
|---|---|---|---|
| S1 | Diamond Phases: 3 |
105/210 471/942 | |
| Diamond Phases: 3 |
145/290 651/1302 | ||
| Diamond Phases: 3 |
114/228 512/1023 | ||
| # | Formation | Air Defense Node | AD/AP AS/AS+ |
| # | Formation | Air Defense Node | AD/AP AS/AS+ |
|---|---|---|---|
| S2 | Diamond Phases: 3 |
105/210 471/942 | |
| Diamond Phases: 3 |
145/290 651/1302 | ||
| Diamond Phases: 3 |
114/228 512/1023 | ||
| # | Formation | Air Defense Node | AD/AP AS/AS+ |
| # | Formation | Boss Battle Node | AD/AP AS/AS+ |
|---|---|---|---|
| T | Cruising Formation 3 Phases: 2, 3 |
145/290 651/1302 | |
| Cruising Formation 3 Phases: 2 (Final)
|
156/311 699/1398 | ||
| # | Formation | Boss Battle Node | AD/AP AS/AS+ |
| # | Formation | Supported Battle Node | AD/AP AS/AS+ |
|---|---|---|---|
| U | Echelon Line Abreast Phases: 3 |
9/17 36/72 | |
| Echelon Line Abreast Phases: 3 |
43/85 189/378 | ||
| Echelon Line Abreast Phases: 3 |
43/85 189/378 | ||
| # | Formation | Supported Battle Node | AD/AP AS/AS+ |
| # | Formation | Supported Battle Node | AD/AP AS/AS+ |
|---|---|---|---|
| U1 | Line Abreast Phases: 3 |
9/17 36/72 | |
| # | Formation | Supported Battle Node | AD/AP AS/AS+ |
| # | Formation | Normal Battle Node | AD/AP AS/AS+ |
|---|---|---|---|
| U2 | Echelon Line Abreast Phases: 3 |
0/0 0/0 | |
| Echelon Line Abreast Phases: 3 |
0/0 0/0 | ||
| Echelon Line Abreast Phases: 3 |
0/0 0/0 | ||
| # | Formation | Normal Battle Node | AD/AP AS/AS+ |
| # | Formation | Normal Battle Node | AD/AP AS/AS+ |
|---|---|---|---|
| U3 | Echelon Line Abreast Phases: 3 |
0/0 0/0 | |
| Echelon Line Abreast Phases: 3 |
0/0 0/0 | ||
| Echelon Line Abreast Phases: 3 |
0/0 0/0 | ||
| # | Formation | Normal Battle Node | AD/AP AS/AS+ |
| # | Formation | Normal Battle Node | AD/AP AS/AS+ |
|---|---|---|---|
| V | Diamond Phases: 3 |
71/142 318/636 | |
| Diamond Phases: 3 |
78/155 348/696 | ||
| Diamond Phases: 3 |
85/169 378/756 | ||
| # | Formation | Normal Battle Node | AD/AP AS/AS+ |
| # | Formation | Air Defense Node | AD/AP AS/AS+ |
|---|---|---|---|
| V1 | Diamond Phases: 3 |
145/289 650/1299 | |
| Diamond Phases: 3 |
220/439 986/1971 | ||
| Diamond Phases: 3 |
155/309 695/1389 | ||
| # | Formation | Air Defense Node | AD/AP AS/AS+ |
| # | Formation | Normal Battle Node | AD/AP AS/AS+ |
|---|---|---|---|
| V2 | Line Ahead Double Line Phases: 3 |
0/0 0/0 | |
| Line Ahead Phases: 3 |
15/29 63/126 | ||
| # | Formation | Normal Battle Node | AD/AP AS/AS+ |
| # | Empty Node | ||
|---|---|---|---|
| W | 敵影を見ず。 No enemy spotted. | ||
| # | Empty Node | ||
| # | Formation | Boss Battle Node | AD/AP AS/AS+ |
|---|---|---|---|
| X | Cruising Formation 4 Phases: 3 |
210/419 941/1881 | |
| Cruising Formation 4 Phases: 3 (Final)
|
284/568 1277/2553 | ||
| # | Formation | Boss Battle Node | AD/AP AS/AS+ |
| Type | Ships |
|---|---|
| DD |
| Type | Ships |
|---|---|
| DD | |
| SS | |
| SSV |
| Type | Ships |
|---|---|
| DD | |
| SS | |
| SSV | |
| AV |
| Type | Ships |
|---|---|
| DD |
| Type | Ships |
|---|---|
| DD |
| Type | Ships |
|---|---|
| DD | |
| SS | |
| SSV | |
| AV |
| Type | Ships |
|---|---|
| DD |
| Type | Ships |
|---|---|
| DE | |
| DD | |
| SS | |
| SSV | |
| AV |
| Type | Ships |
|---|---|
| DD |
| Type | Ships |
|---|---|
| DD |
| Type | Ships |
|---|---|
| DE | |
| DD | |
| CL | |
| CV | |
| SS |
| # | Formation | Air Raids | AD/AP AS/AS+ |
|---|---|---|---|
| AB | Diamond | 126/251 563/1125 | |
| Diamond | 199/397 893/1785 | ||
| Diamond | 144/287 644/1287 | ||
| # | Formation | Air Raids | AD/AP AS/AS+ |
| # | Selection Node | ||
|---|---|---|---|
| A | 艦隊の針路を選択できます。提督、どちらの針路をとられますか? You can decide the fleet's course. Admiral, which heading should we take? | ||
| # | Selection Node | ||
| # | Formation | Normal Battle Node | AD/AP AS/AS+ |
|---|---|---|---|
| B | Echelon Line Abreast Phases: 1, 3 |
0/0 0/0 | |
| Echelon Line Abreast Phases: 1, 2, 3 |
0/0 0/0 | ||
| Echelon Line Abreast Phases: 1, 2, 3 |
0/0 0/0 | ||
| # | Formation | Normal Battle Node | AD/AP AS/AS+ |
| # | Formation | Air Defense Node | AD/AP AS/AS+ |
|---|---|---|---|
| B1 | Diamond Phases: 1, 2, 3 |
106/211 474/948 | |
| Diamond Phases: 1, 3 |
109/217 486/972 | ||
| Diamond Phases: 1, 3 |
114/227 510/1020 | ||
| # | Formation | Air Defense Node | AD/AP AS/AS+ |
| # | Formation | Normal Battle Node | AD/AP AS/AS+ |
|---|---|---|---|
| B2 | Line Ahead Echelon Phases: 2, 3 |
0/0 0/0 | |
| Line Ahead Phases: 1 |
0/0 0/0 | ||
| # | Formation | Normal Battle Node | AD/AP AS/AS+ |
| # | Formation | Normal Battle Node | AD/AP AS/AS+ |
|---|---|---|---|
| C | Line Ahead Echelon Phases: 1, 2, 3 |
0/0 0/0 | |
| Line Ahead Phases: 1, 3 |
0/0 0/0 | ||
| # | Formation | Normal Battle Node | AD/AP AS/AS+ |
| # | Landing Node | ||
|---|---|---|---|
| D | 輸送物資の揚陸地点に到達しました。本海域の輸送作戦は無事完了しています。 The landing point of the convoy has been reached. The transport operation here has already been completed successfully. | ||
| # | Landing Node | ||
| # | Empty Node | ||
|---|---|---|---|
| E | 敵影を見ず。 No enemy spotted. | ||
| # | Empty Node | ||
| # | Formation | Air Defense Node | AD/AP AS/AS+ |
|---|---|---|---|
| F | Diamond Phases: 1, 2, 3 |
106/211 474/948 | |
| Diamond Phases: 2, 3 |
109/217 486/972 | ||
| Diamond Phases: 2, 3 |
114/227 510/1020 | ||
| # | Formation | Air Defense Node | AD/AP AS/AS+ |
| # | Selection Node | ||
|---|---|---|---|
| G | 艦隊の針路を選択できます。提督、どちらの針路をとられますか? You can decide the fleet's course. Admiral, which heading should we take? | ||
| # | Selection Node | ||
| # | Formation | Normal Battle Node | AD/AP AS/AS+ |
|---|---|---|---|
| H | Echelon Line Abreast Phases: 2, 3 |
0/0 0/0 | |
| Echelon Line Abreast Phases: 2, 3 |
0/0 0/0 | ||
| # | Formation | Normal Battle Node | AD/AP AS/AS+ |
| # | Formation | Normal Battle Node | AD/AP AS/AS+ |
|---|---|---|---|
| H1 | Line Ahead Double Line Vanguard Phases: 2, 3 |
0/0 0/0 | |
| # | Formation | Normal Battle Node | AD/AP AS/AS+ |
| # | Empty Node | ||
|---|---|---|---|
| H2 | 敵影を見ず。 No enemy spotted. | ||
| # | Empty Node | ||
| # | Formation | Normal Battle Node | AD/AP AS/AS+ |
|---|---|---|---|
| I | Cruising Formation 3 Phases: 2, 3 |
113/226 507/1014 | |
| Cruising Formation 3 Phases: 2, 3 |
114/227 510/1020 | ||
| # | Formation | Normal Battle Node | AD/AP AS/AS+ |
| # | Formation | Supported Battle Node | AD/AP AS/AS+ |
|---|---|---|---|
| J | Echelon Line Abreast Phases: 2, 3 |
3/6 12/24 | |
| Echelon Line Abreast Phases: 2, 3 |
9/17 36/72 | ||
| Echelon Line Abreast Phases: 2, 3 |
43/85 189/378 | ||
| # | Formation | Supported Battle Node | AD/AP AS/AS+ |
| # | Formation | Boss Battle Node | AD/AP AS/AS+ |
|---|---|---|---|
| K | Cruising Formation 3 Phases: 1, 2, 3 |
109/217 486/972 | |
| Cruising Formation 3 Phases: 1, 3 (Final)
|
114/227 510/1020 | ||
| # | Formation | Boss Battle Node | AD/AP AS/AS+ |
| # | Empty Node | ||
|---|---|---|---|
| L | 気のせいだった。 Must be my imagination. | ||
| # | Empty Node | ||
| # | Formation | Normal Battle Node | AD/AP AS/AS+ |
|---|---|---|---|
| M | Echelon Line Abreast Phases: 2, 3 |
0/0 0/0 | |
| Echelon Line Abreast Phases: 2, 3 |
0/0 0/0 | ||
| Echelon Line Abreast Phases: 2, 3 |
0/0 0/0 | ||
| # | Formation | Normal Battle Node | AD/AP AS/AS+ |
| # | Formation | Normal Battle Node | AD/AP AS/AS+ |
|---|---|---|---|
| N | Line Ahead Phases: 2, 3 |
0/0 0/0 | |
| Line Ahead Double Line Phases: 2, 3 |
0/0 0/0 | ||
| # | Formation | Normal Battle Node | AD/AP AS/AS+ |
| # | Formation | Air Defense Node | AD/AP AS/AS+ |
|---|---|---|---|
| O | Diamond Phases: 2, 3 |
105/210 471/942 | |
| Diamond Phases: 2, 3 |
113/226 507/1014 | ||
| Diamond Phases: 2, 3 |
69/137 306/612 | ||
| # | Formation | Air Defense Node | AD/AP AS/AS+ |
| # | Formation | Normal Battle Node | AD/AP AS/AS+ |
|---|---|---|---|
| O1 | Diamond Phases: 2 |
45/90 201/402 | |
| Diamond Phases: 2 |
51/101 225/450 | ||
| Diamond Phases: 2 |
85/169 378/756 | ||
| # | Formation | Normal Battle Node | AD/AP AS/AS+ |
| # | Formation | Normal Battle Node | AD/AP AS/AS+ |
|---|---|---|---|
| O2 | Line Ahead Double Line Vanguard Phases: 2, 3 |
0/0 0/0 | |
| # | Formation | Normal Battle Node | AD/AP AS/AS+ |
| # | Formation | Normal Battle Node | AD/AP AS/AS+ |
|---|---|---|---|
| P | Cruising Formation 3 Phases: 2, 3 |
113/226 507/1014 | |
| Cruising Formation 3 Phases: 2, 3 |
109/217 486/972 | ||
| # | Formation | Normal Battle Node | AD/AP AS/AS+ |
| # | Empty Node | ||
|---|---|---|---|
| Q | 敵影を見ず。 No enemy spotted. | ||
| # | Empty Node | ||
| # | Empty Node | ||
|---|---|---|---|
| R | 気のせいだった。 Must be my imagination. | ||
| # | Empty Node | ||
| # | Formation | Normal Battle Node | AD/AP AS/AS+ |
|---|---|---|---|
| S | Double Line Diamond Phases: 2, 3 |
43/85 189/378 | |
| Diamond Phases: 2 |
85/169 378/756 | ||
| # | Formation | Normal Battle Node | AD/AP AS/AS+ |
| # | Formation | Air Defense Node | AD/AP AS/AS+ |
|---|---|---|---|
| S1 | Diamond Phases: 2, 3 |
105/210 471/942 | |
| Diamond Phases: 2 |
113/226 507/1014 | ||
| Diamond Phases: 2 |
69/137 306/612 | ||
| # | Formation | Air Defense Node | AD/AP AS/AS+ |
| # | Formation | Air Defense Node | AD/AP AS/AS+ |
|---|---|---|---|
| S2 | Diamond | 105/210 471/942 | |
| Diamond | 113/226 507/1014 | ||
| Diamond Phases: 3 |
69/137 306/612 | ||
| # | Formation | Air Defense Node | AD/AP AS/AS+ |
| # | Formation | Boss Battle Node | AD/AP AS/AS+ |
|---|---|---|---|
| T | Cruising Formation 3 Phases: 2, 3 |
105/210 471/942 | |
| Cruising Formation 3 Phases: 2 (Final)
|
113/226 507/1014 | ||
| # | Formation | Boss Battle Node | AD/AP AS/AS+ |
| # | Formation | Supported Battle Node | AD/AP AS/AS+ |
|---|---|---|---|
| U | Echelon Line Abreast Phases: 3 |
3/6 12/24 | |
| Echelon Line Abreast Phases: 3 |
9/17 36/72 | ||
| Echelon Line Abreast Phases: 3 |
43/85 189/378 | ||
| # | Formation | Supported Battle Node | AD/AP AS/AS+ |
| # | Formation | Supported Battle Node | AD/AP AS/AS+ |
|---|---|---|---|
| U1 | Line Abreast | 9/17 36/72 | |
| Echelon Line Abreast Phases: 3 |
43/85 189/378 | ||
| # | Formation | Supported Battle Node | AD/AP AS/AS+ |
| # | Formation | Normal Battle Node | AD/AP AS/AS+ |
|---|---|---|---|
| U2 | Echelon Line Abreast Phases: 3 |
0/0 0/0 | |
| Echelon Line Abreast Phases: 3 |
0/0 0/0 | ||
| Echelon Line Abreast Phases: 3 |
0/0 0/0 | ||
| # | Formation | Normal Battle Node | AD/AP AS/AS+ |
| # | Formation | Normal Battle Node | AD/AP AS/AS+ |
|---|---|---|---|
| U3 | Echelon Line Abreast Phases: 3 |
0/0 0/0 | |
| Echelon Line Abreast Phases: 3 |
0/0 0/0 | ||
| Echelon Line Abreast Phases: 3 |
0/0 0/0 | ||
| # | Formation | Normal Battle Node | AD/AP AS/AS+ |
| # | Formation | Normal Battle Node | AD/AP AS/AS+ |
|---|---|---|---|
| V | Diamond Phases: 3 |
78/155 348/696 | |
| Diamond Phases: 3 |
51/101 225/450 | ||
| Diamond Phases: 3 |
85/169 378/756 | ||
| # | Formation | Normal Battle Node | AD/AP AS/AS+ |
| # | Formation | Air Defense Node | AD/AP AS/AS+ |
|---|---|---|---|
| V1 | Diamond Phases: 3 |
125/249 560/1119 | |
| Diamond Phases: 3 |
204/408 917/1833 | ||
| Diamond Phases: 3 |
148/296 665/1329 | ||
| # | Formation | Air Defense Node | AD/AP AS/AS+ |
| # | Formation | Normal Battle Node | AD/AP AS/AS+ |
|---|---|---|---|
| V2 | Line Ahead Phases: 3 |
15/29 63/126 | |
| Line Ahead Double Line Phases: 3 |
0/0 0/0 | ||
| # | Formation | Normal Battle Node | AD/AP AS/AS+ |
| # | Empty Node | ||
|---|---|---|---|
| W | 敵影を見ず。 No enemy spotted. | ||
| # | Empty Node | ||
| # | Formation | Boss Battle Node | AD/AP AS/AS+ |
|---|---|---|---|
| X | Cruising Formation 4 Phases: 3 |
181/361 812/1623 | |
| Cruising Formation 4 Phases: 3 (Final)
|
260/520 1169/2337 | ||
| # | Formation | Boss Battle Node | AD/AP AS/AS+ |
| Type | Ships |
|---|---|
| DD |
| Type | Ships |
|---|---|
| DD | |
| SS |
| Type | Ships |
|---|---|
| DD |
| Type | Ships |
|---|---|
| DD |
| Type | Ships |
|---|---|
| DD | |
| SS | |
| SSV |
| Type | Ships |
|---|---|
| DD |
| Type | Ships |
|---|---|
| DE | |
| DD | |
| SS | |
| SSV | |
| AV |
| Type | Ships |
|---|---|
| DD |
| Type | Ships |
|---|---|
| DD |
| Type | Ships |
|---|---|
| DE | |
| DD | |
| CL | |
| CV | |
| SS |
| # | Formation | Air Raids | AD/AP AS/AS+ |
|---|---|---|---|
| AB | Diamond | 85/169 380/759 | |
| Diamond | 138/275 617/1233 | ||
| Diamond | 154/307 689/1377 | ||
| # | Formation | Air Raids | AD/AP AS/AS+ |
| # | Selection Node | ||
|---|---|---|---|
| A | 艦隊の針路を選択できます。提督、どちらの針路をとられますか? You can decide the fleet's course. Admiral, which heading should we take? | ||
| # | Selection Node | ||
| # | Formation | Normal Battle Node | AD/AP AS/AS+ |
|---|---|---|---|
| B | Echelon Line Abreast Phases: 1, 3 |
0/0 0/0 | |
| Echelon Line Abreast Phases: 1, 3 |
0/0 0/0 | ||
| # | Formation | Normal Battle Node | AD/AP AS/AS+ |
| # | Formation | Air Defense Node | AD/AP AS/AS+ |
|---|---|---|---|
| B1 | Diamond Phases: 1, 3 |
61/121 270/540 | |
| Diamond Phases: 1, 3 |
63/126 282/564 | ||
| Diamond Phases: 1 |
66/131 294/588 | ||
| # | Formation | Air Defense Node | AD/AP AS/AS+ |
| # | Formation | Normal Battle Node | AD/AP AS/AS+ |
|---|---|---|---|
| B2 | Line Ahead Echelon Phases: 1 |
0/0 0/0 | |
| Line Ahead | 0/0 0/0 | ||
| # | Formation | Normal Battle Node | AD/AP AS/AS+ |
| # | Formation | Normal Battle Node | AD/AP AS/AS+ |
|---|---|---|---|
| C | Line Ahead Echelon Phases: 1, 3 |
0/0 0/0 | |
| Line Ahead Phases: 1 |
0/0 0/0 | ||
| # | Formation | Normal Battle Node | AD/AP AS/AS+ |
| # | Landing Node | ||
|---|---|---|---|
| D | 輸送物資の揚陸地点に到達しました。本海域の輸送作戦は無事完了しています。 The landing point of the convoy has been reached. The transport operation here has already been completed successfully. | ||
| # | Landing Node | ||
| # | Empty Node | ||
|---|---|---|---|
| E | 敵影を見ず。 No enemy spotted. | ||
| # | Empty Node | ||
| # | Formation | Air Defense Node | AD/AP AS/AS+ |
|---|---|---|---|
| F | Diamond Phases: 1, 2 |
61/121 270/540 | |
| Diamond Phases: 1, 2 |
63/126 282/564 | ||
| Diamond Phases: 1, 2 |
66/131 294/588 | ||
| # | Formation | Air Defense Node | AD/AP AS/AS+ |
| # | Selection Node | ||
|---|---|---|---|
| G | 艦隊の針路を選択できます。提督、どちらの針路をとられますか? You can decide the fleet's course. Admiral, which heading should we take? | ||
| # | Selection Node | ||
| # | Formation | Normal Battle Node | AD/AP AS/AS+ |
|---|---|---|---|
| H | Echelon Line Abreast Phases: 2 |
0/0 0/0 | |
| Echelon Line Abreast Phases: 2 |
0/0 0/0 | ||
| # | Formation | Normal Battle Node | AD/AP AS/AS+ |
| # | Formation | Normal Battle Node | AD/AP AS/AS+ |
|---|---|---|---|
| H1 | Line Ahead Double Line Vanguard Phases: 2 |
0/0 0/0 | |
| # | Formation | Normal Battle Node | AD/AP AS/AS+ |
| # | Empty Node | ||
|---|---|---|---|
| H2 | 敵影を見ず。 No enemy spotted. | ||
| # | Empty Node | ||
| # | Formation | Normal Battle Node | AD/AP AS/AS+ |
|---|---|---|---|
| I | Cruising Formation 3 Phases: 2 |
60/119 267/534 | |
| Cruising Formation 3 Phases: 2 |
102/203 456/912 | ||
| # | Formation | Normal Battle Node | AD/AP AS/AS+ |
| # | Formation | Supported Battle Node | AD/AP AS/AS+ |
|---|---|---|---|
| J | Echelon Line Abreast Phases: 2, 3 |
3/6 12/24 | |
| Echelon Line Abreast Phases: 2, 3 |
9/17 36/72 | ||
| # | Formation | Supported Battle Node | AD/AP AS/AS+ |
| # | Formation | Boss Battle Node | AD/AP AS/AS+ |
|---|---|---|---|
| K | Cruising Formation 3 Phases: 1 |
61/121 270/540 | |
| Cruising Formation 3 Phases: 1, 3 (Final)
|
63/126 282/564 | ||
| # | Formation | Boss Battle Node | AD/AP AS/AS+ |
| # | Empty Node | ||
|---|---|---|---|
| L | 気のせいだった。 Must be my imagination. | ||
| # | Empty Node | ||
| # | Formation | Normal Battle Node | AD/AP AS/AS+ |
|---|---|---|---|
| M | Echelon Line Abreast Phases: 2, 3 |
0/0 0/0 | |
| Echelon Line Abreast Phases: 2, 3 |
0/0 0/0 | ||
| # | Formation | Normal Battle Node | AD/AP AS/AS+ |
| # | Formation | Normal Battle Node | AD/AP AS/AS+ |
|---|---|---|---|
| N | Line Ahead Phases: 2 |
0/0 0/0 | |
| Line Ahead Double Line Phases: 2 |
0/0 0/0 | ||
| # | Formation | Normal Battle Node | AD/AP AS/AS+ |
| # | Formation | Air Defense Node | AD/AP AS/AS+ |
|---|---|---|---|
| O | Diamond Phases: 2, 3 |
57/113 252/504 | |
| Diamond Phases: 2, 3 |
60/119 267/534 | ||
| Diamond Phases: 2, 3 |
97/193 432/864 | ||
| # | Formation | Air Defense Node | AD/AP AS/AS+ |
| # | Formation | Normal Battle Node | AD/AP AS/AS+ |
|---|---|---|---|
| O1 | Diamond Phases: 2 |
43/85 189/378 | |
| Diamond Phases: 2 |
45/90 201/402 | ||
| Diamond Phases: 2 |
51/101 225/450 | ||
| # | Formation | Normal Battle Node | AD/AP AS/AS+ |
| # | Formation | Normal Battle Node | AD/AP AS/AS+ |
|---|---|---|---|
| O2 | Line Ahead Double Line Vanguard Phases: 2 |
0/0 0/0 | |
| # | Formation | Normal Battle Node | AD/AP AS/AS+ |
| # | Formation | Normal Battle Node | AD/AP AS/AS+ |
|---|---|---|---|
| P | Cruising Formation 3 Phases: 2 |
60/119 267/534 | |
| Cruising Formation 3 Phases: 2 |
97/193 432/864 | ||
| # | Formation | Normal Battle Node | AD/AP AS/AS+ |
| # | Empty Node | ||
|---|---|---|---|
| Q | 敵影を見ず。 No enemy spotted. | ||
| # | Empty Node | ||
| # | Empty Node | ||
|---|---|---|---|
| R | 気のせいだった。 Must be my imagination. | ||
| # | Empty Node | ||
| # | Formation | Normal Battle Node | AD/AP AS/AS+ |
|---|---|---|---|
| S | Double Line Diamond Phases: 2, 3 |
43/85 189/378 | |
| Diamond Phases: 2 |
51/101 225/450 | ||
| # | Formation | Normal Battle Node | AD/AP AS/AS+ |
| # | Formation | Air Defense Node | AD/AP AS/AS+ |
|---|---|---|---|
| S1 | Diamond Phases: 2 |
57/113 252/504 | |
| Diamond Phases: 2 |
60/119 267/534 | ||
| Diamond Phases: 2 |
97/193 432/864 | ||
| # | Formation | Air Defense Node | AD/AP AS/AS+ |
| # | Formation | Air Defense Node | AD/AP AS/AS+ |
|---|---|---|---|
| # | Formation | Air Defense Node | AD/AP AS/AS+ |
| # | Formation | Boss Battle Node | AD/AP AS/AS+ |
|---|---|---|---|
| T | Cruising Formation 3 Phases: 2, 3 |
65/129 288/576 | |
| Cruising Formation 3 Phases: 2 (Final)
|
97/193 432/864 | ||
| # | Formation | Boss Battle Node | AD/AP AS/AS+ |
| # | Formation | Supported Battle Node | AD/AP AS/AS+ |
|---|---|---|---|
| U | Echelon Line Abreast Phases: 3 |
3/6 12/24 | |
| Echelon Line Abreast Phases: 3 |
9/17 36/72 | ||
| # | Formation | Supported Battle Node | AD/AP AS/AS+ |
| # | Formation | Supported Battle Node | AD/AP AS/AS+ |
|---|---|---|---|
| U1 | Echelon Line Abreast Phases: 3 |
3/6 12/24 | |
| Echelon Line Abreast |
9/17 36/72 | ||
| # | Formation | Supported Battle Node | AD/AP AS/AS+ |
| # | Formation | Normal Battle Node | AD/AP AS/AS+ |
|---|---|---|---|
| U2 | Echelon Line Abreast Phases: 3 |
0/0 0/0 | |
| Echelon Line Abreast Phases: 3 |
0/0 0/0 | ||
| # | Formation | Normal Battle Node | AD/AP AS/AS+ |
| # | Formation | Normal Battle Node | AD/AP AS/AS+ |
|---|---|---|---|
| U3 | Echelon Line Abreast Phases: 3 |
0/0 0/0 | |
| Echelon Line Abreast Phases: 3 |
0/0 0/0 | ||
| # | Formation | Normal Battle Node | AD/AP AS/AS+ |
| # | Formation | Normal Battle Node | AD/AP AS/AS+ |
|---|---|---|---|
| V | Diamond Phases: 3 |
45/90 201/402 | |
| Diamond Phases: 3 |
51/101 225/450 | ||
| Diamond Phases: 3 |
85/169 378/756 | ||
| # | Formation | Normal Battle Node | AD/AP AS/AS+ |
| # | Formation | Air Defense Node | AD/AP AS/AS+ |
|---|---|---|---|
| V1 | Diamond Phases: 3 |
85/169 380/759 | |
| # | Formation | Air Defense Node | AD/AP AS/AS+ |
| # | Formation | Normal Battle Node | AD/AP AS/AS+ |
|---|---|---|---|
| V2 | Line Ahead Double Line Phases: 3 |
0/0 0/0 | |
| Line Ahead Phases: 3 |
0/0 0/0 | ||
| # | Formation | Normal Battle Node | AD/AP AS/AS+ |
| # | Empty Node | ||
|---|---|---|---|
| W | 敵影を見ず。 No enemy spotted. | ||
| # | Empty Node | ||
| # | Formation | Boss Battle Node | AD/AP AS/AS+ |
|---|---|---|---|
| X | Cruising Formation 4 Phases: 3 |
125/249 560/1119 | |
| Cruising Formation 4 Phases: 3 (Final)
|
194/387 869/1737 | ||
| # | Formation | Boss Battle Node | AD/AP AS/AS+ |
Ship Drops
| Ship drops | |||||||||||||||||||||||||||||||||||||||||||||||||||||||||||||||||||||||||||||||||||||||||||||||||||
|---|---|---|---|---|---|---|---|---|---|---|---|---|---|---|---|---|---|---|---|---|---|---|---|---|---|---|---|---|---|---|---|---|---|---|---|---|---|---|---|---|---|---|---|---|---|---|---|---|---|---|---|---|---|---|---|---|---|---|---|---|---|---|---|---|---|---|---|---|---|---|---|---|---|---|---|---|---|---|---|---|---|---|---|---|---|---|---|---|---|---|---|---|---|---|---|---|---|---|---|
| Type | Ship? | H1 | I | K | O1 | O2 | P | S | T | V | V2 | X | |||||||||||||||||||||||||||||||||||||||||||||||||||||||||||||||||||||||||||||||||||||||
| DE | Tsushima | Hard+ | Easy+ | Casual+ | |||||||||||||||||||||||||||||||||||||||||||||||||||||||||||||||||||||||||||||||||||||||||||||||
| DE | Hirato | Hard+ | Medium+ | Medium+ | Casual+ | Casual+ | |||||||||||||||||||||||||||||||||||||||||||||||||||||||||||||||||||||||||||||||||||||||||||||
| DD | Heywood L. Edwards | Medium+ | Casual+ | ||||||||||||||||||||||||||||||||||||||||||||||||||||||||||||||||||||||||||||||||||||||||||||||||
| DD | Fuyutsuki | Casual+ | |||||||||||||||||||||||||||||||||||||||||||||||||||||||||||||||||||||||||||||||||||||||||||||||||
| DD | Yuugure | Hard+ | Hard+ | Easy+ | |||||||||||||||||||||||||||||||||||||||||||||||||||||||||||||||||||||||||||||||||||||||||||||||
| DD | Hatsukaze | Easy+ | Easy+ | Casual+ | Casual+ | Easy+ | Casual+ | Casual+ | Casual+ | Casual+ | Casual+ | ||||||||||||||||||||||||||||||||||||||||||||||||||||||||||||||||||||||||||||||||||||||||
| DD | Amatsukaze | Casual+ | Casual+ | Casual+ | Casual+ | Casual+ | Casual+ | Casual+ | |||||||||||||||||||||||||||||||||||||||||||||||||||||||||||||||||||||||||||||||||||||||||||
| DD | Tokitsukaze | Casual+ | |||||||||||||||||||||||||||||||||||||||||||||||||||||||||||||||||||||||||||||||||||||||||||||||||
| DD | Tanikaze | Hard+ | Casual+ | Casual+ | Easy+ | Medium+ | Casual+ | Casual+ | Casual+ | Easy+ | Casual+ | ||||||||||||||||||||||||||||||||||||||||||||||||||||||||||||||||||||||||||||||||||||||||
| DD | Maikaze | Hard+ | Casual+ | Casual+ | Casual+ | Easy+ | Casual+ | Casual+ | Casual+ | Casual+ | Casual+ | ||||||||||||||||||||||||||||||||||||||||||||||||||||||||||||||||||||||||||||||||||||||||
| DD | Kazagumo | Casual+ | Casual+ | Casual+ | Casual+ | Easy+ | |||||||||||||||||||||||||||||||||||||||||||||||||||||||||||||||||||||||||||||||||||||||||||||
| DD | Takanami | Easy+ | Casual+ | Easy+ | Casual+ | Casual+ | Hard+ | Casual+ | |||||||||||||||||||||||||||||||||||||||||||||||||||||||||||||||||||||||||||||||||||||||||||
| DD | Fujinami | Medium+ | Casual+ | Casual+ | Easy+ | Casual+ | Casual+ | Casual+ | Casual+ | Casual+ | |||||||||||||||||||||||||||||||||||||||||||||||||||||||||||||||||||||||||||||||||||||||||
| DD | Asashimo | Easy+ | Casual+ | Casual+ | Easy+ | Casual+ | Casual+ | Casual+ | Casual+ | Casual+ | Casual+ | ||||||||||||||||||||||||||||||||||||||||||||||||||||||||||||||||||||||||||||||||||||||||
| DD | Hayashimo | Casual+ | Casual+ | Easy+ | Casual+ | Casual+ | |||||||||||||||||||||||||||||||||||||||||||||||||||||||||||||||||||||||||||||||||||||||||||||
| DD | Kiyoshimo | Casual+ | Casual+ | Casual+ | Hard+ | Casual+ | Casual+ | ||||||||||||||||||||||||||||||||||||||||||||||||||||||||||||||||||||||||||||||||||||||||||||
| CL | Ooyodo | Casual+ | |||||||||||||||||||||||||||||||||||||||||||||||||||||||||||||||||||||||||||||||||||||||||||||||||
| CV | Amagi | Casual+ | |||||||||||||||||||||||||||||||||||||||||||||||||||||||||||||||||||||||||||||||||||||||||||||||||
| CV | Katsuragi | Casual+ | |||||||||||||||||||||||||||||||||||||||||||||||||||||||||||||||||||||||||||||||||||||||||||||||||
| SS | I-201 | Casual+ | |||||||||||||||||||||||||||||||||||||||||||||||||||||||||||||||||||||||||||||||||||||||||||||||||
| SS | I-26 | Easy+ | Casual+ | Casual+ | Casual+ | Medium+ | |||||||||||||||||||||||||||||||||||||||||||||||||||||||||||||||||||||||||||||||||||||||||||||
| SS | I-203 | Casual+ | |||||||||||||||||||||||||||||||||||||||||||||||||||||||||||||||||||||||||||||||||||||||||||||||||
| SS | Maruyu | Casual+ | |||||||||||||||||||||||||||||||||||||||||||||||||||||||||||||||||||||||||||||||||||||||||||||||||
| SSV | I-400 | Easy+ | Easy+ | Casual+ | Casual+ | Hard+ | |||||||||||||||||||||||||||||||||||||||||||||||||||||||||||||||||||||||||||||||||||||||||||||
| AV | Nisshin | Medium+ | Easy+ | Easy+ | Casual+ | ||||||||||||||||||||||||||||||||||||||||||||||||||||||||||||||||||||||||||||||||||||||||||||||
| DD | Yukikaze | Casual+ | |||||||||||||||||||||||||||||||||||||||||||||||||||||||||||||||||||||||||||||||||||||||||||||||||
| DD | Urakaze | Easy+ | Easy+ | Casual+ | Casual+ | Easy+ | Casual+ | Casual+ | Casual+ | Casual+ | Casual+ | ||||||||||||||||||||||||||||||||||||||||||||||||||||||||||||||||||||||||||||||||||||||||
| DD | Hamakaze | Hard+ | Casual+ | Casual+ | Casual+ | Casual+ | Casual+ | Casual+ | Casual+ | Casual+ | Casual+ | ||||||||||||||||||||||||||||||||||||||||||||||||||||||||||||||||||||||||||||||||||||||||
| DD | Akigumo | Medium+ | Easy+ | Casual+ | Casual+ | Easy+ | Casual+ | Casual+ | Casual+ | Casual+ | Casual+ | ||||||||||||||||||||||||||||||||||||||||||||||||||||||||||||||||||||||||||||||||||||||||
| DD | Yuugumo | Easy+ | Casual+ | Casual+ | Easy+ | Casual+ | Casual+ | Casual+ | Casual+ | Casual+ | Casual+ | ||||||||||||||||||||||||||||||||||||||||||||||||||||||||||||||||||||||||||||||||||||||||
| DD | Makigumo | Casual+ | Casual+ | Casual+ | Easy+ | Casual+ | Casual+ | ||||||||||||||||||||||||||||||||||||||||||||||||||||||||||||||||||||||||||||||||||||||||||||
| DD | Naganami | Easy+ | Casual+ | Casual+ | Casual+ | Casual+ | |||||||||||||||||||||||||||||||||||||||||||||||||||||||||||||||||||||||||||||||||||||||||||||
| CL | Kitakami | Easy+ | Casual+ | Casual+ | Casual+ | Hard+ | Casual+ | Casual+ | Casual+ | Casual+ | Casual+ | Casual+ | |||||||||||||||||||||||||||||||||||||||||||||||||||||||||||||||||||||||||||||||||||||||
| CL | Ooi | Casual+ | |||||||||||||||||||||||||||||||||||||||||||||||||||||||||||||||||||||||||||||||||||||||||||||||||
| CL | Nagara | Hard+ | Casual+ | Casual+ | Casual+ | Casual+ | Casual+ | Casual+ | Casual+ | Casual+ | Casual+ | Casual+ | |||||||||||||||||||||||||||||||||||||||||||||||||||||||||||||||||||||||||||||||||||||||
| CL | Yuubari | Casual+ | |||||||||||||||||||||||||||||||||||||||||||||||||||||||||||||||||||||||||||||||||||||||||||||||||
| CA | Kinugasa | Casual+ | |||||||||||||||||||||||||||||||||||||||||||||||||||||||||||||||||||||||||||||||||||||||||||||||||
| CA | Myoukou | Casual+ | |||||||||||||||||||||||||||||||||||||||||||||||||||||||||||||||||||||||||||||||||||||||||||||||||
| CA | Atago | Casual+ | |||||||||||||||||||||||||||||||||||||||||||||||||||||||||||||||||||||||||||||||||||||||||||||||||
| CA | Mogami | Casual+ | |||||||||||||||||||||||||||||||||||||||||||||||||||||||||||||||||||||||||||||||||||||||||||||||||
| CA | Suzuya | Casual+ | |||||||||||||||||||||||||||||||||||||||||||||||||||||||||||||||||||||||||||||||||||||||||||||||||
| CA | Kumano | Casual+ | |||||||||||||||||||||||||||||||||||||||||||||||||||||||||||||||||||||||||||||||||||||||||||||||||
| CA | Tone | Medium+ | Easy+ | Easy+ | Easy+ | Casual+ | |||||||||||||||||||||||||||||||||||||||||||||||||||||||||||||||||||||||||||||||||||||||||||||
| CA | Chikuma | Hard+ | Casual+ | Casual+ | Easy+ | Casual+ | Casual+ | Casual+ | Casual+ | Casual+ | Easy+ | ||||||||||||||||||||||||||||||||||||||||||||||||||||||||||||||||||||||||||||||||||||||||
| FBB | Kongou | Casual+ | |||||||||||||||||||||||||||||||||||||||||||||||||||||||||||||||||||||||||||||||||||||||||||||||||
| FBB | Hiei | Casual+ | |||||||||||||||||||||||||||||||||||||||||||||||||||||||||||||||||||||||||||||||||||||||||||||||||
| FBB | Haruna | Hard+ | Easy+ | Casual+ | Hard+ | Easy+ | Casual+ | Casual+ | Medium+ | Casual+ | Casual+ | ||||||||||||||||||||||||||||||||||||||||||||||||||||||||||||||||||||||||||||||||||||||||
| FBB | Kirishima | Casual+ | |||||||||||||||||||||||||||||||||||||||||||||||||||||||||||||||||||||||||||||||||||||||||||||||||
| BB | Fusou | Casual+ | |||||||||||||||||||||||||||||||||||||||||||||||||||||||||||||||||||||||||||||||||||||||||||||||||
| BB | Yamashiro | Casual+ | |||||||||||||||||||||||||||||||||||||||||||||||||||||||||||||||||||||||||||||||||||||||||||||||||
| BB | Ise | Casual+ | |||||||||||||||||||||||||||||||||||||||||||||||||||||||||||||||||||||||||||||||||||||||||||||||||
| BB | Hyuuga | Casual+ | |||||||||||||||||||||||||||||||||||||||||||||||||||||||||||||||||||||||||||||||||||||||||||||||||
| BB | Nagato | Casual+ | |||||||||||||||||||||||||||||||||||||||||||||||||||||||||||||||||||||||||||||||||||||||||||||||||
| BB | Mutsu | Casual+ | |||||||||||||||||||||||||||||||||||||||||||||||||||||||||||||||||||||||||||||||||||||||||||||||||
| CV | Akagi | Casual+ | |||||||||||||||||||||||||||||||||||||||||||||||||||||||||||||||||||||||||||||||||||||||||||||||||
| CV | Kaga | Casual+ | |||||||||||||||||||||||||||||||||||||||||||||||||||||||||||||||||||||||||||||||||||||||||||||||||
| CV | Souryuu | Casual+ | |||||||||||||||||||||||||||||||||||||||||||||||||||||||||||||||||||||||||||||||||||||||||||||||||
| SS | I-8 | Easy+ | Casual+ | Easy+ | Casual+ | Medium+ | |||||||||||||||||||||||||||||||||||||||||||||||||||||||||||||||||||||||||||||||||||||||||||||
|
| ||||||||
|---|---|---|---|---|---|---|---|---|
|
Time remaining until Event ends [3]:
| ||||||||
| ||||||||