- Welcome to the Kancolle Wiki!
- If you have any questions regarding site content, account registration, etc., please visit the KanColle Wiki Discord
Difference between revisions of "User:Tohoseiryu"
>Wikia |
>Tohoseiryu |
||
| (11 intermediate revisions by the same user not shown) | |||
| Line 1: | Line 1: | ||
| − | |||
| − | + | <Tabber>Profile= | |
| − | + | [http://kancolle.wikia.com/wiki/Special:Forum Forum] | |
| − | * | + | [http://kancolle.wikia.com/wiki/Board:News_and_Announcements News and Announcements] |
| − | * | + | |
| − | * | + | [http://kancolle.wikia.com/wiki/Board:General_Discussion General Discussion] |
| + | |||
| + | [http://kancolle.wikia.com/wiki/Board:Questions_and_Answers Questions and Answers] | ||
| + | |||
| + | [http://kancolle.wikia.com/wiki/Combat Combat page] | ||
| + | |||
| + | |-|HQ= | ||
| + | |||
| + | |||
| + | <div style="position:fixed; top:325px; right:-30px;">[[File:Akashi_newyear_2015_1.png|right]]</div> | ||
| + | <div style="position:fixed; top:320px; Left:-70px;">[[File:Ooyodo_NPC.png]]</div> | ||
| + | |||
| + | |||
| + | {| Class="wikitable" style="float:right" | ||
| + | ! X !! Activity Level | ||
| + | |- | ||
| + | | Style="text-align:center;"| | ||
| + | | Style="text-align:center;background-color:rgb(255,0,0);"| '''Level 5''' | ||
| + | |- | ||
| + | | Style="text-align:center;"| | ||
| + | | Style="text-align:center;background-color:rgb(255,165,0);"| '''Level 4''' | ||
| + | |- | ||
| + | | Style="text-align:center;"| | ||
| + | | Style="text-align:center;background-color:rgb(255,255,0);"| '''Level 3''' | ||
| + | |- | ||
| + | | Style="text-align:center;"|'''X''' | ||
| + | | Style="text-align:center;background-color:rgb(204,255,00);"| '''Level 2''' | ||
| + | |- | ||
| + | | Style="text-align:center;"| | ||
| + | | Style="text-align:center;background-color:rgb(0,255,0);"| '''Level 1''' | ||
| + | |} | ||
| + | {| class="wikitable" | ||
| + | ! Number !! Fleet Name !! Readiness !! Status | ||
| + | |- | ||
| + | | style="text-align:center;"| '''I''' | ||
| + | | style="text-align:center;"| '''Kure''' | ||
| + | | Style="text-align:center;background-color:rgb(0,255,0);"| '''Active''' | ||
| + | | Style="text-align:center;background-color:rgb(0,255,0);"| '''Active''' | ||
| + | |- | ||
| + | | style="text-align:center;"| '''II''' | ||
| + | | style="text-align:center;"| '''Kanagawa''' | ||
| + | | Style="text-align:center;background-color:rgb(255,255,0);"| '''Partial Ready''' | ||
| + | | Style="text-align:center;background-color:rgb(255,0,0);"| '''Inactive''' | ||
| + | |- | ||
| + | | style="text-align:center;"| '''III''' | ||
| + | | style="text-align:center;"| '''Yamaguchi''' | ||
| + | | Style="text-align:center;background-color:rgb(255,0,0);"| '''Inactive''' | ||
| + | | Style="text-align:center;background-color:rgb(255,0,0);"| '''Inactive''' | ||
| + | |- | ||
| + | | style="text-align:center;"| '''IV''' | ||
| + | | style="text-align:center;"| '''Okayama''' | ||
| + | | Style="text-align:center;background-color:rgb(0,255,0);"| '''Ready''' | ||
| + | | Style="text-align:center;background-color:rgb(255,0,0);"| '''Inactive''' | ||
| + | |- | ||
| + | | style="text-align:center;"| '''V''' | ||
| + | | style="text-align:center;"| '''Fukushima''' | ||
| + | | Style="text-align:center;background-color:rgb(0,255,0);"| '''Ready''' | ||
| + | | Style="text-align:center;background-color:rgb(0,255,0);"| '''Ready''' | ||
| + | |} | ||
| + | |||
| + | |||
| + | |||
| + | |-|I.Fleet= | ||
| + | |||
| + | [[File:[[File:640px-Flag_of_Hiroshima_Prefecture.svg.png|thumb|100px]] | ||
| + | <div style="position:fixed; top:265px; right:-040px;">[[File:426.png]] | ||
| + | .png|right]]</div> | ||
| + | |||
| + | <div style="position:fixed; top:330px; right:255px;"> | ||
| + | <div style="color:navyblue;background:white;border:solid 1px black;width:175px;border-radius:10px;padding:5px; z-index:3">Welcome to the Combined Fleet HQ in Kure!</div> | ||
| + | </div> | ||
| + | |||
| + | *'''I.1st Destroyer Division (Hiroshima)''' | ||
| + | **I.1st Destroyer Squadron: [[Fubuki]] & [[Tokitsukaze]] | ||
| + | ***II.2nd Destroyer Squadron: [[Ushio]] & [[Akizuki]] | ||
| + | ****III.3rd Destroyer Squadron: [[Ayanami]] & [[Yuudachi]] | ||
| + | *'''I.1st Light Cruiser Division (Kure)''' | ||
| + | **I.1st Light Cruiser Squadron: [[Yuubari]] & [[Ooyodo]] | ||
| + | ***II.2nd Light Cruiser Squadron: [[Sendai]], [[Jintsuu]] & [[Naka]] | ||
| + | ****'''III.1st Torpedo Cruiser Task Unit: '''[[Kitakami]], [[Ooi]] & [[Kiso]] | ||
| + | *'''I.1st Heavy Cruiser Division (Kure)''' | ||
| + | **I.1st Heavy Cruiser Squadron: [[Maya]], [[Choukai]], [[Takao]] & [[Atago]] | ||
| + | ***II.1st Heavy Cruiser Squadron: [[Kinugasa]] & [[Furutaka]] | ||
| + | ****'''III.1st Aviation Cruiser Squadron:''' [[Mogami]] & [[Mikuma]] | ||
| + | *'''I.1st Fast Battleship Division (Kure)''' | ||
| + | **I.1st Fast Battleship : [[Kongou]] & [[Hiei]] | ||
| + | ***II.2nd Fast Battleship Squadron: [[Haruna]] & [[Kirishima]] | ||
| + | ****'''III.1st Battleship Squadron: '''[[Mutsu]] & [[Nagato]] | ||
| + | *****'''IV.1st Aviation Battleship Squadron: '''[[Fusou]] & [[Yamashiro]] | ||
| + | *'''I.1st Aircraft Carrier Group (Kure): '''[[Hiryuu]] & [[Souryuu]] | ||
| + | **'''II.1st Light Aircraft Carrier Task Unit:''' [[Chitose]], [[Chiyoda]] & [[Zuihou]] | ||
| + | |||
| + | |||
| + | |||
| + | {| Style="width: 125px;class=" class="wikitable" | ||
| + | !Style="text-align:center;background: rgb(229,228,226);" colspan=2 | | ||
| + | <p Class="MsoNormal">'''<span style="font-size:16.0pt;line-height:100%">I.Destroyer Division</span>'''</p> | ||
| + | |- | ||
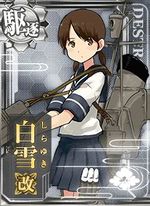
| + | ! Style="solid;text-align:center;background-color:rgb(238,130,238);"| Fubuki | ||
| + | ! Style="solid;text-align:center;background-color:rgb(238,130,238);"| Tokitsukaze | ||
| + | ! Style="solid;text-align:center;background-color:rgb(238,130,238);"| Ushio | ||
| + | ! Style="solid;text-align:center;background-color:rgb(238,130,238);"| Akizuki | ||
| + | ! Style="solid;text-align:center;background-color:rgb(238,130,238);"| Ayanami | ||
| + | ! Style="solid;text-align:center;background-color:rgb(238,130,238);"| Yuudachi | ||
| + | ! Style="solid;text-align:center;background-color:rgb(0,0,205);"|<span style="color:Yellow;">Hiroshima</span> | ||
| + | |- | ||
| + | | [[File:426_Card.jpg|link=Fubuki|150px]] | ||
| + | | [[File:322_Card.jpg|link=Tokitsukaze|150px]] | ||
| + | | [[File:407_Card.jpg|link=Ushio|150px]] | ||
| + | | [[File:330_Card.jpg|link=Akizuki|150px]] | ||
| + | | [[File:195_Card.jpg|link=Ayanami|150px]] | ||
| + | | [[File:144.jpg|link=Yuudachi|150px]] | ||
| + | | [[File:640px-Flag_of_Hiroshima_Prefecture.svg.png|link=http://en.wikipedia.org/wiki/Hiroshima_Prefecture|150px]] | ||
| + | |- | ||
| + | | style="text-align:center;"| '''Level 70''' | ||
| + | | style="text-align:center;"| '''Level 31''' | ||
| + | | style="text-align:center;"| '''Level 60''' | ||
| + | | style="text-align:center;"| '''Level 50''' | ||
| + | | style="text-align:center;"| '''Level 22''' | ||
| + | | style="text-align:center;"| '''Level 56''' | ||
| + | | Style="text-align:center;"|'''N/A''' | ||
| + | |- | ||
| + | | Style="text-align:center;" | [[61cm Quad (Oxygen) Torpedo Mount|61cm Quad Torpedo Mount]] | ||
| + | | Style="text-align:center;" | [[61cm Quint (Oxygen) Torpedo Mount|61cm Quint Torpedo Mount]] | ||
| + | | Style="text-align:center;" | [[61cm Quad (Oxygen) Torpedo Mount|61cm Quad Torpedo Mount]] | ||
| + | | Style="text-align:center;" | [[10cm Twin High-angle Mount + Anti-Aircraft Fire Director|10cm Twin High-angle Mount Fire Director]] | ||
| + | | Style="text-align:center;" | [[10cm Twin High-angle Mount]] | ||
| + | | Style="text-align:center;" | [[Type 3 SONAR]] | ||
| + | | Style="text-align:center;" | I.1st Destroyer Squadron | ||
| + | |- | ||
| + | | Style="text-align:center;"| [[61cm Quad (Oxygen) Torpedo Mount|61cm Quad Torpedo Mount]] | ||
| + | | Style="text-align:center;"| [[61cm Quad (Oxygen) Torpedo Mount|61cm Quad Torpedo Mount]] | ||
| + | | Style="text-align:center;"| [[61cm Quad (Oxygen) Torpedo Mount|61cm Quad Torpedo Mount]] | ||
| + | | Style="text-align:center;"| [[10cm Twin High-angle Mount + Anti-Aircraft Fire Director|10cm Twin High-angle Mount Fire Director]] | ||
| + | | Style="text-align:center;"| [[10cm Twin High-angle Mount]] | ||
| + | | Style="text-align:center;"| [[Type 3 SONAR]] | ||
| + | | Style="text-align:center;"| II.2nd Destroyer Squadron | ||
| + | |- | ||
| + | | Style="text-align:center;"| [[Type 22 Surface RADAR Kai 4]] | ||
| + | | Style="text-align:center;"| [[Type 33 Surface RADAR]] | ||
| + | | Style="text-align:center;"| [[Type 33 Surface RADAR]] | ||
| + | | Style="text-align:center;"| [[Type 13 AIR RADAR Kai]] | ||
| + | | Style="text-align:center;"| [[Type 13 AIR RADAR Kai]] | ||
| + | | Style="text-align:center;"| [[Type 3 Depth Charge]] | ||
| + | | Style="text-align:center;"| III.3rd Destroyer Squadron | ||
| + | |- | ||
| + | | Style="text-align:center;"| Locked | ||
| + | | Style="text-align:center;"| Locked | ||
| + | | Style="text-align:center;"| Locked | ||
| + | | Style="text-align:center;"| Locked | ||
| + | | Style="text-align:center;"| Locked | ||
| + | | Style="text-align:center;"| Locked | ||
| + | | Style="text-align:center;"| N/A | ||
| + | |} | ||
| + | |||
| + | |||
| + | |||
| + | {| Style="width: 125px;class=" class="wikitable" | ||
| + | ! Style="text-align:center;background: rgb(229,228,226);" colspan=2 | | ||
| + | <p Class="MsoNormal"><span style="font-size:21px;line-height:22.8266677856445px;">I.1st Light Cruiser Division</span></p> | ||
| + | |- | ||
| + | ! Style="solid;text-align:center;background-color:rgb(238,130,238)"| Yuubari | ||
| + | ! Style="solid;text-align:center;background-color:rgb(238,130,238)"| Ooyodo | ||
| + | ! Style="solid;text-align:center;background-color:rgb(238,130,238)"| Sendai | ||
| + | ! Style="solid;text-align:center;background-color:rgb(238,130,238)"| Jintsuu | ||
| + | ! Style="solid;text-align:center;background-color:rgb(238,130,238)"| Naka | ||
| + | ! Style="solid;text-align:center;background-color:rgb(0,0,205);"|<span style="color:Yellow;">Kure</span> | ||
| + | |- | ||
| + | | [[File:111M.jpg|link=Yuubari|150px]] | ||
| + | | [[File:321_Card.jpg|link=Ooyodo|150px]] | ||
| + | | [[File:158_Card.jpg|link=Sendai|150px]] | ||
| + | | [[File:047M.jpg|link=Jintsuu|150px]] | ||
| + | | [[File:048M.jpg|link=Naka|150px]] | ||
| + | | [[File:640px-Flag_of_Kure,_Hiroshima.png|http://en.wikipedia.org/wiki/Kure,_Hiroshima|150px]] | ||
| + | |- | ||
| + | | style="text-align:center;"| '''Level 33''' | ||
| + | | style="text-align:center;"| '''Level 35''' | ||
| + | | style="text-align:center;"| '''Level 56''' | ||
| + | | style="text-align:center;"| '''Level 23''' | ||
| + | | style="text-align:center;"| '''Level 22''' | ||
| + | | Style="text-align:center;"| '''N/A''' | ||
| + | |- | ||
| + | | Style="text-align:center;"| [[Type 3 SONAR]] | ||
| + | | Style="text-align:center;"| [[15.5cm Triple Gun Mount (Main)]] | ||
| + | | Style="text-align:center;"| [[15.5cm Triple Gun Mount (Main)]] | ||
| + | | Style="text-align:center;"| [[15.5cm Triple Gun Mount (Main)]] | ||
| + | | Style="text-align:center;"| [[15.5cm Triple Gun Mount (Main)]] | ||
| + | | Style="text-align:center;"| I.1st Light Cruiser Squadron | ||
| + | |- | ||
| + | | Style="text-align:center;"| [[Type 3 SONAR]] | ||
| + | | Style="text-align:center;"| [[15.5cm Triple Gun Mount (Main)]] | ||
| + | | Style="text-align:center;"| [[15.5cm Triple Gun Mount (Main)]] | ||
| + | | Style="text-align:center;"| [[15.5cm Triple Gun Mount (Main)]] | ||
| + | | Style="text-align:center;"| [[15.5cm Triple Gun Mount (Main)]] | ||
| + | | Style="text-align:center;"| II.2nd Light Cruiser Squadron | ||
| + | |- | ||
| + | | Style="text-align:center;"| [[Type 3 SONAR]] | ||
| + | | Style="text-align:center;"| [[Type 14 Air RADAR]] | ||
| + | | Style="text-align:center;"| [[Type 0 Observation Seaplane]] | ||
| + | | Style="text-align:center;"| [[Type 0 Observation Seaplane]] | ||
| + | | Style="text-align:center;"| [[Type 0 Observation Seaplane]] | ||
| + | | Style="text-align:center;"| III.1st Torpedo Cruiser Task Unit | ||
| + | |- | ||
| + | | Style="text-align:center;"| [[Type 3 Depth Charge]] | ||
| + | | Style="text-align:center;"| [[Type 0 Observation Seaplane]] | ||
| + | | Style="text-align:center;"| Locked | ||
| + | | Style="text-align:center;"| Locked | ||
| + | | Style="text-align:center;"| Locked | ||
| + | | Style="text-align:center;"| N/A | ||
| + | |} | ||
| + | |||
| + | |||
| + | |||
| + | {| Style="width: 125px;class=" class="wikitable" | ||
| + | ! Style="text-align:center;background: rgb(229,228,226);" colspan=2 | | ||
| + | <p Class="MsoNormal"><span style="font-size:21px;line-height:22.8266677856445px;">III.Torpedo Cruiser Task Unit</span></p> | ||
| + | |- | ||
| + | ! Style="solid;text-align:center;background-color:rgb(238,130,238)"|Kitakami | ||
| + | ! Style="solid;text-align:center;background-color:rgb(238,130,238)"|Ooi | ||
| + | ! Style="solid;text-align:center;background-color:rgb(238,130,238)"|Kiso | ||
| + | ! Style="solid;text-align:center;background-color:rgb(0,0,205);"|<span style="color:Yellow;">Kure</span> | ||
| + | |- | ||
| + | | [[File:098.jpg|link=Kitakami|150px]] | ||
| + | | [[File:097.jpg|link=Ooi|150px]] | ||
| + | | [[File:146.jpg|link=Kiso|150px]] | ||
| + | | [[File:640px-Flag_of_Kure,_Hiroshima.png|http://en.wikipedia.org/wiki/Kure,_Hiroshima|150px]] | ||
| + | |- | ||
| + | | Style="text-align:center;"| '''Level 32''' | ||
| + | | Style="text-align:center;"| '''Level 22''' | ||
| + | | Style="text-align:center;"| '''Level 57''' | ||
| + | | style="text-align:center;"| '''N/A''' | ||
| + | |- | ||
| + | | Style="text-align:center;"| [[15.5cm Triple Gun Mount (Secondary)]] | ||
| + | | Style="text-align:center;"| [[15.5cm Triple Gun Mount (Secondary)]] | ||
| + | | Style="text-align:center;"| [[15.5cm Triple Gun Mount (Secondary)]] | ||
| + | | Style="text-align:center;"| Reinforcements from Hiroshima | ||
| + | |- | ||
| + | | Style="text-align:center;"| [[15.5cm Triple Gun Mount (Secondary)]] | ||
| + | | Style="text-align:center;"| [[15.5cm Triple Gun Mount (Secondary)]] | ||
| + | | Style="text-align:center;"| [[15.5cm Triple Gun Mount (Secondary)]] | ||
| + | | Style="text-align:center;"| N/A | ||
| + | |- | ||
| + | | Style="text-align:center;"| [[Type A Ko-hyoteki]] | ||
| + | | Style="text-align:center;"| [[Type A Ko-hyoteki]] | ||
| + | | Style="text-align:center;"| [[Type A Ko-hyoteki]] | ||
| + | | Style="text-align:center;"| N/A | ||
| + | |- | ||
| + | | Style="text-align:center;"| Locked | ||
| + | | Style="text-align:center;"| Locked | ||
| + | | Style="text-align:center;"| Locked | ||
| + | | Style="text-align:center;"| N/A | ||
| + | |} | ||
| + | |||
| + | |||
| + | |||
| + | {| Style="width: 125px;class=" class="wikitable" | ||
| + | ! Style="text-align:center;background: rgb(229,228,226);" colspan=2 | | ||
| + | <p Class="MsoNormal"><span style="font-size:21px;line-height:22.8266677856445px;">I.1st Heavy Cruiser Division</span></p> | ||
| + | |- | ||
| + | ! Style="solid;text-align:center;background-color:rgb(238,130,238)"|Maya | ||
| + | ! Style="solid;text-align:center;background-color:rgb(238,130,238)"|Choukai | ||
| + | ! Style="solid;text-align:center;background-color:rgb(238,130,238)"|<span style="font-weight:bold;">Takao</span> | ||
| + | ! Style="solid;text-align:center;background-color:rgb(238,130,238)"|Atago | ||
| + | ! Style="solid;text-align:center;background-color:rgb(0,0,205);"|<span style="color:Yellow;">Kure</span> | ||
| + | |- | ||
| + | | [[File:061M.jpg|link=Maya|150px]] | ||
| + | | [[File:062M.jpg|link=Choukai|150px]] | ||
| + | | [[File:059M.jpg|link=Takao|150px]] | ||
| + | | [[File:060M.jpg|link=Atago|150px]] | ||
| + | | [[File:640px-Flag_of_Kure,_Hiroshima.png|http://en.wikipedia.org/wiki/Kure,_Hiroshima|150px]] | ||
| + | |- | ||
| + | | Style="text-align:center;"| '''Level 50''' | ||
| + | | Style="text-align:center;"| '''Level 28''' | ||
| + | | Style="text-align:center;"| '''Level 25''' | ||
| + | | Style="text-align:center;"| '''Level 27''' | ||
| + | | Style="text-align:center;"| '''N/A''' | ||
| + | |- | ||
| + | | Style="text-align:center;"| [[20.3cm(no.2) Twin Gun Mount]] | ||
| + | | Style="text-align:center;"| [[20.3cm(no.2) Twin Gun Mount]] | ||
| + | | Style="text-align:center;"| [[20.3cm(no.2) Twin Gun Mount]] | ||
| + | | Style="text-align:center;"| [[SKC34 20.3cm Twin Cannon]] | ||
| + | | Style="text-align:center;"| I.1st Heavy Cruiser Squadron | ||
| + | |- | ||
| + | | Style="text-align:center;"| [[20.3cm(no.2) Twin Gun Mount]] | ||
| + | | Style="text-align:center;"| [[20.3cm(no.2) Twin Gun Mount]] | ||
| + | | Style="text-align:center;"| [[20.3cm(no.2) Twin Gun Mount]] | ||
| + | | Style="text-align:center;"| [[SKC34 20.3cm Twin Cannon]] | ||
| + | | Style="text-align:center;"| II.2nd Heavy Cruiser Squadron | ||
| + | |- | ||
| + | | Style="text-align:center;"| [[Type 14 Air RADAR]] | ||
| + | | Style="text-align:center;"| [[Type 14 Air RADAR]] | ||
| + | | Style="text-align:center;"| [[Type 14 Air RADAR]] | ||
| + | | Style="text-align:center;"| [[FuMO25 Radar]] | ||
| + | | Style="text-align:center;"| III.1st Aviation Cruiser Squadron | ||
| + | |- | ||
| + | | Style="text-align:center;"| [[Type 0 Recon Seaplane]] | ||
| + | | Style="text-align:center;"| [[Type 0 Recon Seaplane]] | ||
| + | | Style="text-align:center;"| [[Type 0 Recon Seaplane]] | ||
| + | | Style="text-align:center;"| [[Type 0 Recon Seaplane]] | ||
| + | | Style="text-align:center;"|N/A | ||
| + | |} | ||
| + | |||
| + | |||
| + | |||
| + | {| Style="width: 125px;class=" class="wikitable" | ||
| + | ! Style="text-align:center;background: rgb(229,228,226);" colspan=2 | | ||
| + | <p Class="MsoNormal"><span style="font-size:21px;line-height:22.8266677856445px;">III.1st Aviation Cruiser Squadron</span></p> | ||
| + | |- | ||
| + | ! Style="solid;text-align:center;background-color:rgb(238,130,238)"|Mogami | ||
| + | ! Style="solid;text-align:center;background-color:rgb(238,130,238)"|Mikuma | ||
| + | ! Style="solid;text-align:center;background-color:rgb(0,0,205);"|<span style="color:Yellow;">Kure</span> | ||
| + | |- | ||
| + | | [[File:101.jpg|link=Mogami|150px]] | ||
| + | | [[File:117.jpg|link=Mikuma|150px]] | ||
| + | | [[File:640px-Flag_of_Kure,_Hiroshima.png|http://en.wikipedia.org/wiki/Kure,_Hiroshima|150px]] | ||
| + | |- | ||
| + | | Style="text-align:center;"| '''Level 55''' | ||
| + | | Style="text-align:center;"| '''Level 31''' | ||
| + | | Style="text-align:center;"| '''N/A''' | ||
| + | |- | ||
| + | | Style="text-align:center;"| [[20.3cm(no.3) Twin Gun Mount]] | ||
| + | | Style="text-align:center;"| [[20.3cm(no.3) Twin Gun Mount]] | ||
| + | | Style="text-align:center;"| Detached from Hiroshima | ||
| + | |- | ||
| + | | Style="text-align:center;"| [[20.3cm(no.3) Twin Gun Mount]] | ||
| + | | Style="text-align:center;"| [[20.3cm(no.3) Twin Gun Mount]] | ||
| + | | Style="text-align:center;"| N/A | ||
| + | |- | ||
| + | | Style="text-align:center;"| [[Zuiun (634 Air Group)|Zuiun 634 Air Group]] | ||
| + | | Style="text-align:center;"| [[Zuiun (634 Air Group)|Zuiun 634 Air Group]] | ||
| + | | Style="text-align:center;"| N/A | ||
| + | |- | ||
| + | | Style="text-align:center;"| [[Zuiun (634 Air Group)|Zuiun 634 Air Group]] | ||
| + | | Style="text-align:center;"| [[Zuiun (634 Air Group)|Zuiun 634 Air Group]] | ||
| + | | Style="text-align:center;"| N/A | ||
| + | |} | ||
| + | |||
| + | |||
| + | |||
| + | {| Style="width: 125px;class=" class="wikitable" | ||
| + | ! Style="text-align:center;background: rgb(229,228,226);" colspan=2 | | ||
| + | <p Class="MsoNormal"><span style="font-size:21px;line-height:22.8266677856445px;">I.1st Fast Battleship Division</span></p> | ||
| + | |- | ||
| + | ! Style="solid;text-align:center;background-color:rgb(238,130,238)"|Kongou | ||
| + | ! Style="solid;text-align:center;background-color:rgb(238,130,238)"|Hiei | ||
| + | ! Style="solid;text-align:center;background-color:rgb(238,130,238)"|Haruna | ||
| + | ! Style="solid;text-align:center;background-color:rgb(238,130,238)"|Kirishima | ||
| + | ! Style="solid;text-align:center;background-color:rgb(0,0,205);"|<span style="color:Yellow;">Kure</span> | ||
| + | |- | ||
| + | | [[File:021b.png|link=Kongou|150px]] | ||
| + | | [[File:022b.png|link=Hiei|150px]] | ||
| + | | [[File:211 Card.jpg|link=Haruna|150px]] | ||
| + | | [[File:024b.jpg|link=Kirishima|150px]] | ||
| + | | [[File:640px-Flag_of_Kure,_Hiroshima.png|http://en.wikipedia.org/wiki/Kure,_Hiroshima|150px]] | ||
| + | |- | ||
| + | | Style="text-align:center;"| '''Level 30''' | ||
| + | | Style="text-align:center;"| '''Level 30''' | ||
| + | | Style="text-align:center;"| '''Level 55''' | ||
| + | | Style="text-align:center;"| '''Level 47''' | ||
| + | | style="text-align:center;"| '''N/A''' | ||
| + | |- | ||
| + | | Style="text-align:center;"| [[Prototype 41cm Triple Cannon]] | ||
| + | | Style="text-align:center;"| [[Prototype 41cm Triple Cannon]] | ||
| + | | Style="text-align:center;"| [[Prototype 41cm Triple Cannon]] | ||
| + | | Style="text-align:center;"| [[Prototype 35.6cm Triple Gun Mount]] | ||
| + | | Style="text-align:center;"| I.1st Fast Battleship Squadron | ||
| + | |- | ||
| + | | Style="text-align:center;"| [[46cm Triple Gun Mount]] | ||
| + | | Style="text-align:center;"| [[46cm Triple Gun Mount]] | ||
| + | | Style="text-align:center;"| [[46cm Triple Gun Mount]] | ||
| + | | Style="text-align:center;"| [[46cm Triple Gun Mount]] | ||
| + | | Style="text-align:center;"| II.2nd Fast Battleship Squadron | ||
| + | |- | ||
| + | | Style="text-align:center;"| [[Type 91 Armor-Piercing (AP) Shell|Type 91 Armor-Piercing Shell]] | ||
| + | | Style="text-align:center;"| [[Type 91 Armor-Piercing (AP) Shell|Type 91 Armor-Piercing Shell]] | ||
| + | | Style="text-align:center;"| [[Type 91 Armor-Piercing (AP) Shell|Type 91 Armor-Piercing Shell]] | ||
| + | | Style="text-align:center;"| [[Type 91 Armor-Piercing (AP) Shell|Type 91 Armor-Piercing Shell]] | ||
| + | | Style="text-align:center;"| III.1st Battleship Squadron | ||
| + | |- | ||
| + | | Style="text-align:center;"| [[Type 0 Observation Seaplane]] | ||
| + | | Style="text-align:center;"| [[Type 0 Observation Seaplane]] | ||
| + | | Style="text-align:center;"| [[Type 0 Observation Seaplane]] | ||
| + | | Style="text-align:center;"| [[Type 0 Observation Seaplane]] | ||
| + | | Style="text-align:center;"| IV.1st Aviation Battleship Squadron | ||
| + | |} | ||
| + | |||
| + | |||
| + | |||
| + | {| Style="width: 125px;class=" class="wikitable" | ||
| + | ! Style="text-align:center;background: rgb(229,228,226);" colspan=2 | | ||
| + | <p Class="MsoNormal"><span style="font-size:21px;line-height:22.8266677856445px;">III.Battleship Task Unit</span></p> | ||
| + | |- | ||
| + | ! Style="solid;text-align:center;background-color:rgb(238,130,238)"|Mutsu | ||
| + | ! Style="solid;text-align:center;background-color:rgb(238,130,238)"|Nagato | ||
| + | ! Style="solid;text-align:center;background-color:rgb(0,0,205);"|<span style="color:Yellow;">Kure</span> | ||
| + | |- | ||
| + | | [[File:002b.png|link=Mutsu|150px]] | ||
| + | | [[File:001b.jpg|link=Nagato|150px]] | ||
| + | | [[File:640px-Flag_of_Kure,_Hiroshima.png|http://en.wikipedia.org/wiki/Kure,_Hiroshima|150px]] | ||
| + | |- | ||
| + | | Style="text-align:center;"| '''Level 45''' | ||
| + | | Style="text-align:center;"| '''Level 40''' | ||
| + | | Style="text-align:center;"| '''N/A''' | ||
| + | |- | ||
| + | | Style="text-align:center;"| [[46cm Triple Gun Mount]] | ||
| + | | Style="text-align:center;"| [[46cm Triple Gun Mount]] | ||
| + | | Style="text-align:center;"| Detached from Hiroshima | ||
| + | |- | ||
| + | | Style="text-align:center;"| [[46cm Triple Gun Mount]] | ||
| + | | Style="text-align:center;"| [[46cm Triple Gun Mount]] | ||
| + | | Style="text-align:center;"| N/A | ||
| + | |- | ||
| + | | Style="text-align:center;"| [[Type 1 Armor-Piercing (AP) Shell|Type 1 Armor-Piercing Shell]] | ||
| + | | Style="text-align:center;"| [[Type 1 Armor-Piercing (AP) Shell|Type 1 Armor-Piercing Shell]] | ||
| + | | Style="text-align:center;"| N/A | ||
| + | |- | ||
| + | | Style="text-align:center;"| [[Type 0 Observation Seaplane]] | ||
| + | | Style="text-align:center;"| [[Type 0 Observation Seaplane]] | ||
| + | | Style="text-align:center;"| N/A | ||
| + | |} | ||
| + | |||
| + | |||
| + | |||
| + | {| Style="width: 125px;class=" class="wikitable" | ||
| + | ! Style="text-align:center;background: rgb(229,228,226);" colspan=2 | | ||
| + | <p Class="MsoNormal"><span style="font-size:21px;line-height:22.8266677856445px;">IV.1st Aviation Battleship Squadron</span></p> | ||
| + | |- | ||
| + | ! Style="solid;text-align:center;background-color:rgb(238,130,238)"|Fusou | ||
| + | ! Style="solid;text-align:center;background-color:rgb(238,130,238)"|Yamashiro | ||
| + | ! Style="solid;text-align:center;background-color:rgb(0,0,205);"|<span style="color:Yellow;">Kure</span> | ||
| + | |- | ||
| + | | [[File:211.png|link=Fusou|150px]] | ||
| + | | [[File:412_Card.jpg|link=Yamashiro|150px]] | ||
| + | | [[File:640px-Flag_of_Kure,_Hiroshima.png|http://en.wikipedia.org/wiki/Kure,_Hiroshima|150px]] | ||
| + | |- | ||
| + | | Style="text-align:center;"| '''Level 86''' | ||
| + | | Style="text-align:center;"| '''Level 82''' | ||
| + | | Style="text-align:center;"| '''N/A''' | ||
| + | |- | ||
| + | | Style="text-align:center;"| [[46cm Triple Gun Mount]] | ||
| + | | Style="text-align:center;"| [[46cm Triple Gun Mount]] | ||
| + | | Style="text-align:center;"| N/A | ||
| + | |- | ||
| + | | Style="text-align:center;"| [[46cm Triple Gun Mount]] | ||
| + | | Style="text-align:center;"| [[46cm Triple Gun Mount]] | ||
| + | | style="text-align:center;"| N/A | ||
| + | |- | ||
| + | | Style="text-align:center;"| [[Zuiun Model 12]] | ||
| + | | Style="text-align:center;"| [[Zuiun Model 12]] | ||
| + | | Style="text-align:center;"| N/A | ||
| + | |- | ||
| + | | Style="text-align:center;"| [[Prototype Seiran (Mountain Haze)|Prototype Seiran]] | ||
| + | | Style="text-align:center;"| [[Prototype Seiran (Mountain Haze)|Prototype Seiran]] | ||
| + | | Style="text-align:center;"| N/A | ||
| + | |} | ||
| + | |||
| + | |||
| + | |||
| + | {| Style="width: 125px;class=" class="wikitable" | ||
| + | ! Style="text-align:center;background: rgb(229,228,226);" colspan=2 | | ||
| + | <p Class="MsoNormal"><span style="font-size:21px;line-height:22.8266677856445px;">I.1st Aircraft Carrier Group</span></p> | ||
| + | |- | ||
| + | ! Style="solid;text-align:center;background-color:rgb(238,130,238)"|Hiryuu | ||
| + | ! Style="solid;text-align:center;background-color:rgb(238,130,238)"|Souryuu | ||
| + | ! Style="solid;text-align:center;background-color:rgb(0,0,205);"|<span style="color:Yellow;">Kure</span> | ||
| + | |- | ||
| + | | [[File:009b.png|link=Hiryuu|150px]] | ||
| + | | [[File:197 Card.jpg|link=Souryuu|150px]] | ||
| + | | [[File:640px-Flag_of_Kure,_Hiroshima.png|http://en.wikipedia.org/wiki/Kure,_Hiroshima|150px]] | ||
| + | |- | ||
| + | | Style="text-align:center;"| '''Level 32''' | ||
| + | | Style="text-align:center;"| '''Level 79''' | ||
| + | | style="text-align:center;"| '''N/A''' | ||
| + | |- | ||
| + | | Style="text-align:center;"| [[Reppuu Kai|Reppuu Kai]] | ||
| + | | Style="text-align:center;"| [[Reppuu (601 Air Group)]] | ||
| + | | Style="text-align:center;"| N/A | ||
| + | |- | ||
| + | | Style="text-align:center;"| [[Reppuu (Strong Gale)|Reppuu]] | ||
| + | | Style="text-align:center;"| [[Reppuu (601 Air Group)]] | ||
| + | | Style="text-align:center;"| N/A | ||
| + | |- | ||
| + | | Style="text-align:center;"| [[Reppuu (Strong Gale)|Reppuu]] | ||
| + | | Style="text-align:center;"| [[Tenzan Model 12 (Tomonaga Squadron)]] | ||
| + | | Style="text-align:center;"| N/A | ||
| + | |- | ||
| + | | Style="text-align:center;"| [[Suisei (Comet) (Egusa Squadron)]] | ||
| + | | Style="text-align:center;"| [[Saiun (Iridescent Cloud)|Saiun]] | ||
| + | | Style="text-align:center;"| N/A | ||
| + | |} | ||
| + | |||
| + | |||
| + | |||
| + | {| Style="width: 125px;class=" class="wikitable" | ||
| + | ! Style="text-align:center;background: rgb(229,228,226);" colspan=2 | | ||
| + | <p Class="MsoNormal"><span style="font-size:21px;line-height:22.8266677856445px;">II.1st Light Aircraft Carrier Task Unit</span></p> | ||
| + | |- | ||
| + | ! Style="solid;text-align:center;background-color:rgb(238,130,238)"|Chitose | ||
| + | ! Style="solid;text-align:center;background-color:rgb(238,130,238)"|Chiyoda | ||
| + | ! Style="solid;text-align:center;background-color:rgb(238,130,238)"|Zuihou | ||
| + | ! Style="solid;text-align:center;background-color:rgb(0,0,205);"|<span style="color:Yellow;">Kure</span> | ||
| + | |- | ||
| + | | [[File:104M.jpg|link=Chitose|150px]] | ||
| + | | [[File:105M.jpg|link=Chiyoda|150px]] | ||
| + | | [[File:113.jpg|link=Zuihou|150px]] | ||
| + | | [[File:640px-Flag_of_Kure,_Hiroshima.png|http://en.wikipedia.org/wiki/Kure,_Hiroshima|150px]] | ||
| + | |- | ||
| + | | Style="text-align:center;"| '''Level 35''' | ||
| + | | Style="text-align:center;"| '''Level 30''' | ||
| + | | Style="text-align:center;"| '''Level 36''' | ||
| + | | Style="text-align:center;"| '''N/A''' | ||
| + | |- | ||
| + | | Style="text-align:center;"| [[Reppuu (Strong Gale)|Reppuu]] | ||
| + | | Style="text-align:center;"| [[Reppuu (Strong Gale)|Reppuu]] | ||
| + | | Style="text-align:center;"| [[Reppuu (Strong Gale)|Reppuu]] | ||
| + | | Style="text-align:center;"|N/A | ||
| + | |- | ||
| + | | Style="text-align:center;"| [[Reppuu (Strong Gale)|Reppuu]] | ||
| + | | Style="text-align:center;"| [[Reppuu (Strong Gale)|Reppuu]] | ||
| + | | Style="text-align:center;"| [[Ryuusei Kai]] | ||
| + | | Style="text-align:center;"| N/A | ||
| + | |- | ||
| + | | Style="text-align:center;"| [[Reppuu (Strong Gale)|Reppuu]] | ||
| + | | Style="text-align:center;"| [[Reppuu (Strong Gale)|Reppuu]] | ||
| + | | Style="text-align:center;"| [[Reppuu (Strong Gale)|Reppuu]] | ||
| + | | Style="text-align:center;"| N/A | ||
| + | |- | ||
| + | | Style="text-align:center;"| [[Ju 87C Kai]] | ||
| + | | Style="text-align:center;"| [[Ju 87C Kai]] | ||
| + | | Style="text-align:center;"| [[Saiun (Iridescent Cloud)|Saiun]] | ||
| + | | Style="text-align:center;"| N/A | ||
| + | |} | ||
| + | |||
| + | |||
| + | |-|II.Fleet= | ||
| + | |||
| + | [[File:4._sjöstridsflottiljen_vapen.svg|thumb|100px]] | ||
| + | |||
| + | <div style="position:fixed; top:305px; right:-23px;">[[File:Aoba_Fleet_II.png|right]]</div> | ||
| + | |||
| + | <div style="position:fixed; top:465px; right:325px;"> | ||
| + | <div style="color:navyblue;background:white;border:solid 1px black;width:175px;border-radius:10px;padding:5px; z-index:3">Strömstad Fleet is on training, commander!</div> | ||
| + | </div> | ||
| + | |||
| + | *'''II.Destroyer Division (Västergötland)''' | ||
| + | **IV.Destroyer Task Unit: [[Hatsushimo]] & [[Yuudachi]] | ||
| + | ***V.Destroyer Task Unit: [[Shimakaze]] & [[Amatsukaze]] | ||
| + | ****VI.Destroyer Task Unit: [[Hatsuharu]] & [[Ushio]] | ||
| + | *'''II.Light Cruiser Division (Södermanland)''' | ||
| + | **V.Light Cruiser Task Unit:[[ Agano]] & [[Noshiro]] | ||
| + | ***VI.Light Cruiser Task Unit: [[Yahagi]] & [[Sakawa]] | ||
| + | *'''II.Heavy Cruiser Squadron (Sjöbo)''' | ||
| + | **VI.Heavy Cruiser Task Unit: [[Prinz Eugen]] & [[Furutaka]] | ||
| + | ***V.Heavy Cruiser Task Unit: [[Kinugasa]] & [[Aoba]] | ||
| + | ****'''VI.Aviation Cruiser Task Unit: '''[[Suzuya]] & [[Kumano]] | ||
| + | *'''V.Battleship Task Unit (Surahammar): '''[[Nagato]] & [[Mutsu]] | ||
| + | ***'''VI.Aviation Battleship Task Unit:''' [[Ise]] & [[Hyuuga]] | ||
| + | *'''III.Aircraft Carrier Task Unit (Grästorp): '''[[Shoukaku]] & [[Zuikaku]] | ||
| + | **'''IV.Light Aircraft Carrier Task Unit:''' [[Ryuujou]] & [[Hiyou]] | ||
| + | |||
| + | |||
| + | {| Style="width: 125px;class=" class="wikitable" | ||
| + | !Style="text-align:center;background: rgb(229,228,226);" colspan=2 | | ||
| + | <p Class="MsoNormal">'''<span style="font-size:16.0pt;line-height:100%">II.Destroyer Division</span>'''</p> | ||
| + | |- | ||
| + | ! Style="solid;text-align:center;background-color:rgb(238,130,238);"| Hatsushimo | ||
| + | ! Style="solid;text-align:center;background-color:rgb(238,130,238);"| Yuudachi | ||
| + | ! Style="solid;text-align:center;background-color:rgb(238,130,238);"| Shimakaze | ||
| + | ! Style="solid;text-align:center;background-color:rgb(238,130,238);"| Amatsukaze | ||
| + | ! Style="solid;text-align:center;background-color:rgb(238,130,238);"| Hatsuharu | ||
| + | ! Style="solid;text-align:center;background-color:rgb(238,130,238);"| Ushio | ||
| + | ! Style="text-align:center;background-color:rgb(0,0,0);"|<span style="color:Yellow;">Västergötland</span> | ||
| + | |- | ||
| + | | [[File:419_Card.jpg|link=Hatsushimo|150px]] | ||
| + | | [[File:144.jpg|link=Yuudachi|150px]] | ||
| + | | [[File:010M.jpg|link=Shimakaze|150px]] | ||
| + | | [[File:316_Card.jpg|link=Amatsukaze|150px]] | ||
| + | | [[File:204.jpg|link=Hatsuharu|150px]] | ||
| + | | [[File:407_Card.jpg|link=Ushio|150px]] | ||
| + | | [[File:Västergötland_vapen.svg|link=http://en.wikipedia.org/wiki/V%C3%A4sterg%C3%B6tland|150px]] | ||
| + | |- | ||
| + | | style="text-align:center;"| '''Level 70''' | ||
| + | | style="text-align:center;"| '''Level 80''' | ||
| + | | style="text-align:center;"| '''Level 77 (80)''' | ||
| + | | style="text-align:center;"| '''Level 34 (70)''' | ||
| + | | style="text-align:center;"| '''Level 68 (70)''' | ||
| + | | style="text-align:center;"| '''Level 63 (70)''' | ||
| + | | Style="text-align:center;"|'''N/A''' | ||
| + | |- | ||
| + | | Style="text-align:center;" | [[61cm Quad (Oxygen) Torpedo Mount|61cm Quad Torpedo Mount]] | ||
| + | | Style="text-align:center;" | [[10cm Twin High-angle Mount]] | ||
| + | | Style="text-align:center;" | [[10cm Twin High-angle Mount]] | ||
| + | | Style="text-align:center;" | [[10cm Twin High-angle Mount]] | ||
| + | | Style="text-align:center;" | [[10cm Twin High-angle Mount]] | ||
| + | | Style="text-align:center;" | [[10cm Twin High-angle Mount]] | ||
| + | | Style="text-align:center;" | IV.Destroyer Task Unit H&Y | ||
| + | |- | ||
| + | | Style="text-align:center;"| [[61cm Quad (Oxygen) Torpedo Mount|61cm Quad Torpedo Mount]] | ||
| + | | Style="text-align:center;"| [[10cm Twin High-angle Mount]] | ||
| + | | Style="text-align:center;"| [[10cm Twin High-angle Mount]] | ||
| + | | Style="text-align:center;"| [[10cm Twin High-angle Mount]] | ||
| + | | Style="text-align:center;"| [[10cm Twin High-angle Mount]] | ||
| + | | Style="text-align:center;"| [[10cm Twin High-angle Mount]] | ||
| + | | Style="text-align:center;"| V.Destroyer Task Unit S&A | ||
| + | |- | ||
| + | | Style="text-align:center;"| [[Type 33 Surface RADAR]] | ||
| + | | Style="text-align:center;"| [[Type 13 AIR RADAR Kai]] | ||
| + | | Style="text-align:center;"| [[Type 13 AIR RADAR Kai]] | ||
| + | | Style="text-align:center;"| [[Type 22 Surface RADAR]] | ||
| + | | Style="text-align:center;"| [[Type 22 Surface RADAR]] | ||
| + | | Style="text-align:center;"| [[Type 22 Surface RADAR]] | ||
| + | | Style="text-align:center;"| V!.Destroyer Task Unit H&U | ||
| + | |- | ||
| + | | Style="text-align:center;"| Locked | ||
| + | | Style="text-align:center;"| Locked | ||
| + | | Style="text-align:center;"| Locked | ||
| + | | Style="text-align:center;"| Locked | ||
| + | | Style="text-align:center;"| Locked | ||
| + | | Style="text-align:center;"| Locked | ||
| + | | Style="text-align:center;"| N/A | ||
| + | |} | ||
| + | |||
| + | |||
| + | {| Style="width: 125px;class=" class="wikitable" | ||
| + | ! Style="text-align:center;background: rgb(229,228,226);" colspan=2 | | ||
| + | <p Class="MsoNormal"><span style="font-size:21px;line-height:22.8266677856445px;">II.Light Cruiser Division</span></p> | ||
| + | |- | ||
| + | ! Style="solid;text-align:center;background-color:rgb(238,130,238)"| Agano | ||
| + | ! Style="solid;text-align:center;background-color:rgb(238,130,238)"| Noshiro | ||
| + | ! Style="solid;text-align:center;background-color:rgb(238,130,238)"| Yahagi | ||
| + | ! Style="solid;text-align:center;background-color:rgb(238,130,238)"| Sakawa | ||
| + | ! Style="solid;text-align:center;background-color:rgb(255,215,0)"| Isuzu | ||
| + | ! style="text-align:center;background-color:rgb(0,0,0);"|<span style="color:Yellow;">Södermanland</span> | ||
| + | |- | ||
| + | | [[File:137M.jpg|link=Agano|150px]] | ||
| + | | [[File:138M.jpg|link=Noshiro|150px]] | ||
| + | | [[File:307_Card.jpg|link=Yahagi|150px]] | ||
| + | | [[File:314_Card.jpg|link=Sakawa|150px]] | ||
| + | | [[File:141.jpg|link=Isuzu|150px]] | ||
| + | | [[File:Södermanland_vapen.svg|link=http://en.wikipedia.org/wiki/S%C3%B6dermanland|150px]] | ||
| + | |- | ||
| + | | style="text-align:center;"| '''Level 40 (70)''' | ||
| + | | style="text-align:center;"| '''Level 60 (70)''' | ||
| + | | style="text-align:center;"| '''Level 40 (70)''' | ||
| + | | style="text-align:center;"| '''Level 60 (70)''' | ||
| + | | style="text-align:center;"| '''Level 85''' | ||
| + | | Style="text-align:center;"| '''N/A''' | ||
| + | |- | ||
| + | | Style="text-align:center;"| [[15.5cm Triple Gun Mount (Main)]] | ||
| + | | Style="text-align:center;"| [[15.5cm Triple Gun Mount (Main)]] | ||
| + | | Style="text-align:center;"| [[15.5cm Triple Gun Mount (Main)]] | ||
| + | | Style="text-align:center;"| [[15.5cm Triple Gun Mount (Main)]] | ||
| + | | Style="text-align:center;"| [[Type 3 SONAR]] | ||
| + | | Style="text-align:center;"| V.Light Cruiser Task Unit A&N | ||
| + | |- | ||
| + | | Style="text-align:center;"| [[15.5cm Triple Gun Mount (Main)]] | ||
| + | | Style="text-align:center;"| [[15.5cm Triple Gun Mount (Main)]] | ||
| + | | Style="text-align:center;"| [[15.5cm Triple Gun Mount (Main)]] | ||
| + | | Style="text-align:center;"| [[15.5cm Triple Gun Mount (Main)]] | ||
| + | | Style="text-align:center;"| [[Type 3 SONAR]] | ||
| + | | Style="text-align:center;"| VI.Light Cruiser Task Unit YS&I | ||
| + | |- | ||
| + | | Style="text-align:center;"| [[Type 0 Recon Seaplane]] | ||
| + | | Style="text-align:center;"| [[Type 0 Recon Seaplane]] | ||
| + | | Style="text-align:center;"| [[Type 0 Recon Seaplane]] | ||
| + | | Style="text-align:center;"| [[Type 0 Recon Seaplane]] | ||
| + | | Style="text-align:center;"| [[Type 3 Depth Charge]] | ||
| + | | Style="text-align:center;"| N/A | ||
| + | |- | ||
| + | | Style="text-align:center;"| Locked | ||
| + | | Style="text-align:center;"| Locked | ||
| + | | Style="text-align:center;"| Locked | ||
| + | | Style="text-align:center;"| Locked | ||
| + | | Style="text-align:center;"| Locked | ||
| + | | Style="text-align:center;"| N/A | ||
| + | |} | ||
| + | |||
| + | |||
| + | {| Style="width: 125px;class=" class="wikitable" | ||
| + | ! Style="text-align:center;background: rgb(229,228,226);" colspan=2 | | ||
| + | <p Class="MsoNormal"><span style="font-size:21px;line-height:22.8266677856445px;">II.Heavy Cruiser Squadron</span></p> | ||
| + | |- | ||
| + | ! Style="solid;text-align:center;background-color:rgb(238,130,238)"|<span style="font-weight:bold;">Prinz Eugen</span> | ||
| + | ! Style="solid;text-align:center;background-color:rgb(238,130,238)"|Furutaka | ||
| + | ! Style="solid;text-align:center;background-color:rgb(238,130,238)"|Kinugasa | ||
| + | ! Style="solid;text-align:center;background-color:rgb(192,192,192)"|Aoba | ||
| + | ! style="text-align:center;background-color:rgb(0,0,0);"|<span style="color:Yellow;">Sjöbo</span> | ||
| + | |- | ||
| + | | [[File:177_Card.jpg|link=Prinz Eugen|150px]] | ||
| + | | [[File:416_Card.jpg|link=Furutaka|150px]] | ||
| + | | [[File:File120c.PNG|link=Kinugasa|150px]] | ||
| + | | [[File:054M.jpg|link=Aoba|150px]] | ||
| + | | [[File:Sjöbo_vapen.svg|link=http://en.wikipedia.org/wiki/Sj%C3%B6bo|150px|]] | ||
| + | |- | ||
| + | | Style="text-align:center;"| '''Level 85''' | ||
| + | | Style="text-align:center;"| '''Level 75''' | ||
| + | | Style="text-align:center;"| '''Level 75''' | ||
| + | | Style="text-align:center;"| '''Level 75''' | ||
| + | | Style="text-align:center;"| '''N/A''' | ||
| + | |- | ||
| + | | Style="text-align:center;"| [[SKC34 20.3cm Twin Cannon]] | ||
| + | | Style="text-align:center;"| [[20.3cm(no.2) Twin Gun Mount]] | ||
| + | | Style="text-align:center;"| [[20.3cm(no.2) Twin Gun Mount]] | ||
| + | | Style="text-align:center;"| [[SKC34 20.3cm Twin Cannon]] | ||
| + | | Style="text-align:center;"| IV.Heavy Cruiser Task Unit P&F | ||
| + | |- | ||
| + | | Style="text-align:center;"| [[SKC34 20.3cm Twin Cannon]] | ||
| + | | Style="text-align:center;"| [[20.3cm(no.2) Twin Gun Mount]] | ||
| + | | Style="text-align:center;"| [[20.3cm(no.2) Twin Gun Mount]] | ||
| + | | Style="text-align:center;"| [[SKC34 20.3cm Twin Cannon]] | ||
| + | | Style="text-align:center;"| V.Heavy Cruiser Task Unit K&A | ||
| + | |- | ||
| + | | Style="text-align:center;"| [http://kancolle.wikia.com/wiki/FuMO25_Radar FuMO25 Radar] | ||
| + | | Style="text-align:center;"| [[Type 14 Air RADAR]] | ||
| + | | Style="text-align:center;"| [[Type 14 Air RADAR]] | ||
| + | | Style="text-align:center;"| [[Type 14 Air RADAR]] | ||
| + | | Style="text-align:center;"| VI.Aviation Cruiser Task Unit | ||
| + | |- | ||
| + | | Style="text-align:center;"| [[Type 0 Observation Seaplane]] | ||
| + | | Style="text-align:center;"| [[Type 0 Observation Seaplane]] | ||
| + | | Style="text-align:center;"| [[Type 0 Observation Seaplane]] | ||
| + | | Style="text-align:center;"| [[Type 0 Observation Seaplane]] | ||
| + | | Style="text-align:center;"|N/A | ||
| + | |} | ||
| + | |||
| + | |||
| + | |||
| + | {| Style="width: 125px;class=" class="wikitable" | ||
| + | ! Style="text-align:center;background: rgb(229,228,226);" colspan=2 | | ||
| + | <p Class="MsoNormal"><span style="font-size:21px;line-height:22.8266677856445px;">VI.Aviation Cruiser Task Unit</span></p> | ||
| + | |- | ||
| + | ! Style="solid;text-align:center;background-color:rgb(255,215,0)"|Suzuya | ||
| + | ! Style="solid;text-align:center;background-color:rgb(255,215,0)"|Kumano | ||
| + | ! style="text-align:center;background-color:rgb(0,0,0);"|<span style="color:rgb(255,255,0);font-weight:bold;">Sjöbo</span> | ||
| + | |- | ||
| + | | [[File:129.png|link=Suzuya|150px]] | ||
| + | | [[File:130.png|link=Kumano|150px]] | ||
| + | | [[File:Sjöbo_vapen.svg|link=http://en.wikipedia.org/wiki/Sj%C3%B6bo|150px]] | ||
| + | |- | ||
| + | | Style="text-align:center;"| '''Level 75''' | ||
| + | | Style="text-align:center;"| '''Level 75''' | ||
| + | | Style="text-align:center;"| '''N/A''' | ||
| + | |- | ||
| + | | Style="text-align:center;"| [[Zuiun (Auspicious Clouds)|Zuiun]] | ||
| + | | Style="text-align:center;"| [[Zuiun (Auspicious Clouds)|Zuiun]] | ||
| + | | Style="text-align:center;"| Detached from Sjöbo | ||
| + | |- | ||
| + | | Style="text-align:center;"| [[Zuiun (Auspicious Clouds)|Zuiun]] | ||
| + | | Style="text-align:center;"| [[Zuiun (Auspicious Clouds)|Zuiun]] | ||
| + | | Style="text-align:center;"| N/A | ||
| + | |- | ||
| + | | Style="text-align:center;"| [[20.3cm Twin Gun Mount]] | ||
| + | | Style="text-align:center;"| [[20.3cm Twin Gun Mount]] | ||
| + | | Style="text-align:center;"| N/A | ||
| + | |- | ||
| + | | Style="text-align:center;"| [[20.3cm Twin Gun Mount]] | ||
| + | | Style="text-align:center;"| [[20.3cm Twin Gun Mount]] | ||
| + | | Style="text-align:center;"| N/A | ||
| + | |} | ||
| + | |||
| + | {| Style="width: 125px;class=" class="wikitable" | ||
| + | ! Style="text-align:center;background: rgb(229,228,226);" colspan=2 | | ||
| + | <p Class="MsoNormal"><span style="font-size:21px;line-height:22.8266677856445px;">V.Battleship Task Unit</span></p> | ||
| + | |- | ||
| + | ! Style="solid;text-align:center;background-color:rgb(238,130,238)"|Nagato | ||
| + | ! Style="solid;text-align:center;background-color:rgb(238,130,238)"|Mutsu | ||
| + | ! style="text-align:center;background-color:rgb(0,0,0);"|<span style="color:Yellow;">Surahammar</span> | ||
| + | |- | ||
| + | | [[File:001b.jpg|link=Nagato|150px]] | ||
| + | | [[File:002b.png|link=Mutsu|150px]] | ||
| + | | [[File:Surahammar_vapen.svg|link=http://en.wikipedia.org/wiki/Surahammar_Municipality|150px]] | ||
| + | |- | ||
| + | | Style="text-align:center;"| '''Level 91''' | ||
| + | | Style="text-align:center;"| '''Level 91''' | ||
| + | | Style="text-align:center;"| '''N/A''' | ||
| + | |- | ||
| + | | Style="text-align:center;"| [[46cm Triple Gun Mount]] | ||
| + | | Style="text-align:center;"| [[46cm Triple Gun Mount]] | ||
| + | | Style="text-align:center;"| N/A | ||
| + | |- | ||
| + | | Style="text-align:center;"| [[46cm Triple Gun Mount]] | ||
| + | | Style="text-align:center;"| [[46cm Triple Gun Mount]] | ||
| + | | Style="text-align:center;"| N/A | ||
| + | |- | ||
| + | | Style="text-align:center;"| [[Type 91 Armor-Piercing (AP) Shell|Type 91 Armor-Piercing Shell]] | ||
| + | | Style="text-align:center;"| [[Type 91 Armor-Piercing (AP) Shell|Type 91 Armor-Piercing Shell]] | ||
| + | | Style="text-align:center;"| N/A | ||
| + | |- | ||
| + | | Style="text-align:center;"| [[Ar196 Kai]] | ||
| + | | Style="text-align:center;"| [[Ar196 Kai]] | ||
| + | | Style="text-align:center;"| N/A | ||
| + | |} | ||
| + | |||
| + | {| Style="width: 125px;class=" class="wikitable" | ||
| + | ! Style="text-align:center;background: rgb(229,228,226);" colspan=2 | | ||
| + | <p Class="MsoNormal"><span style="font-size:21px;line-height:22.8266677856445px;">VI.</span><span style="font-size:21px;font-weight:bold;line-height:22.8266677856445px;">Aviation Battleship Task Unit</span></p> | ||
| + | |- | ||
| + | ! Style="solid;text-align:center;background-color:rgb(238,130,238)"|Ise | ||
| + | ! Style="solid;text-align:center;background-color:rgb(238,130,238)"|Hyuuga | ||
| + | ! style="text-align:center;background-color:rgb(0,0,0);"|<span style="color:Yellow;">Surahammar</span> | ||
| + | |- | ||
| + | | [[File:102.jpg|link=Ise|150px]] | ||
| + | | [[File:103.jpg|link=Hyuuga|150px]] | ||
| + | | [[File:Surahammar_vapen.svg|link=http://en.wikipedia.org/wiki/Surahammar_Municipality|150px]] | ||
| + | |- | ||
| + | | Style="text-align:center;"| '''Level 82 (85)''' | ||
| + | | Style="text-align:center;"| '''Level 83 (85)''' | ||
| + | | Style="text-align:center;"| '''N/A''' | ||
| + | |- | ||
| + | | Style="text-align:center;"| [[Ka-type Observation Autogyro]] | ||
| + | | Style="text-align:center;"| [[46cm Triple Gun Mount]] | ||
| + | | Style="text-align:center;"| Detached from Surahammar | ||
| + | |- | ||
| + | | Style="text-align:center;"| [[Zuiun (Auspicious Clouds)|Zuiun]] | ||
| + | | Style="text-align:center;"| [[46cm Triple Gun Mount]] | ||
| + | | Style="text-align:center;"| N/A | ||
| + | |- | ||
| + | | Style="text-align:center;"| [[Zuiun (Auspicious Clouds)|Zuiun]] | ||
| + | | Style="text-align:center;"| [[Zuiun (Auspicious Clouds)|Zuiun]] | ||
| + | | Style="text-align:center;"| N/A | ||
| + | |- | ||
| + | | Style="text-align:center;"| [[Zuiun (Auspicious Clouds)|Zuiun]] | ||
| + | | Style="text-align:center;"| [[Zuiun (Auspicious Clouds)|Zuiun]] | ||
| + | | Style="text-align:center;"| N/A | ||
| + | |} | ||
| + | |||
| + | |||
| + | {| Style="width: 125px;class=" class="wikitable" | ||
| + | ! Style="text-align:center;background: rgb(229,228,226);" colspan=2 | | ||
| + | <p Class="MsoNormal"><span style="font-size:21px;line-height:22.8266677856445px;">III.Aircraft Carrier Task Unit</span></p> | ||
| + | |- | ||
| + | ! Style="solid;text-align:center;background-color:rgb(238,130,238)"|Shoukaku | ||
| + | ! Style="solid;text-align:center;background-color:rgb(238,130,238)"|Zuikaku | ||
| + | ! ! style="text-align:center;background-color:rgb(0,0,0);"|<span style="color:Yellow;">Grästorp</span> | ||
| + | |- | ||
| + | | [[File:106M.jpg|150px]] | ||
| + | | [[File:108.jpg|150px]] | ||
| + | | [[File:Grästorp_vapen.svg|link=http://en.wikipedia.org/wiki/Gr%C3%A4storp_Municipality|150px]] | ||
| + | |- | ||
| + | | Style="text-align:center;"| '''Level 85''' | ||
| + | | Style="text-align:center;"| '''Level 93''' | ||
| + | | style="text-align:center;"| '''N/A''' | ||
| + | |- | ||
| + | | Style="text-align:center;"| [[Reppuu (Strong Gale)|Reppuu]] | ||
| + | | Style="text-align:center;"| [[Reppuu (Strong Gale)|Reppuu]] | ||
| + | | Style="text-align:center;"| N/A | ||
| + | |- | ||
| + | | Style="text-align:center;"| [[Reppuu (Strong Gale)|Reppuu]] | ||
| + | | Style="text-align:center;"| [[Reppuu (Strong Gale)|Reppuu]] | ||
| + | | Style="text-align:center;"| N/A | ||
| + | |- | ||
| + | | Style="text-align:center;"| [[Ryuusei Kai]] | ||
| + | | Style="text-align:center;"| [[Reppuu (Strong Gale)|Reppuu]] | ||
| + | | Style="text-align:center;"| N/A | ||
| + | |- | ||
| + | | Style="text-align:center;"| [[Saiun (Iridescent Cloud)|Saiun]] | ||
| + | | Style="text-align:center;"| [[Suisei Model 12A]] | ||
| + | | Style="text-align:center;"| N/A | ||
| + | |} | ||
| + | |||
| + | |||
| + | |||
| + | {| Style="width: 125px;class=" class="wikitable" | ||
| + | ! Style="text-align:center;background: rgb(229,228,226);" colspan=2 | | ||
| + | <p Class="MsoNormal"><span style="font-size:21px;line-height:22.8266677856445px;">IV.Light Aircraft Carrier Task Unit</span></p> | ||
| + | |- | ||
| + | ! Style="solid;text-align:center;background-color:rgb(238,130,238)"|Ryuujou | ||
| + | ! Style="solid;text-align:center;background-color:rgb(238,130,238)"|Hiyou | ||
| + | ! ! style="text-align:center;background-color:rgb(0,0,0);"|<span style="color:Yellow;">Grästorp</span> | ||
| + | |- | ||
| + | | [[File:157_Card.jpg|link=Ryuujou|150px]] | ||
| + | | [[File:065b.png|link=Hiyou|150px]] | ||
| + | | [[File:Grästorp_vapen.svg|link=http://en.wikipedia.org/wiki/Gr%C3%A4storp_Municipality|150px]] | ||
| + | |- | ||
| + | | Style="text-align:center;"| '''Level 83 (85)''' | ||
| + | | Style="text-align:center;"| '''Level 90''' | ||
| + | | Style="text-align:center;"| '''N/A''' | ||
| + | |- | ||
| + | | Style="text-align:center;"| [[Reppuu (Strong Gale)|Reppuu]] | ||
| + | | Style="text-align:center;"| [[Reppuu (Strong Gale)|Reppuu]] | ||
| + | | Style="text-align:center;"|N/A | ||
| + | |- | ||
| + | | Style="text-align:center;"| [[Reppuu (Strong Gale)|Reppuu]] | ||
| + | | Style="text-align:center;"| [[Reppuu (Strong Gale)|Reppuu]] | ||
| + | | Style="text-align:center;"| N/A | ||
| + | |- | ||
| + | | Style="text-align:center;"| [[Reppuu (Strong Gale)|Reppuu]] | ||
| + | | Style="text-align:center;"| [[Ryuusei Kai]] | ||
| + | | Style="text-align:center;"| N/A | ||
| + | |- | ||
| + | | Style="text-align:center;"| [[Ju 87C Kai]] | ||
| + | | Style="text-align:center;"| [[Saiun (Iridescent Cloud)|Saiun]] | ||
| + | | Style="text-align:center;"| N/A | ||
| + | |} | ||
| + | |-|III.Fleet= | ||
| + | |||
| + | [[File:HMS_Visby_vapen,_korvett.svg|thumb|100px]] | ||
| + | |||
| + | <div style="position:fixed; top:345px; right:-23px;">[[File:170_stvalentine_1.png]]</div> | ||
| + | |||
| + | <div style="position:fixed; top:465px; right:255px;"> | ||
| + | <div style="color:navyblue;background:white;border:solid 1px black;width:175px;border-radius:10px;padding:5px; z-index:3">TEST TEST TEST TEST</div> | ||
| + | </div> | ||
| + | |||
| + | *'''I.Aircraft Support Squadrion (Uppsala)''' | ||
| + | **V.Aircraft Carrier Task Unit:[[Souryuu]] & [[Hiryuu]] | ||
| + | ***VII.Destroyer Task Unit: [[Tokitsukaze]] & [[Nowaki]] | ||
| + | *'''II.Aircraft Support Squadrion (Mora)''' | ||
| + | **V.Aircraft Carrier Task Unit: [[Amagi]] & [[Unryuu]] | ||
| + | ***VIII.Destroyer Task Unit:[[ Urakaze]] & [[Asagumo]] | ||
| + | |||
| + | {| Style="width: 125px;class=" class="wikitable" | ||
| + | !Style="text-align:center;background: rgb(229,228,226);" colspan=2 | | ||
| + | '''<span style="font-size:16.0pt;line-height:100%">I.Aircraft</span>'''<span style="font-size:21px;line-height:21.3333358764648px;"> Support Squadron</span> | ||
| + | |- | ||
| + | ! Style="solid;text-align:center;background-color:rgb(238,130,238);"| Souryuu | ||
| + | ! Style="solid;text-align:center;background-color:rgb(238,130,238);"| Hiryuu | ||
| + | ! Style="solid;text-align:center;background-color:rgb(238,130,238);"| Tokitsukaze | ||
| + | ! Style="solid;text-align:center;background-color:rgb(238,130,238);"| Nowaki | ||
| + | ! Style="solid;text-align:center;background-color:rgb(255,0,0);"|<span style="color:Yellow;">Uppsala</span> | ||
| + | |- | ||
| + | | [[File:197_Card.jpg|link=Souryuu|150px]] | ||
| + | | [[File:196_Card.jpg|link=Hiryuu|150px]] | ||
| + | | [[File:322_Card.jpg|link=Tokitsukaze|150px]] | ||
| + | | [[File:329_Card.jpg|link=Nowaki|150px]] | ||
| + | | [[File:Uppland_vapen.svg|link=http://en.wikipedia.org/wiki/Uppsala|150px]] | ||
| + | |- | ||
| + | | Style="text-align:center;"| '''Level 85''' | ||
| + | | Style="text-align:center;"| '''Level 86''' | ||
| + | | Style="text-align:center;"| '''Level 31 (70)''' | ||
| + | | Style="text-align:center;"| '''Level 35 (70)''' | ||
| + | | Style="text-align:center;"|'''N/A''' | ||
| + | |- | ||
| + | | Style="text-align:center;" | [[Suisei (Comet) Model 12A]] | ||
| + | | Style="text-align:center;" | [[Suisei (Comet) Model 12A]] | ||
| + | | Style="text-align:center;" | [[12.7cm Twin Mount Type-B Kai 2]] | ||
| + | | Style="text-align:center;" | [[12.7cm Twin Mount Type-B Kai 2]] | ||
| + | | Style="text-align:center;" | V.Aircraft Carrier Task Unit S&H | ||
| + | |- | ||
| + | | Style="text-align:center;"| [[Suisei (Comet) Model 12A]] | ||
| + | | Style="text-align:center;"| [[Suisei (Comet) Model 12A]] | ||
| + | | Style="text-align:center;"| [[12.7cm Twin Mount Type-B Kai 2]] | ||
| + | | Style="text-align:center;"| [[12.7cm Twin Mount Type-B Kai 2]] | ||
| + | | Style="text-align:center;"| VII.Destroyer Task Unit T&N | ||
| + | |- | ||
| + | | Style="text-align:center;"| [[Suisei (Comet) Model 12A]] | ||
| + | | Style="text-align:center;"| [[Suisei (Comet) Model 12A]] | ||
| + | | Style="text-align:center;"| [[Type 22 Surface RADAR]] | ||
| + | | Style="text-align:center;"| [[Type 22 Surface RADAR]] | ||
| + | | Style="text-align:center;"| N/A | ||
| + | |- | ||
| + | | Style="text-align:center;"| [[Type 32 Surface RADAR]] | ||
| + | | Style="text-align:center;"| [[Type 32 Surface RADAR]] | ||
| + | | Style="text-align:center;"| Locked | ||
| + | | Style="text-align:center;"| Locked | ||
| + | | Style="text-align:center;"| N/A | ||
| + | |} | ||
| + | |||
| + | |||
| + | |||
| + | {| Style="width: 125px;class=" class="wikitable" | ||
| + | !Style="text-align:center;background: rgb(229,228,226);" colspan=2 | | ||
| + | <p Class="MsoNormal">'''<span style="font-size:16.0pt;line-height:100%">II.Aircraft</span>'''<span style="font-size:21px;line-height:21.3333358764648px;"> Support Squadron</span></p> | ||
| + | |- | ||
| + | ! Style="solid;text-align:center;background-color:rgb(238,130,238);"| Amagi | ||
| + | ! Style="solid;text-align:center;background-color:rgb(238,130,238);"| Unryuu | ||
| + | ! Style="solid;text-align:center;background-color:rgb(255,215,0);"| Urakaze | ||
| + | ! Style="solid;text-align:center;background-color:rgb(255,215,0);"| Asagumo | ||
| + | ! Style="solid;text-align:center;background-color:rgb(255,0,0);"|<span style="color:Yellow;">Mora</span> | ||
| + | |- | ||
| + | | [[File:429_Card.jpg|link=Amagi|150px]] | ||
| + | | [[File:406_Card.jpg|link=Unryuu|150px]] | ||
| + | | [[File:317_Card.jpg|link=Urakaze|150px]] | ||
| + | | [[File:327_Card.jpg|link=Asagumo|150px]] | ||
| + | | [[File:Mora_vapen.svg|link=http://en.wikipedia.org/wiki/Mora,_Sweden|150px]] | ||
| + | |- | ||
| + | | Style="text-align:center;"| '''Level 50 (85)''' | ||
| + | | Style="text-align:center;"| '''Level 79 (85)''' | ||
| + | | Style="text-align:center;"| '''Level 35 (70)''' | ||
| + | | Style="text-align:center;"| '''Level 35 (70)''' | ||
| + | | Style="text-align:center;"|'''N/A''' | ||
| + | |- | ||
| + | | Style="text-align:center;" | [[Suisei (Comet) Model 12A]] | ||
| + | | Style="text-align:center;" | [[Suisei (Comet) Model 12A]] | ||
| + | | Style="text-align:center;" | [[12.7cm Twin Mount Type-B Kai 2]] | ||
| + | | Style="text-align:center;" | [[12.7cm Twin Mount Type-B Kai 2]] | ||
| + | | Style="text-align:center;" | VI.Aircraft Carrier Task Unit A&U | ||
| + | |- | ||
| + | | Style="text-align:center;"| [[Suisei (Comet) Model 12A]] | ||
| + | | Style="text-align:center;"| [[Suisei (Comet) Model 12A]] | ||
| + | | Style="text-align:center;"| [[12.7cm Twin Mount Type-B Kai 2]] | ||
| + | | Style="text-align:center;"| [[12.7cm Twin Mount Type-B Kai 2]] | ||
| + | | Style="text-align:center;"| VIII.Destroyer Task Unit U&A | ||
| + | |- | ||
| + | | Style="text-align:center;"| [[Suisei (Comet) Model 12A]] | ||
| + | | Style="text-align:center;"| [[Suisei (Comet) Model 12A]] | ||
| + | | Style="text-align:center;"| [[12.7cm Twin Mount Type-B Kai 2]] | ||
| + | | Style="text-align:center;"| [[12.7cm Twin Mount Type-B Kai 2]] | ||
| + | | Style="text-align:center;"| N/A | ||
| + | |- | ||
| + | | Style="text-align:center;"| [[Type 32 Surface RADAR]] | ||
| + | | Style="text-align:center;"| [[Type 32 Surface RADAR]] | ||
| + | | Style="text-align:center;"| Locked | ||
| + | | Style="text-align:center;"| Locked | ||
| + | | Style="text-align:center;"| N/A | ||
| + | |} | ||
| + | |||
| + | |||
| + | <p style="margin-top:0.4em;margin-bottom:0.5em;">|-|IV.Submarine Flotilla= | ||
| + | |||
| + | [[File:Första_ubåtsflottiljen_vapen.svg|thumb|100px]] | ||
| + | |||
| + | *'''I.Submarine Aircraft Carrier Division (Leksand)''' | ||
| + | **I.Submarine Task Unit:[[ I-8]] & [[I-19]] | ||
| + | ***II.Submarine Task Unit: [[I-168]] & [[I-58]] | ||
| + | ****III.Submarine Task Unit: [[I-401]] & [[U-511]] | ||
| + | *'''II.Submarine Division (Köping)''' | ||
| + | **IV.Submarine Task Unit: [[I-8]] & [[I-19]] | ||
| + | ***V.Submarine Task Unit: [[I-168]] & [[I-58]] | ||
| + | *'''III.Submarine Division (Värnamo)''' | ||
| + | **VI.Submarine Task Unit: [[I-8]] & [[I-19]] | ||
| + | ***VII.Submarine Task Unit: [[I-168]] & [[I-58]] | ||
| + | |||
| + | {| Style="width: 125px;class=" class="wikitable" | ||
| + | ! Style="text-align:center;background: rgb(229,228,226);" colspan=2 | | ||
| + | <span style="font-size:21px;line-height:22.8266677856445px;">I.Submarine Aircraft Carrier Division</span> | ||
| + | |- | ||
| + | ! Style="solid;text-align:center;background-color:rgb(238,130,238)"| I-8 | ||
| + | ! Style="solid;text-align:center;background-color:rgb(255,215,0)"| I-19 | ||
| + | ! Style="solid;text-align:center;background-color:rgb(192,192,192)"| I-168 | ||
| + | ! Style="solid;text-align:center;background-color:rgb(255,215,0)"| I-58 | ||
| + | ! Style="solid;text-align:center;background-color:rgb(238,130,238)"| I-401 | ||
| + | ! Style="solid;text-align:center;background-color:rgb(238,130,238)"| U-511 | ||
| + | ! Style="solid;text-align:center;background-color:rgb(255,215,0);"|<span style="color:Black;">Leksand</span> | ||
| + | |- | ||
| + | | [[File:400-2-.jpg|link=I-8|150px]] | ||
| + | | [[File:401-2-.jpg|link=I-19|150px]] | ||
| + | | [[File:126M.jpg|link=I-168|150px]] | ||
| + | | [[File:127M.jpg|link=I-58|150px]] | ||
| + | | [[File:155M.jpg|link=I-401|150px]] | ||
| + | | [[File:334_Card.jpg|link=U-511|150px]] | ||
| + | | [[File:Leksand_vapen.svg|link=http://en.wikipedia.org/wiki/Leksand_Municipality|150px]] | ||
| + | |- | ||
| + | | style="text-align:center;"| '''Level 99''' | ||
| + | | style="text-align:center;"| '''Level 99''' | ||
| + | | style="text-align:center;"| '''Level 99''' | ||
| + | | style="text-align:center;"| '''Level 99''' | ||
| + | | style="text-align:center;"| '''Level 99''' | ||
| + | | style="text-align:center;"| '''Level 54''' | ||
| + | | Style="text-align:center;"| '''N/A''' | ||
| + | |- | ||
| + | | Style="text-align:center;"| [[61cm Quad (Oxygen) Torpedo Mount|61cm Quad Torpedo Mount]] | ||
| + | | Style="text-align:center;"| [[61cm Quad (Oxygen) Torpedo Mount|61cm Quad Torpedo Mount]] | ||
| + | | Style="text-align:center;"| [[61cm Quad (Oxygen) Torpedo Mount|61cm Quad Torpedo Mount]] | ||
| + | | Style="text-align:center;"| [[53cm Submarine Bow Torpedo Mount (8 tubes)|53cm Submarine Bow Torpedo Mount]] | ||
| + | | Style="text-align:center;"| [[61cm Quad (Oxygen) Torpedo Mount|61cm Quad Torpedo Mount]] | ||
| + | | Style="text-align:center;"| [[61cm Quad (Oxygen) Torpedo Mount|61cm Quad Torpedo Mount]] | ||
| + | | Style="text-align:center;"| I.Submarine Task Unit I-8 & I-19 | ||
| + | |- | ||
| + | | Style="text-align:center;"| [[61cm Quad (Oxygen) Torpedo Mount|61cm Quad Torpedo Mount]] | ||
| + | | Style="text-align:center;"| [[61cm Quad (Oxygen) Torpedo Mount|61cm Quad Torpedo Mount]] | ||
| + | | Style="text-align:center;"| [[61cm Quad (Oxygen) Torpedo Mount|61cm Quad Torpedo Mount]] | ||
| + | | Style="text-align:center;"| [[53cm Submarine Bow Torpedo Mount (8 tubes)|53cm Submarine Bow Torpedo Mount]] | ||
| + | | Style="text-align:center;"| [[61cm Quad (Oxygen) Torpedo Mount|61cm Quad Torpedo Mount]] | ||
| + | | Style="text-align:center;"| [[61cm Quad (Oxygen) Torpedo Mount|61cm Quad Torpedo Mount]] | ||
| + | | Style="text-align:center;"| II.Submarine Task Unit I-168 & I-58 | ||
| + | |- | ||
| + | | Style="text-align:center;"| Locked | ||
| + | | Style="text-align:center;"| Locked | ||
| + | | Style="text-align:center;"| Locked | ||
| + | | Style="text-align:center;"| Locked | ||
| + | | Style="text-align:center;"| Locked | ||
| + | | Style="text-align:center;"| Locked | ||
| + | | Style="text-align:center;"| III.Submarine Task Unit I-401 & U-511 | ||
| + | |- | ||
| + | | Style="text-align:center;"| Locked | ||
| + | | Style="text-align:center;"| Locked | ||
| + | | Style="text-align:center;"| Locked | ||
| + | | Style="text-align:center;"| Locked | ||
| + | | Style="text-align:center;"| Locked | ||
| + | | Style="text-align:center;"| Locked | ||
| + | | Style="text-align:center;"| NA | ||
| + | |} | ||
| + | |||
| + | |||
| + | |||
| + | {| Style="width: 125px;class=" class="wikitable" | ||
| + | ! Style="text-align:center;background: rgb(229,228,226);" colspan=2 | | ||
| + | <span style="font-size:21px;line-height:22.8266677856445px;">II.Submarine Division</span> | ||
| + | |- | ||
| + | ! Style="solid;text-align:center;background-color:rgb(255,215,0)"| I-8 | ||
| + | ! Style="solid;text-align:center;background-color:rgb(192,192,192)"| I-19 | ||
| + | ! Style="solid;text-align:center;background-color:rgb(192,192,192)"| I-168 | ||
| + | ! Style="solid;text-align:center;background-color:rgb(192,192,192)"| I-58 | ||
| + | ! Style="solid;text-align:center;background-color:rgb(255,215,0);"|<span style="color:Blue;">Köping</span> | ||
| + | |- | ||
| + | | [[File:128.jpg|link=I-8|150px]] | ||
| + | | [[File:123.png|link=I-19|150px]] | ||
| + | | [[File:126M.jpg|link=I-168|150px]] | ||
| + | | [[File:127.png|link=I-58|150px]] | ||
| + | | [[File:Köpings_vapen.svg|link=http://en.wikipedia.org/wiki/K%C3%B6ping_Municipality|150px]] | ||
| + | |- | ||
| + | | style="text-align:center;"| '''Level 75''' | ||
| + | | style="text-align:center;"| '''Level 77''' | ||
| + | | style="text-align:center;"| '''Level 77''' | ||
| + | | style="text-align:center;"| '''Level 80''' | ||
| + | | Style="text-align:center;"| '''N/A''' | ||
| + | |- | ||
| + | | Style="text-align:center;"| [[61cm Quad (Oxygen) Torpedo Mount|61cm Quad Torpedo Mount]] | ||
| + | | Style="text-align:center;"| [[61cm Quad (Oxygen) Torpedo Mount|61cm Quad Torpedo Mount]] | ||
| + | | Style="text-align:center;"| [[61cm Quad (Oxygen) Torpedo Mount|61cm Quad Torpedo Mount]] | ||
| + | | Style="text-align:center;"| [[53cm Submarine Bow Torpedo Mount (8 tubes)|53cm Submarine Bow Torpedo Mount]] | ||
| + | | Style="text-align:center;"| IV.Submarine Task Unit I-8 & I-19 | ||
| + | |- | ||
| + | | Style="text-align:center;"| Locked | ||
| + | | Style="text-align:center;"| Locked | ||
| + | | Style="text-align:center;"| [[61cm Quad (Oxygen) Torpedo Mount|61cm Quad Torpedo Mount]] | ||
| + | | Style="text-align:center;"| Locked | ||
| + | | Style="text-align:center;"| V.Submarine Task Unit I-168 & I-58 | ||
| + | |- | ||
| + | | Style="text-align:center;"| Locked | ||
| + | | Style="text-align:center;"| Locked | ||
| + | | Style="text-align:center;"| Locked | ||
| + | | Style="text-align:center;"| Locked | ||
| + | | Style="text-align:center;"| NA | ||
| + | |- | ||
| + | | Style="text-align:center;"| Locked | ||
| + | | Style="text-align:center;"| Locked | ||
| + | | Style="text-align:center;"| Locked | ||
| + | | Style="text-align:center;"| Locked | ||
| + | | Style="text-align:center;"| NA | ||
| + | |} | ||
| + | |||
| + | |||
| + | |||
| + | {| Style="width: 125px;class=" class="wikitable" | ||
| + | ! Style="text-align:center;background: rgb(229,228,226);" colspan=2 | | ||
| + | <span style="font-size:21px;line-height:22.8266677856445px;">III.Submarine Division</span> | ||
| + | |- | ||
| + | ! Style="solid;text-align:center;background-color:rgb(255,215,0)"| I-8 | ||
| + | ! Style="solid;text-align:center;background-color:rgb(192,192,192)"| I-19 | ||
| + | ! Style="solid;text-align:center;background-color:rgb(192,192,192)"| I-168 | ||
| + | ! Style="solid;text-align:center;background-color:rgb(192,192,192)"| I-58 | ||
| + | ! Style="solid;text-align:center;background-color:rgb(255,215,0);"|<span style="color:Blue;">Värnamo</span> | ||
| + | |- | ||
| + | | [[File:128.jpg|link=I-8|150px]] | ||
| + | | [[File:123.png|link=I-19|150px]] | ||
| + | | [[File:126M.jpg|link=I-168|150px]] | ||
| + | | [[File:127.png|link=I-58|150px]] | ||
| + | | [[File:Värnamo_vapen.svg|150px]] | ||
| + | |- | ||
| + | | style="text-align:center;"| '''Level 75''' | ||
| + | | style="text-align:center;"| '''Level 77''' | ||
| + | | style="text-align:center;"| '''Level 77''' | ||
| + | | style="text-align:center;"| '''Level 80''' | ||
| + | | Style="text-align:center;"| '''N/A''' | ||
| + | |- | ||
| + | | Style="text-align:center;"| [[61cm Quad (Oxygen) Torpedo Mount|61cm Quad Torpedo Mount]] | ||
| + | | Style="text-align:center;"| [[61cm Quad (Oxygen) Torpedo Mount|61cm Quad Torpedo Mount]] | ||
| + | | Style="text-align:center;"| [[61cm Quad (Oxygen) Torpedo Mount|61cm Quad Torpedo Mount]] | ||
| + | | Style="text-align:center;"| [[53cm Submarine Bow Torpedo Mount (8 tubes)|53cm Submarine Bow Torpedo Mount]] | ||
| + | | Style="text-align:center;"| VI.Submarine Task Unit I-8 & I-19 | ||
| + | |- | ||
| + | | Style="text-align:center;"| Locked | ||
| + | | Style="text-align:center;"| Locked | ||
| + | | Style="text-align:center;"| [[61cm Quad (Oxygen) Torpedo Mount|61cm Quad Torpedo Mount]] | ||
| + | | Style="text-align:center;"| Locked | ||
| + | | Style="text-align:center;"| VII.Submarine Task Unit I-168 & I-58 | ||
| + | |- | ||
| + | | Style="text-align:center;"| Locked | ||
| + | | Style="text-align:center;"| Locked | ||
| + | | Style="text-align:center;"| Locked | ||
| + | | Style="text-align:center;"| Locked | ||
| + | | Style="text-align:center;"| NA | ||
| + | |- | ||
| + | | Style="text-align:center;"| Locked | ||
| + | | Style="text-align:center;"| Locked | ||
| + | | Style="text-align:center;"| Locked | ||
| + | | Style="text-align:center;"| Locked | ||
| + | | Style="text-align:center;"| NA | ||
| + | |} | ||
| + | |||
| + | |||
| + | |||
| + | |-|V.Expedition Force= | ||
| + | [[File:Norrbottens_flygflottilj_vapen.svg|thumb|100px]] | ||
| + | |||
| + | *'''III.Destroyer Expedition Division (Årjäng)''' | ||
| + | **IX.Destroyer Task Unit:[[Akatsuki]] & [[Ikazuchi]] | ||
| + | ***X.Destroyer Task Unit: [[Inazuma]] & [[Akigumo]] | ||
| + | ****XI.Destroyer Task Unit: [[Tanikaze]] & [[Hamakaze]] | ||
| + | *'''IV.Destroyer Flagship Expedition Division (Halland)''' | ||
| + | **XII.Destroyer Task Unit: [[Tatsuta]] & [[Makigumo]] | ||
| + | ***XIII.Destroyer Task Unit: [[Naganami]] & [[Hayashimo]] | ||
| + | ****XIV.Destroyer Task Unit: [[Kiyoshimo]] & [[Yuugumo]] | ||
| + | *'''V.Destroyer Flagship Expedition Division (Luleå)''' | ||
| + | **XV.Destroyer Task Unit [[Tenryuu]] & [[Shiratsuyu]] | ||
| + | ***XVI.Destroyer Task Unit [[Murasame]] & [[Harusame]] | ||
| + | ****XVII.Destroyer Task Unit [[Yayoi]] & [[Uzuki]] | ||
| + | *'''I.Seaplane Tender Task Unit (Mullsjö):''' [[Chitose]] & [[Chiyoda]] | ||
| + | *'''VII.Light Aircraft Carrier Expedition Task Unit:''' [[Zuihou]] & [[Ryuuhou]] | ||
| + | |||
| + | |||
| + | |||
| + | {| Style="width: 125px;class=" class="wikitable" | ||
| + | !Style="text-align:center;background: rgb(229,228,226);" colspan=2 | | ||
| + | '''<span style="font-size:16.0pt;line-height:100%">III.Destroyer Expedition Division</span>''' | ||
| + | |- | ||
| + | ! Style="solid;text-align:center;background-color:rgb(192,192,192);"| <span style="font-weight:bold;">Akatsuki</span> | ||
| + | ! Style="solid;text-align:center;background-color:rgb(192,192,192);"| <span style="font-weight:bold;">Ikazuchi</span> | ||
| + | ! Style="solid;text-align:center;background-color:rgb(192,192,192);"| <span style="font-weight:bold;">Inazuma</span> | ||
| + | ! Style="solid;text-align:center;background-color:rgb(255,215,0);"| <span style="font-weight:bold;">Akigumo</span> | ||
| + | ! Style="solid;text-align:center;background-color:rgb(255,215,0);"| Tanikaze | ||
| + | ! Style="solid;text-align:center;background-color:rgb(255,215,0);"| Hamakaze | ||
| + | ! Style="solid;text-align:center;background-color:rgb(0,0,205);"|<span style="color:White;">Årjäng</span> | ||
| + | |- | ||
| + | | [[File:071M.jpg|link=Akatsuki|150px]] | ||
| + | | [[File:073M.jpg|link=Ikazuchi|150px]] | ||
| + | | [[File:074M.jpg|link=Inazuma|150px]] | ||
| + | | [[File:132M.jpg|link=Akigumo|150px]] | ||
| + | | [[File:313_Card.jpg|link=Tanikaze|150px]] | ||
| + | | [[File:170M.jpg|link=Hamakaze|150px]] | ||
| + | | [[File:Årjäng_vapen.svg|link=|150px]] | ||
| + | |- | ||
| + | | style="text-align:center;"| '''Level 67''' | ||
| + | | style="text-align:center;"| '''Level 58''' | ||
| + | | style="text-align:center;"| '''Level 58''' | ||
| + | | style="text-align:center;"| '''Level 50''' | ||
| + | | style="text-align:center;"| '''Level 51''' | ||
| + | | style="text-align:center;"| '''Level 51''' | ||
| + | | Style="text-align:center;"|'''N/A''' | ||
| + | |- | ||
| + | | Style="text-align:center;" | N/A | ||
| + | | Style="text-align:center;" | N/A | ||
| + | | Style="text-align:center;" | N/A | ||
| + | | Style="text-align:center;" | N/A | ||
| + | | Style="text-align:center;" | N/A | ||
| + | | Style="text-align:center;" | N/A | ||
| + | | Style="text-align:center;" | IX.Destroyer Task Unit A&I | ||
| + | |- | ||
| + | | Style="text-align:center;"| [[Drum Canister]] | ||
| + | | Style="text-align:center;"| [[Drum Canister]] | ||
| + | | Style="text-align:center;"| [[Drum Canister]] | ||
| + | | Style="text-align:center;"| [[Drum Canister]] | ||
| + | | Style="text-align:center;"| [[Drum Canister]] | ||
| + | | Style="text-align:center;"| [[Drum Canister]] | ||
| + | | Style="text-align:center;"| X.Destroyer Task Unit I&U | ||
| + | |- | ||
| + | | Style="text-align:center;"| [[Drum Canister]] | ||
| + | | Style="text-align:center;"| [[Drum Canister]] | ||
| + | | Style="text-align:center;"| [[Drum Canister]] | ||
| + | | Style="text-align:center;"| [[Drum Canister]] | ||
| + | | Style="text-align:center;"| [[Drum Canister]] | ||
| + | | Style="text-align:center;"| [[Drum Canister]] | ||
| + | | Style="text-align:center;"| XI.Destroyer Task Unit T&H | ||
| + | |- | ||
| + | | Style="text-align:center;"| Locked | ||
| + | | Style="text-align:center;"| Locked | ||
| + | | Style="text-align:center;"| Locked | ||
| + | | Style="text-align:center;"| Locked | ||
| + | | Style="text-align:center;"| Locked | ||
| + | | Style="text-align:center;"| Locked | ||
| + | | Style="text-align:center;"| N/A | ||
| + | |} | ||
| + | |||
| + | |||
| + | |||
| + | |||
| + | |||
| + | {| Style="width: 125px;class=" class="wikitable" | ||
| + | !Style="text-align:center;background: rgb(229,228,226);" colspan=2 |'''<span style="font-size:16.0pt;line-height:100%">IV.Destroyer Flagship Expedition Division</span>''' | ||
| + | |- | ||
| + | ! Style="solid;text-align:center;background-color:rgb(192,192,192);"| Tatsuta | ||
| + | ! Style="solid;text-align:center;background-color:rgb(255,215,0);"| Makigumo | ||
| + | ! Style="solid;text-align:center;background-color:rgb(255,215,0);"| Naganami | ||
| + | ! Style="solid;text-align:center;background-color:rgb(255,215,0);"| Hayashimo | ||
| + | ! Style="solid;text-align:center;background-color:rgb(255,215,0);"| Kiyoshimo | ||
| + | ! Style="solid;text-align:center;background-color:rgb(255,215,0);"| Yuugumo | ||
| + | ! Style="solid;text-align:center;background-color:rgb(0,0,205);"|<span style="color:White;">Halland</span> | ||
| + | |- | ||
| + | | [[File:029b.png|link=Tasuta|150px]] | ||
| + | | [[File:134M.jpg|link=Makigumo|150px]] | ||
| + | | [[File:135M.jpg|link=Naganami|150px]] | ||
| + | | [[File:324_Card.jpg|link=Hayashimo|150px]] | ||
| + | | [[File:325_Card.jpg|link=Kiyoshimo|150px]] | ||
| + | | [[File:133M.jpg|link=Yuugumo|150px]] | ||
| + | | [[File:Halland_vapen.svg|150px]] | ||
| + | |- | ||
| + | | Style="text-align:center;"| '''Level 78''' | ||
| + | | Style="text-align:center;"| '''Level 70''' | ||
| + | | Style="text-align:center;"| '''Level 70''' | ||
| + | | Style="text-align:center;"| '''Level 49''' | ||
| + | | Style="text-align:center;"| '''Level 49''' | ||
| + | | Style="text-align:center;"| '''Level 23''' | ||
| + | | Style="text-align:center;"|'''N/A''' | ||
| + | |- | ||
| + | | Style="text-align:center;" | N/A | ||
| + | | Style="text-align:center;" | N/A | ||
| + | | Style="text-align:center;" | N/A | ||
| + | | Style="text-align:center;" | N/A | ||
| + | | Style="text-align:center;" | N/A | ||
| + | | Style="text-align:center;" | N/A | ||
| + | | Style="text-align:center;" | XII.Destroyer Task Unit T&Y | ||
| + | |- | ||
| + | | Style="text-align:center;"| [[Drum Canister]] | ||
| + | | Style="text-align:center;"| [[Drum Canister]] | ||
| + | | Style="text-align:center;"| [[Drum Canister]] | ||
| + | | Style="text-align:center;"| [[Drum Canister]] | ||
| + | | Style="text-align:center;"| [[Drum Canister]] | ||
| + | | Style="text-align:center;"| [[Drum Canister]] | ||
| + | | Style="text-align:center;"| XIII.Destroyer Task Unit M&N | ||
| + | |- | ||
| + | | Style="text-align:center;"| [[Drum Canister]] | ||
| + | | Style="text-align:center;"| [[Drum Canister]] | ||
| + | | Style="text-align:center;"| [[Drum Canister]] | ||
| + | | Style="text-align:center;"| [[Drum Canister]] | ||
| + | | Style="text-align:center;"| [[Drum Canister]] | ||
| + | | Style="text-align:center;"| [[Drum Canister]] | ||
| + | | Style="text-align:center;"| XIV.Destroyer Task Unit H&K | ||
| + | |- | ||
| + | | Style="text-align:center;"| Locked | ||
| + | | Style="text-align:center;"| Locked | ||
| + | | Style="text-align:center;"| Locked | ||
| + | | Style="text-align:center;"| Locked | ||
| + | | Style="text-align:center;"| Locked | ||
| + | | Style="text-align:center;"| Locked | ||
| + | | Style="text-align:center;"| Akigumo Reserve | ||
| + | |} | ||
| + | |||
| + | |||
| + | |||
| + | |||
| + | |||
| + | {| Style="width: 125px;class=" class="wikitable" | ||
| + | !Style="text-align:center;background: rgb(229,228,226);" colspan=2 |<p Class="MsoNormal">'''<span style="font-size:16.0pt;line-height:100%">V.Destroyer Flagship Expedition Division</span>''' | ||
| + | |- | ||
| + | ! Style="solid;text-align:center;background-color:rgb(192,192,192);"| Tenryuu | ||
| + | ! Style="solid;text-align:center;background-color:rgb(192,192,192);"| Shiratsuyu | ||
| + | ! Style="solid;text-align:center;background-color:rgb(192,192,192);"| Murasame | ||
| + | ! Style="solid;text-align:center;background-color:rgb(255,215,0);"| Harusame | ||
| + | ! Style="solid;text-align:center;background-color:rgb(255,215,0);"| Yayoi | ||
| + | ! Style="solid;text-align:center;background-color:rgb(255,215,0);"| Uzuki | ||
| + | ! Style="solid;text-align:center;background-color:rgb(0,0,205);"|<span style="color:White;">Luleå</span> | ||
| + | |- | ||
| + | | [[File:028b.jpg|link=Tenryuu|153px]] | ||
| + | | [[File:079M.jpg|link=Shiratsuyu|150px]] | ||
| + | | [[File:081M_2.jpg|link=Murasame|150px]] | ||
| + | | [[File:Harusame_Kai_Card_v2.jpg|link=Harusame|150px]] | ||
| + | | [[File:164M.JPG|link=Yayoi|150px]] | ||
| + | | [[File:165M.jpg|link=Uzuki|150px]] | ||
| + | | [[File:Luleå_vapen.svg|link=|150px]] | ||
| + | |- | ||
| + | | Style="text-align:center;"| '''Level 66''' | ||
| + | | Style="text-align:center;"| '''Level 67''' | ||
| + | | Style="text-align:center;"| '''Level 67''' | ||
| + | | Style="text-align:center;"| '''Level 50''' | ||
| + | | Style="text-align:center;"| '''Level 60''' | ||
| + | | Style="text-align:center;"| '''Level 52''' | ||
| + | | Style="text-align:center;"|'''N/A''' | ||
| + | |- | ||
| + | | Style="text-align:center;" | N/A | ||
| + | | Style="text-align:center;" | N/A | ||
| + | | Style="text-align:center;" | N/A | ||
| + | | Style="text-align:center;" | N/A | ||
| + | | Style="text-align:center;" | N/A | ||
| + | | Style="text-align:center;" | N/A | ||
| + | | Style="text-align:center;" | XV.Destroyer Task Unit T&H | ||
| + | |- | ||
| + | | Style="text-align:center;"| [[Drum Canister]] | ||
| + | | Style="text-align:center;"| [[Drum Canister]] | ||
| + | | Style="text-align:center;"| [[Drum Canister]] | ||
| + | | Style="text-align:center;"| [[Drum Canister]] | ||
| + | | Style="text-align:center;"| [[Drum Canister]] | ||
| + | | Style="text-align:center;"| [[Drum Canister]] | ||
| + | | Style="text-align:center;"| XVI.Destroyer Task Unit S&M | ||
| + | |- | ||
| + | | Style="text-align:center;"| [[Drum Canister]] | ||
| + | | Style="text-align:center;"| [[Drum Canister]] | ||
| + | | Style="text-align:center;"| [[Drum Canister]] | ||
| + | | Style="text-align:center;"| [[Drum Canister]] | ||
| + | | Style="text-align:center;"| [[Drum Canister]] | ||
| + | | Style="text-align:center;"| [[Drum Canister]] | ||
| + | | Style="text-align:center;"| XVII.Destroyer Task Unit Y&U | ||
| + | |- | ||
| + | | Style="text-align:center;"| Locked | ||
| + | | Style="text-align:center;"| Locked | ||
| + | | Style="text-align:center;"| Locked | ||
| + | | Style="text-align:center;"| Locked | ||
| + | | Style="text-align:center;"| Locked | ||
| + | | Style="text-align:center;"| Locked | ||
| + | | Style="text-align:center;"| N/A | ||
| + | |} | ||
| + | |||
| + | |||
| + | |||
| + | |||
| + | |||
| + | {| Style="width: 125px;class=" class="wikitable" | ||
| + | !Style="text-align:center;background: rgb(229,228,226);" colspan=2 | | ||
| + | <p Class="MsoNormal"><span style="font-size:21px;font-weight:bold;line-height:22.8266677856445px;">I.Seaplane Tender Task Unit</span></p> | ||
| + | |- | ||
| + | ! Style="solid;text-align:center;background-color:rgb(0,255,255);"| Chitose | ||
| + | ! Style="solid;text-align:center;background-color:rgb(0,255,255);"| Chiyoda | ||
| + | ! Style="solid;text-align:center;background-color:rgb(0,0,205);"|<span style="color:White;">Mullsjö</span> | ||
| + | |- | ||
| + | | [[File:099.jpg|link=Chitose|150px]] | ||
| + | | [[File:100.jpg|link=Chiyoda|150px]] | ||
| + | | [[File:Mullsjö_vapen.svg|link=http://en.wikipedia.org/wiki/Mullsj%C3%B6|150px]] | ||
| + | |- | ||
| + | | Style="text-align:center;"| '''Level 25''' | ||
| + | | Style="text-align:center;"| '''Level 25''' | ||
| + | | Style="text-align:center;"|'''N/A''' | ||
| + | |- | ||
| + | | Style="text-align:center;" | [[Type A Ko-hyoteki]] | ||
| + | | Style="text-align:center;" | [[Type A Ko-hyoteki]] | ||
| + | | Style="text-align:center;" | N/A | ||
| + | |- | ||
| + | | Style="text-align:center;"| [[Type A Ko-hyoteki]] | ||
| + | | Style="text-align:center;"| [[Type A Ko-hyoteki]] | ||
| + | | Style="text-align:center;"| N/A | ||
| + | |- | ||
| + | | Style="text-align:center;"| [[Type A Ko-hyoteki]] | ||
| + | | Style="text-align:center;"| [[Type A Ko-hyoteki]] | ||
| + | | Style="text-align:center;"| N/A | ||
| + | |- | ||
| + | | Style="text-align:center;"| Locked | ||
| + | | Style="text-align:center;"| Locked | ||
| + | | Style="text-align:center;"| N/A | ||
| + | |} | ||
| + | |||
| + | |||
| + | |||
| + | {| Style="width: 125px;class=" class="wikitable" | ||
| + | !Style="text-align:center;background: rgb(229,228,226);" colspan=2 | | ||
| + | <span style="font-size:21px;font-weight:bold;line-height:22.8266677856445px;">VII.Light Aircraft Carrier Expedition </span><span style="font-size:21px;font-weight:bold;line-height:22.8266677856445px;">Task </span><span style="font-size:21px;font-weight:bold;line-height:22.8266677856445px;">Unit</span> | ||
| + | |- | ||
| + | ! Style="solid;text-align:center;background-color:rgb(238,130,238);"| Zuihou | ||
| + | ! Style="solid;text-align:center;background-color:rgb(238,130,238);"| Ryuuhou | ||
| + | ! Style="solid;text-align:center;background-color:rgb(0,0,205);"|<span style="color:White;">Västerbotten</span> | ||
| + | |- | ||
| + | | [[File:113.jpg|link=Zuihou|150px]] | ||
| + | | [[File:318_Card.jpg|link=Ryuuhou|150px]] | ||
| + | | [[File:Västerbotten_vapen.svg|link=http://en.wikipedia.org/wiki/V%C3%A4sterbotten|150px]] | ||
| + | |- | ||
| + | | Style="text-align:center;"| '''Level 77''' | ||
| + | | Style="text-align:center;"| '''Level 74''' | ||
| + | | Style="text-align:center;"|'''N/A''' | ||
| + | |- | ||
| + | | Style="text-align:center;" | N/A | ||
| + | | Style="text-align:center;" | N/A | ||
| + | | Style="text-align:center;" | N/A | ||
| + | |- | ||
| + | | Style="text-align:center;"| N/A | ||
| + | | Style="text-align:center;"| N/A | ||
| + | | Style="text-align:center;"| N/A | ||
| + | |- | ||
| + | | Style="text-align:center;"| N/A | ||
| + | | Style="text-align:center;"| N/A | ||
| + | | Style="text-align:center;"| N/A | ||
| + | |- | ||
| + | | Style="text-align:center;"| N/A | ||
| + | | Style="text-align:center;"| N/A | ||
| + | | Style="text-align:center;"| N/A | ||
| + | |} | ||
| + | |||
| + | |||
| + | |-|VI.Reserve Fleet= | ||
| + | [[File:640px-Flag_of_Kyoto_Prefecture.svg.png|thumb]] | ||
| + | |||
| + | [[File:012M.jpg|link=Shirayuki|150px]][[File:053M.jpg|150px]][[File:013M.jpg|150px]] | ||
Latest revision as of 01:59, 4 March 2015
<Tabber>Profile=
|-|HQ=


| X | Activity Level |
|---|---|
| Level 5 | |
| Level 4 | |
| Level 3 | |
| X | Level 2 |
| Level 1 |
| Number | Fleet Name | Readiness | Status |
|---|---|---|---|
| I | Kure | Active | Active |
| II | Kanagawa | Partial Ready | Inactive |
| III | Yamaguchi | Inactive | Inactive |
| IV | Okayama | Ready | Inactive |
| V | Fukushima | Ready | Ready |
|-|I.Fleet=
[[File:
 .png|right]]
- I.1st Destroyer Division (Hiroshima)
- I.1st Light Cruiser Division (Kure)
- I.1st Heavy Cruiser Division (Kure)
- I.1st Fast Battleship Division (Kure)
- I.1st Aircraft Carrier Group (Kure): Hiryuu & Souryuu
|
I.Destroyer Division | ||||||
|---|---|---|---|---|---|---|
| Fubuki | Tokitsukaze | Ushio | Akizuki | Ayanami | Yuudachi | Hiroshima |
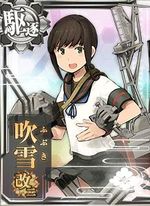
|
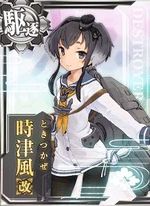
|
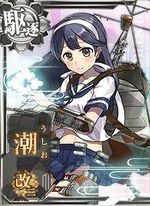
|
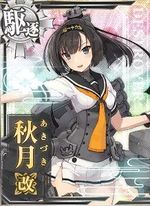
|
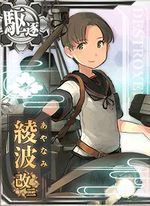
|
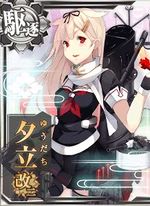
|
150px |
| Level 70 | Level 31 | Level 60 | Level 50 | Level 22 | Level 56 | N/A |
| 61cm Quad Torpedo Mount | 61cm Quint Torpedo Mount | 61cm Quad Torpedo Mount | 10cm Twin High-angle Mount Fire Director | 10cm Twin High-angle Mount | Type 3 SONAR | I.1st Destroyer Squadron |
| 61cm Quad Torpedo Mount | 61cm Quad Torpedo Mount | 61cm Quad Torpedo Mount | 10cm Twin High-angle Mount Fire Director | 10cm Twin High-angle Mount | Type 3 SONAR | II.2nd Destroyer Squadron |
| Type 22 Surface RADAR Kai 4 | Type 33 Surface RADAR | Type 33 Surface RADAR | Type 13 AIR RADAR Kai | Type 13 AIR RADAR Kai | Type 3 Depth Charge | III.3rd Destroyer Squadron |
| Locked | Locked | Locked | Locked | Locked | Locked | N/A |
|
I.1st Light Cruiser Division | |||||
|---|---|---|---|---|---|
| Yuubari | Ooyodo | Sendai | Jintsuu | Naka | Kure |
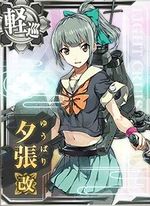
|
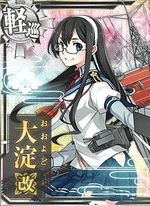
|
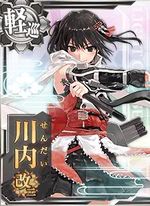
|
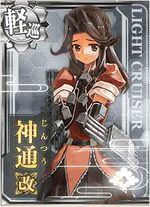
|

|
150px |
| Level 33 | Level 35 | Level 56 | Level 23 | Level 22 | N/A |
| Type 3 SONAR | 15.5cm Triple Gun Mount (Main) | 15.5cm Triple Gun Mount (Main) | 15.5cm Triple Gun Mount (Main) | 15.5cm Triple Gun Mount (Main) | I.1st Light Cruiser Squadron |
| Type 3 SONAR | 15.5cm Triple Gun Mount (Main) | 15.5cm Triple Gun Mount (Main) | 15.5cm Triple Gun Mount (Main) | 15.5cm Triple Gun Mount (Main) | II.2nd Light Cruiser Squadron |
| Type 3 SONAR | Type 14 Air RADAR | Type 0 Observation Seaplane | Type 0 Observation Seaplane | Type 0 Observation Seaplane | III.1st Torpedo Cruiser Task Unit |
| Type 3 Depth Charge | Type 0 Observation Seaplane | Locked | Locked | Locked | N/A |
|
III.Torpedo Cruiser Task Unit | |||
|---|---|---|---|
| Kitakami | Ooi | Kiso | Kure |
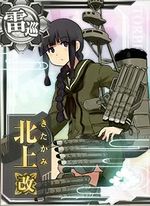
|
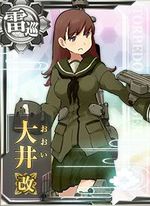
|
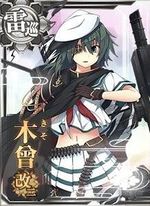
|
150px |
| Level 32 | Level 22 | Level 57 | N/A |
| 15.5cm Triple Gun Mount (Secondary) | 15.5cm Triple Gun Mount (Secondary) | 15.5cm Triple Gun Mount (Secondary) | Reinforcements from Hiroshima |
| 15.5cm Triple Gun Mount (Secondary) | 15.5cm Triple Gun Mount (Secondary) | 15.5cm Triple Gun Mount (Secondary) | N/A |
| Type A Ko-hyoteki | Type A Ko-hyoteki | Type A Ko-hyoteki | N/A |
| Locked | Locked | Locked | N/A |
|
I.1st Heavy Cruiser Division | ||||
|---|---|---|---|---|
| Maya | Choukai | Takao | Atago | Kure |
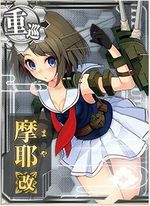
|
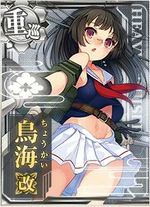
|

|
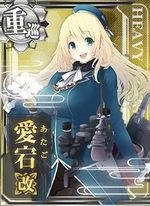
|
150px |
| Level 50 | Level 28 | Level 25 | Level 27 | N/A |
| 20.3cm(no.2) Twin Gun Mount | 20.3cm(no.2) Twin Gun Mount | 20.3cm(no.2) Twin Gun Mount | SKC34 20.3cm Twin Cannon | I.1st Heavy Cruiser Squadron |
| 20.3cm(no.2) Twin Gun Mount | 20.3cm(no.2) Twin Gun Mount | 20.3cm(no.2) Twin Gun Mount | SKC34 20.3cm Twin Cannon | II.2nd Heavy Cruiser Squadron |
| Type 14 Air RADAR | Type 14 Air RADAR | Type 14 Air RADAR | FuMO25 Radar | III.1st Aviation Cruiser Squadron |
| Type 0 Recon Seaplane | Type 0 Recon Seaplane | Type 0 Recon Seaplane | Type 0 Recon Seaplane | N/A |
|
III.1st Aviation Cruiser Squadron | ||
|---|---|---|
| Mogami | Mikuma | Kure |
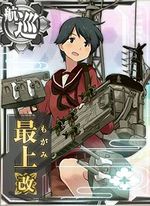
|
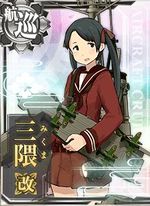
|
150px |
| Level 55 | Level 31 | N/A |
| 20.3cm(no.3) Twin Gun Mount | 20.3cm(no.3) Twin Gun Mount | Detached from Hiroshima |
| 20.3cm(no.3) Twin Gun Mount | 20.3cm(no.3) Twin Gun Mount | N/A |
| Zuiun 634 Air Group | Zuiun 634 Air Group | N/A |
| Zuiun 634 Air Group | Zuiun 634 Air Group | N/A |
|
I.1st Fast Battleship Division | ||||
|---|---|---|---|---|
| Kongou | Hiei | Haruna | Kirishima | Kure |
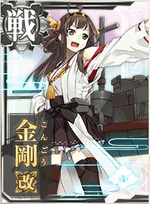
|
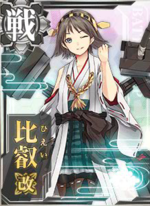
|
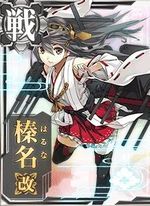
|
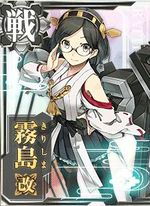
|
150px |
| Level 30 | Level 30 | Level 55 | Level 47 | N/A |
| Prototype 41cm Triple Cannon | Prototype 41cm Triple Cannon | Prototype 41cm Triple Cannon | Prototype 35.6cm Triple Gun Mount | I.1st Fast Battleship Squadron |
| 46cm Triple Gun Mount | 46cm Triple Gun Mount | 46cm Triple Gun Mount | 46cm Triple Gun Mount | II.2nd Fast Battleship Squadron |
| Type 91 Armor-Piercing Shell | Type 91 Armor-Piercing Shell | Type 91 Armor-Piercing Shell | Type 91 Armor-Piercing Shell | III.1st Battleship Squadron |
| Type 0 Observation Seaplane | Type 0 Observation Seaplane | Type 0 Observation Seaplane | Type 0 Observation Seaplane | IV.1st Aviation Battleship Squadron |
|
III.Battleship Task Unit | ||
|---|---|---|
| Mutsu | Nagato | Kure |
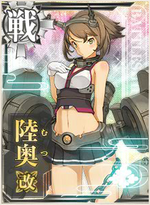
|
|
150px |
| Level 45 | Level 40 | N/A |
| 46cm Triple Gun Mount | 46cm Triple Gun Mount | Detached from Hiroshima |
| 46cm Triple Gun Mount | 46cm Triple Gun Mount | N/A |
| Type 1 Armor-Piercing Shell | Type 1 Armor-Piercing Shell | N/A |
| Type 0 Observation Seaplane | Type 0 Observation Seaplane | N/A |
|
IV.1st Aviation Battleship Squadron | ||
|---|---|---|
| Fusou | Yamashiro | Kure |
|
|
150px |
| Level 86 | Level 82 | N/A |
| 46cm Triple Gun Mount | 46cm Triple Gun Mount | N/A |
| 46cm Triple Gun Mount | 46cm Triple Gun Mount | N/A |
| Zuiun Model 12 | Zuiun Model 12 | N/A |
| Prototype Seiran | Prototype Seiran | N/A |
|
I.1st Aircraft Carrier Group | ||
|---|---|---|
| Hiryuu | Souryuu | Kure |
|
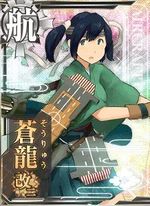
|
150px |
| Level 32 | Level 79 | N/A |
| Reppuu Kai | Reppuu (601 Air Group) | N/A |
| Reppuu | Reppuu (601 Air Group) | N/A |
| Reppuu | Tenzan Model 12 (Tomonaga Squadron) | N/A |
| Suisei (Comet) (Egusa Squadron) | Saiun | N/A |
|
II.1st Light Aircraft Carrier Task Unit | |||
|---|---|---|---|
| Chitose | Chiyoda | Zuihou | Kure |
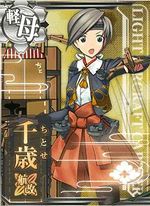
|
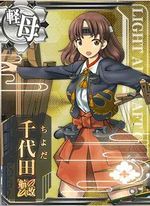
|
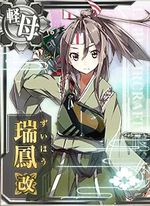
|
150px |
| Level 35 | Level 30 | Level 36 | N/A |
| Reppuu | Reppuu | Reppuu | N/A |
| Reppuu | Reppuu | Ryuusei Kai | N/A |
| Reppuu | Reppuu | Reppuu | N/A |
| Ju 87C Kai | Ju 87C Kai | Saiun | N/A |
|-|II.Fleet=


- II.Destroyer Division (Västergötland)
- IV.Destroyer Task Unit: Hatsushimo & Yuudachi
- V.Destroyer Task Unit: Shimakaze & Amatsukaze
- IV.Destroyer Task Unit: Hatsushimo & Yuudachi
- II.Light Cruiser Division (Södermanland)
- II.Heavy Cruiser Squadron (Sjöbo)
- V.Battleship Task Unit (Surahammar): Nagato & Mutsu
- III.Aircraft Carrier Task Unit (Grästorp): Shoukaku & Zuikaku
|
II.Destroyer Division | ||||||
|---|---|---|---|---|---|---|
| Hatsushimo | Yuudachi | Shimakaze | Amatsukaze | Hatsuharu | Ushio | Västergötland |
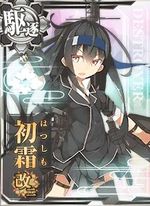
|
|
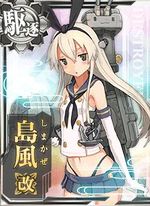
|
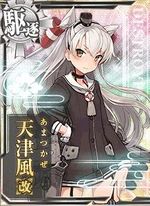
|
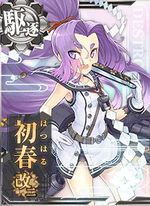
|
|

|
| Level 70 | Level 80 | Level 77 (80) | Level 34 (70) | Level 68 (70) | Level 63 (70) | N/A |
| 61cm Quad Torpedo Mount | 10cm Twin High-angle Mount | 10cm Twin High-angle Mount | 10cm Twin High-angle Mount | 10cm Twin High-angle Mount | 10cm Twin High-angle Mount | IV.Destroyer Task Unit H&Y |
| 61cm Quad Torpedo Mount | 10cm Twin High-angle Mount | 10cm Twin High-angle Mount | 10cm Twin High-angle Mount | 10cm Twin High-angle Mount | 10cm Twin High-angle Mount | V.Destroyer Task Unit S&A |
| Type 33 Surface RADAR | Type 13 AIR RADAR Kai | Type 13 AIR RADAR Kai | Type 22 Surface RADAR | Type 22 Surface RADAR | Type 22 Surface RADAR | V!.Destroyer Task Unit H&U |
| Locked | Locked | Locked | Locked | Locked | Locked | N/A |
|
II.Light Cruiser Division | |||||
|---|---|---|---|---|---|
| Agano | Noshiro | Yahagi | Sakawa | Isuzu | Södermanland |
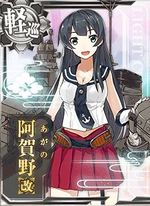
|
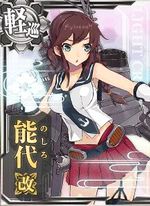
|
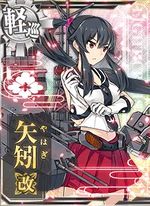
|
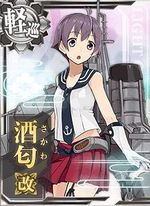
|
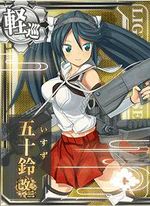
|
|
| Level 40 (70) | Level 60 (70) | Level 40 (70) | Level 60 (70) | Level 85 | N/A |
| 15.5cm Triple Gun Mount (Main) | 15.5cm Triple Gun Mount (Main) | 15.5cm Triple Gun Mount (Main) | 15.5cm Triple Gun Mount (Main) | Type 3 SONAR | V.Light Cruiser Task Unit A&N |
| 15.5cm Triple Gun Mount (Main) | 15.5cm Triple Gun Mount (Main) | 15.5cm Triple Gun Mount (Main) | 15.5cm Triple Gun Mount (Main) | Type 3 SONAR | VI.Light Cruiser Task Unit YS&I |
| Type 0 Recon Seaplane | Type 0 Recon Seaplane | Type 0 Recon Seaplane | Type 0 Recon Seaplane | Type 3 Depth Charge | N/A |
| Locked | Locked | Locked | Locked | Locked | N/A |
|
II.Heavy Cruiser Squadron | ||||
|---|---|---|---|---|
| Prinz Eugen | Furutaka | Kinugasa | Aoba | Sjöbo |
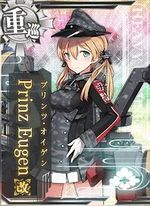
|
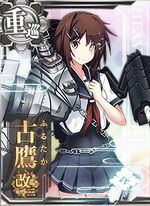
|
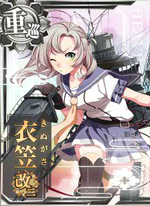
|
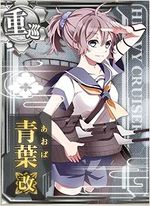
|

|
| Level 85 | Level 75 | Level 75 | Level 75 | N/A |
| SKC34 20.3cm Twin Cannon | 20.3cm(no.2) Twin Gun Mount | 20.3cm(no.2) Twin Gun Mount | SKC34 20.3cm Twin Cannon | IV.Heavy Cruiser Task Unit P&F |
| SKC34 20.3cm Twin Cannon | 20.3cm(no.2) Twin Gun Mount | 20.3cm(no.2) Twin Gun Mount | SKC34 20.3cm Twin Cannon | V.Heavy Cruiser Task Unit K&A |
| FuMO25 Radar | Type 14 Air RADAR | Type 14 Air RADAR | Type 14 Air RADAR | VI.Aviation Cruiser Task Unit |
| Type 0 Observation Seaplane | Type 0 Observation Seaplane | Type 0 Observation Seaplane | Type 0 Observation Seaplane | N/A |
|
VI.Aviation Cruiser Task Unit | ||
|---|---|---|
| Suzuya | Kumano | Sjöbo |

|
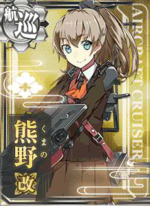
|
|
| Level 75 | Level 75 | N/A |
| Zuiun | Zuiun | Detached from Sjöbo |
| Zuiun | Zuiun | N/A |
| 20.3cm Twin Gun Mount | 20.3cm Twin Gun Mount | N/A |
| 20.3cm Twin Gun Mount | 20.3cm Twin Gun Mount | N/A |
|
V.Battleship Task Unit | ||
|---|---|---|
| Nagato | Mutsu | Surahammar |
|
|
|
|
| Level 91 | Level 91 | N/A |
| 46cm Triple Gun Mount | 46cm Triple Gun Mount | N/A |
| 46cm Triple Gun Mount | 46cm Triple Gun Mount | N/A |
| Type 91 Armor-Piercing Shell | Type 91 Armor-Piercing Shell | N/A |
| Ar196 Kai | Ar196 Kai | N/A |
|
VI.Aviation Battleship Task Unit | ||
|---|---|---|
| Ise | Hyuuga | Surahammar |
|

|
|
| Level 82 (85) | Level 83 (85) | N/A |
| Ka-type Observation Autogyro | 46cm Triple Gun Mount | Detached from Surahammar |
| Zuiun | 46cm Triple Gun Mount | N/A |
| Zuiun | Zuiun | N/A |
| Zuiun | Zuiun | N/A |
|
III.Aircraft Carrier Task Unit | ||
|---|---|---|
| Shoukaku | Zuikaku | Grästorp |

|

|
|
| Level 85 | Level 93 | N/A |
| Reppuu | Reppuu | N/A |
| Reppuu | Reppuu | N/A |
| Ryuusei Kai | Reppuu | N/A |
| Saiun | Suisei Model 12A | N/A |
|
IV.Light Aircraft Carrier Task Unit | ||
|---|---|---|
| Ryuujou | Hiyou | Grästorp |
|
|
|
| Level 83 (85) | Level 90 | N/A |
| Reppuu | Reppuu | N/A |
| Reppuu | Reppuu | N/A |
| Reppuu | Ryuusei Kai | N/A |
| Ju 87C Kai | Saiun | N/A |
|-|III.Fleet=


- I.Aircraft Support Squadrion (Uppsala)
- V.Aircraft Carrier Task Unit:Souryuu & Hiryuu
- VII.Destroyer Task Unit: Tokitsukaze & Nowaki
- V.Aircraft Carrier Task Unit:Souryuu & Hiryuu
- II.Aircraft Support Squadrion (Mora)
|
I.Aircraft Support Squadron | ||||
|---|---|---|---|---|
| Souryuu | Hiryuu | Tokitsukaze | Nowaki | Uppsala |
|
|
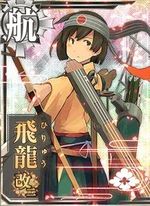
|
|
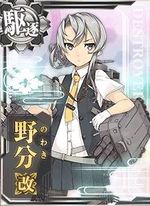
|
|
| Level 85 | Level 86 | Level 31 (70) | Level 35 (70) | N/A |
| Suisei (Comet) Model 12A | Suisei (Comet) Model 12A | 12.7cm Twin Mount Type-B Kai 2 | 12.7cm Twin Mount Type-B Kai 2 | V.Aircraft Carrier Task Unit S&H |
| Suisei (Comet) Model 12A | Suisei (Comet) Model 12A | 12.7cm Twin Mount Type-B Kai 2 | 12.7cm Twin Mount Type-B Kai 2 | VII.Destroyer Task Unit T&N |
| Suisei (Comet) Model 12A | Suisei (Comet) Model 12A | Type 22 Surface RADAR | Type 22 Surface RADAR | N/A |
| Type 32 Surface RADAR | Type 32 Surface RADAR | Locked | Locked | N/A |
|
II.Aircraft Support Squadron | ||||
|---|---|---|---|---|
| Amagi | Unryuu | Urakaze | Asagumo | Mora |
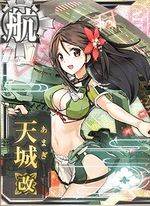
|
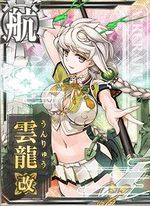
|

|
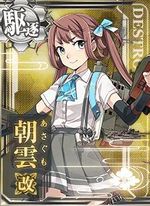
|

|
| Level 50 (85) | Level 79 (85) | Level 35 (70) | Level 35 (70) | N/A |
| Suisei (Comet) Model 12A | Suisei (Comet) Model 12A | 12.7cm Twin Mount Type-B Kai 2 | 12.7cm Twin Mount Type-B Kai 2 | VI.Aircraft Carrier Task Unit A&U |
| Suisei (Comet) Model 12A | Suisei (Comet) Model 12A | 12.7cm Twin Mount Type-B Kai 2 | 12.7cm Twin Mount Type-B Kai 2 | VIII.Destroyer Task Unit U&A |
| Suisei (Comet) Model 12A | Suisei (Comet) Model 12A | 12.7cm Twin Mount Type-B Kai 2 | 12.7cm Twin Mount Type-B Kai 2 | N/A |
| Type 32 Surface RADAR | Type 32 Surface RADAR | Locked | Locked | N/A |
|-|IV.Submarine Flotilla=

- I.Submarine Aircraft Carrier Division (Leksand)
- II.Submarine Division (Köping)
- III.Submarine Division (Värnamo)
|
I.Submarine Aircraft Carrier Division | ||||||
|---|---|---|---|---|---|---|
| I-8 | I-19 | I-168 | I-58 | I-401 | U-511 | Leksand |
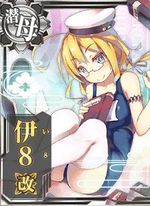
|
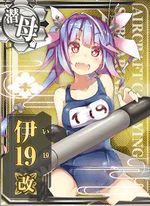
|
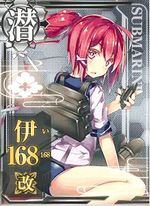
|
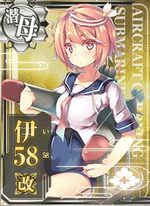
|
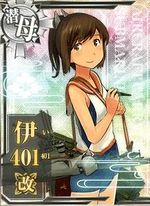
|
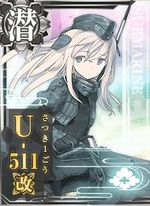
|
|
| Level 99 | Level 99 | Level 99 | Level 99 | Level 99 | Level 54 | N/A |
| 61cm Quad Torpedo Mount | 61cm Quad Torpedo Mount | 61cm Quad Torpedo Mount | 53cm Submarine Bow Torpedo Mount | 61cm Quad Torpedo Mount | 61cm Quad Torpedo Mount | I.Submarine Task Unit I-8 & I-19 |
| 61cm Quad Torpedo Mount | 61cm Quad Torpedo Mount | 61cm Quad Torpedo Mount | 53cm Submarine Bow Torpedo Mount | 61cm Quad Torpedo Mount | 61cm Quad Torpedo Mount | II.Submarine Task Unit I-168 & I-58 |
| Locked | Locked | Locked | Locked | Locked | Locked | III.Submarine Task Unit I-401 & U-511 |
| Locked | Locked | Locked | Locked | Locked | Locked | NA |
|
II.Submarine Division | ||||
|---|---|---|---|---|
| I-8 | I-19 | I-168 | I-58 | Köping |
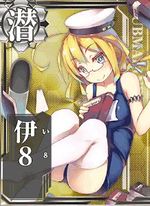
|
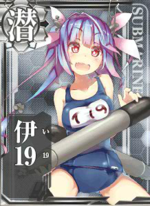
|
|
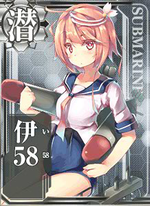
|
|
| Level 75 | Level 77 | Level 77 | Level 80 | N/A |
| 61cm Quad Torpedo Mount | 61cm Quad Torpedo Mount | 61cm Quad Torpedo Mount | 53cm Submarine Bow Torpedo Mount | IV.Submarine Task Unit I-8 & I-19 |
| Locked | Locked | 61cm Quad Torpedo Mount | Locked | V.Submarine Task Unit I-168 & I-58 |
| Locked | Locked | Locked | Locked | NA |
| Locked | Locked | Locked | Locked | NA |
|
III.Submarine Division | ||||
|---|---|---|---|---|
| I-8 | I-19 | I-168 | I-58 | Värnamo |
|
|
|
|
|

|
| Level 75 | Level 77 | Level 77 | Level 80 | N/A |
| 61cm Quad Torpedo Mount | 61cm Quad Torpedo Mount | 61cm Quad Torpedo Mount | 53cm Submarine Bow Torpedo Mount | VI.Submarine Task Unit I-8 & I-19 |
| Locked | Locked | 61cm Quad Torpedo Mount | Locked | VII.Submarine Task Unit I-168 & I-58 |
| Locked | Locked | Locked | Locked | NA |
| Locked | Locked | Locked | Locked | NA |
|-|V.Expedition Force=

- III.Destroyer Expedition Division (Årjäng)
- IV.Destroyer Flagship Expedition Division (Halland)
- V.Destroyer Flagship Expedition Division (Luleå)
- I.Seaplane Tender Task Unit (Mullsjö): Chitose & Chiyoda
- VII.Light Aircraft Carrier Expedition Task Unit: Zuihou & Ryuuhou
|
III.Destroyer Expedition Division | ||||||
|---|---|---|---|---|---|---|
| Akatsuki | Ikazuchi | Inazuma | Akigumo | Tanikaze | Hamakaze | Årjäng |
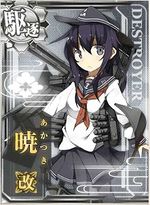
|
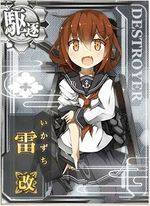
|
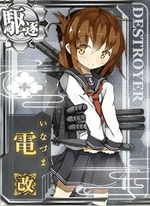
|
|
|

|
|
| Level 67 | Level 58 | Level 58 | Level 50 | Level 51 | Level 51 | N/A |
| N/A | N/A | N/A | N/A | N/A | N/A | IX.Destroyer Task Unit A&I |
| Drum Canister | Drum Canister | Drum Canister | Drum Canister | Drum Canister | Drum Canister | X.Destroyer Task Unit I&U |
| Drum Canister | Drum Canister | Drum Canister | Drum Canister | Drum Canister | Drum Canister | XI.Destroyer Task Unit T&H |
| Locked | Locked | Locked | Locked | Locked | Locked | N/A |
| IV.Destroyer Flagship Expedition Division | ||||||
|---|---|---|---|---|---|---|
| Tatsuta | Makigumo | Naganami | Hayashimo | Kiyoshimo | Yuugumo | Halland |
|

|
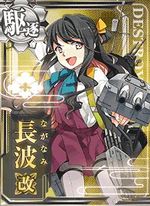
|
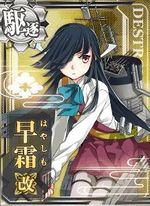
|
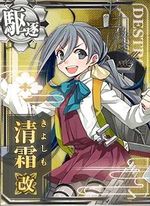
|
|

|
| Level 78 | Level 70 | Level 70 | Level 49 | Level 49 | Level 23 | N/A |
| N/A | N/A | N/A | N/A | N/A | N/A | XII.Destroyer Task Unit T&Y |
| Drum Canister | Drum Canister | Drum Canister | Drum Canister | Drum Canister | Drum Canister | XIII.Destroyer Task Unit M&N |
| Drum Canister | Drum Canister | Drum Canister | Drum Canister | Drum Canister | Drum Canister | XIV.Destroyer Task Unit H&K |
| Locked | Locked | Locked | Locked | Locked | Locked | Akigumo Reserve |
V.Destroyer Flagship Expedition Division | ||||||
|---|---|---|---|---|---|---|
| Tenryuu | Shiratsuyu | Murasame | Harusame | Yayoi | Uzuki | Luleå |
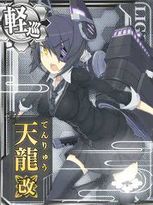
|
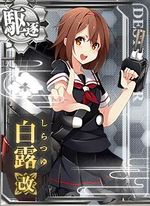
|
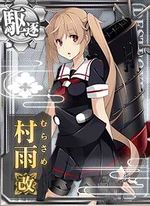
|
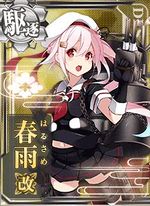
|
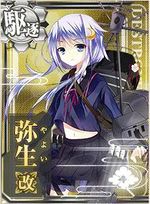
|
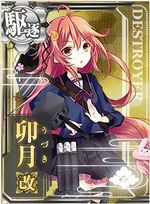
|
|
| Level 66 | Level 67 | Level 67 | Level 50 | Level 60 | Level 52 | N/A |
| N/A | N/A | N/A | N/A | N/A | N/A | XV.Destroyer Task Unit T&H |
| Drum Canister | Drum Canister | Drum Canister | Drum Canister | Drum Canister | Drum Canister | XVI.Destroyer Task Unit S&M |
| Drum Canister | Drum Canister | Drum Canister | Drum Canister | Drum Canister | Drum Canister | XVII.Destroyer Task Unit Y&U |
| Locked | Locked | Locked | Locked | Locked | Locked | N/A |
|
I.Seaplane Tender Task Unit | ||
|---|---|---|
| Chitose | Chiyoda | Mullsjö |
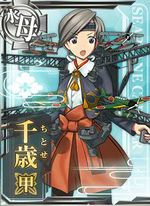
|
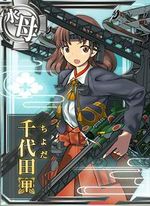
|
|
| Level 25 | Level 25 | N/A |
| Type A Ko-hyoteki | Type A Ko-hyoteki | N/A |
| Type A Ko-hyoteki | Type A Ko-hyoteki | N/A |
| Type A Ko-hyoteki | Type A Ko-hyoteki | N/A |
| Locked | Locked | N/A |
|
VII.Light Aircraft Carrier Expedition Task Unit | ||
|---|---|---|
| Zuihou | Ryuuhou | Västerbotten |
|
|
|

|
| Level 77 | Level 74 | N/A |
| N/A | N/A | N/A |
| N/A | N/A | N/A |
| N/A | N/A | N/A |
| N/A | N/A | N/A |
|-|VI.Reserve Fleet=