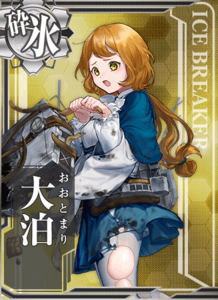
Ootomari
Info
| |||||||||||||||||||||||||||||||||||||||||
| |||||||||||||||||||||||||||||||||||||||||


| |||||||||||||||||||||||||||||||||||||||||
| |||||||||||||||||||||||||||||||||||||||||


Is a "Fleet Oiler" (AO), despite being designated in the game as an "Ice Breaker" (AGB / 砕氷 / 砕氷艦) and being historically one.
- This is reflected in her equipability exceptions.
Gameplay Notes
Fleet Oilers (AO) can notably refuel ships mid-sortie using ![]() Underway Replenishment
Underway Replenishment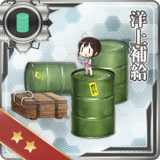 .
.
- They can also carry
 Landing Craft, which is useful for Resource Farming.
Special Mechanics

![]() Underway Replenishment s are consumable items that are used to restore fuel and ammo mid-sortie when consumed.
Underway Replenishment s are consumable items that are used to restore fuel and ammo mid-sortie when consumed.
- As "consumables", they do not take any equipment slot and appear in the Inventory.
- Only Fleet Oilers (AO) and Kumano Maru can carry them, including in their RE.
When entering a boss node, a prompt will appear giving a choice to use the Underway Replenishment(s) or not.
- The cost of the resupply will be deducted from the stockpile.
- The resupply cannot be activated when having insufficient
 fuel or
  ammo.
ammo. - The amount of fuel and ammo resupplied depends on
- The fleet type (single or combined)
- How many Resupplies are carried.
The resupply rates are as follow:
| Single Fleet | Combined Fleet | |
|---|---|---|
| 1 | 25 % | 15 % |
| 2 | 36 % | 27.5 % |
| 3 | 47 % | 40 % |
This mechanic should only be used to avoid Fuel penalty or/and Ammo penalty.
Stats Exceptions
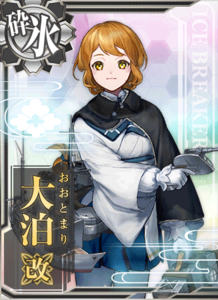
- Kai
- Has 2 equipment slots.
Equipability Exceptions
| AO | Default equipment compatibility | |
|---|---|---|
| ✔️ Can Equip | ❌ Cannot Equip | |
| RE: | ||
| Notes: | ||
| Ootomari Equipability Exceptions | |||
|---|---|---|---|
Ootomari |
Ootomari Kai | ||
| Expansion Slot Exceptions | Can Equip: | ||
| Cannot Equip: |
- | ||
| Ship Exceptions | Can Equip: |
Can Equip: | |
| Cannot Equip: |
Cannot Equip: | ||
Fit Bonuses
| [edit]Ootomari Equipment Bonuses | |||||||||||||||||||||||||||||||||||||||||||||||||||||||||||||||||||||||||||||||||||||||||||||||||||
|---|---|---|---|---|---|---|---|---|---|---|---|---|---|---|---|---|---|---|---|---|---|---|---|---|---|---|---|---|---|---|---|---|---|---|---|---|---|---|---|---|---|---|---|---|---|---|---|---|---|---|---|---|---|---|---|---|---|---|---|---|---|---|---|---|---|---|---|---|---|---|---|---|---|---|---|---|---|---|---|---|---|---|---|---|---|---|---|---|---|---|---|---|---|---|---|---|---|---|---|
| Equipment | Extra Requirement | Note | |||||||||||||||||||||||||||||||||||||||||||||||||||||||||||||||||||||||||||||||||||||||||||||||||
| Ship-Type Bonuses | |||||||||||||||||||||||||||||||||||||||||||||||||||||||||||||||||||||||||||||||||||||||||||||||||||

|
+ Air Radar | +2 | +2 | One-time | |||||||||||||||||||||||||||||||||||||||||||||||||||||||||||||||||||||||||||||||||||||||||||||||
| (2nd equipped) + Air Radar | +2 | One-time | |||||||||||||||||||||||||||||||||||||||||||||||||||||||||||||||||||||||||||||||||||||||||||||||||
| (3rd equipped) + Air Radar | +2 | One-time | |||||||||||||||||||||||||||||||||||||||||||||||||||||||||||||||||||||||||||||||||||||||||||||||||
|
(★2-3) | +1 | |||||||||||||||||||||||||||||||||||||||||||||||||||||||||||||||||||||||||||||||||||||||||||||||||
| (★4-5) | +1 | +2 | |||||||||||||||||||||||||||||||||||||||||||||||||||||||||||||||||||||||||||||||||||||||||||||||||
| (★6-7) | +1 | +1 | +2 | ||||||||||||||||||||||||||||||||||||||||||||||||||||||||||||||||||||||||||||||||||||||||||||||||
| (★8-9) | +1 | +2 | +2 | ||||||||||||||||||||||||||||||||||||||||||||||||||||||||||||||||||||||||||||||||||||||||||||||||
| (★MAX) | +1 | +2 | +1 | +2 | |||||||||||||||||||||||||||||||||||||||||||||||||||||||||||||||||||||||||||||||||||||||||||||||
|
(★0) | +1 | +2 | +1 | +2 | ||||||||||||||||||||||||||||||||||||||||||||||||||||||||||||||||||||||||||||||||||||||||||||||
| (★1) | +1 | +2 | +1 | +3 | |||||||||||||||||||||||||||||||||||||||||||||||||||||||||||||||||||||||||||||||||||||||||||||||
| (★2-3) | +1 | +2 | +1 | +4 | |||||||||||||||||||||||||||||||||||||||||||||||||||||||||||||||||||||||||||||||||||||||||||||||
| (★4-5) | +1 | +3 | +1 | +4 | |||||||||||||||||||||||||||||||||||||||||||||||||||||||||||||||||||||||||||||||||||||||||||||||
| (★6) | +1 | +3 | +1 | +5 | |||||||||||||||||||||||||||||||||||||||||||||||||||||||||||||||||||||||||||||||||||||||||||||||
| (★7) | +1 | +3 | +2 | +5 | |||||||||||||||||||||||||||||||||||||||||||||||||||||||||||||||||||||||||||||||||||||||||||||||
| (★8) | +1 | +4 | +2 | +5 | |||||||||||||||||||||||||||||||||||||||||||||||||||||||||||||||||||||||||||||||||||||||||||||||
| (★9) | +1 | +4 | +2 | +6 | |||||||||||||||||||||||||||||||||||||||||||||||||||||||||||||||||||||||||||||||||||||||||||||||
| (★MAX) | +2 | +4 | +2 | +6 | |||||||||||||||||||||||||||||||||||||||||||||||||||||||||||||||||||||||||||||||||||||||||||||||
| + Air Radar | +2 | +2 | One-time | ||||||||||||||||||||||||||||||||||||||||||||||||||||||||||||||||||||||||||||||||||||||||||||||||
|
(1st equipped) (★7) | +1 | One-time | ||||||||||||||||||||||||||||||||||||||||||||||||||||||||||||||||||||||||||||||||||||||||||||||||
| (1st equipped) (★8) | +1 | +1 | One-time | ||||||||||||||||||||||||||||||||||||||||||||||||||||||||||||||||||||||||||||||||||||||||||||||||
| (1st equipped) (★9) | +1 | +1 | +1 | One-time | |||||||||||||||||||||||||||||||||||||||||||||||||||||||||||||||||||||||||||||||||||||||||||||||
| (1st equipped) (★MAX) | +1 | +2 | +1 | One-time | |||||||||||||||||||||||||||||||||||||||||||||||||||||||||||||||||||||||||||||||||||||||||||||||
+ ★3+ 12.7cm Twin Gun Mount Model D Kai 2 OR ★3+ 12.7cm Twin Gun Mount Model D Kai 3 OR ★3+ 12.7cm Twin Gun Mount Model D Kai 3
|
+1 | +1 | One-time | ||||||||||||||||||||||||||||||||||||||||||||||||||||||||||||||||||||||||||||||||||||||||||||||||
+ ★4+ Type 13 Air Radar Kai (Late Model)
|
+1 | +4 | +1 | +3 | One-time | ||||||||||||||||||||||||||||||||||||||||||||||||||||||||||||||||||||||||||||||||||||||||||||||
|
(★8-9) | +1 | |||||||||||||||||||||||||||||||||||||||||||||||||||||||||||||||||||||||||||||||||||||||||||||||||
| (★MAX) | +2 | ||||||||||||||||||||||||||||||||||||||||||||||||||||||||||||||||||||||||||||||||||||||||||||||||||
|
(★4-6) | +1 | +1 | ||||||||||||||||||||||||||||||||||||||||||||||||||||||||||||||||||||||||||||||||||||||||||||||||
| (★7-9) | +1 | +2 | +1 | ||||||||||||||||||||||||||||||||||||||||||||||||||||||||||||||||||||||||||||||||||||||||||||||||
| (★MAX) | +1 | +3 | +2 | ||||||||||||||||||||||||||||||||||||||||||||||||||||||||||||||||||||||||||||||||||||||||||||||||
| (★4-MAX) + Air Radar | +1 | One-time | |||||||||||||||||||||||||||||||||||||||||||||||||||||||||||||||||||||||||||||||||||||||||||||||||
|
(★6-7) | +1 | +1 | ||||||||||||||||||||||||||||||||||||||||||||||||||||||||||||||||||||||||||||||||||||||||||||||||
| (★8-9) | +1 | +1 | +1 | ||||||||||||||||||||||||||||||||||||||||||||||||||||||||||||||||||||||||||||||||||||||||||||||||
| (★MAX) | +1 | +1 | +1 | +2 | |||||||||||||||||||||||||||||||||||||||||||||||||||||||||||||||||||||||||||||||||||||||||||||||
| (★6-MAX) + Air Radar | +2 | One-time | |||||||||||||||||||||||||||||||||||||||||||||||||||||||||||||||||||||||||||||||||||||||||||||||||
|
(★7) | +1 | |||||||||||||||||||||||||||||||||||||||||||||||||||||||||||||||||||||||||||||||||||||||||||||||||
| (★8) | +1 | +1 | |||||||||||||||||||||||||||||||||||||||||||||||||||||||||||||||||||||||||||||||||||||||||||||||||
| (★9) | +1 | +1 | +1 | ||||||||||||||||||||||||||||||||||||||||||||||||||||||||||||||||||||||||||||||||||||||||||||||||
| (★MAX) | +1 | +1 | +2 | ||||||||||||||||||||||||||||||||||||||||||||||||||||||||||||||||||||||||||||||||||||||||||||||||
|
(★4) | +1 | |||||||||||||||||||||||||||||||||||||||||||||||||||||||||||||||||||||||||||||||||||||||||||||||||
| (★5) | +1 | +1 | |||||||||||||||||||||||||||||||||||||||||||||||||||||||||||||||||||||||||||||||||||||||||||||||||
| (★6) | +1 | +1 | +1 | ||||||||||||||||||||||||||||||||||||||||||||||||||||||||||||||||||||||||||||||||||||||||||||||||
| (★7) | +1 | +2 | +1 | ||||||||||||||||||||||||||||||||||||||||||||||||||||||||||||||||||||||||||||||||||||||||||||||||
| (★8) | +2 | +2 | +1 | ||||||||||||||||||||||||||||||||||||||||||||||||||||||||||||||||||||||||||||||||||||||||||||||||
| (★9) | +2 | +2 | +2 | ||||||||||||||||||||||||||||||||||||||||||||||||||||||||||||||||||||||||||||||||||||||||||||||||
| (★MAX) | +2 | +3 | +2 | ||||||||||||||||||||||||||||||||||||||||||||||||||||||||||||||||||||||||||||||||||||||||||||||||
Important Information
Drop Locations
Voice Lines
CG
| Regular |
|---|
|


Trivia
- General Information
- She is named after the Port of Ootomari.
- She was launched on the 3rd of October 1921.
- Originally designed as a Kamoi-class Oiler. The failure of Japan to dispatch ships capable of breaking through the ice to rescue their citizens during the Nikolayevsk Incident caused her redesign as an Ice Breaker.
- Japan had no prior experience in constructing ice breakers, as such they relied on observing designs from other nations, particularly the Soviet Union, and ultimately she was based after the Dobrynya Nikitich.
- Update History
- She was added on the 7th of March 2025 as Spring 2025 Event E1 drop.
- Misc
- Was assigned to the Ōminato Guard District and took northern patrol duties in the regions of Sakhalin, Kuril Islands and Sea of Okhotsk
- Survived World War II.
- Was initially planned to be a repatriation ship, but her boilers were no longer usable; in fact, she was heading for Youkosuka for maintenance, but the war ended and plans were stopped.