• Welcome to the Kancolle Wiki!
  • If you have any questions regarding site content, account registration, etc., please visit the KanColle Wiki Discord

User:Totaku/Fall 2019 Event Back up

From Kancolle Wiki
Jump to navigation Jump to search

The Fall 2019 Event, Advance! The 2nd Southern Operation is scheduled to begin on November 29th. The event will be the "largest event of this year".

The theme of the event will take place in the "Southern Waters past Indonesia, where the 8th Destroyer Division played a role during the war. Current details imply the main part of the campaign will be part of the Dutch East Indies Campaign. The Event will consist of a total of 6 Event Maps, consisting of 4 Main Operations and 2 Extra Operations.

The Event will begin in Southern area of the Bali Sea.

For additional information regarding event-related subjects and content, please refer to the following links:

Historical Background

Disclaimer: The following information is based upon a summary of World War II history and may not have any bearing on in-game mechanics. This is for historical reference only.

Dutch East Indies Campaign

Information

New Mechanics

New Ships

A total of 7 ships will be released as part of the event. 4 for the Main Operation and 3 for the Extra Operation.

So far, it has been revealed that the following ships will be released this event:


It is also known that two artist who are generally commissioned to work on shipgirls from time to time are returning:

  • Parsley
  • Kusada Souta

Returning Ships

New Equipment

Note: Some equipment was previously introduced as part of prior ranking rewards.

New Enemy Vessels

New Enemy Equipment

Friend Fleet

Fleet Formations

Friend Fleets will now come with a new function which will allow players to choose if they wish to bring in a Friend Fleet to aid them in battle or not. They can also choose to also decide if they want a normal Friend Fleet come aid them in battle or if they wish to use a powerful Friend Fleet that will require the cost of 6 Instant Constructions Instant construction-0.jpg to allow you call in a more powerful Friend Fleet to aid you into battle.

If you choose to opt in for the powerful Friend fleet, the Instant Constructions Instant construction-0.jpg will not be consumed unless a powerful Friend Fleet appears.


Voice Lines

Friend Fleet Voice Lines

Ship Japanese/English Notes
Destroyers
???
Friend Fleet 1
???
Friend Fleet 1
???
Friend Fleet 2

Event Voice Lines

Ship Japanese/English Notes
Destroyers
Shiratsuyu
Secretary 3
Play
Admiral, I'll be fine. I'll be very careful on this sea. I'll be the number one lookout. Trust meee!
提督、大丈夫だって。この海、ちゃんと気をつけるから。一番ちゃんと見張りをするから。信じてよー!
Shiratsuyu
Attack
Play
Now, it's time for me to do my best as the eldest sister. Take thiiiis!
さあ、ここは長女のあたしが頑張らないと。いけー!
Shigure
Secretary 3
Play
An anti-submarine patrol? I'll work hard too.
対潜哨戒か?僕も、頑張るよ。
Shigure
Attack
Play
I'll protect this place too.
ここは、僕も、守る。
Shigure Kai Ni
Attack
Play
I'll... protect this place too!
ここは僕も…守る!
Murasame
Secretary 1
Play
Ufufufu. Admiral, all of us in DesDiv2 are ready and waiting.
うふふふぅ。提督、私達二駆はスタンバイオーケーよ。
Murasame
Battle Start
Play
DesDiv2; Yuudachi, Harusame, Samidare. Come on, let's go.
二駆、夕立、春雨、五月雨。さあ、行きましょう。
Murasame Kai Ni
Battle Start
Play
DesDiv2; Yuudachi, Harusame, Samidare. Come on, let's go.
二駆、夕立、春雨、五月雨。さあ、行きましょう。
Yuudachi
Secretary 1
Play
I'll come with you.
夕立、一緒に行くよ。
Yuudachi Kai Ni
Secretary 1
Play
I'll come with you.
夕立、一緒に行くよ。
Yuudachi
Secretary 3
Play
My division is here-poi. It's time for me to go wild-poi!
夕立の部隊が来たっぽい。思いっきり暴れるっぽい!
Yuudachi Kai Ni
Secretary 3
Play
My division is here-poi. It's time for me to go wild-pooooooi!
夕立の部隊が来たっぽい。思いっきり暴れるっぽぉいぃー!
Yuudachi
Joining A Fleet
Play
Destroyer Yuudachi will now be sortieing to the Solomons.
駆逐艦夕立、いざソロモンに抜けて、出撃よ。
Yuudachi Kai Ni
Joining A Fleet
Play
Destroyer Yuudachi will now be sortieing to the Solomons.
駆逐艦夕立、いざソロモンに抜けて、出撃よ。
Yuudachi
Night Attack
Play
I really have so many targets to choose from-poi. Grr, grarr!
本当に選り取り見取りっぽい。がる、がるる!
Yuudachi Kai Ni
Night Attack
Play
I really have so many targets to choose from-poi. Rawr, RAWRR!
本当に選り取り見取りっぽい。がる、がるる!
Yuudachi
Night Battle
Play
Now is the time-poi. I'll show you what the Nightmare of Solomon is really about.
今がその時っぽい。ソロモンの悪夢、たっぷり見せてあげる。
Yuudachi Kai Ni
Night Battle
Play
Now is the time-poi. I'll show you what the Nightmare of Solomon is really about.
今がその時っぽい。ソロモンの悪夢、たっぷり、見せてあげる。

Mechanics

Participation requirements

  • Must have a 75% sortie win ratio.
  • Must have 5 empty ship slots for new ships.
  • Must have 20 free equipment slots.

Special Mechanics

  1. The difficulty system first used in Spring 2015 Event returns: you can choose between Operation A (, Hard), Operation B (, Medium), Operation C (, Easy) or Operation D (, Very Easy) .
    • Choosing A or B requires certain HQ Level (HQ Lv 35 for B / 80 for A in Spring 2015 Event).
    • An important note to all Admirals intending to clear the event on Hard difficulty - further (new) conditions now apply:
      • When switching difficulty from any other difficulty to Hard, the map's debuff mechanism (where applicable) will be reset.
        • Switching between any other difficulties will not reset the debuff mechanism.
  2. The debuff system from Summer 2015 Event's final map, where certain nodes had to be attacked and other conditions fulfilled to reduce boss armor, will return.
  3. Returning this event, the Vanguard Formation can be used .
    • This formation will organize the fleet such that the 3rd-6th/7th ships protect the Flagship and 2nd Ship of the Fleet.
      • In addition, the formation allows for ships to become more evasive in combat situations, especially with well-trained Destroyer.
      • This formation is also available only during the duration of the event.
      • The formation will be usable by both normal fleets as well as the Striking Force Fleet.
  4. NPC Friend Fleets have been introduced into the game.
    • Friend Fleets act as another unit that appears in particular battles to help aid your fleet when attacking the enemy at the start of night battle.
      • NPC Friend Fleets are selected from a randomized preset list of ship.
      • Depending on who you have in your fleet can also influence who will be arrive to aid you in battle.
  5. Enemy Radar Ambush Nodes have been introduced into the game.
    • Entering this node will result in your fleet facing off against an enemy fleet that will ambush and attack your fleet
      • Your Fleet will not be able to fight against the enemy Fleet.
      • By meeting certain conditions, you can evade these nodes.
  6. Emergency Anchorage Maintenance/Repairs 【緊急泊地修理】
  7. High-Altitude Abyssal Bombers that are resistant to all types of interceptors other than the new land-based jet interceptors may also return this event.

Quick Info Table

Classification Map Name Fleet Type? Land-Based Air Squadron? Friendly Fleet? Color of Tag Tag Condition & Deployment Restriction Difficulty Restrictions Notes
Main Operation
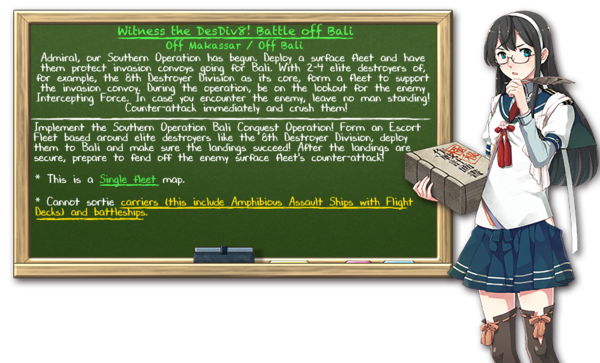
E-1 Witness the 8th Destroyer Division! Battle Off Bali Single Fleet No TBD Fall2019EventMagentaTag.png
Occupation Convoy
Tagging:
Ships not already color-tagged will be tagged with the color associated with the map when deployed. This tag exists on all difficulties and is not reset on remodel, etc.
Deployment Restriction:
Normal or Hard: Must have either the same-colored tag or no tag.
No restrictions. All difficulties OK
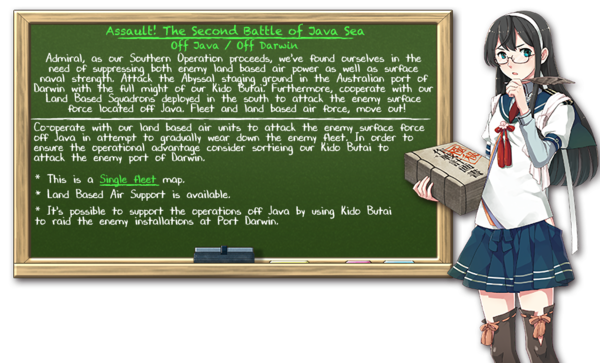
E-2 Assault! The 2nd Battle of the Java Sea Single Fleet Yes TBD Fall2019EventLightBlueTag.png
Air Raid Unit
In order to play these maps on hard, you must complete the previous map* on either normal or hard.
(e.g., to do E-2 on hard, you must complete E-1 on normal or hard.)
E-3 Clash! Battle off Surabaya! Combined Fleet Yes TBD Fall2019EventDarkBlueTag.png
Dutch East Indies Unit
E-4 Battle off Batavia Single/Combined Fleet Yes TBD Fall2019EventGreenTag.png
Malay Unit
Extra Operation
E-5 Davao Sea Patrol Line Single/Combined Fleet Yes ??? Fall2019EventWhiteTag.png
Patrol Unit
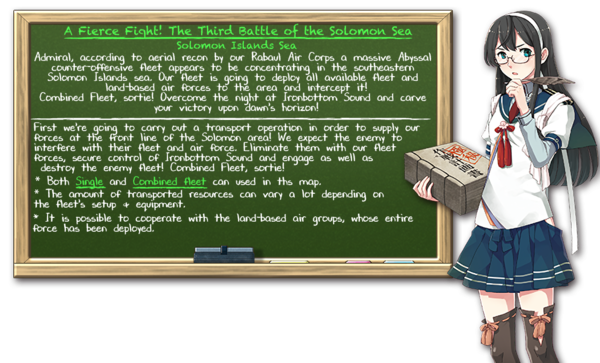
E-6 A Fierce Fight! The Third Battle of the Solomon Sea Single/Combined Fleet Yes ??? Fall2019EventGoldTag.png
Decisive Battle Squadron

Event Maps

E-1

OoyodoE-1Fall2019.png

Witness the 8th Destroyer Division! Battle Off Bali
No map name yet

Information

  • Event Tag: Fall2019EventMagentaTag.png Occupation Convoy

(Phase 1 - Boss): Supply Depot Princess

  • Hard ():
  • Medium ():
  • Easy ():
  • Casual ():

(Phase 2 - Boss): Light Cruiser He-Class (Enemy type varies upon difficulty)

  • Hard ():
  • Medium ():
  • Easy ():
  • Casual ():

Key Rewards:


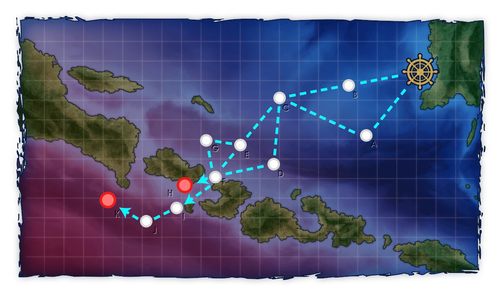
E-1 Branching Rules
Nodes Rules
1
A
  • Do not meet the requirements to go to B.
B
  • Meet ALL of the following requirements:
    • Amount of ships ≤ 5
    • Amount of DD ≥ 4
C
D
  • Do not meet the requirements to go to E.
E
  • Meet ALL of the following requirements:
    • Amount of ships ≤ 5
    • Amount of DD ≥ 4
E
F
  • Amount of DD ≤ 4
G
  • Amount of DD ≥ 5
F
I
  • Active branching
H


Branching compositions were reported over the course of the event.

Fall2019E-1Banner.png
Fall2019E-1Map.png

Branching rules

  • No branching rules known

Tips

Note: The Following Guide is an early version that has been based on current collected info. Be aware that information is subject to change as more of the maps and information is released.

Preparations

Historical Bonuses:

Note: Base multiplier stacks multiplicatively with node-specific bonuses, if any.


On this map, you will be using a single fleet that cannot include (F)BB(V),CV(L)(B) and LHA. 8th DesDiv ships have the highest bonus here. However, it's not strictly necessary to use them to clear, and you can consider conserving them for later maps instead.

The three major factors consider before attempting this map are:

  1. Do you have any anti-installation equipment? (Type 3 Shell, Anti-Ground Rockets, Mortars, Daihatsu/Ka-Mi Tank, etc.)
  2. Do you have any Destroyers and Light Cruisers that can equip said equipment?
  3. Do you have any 8th DesDiv Members (Asashio, Ooshio, Michishio, Arashio) (preferably Kai Ni, but not required)?

If you said yes to the first 2 questions, you can clear Part 1 of the map using the recommended lighter ship comps listed below. If you said yes to the 8th DesDiv question, you can consider using them here as well, although just 1-2 of them should be more than sufficient for the purposes of clearing this map (it really is that easy).

The alternative heavier composition should not be used at all on Medium difficulty or higher, especially given how many CAs are required for later Main Operation maps. It has been included only for those with no other alternatives.

Support expeditions are not necessary for this map.

Part 1: Supply Depot Princess (HP Bar)

Below is a tab which will cover three of the most recommended fleet comps that can be used on this map. These comps can be used across the whole map.

Recommended Fleet

Total ships needed: 4-6 ships

  • Route: B-C-E-F-H
  • You will only face off against one enemy fleet consisting of 3-4 DDs prior to the boss.
  • This comp is the strongest, most efficient comp for this map as a whole, although you can omit the CL for the purposes of the Part 1 boss.
    • Using a CLT here is not recommended unless you have dupes, or you are playing on Easy or below.
  • This comp is ideal if you have at least 2 DD that can equip anti-installation one-shot builds (Type 2 Amphibious Tank, Marine (Type 89 Daihatsu / M4A1 / Toku Daihatsu 11th Regiment), and WG42 / Shipborne Model Type 4 20cm Anti-ground Rocket Launcher / Concentrated variant) to deal maximum damage to the boss) while the other ships can be equipped for taking out PT imps.

  • Route: B-C-E-F-H
  • You will only face off against one enemy fleet consisting of 3-4 DDs prior to the boss.
  • This comp is perfectly viable for the Part 1 boss, although a CL should be added for the Part 2 boss.
  • This comp is ideal if you have at least 2 DD that can equip anti-installation one-shot builds (Type 2 Amphibious Tank, Marine (Type 89 Daihatsu / M4A1 / Toku Daihatsu 11th Regiment), and WG42 / Shipborne Model Type 4 20cm Anti-ground Rocket Launcher / Concentrated variant) to deal maximum damage to the boss) while the other ships can be equipped for taking out PT imps.

  • Route: A-C-E-F-H (Easy or Less)
  • Route: A-C-D-F-H (Medium or Higher)
  • Not recommended on Medium difficulty or above. Shiplocking will be very tight for CAs, taking into account later maps.
  • This comp is recommended only to players who are relatively new and lack in anti-installation equipment for DDs/CLs, and have no means of gaining access to that equipment in the short run.
  • CAs should equip Type 3 Shells for the bonus against the Supply Depot Princess. DDs should be equipped to combat PT Imps.
  • You will take the same route on Easy or lower, but on higher difficulties, you will face off against a sub fleet and a fleet consisting of heavy ships.

Once the Part 1 HP bar has been fully depleted, the Part 2 boss will automatically be unlocked.

Part 2: Defeat the Light Cruiser He-Class (HP Bar)

  • Route: A-C-E-F-I-J-K (Easy or Less) if using 1 DD/CL/CLT, 4 DD or 4 DD comp
  • Route: A-C-D-F-I-J-K (Normal or Higher) if using CA-based comp

You can reuse your previous fleet for Part 1. All ships should now be equipped with double-attack set-ups (no anti-installation equipment is required for this part, and anti-PT Imp equipment is also not necessary). If using the 4DD fleet above, adding 1CL is helpful.

There is one additional pre-boss node (J) that is not difficult to clear. If you are having difficulty passing, Vanguard formation may be useful. The boss node (K) is not particularly hard to clear either, particularly with historical bonus ships.

  • The new Kai variant of the He-Class CL has significantly higher HP and armour, but this should not pose a problem with enough historical bonuses.

The event guides are to be constructed through the respective Event map page guide and reviewed by editor staff / collaboration committee before being approved here. Do not under any circumstance update the guides through this page or attempt to fix them through this page. Please only update guides through their respective sandbox pages.

Enemy comps

Ship drops Totaku/Fall 2019 Event Back up/E-1/Ship drops


E-2

OoyodoE-2Fall2019.png

Assault! The 2nd Battle of the Java Sea
No map name yet

Information

  • Event Tag: Fall2019EventLightBlueTag.png Air Raid Unit

(Phase 1 - Boss): Heavy Cruiser Princess

  • Hard ():
  • Medium ():
  • Easy ():
  • Casual ():

Key Rewards:


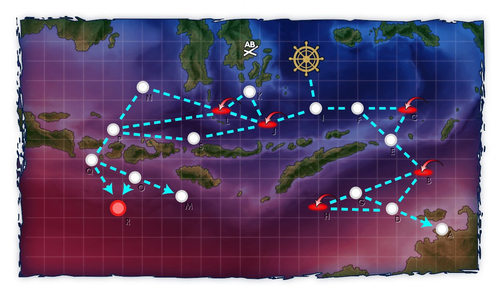
E-2 Branching Rules
Nodes Rules
I
F
  • Active branching
J
F
C
  • Do not meet the requirements to go to E.
E
  • Amount of CV(L/B)+(F)BB(V) ≤ 2
B
D
  • Fast Fleet
G
  • Slow Fleet
G
D
  • ???
H
  • ???
J
K
  • Do not meet the requirements to go to either L or S.
L
  • Meet ALL of the following requirements:
    • Do not meet the requirements to go to S.
    • No CV
    • Amount of CVL+(F)BB(V) ≤ 1
    • Amount of CA(V) ≤ 3
S
  • Meet ALL of the following requirements:
    • Fast Fleet
    • Amount of DD ≥ 4
    • No CV
    • Amount of CVL+(F)BB(V) ≤ 1
    • Amount of CA(V) ≤ 3
    • Short is unlocked.
L
N
  • Do not meet the requirements to go to P.
P
  • Meet ALL of the following requirements:
    • No (F)BB(V)
    • No CV
    • Amount of CA(V) ≤ 3
Q
O
  • Do not meet the requirements to go to R.
R
  • Meet ALL of the following requirements:
    • Pass the LoS check.
    • No CV(B)
    • No BB(V)
    • Amount of CVL+FBB ≤ 1
O
M
  • Do not meet the requirements to go to R.
R
  • Meet ALL of thhe following requirements:
    • Pass the LoS check.
    • No CV(B)


Branching compositions were reported over the course of the event.

Fall2019E-2Banner.png
Fall2019E-2Map.png

Branching rules

  • No branching rules known

Tips
Note: The Current Guide is an early version of the guide and some hints may be subject to change as more information comes out with the release of EO maps and other information. Use this guide with caution as it is subject for possible finalization.

Preparation

On this map, there are several ships that will have historical benefits on this map. A good number of them while useful on this map could possibly be useful in later maps. So be sure to only use ships you can carefully toss in here while doing this map on Normal and Hard Difficulty. In addition, while there is a mechanic to open a shortcut on this map, completing it isn't entirely necessary.

The only main question you need to ask here is the following:

  1. Are you willing to use some of the following ships such as Choukai, Sendai, Yura, Amagiri, Atago, Takao, Kongou, Haruna on this map?
  2. Are you willing to go through with completing a shortcut phase on this map?

If you agree with the first one, carefully consider who you'll use as they may become useful in later maps. If you agree with the 2nd, you will need additional ships to meet shortcut requirements. Plan carefully using your ships on this map.

Historical Bonuses

Below is a list of the following historical bonuses:

You may be able to use up to 3-4 historical ships here that will likely benefit this map. But once more, please carefully weigh your options before doing so.

Step 1: Deciding your course of action

On this map, you can choose to do the following options:

  • Go Directly for the Heavy Cruiser Princess
  • Attack Port Darwin (Node A) and defeat the Harbor Water Demon several times with an A rank to unlock the shortcut (1 times on Easy / Normal, 2 Times on Hard.

Depend on the direction you choose some options will need to be considered, keep in mind however that there it is not necessary to do the Node A Shortcut

Below we will focus on the shortcut first before engaging in the actual battle. You are welcome to skip and go directly to attacking the Heavy Cruiser Princess.

Step 1a: Attack Port Darwin (Node A) and defeat the Harbor Water Demon

  • Note that it's completely possible to defeat Heavy Cruiser Princess without the need of unlocking extra route. This phase should be done only if your fleet can't finish off the boss in Final Form to take an alternative route to avoid one air raid!
  • Recommend Fleet: 2 CA, 1 CL, 2DD, 1 CVL (Fast Fleet)
  • Path: I-F-E-B-D-A
  • LBAS Recommendation:
    • LBAS 1: 1 Land Base Fighter, 3 Land Base Bombers (Distance of 7 Required)
  • On this path your fleet will take the shortest route
  • Your Fleet will encounter a surface fleet consisting of CLs and DD, Vanguard Formation is recommended.
  • Air Nodes will require decent air defense and AACI to pass efficiently. Use your CVL as a fighter mule, and bring a DD that can AACI to help efficiently past these nodes.
  • It's recommended to also bring some Anti-Installation equipment, but it's not necessary to use a nuke setup to efficiently kill the enemies in Node A.

Harbor Water Demon will usually have possibly have an Airfield Princess, 2 DD and 2 Transports. Having an LBAS target this node should make short work of the enemies allowing for your fleet to do extensive damage to the boss. All you will need is 1-2 A ranks to successfully complete the requirements.

Once you successfully complete the requirement you will open a shortcut through nodes J-S-P

Step 1b: Defeat the Heavy Cruiser Princess

  • Path: I-J-L-P-Q-R
  • Standard comp that DOES NOT go through the shortcut should you decide not to unlock it
  • You will encounter 2 Air Attack Nodes and 2 Surface Battle Nodes before reaching the boss
  • For the Air Nods, use Diamond formation and have a CVL that's a fighter mule along with AACI DD.
  • If you have some of the better planes, a CVL can easily get 110 AP 1 Fighter and 1 Fighter Bomber which you only need at minimum which is considered suitable enough to susive the air attacks. You can then use the other spots for torpedo bombers.
  • For the Surface Fleet, use Line Ahead or Vanguard Formation to take out or evade most of the enemies attacks and survive depending on what you bring.

  • Route: I-J-S-P-Q-R
  • Ths comp will allow you to take the shortcut if you completed Step 1a's process.
  • A Fast Fleet" is required to take this path.
  • Going through the shortcut and skipping one air raid node, also enabling second shelling at the boss node for higher chance of disabling the closing torpedo salvo from enemies
      • However, your fleet will become very light due to the presence of 4DDs, may cause higher retreat pre-boss
  • If you have some of the better planes, a CVL can easily get 110 AP 1 Fighter and 1 Fighter Bomber which you only need at minimum which is considered suitable enough to susive the air attacks. You can then use the other spots for torpedo bombers.
  • For the Surface Fleet, use Line Ahead or Vanguard Formation to take out or evade most of the enemies attacks and survive depending on what you bring.

Recommended LBAS

  • 4 Land Base Bombers (Range 6 Required)

The Heavy Cruiser Princess will be of a weaker variant that will consist of some CLs and DDs in her fleet. She will not have any airpower therefore allowing your fleet to get an easy AS if you bring a carrier with some fighter power. In addition to this, you can use an all bomber LBAS group to swiftly take out the majority of the enemy fleet so your fleet can focus more on the Princess.

The most effective way to win is to either have a DD that can TCI or use a ship with historical bonuses such as Atago, Takao, and Sendai who are most effective against the Princess with a double attack on this map. Bringing night battle gear such as a Night scout and star shells will also improve your win rate. Whichever method you choose you can make short work of her and eventually you will clear the map with little effort.


The event guides are to be constructed through the respective Event map page guide and reviewed by editor staff / collaboration committee before being approved here. Do not under any circumstance update the guides through this page or attempt to fix them through this page. Please only update guides through their respective sandbox pages.

Enemy comps

Ship drops Totaku/Fall 2019 Event Back up/E-2/Ship drops


E-3

OoyodoE-3Fall2019.png

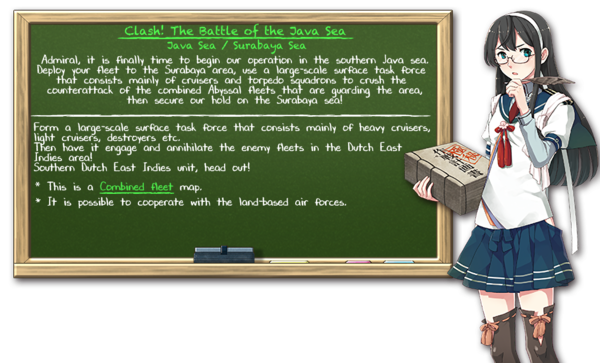
Clash! Battle off Surabaya!
No map name yet

Information

  • Event Tag: Fall2019EventDarkBlueTag.png Dutch East Indies Unit

(Phase 1 - Boss): Heavy Cruiser Ne-class Kai

  • Hard ():
  • Medium ():
  • Easy ():
  • Casual ():

(Phase 2 - Boss): Battleship Water Demon (Kai on final kill)

  • Hard ():
  • Medium ():
  • Easy ():
  • Casual ():

Key Rewards:


E-3 Branching Rules
Nodes Rules
Start
1
  • Carrier Task Force
2
  • Transport Combined Fleet
3
  • Surface Task Force
1
A
  • Do not meet the requirements to go to B.
B
  • ???
A
B
  • ???
D
  • ???
D
E
  • Do not meet the requirements to go to G.
G
  • Meet ALL of the following requirements:
    • No CV(L)
    • No (F)BB(V)
    • LHA
    • Amount of CLT+CA(V)+AV ≤ 4
E
F
  • Do not meet the requirements to go to G.
G
  • Meet ALL of the following requirements:
    • No CV(B)
    • No (F)BB(V) OR fleet contains AO
    • Amount of (F)BB(V) ≤ 1
    • Amount of CVL ≤ 1
    • Amount of CLT+CA(V)+AV ≤ 4
F
I
  • Do not meet the requirements to go to G.
G
  • Meet ALL of the following requirements:
    • Amount of (F)BB(V)+CVL ≤ 2
    • Amount of (F)BB(V)+CV(B) ≤ 1
    • Amount of CLT+CA(V)+AV ≤ 5
G
H
  • Fleet contains AO, Akashi Kai or Akitsushima Kai
J
  • Do not meet the requirements to go to H.
H
J
  • Do not meet the requirements to go to K.
K
  • Meet ALL of the following requirements:
    • No CV(B)
    • No (F)BB(V) or CV(L/B) OR fleet contains AO
    • Amount of (F)BB(V)+CVL ≤ 1
    • Amount of DD+DE ≥ 3
    • After TP phase is cleared, Surface Task Force is not allowed.
J
L
  • Do not meet the requirements to go to M.
M
  • Meet ALL of the following requirements:
    • Pass the LoS check
    • After TP phase is cleared, only Transport Combined Fleet can go to M.
L
N
  • Fail the LoS check.
O
  • Pass the LoS check.


Branching compositions were reported over the course of the event.

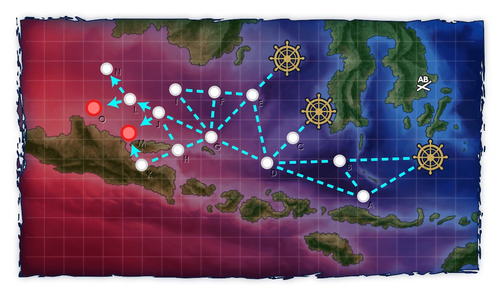
Fall2019E-3Banner.png
Fall2019E-3Map.png

Branching rules

  • No branching rules known

Tips
Note: The following guide is an early version of the guide and can be subject to change. Do note that some details may not be complete so use at your own percaution.

Preperation

This map will give present the first Combined Fleet Battle for this event. While you are free to go about choosing how to approach this map, the most effecitive way to take care of this map will use either Transport Combined Fleet or a Surface Task Force to tackle the battle.

Since this battle will serve as the Battle of the Java Sea. Ship affiliated with the battle from history will be most benifical in this map. Since there was a large number of ships the partook in the battle, there will be way more than enough options to select from this campaign. However it is still important to Choose Wisely on who to bring as others may become important for later maps

In addition to this, depending on the ships you may have a possible serires of options you can consider for this map that you can choose.

Below are the following options you should consider before partaking in this map if you plan to do Normal or above:


  1. Do you have an Oiler you are willing to place within this map?
    • If yes, do you want to use battleships on this map to conserve some Heavy Cruisers?
  2. If no, are you willing to use Akitsushima on this map?
    • If yes, do you want to take advantage of a shorter route to get fuel and (optionally) repair ships?

If you reached an agreement, with the Oiler question, you can take advantage of a route that will allow you to use up to 2 larger ships on this map and still take the most effective routing.

If you said yes, to Akitsushima, you can consider using her to take advantage of fuel hoarding if you lack in an oiler to do the job. But you will need to have a 2nd AV handy for later steps.

Depending on how you answer will decide what pathing route you can take.

Historical Bonuses

Since thie battle takes place as part of the Battle of the Java Sea. A large number of ships will be useful for here but as a reminder, choose wisely on who to bring as others may become important for later maps.

1.1x bonus

Chitose, Mizuho, Myoukou, Naka, Yuudachi, Ikazuchi. Inazuma, Minegumo, Samidare, Harusame

1.2x Bonus

Ashigara, Haguro, Nachi, Jintsuu, Ryuujou, Yukikaze, Sazanami, Ushio, Amatsukaze, Tokitsukaze, Yamakaze, Kawakaze, Murasame, Matsukaze.

All ship with historical ties will also get a 1.32x bonus at the 2nd boss node (Node O)

Step 1: Sink the Heavy Cruiser Ne-class Kai's fleet

In this path, your best methods of tackling this map is to bring either a Transport Combined Fleet or a Surface Task Force. Each combined fleet has their own unique path and challenges you'll face along the way toward your first target on the map. Below will be a summary of each comp that makes up each of the combined fleets and what you'll expect from them.

Transport Combined Fleet Method

  • Composition: 1 AO 1 BBV/CV(E) 4DD + 1CL 3DD 2CA(V)
  • Path: E-G-H-K-M
  • Shortest Path and will also allow you to bring the strongest possible comp to the boss node.
  • You will encounter 1 Submarine Node and 1 Surface Battle
  • Bringing 1-2 OASW in the fleet is recommended to improve you success rate against the subs on higher difficulties.
  • Surface Battle will consist of CLs, CAs, and DDs.
  • The main difficult part is the ordering of which the enemy fleet will attack as your escorts will go first, otherwise it's still manageable.
  • Since all nodes have 0 air power, a single fighter/zuiun/Seaplane fighter is more than enough to get Air Supremacy across all nodes.
  • Can also double as a means to collect fuel (if you are willing to assemble a daihatsu fleet and not mind getting damaged in some occasions.

  • Composition: Akitsushima 1 CVE 4DD + 1CL 3DD 2CA(V)
  • Path: E-G-H-K-M
  • Shortest Path
  • You will encounter 1 Submarine Node and 1 Surface Battle
  • Bringing 1-2 OASW in the fleet is recommended to improve you success rate against the subs on higher difficulties.
  • Surface Battle will consist of CLs, CAs, and DDs.
  • The main difficult part is the ordering of which the enemy fleet will attack as your escorts will go first, otherwise it's still manageable.
  • If you have a Fleet Command Facility you can use it to help get damaged ships out while ma
  • Since all nodes have 0 air power, a single fighter/zuiun/Seaplane fighter is more than enough to get Air Supremacy across all nodes.
  • Can also double as a means to collect fuel (if you are willing to assemble a daihatsu fleet and not mind getting damaged in some occasions.

  • Composition: 1 CVE 1CL 4DD + 1CL 3DD 2CA(V)
  • Path: E-G-J-M
  • Will have you face 3 battles.
  • You will encounter 1 Submarine Node and 2 Surface Battle
  • Bringing 1-2 OASW in the fleet is recommended to improve you success rate against the subs on higher difficulties.
  • Both Surface Battle will consist of CLs, CAs, and DDs.
  • The main difficult part is the ordering of which the enemy fleet will attack as your escorts will go first, otherwise it's still manageable.
  • Since all nodes have 0 air power, a single fighter/zuiun/Seaplane fighter is more than enough to get Air Supremacy across all nodes.

Surface Task Force Method

  • Composition: 1AO 1(F)BB(V)/1 CVL 4CA(V)/CL + 1CL 4DD 1CAV/CLT
  • Path: C-D-E-G-H-K-M
  • Can bring the strongest possible comp to the boss node.
  • You will encounter 2 Submarine Node and 1 Surface Battle
  • Bringing 1-2 OASW in the fleet is recommended to improve you success rate against the subs on higher difficulties.
  • Surface Battle will consist of CLs, CAs, and DDs.
  • Since all nodes have 0 air power, a single fighter/zuiun/Seaplane fighter is more than enough to get Air Supremacy across all nodes.

  • Composition: Akitsushima 3CA(V) 2 CL + 1CL 5DD
  • Path: C-D-G-H-K-M
  • Shortest Path to the boss node.
  • You will encounter 1 Submarine Node and 1 Surface Battle
  • Bringing 1-2 OASW in the fleet is recommended to improve you success rate against the subs on higher difficulties.
  • Surface Battle will consist of CLs, CAs, and DDs.
  • Since all nodes have 0 air power, a single fighter/zuiun/Seaplane fighter is more than enough to get Air Supremacy across all nodes.

  • Composition: 1AV 3CA(V) 2 CL + 1CL 5DD
  • Route: C-D-G-J-M
  • You will encounter 1 Submarine Node and 2 Surface Battle
  • Bringing 1-2 OASW in the fleet is recommended to improve you success rate against the subs on higher difficulties.
  • Surface Battle will consist of CLs, CAs, and DDs.
  • Since all nodes have 0 air power, a single fighter/zuiun/Seaplane fighter is more than enough to get Air Supremacy across all nodes.

  • Composition: 1CVL 3CA(V) 2 CL + 1CL 1CA(V) 4DD
  • Route: C-D-E-G-J-M
  • You will encounter 2 Submarine Node and 2 Surface Battle
  • Bringing 1-2 OASW in the fleet is recommended to improve you success rate against the subs on higher difficulties.
  • Surface Battle will consist of CLs, CAs, and DDs.
  • Since all nodes have 0 air power, a single fighter/zuiun/Seaplane fighter is more than enough to get Air Supremacy across all nodes.

LBAS Recommendation

LBAS 1: 4 Torpedo Bombers/ Land Base Bombers (Range 5 Needed)

At the boss node, you'll face off against the Heavy Cruiser Ne-Class Kai along with a group of CLs and DDs in a single Fleet. Depending on the difficulty, you will face enemies ranging all the way up to He-class flagship Kais accompanying the fleet. Having a Land Base full of bombers will make it more convenient wipe out the majority of the enemy fleet making it more possible to concentrate your fire upon the Ne-class. Given that it's armor is also very high, you will need a strong historical ship with TCI available to make it possible to score more wins from it if possible.

If you are able to do this and defeat the Ne-class effectively it should be possible to clear this node with little difficulty. But if you have problems feel free to bring boss support to help you have a better chance at winning against the Ne-class.

Once the Ne-class Kai is sunk, a new path will open to the 2nd boss node which will need to be completed to clear the map.

Step 2: Sinking the Battleship Water Demon

In this phase, you will be using a Surface Task Force as it will be the only way you can effectively be able to reach Node O. The enemy's you'll encounter will be the same as before so while the process will be the same, the path you will take will be to the next boss so below we'll review 3 of the most effective comps for the route.

  • Composition: 1AO 1(F)BB(V) 1 CVL 3CA(V)/CL + 1CL 4DD 1CAV/CLT
  • Path: C-D-E-G-H-J-L-O
  • Can bring the strongest possible comp to the boss node.
  • You will encounter 2 Submarine Node and 2 Surface Battle
  • Bringing 1-2 OASW in the fleet is recommended to improve you success rate against the subs on higher difficulties.
  • Surface Battle will consist of CLs, CAs, and DDs.
  • Depending on the difficulty, you will need to bring either only a small amount of Air Power or a larger on higher difficulties.
    • Casual and Easy will only need 1 plane with fighting power to overpower all nodes.
    • Normal will need an air power of 36 to AS or 72 to AS+
    • Hard will need an air power of 198 to at least AS

  • Composition: 1AV 3CA(V) 2 CL + 1CL 5DD
  • Route: C-D-G-J-L-O
  • You will encounter 1 Submarine Node and 2 Surface Battle
  • Bringing 1-2 OASW in the fleet is recommended to improve you success rate against the subs on higher difficulties.
  • Surface Battle will consist of CLs, CAs, and DDs.
  • Depending on the difficulty, you will need to bring either only a small amount of Air Power or a larger on higher difficulties.
    • Casual and Easy will only need 1 plane with fighting power to overpower all nodes.
    • Normal will need an air power of 36 to AS or 72 to AS+
    • Hard will need an air power of 198 to at least AS

  • Composition: 1CVL 3CA(V) 2 CL + 1CL 1CA(V) 4DD
  • Route: C-D-E-J-L-O
  • You will encounter 2 Submarine Node and 2 Surface Battle
  • Bringing 1-2 OASW in the fleet is recommended to improve you success rate against the subs on higher difficulties.
  • Surface Battle will consist of CLs, CAs, and DDs.
  • Depending on the difficulty, you will need to bring either only a small amount of Air Power or a larger on higher difficulties.
    • Casual and Easy will only need 1 plane with fighting power to overpower all nodes.
    • Normal will need an air power of 36 to AS or 72 to AS+
    • Hard will need an air power of 198 to at least AS.

LBAS Recommendation

LBAS 1:

  • Casual/Easy: 4 Torpedo Bombers/ Land Base Bombers (Range 6 Needed)
  • Normal/Hard: 0-1 Fighter , 3-4 Torpedo Bombers/ Land Base Bombers (Range 6 Needed)

At the boss node you'll encounter an enemy combined fleet consisting of a Battleship Water Demon (on hard mode, she'll start in her "damaged" form). along with a combined fleet consisting of CAs, CLs, and DDs.

In harder difficulties, her composition can include a CVL with high air power and even a Kai He-class flagship among the mix. Your fleet will need to be able to depend on the LBAS and achieving AS to have a chance to defeat the boss fleet. In addition, bringing historical ships will also give you a better chance at success along with bringing in a TCI DD (Preferably Ushio or Yukikaze to help wipe out the boss if necessary.

Once the HP bar closes near the end, you will face off against the Kai version of the Princess. Who will be more heavily armored and harder to take down without the assistance of your historicals. As per usual, night battle equipment is important and is necessary, bring a boss suport fleet to give you the edge you need to secure the win to complete the map.

The event guides are to be constructed through the respective Event map page guide and reviewed by editor staff / collaboration committee before being approved here. Do not under any circumstance update the guides through this page or attempt to fix them through this page. Please only update guides through their respective sandbox pages.

Enemy comps

Ship drops Totaku/Fall 2019 Event Back up/E-3/Ship drops


E-4

OoyodoE-4Fall2019.png

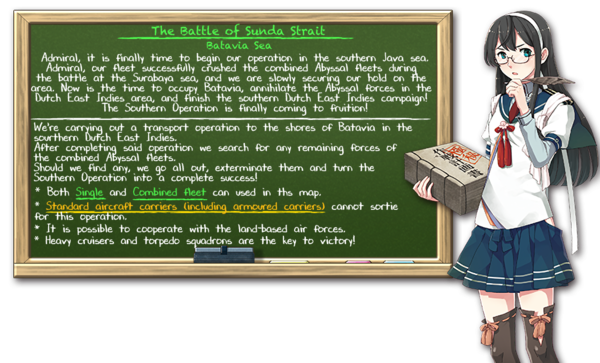
Battle off Batavia
No map name yet

Information

  • Event Tag: Fall2019EventGreenTag.png Malay Unit

(Phase 1 - Transport Phase):

  • Hard ():
  • Medium ():
  • Easy ():
  • Casual ():

Phase 2 - Batavia Princess):

  • Hard ():
  • Medium ():
  • Easy ():
  • Casual ():

Key Rewards:


E-4 Branching Rules
Nodes Rules
Start
1
  • Transport Combined Fleet
  • Surface Task Force
2
  • Single Fleet
  • Carrier Task Force
2
F
  • Surface Task Force
K
  • Transport Combined Fleet
A
B
  • Do not meet the requirements to go to either C or Q.
C
  • Meet ALL of the following requirements:
    • Do not meet the requirements to go to Q.
    • Amount of (F)BB(V)+CV(L/B) ≤ 3
Q
  • Meet ALL of the following requirements:
    • Node Q is unlocked
    • Single Fleet
B
C
  • ???
D
  • ???
C
E
  • Carrier Task Force
G
  • Single Fleet
E
G
  • Fleet contains either Akashi Kai or Akitsushima Kai
H
  • Do not meet the requirement to go to G.
G
I
  • Meet ALL of the following requirements:
    • Fleet contains either Akashi Kai or Akitsushima Kai.
    • Amount of (F)BB(V) ≤ 1
    • Amount of CVL+LHA ≤ 2
J
  • Use a Single Fleet.
  • Alternatively, meet ALL of the following requirements:
    • No (F)BB(V)
    • Amount of CVL+LHA ≤ 1
K
  • Do not meet any of the requirements to go to either I, J or L.
L
  • Meet ALL of the following requirements:
    • Do not meet any of the requirements to go to either I or J.
    • Amount of (F)BB(V) ≤ 2
N
O
  • Fail the LoS check.
P
  • Pass the LoS check, but do not meet the requirements to go to R.
R
  • Meet ALL of the folloing requirements:
    • Pass the LoS check.
    • Fleet is NOT a Transport Combined Fleet.


Branching compositions were reported over the course of the event.

Fall2019E-4Banner.png
Fall2019E-4Map.png

Branching rules

  • No branching rules known

Tips

Note: The Following Guide is an early version of the event guide and is subject for possible changes over time as more information from the events are released. As such information of subject to change as more discoveries are made.

Preparation

For this map, you will be utilizing ships from the battle of Sunda for this map which will consist of a large group of ships, most which are not all relevant to the Solomon Sea Operations and can be safely used here. You may want to carefully weigh up your options before sending them into this map. In addition to this, you will be using all 3 combined fleets to complete the task this map will challenge you with.

Do note that you can also take advantage of special routing on this map to possibly save on using some Heavy Cruisers (CA) in favor of bringing a Fast Battleship (FBB) and a second Light Carrier (CVL) if you consider using Akashi or Akitsushima. Before partaking in the map, consider the following questions:

  • Do you have or wish to use Akitsushima or Akashi on this map to bring in a stronger fleet?
  • Do you have any Fast Battleships you can consider using on this map that are not the Kongou-class?
  • Do you plan to use Ryuujou (if you have her) or conserve her for a later map?
    • If you choose to conserve, do you have another CVL to use in her place?
  • Do you still have a sizeable amount of CAs remaining in your fleet, approximately 8-10 or more? (You will need at most up to 5 CA(V) for this map)
  • Do you have some Saiuns or Rocket Interceptors to help you get an AS in the Land Base Air Raid Defense node?
  • If you answered no to the Rocket Interceptors, can your fighters and Saiun can still successfully achieve the AS requirements (188 for Normal, 512 on Hard)? Do remember that your calculated airpower is only 50% of the displayed value with no rocket interceptors.

If you agreed to the first option, you can consider taking advantage of a route and a way to conserve your CAs toward the EO segment of the event. If you have other FBBs besides the Kongous, consider using one of them to save the Kongou-class for the Solomon campaign. If you have a CVL you can use in place of Ryuujou, consider them over of Ryuujou so you can conserve for a possible historical ship for EOs. Otherwise, if you really need her then consider using her in this map.

Finally, if you have a lower amount of CAs than what is listed, you might want to weigh your options very carefully as you might be forced to lower the difficulty due to your lack of ships. Having a lack of historical ships for certain EO segments may hinder your progress on certain difficulty levels. Plan carefully and decide when it's a good time to drop difficulty.

Finally, if you have a lower amount of CAs than what is listed, you may want to consider weighing your options carefully as you may be forced to lower the difficulty at some point due to lack of ships you may have to EO and more importantly the possible chance that you may lack in historical ships for certain EO segments. Plan your attack carefully and decide when it is a good time to drop in difficulty.

If you do not have rocket interceptors, and can still achieve AS through other means. You can attempt the difficulty level you desire, but if you are struggling, you may need to weigh your options and drop down in difficulty in order to successfully complete the operation. This applies to players especially on Hard mode.

Historical Bonus

Within this operation, many ships associated with the battle of the Sudan Strait will be vital towards completing this operation. However, at the same time many of these ships are also relevant to the Solomon Campaign. While it'll be safe to select some, be careful how many you bring in as they may be relevant to the EOs. Below are the known bonuses that exist on this map:

1.1x Bonus

1.2x Bonus

1.2x Bonus for P and S node (after clearing first gauge)

Out of all the ships present with historical buff, the safest ones you can consider for E-4 include Murakumo, Mogami, Mikuma , Shikinami, Natori, Fumizuki, Satsuki, and Asakaze as they have no connection to the Solomons after this map. However you can add in some of the other ships mentioned above in the list as needed or use alternatives, just keep in mind that you need to plan carefully who to bring in order to prevent a forced drop in difficulty.

Step 1: Successfully Complete the Transport Operation

The first phase will consist of a transport Operation which you'll need to deplete the transport gauge to complete said operation. You will be using a Transport Combined Fleet to complete the Objective. For this comp, you will be using a majority of CA(V)/ CLs and DDs. This composition can be summarized in one single comp.

Fleet Recommendation

Transport Combined Fleet: 1 CAV, 1CL/CA(V), 4 DD + 1 CL, 3-4 DD, 1-2 CA(V)

Path: K-L-M-N-P

  • Depending on how willing you are to conserve heavy cruisers, you can opt for replacing planned CA with a CL for the main fleet and a DD for the Escort fleet.
  • Main Fleet should be armed with as many drums and Daihatsu as possible while maintaining a suitable LOS.
  • You will encounter 1 Sub Fleet and 2 Surface Battles.
  • It's recommended to have 1-2 OASW ships in your escort fleet.
  • Surface fleets will consists of CAs, CLs and DDs. On higher difficulties, they can pose a threat with stronger ships along with their torpedos.
  • Node M contain a very strong fleet in higher difficulties which you may need the assistance of a Land Base Air Squadron or even in-route support to help pass this node.
  • It's highly recommended to bring a Fleet Command Facility to help prevent yourself from retreating from the map early on if some of your ships take heavy damage.

Most of the battles should be easy to clear if you remember all the mentioned info above. Outside of Node M which may require additional help the rest of the path should be easy.

If the map presents some difficulty, in-route support may help, but isn't entirely necessary.

Recommended LBAS

  • LBAS 1: 4 Land Base Bombers
  • LBAS 2: 4 Land Base Bombers
    • Can consider using them to target both on Node P or one on Node M and one on Node P

The Boss will consist of a Heavy Cruiser Ne-class Kai along with CLs and DDs. Any Land Base Air Squadron sent there can help wipe out most of the enemy ships here to help you secure an A rank at the very least. The rest should be achievable through your ships and depending on how much transport equips you bring can help you clear the Transport phase more quickly. Remember that you will only need an A Rank at minimum to deplete the TP gauge. Once the TP gauge is depleted, this part of the operation will be complete and the path for the Batativa Princess will be open.

Step 2: Battle the Batavia Princess until the final kill

In this phase, you will be using a Surface Task Force to fight against the Batavia Princess in Node S. For this phase there are a number of compositions that can come in very handy for how you want to path your way to the boss. Most of these compositions will involve the use of CAs and CLs, unless you decide to use Akashi or Akitsushima on this map to take a slightly different route while being able to bring in Fast Battleship and an extra light carrier in your fleet. Below is a list of the composition that players have used that are among the most commonly referred to in this map:

In the list below all comps will face a total of 1 Submarine Node, 2 Surface Battle, and 1 Air Attack.

  • Composition: 1-2CL / 2-4CA(V) / 0-2 DD / 1CVL + 1CL / 1-2CA / 0-1CLT / 3DD
  • Path: F-G-J-M-N-R-S
  • Limit your fleet to 5 CA(V)s within the composition.
  • Bringing 1-2 OASW in the fleet is recommended to improve you success rate against the subs on higher difficulties.
  • Surface fleets will consists of CAs, CLs and DDs. On higher difficulties, they can pose a threat with stronger ships along with their firepower.
  • Since your main fleet will go first, hope they can wipe out the majority of the enemy ships so your escort fleet can survive.
  • With a single carrier, it's recommended to have her has decent air power on lower difficulties or go as far as becoming a fighter mule to help improve your chances of surviving the Air Attack node.
  • This comp will also use a large amount of CAs. So please be careful who you lock in this comp if you play on Normal or Hard.

  • Composition: Akitsushima or Akashi / 1 FBB / 1-2 CVL / 2-3 CA(V) / 0-1 CL + 0-1CVL / 1CL / 3DD / 1-2CA(V)
  • Path: F-G-I-J-M-N-R-S
  • This comp will allow you to bring a FBB and a 2nd CVL in your fleet, giving your extra carrier power and a 2nd round of shelling for most node along the way.
  • If you bring Akitsushima, you can use her as a seaplane fighter mule to allow extra fighter power so you carriers can be more combat focused.
  • Bringing 1-2 OASW in the fleet is recommended to improve you success rate against the subs on higher difficulties.
  • Surface fleets will consists of CAs, CLs and DDs. On higher difficulties, they can pose a threat with stronger ships along with their firepower.
  • Since your main fleet will go first, hope they can wipe out the majority of the enemy ships so your escort fleet can survive.
  • This comp works well for effectively saving from using too many CA(V)s in your fleet so you can save some of them for the final operation.
  • If desired and you have the proper equipment, you can also consider putting a CVL in escort and arming her with night plane/battle equipment so she can deliver a hard hitting blow in night battle.

Recommended LBAS

  • LBAS 1: 4 Land Base Bombers
  • LBAS 2: 4 Land Base Bombers
    • LBAS Distance of 7 Required

This will be good up until the final kill which if you're playing on normal or higher, you may need to switch your LBAS around a bit for final kill.

The Batavia Princess will come in a combined fleet with some Heavy Cruisers, Light Cruisers and Destroyers mixed within the fleet. Hard mode will especially challenge players by having a Ne-class Heavy Cruiser Kai as part of the main fleet. Using the combination of your LBAS full of bombers and historical ships in your fleet you can wipe out most of the enemy ships without issue leaving only the Princess (and Ne-class Kai on Hard) to be the only main threats in the fleet. Since there is no air power to content with you can take out with your fleet under AS+ with the exception of the final kill on normal and hard. (Please refer to Step 4 of the guide for further explanation). Once you get the Batavia Princess down to final kill, you will need to make a decision on if you'll complete the debuff process, or proceed to continue attacking the boss until you defeat her as her armor and the threat of her fleet will increase for the final kill. If your playing on Easy or lower, it's quite possible to complete the fight without doing the debuff.

  • If you plan to do the debuff please look at the complete guide for Step 3.
  • If you plan to just go straight to killing the boss, please skip Step 3 and refer to Step 4.

Step 3: Complete the Debuff Process

Once the Batavia Princess is down to her final kill phase you can complete the debuffing phase which will further buff your fleet and weaken the Princess further making it easier to defeat her. To complete this step you will need to complete a series of steps depending on the difficulty listed below.

  • Hard: Score 2 A+ Ranks in Node P, Score an S Rank on Node E, score AS in a Land Base Air Raid Defense.
  • Medium: Score an A+ Ranks in Node P, Score an S Rank on Node E, score AS in a Land Base Air Raid Defense.
  • Easy: Score an A+ Ranks in Node P
  • Casual: Score an A+ Ranks in Node P (pending confirmation}

Depending on the difficulty, you will likely need to complete these step to get the Debuff to make the princess weaker. At lower difficulties, you can possibly skip the debuff step entirely and just kill the princess from the final step.

Once the debuff is complete, all ships will get a 1.1x additional buff if they attack the Batavia Princess.

Step 3a: Return with a Transport Combined Fleet Heavy Cruiser Ne-Class Kai (Node P) for an A rank

Recommended Fleet: Transport Combined Fleet: Same as Step 1's composition

LBAS Setup: Same as Step 1's set up for both LBAS

  • You will need to do this process twice on hard, otherwise only once on all other difficulties.

The process of completing this step is the same as doing Step 1. The only difference is that the enemy fleets along the way along with the boss will have improved enemy ships that will make things slightly harder, but otherwise winning these battles should still be about the same way. Remember that you only need to take out 4 enemy ships at the boss node to count as an A rank.

Once the process is completed a chime will play once you return to port and game sounds (SFX) are enabled.

Step 3b: Defeat the Carrier fleet (Node E) with a Carrier Task Force

For this step you will be using your a Carrier Task Force which will require you to make some changes to your comp along with starting from the starting point from the far east. This part of the debuff requirement will be simple to do and will only need you to reach Node E and eliminate a carrier fleet. Below is the recommended composition:

Recommended Composition: Carrier Task Force - 2 CVL, 2-4 CA(V), 0-2 CL + 1 CL, 3-4 DD, 1-2CA(V)

Path: A-C-E

Recommended LBAS

  • LBAS 1: 3-4 Land Base Bombers, 1 Fighter
  • LBAS 2: 4 Land Base Bombers
    • Distance of 3 (Node C) and Distance of 4 (Node E) or more required.
    • Can consider using them to target both on Node E or one on Node C and one on Node E
  • For Medium and Hard mode only:
  • You will encounter 2 surface battles along the way
  • First battle will be a torpedo squadron, which you may want to send an LBAS to to minimize the chance of your fleet taking damage from the enemy fleets' torpedo strike at the end of the escort fleets' turn.
  • Second Battle will have the simple light carriers, with some CAs, CLs and DDs. Use your LBAS to wipe out most of the enemy ships and finish off the rest of the fleet to get the S rank victory you need.

Overall, this step requires you to simply eliminate the enemies on node E. Spreading out your LBAS along C and E is the most effective method. Using this set up and sending LBAS 1 to E and LBAS 2 to C should get you the desired results easily.

Once you complete this step, you will hear a chime upon returning to port if game sounds (SFX) are enabled.

Step 3c: Successfully Protect your Landbase during an enemy Air Raid (Achieve AS)

Recommended LBAS

  • LBAS 1: 2-4 Interceptors, 1-2 Rocket Interceptors or 1 Saiun
  • LBAS 2: 2-4 Interceptors, 1-2 Rocket Interceptors or 1 Saiun
  • For maximum air defense against high-altitude bombers, you'll need 3 rocket interceptors
  • For Medium and Hard mode only

This step can be done at any time during or after Steps 3a and 3b. To be able to get AS you will need most of the stronger incerceptors or well modified interceptors in your land base. If you obtained rocket interceptors from the last event, you can use those to improve your AA vs. the Abyssal Sky Fortresses to make AA more achievable. You should only need 1-2 rocket interceptors minimum.

If for some reason you do not have your rocket interceptors, you can resort to Saiuns to help edge your land base's AA performance towards reaching AS. Although on Hard mode, the only way to achieve AS if you lack in rocket interceptors is to hope you can reach 512+ Air Power and replay the Map until you roll the 3 Airfield Princess composition on Hard to see if you can get AS. It's also important to remember your air power will be cut in half without rocket interceptors, so if you for one reason or another you cannot achieve 512 Air power, you will need to consider dropping in difficulty unless you want to gamble on trying to defeat the Batavia Princess without debuffing her which is definitely not recommended on harder difficulties.

On Medium difficulty, AS should be achievable with all interceptors / fighters in your land base with at least 188 Air Power.

Once you complete this step, you will hear a chime upon returning to port if game sounds (SFX) are enabled.

Step 4: Finish the Batavia Princess

If you have completed all of step 3's requirements, then at this point it is time to proceed with the final kill. If for some reason you chose to skip that, you are still welcome to take the Princess out if you know what your doing or are on a lower difficulty. This part of the guide will focus more on the higher difficulties as most of easy mode can be summarized in the step 2 process since the Princess doesn't change her composition drastically in the final kill. As before, here are the following comps you can consider along with one additional one:

  • Composition: 1-2CL / 2-4CA(V) / 0-2 DD / 1CVL + 1CL / 1-2CA / 0-1CLT / 3DD
  • Path: F-G-J-M-N-R-S
  • Limit your fleet to 5 CA(V)s within the composition.
  • Bringing 1-2 OASW in the fleet is recommended to improve your success rate against the subs on higher difficulties.
  • Surface fleets will consists of CAs, CLs and DDs. On higher difficulties, they can pose a threat with stronger ships along with their firepower.
  • Since your Main Fleet will go first, hope they can wipe out the majority of the enemy ships so your escort fleet can survive.
  • With a Single Carrier, it's recommended to make sure she has decent air power on lower difficulties or go as far as becoming a fighter mule to help improve your chances of surviving the Air Attack node.
  • This comp will also use a large amount of CAs, be careful who you lock in this comp if you play on Normal or Hard.

  • Composition: Akitsushima or Akashi / 1 FBB / 1-2 CVL / 2-3 CA(V) / 0-1 CL + 0-1CVL / 1CL / 3DD / 1-2CA(V)
  • Path: F-G-I-J-M-N-R-S
  • This comp will allow you to bring a FBB and a second CVL in your fleet, giving your extra carrier power and a second round of shelling for most node along the way.
  • If you bring Akitsushima, you can use her as a seaplane fighter mule to allow extra fighter power so you carriers can be more combat focused.
  • Bringing 1-2 OASW in the fleet is recommended to improve your success rate against the subs on higher difficulties.
  • Surface fleets will consists of CAs, CLs and DDs. On higher difficulties, they can pose a threat with stronger ships along with their firepower.
  • Since your Main Fleet will go first, hope they can wipe out the majority of the enemy ships so your escort fleet can survive.
  • This comp works well for effectively saving from using too many CA(V)s in your fleet so you can save some of them for the final operation.
  • If desired and have the proper equipment, you can also consider putting a CVL in escort and arming her with night plane/battle equipment so she can deliver a hard hitting blow in night battle.

  • Composition: AO / 2 BB / (F)BB(V) / CVL / CVL or CA + CL / 2 DD / 2 CAV / CLT or CVL
  • Path: F-G-K-L-M-N-R-S
  • This comp will take you along the longest path with lots of battles.
  • This is the absolute last ditch final resort if you do not have the time or patience to tackle the boss through the other methods.
  • You will likely be bringing Nagato and Mutsu (in their Kai 2 form) as part of this resort. You'll be depending on their special attacks to clear the way.
  • You will be bringing an Oiler with 2 Underway Replenishments to restore the Fuel and Ammo you will be losing over the trip.
  • You will go through a total of 2 Sub Battles, 3 Surface Battles, and 1 Air Battle before the boss.
  • The main concern from these battles is losing out on Fuel and Ammo over the duration of the trip prior to reaching the boss making the fights harder the deeper you progress into each battle due to the Fuel and Ammo penalty you'll receive.
  • At the boss, using the Nagato/Mutsu special attacks can give a possible edge in battle.
  • As a reminder: DO NOT RESORT TO THIS UNLESS YOU ABSOLUTELY HAVE NO CHOICE AS YOU WILL BE LOCKING AWAY CRITICAL SHIPS THAT MAY HELP IN LATER MAPS!!

Recommended LBAS

  • LBAS 1: 1 Fighter, 3 Land Base Bombers
  • LBAS 2: 4 Land Base Bombers
    • Distance of 7 Required

In the final phase, the Batavia Princess will now have more powerful ships along side of her which will include a Light Carrier on higher difficulties. If you carefully planned your fleet out and bring some good historical ship members in this map then you can easily turn the tides in this battle without resorting to more drastic measures. Using ships like Mogami and Mikuma are recommended since this will be the only map they'll be viable for. If you manage to save Atago and Takao to use here they can also assist efficiently (but could be relevant for later [TBD]). Ryuujou (who might also be relevant to EO maps) can also be a possible heavy damage dealer if you arm her with a Night Carrier set up and use her in escort. Other members suchs as Natori,Shikinami or Fubuki can also effectively work here (though penitating the princess's armor on final kill on hard may be difficult to achive compared to historical CAs).

Using your combination of historical ships along with the debuff should easily make short work of the princess. But do note that if you play on Hard difficulty, there might be a slight struggle due to the Heavy Cruiser Ne-Class Kai being a strong meat shield and protecting the Batavia Princess from most hits. However if the Princess is weak enough a well placed double attack from your CAs is all you'll probably need to win.

It's highly recommended to have a boss support fleet to tackle the boss's other ships so you can concentrate more on the Princess herself.

Once the princess has been defeated, the operation will be considered complete.


The event guides are to be constructed through the respective Event map page guide and reviewed by editor staff / collaboration committee before being approved here. Do not under any circumstance update the guides through this page or attempt to fix them through this page. Please only update guides through their respective sandbox pages.

Enemy comps

Ship drops Totaku/Fall 2019 Event Back up/E-4/Ship drops


E-5

OoyodoE-5Fall2019.png

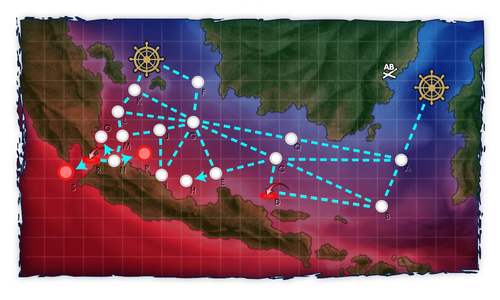
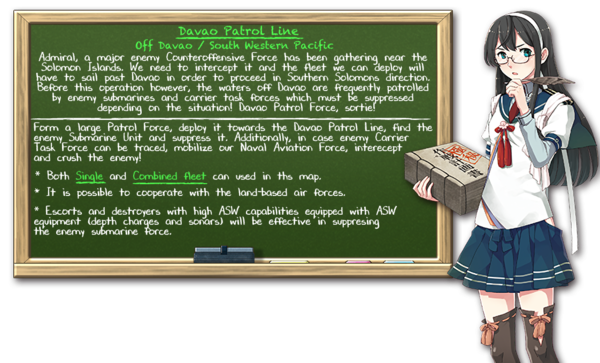
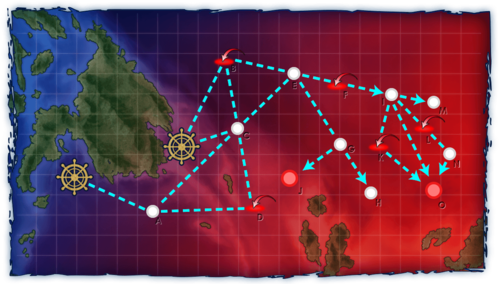
Davao Sea Patrol Line
No map name yet

Information

  • Event Tag: Fall2019EventWhiteTag.png Patrol Unit

(Phase 1 - Submarine Princess Kai):

  • Hard ():
  • Medium ():
  • Easy ():
  • Casual ():

Phase 2 - : Aircraft Carrier Princess Kai

  • Hard ():
  • Medium ():
  • Easy ():
  • Casual ():

Key Rewards:


E-5 Branching Rules
Nodes Rules
Start
1
  • Combined Fleet
2
  • Single Fleet
2
B
  • Meet ALL of the following requirements:
    • Fast Fleet
    • No (F)BB(V)
    • No CV(L/B)
    • No SS(V)
C
  • Do not meet the requirements to go to B.
A
C
  • Meet ALL of the following requirements:
    • Fleet is NOT a Carrier Task Force
    • Amount of CV(L/B)+LHA ≤ 2
    • Amount of (F)BB(V)+CV(B) ≤ 3
D
  • Do not meet the requirements to go to C.
C
B
  • Do not meet the requirements to go to E.
E
  • If fleet contains either CV(B) or LHA, go to B.
  • Else, if amount of (F)BB(V)+CVL ≥ 3 AND Single Fleet, go to B.
  • Else, if amount of CVL ≥ 2, random routing.
  • Else, if Fast Fleet AND amount of DD ≥ 2, go to E.
  • Else, if amount of DD ≥ 4, go to E.
  • Finally, go to B if you don't meet any of the above requirements.
E
F
  • Surface Task Force OR Carrier Task Force
G
  • Single Fleet OR Transport Combined Fleet
G
H
  • Fail the LoS check
J
  • Pass the LoS check
I
K
  • Meet ALL of the following requirements:
    • Do not meet the requirements to go to O.
    • Pass the LoS check.
    • Amount of CV(B) ≤ 2
    • Amount of (F)BB(V) ≤ 3
    • If Slow fleet, amount of (F)BB(V)+CV(L/B) ≤ 5
L
  • Pass the LoS check, but fail to meet the requirements to go to either K or O.
M
  • Do not meet the requirements to go to either K, L or O.
O
  • Meet ALL of the following requirements:
    • Pass the LoS check.
    • Fast Fleet
    • No CV(B)
    • Amount of (F)BB(V)+CVL ≤ 5


Branching compositions were reported over the course of the event.

Fall2019E-5Banner.png
Fall2019E-5Map.png

Branching rules

  • No branching rules known

Tips

The event guides are to be constructed through the respective Event map page guide and reviewed by editor staff / collaboration committee before being approved here. Do not under any circumstance update the guides through this page or attempt to fix them through this page. Please only update guides through their respective sandbox pages.

Enemy comps

Ship drops Totaku/Fall 2019 Event Back up/E-5/Ship drops


E-6

OoyodoE-6Fall2019.png

A Fierce Fight! The Third Battle of the Solomon Sea
No map name yet

Information

  • Event Tag: Fall2019EventGoldTag.png Decisive Battle Squadron

(Phase 1 - Transport Phase):

  • Hard ():
  • Medium ():
  • Easy ():
  • Casual ():

Phase 2 - : Air Defense Cruiser Princess

  • Hard ():
  • Medium ():
  • Easy ():
  • Casual ():

Key Rewards:


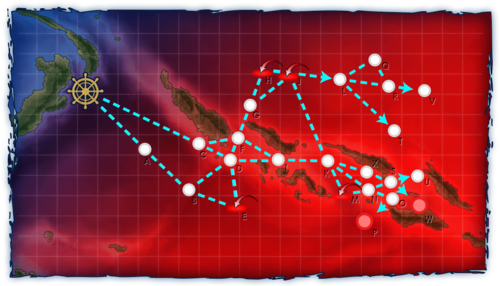
E-6 Branching Rules
Nodes Rules
1
A
  • Do not meet the requirements to go to C.
C
  • Single Fleet
  • Alternatively, meet ALL of the following requirements:
    • Carrier Task Force OR Transport Combined Fleet
    • Fast Fleet
    • Amount of CV(L/B) ≤ 3
    • No Slow DD (engines irrelevant)
B
D
  • Meet ALL of the following requirements:
    • Amount of (F)BB(V)+CV(L/B) ≤ 6
    • Amount of CV(L/B)+LHA ≤ 4 (Shinshuu Maru doesn't count)
    • And meet ANY of the following requirements:
      • Fast Fleet
      • Carrier Task Force AND amount of DD ≥ 3
      • Surface Task Force AND amount of DD ≥ 4
      • Amount of (F)BB(V) ≤ 2
      • Amount of (F)BB(V)+CV(L/B)+LHA ≤ 4
      • Amount of CV(L/B) ≤ 1
      • Fleet contains Shinshuu Maru
E
  • Do not meet the requirements to go to D.
C
D
  • Active branching
F
D
F
  • Do not meet the requirements to go to F.
I
  • Meet ALL of the following requirements:
    • Amount of DD ≥ 2
    • No CV(L/B)
    • No SS(V)
    • If Single Fleet, amount of (F)BB(V) ≤ 2
    • If Combined Fleet, amount of (F)BB(V) ≤ 3
    • Meet ANY of the following to prevent random routing:
      • Fleet contains AV
      • Amount of ships equipped with Surface radars ≥ 4
F
G
  • Do not meet the requirements to go to I.
I
  • Meet ALL of the following requirements:
    • No SS(V)
    • No CV(L/B)
G
H
  • Do not meet the requirements to go to J.
J
  • Meet ALL of the following requirements:
    • Amount of CV(L/B) ≤ 3
    • Amount of CV(B) ≤ 2
    • Amount of (F)BB(V) ≤ 2
J
K
  • Not a Carrier Task Force
L
  • Carrier Task Force
K
M
  • Do not meet the requirements to go to either N or X.
N
  • Meet ALL of the following requirements:
    • Do not meet the requirements to go to X.
    • Fleet must contain CL
    • Amount of (F)BB(V) ≤ 2
    • Fast Fleet OR Single Fleet
    • No CV(B) OR Single Fleet
X
  • Meet ALL of the following requirements:
    • Node X is unlocked.
    • Fleet contains Akashi Kai or Akitsushima Kai
L
Q
  • Pass the LoS check, but do not meet the requirements to go to R.
R
  • Meet ALL of the following requirements:
    • Pass the LoS check
    • Amount of CV(B) ≤ 2
T
  • Do not meet the requirements to go to either Q or R.
N
O
  • Do not meet the requirements to go to S.
S
  • Meet ALL of the following requirements:
    • Node S is unlocked.
    • Surface Task Force
S
U
  • Do not meet the requirements to go to W.
W
  • Meet ALL of the following requirements:
    • Pass the LoS check.
    • Amount of ships equipped with Surface radars ≥ 3


Branching compositions were reported over the course of the event.

Fall2019E-6Banner.png
Fall2019E-6Map.png

Branching rules

  • No branching rules known

Tips

The event guides are to be constructed through the respective Event map page guide and reviewed by editor staff / collaboration committee before being approved here. Do not under any circumstance update the guides through this page or attempt to fix them through this page. Please only update guides through their respective sandbox pages.

Enemy comps

Ship drops Totaku/Fall 2019 Event Back up/E-6/Ship drops