|
|
| Line 1,336: |
Line 1,336: |
| | ** Clearing on Easy (丙): [[Blueprint|Medal]] | | ** Clearing on Easy (丙): [[Blueprint|Medal]] |
| | *Tips:<br/> | | *Tips:<br/> |
| − | *[[Shigure]], [[Kawakaze]] and [[Sendai]] Are needed for branching; this skips a sub node. | + | *[[Shigure]], [[Kawakaze]] and [[Sendai]] are needed for branching; this skips a sub node and allows the ACG route. Without the third ship, [[Shigure]] and either of the other two go through ACEH, which contains [[Patrol Boat Imp Group]]s. |
| | *The Destoyer Water Demon has rather high armor making her hard to take down. You will need to debuff her armor to make it possible to beat her more easily. | | *The Destoyer Water Demon has rather high armor making her hard to take down. You will need to debuff her armor to make it possible to beat her more easily. |
| − | ***To do this, you will need to destroy 20 Patrol Boat Imp Groups. | + | ***To do this, you will need to destroy 20 [[Patrol Boat Imp Group]]s. |
| | ***If done correctly, when you confront the Destroyer Water Demon, her abyssal helmet will be removed from her head indicating she has lost her armor. | | ***If done correctly, when you confront the Destroyer Water Demon, her abyssal helmet will be removed from her head indicating she has lost her armor. |
| | *** Armor will reset at 5 AM JST | | *** Armor will reset at 5 AM JST |
Revision as of 00:12, 24 November 2015
Introduction
The Fall 2015 Event "Charge! Maritime Transport Operation" will be taking place staring November 18th,2015, will be medium-scaled and will feature combined fleets. The Kancolle dev team has hinted the event will be taking place in a "circular island" in the Southern Seas. Within that location, there will be several battles and "transportation operations". The event map will therefore likely be a series of battles that took place at Kolombangara.
If this is true, expect the majority of the events battles to consist of using smaller fleets to perform "Tokyo Express Runs." The dev team have hinted that well trained destoyers and light cruisers to form an elite torpedo squadron will be key to helping you win the event. Since most of the battles at Kolombongara were small engagements, the battles we will likely see during include the Battle of Kula Gulf, The Battle of Kolombangara and the Battle of Vella Gulf. For this reason, admirals are advised to train up their destroyers and light cruisers. Some maps may feature only night battles.
In addition, it has been mentioned that there will be some engagement that will involve larger fleets such as Battleships and Aircraft Carriers during part of the event. These will likely become combined fleet operations.
Update Info
New Ships
- A total of 4 ship girls are confirmed:
- Training cruiser Kashima is the E-3 clearance reward.
- The Comtiq article in December's magazine mentioned it would be the second ship of the Katori Class training cruisers.
- Arashi was hinted at in an article from Comtique Magazine's September issue. It made mention of a destroyer that worked alongside Kawakaze and engaged in a furious night battle. The Battle of Vella Gulf ties this connection together as both of them sunk during middle of the night.
- November's issue hints that a destroyer that was sunk in the area the event will take place will appear.
- Hagikaze also has been introduced to the game.
- German Aircraft Carrier Graf Zeppelin was hinted at through Comptiq's December issue, where they revealed that a "foreign capital ship" will be appearing.
- Mizuho will be a drop.
- Akizuki and Prinz Eugen will be among the drops in this event, making this their first appearance since the Autumn 2014 Event.
New Enemy Vessels
- There are five new enemy vessels:
New Equipment
Patch Notes
Mechanics
Participation requirements
- Must have a 75% sortie win ratio.
- Must have 5 empty ship slots for new ships.
- Must have 20 free equipment slots.
Special Mechanics
- The difficulty system first used in Spring 2015 Event returns: you can choose between Operation A (甲, Hard), Operation B (乙, Medium) or Operation C (丙, Easy).
- Choosing A or B requires certain HQ Level (HQ Lv 35 for B / 80 for A in Spring 2015 Event).
- The armor-reducing system of the Summer 2015 Event's final map, where certain nodes had to be killed to reduce boss armor, is likely to return, but in a simplified version.
- According to this tweet, Operation A (甲, Hard) and Operation B (乙, Medium) will require you to have mutiple fleets ready, which suggests fleet locking.
- The initial maps will focus on transport operations (Lighter ships, such as CLs and DDs likely), while the later maps will focus on heavy ships (CVs and BBs).
Event Maps
Quick Info Table
| Classification
|
Map
|
Name
|
Combined Fleet?
|
Color of Tag
|
Tag Condition & Deployment Restriction
|
Difficulty Restrictions
|
Notes
|
| Main Operation
|
E-1
|
Transport Operation! Clearing the Route
|
Yes
|

|
Tagging:
Ships not already color-tagged will be tagged with the color associated with the map when deployed. This tag exists on all difficulties and is not reset on remodel, etc.
Deployment Restriction:
Normal or Hard: Must have either the same-colored tag or no tag.
Easy: No restrictions.
|
No restrictions. All difficulties OK
|
|
| E-2
|
Battle off the Shore of Korone Haikara Island
|
No
|
In order to play these maps on hard, you must complete the previous map on either normal or hard.
(e.g., to do E-4 on hard, you must complete E-3 on normal or hard.)
|
Requires exactly 1 CL (Flagship) + 5 DD
|
| E-3
|
Deploy! Maritime Transportation Fleet
|
Yes
|
Up to 2 large ships allowed in the main transport fleet.
|
| Extra Operation
|
E-4
|
Western Front! Deploy a Mobile Task Force
|

|
|
| E-5
|
Survive! Vanilla Bay Night Battle!
|
No
|
N/A
|
CL Flagship and DD escorts plus up to 1 cruiser-class ships only
|
E-1

| Transport Operation! Clearing the Route
|
| 【輸送作戦!前路掃討】
|
Information
|
|
|
Branching rules
Show/Hide Branching Rules
| Branching Rules |
|---|
| Node | Split | Condition |
|---|
| START | A | | | B | | | B | C | Active Branching | | E | Active Branching | | E | F | Certain number of BBs?
If 2nd fleet consists of more than 2 CLT | | G | Fail LoS check(?) | | H | Certain LoS(?) | | F | H | | | I | Fail LoS check(?) | | J | Certain LoS(?) |
|
|
Tips
- Recommended fleet compositions:
- 2FBB 2CA 2CVL / 1CL 3DD 2CA (Surface Task Force)
- 2BBV 2CA 2CVL / 1CL 4DD 1CLT
Show/Hide Nodes and Enemy Encounters
| Nodes and Enemy Encounters |
|---|
| Node | Pattern | Xp | Node Info | Form |
|---|
A
能動分岐 | Pattern 1 | | | | B
| Pattern 1 | | Active Branching | | C
前衛哨戒部隊 | Pattern 1 | | | | | Pattern 2 | | | | D
| Pattern 1 | |  +50 +50 | | E
警戒任務部隊 | Pattern 1 | | | | | Pattern 2 | | | | F
空母機動部隊 | Pattern 1 | | | | G
| Pattern 1 | | | | H
水上打撃部隊 | Pattern 1 | | | | | Pattern 2 | | | | I
| Pattern 1 | | | | J
前衛展開部隊旗艦 | Pattern 1 | | | | Pattern 2
Final Form | | | |
|
|
|
|
|
E-2

| Battle off the Shore of Korone Haikara Island
|
| 【コロネハイカラ沖海戦】
|
Information
- Boss: Light Cruiser Princess
- Transport Gauge: 320 (Hard), 200 (Med), 100 (Easy)
- To reduce the gauge, you must go through node J and obtain at least an A-rank victory at boss.
- You do not need to sink the flagship to deplete the gauge.
- Gauge depletes by 18, +3.5 per Drum Canister equipped, +5.5 per Daihatsu-class Landing Craft equipped. S-rank victory will increase the depletion by 50%.
- Note that for this map only Abukuma Kai Ni can equip Daihatsu-class Landing Craft due to the restriction on ships.
- Ship Restrictions: Flagship must be a CL and 5 DDs in the rest of the fleet
- Ships tagged GREEN
|
|
|
Branching rules
Show/Hide Branching Rules
| Branching Rules |
|---|
| Node | Split | Condition |
|---|
| START | A | *A fleet including Jintsuu as flagship and any two of Yukikaze, Hamakaze, Satsuki and Mikazuki for 100%.
* Have 4 of the 5 ships but without Satsuki might lead to this route.
*Have 3 out of the 5 ships but with Jintsuu in your fleet might lead to this route. | | B | Not having all 5 ships but having Satsuki
Any other fleet without the named ships. | | A | C | Not having Satsuki in the fleet | | D | A fleet including Jintsuu as flagship and any two of Yukikaze, Hamakaze, Satsuki and Mikazuki | | D | E | | | F | A fleet including Jintsuu as flagship and any two of Yukikaze, Hamakaze, Satsuki and Mikazuki | | F | G | | | H | | | I | Fixed | | H | I | With a certain number of drums (Number to be confirmed) | | K | |
|
|
Tips
- It is recommended to take at least 6 drum canisters along. Due to the unfavorable routing, it is unlikely Abukuma will be usable to gain the advantages of Daihatsu landing craft.
- Recommended composition for favorable routing: Jintsuu, Mikazuki, Satsuki, Hamakaze, Yukikaze, and 1 other destroyer
- This composition takes you through route A--D--F--I--J--K.
- Having a fleet without Satsuki opens up the chance to enter this path, but she is needed for guaranteeing this routing.
|
|
|
|
|
E-3

| Korone Haikara Island Eastern Offshore
|
| 【抜錨!海上輸送部隊】
|
Information
- Combined Fleet
- Boss: Seaplane Tender Princess
- Gauge: 800 (Hard), 500 (Med), 300 (Easy)
- Requires going through node G to reduce the boss gauge
- You do not need to sink the flagship to deplete the gauge, just get A rank or better
- Gauge depletes by 40 (A rank) and 81 (S rank) barrels will add 3.5 to the depletion rate per barrel
- Daihatsu landing craft have been observed reduce the gauge by an additional 5.5 per craft; this requires Abukuma or Akitsu Maru.
- Ship Restrictions: Transport Combined Fleet
- Ships tagged GREEN
- Rewards upon clearance: Kashima
- Clearing on Hard (甲): Medal, Improvement Material, Type 4 SONAR
- Clearing on Medium (乙): Medal, Improvement Material
- Clearing on Easy (丙):
|
|
|
Branching rules
Show/Hide Branching Rules
| Branching Rules |
|---|
| Node | Split | Condition |
|---|
| A | B | Active Branching | | C | Active Branching | | C | D | CA/V in fleet, no CLT | | E | Any other fleet | | H | J | Fail LOS check | | K | LOS Check |
|
|
Tips
- CAVs are needed to maintain Air Parity, or the Seaplane Tender Princess at the boss node will be able to deal huge amounts of damage with artillery spotting. An AS value of around 40 is required for Air Parity.
- You can use Akitsu Maru (as the flagship for additional protection). Having a Reppuu Kai, a Type 53 Zero Fighter (Iwamoto Squadron) and a Daihatsu-class Landing Craft is the optimal load-out for pre-final approaches that provides 116 air power and thus air superiority at the boss node. For final form you will need 132 air power to reach superiority which requires swapping out the Daihatsu-class for a Reppuu. With this set-up your CA(V)s can be set up for artillery spotting.
|
|
|
|
|
E-4
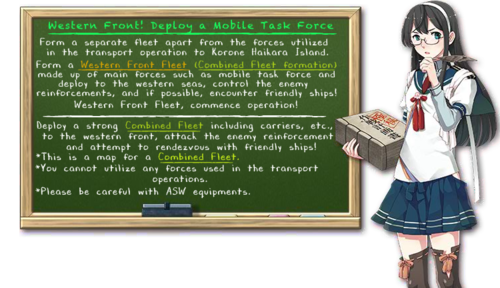
| Western Front! Deploy a Mobile Task Force
|
| No map name yet
|
Information
|
|
|
Branching rules
Show/Hide Branching Rules
| Branching Rules |
|---|
| Node | Split | Condition |
|---|
| START | A | Carrier Task Force | | D | Surface Task Force | | B | C | 50% chance if fleet doesn't contain an Italian Ship | | F | High Chance if fleet does contain an Italian Ship, otherwise 50% chance. | | E | F | Active Branching | | G | Active Branching | | K | M | Active Branching | | N | Active Branching | | N | L | Fail LoS check | | O | LOS Check |
|
|
Tips
- Recommended Fleet composition:
- Surface Task Force: 2BB/FBB (not BBV)/2CVL/2CL+2DD/1CL/2CLT/1CA(Maya Kai Ni)
- Carrier Task Force: (For Farming)2BB/2CL/2CV+2DD/1CL/1FBB/2CA
- Carrier Task Force: (For Final Kill) 2BB/2CL/2CV+2DD/1CL/2CLT/1CA
- Surface Task Force: (For Taking down the Installation buff points) 2BB//2CA (include Maya Kai Ni)/1CL/1CV + 1 CL/2DD/1FBB/2CA
- For the installation battles it might be wise to have some way for some of your ships to fight the Patrol Boat Imp Groups that will come with the Installations. Have a proper balance between installation killing and PT imp removal.
- The Four-slot CLs (Yuubari and Ooyodo after reaching Kai) are very useful as they can equip more ASW equipment than other ships of their kind and so have the potential to hit the boss harder.
- It is important to keep a certain amount of firepower reserved for enemies other than the boss. As such, BBV are not recommended, and CLT are very useful (as they will only target surface ships with a Type A Midgetsub for great amounts of damage).
- Maya Kai Ni is useful as she can cover Anti-Air Cut In duties for Destroyers who are put to better use in an ASW role.
- Submarine Hime does not have night battle protection like normal subs, so don't be afraid and go into night battle as well.
- Nodes J and M are armor reduction nodes which you can attack to reduce the armor of the Submarine Hime. You have to defeat the installation bosses at least twice for the effects to take place.
- On easy and normal, you probably will be able to defeat the Submarine Hime without reducing her armor, but on hard, you may want to consider the option of attacking those points.
- You will need to use a Carrier Task Force and make it to the boss for the debuffs to take effect.
- Using a Surface Task Force will not activate the debuff when you fight the Submarine Hime.
- After defeating these two installations, the submarine hime's dialogue will change and the glow of her torpedoes will emit a green light instead of a blue one.
- Armor buff will reset daily at 5 AM JST.
Show/Hide Nodes and Enemy Encounters
| Nodes and Enemy Encounters |
|---|
| Node | Pattern | Xp | Node Info | Form |
|---|
A
| Pattern 1 | | Must be my imagination (no combat) | | B
| Pattern 1 | | | | | Pattern 2 | | | | C
| Pattern 1 | | | | | Pattern 2 | | | | D
| Pattern 1 | | | | | Pattern 2 | | | | E
| Pattern 1 | | Active Branching | | | Pattern 2 | | | | F
| Pattern 1 | | | | G
| Pattern 1 | | | | H
| Pattern 1 | | | | I
| Pattern 1 | | | | J
| Pattern 1 | | | | K
| Pattern 1 | | Active Branching | | L
| Pattern 1 | | | | M
| Pattern 1 | | | | N
| Pattern 1 | | | | O
| Pattern 1 | | | | | Pattern 2 | | | | Pattern 3
Final Form | | | |
|
|
|
|
|
E-5
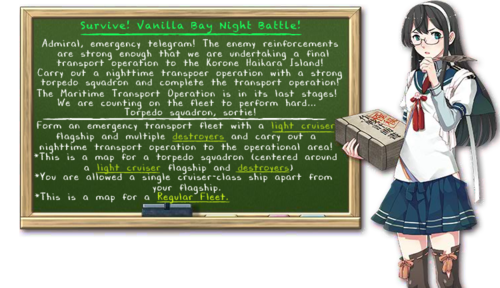
| Survive! Vanilla Bay Night Battle!
|
| No map name yet
|
Information
- Boss: Destroyer Water Demon
- (Kills required) X (All difficulties)
- Requires clearing the supply gauge before the health gauge can be dropped.
- Ship Restrictions
- Rewards upon clearance: Hagikaze
- Clearing on Hard (甲): Medal x2, Hard Mode Medal
- Clearing on Medium (乙): Medal x2
- Clearing on Easy (丙): Medal
- Tips:
- Shigure, Kawakaze and Sendai are needed for branching; this skips a sub node and allows the ACG route. Without the third ship, Shigure and either of the other two go through ACEH, which contains Patrol Boat Imp Groups.
- The Destoyer Water Demon has rather high armor making her hard to take down. You will need to debuff her armor to make it possible to beat her more easily.
- To do this, you will need to destroy 20 Patrol Boat Imp Groups.
- If done correctly, when you confront the Destroyer Water Demon, her abyssal helmet will be removed from her head indicating she has lost her armor.
- Armor will reset at 5 AM JST
|
|
|
Branching rules
Show/Hide Branching Rules
| Branching Rules |
|---|
| Node | Split | Condition |
|---|
| A | B | Active Branching | | C | | | B | D | | | E | | | C | E | | | F | | | G | | | F | G | | | I | | | L | M | | | N | LOS Check |
|
|
Tips
Show/Hide Nodes and Enemy Encounters
| Nodes and Enemy Encounters |
|---|
| Node | Pattern | Xp | Node Info | Form |
|---|
A
| Pattern 1 | | | | B
| Pattern 1 | | | | | Pattern 2 | | | | C
| Pattern 1 | | | | | Pattern 2 | | | | D
| Pattern 1 | | | | E
| Pattern 1 | | | | | Pattern 2 | | | | F
| Pattern 1 | | | | G
| Pattern 1 | | | | H
| Pattern 1 | | | | I
| Pattern 1 | | | | J
| Pattern 1 | | | | K
| Pattern 1 | | | | L
| Pattern 1 | | | | M
| Pattern 1 | | | | N
| Pattern 1 | | | | Pattern 2
Final Form | | | |
Show/Hide Nodes and Enemy Encounters
| Nodes and Enemy Encounters |
|---|
| Node | Pattern | Xp | Node Info | Form |
|---|
A
| Pattern 1 | | | | B
| Pattern 1 | | | | | Pattern 2 | | | | C
| Pattern 1 | | | | | Pattern 2 | | | | D
| Pattern 1 | | | | E
| Pattern 1 | | | | | Pattern 2 | | | | F
| Pattern 1 | | | | G
| Pattern 1 | | | | Z
| Pattern 1 | | | | Pattern 2
Final Form | | | |
|
|
|
|
|
See Also
References
Tools
Discussions
Player Live Streams
|
Events |
|---|
|
2013 | | |
2014 | | |
2015 | | |
2016 | | |
2017 | | |
2018 | | |
2019 | | |
2020 | | |
2021 | | |
2022 | | |
2023 | | |
2024 | | | |
|
2015 · 2016 · 2017 · 2018 · 2019(& sardine) · 2021(large) · 2022 · 2023 | | |
2015 · 2016(simple quest) · 2017(simple quest) · 2020(large) · 2021 · 2022(simple quest) | | |
2019 · 2020 · 2021 · 2022 · 2023 · 2024 | | |
2022 · 2023 | | |
2018 | | |
2014 · 2015 |
|
|
zh:2015年秋季活动


