Participation requirements
To take part in any event, a player MUST HAVE at least:
- A 75% sortie win ratio.
- 5 empty ship slots.
- 20 empty equipment slots.
Special Mechanics
In addition to regular Sortie mechanics, events often involve some specific or rarer mechanics :
| Map Clearing Medals
|
Hard
|
Medium
|
Easy

|
Casual

|
Depending of the HQ level, it is possible to choose between:
- Hard ("operation A", 甲), at HQ 80+
- Medium ("operation B", 乙), at HQ 35+
- Easy ("operation C", 丙), at HQ 1+
- Casual ("operation D", 丁), at HQ 1+
The map difficulty will directly affect the enemy encounters, making them more numerous, with higher stats, or even replacing weaker ships with stronger ones. Additionally, will vary:
- The maps' phases' gauges (HP/TP),
- The amount of map gimmicks to complete,
- The routing requirements, notably LoS and Tags,
- The maps' rewards,
- The ship drops.
Changing difficulty is possible but limited:
- When switching from any "lower" difficulty to any "higher" difficulty, the map will fully be reset.
- When switching from any "higher" difficulty to any "lower" difficulty, the map will stay in the very same state it was previously, with only +25% of TP/HP being reset on the current phase's TP/HP bar.
- Gimmicks might also be reset when applicable, notably the debuffs.
Beginning with the second map onwards:
- It is possible to play any map on Medium/Easy/Casual difficulties in all situations.
- It is only possible to play a map on Hard difficulty if the prior map has been completed on either Medium or Hard.
To simulate simultaneity of battles in different locations, Fleet Tags conditions & deployment restrictions are employed.
- Ships not already tagged will be tagged with the associated tag of the map phase when deployed. This tag will be applied regardless of the difficulty and can't be removed by any measure before the end of the event.
- One map can use multiple tags, usually separated by phases or fleets.
- Several maps can share one or more tags.
- On Medium or Hard difficulty, ships must have either the same tag as the map/phase they are being deployed to, or have no tag at all.
- This requirement is sometimes waived on certain maps, mostly on the last map of the event where tags only matter on Hard.
- Once the event is cleared (last map of the EO), all tag restrictions stop getting enforced on every map (tag routing will still apply).
The Combined Fleet (CF), a fleet assembling both the 1st and 2nd fleets, may come back.
- The CF is only available for the two 1st fleets, where the 2nd fleet can be merged with the 1st one in the "Fleet menu".
- The CF cannot be used in anything outside of event sorties.
- 3 different types of CF are available, depending on the map requirements and the current fleet setup.
- CF with a flagship that carries the
 Fleet Command Facility
 , will be able to make use of the Evacuation mechanic.
- The evacuation requires an escort destroyer.
- Only one ship can be evacuated per battle.
The Flagship of the Escorting fleet cannot sink!
The Striking Force Fleet (SF), a fleet with seven ships, may come back.
- The SF is only available for the 3rd fleet, where an extra 7th ship can be added in the Fleet menu.
- The SF cannot be used in anything outside of event sorties.
- A SF with a flagship that carries the Striking Force Fleet Command Facility
 , will be able to make use of the Evacuation mechanic.
- Only one ship can be evacuated per battle.
The Vanguard Formation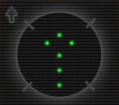 can be used.
- This formation will organize the fleet such that the 2 to 3 last ships protect the 2 to 4 first ships of the Fleet.
- This formation is available for single and Strike Force fleets made of 4 to 7 ships.
- The formation makes ships way more evasive in combat, especially DD, and more accurate against DD, especially PT Imps.
- This formation is available only during the duration of the event, on the event's maps as well as on the regular maps.
NPC Friendly Fleets (FF) may be introduced to the event.
- FFs act as another unit that appears in particular battles to help aid the fleet when attacking the enemy.
- It is possible to choose between using "normal only" or "normal and powerful" FF in the main menu.
- Powerful FFs have an additional cost of 6 Instant Constructions
 for each time they are deployed in a battle.
- The blowtorches won't be consumed unless a powerful FF appears.
- If activated, one FF is randomly selected from a preset list of fleets to help the fleet.
- Which ships are in the fleet will influence which FF can help, excluding the FFs containing ships also in the main fleet.
- The FF will appear at the start of either day or night battle, depending on the node.
- FFs are usually available sometime after the start of the event, to help Admirals facing difficulties clearing the maps.
Most maps have various bonuses, coming in many shapes. Since most of those bonuses follow the historical formations/tactics used in the relevant operations, they are referred to as "Historical Bonuses". Such bonuses are also found on 7-4 and 7-5.
- The bonuses can be given to:
- Ships, including all remodels,
- Ship types, with all ships of a given type sharing a bonus,
- In those cases, types do not overlap (e.g. a CLT does not count as a CL),
- Ships Nationalities, with foreigners (non-Japanese) sharing a bonus,
- Equipment, with some types or specific ones giving a bonus,
- It is only applied to the ship they are equipped on,
- For planes, those bonuses won't work if the plane count is 0, but for the Foreign Plane Bonuses.
- Then, bonuses can be applied:
- Map-wide, working on all nodes
- On some Nodes only, with usually boss or gimmick nodes having some bonuses,
- Those node bonuses are often split following the map's phases.
- Against some abyssals specifically,
- Usually bosses and their escorts,
Bonuses can stack or not between each other depending on the case.
- Bonuses are either damage, accuracy, and/or evasion,
- Damage and evasion bonuses are "post-cap",
- Some gimmicks like the map's phase can further affect the bonuses (usually the Debuff).
- Completion Gimmicks might be required to further progress the map, demanding certain conditions to be accomplished on a given map to unlock several things :
- Boss Debuffs, where once the "Last Dance" of the final boss of a given map is reached, its debuffed form can be unlocked.
- Map phases, where some map areas need to be unlocked, like on 7-2, 7-3, and 7-5.
- Map areas can either be a path to the next boss, an intermediate path asking for new gimmicks, or a shortcut.
- LBAS Relocation.
- Choosing a higher difficulty on an event map will reset it to its initial state.
- These conditions range from reaching certain nodes, defeating specific nodes, attaining air superiority on certain nodes, and defending against Air Raids. As soon as all the given conditions are met, the map advances to the next phase. Lower difficulties may require fewer conditions to be met to complete the phase. The order in which the gimmicks are completed does not matter.
- Completing a gimmick will play a "bell" sound once back in the main port (Play Bell Completion Sound Effect).
- Nodes required to be visited/defeated in gimmicks are highlighted.
- Special Nodes:
- Emergency Anchorage Repairs:
- Enemy Ambush Nodes, "off-route ambush nodes",
- They serve as a "radar check", with fleets lacking enough Surface Radars being off-routed there,
- The fleet will not be able to fight against the enemy fleet.
- Airstrike Supported Battle Nodes, ("ASS nodes") "off-route combat nodes",
- The enemy fleet will consist of "normal surface enemies" (4-5 SS so far), followed by "air support enemies" (1-2 CVL so far), bringing air support, and that cannot be attacked,
- By meeting certain conditions, these nodes can be evaded.
- "Balloon Nodes", being most nodes having one or more Installation in it, and were
 Barrage Balloons can be deployed.
- "Atoll Nodes", being some nodes located on atolls, and were
 Ka-Tsu tanks
 spacial attack can be triggered.
- Superfortress Air-Raid Sequence, a QTE where the LBAS is attacked by bombers, and where the player must click on a button at the right moment to obtain better interception, using "Land-based high-altitude interceptors".
Bug: It is possible to save a sunk ship in events:
- When sinking a ship on a "time-limited event map", by closing the game before the battle ends (before battle result screen is shown), and refraining from logging in until a maintenance in which the time-limited map is removed from the game occurs, upon entering the game after the map is removed, the sunken ship will remain in the game, at 0 HP and with the "Sunk" status.
- The ship can be repaired as per normal; removing this status, and sortieing it at 0HP will cause it to return to 1HP.
- Opening the game at any time before the map is removed, or sinking a ship in a normal map will not enact this behavior, regardless of whether a maintenance has occurred or not.
This probably comes from the fact that the game is unable to resolve the battle state due to the map the ship was sunk in, no longer existing. This presumably aborts the game's attempt to check for and delete the sunken ship in question from the roster.


