Winter 2019 Event

The "Winter 2019 Event", Interception! Operation Buin Defense is scheduled to begin on the December 26th, 2018, on the day following Christmas and will be a small scale event. Given it's size the likely length of the event will be 2 weeks and X number of days (Depending on delays or other issues) and should last till Jaunary 18th, 2019

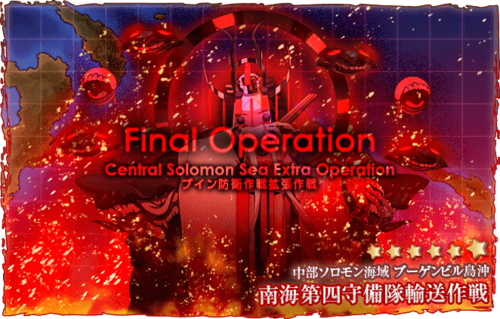
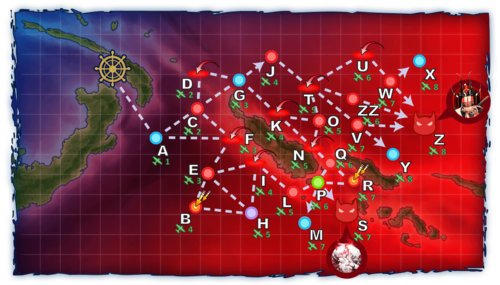
The known details based on what Kensuke Tanaka mentioned in his interview about the Event of the event will be based around the Central Solomon Islands where Rabaul will be providing air support for the campaign. What is known is that the Campaign will begin from Buin as you take a rat transport fleet through the Battle of Blackett Strait, following this will be an intense air battle where Rabaul Airbase will provide suppot with its' Land Based Planes and Carrier based planes, and then finally a transportation operation to provide support for Buin Anchorage.

It's been noted that while this event will only be 3 maps big, the main difficulty will come for players playing Normal or Hard Difficulty. They also encourage players to train torpedo squadrons and prepare your air forces for this event. Surface Radars will be the key to success to the first map, while having strong LBAS planes are vital for the later maps.

There will be a total of 4 new ships that will be released with this event.

For additional information regarding event-related subjects and content, please refer to the following links:

Historical Background

Disclaimer: The following information is based upon a summary of World War II history and may not have any influence on the game itself. This is for historical reference only.

Battle of Blackett Strait

Operation 603 (The Battle over Lingga (Japanese Only)

Battle of Empress Augusta Bay

Information

New Ships

Currently, the devs have noted that there will a total of 4 ships that will be introduced.

Destroyer

Seaplane Tender

New Equipment

New Enemy Vessels

New Enemy Equipment

Friend Fleet

There are a total of 16 different friend fleets in the entire event that spread across E-1 to E-3, below is the list of entire Friend Fleet Roster

Fleet Formations

E-1 Node L
Kanmusu Equipment 1 Equipment 2 Equipment 3 Equipment 4
Rat Transport Fleet
Ship Banner Minegumo Kai.png
Minegumo
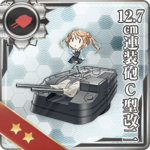
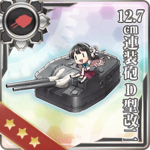
Equipment Card 12.7cm Twin Gun Mount Model C Kai 2.png Equipment Card 12.7cm Twin Gun Mount Model C Kai 2.png Equipment Card Star Shell.png
Ship Banner Murasame Kai Ni.png
Murasame
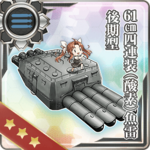
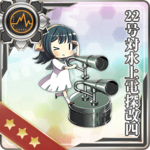
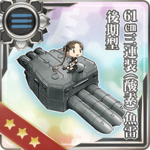
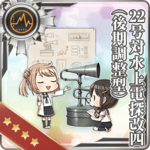
Equipment Card 12.7cm Twin Gun Mount Model C Kai 2.png Equipment Card 61cm Quadruple (Oxygen) Torpedo Mount Late Model.png Equipment Card Type 22 Surface Radar Kai 4.png
Rat Transport Fleet (Damaged Version)
Ship Banner Minegumo Kai Damaged.png
Minegumo
Equipment Card 12.7cm Twin Gun Mount Model C Kai 2.png Equipment Card 12.7cm Twin Gun Mount Model C Kai 2.png Equipment Card Star Shell.png
Ship Banner Murasame Kai Ni Damaged.png
Murasame
Equipment Card 12.7cm Twin Gun Mount Model C Kai 2.png Equipment Card 61cm Quadruple (Oxygen) Torpedo Mount Late Model.png Equipment Card Type 22 Surface Radar Kai 4.png
9th Destroyer Division
Ship Banner Minegumo Kai.png
Minegumo
Equipment Card 12.7cm Twin Gun Mount Model C Kai 2.png Equipment Card 12.7cm Twin Gun Mount Model C Kai 2.png Equipment Card Searchlight.png
Ship Banner Asagumo Kai.png
Asagumo
Equipment Card 12.7cm Twin Gun Mount Model C Kai 2.png Equipment Card 12.7cm Twin Gun Mount Model C Kai 2.png Equipment Card Star Shell.png
Ship Banner Yamagumo Kai.png
Yamagumo
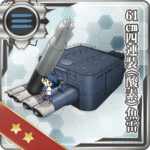
Equipment Card 12.7cm Twin Gun Mount Model C Kai 2.png Equipment Card 61cm Quadruple (Oxygen) Torpedo Mount.png Equipment Card Type 22 Surface Radar Kai 4.png
31st Destroyer Division Platoon
Ship Banner Kishinami Kai.png
Kishinami
Equipment Card 12.7cm Twin Gun Mount Model D Kai 2.png Equipment Card 12.7cm Twin Gun Mount Model D Kai 2.png Equipment Card Star Shell.png
Ship Banner Okinami Kai.png
Okinami
Equipment Card 61cm Quadruple (Oxygen) Torpedo Mount Late Model.png Equipment Card 61cm Quadruple (Oxygen) Torpedo Mount.png Equipment Card 61cm Quadruple (Oxygen) Torpedo Mount Late Model.png
19t Destroyer Division Platoon
Ship Banner Shikinami Kai.png
Shikinami
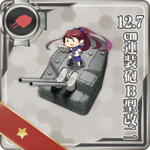
Equipment Card 12.7cm Twin Gun Mount Model B Kai 2.png Equipment Card 12.7cm Twin Gun Mount Model B Kai 2.png Equipment Card Star Shell.png
Ship Banner Ayanami Kai Ni.png
Ayanami
Equipment Card 61cm Triple (Oxygen) Torpedo Mount Late Model.png Equipment Card 61cm Triple (Oxygen) Torpedo Mount Late Model.png Equipment Card 61cm Triple (Oxygen) Torpedo Mount Late Model.png


E-3 Node Z
Kanmusu Equipment 1 Equipment 2 Equipment 3 Equipment 4
ASW Fried Fleet
Ship Banner Shinyou Kai Ni.png
Shinyou
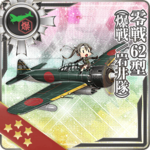
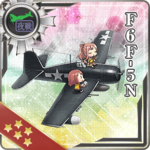
Equipment Card Zero Fighter Model 62 (Fighter-bomber Iwai Squadron).png Equipment Card F6F-5N.png Equipment Card Night Operation Aviation Personnel + Skilled Deckhands.png
Ship Banner Etorofu.png
Etorofu
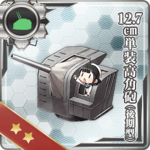
Equipment Card 12.7cm Single High-angle Gun Mount (Late Model).png Equipment Card 12.7cm Single High-angle Gun Mount (Late Model).png Equipment Card Type 22 Surface Radar Kai 4.png
Ship Banner Tsushima.png
Tsushima
Equipment Card 12.7cm Single High-angle Gun Mount (Late Model).png Equipment Card 12.7cm Single High-angle Gun Mount (Late Model).png Equipment Card Type 22 Surface Radar Kai 4.png
10th Destroyer Division
Ship Banner Kazagumo Kai.png
Kazagumo
Equipment Card 12.7cm Twin Gun Mount Model D Kai 2.png Equipment Card 61cm Quadruple (Oxygen) Torpedo Mount Late Model.png Equipment Card Type 22 Surface Radar Kai 4.png
Ship Banner Akigumo Kai.png
Akigumo
Equipment Card 12.7cm Twin Gun Mount Model C Kai 2.png Equipment Card 61cm Quadruple (Oxygen) Torpedo Mount Late Model.png Equipment Card Type 22 Surface Radar Kai 4.png
Ship Banner Yuugumo Kai Ni.png
Yuugumo
Equipment Card 12.7cm Twin Gun Mount Model D Kai 2.png Equipment Card 61cm Quadruple (Oxygen) Torpedo Mount Late Model.png Equipment Card Type 22 Surface Radar Kai 4 (Calibrated Late Model).png
Ship Banner Makigumo Kai Ni.png
Makigumo
Equipment Card 61cm Quadruple (Oxygen) Torpedo Mount Late Model.png Equipment Card 61cm Quadruple (Oxygen) Torpedo Mount Late Model.png Equipment Card 61cm Quadruple (Oxygen) Torpedo Mount Late Model.png
10th Destroyer Division (Damaged Version)
Ship Banner Kazagumo Kai Damaged.png
Kazagumo
Equipment Card 12.7cm Twin Gun Mount Model D Kai 2.png Equipment Card 61cm Quadruple (Oxygen) Torpedo Mount Late Model.png Equipment Card Type 22 Surface Radar Kai 4.png
Ship Banner Akigumo Kai Damaged.png
Akigumo
Equipment Card 12.7cm Twin Gun Mount Model C Kai 2.png Equipment Card 12.7cm Twin Gun Mount Model C Kai 2.png Equipment Card Searchlight.png
Ship Banner Yuugumo Kai Ni.png
Yuugumo
Equipment Card 12.7cm Twin Gun Mount Model D Kai 2.png Equipment Card 12.7cm Twin Gun Mount Model D Kai 2.png Equipment Card Star Shell.png
Ship Banner Makigumo Kai Ni.png
Makigumo
Equipment Card 12.7cm Twin Gun Mount Model D Kai 2.png Equipment Card 61cm Quadruple (Oxygen) Torpedo Mount Late Model.png Equipment Card Type 22 Surface Radar Kai 4 (Calibrated Late Model).png

Friend Fleet Voice Lines

Ship Japanese/English Notes
Destroyers
'
'
'
'
'
Light Cruisers
'
'
Battleships
'
'
'
'
Light Carriers
'
Standard Carriers
'
'
'
Auxiliaries
'
'

Mechanics

Participation requirements

  • Must have a 75% sortie win ratio.
  • Must have 5 empty ship slots for new ships.
  • Must have 20 free equipment slots.

Special Mechanics

  1. The difficulty system first used in Spring 2015 Event returns: you can choose between Operation A (, Hard), Operation B (, Medium), Operation C (, Easy) or Operation D (, Very Easy) .
    • Choosing A or B requires certain HQ Level (HQ Lv 35 for B / 80 for A in Spring 2015 Event).
    • An important note to all Admirals intending to clear the event on Hard difficulty - further (new) conditions now apply:
      • When switching difficulty from any other difficulty to Hard, the map's debuff mechanism (where applicable) will be reset.
        • Switching between any other difficulties will not reset the debuff mechanism.
  2. The debuff system from Summer 2015 Event's final map, where certain nodes had to be killed to reduce boss armor will return.
  3. Returning this event will allow a fleet with seven ships (Striking Force Fleet) to sortie to certain event maps that allow single fleet operations starting from E-2, and also includes the final map of the event.
    • The Striking Force cannot be sortied during exercises or sent on expeditions while it contains seven ships.
    • The Striking Force can only be created and used in the third fleet in the menu (out of a total of four fleets).
    • A Striking Force with a flagship that carries a new piece of equipment, the Striking Force Fleet Command Facility, will be able to make use of the new Single Ship Evacuation mechanic.
      • The new Single Ship Evacuation mechanic that will become available for the Striking Force as of E-4 allowing a single ship in the fleet to retreat from the battlefield after an enemy engagement if she suffered heavy damage.
        • It is possible for the damage to become even worse during a Single Ship Evacuation.
        • Unlike the Combined Fleet's evacuation mechanic, it does not require an escort destroyer.
      • The new Striking Force Fleet Command Facility will become obtainable and useable via the old Fleet Command Facility and the Action Report that can be earned in the upcoming Fall Event. The Fleet Command Facility, as well as the new Action Report item, will be obtainable on all difficulty levels, including Medium and Easy Mode.
      • Supplementary information regarding the new Striking Force Fleet Command Facility and the Single Ship Evacuation it allows when carried by the striking force's flagship:
        • The evacuation does not require an escort destroyer.
        • The evacuation consumes the ship's entire fuel & ammo reserves.
        • Only one ship can be evacuated per battle.
        • The damage the ship suffered may become worse during the evacuation, but she will never sink.
  4. Returning this event, the Vanguard Formation can be used .
    • This formation will organize the fleet such that the 3rd-6th/7th ships protect the Flagship and 2nd Ship of the Fleet.
      • In addition, the formation allows for ships to become more evasive in combat situations, especially with well-trained Destroyer.
      • This formation is also available only during the duration of the event.
      • The formation will be usable by both normal fleets as well as the Striking Force Fleet.
  5. New: NPC Friend Fleets have been introduced into the game.
    • Friend Fleets act as another unit that appears in particular battles to help aid your fleet when attacking the enemy at the start of night battle.
      • NPC Friend Fleets are selected from a randomized preset list of ship.
      • Depending on who you have in your fleet can also influence who will be arrive to aid you in battle.
  6. New: Enemy Radar Ambush Nodes is introduced into the game.
    • Entering this node will result in your fleet facing off against an enemy fleet that will ambush and attack your fleet
      • Your Fleet will not be able to fight against the enemy Fleet.
      • By meeting certain conditions, you can evade these nodes.

Quick Info Table

Classification Map Name Fleet Type? Land-Based Air Squadron? Friendly Fleet? Color of Tag Tag Condition & Deployment Restriction Difficulty Restrictions Notes
Main Operation
E-1 Central Solomon Tokyo Express Naval Battle Single No Yes GreyTagWinter2019.png Tagging:
Ships not already color-tagged will be tagged with the color associated with the map when deployed. This tag exists on all difficulties and is not reset on remodel, etc.
Deployment Restriction:
Normal or Hard: Must have either the same-colored tag or no tag.
There will be 2 additional locks for Hard mode players in E5.
No restrictions. All difficulties OK
E-2 Operation 603 Single / Combined Yes 'Yes GreenTagWinter2019.png BlueTagWinter2019.png In order to play these maps on hard, you must complete the previous map* on either normal or hard.
(e.g., to do E-2 on hard, you must complete E-1 on normal or hard.)
Final Operation
E-3 Southern Seas 4th Garrison Reinforcement Operation Single / Combined Yes Yes YellowTagWinter2019.png

Event Maps

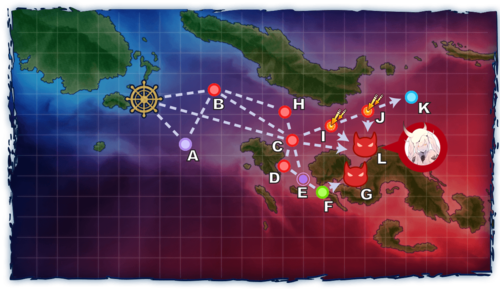
E-1

OoyodoE-1Winter2019.png

Central Solomons Tokyo Express Naval Battle
No map name yet

Information

  • Event Tag: GreyTagWinter2019.png

(Phase 1 - Transport Phase):

  • Hard (): 200 TP
  • Medium (): 180 TP
  • Easy (): 170 TP
  • Casual ():170 TP

(Phase 2 - Boss: Abyssal Nimbus Princess):

  • Hard (): 1600
  • Medium ():
  • Easy ():
  • Casual ():

Key Rewards:

Winter 2019 Event E-1 Banner.png
Winter2019E-1Map.png

Branching rules

E-1 Branching Rules Phase 1
Nodes Rules
Start
A
  • Do not meet the requirements to go to either B or C.
B
  • Meet ALL of the following requirements:
    • Do not meet the requirements to go to C.
    • Amount of ships in fleet ≤ 6/5 on Casual/Easy/Medium+
    • Amount of CLT+CA ≤ 2
    • No SS(V)
C
  • Meet ALL of the following requirements:
    • Amount of ships in fleet ≤ 6/5/4 on Casual/Easy/Medium+ OR Fast+ Fleet
    • Amount of CL ≤ 1
    • Amount of CLT+CA ≤ 1
    • No SS(V)
    • Fleet contains at least one historical ship OR Fast+ Fleet. (Medium+)
C
D
  • Do not meet the requirements to go to E.
E
  • Meet ALL of the following requirements:
    • Amount of CL ≤ 2
    • Amount of CLT+CA ≤ 1


E-1 Branching Rules Phase 2
Nodes Rules
Start
A
  • Do not meet the requirements to go to either B or C.
B
  • Meet ALL of the following requirements:
    • Do not meet the requirements to go to C.
    • Amount of CL ≤ 2
    • Amount of CLT+CA(V) ≤ 2/1/0 on Easy/Medium/Hard
    • No SS(V)
C
  • Meet ALL of the following requirements:
    • Amount of ships in fleet ≤ 5/5/4 on Casual/Easy/Medium+
    • Amount of CL ≤ 1
    • Amount of CLT+CA ≤ 1
    • No SS(V)
    • Fleet contains at least one historical ship. (Medium+)
B
C
  • Amount of ships ≤ 5
H
  • Amount of ships = 6
C
D
  • If amount of ships ≤ 5:
    • If amount of CL ≤ 2 AND amount of CLT+CA ≤ 1, go to E.
    • Else, go to D.
  • If amount of ships = 6:
    • Meet ALL of the following requirements to go to L:
      • Amount of ships with Surface Radars equipped ≥ 2/5 on Easy/Medium+
      • Flagship has a Surface Radar equipped.
      • Amount of CLT+CA(V) ≥ 0/1/2 on Medium+/Easy/Casual (Failure to meet this requirement FORCES you to E)
      • Amount of CL ≤ 2 (Failure to meet this requirement FORCES you to E)
      • Amount of CLT+CA(V) ≤ 2 (Failure to meet this requirement FORCES you to D)
    • Else, go to I.
E
I
L
I
J
  • Do not meet the requirements to go to L.
L
  • Meet ALL of the following requirements to go to L:
    • Amount of ships with Surface Radars equipped ≥ 1/4 on Easy/Medium+
    • Flagship has a Surface Radar equipped.
J
K
  • Do not meet the requirements to go to L.
L
  • Amount of ships with Surface Radars equipped ≥ 3 on Medium+

Branching compositions were reported over the course of the event.

Tips
The following guide is an early version of the guide. Please use at your own discretion until it is further updated.

About Ambush Nodes

ambush node

On this event map, player will get to experience a new mechanic known as an Enemy Ambush Node. There nodes are generally encountered only if your fleet meet specific conditions which redirect them along a path to this node. Similar to the way LoS check are done in maps.

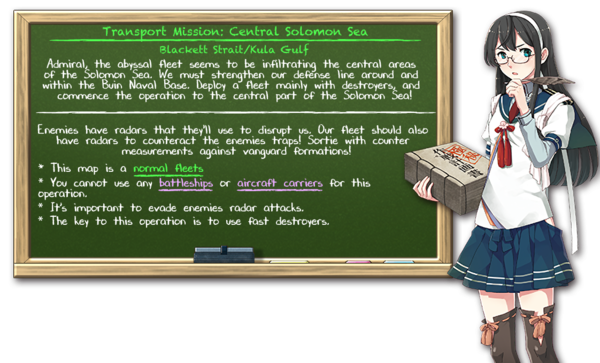
For this event, Ambush Nodes mainly occur if your fleet does not meet the Surface Radar requirements and if you land on one, you will enter a battle.

During these battle, your fleet will not participate in attacking the enemy fleet, but the enemy will attempt to attack your fleet. Your will consume 4% of it's total fuel in the sequence.

It's recommended to try to do what you can to avoid hitting these nodes as much as possible.

This map is divided into 2 phase, a Transportation phase and a Killing phase. Both objectives will need to be completed in order to complete this map.

Most battle in this map mainly consist of simple fights which will pit your fleet up to 4 enemy ships mainly consisting of subs, DDs or CLs mixed with DDs. Most of these fights can be won easily, espcially with an expeirenced fleet. For this guide, the focus will be on the boss nodes and requirements needed for completing the objectives.


Phase 1- Transportation through the Blackket Strait

Recommended Composition

1 CL, 4 DD or 5 DD

Route: B-C-E-F-G

Have your fleet drum and Daihatsu, but keep a balance between combat and TP gear to get the best outcome to deplete the TP gauge. The TP phase here is small so completing should only take a short while to do.

Boss is a Tsu-class with Destroyers and should be overall easy to S rank if you equip your fleet properly. It is also possible to use a Boss support fleet here and load your fleet with only drums and Daihatsu to maximize your TP gain which cam make it possible to complete it in as short as 2 runs.

Phase 2 - Battle Against the Abyssal Nimbus Princess

Recommended Composition

Casual and Easy - 1 CAV, 1 CLT, 4DD (2 Surface Radars needed to complete the objective)
Normal and Hard - 1 CL, 5 DD (1 historical ship + 5 Surface Radars needed to complete the objective)

Route: B-H-C-L

To be able to reach the boss node, your fleet will need to have radars equipped to each of them, from those radars you will need a certain amount of Surface Radars equipped on your ships along with 1 Surface Radar equipped on the flagship (2 (Easy) /5 (Medium+) Surface Radars overall needed) in order to reach Node L.

Players on Easy and Casual will need heavier ships along with a flagship with a surface radar to being directed to the boss and avoid being tossed into the dead end node or getting stuck in ambush nodes. Easy will need 1 CA(V)+CLT while Casual will need 2 CAV+1CLT.

Once your fleet reached the boss will battle the Abyssal Nimbus Princess who will consist of herself + 3 CL and 2 other DDs. The fight is simple, but having a Boss Support Fleet will help make it easier to concentrate on attacking the boss herself. As such, a Boss Support Fleet is recommended for this map.

In addition to this, ships from the Asashio-class, Shiratsuyu-class , and Yura all can deliver a damage modifier to the Nimbus Princess which consist of a value of 1.3x the normal damage value.

Murasame can deliver 1.5x the normal damage value.

Bringing a few ships from this group should easily help you win the battle even with double attack shelling. However, if you face complication with the boss, bringing in a DD with Torpedo Cut ins can be an alternative.

The event guides are to be constructed through the respective Event map page guide and reviewed by editor staff / collaboration committee before being approved here. Do not under any circumstance update the guides through this page or attempt to fix them through this page. Please only update guides through their respective sandbox pages.

Show/Hide Nodes and Enemy Encounters
Nodes and Enemy Encounters
NodePatternXpNode InfoFormAir
A
Maelstrom Node
Pattern 1Fuel - ?
B
深海ソロモン艦隊 潜水艦哨戒線
Pattern 1 Submarine Ka-Class flagshipSubmarine Ka-Class eliteSubmarine Ka-Class elite
Formation 3: Diamond
Formation 5: Line Abreast
Pattern 2 Submarine Ka-Class eliteSubmarine Ka-Class eliteSubmarine Ka-Class elite
Formation 3: Diamond
Formation 5: Line Abreast
C
深海ソロモン艦隊 前衛警戒隊
Pattern 1 Light Cruiser Ho-Class flagshipDestroyer I-Class Late ModelDestroyer I-Class Late ModelDestroyer I-Class Late Model
Formation 1: Line Ahead
Formation 2: Double Line
Formation 3: Diamond
D
深海ソロモン魚雷艇戦隊
Pattern 1 PT Imp GroupPT Imp GroupPT Imp GroupPT Imp Group
Formation 3: Diamond
Pattern 2 PT Imp GroupPT Imp GroupPT Imp GroupPT Imp Group
Formation 3: Diamond
Pattern 3 PT Imp GroupPT Imp GroupPT Imp GroupPT Imp Group
Formation 3: Diamond
Pattern 4 PT Imp GroupPT Imp GroupPT Imp GroupPT Imp Group
Formation 3: Diamond
E
ブラケット水道 侵入深海駆逐隊
Night Battle Node
Pattern 1 Destroyer Ni-Class Kai Late ModelDestroyer I-Class Late ModelDestroyer I-Class Late Model
Formation 1: Line Ahead
Formation 3: Diamond
Pattern 2 Destroyer I-Class Late ModelDestroyer I-Class Late ModelDestroyer I-Class Late Model
Formation 1: Line Ahead
Formation 3: Diamond
F
Transport Drop-Off Node
Pattern 1
G
深海ソロモン任務部隊 先遣隊
Pattern 1 Light Cruiser Tsu-Class eliteDestroyer Ni-Class Kai Late ModelDestroyer I-Class Late ModelDestroyer I-Class Late Model
Formation 1: Line Ahead
Pattern 2 Light Cruiser Tsu-Class eliteDestroyer Ni-Class Kai Late ModelDestroyer Ni-Class Kai Late ModelDestroyer Ni-Class Kai Late Model
Formation 1: Line Ahead
Pattern 3 Light Cruiser Tsu-Class eliteDestroyer Ni-Class Kai Late ModelDestroyer Ni-Class KaiDestroyer Ni-Class Kai
Formation 1: Line Ahead
Pattern 4 Light Cruiser Tsu-Class eliteDestroyer I-Class Late ModelDestroyer I-Class Late ModelDestroyer I-Class Late Model
Formation 1: Line Ahead
Pattern 5 Light Cruiser Tsu-Class eliteDestroyer Ni-Class Kai Late ModelDestroyer Ni-Class Kai Late ModelDestroyer Ni-Class Kai
Formation 1: Line Ahead
H
深海ソロモン艦隊 警戒駆逐隊
Pattern 1 Destroyer I-Class Late ModelDestroyer I-Class Late ModelDestroyer I-Class Late ModelDestroyer I-Class Late Model
Formation 1: Line Ahead
Formation 2: Double Line
Formation 3: Diamond
I
深海新型装備駆逐隊 第II群
Ambush Node
Pattern 1 Destroyer Ni-Class Kai Late Model eliteDestroyer Ni-Class KaiDestroyer Ni-Class Kai
Formation 1: Line Ahead
Formation 3: Diamond
Pattern 2 Destroyer Ni-Class Kai Late Model flagshipDestroyer Ni-Class KaiDestroyer Ni-Class Kai
Formation 1: Line Ahead
Formation 3: Diamond
J
深海新型装備駆逐隊 第I群
Ambush Node
Pattern 1 Destroyer Ni-Class Kai Late Model flagshipDestroyer Ni-Class Kai Late ModelDestroyer Ni-Class KaiDestroyer Ni-Class Kai
Formation 1: Line Ahead
Formation 3: Diamond
Pattern 2 Destroyer Ni-Class Kai Late Model flagshipDestroyer Ni-Class Kai Late ModelDestroyer Ni-Class Kai Late ModelDestroyer Ni-Class Kai Late Model
Formation 1: Line Ahead
Formation 3: Diamond
K
Battle Avoided
Pattern 1"Must be my imagination" (battle avoided)
L
深海ソロモン任務部隊 クラ湾主力
Pattern 1 Abyssal Nimbus PrincessLight Cruiser Tsu-ClassLight Cruiser Tsu-ClassLight Cruiser Tsu-ClassDestroyer Ni-Class Kai Late ModelDestroyer Ni-Class Kai Late Model
Formation 1: Line Ahead
Pattern 2 Abyssal Nimbus Princess - DamagedLight Cruiser Tsu-Class eliteLight Cruiser Tsu-ClassLight Cruiser Tsu-ClassDestroyer Ni-Class Kai Late ModelDestroyer Ni-Class Kai Late Model
Formation 1: Line Ahead

Show/Hide Nodes and Enemy Encounters
Nodes and Enemy Encounters
NodePatternXpNode InfoFormAir
A
Maelstrom Node
Pattern 1Fuel - ?
B
深海ソロモン艦隊 潜水艦哨戒線
Pattern 1 Submarine Ka-Class eliteSubmarine Ka-Class eliteSubmarine Ka-Class elite
Formation 3: Diamond
Formation 5: Line Abreast
Pattern 2 Submarine Ka-Class eliteSubmarine Ka-Class eliteSubmarine Ka-Class
Formation 3: Diamond
Formation 5: Line Abreast
Pattern 3 Submarine Ka-Class eliteSubmarine Ka-ClassSubmarine Ka-Class
Formation 3: Diamond
Formation 5: Line Abreast
C
深海ソロモン艦隊 前衛警戒隊
Pattern 1 Light Cruiser Ho-Class flagshipDestroyer I-Class Late ModelDestroyer I-ClassDestroyer I-Class
Formation 1: Line Ahead
Formation 2: Double Line
Formation 3: Diamond
D
深海ソロモン魚雷艇戦隊
Pattern 1 PT Imp GroupPT Imp GroupPT Imp GroupPT Imp Group
Formation 3: Diamond
Pattern 2 PT Imp GroupPT Imp GroupPT Imp GroupPT Imp Group
Formation 3: Diamond
Pattern 3 PT Imp GroupPT Imp GroupPT Imp GroupPT Imp Group
Formation 3: Diamond
E
ブラケット水道 侵入深海駆逐隊
Night Battle Node
Pattern 1 Destroyer I-Class Late ModelDestroyer I-Class Late ModelDestroyer I-Class
Formation 1: Line Ahead
Formation 3: Diamond
Pattern 2 Destroyer I-Class Late ModelDestroyer I-Class Late ModelDestroyer I-Class Late Model
Formation 1: Line Ahead
Formation 3: Diamond
F
Transport Drop-Off Node
Pattern 1
G
深海ソロモン任務部隊 先遣隊
Pattern 1 Light Cruiser Tsu-ClassDestroyer I-Class Late ModelDestroyer I-Class Late ModelDestroyer I-Class
Formation 1: Line Ahead
Pattern 2 Light Cruiser Tsu-ClassDestroyer I-Class Late ModelDestroyer I-Class Late ModelDestroyer I-Class Late Model
Formation 1: Line Ahead
Pattern 3 Light Cruiser Tsu-Class eliteDestroyer I-Class Late ModelDestroyer I-Class Late ModelDestroyer I-Class Late Model
Formation 1: Line Ahead
Pattern 4 Light Cruiser Tsu-Class eliteDestroyer Ni-Class Kai Late ModelDestroyer Ni-Class KaiDestroyer Ni-Class Kai
Formation 1: Line Ahead
Pattern 5 Light Cruiser Tsu-Class eliteDestroyer Ni-Class Kai Late ModelDestroyer I-Class Late ModelDestroyer I-Class Late Model
Formation 1: Line Ahead
H
深海ソロモン艦隊 警戒駆逐隊
Pattern 1 Destroyer I-Class Late ModelDestroyer I-Class Late ModelDestroyer I-ClassDestroyer I-Class
Formation 1: Line Ahead
Formation 2: Double Line
Formation 3: Diamond
I
深海新型装備駆逐隊 第II群
Ambush Node
Pattern 1 Destroyer Ni-Class Kai Late Model eliteDestroyer Ni-Class KaiDestroyer Ni-Class Kai
Formation 1: Line Ahead
Formation 3: Diamond
Pattern 2 Destroyer Ni-Class Kai Late ModelDestroyer Ni-Class KaiDestroyer Ni-Class Kai
Formation 1: Line Ahead
Formation 3: Diamond
J
深海新型装備駆逐隊 第I群
Ambush Node
Pattern 1 Destroyer Ni-Class Kai Late Model eliteDestroyer Ni-Class Kai Late ModelDestroyer Ni-Class KaiDestroyer Ni-Class Kai
Formation 1: Line Ahead
Formation 3: Diamond
Pattern 2 Destroyer Ni-Class Kai Late Model flagshipDestroyer Ni-Class Kai Late ModelDestroyer Ni-Class KaiDestroyer Ni-Class Kai
Formation 1: Line Ahead
Formation 3: Diamond
K
Battle Avoided
Pattern 1"Must be my imagination" (battle avoided)
L
深海ソロモン任務部隊 クラ湾主力
Pattern 1 Abyssal Nimbus PrincessLight Cruiser Tsu-ClassLight Cruiser Tsu-ClassLight Cruiser Tsu-ClassDestroyer Ni-Class KaiDestroyer Ni-Class Kai
Formation 1: Line Ahead
Pattern 2 Abyssal Nimbus Princess - DamagedLight Cruiser Tsu-Class eliteLight Cruiser Tsu-ClassLight Cruiser Tsu-ClassDestroyer Ni-Class KaiDestroyer Ni-Class Kai
Formation 1: Line Ahead

Show/Hide Nodes and Enemy Encounters
Nodes and Enemy Encounters
NodePatternXpNode InfoFormAir
A
Maelstrom Node
Pattern 1Fuel - ?
B
深海ソロモン艦隊 潜水艦哨戒線
Abyssal Solomon Fleet
Submarie Patrol Line
Pattern 1 Submarine Ka-Class eliteSubmarine Ka-ClassSubmarine Ka-Class
Formation 3: Diamond
Formation 5: Line Abreast
Pattern 2 Submarine Ka-Class eliteSubmarine Ka-Class eliteSubmarine Ka-Class
Formation 3: Diamond
Formation 5: Line Abreast
Pattern 3 Submarine Ka-ClassSubmarine Ka-ClassSubmarine Ka-Class
Formation 3: Diamond
C
深海ソロモン艦隊 前衛警戒隊
Abyssal Solomon Fleet
Vamguard Unit
Pattern 1 Destroyer I-Class Late ModelDestroyer I-ClassDestroyer I-ClassDestroyer I-Class
Formation 1: Line Ahead
Formation 2: Double Line
Formation 3: Diamond
Pattern 2 Light Cruiser Ho-Class flagshipDestroyer I-Class Late ModelDestroyer I-ClassDestroyer I-Class
Formation 2: Double Line
Formation 3: Diamond
D
深海ソロモン魚雷艇戦隊
Abyssal Solomon Fleet
Torpedo Boat Squadron
Pattern 1 PT Imp GroupPT Imp GroupPT Imp GroupPT Imp Group
Formation 3: Diamond
Pattern 2 PT Imp GroupPT Imp GroupPT Imp GroupPT Imp Group
Formation 3: Diamond
Pattern 3 PT Imp GroupPT Imp GroupPT Imp GroupPT Imp Group
Formation 3: Diamond
Pattern 4 PT Imp GroupPT Imp GroupPT Imp Group
Formation 3: Diamond
Pattern 5 PT Imp GroupPT Imp GroupPT Imp GroupPT Imp Group
Formation 3: Diamond
E
ブラケット水道 侵入深海駆逐隊
Night Battle Node
Blackket Strait
Invading Abyssal Destroyer Unit
Pattern 1 Destroyer I-Class Late ModelDestroyer I-ClassDestroyer I-Class
Formation 1: Line Ahead
Formation 3: Diamond
Pattern 2 Destroyer I-Class Late ModelDestroyer I-Class Late ModelDestroyer I-Class
Formation 1: Line Ahead
Formation 3: Diamond
F
Transport Drop-Off Node
Pattern 1
G
深海ソロモン任務部隊 先遣隊
Abyssal Solomon Task Force
Vanguard Unit
Pattern 1 Light Cruiser Tsu-ClassDestroyer I-Class Late ModelDestroyer I-Class Late ModelDestroyer I-Class Late Model
Formation 1: Line Ahead
Pattern 2 Light Cruiser Tsu-ClassDestroyer I-ClassDestroyer I-ClassDestroyer I-Class
Formation 1: Line Ahead
Pattern 3 Light Cruiser Tsu-ClassDestroyer I-Class Late ModelDestroyer I-Class Late ModelDestroyer I-Class
Formation 1: Line Ahead
Pattern 4 Light Cruiser Tsu-ClassDestroyer I-Class Late ModelDestroyer I-ClassDestroyer I-Class
Formation 1: Line Ahead
H
深海ソロモン艦隊 警戒駆逐隊
Abyssal Solomon Fleet
Vanguard Destoyer Unit
Pattern 1 Destroyer I-Class Late ModelDestroyer I-ClassDestroyer I-Class
Formation 1: Line Ahead
Formation 2: Double Line
Formation 3: Diamond
Pattern 2 Destroyer I-Class Late ModelDestroyer I-Class Late ModelDestroyer I-ClassDestroyer I-Class
Formation 2: Double Line
Formation 3: Diamond
I
深海新型装備駆逐隊 第II群
Ambush Node
Abyssal New Type Equipment
Destroyer Unit Group II
Pattern 1 Destroyer Ni-Class KaiDestroyer I-ClassDestroyer I-Class
Formation 3: Diamond
Pattern 2 Destroyer Ni-Class Kai Late ModelDestroyer Ni-Class KaiDestroyer Ni-Class Kai
Formation 1: Line Ahead
Pattern 3 Destroyer Ni-Class KaiDestroyer Ni-Class KaiDestroyer I-Class
Formation 3: Diamond
J
深海新型装備駆逐隊 第I群
Ambush Node
Abyssal New Type Equipment
Destroyer Unit Group I
Pattern 1 Destroyer Ni-Class Kai Late Model eliteDestroyer Ni-Class Kai Late ModelDestroyer Ni-Class KaiDestroyer Ni-Class Kai
Formation 1: Line Ahead
Pattern 2 Destroyer Ni-Class Kai Late Model eliteDestroyer Ni-Class KaiDestroyer I-ClassDestroyer I-Class
Formation 3: Diamond
Pattern 3 Destroyer Ni-Class Kai Late Model eliteDestroyer Ni-Class KaiDestroyer Ni-Class KaiDestroyer I-Class
Formation 3: Diamond
K
Battle Avoided
Pattern 1"Must be my imagination" (battle avoided)
L
深海ソロモン任務部隊 クラ湾主力
Abyssal Solomon Task Force
Kula Gulf Main Forces
Pattern 1 Abyssal Nimbus Princess - DamagedLight Cruiser Tsu-ClassLight Cruiser Tsu-ClassLight Cruiser Tsu-ClassDestroyer Ni-Class KaiDestroyer Ni-Class Kai
Formation 1: Line Ahead
Pattern 2 Abyssal Nimbus PrincessLight Cruiser Tsu-ClassLight Cruiser Tsu-ClassLight Cruiser To-ClassDestroyer Ni-Class KaiDestroyer Ni-Class Kai
Formation 1: Line Ahead
Pattern 3 Abyssal Nimbus PrincessLight Cruiser Tsu-ClassLight Cruiser To-ClassLight Cruiser To-ClassDestroyer Ni-Class KaiDestroyer Ni-Class Kai
Formation 1: Line Ahead

Show/Hide Nodes and Enemy Encounters
Nodes and Enemy Encounters
NodePatternXpNode InfoFormAir
A
Maelstrom Node
Pattern 1Fuel - ?
B
深海ソロモン艦隊 潜水艦哨戒線
Pattern 1 Submarine Ka-Class eliteSubmarine Ka-ClassSubmarine Ka-Class
Formation 3: Diamond
Formation 5: Line Abreast
Pattern 2 Submarine Ka-ClassSubmarine Ka-ClassSubmarine Ka-Class
Formation 3: Diamond
C
深海ソロモン艦隊 前衛警戒隊
Pattern 1 Destroyer I-Class Late ModelDestroyer I-ClassDestroyer I-ClassDestroyer I-Class
Formation 1: Line Ahead
Formation 2: Double Line
Formation 3: Diamond
D
深海ソロモン魚雷艇戦隊
Pattern 1 PT Imp GroupPT Imp GroupPT Imp Group
Formation 3: Diamond
Pattern 2 PT Imp GroupPT Imp GroupPT Imp GroupPT Imp Group
Formation 3: Diamond
Pattern 3 PT Imp GroupPT Imp GroupPT Imp GroupPT Imp Group
Formation 3: Diamond
E
ブラケット水道 侵入深海駆逐隊
Night Battle Node
Pattern 1 Destroyer I-Class Late ModelDestroyer I-ClassDestroyer I-Class
Formation 1: Line Ahead
Formation 3: Diamond
Pattern 2 Destroyer I-ClassDestroyer I-ClassDestroyer I-Class
Formation 1: Line Ahead
F
Transport Drop-Off Node
Pattern 1
G
深海ソロモン任務部隊 先遣隊
Pattern 1 Light Cruiser Tsu-ClassDestroyer I-Class Late ModelDestroyer I-ClassDestroyer I-Class
Formation 1: Line Ahead
Pattern 2 Light Cruiser Tsu-ClassDestroyer I-ClassDestroyer I-ClassDestroyer I-Class
Formation 1: Line Ahead
Pattern 3 Light Cruiser Tsu-ClassDestroyer I-Class Late ModelDestroyer I-Class Late ModelDestroyer I-Class
Formation 1: Line Ahead
H
深海ソロモン艦隊 警戒駆逐隊
Pattern 1 Destroyer I-Class Late ModelDestroyer I-ClassDestroyer I-Class
Formation 1: Line Ahead
Formation 2: Double Line
Formation 3: Diamond
I
Ambush Node
Pattern 1
J
Ambush Node
Pattern 1
K
Battle Avoided
Pattern 1"Must be my imagination" (battle avoided)
L
深海ソロモン任務部隊 クラ湾主力
Pattern 1 Abyssal Nimbus PrincessLight Cruiser To-ClassLight Cruiser To-ClassLight Cruiser To-ClassDestroyer Ni-Class KaiDestroyer Ni-Class Kai
Formation 1: Line Ahead
Pattern 2 Abyssal Nimbus Princess - DamagedLight Cruiser Tsu-ClassLight Cruiser To-ClassLight Cruiser To-ClassDestroyer Ni-Class KaiDestroyer Ni-Class Kai
Formation 1: Line Ahead

Ship drops

NodeShip List
ADestroyers
Light Cruisers
EDestroyers
Light Cruisers
Light Aircraft Carriers
Seaplane Tenders
FDestroyer Escorts
Destroyers
Light Cruisers
Light Aircraft Carriers
Seaplane Tenders
Auxiliary Ships
GDestroyers
Light Cruisers
IDestroyers
Light Cruisers
Heavy Cruisers
Battleships
Light Aircraft Carriers
Seaplane Tenders
Submarines


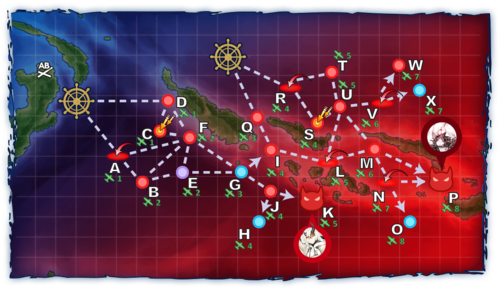
E-2

OoyodoE-2Winter2019.png

Operation 603
No map name yet

Information

  • Event Tag: GreenTagWinter2019.png BlueTagWinter2019.png

Phase 1 Boss:

  • Hard (): 1400
  • Medium ():
  • Easy ():
  • Casual ():

Phase 2 Boss:

  • Hard (): 840
  • Medium ():
  • Easy ():
  • Casual ():

Key Rewards:

Winter 2019 Event E-2 Banner.png
Wintr2019E-2Map.png

Branching rules

E-2 Branching Rules
Nodes Rules
Start
1
  • Single Fleet
2
  • Combined Fleet
1
D
  • Meet ALL of the following requirements:
    • Amount of DD ≤ 3
    • No (F)BB(V)
    • No CVL
  • Alternatively, fleet contains SS(V).
A
  • Do not meet the requirements to go to D.
D
C
  • Do not meet the requirements to go to F.
F
  • Meet ALL of the following requirements:
    • Amount of ships with Surface Radars equipped ≥ ?/?/3/4 on Casual/Easy/Medium/Hard
    • Flagship has a Surface Radar equipped.
    • Amount of DD ≥ 2
    • No SS(V)
F
E
  • Do not meet the requirements to go to G.
G
  • Meet ALL of the following requirements:
    • Amount of (F)BB(V)+CVL ≤ 3
    • Amount of CVL ≤ 2
    • Amount of DD ≥ 2
A
F
  • No (F)BB(V) or CV(L/B)
B
  • Do not meet the requirements to go to F.
B
E
  • Meet ALL of the following requirements:
    • Amount of ships ≤ 5
    • ???
F
  • Do not meet the requirements to go to E.
G
I
  • Active branching
J
J
H
  • Do not meet the requirements to go to K.
K
  • Meet ALL of the following requirements:
    • Pass the LoS check.
    • Amount of ships with Surface Radars equipped ≥ 4 on Hard.
2
Q
  • Meet ALL of the following requirements:
    • No CVL
    • No BBV
    • Amount of (F)BB ≤ 2
R
  • Do not meet the requirements to go to Q.
R
S
  • Do not meet the requirements to go to either T or U.
T
  • Fleet contains CVL.
U
  • Meet ALL of the following requirements:
    • Amount of ships with Surface Radars equipped ≥ ?/?/8 on Casual/Easy/Medium+
    • Flagship has a Surface Radar equipped. (Medium+)
    • Do not meet the requirements to go to T.
U
L
  • Do not meet the requirements to go to M or V.
V
  • Meet ALL of the following requirements:
    • Carrier Task Force
    • ???
    • ???
    • ???
M
  • ???
V
W
  • Pass the LoS check
X
  • Fail the LoS check
M
N
  • Do not meet the requirements to go to P.
P
  • Combined Fleet
N
O
  • Do not meet the requirements to go to P.
P
  • Meet ALL of the following requirements:
    • Pass the LoS check.
    • Amount of ships with Surface Radars equipped ≥ 7 on Medium+.
  • Alternatively, use a Single Fleet.

Branching compositions were reported over the course of the event.

Tips
The following guide is an early version of the guide. Please use at your own discretion until it is further updated.

For this map, there will be a large amount of tasks that you need to complete along with an important list of historical ships are have ties to this map that will have an important role in this area. The start of this guide will cover the historical before going into the steps to completing the map and also bring up alternate paths that will not be recommended.

Historical Fleets

With this map taking place closer to the Solomon Seas, a lot of ships that have connection to the campaign will have additional bonus when entering boss nodes depending on the location they fight at.

Overall the known ships to have bonuses on this map includes:

E-2 (Phase 1)

E-2 (Phase 2)

Because of this, many can be useful here, but please weigh your decisions carefully especially if your are playing normal + as you will have 2 tags to deal with and some also have benefits in the final node.

Phase 1 - Killing the Heavy Cruiser Princess

Recommended Fleet

1FBB, 1 CAV, 1 CA, 1 CVL, 2 DD

Path A-B-F-G-J-K

1CAV, 2-3 CA, 0-1 CL, 2 DD

Path D-F-G-J-K

Recommended LBAS

LBAS 1+2
Node K - 4 LBAS Bombers / Torpedo Bombers (Distance of 5 needed)

The first comp (1FBB, 1 CAV, 1 CA, 1 CVL, 2 DD) will have you face off against an air raid, a sub fleet, and 2 torpedo squadrons before reaching the boss. Most of the enemies here are easy to deal with.

It's recommended to bring an AACI ship to deal with the air raid but otherwise most nodes are easy to deal with. And to reach the boss node, you will need to bring a sufficient amount of Surface RADARs (0/2/3/4) to go to the boss.

The second Comp (1CAV, 2-3 CA, 0-1 CL, 2 DD) will help you avoid the sub node and air strike node all together and only have to deal with a few surface battles against some DD, CL and CAs. Using this fleet may preset some challeges if any DD or CL survives shelling phase so Vangaurd formation may be considered for possible protection along the route. Bringing a single Seaplane fighter should also be more than enough to gain AS+ at boss. Keep in mind however that because you'll use extra CAs that segment, if you choose this comp for Normal or Hard, you may end up locking out potential CAs ships for phase 2. So please weigh your choices carefully before entering this as you will be using a CVL for unlocking the 2nd path either way.

You will also need to bring a sufficient amount of Surface RADARs (0/2/3/4) to go to the boss.

The boss node itself features a Heavy Cruiser Princess who will be accompanied by a few other CAs, CL and DD. Because she has no air power, it'll be easy for your LBAS using only bombers and can wipe a good number of the enemy units with minimal effort.

If you bring in a ship or two that has a modifier bonus to the map, you can clear this segment relatively easily. However place consider who you brig prior to entering the fight as you may consider some for Phase 2.

Phase 2 - Killing the Southern War Demon

Part 1 - Unlocking the Combined Fleet Path

Recommended Fleet

1FBB, 1 CAV, 1 CA, 1 CVL, 2 DD
6SS(V) (about 2-3 SSV required)

Surface Fleet Path
Path A-B-F-G-I-L-M-N

SS(V) path
Path D-E-F-G-I-L-M-N Recommended LBAS

Node A Clearing
LBAS 1
Node A - 4 Fighters (Distance of 2 needed)

Node L Clearing
LBAS 1
Node L - 4 Fighters (Distance of 5 needed)

Node A & L Clearing
LBAS 1+2
Node L - 4 Fighters (Distance of 2 and 5 needed)

LBAS 2
Node I - 4 Torpedo Bomber/LBAS Bombers (Distance of 4 needed)

Node N Clearing
LBAS 1
Node L - 4 Fighters (Distance of 7 needed)

LBAS 2
Node M - 4 Torpedo Bomber/LBAS Bombers (Distance of 6 needed)


Node N Clearing (alterative)
LBAS 1+2
Node L - 4 Fighters (Distance of 7 needed)

Scoring Perfect Defense at Land Base'
LBAS 1+2
Based Defense - 4 Intercetors/Fighters or 3 Intercetors/Fighters + 1 Saiun

In this phase, you will need to gain air control over various points in the map (Nodes A, L, and N) along with successfully protecting your Land Base from taking any daamge to gain access to your 2nd starting point in which your Combined fleet can used at.

The fleet you can use here can be the same as Phase 1's fleet, but if you didn't use a CVL you may consider bringing one for this segment), but also if you have enough Subs and seaplane carrying subs you can consider bringing them here to help traverse the path to the nodes more easily. On higher difficulties, if you use a surface fleet you may need to use your CVL and CAVs as fighter mules to help secure your AS as the specific nodes mentioned above.

Depending on the difficulty the following process will need to be done: Casual - ??? Easy - AS Node A + Perfect Defense on Land Base Air Raid Normal - AS Node A and L + Perfect Defense on Land Base Air Raid Hard - AS Node A, L, and N + Perfect Defense on Land Base Air Raid (1-2 times needed)

Keep in mind that you will need to have your LBAS travel to nodes A, N and L and score AS with your LBAS participating at these nodes in order to count to completing the requirements.

Perfect defense will simply require you to use Fighters/ Interceptors to wipe out the bombers and take 0 damage from it.

On Hard mode, your biggest difficulty will be to over come the Ru-class node (Node I) BB Princess node (Node M), so if necessary bring an LBAS bomber group to Nodes I and M to take out some of the enemies there to improve your chances of passing.

If you choose to try to pass requirements by concentrating just on the nodes without bringing LBAS nodes for Node I and M, remember that there nodes will be much harder to pass.

Once all conditions are complete the new starting point should appear and you will be able to use your combined fleet.

Part 2 - Killing the Southern War Demon

Recommended Fleet
2(F)BB, 2CAV, 2 CA + 1 CL, 2 CA, 2DD, 1 CLT

Path Q-I-L-M-N-P

Recommended LBAS

Boss Node LBAS LBAS 1
Boss Node - 2 Fighters/1 Land Base Bomber/ 1 Flying Boat (Distance of 8 needed)

LBAS 2
Boss Node - 1-2 Fighters/1-2 Land Base Bomber/ 1 Flying Boat (Distance of 8 needed)

For this path, your fleet will have to go through a fleet of PT imps, several raid raids, and some battles against some Battleships (including Battleship Princesses). Depending on the battle a in-route support fleet may be recommended to help clear out the battleships along the way. Alternatively you can also resort to using Nelson and her Nelson Touch or Nagato Kai Ni and her broadside attack to help clear out the Battleship Princesses. If you have both of them carefully consider who you choose to bring for your fleet. Nelson is recommended to E-2 since she's mainly useful in surface task force while Nagato Kai Ni is more usable in E-3 due to her strong broadside attack which is more crucial for taking down E-3's boss. In either case, one of them needs to be reserved for E-3 which depending on the comp you choose and who you reserve will greatly affect what you'll do on higher difficulties on E-3. In-route boss support is preferred to ensure your survival along this path.

Bringing a AACI ship is highly recommended for the Air Battles.

Once you reach the boss node, you will face a considerable amount of air power, if you have enough seaplane fighters (about 6-8 on hard, less on lower difficulties) it will be possible along with you LBAS to score Air Superiority or Air Parity making it much easier to win the battle. If for some reason you lack in seaplane fighters, you may suffer Air Denial which will make things harder, but may be still possible to win. While this would be considered bad in most situations, thanks to the boss and her mostly weak fleet, this battle is much easier to complete. Along with the assistance of LBAS, it should be easy to clear with minimal effort. However if necessary, bring a boss support fleet.


Alternative (Part 2) - Unlocking U-M (Not Recommended)

4CVL, 2CAV + 1 CL, 1CA, 2DD, 2 FBB

Path: R-U-V-W (If enough surface radars air equipped)

Node R and V wit LBAS LBAS 1
4 Fighters (Distance of 4 and 6 needed)

For this alternative step, you will need to complete the following conditions:

  • AS R and V with LBAS
  • S rank Node W Twice

Path is is simple to complete but you will face a battle against a Battleship Re-Class which can be problematic especially on higher difficulties. Otherwise using your LBAS to get AS on Node of R and V should be easy and once you get to node W, completing the task shouldn't be too hard as there are mainly transports there.

Once complete, you'll unlock the path to from node U to M.

Alternative (Part 3) Unlocking M-P (Not Recommended)

Most of the requirements to complete this step will required using previous compositions and LBAS set ups to complete certain requirements, however tests to determine the exact way to unlock this path is not fully known. Below are the lists of what has been documented to possibly unlock the path.

  • AS+ at Node L, N and R with LBAS
  • 2x Perfect Defense
  • 3 S-Ranks at Node Q (verification required)
  • A-Rank the boss node twice, once from Node R, once from Node Q (Verification required)

Once you complete the conditions, you will unlock the path from M-P

Alternative (Part 4) Killing the Southern War Demon via U-M-P shortcut (Not Recommended)

2(F)BB, 2CAV, 2 CVL + 1 CL, 2 CA, 2DD, 1 CLT

Pat: R-U-L-M-P

Boss Node LBAS LBAS 1
Boss Node - 2 Fighters/1 Land Base Bomber/ 1 Flying Boat (Distance of 8 needed)

LBAS 2
Boss Node - 1 Fighters/2 Land Base Bomber/ 1 Flying Boat (Distance of 8 needed)

This comp will allow you to bring a larger air power to the boss, however you will have to face off against a Re-class node (Node U) and the Battle Princess Node (Node M). Both of these nodes are difficult to over take compared to taking the CAV route through the PT imp nodes.

As such we personally don't recommend this comp unless you have a fear of PT imps and would rather be taking on Re-class and BB Princesses. If you do make it to the boss, you will likely get AS at boss making the fight even easier.

As a reminder, please consider the normal recommendation before even considering the alternative recommendation as it is more trouble than it's worth.

The event guides are to be constructed through the respective Event map page guide and reviewed by editor staff / collaboration committee before being approved here. Do not under any circumstance update the guides through this page or attempt to fix them through this page. Please only update guides through their respective sandbox pages.

Show/Hide Nodes and Enemy Encounters
Nodes and Enemy Encounters
NodePatternXpNode InfoFormAir
A
リコリス飛行場 基地航空隊
Air Battle Node
Pattern 1 Lycoris Princess
Formation 4: Echelon
AP:103
AS:231
AS+:462
Pattern 2 Lycoris PrincessAirfield PrincessAirfield Princess
Formation 4: Echelon
AP:167
AS:375
AS+:750
Pattern 3 Lycoris PrincessAirfield PrincessAirfield Princess
Formation 4: Echelon
AP:148
AS:333
AS+:666
Pattern 4 Lycoris PrincessAirfield Princess
Formation 4: Echelon
AP:102
AS:230
AS+:459
Pattern 5 Lycoris PrincessAirfield Princess
Formation 4: Echelon
AP:126
AS:282
AS+:564
B
深海潜水艦隊 ラバウル警戒隊
Pattern 1 Submarine So-Class flagshipSubmarine So-Class eliteSubmarine So-Class elite
Formation 5: Line Abreast
Pattern 2 Submarine So-Class flagshipSubmarine So-ClassSubmarine So-ClassSubmarine So-Class
Formation 3: Diamond
Pattern 3 Submarine So-Class flagshipSubmarine So-Class eliteSubmarine So-Class eliteSubmarine So-Class elite
Formation 3: Diamond
Pattern 4 Submarine So-Class flagshipSubmarine So-ClassSubmarine So-Class
Formation 5: Line Abreast
Pattern 5 Submarine So-Class eliteSubmarine So-ClassSubmarine So-ClassSubmarine So-Class
Formation 3: Diamond
Pattern 6 Submarine So-Class eliteSubmarine So-ClassSubmarine So-Class
Formation 5: Line Abreast
C
深海待ち伏せ展開部隊 前衛戦隊
Ambush Node
Pattern 1 Heavy Cruiser Ne-Class eliteDestroyer Ni-Class Kai Late Model eliteDestroyer Ni-Class KaiDestroyer Ni-Class Kai
Formation 1: Line Ahead
Formation 3: Diamond
Pattern 2 Heavy Cruiser Ne-Class eliteDestroyer Ni-Class Kai Late Model eliteDestroyer Ni-Class Kai Late ModelDestroyer Ni-Class Kai Late Model
Formation 1: Line Ahead
Formation 3: Diamond
D
深海水雷戦隊 前衛警戒隊
Pattern 1 Light Cruiser He-Class flagshipLight Cruiser Tsu-Class eliteDestroyer I-Class Late ModelDestroyer I-Class Late ModelDestroyer I-Class Late Model
Formation 1: Line Ahead
Formation 2: Double Line
Formation 3: Diamond
E
Maelstrom Node
Pattern 1Fuel - ?
F
深海水雷戦隊 重雷装隊
Pattern 1 Light Cruiser Ho-Class flagshipTorpedo Cruiser Chi-Class flagshipTorpedo Cruiser Chi-Class flagshipLight Cruiser Tsu-ClassDestroyer I-Class Late ModelDestroyer I-Class Late Model
Formation 1: Line Ahead
Formation 2: Double Line
Formation 3: Diamond
G
Battle Avoided
Pattern 1"Must be my imagination" (battle avoided)
H
Battle Avoided
Pattern 1"Must be my imagination" (battle avoided)
I
深海戦艦部隊 前衛集団
Pattern 1 Battleship Ru-Class flagshipBattleship Ru-Class flagshipDestroyer Ni-Class Kai Late Model flagshipDestroyer Ni-Class Kai Late ModelDestroyer Ni-Class Kai Late ModelDestroyer Ni-Class Kai Late Model
Formation 1: Line Ahead
Formation 2: Double Line
Formation 3: Diamond
J
深海ソロモン艦隊 重巡戦隊 前衛
Pattern 1 Heavy Cruiser Ri-Class flagshipHeavy Cruiser Ri-Class flagshipHeavy Cruiser Ri-Class flagshipLight Cruiser Tsu-ClassDestroyer I-Class Late ModelDestroyer I-Class Late Model
Formation 1: Line Ahead
Formation 2: Double Line
Formation 3: Diamond
K
深海ソロモン艦隊 重巡戦隊 旗艦
Pattern 1 Heavy Cruiser PrincessHeavy Cruiser Ne-Class eliteHeavy Cruiser Ne-Class eliteLight Cruiser Tsu-Class eliteDestroyer I-Class Late ModelDestroyer I-Class Late Model
Formation 1: Line Ahead
Pattern 2 Heavy Cruiser Princess Final FormHeavy Cruiser Ne-Class eliteHeavy Cruiser Ne-Class eliteLight Cruiser Tsu-Class eliteDestroyer Ni-Class Kai Late Model flagshipDestroyer Ni-Class Kai Late Model flagship
Formation 1: Line Ahead
L
リコリス飛行場 基地航空隊
Air Battle Node
Pattern 1 Lycoris Princess
Formation 4: Echelon
AP:103
AS:231
AS+:462
Pattern 2 Lycoris PrincessAirfield PrincessAirfield Princess
Formation 4: Echelon
AP:167
AS:375
AS+:750
Pattern 3 Lycoris PrincessAirfield PrincessAirfield Princess
Formation 4: Echelon
AP:148
AS:333
AS+:666
Pattern 4 Lycoris PrincessAirfield Princess
Formation 4: Echelon
AP:102
AS:230
AS+:459
Pattern 5 Lycoris PrincessAirfield Princess
Formation 4: Echelon
AP:126
AS:282
AS+:564
M
深海戦艦部隊 水上打撃集団
Pattern 1 Battleship PrincessBattleship PrincessLight Cruiser Tsu-Class eliteDestroyer Ni-Class Kai Late ModelDestroyer Ni-Class Kai Late ModelDestroyer Ni-Class Kai Late Model
Formation 1: Line Ahead
Formation 2: Double Line
Formation 3: Diamond
N
リコリス飛行場 基地航空隊
Air Battle Node
Pattern 1 Lycoris PrincessAirfield PrincessAirfield PrincessAirfield Princess
Formation 4: Echelon
AP:171
AS:384
AS+:768
Pattern 2 Lycoris PrincessAirfield PrincessAirfield PrincessAirfield Princess
Formation 4: Echelon
AP:180
AS:405
AS+:810
Pattern 3 Lycoris PrincessAirfield PrincessAirfield Princess
Formation 4: Echelon
AP:125
AS:281
AS+:561
Pattern 4 Lycoris PrincessAirfield PrincessAirfield Princess
Formation 4: Echelon
AP:148
AS:333
AS+:666
Pattern 5 Lycoris PrincessAirfield Princess
Formation 4: Echelon
AP:102
AS:230
AS+:459
O
Battle Avoided
Pattern 1"Must be my imagination" (battle avoided)
P
深海ソロモン艦隊 旗艦展開泊地
Enemy Combined Fleet
Pattern 1 Southern DemonBattleship Ru-Class flagshipBattleship Ru-Class flagshipLight Carrier Nu-Class flagshipLight Carrier Nu-Class eliteLight Cruiser Tsu-Class elite
Light Cruiser Ho-Class flagshipDestroyer Na-Class Late Model eliteTransport Ship Wa-Class eliteTransport Ship Wa-Class elitePT Imp GroupPT Imp Group
Cruising Formation 4: Battle Formation
AP:162
AS:365
AS+:729
Pattern 2 Southern DemonBattleship Ru-Class Kai flagshipBattleship Ru-Class flagshipLight Carrier Nu-Class flagshipLight Carrier Nu-Class flagshipLight Cruiser Tsu-Class elite
Light Cruiser Ho-Class flagshipDestroyer Na-Class Late Model eliteDestroyer Na-Class Late Model eliteDestroyer Na-Class Late Model elitePT Imp GroupPT Imp Group
Cruising Formation 4: Battle Formation
AP:172
AS:386
AS+:771
Q
深海ソロモン配備 魚雷艇集団
Pattern 1 PT Imp GroupPT Imp GroupPT Imp GroupPT Imp GroupPT Imp Group
Formation 3: Diamond
Pattern 2 PT Imp GroupPT Imp GroupPT Imp GroupPT Imp GroupPT Imp Group
Formation 3: Diamond
Pattern 3 PT Imp GroupPT Imp GroupPT Imp GroupPT Imp GroupPT Imp Group
Formation 3: Diamond
Pattern 4 PT Imp GroupPT Imp GroupPT Imp GroupPT Imp GroupPT Imp Group
Formation 3: Diamond
R
深海ソロモン派遣 空母任務部隊
Air Battle Node
Pattern 1 Standard Carrier Wo-Class Kai flagshipStandard Carrier Wo-Class Kai flagshipBattleship Ta-Class flagshipBattleship Ta-Class flagshipLight Cruiser He-Class flagshipLight Cruiser Tsu-Class elite
Formation 4: Echelon
AP:176
AS:396
AS+:792
Pattern 2 Standard Carrier Wo-Class Kai flagshipLight Carrier Nu-Class flagshipLight Carrier Nu-Class flagshipBattleship Ta-Class flagshipLight Cruiser He-Class flagshipLight Cruiser Tsu-Class elite
Formation 4: Echelon
AP:231
AS:519
AS+:1038
Pattern 3 Standard Carrier Wo-Class Kai flagshipLight Carrier Nu-Class flagshipBattleship Ta-Class flagshipBattleship Ta-Class flagshipLight Cruiser He-Class flagshipLight Cruiser Tsu-Class elite
Formation 4: Echelon
AP:160
AS:359
AS+:717
T
深海ソロモン派遣 空母任務部隊
Pattern 1 Standard Carrier Wo-Class Kai flagshipStandard Carrier Wo-Class Kai flagshipBattleship Ta-Class flagshipBattleship Ta-Class flagshipLight Cruiser He-Class flagshipLight Cruiser Tsu-Class elite
Formation 4: Echelon
AP:176
AS:396
AS+:792
Pattern 2 Standard Carrier Wo-Class Kai flagshipLight Carrier Nu-Class flagshipLight Carrier Nu-Class flagshipBattleship Ta-Class flagshipLight Cruiser He-Class flagshipLight Cruiser Tsu-Class elite
Formation 4: Echelon
AP:231
AS:519
AS+:1038
Pattern 3 Standard Carrier Wo-Class Kai flagshipLight Carrier Nu-Class flagshipBattleship Ta-Class flagshipBattleship Ta-Class flagshipLight Cruiser He-Class flagshipLight Cruiser Tsu-Class elite
Formation 4: Echelon
AP:160
AS:359
AS+:717
U
深海任務部隊 上陸支援打撃群
Pattern 1 Battleship Re-Class eliteBattleship Re-Class eliteHeavy Cruiser Ne-Class eliteLight Cruiser Tsu-Class eliteDestroyer Ni-Class Kai Late Model eliteDestroyer Ni-Class Kai Late Model elite
Formation 1: Line Ahead
Formation 3: Diamond
AP:143
AS:321
AS+:642
Pattern 2 Battleship Re-Class eliteHeavy Cruiser Ne-Class eliteHeavy Cruiser Ne-Class eliteLight Cruiser Tsu-Class eliteDestroyer Ni-Class Kai Late ModelDestroyer Ni-Class Kai Late Model
Formation 1: Line Ahead
Formation 3: Diamond
AP:72
AS:161
AS+:321
V
リコリス飛行場 基地航空隊
Air Battle Node
Pattern 1 Lycoris Princess
Formation 4: Echelon
AP:80
AS:179
AS+:357
Pattern 2 Lycoris PrincessAirfield PrincessAirfield Princess
Formation 4: Echelon
AP:148
AS:333
AS+:666
Pattern 3 Lycoris PrincessAirfield PrincessAirfield Princess
Formation 4: Echelon
AP:125
AS:281
AS+:561
Pattern 4 Lycoris PrincessAirfield PrincessAirfield PrincessAirfield Princess
Formation 4: Echelon
AP:180
AS:405
AS+:810
Pattern 5 Lycoris PrincessAirfield PrincessAirfield PrincessAirfield Princess
Formation 4: Echelon
AP:171
AS:384
AS+:768
Pattern 6 Lycoris PrincessAirfield Princess
Formation 4: Echelon
AP:102
AS:230
AS+:459
W
深海ブイン攻略任務群 上陸船団
Pattern 1 Transport Ship Wa-Class flagshipTransport Ship Wa-Class eliteTransport Ship Wa-Class eliteLight Cruiser Tsu-Class eliteDestroyer Ni-Class Kai Late ModelDestroyer Ni-Class Kai Late Model
Formation 4: Echelon
Pattern 2 Light Cruiser Tsu-Class eliteDestroyer Ni-Class Kai Late ModelDestroyer Ni-Class Kai Late ModelTransport Ship Wa-Class flagshipTransport Ship Wa-Class eliteTransport Ship Wa-Class elite
Formation 1: Line Ahead
Formation 6: Vanguard
X
Battle Avoided
Pattern 1"Must be my imagination" (battle avoided)

Show/Hide Nodes and Enemy Encounters
Nodes and Enemy Encounters
NodePatternXpNode InfoFormAir
A
リコリス飛行場 基地航空隊
Air Battle Node
Pattern 1 Airfield Princess
Formation 3: Diamond
AP:46
AS:102
AS+:204
Pattern 2 Lycoris Princess
Formation 4: Echelon
AP:80
AS:179
AS+:357
Pattern 3 Lycoris Princess
Formation 4: Echelon
AP:103
AS:231
AS+:462
Pattern 4 Lycoris PrincessAirfield Princess
Formation 4: Echelon
AP:126
AS:282
AS+:564
Pattern 5 Lycoris PrincessAirfield Princess
Formation 4: Echelon
AP:102
AS:230
AS+:459
B
深海潜水艦隊 ラバウル警戒隊
Pattern 1 Submarine So-Class eliteSubmarine So-ClassSubmarine So-Class
Formation 5: Line Abreast
Pattern 2 Submarine So-Class flagshipSubmarine So-ClassSubmarine So-Class
Formation 5: Line Abreast
Pattern 3 Submarine So-Class eliteSubmarine So-ClassSubmarine So-ClassSubmarine So-Class
Formation 3: Diamond
Pattern 4 Submarine So-ClassSubmarine So-ClassSubmarine So-Class
Formation 3: Diamond
Pattern 5 Submarine So-Class flagshipSubmarine So-ClassSubmarine So-ClassSubmarine So-Class
Formation 3: Diamond
C
深海待ち伏せ展開部隊 前衛戦隊
Ambush Node
Pattern 1 Heavy Cruiser Ne-ClassDestroyer Ni-Class Kai Late ModelDestroyer Ni-Class KaiDestroyer Ni-Class Kai
Formation 1: Line Ahead
Formation 3: Diamond
Pattern 2 Heavy Cruiser Ne-ClassDestroyer Ni-Class KaiDestroyer Ni-Class KaiDestroyer I-Class
Formation 3: Diamond
Pattern 3 Heavy Cruiser Ne-ClassDestroyer Ni-Class KaiDestroyer Ni-Class KaiDestroyer Ni-Class Kai
Formation 3: Diamond
D
深海水雷戦隊 前衛警戒隊
Pattern 1 Light Cruiser He-Class flagshipLight Cruiser Tsu-ClassDestroyer I-Class Late ModelDestroyer I-ClassDestroyer I-Class
Formation 1: Line Ahead
Formation 2: Double Line
Formation 3: Diamond
E
Maelstrom Node
Pattern 1Fuel - ?
F
深海水雷戦隊 重雷装隊
Pattern 1 Light Cruiser Ho-Class flagshipTorpedo Cruiser Chi-Class flagshipTorpedo Cruiser Chi-Class flagshipDestroyer I-Class Late ModelDestroyer I-ClassDestroyer I-Class
Formation 1: Line Ahead
Formation 2: Double Line
Formation 3: Diamond
G
Battle Avoided
Pattern 1"Must be my imagination" (battle avoided)
H
Battle Avoided
Pattern 1"Must be my imagination" (battle avoided)
I
深海戦艦部隊 前衛集団
Pattern 1 Battleship Ru-Class flagshipBattleship Ru-Class flagshipDestroyer Ni-Class Kai Late ModelDestroyer Ni-Class Kai Late ModelDestroyer Ni-Class KaiDestroyer Ni-Class Kai
Formation 1: Line Ahead
Formation 2: Double Line
Formation 3: Diamond
J
深海ソロモン艦隊 重巡戦隊 前衛
Pattern 1 Heavy Cruiser Ri-Class flagshipHeavy Cruiser Ri-Class flagshipHeavy Cruiser Ri-Class flagshipDestroyer I-Class Late ModelDestroyer I-Class Late ModelDestroyer I-Class
Formation 1: Line Ahead
Formation 2: Double Line
Formation 3: Diamond
K
深海ソロモン艦隊 重巡戦隊 旗艦
Pattern 1 Heavy Cruiser PrincessHeavy Cruiser Ne-ClassHeavy Cruiser Ne-ClassLight Cruiser Tsu-ClassDestroyer I-Class Late ModelDestroyer I-Class Late Model
Formation 1: Line Ahead
Pattern 2 Heavy Cruiser Princess Final FormHeavy Cruiser Ne-Class eliteHeavy Cruiser Ne-Class eliteLight Cruiser Tsu-ClassDestroyer I-Class Late ModelDestroyer I-Class Late Model
Formation 1: Line Ahead
L
リコリス飛行場 基地航空隊
Air Battle Node
Pattern 1 Airfield Princess
Formation 3: Diamond
AP:46
AS:102
AS+:204
Pattern 2 Lycoris Princess
Formation 4: Echelon
AP:80
AS:179
AS+:357
Pattern 3 Lycoris Princess
Formation 4: Echelon
AP:103
AS:231
AS+:462
Pattern 4 Lycoris PrincessAirfield Princess
Formation 4: Echelon
AP:102
AS:230
AS+:459
Pattern 5 Lycoris PrincessAirfield Princess
Formation 4: Echelon
AP:126
AS:282
AS+:564
M
深海戦艦部隊 水上打撃集団
Pattern 1 Battleship PrincessBattleship PrincessLight Cruiser Tsu-ClassDestroyer Ni-Class Kai Late ModelDestroyer I-ClassDestroyer I-Class
Formation 1: Line Ahead
Formation 2: Double Line
Formation 3: Diamond
N
リコリス飛行場 基地航空隊
Air Battle Node
Pattern 1 Lycoris Princess
Formation 4: Echelon
AP:80
AS:179
AS+:357
Pattern 2 Lycoris PrincessAirfield PrincessAirfield Princess
Formation 4: Echelon
AP:125
AS:281
AS+:561
Pattern 3 Lycoris PrincessAirfield PrincessAirfield Princess
Formation 4: Echelon
AP:148
AS:333
AS+:666
Pattern 4 Airfield PrincessAirfield Princess
Formation 3: Diamond
AP:46
AS:102
AS+:204
Pattern 5 Lycoris PrincessAirfield Princess
Formation 4: Echelon
AP:102
AS:230
AS+:459
O
Battle Avoided
Pattern 1"Must be my imagination" (battle avoided)
P
深海ソロモン艦隊 旗艦展開泊地
Enemy Combined Fleet
Pattern 1 Southern DemonBattleship Ru-Class flagshipBattleship Ru-Class flagshipLight Carrier Nu-Class eliteLight Carrier Nu-Class eliteLight Cruiser Tsu-Class elite
Light Cruiser Ho-Class flagshipDestroyer Na-Class Late ModelTransport Ship Wa-ClassTransport Ship Wa-ClassPT Imp GroupPT Imp Group
Cruising Formation 4: Battle Formation
AP:192
AS:431
AS+:861
Pattern 2 Southern DemonBattleship Ru-Class flagshipBattleship Ru-Class flagshipLight Carrier Nu-Class eliteLight Carrier Nu-Class eliteLight Cruiser Tsu-Class elite
Light Cruiser Ho-Class flagshipDestroyer Na-Class Late ModelDestroyer Na-Class Late ModelTransport Ship Wa-ClassPT Imp GroupPT Imp Group
Cruising Formation 4: Battle Formation
AP:153
AS:344
AS+:687
Q
深海ソロモン配備 魚雷艇集団
Pattern 1 PT Imp GroupPT Imp GroupPT Imp GroupPT Imp GroupPT Imp Group
Formation 3: Diamond
Pattern 2 PT Imp GroupPT Imp GroupPT Imp GroupPT Imp GroupPT Imp Group
Formation 3: Diamond
Pattern 3 PT Imp GroupPT Imp GroupPT Imp GroupPT Imp GroupPT Imp Group
Formation 3: Diamond
Pattern 4 PT Imp GroupPT Imp GroupPT Imp GroupPT Imp GroupPT Imp Group
Formation 3: Diamond
Pattern 5 PT Imp GroupPT Imp GroupPT Imp GroupPT Imp GroupPT Imp Group
Formation 3: Diamond
Pattern 6 PT Imp GroupPT Imp GroupPT Imp GroupPT Imp GroupPT Imp Group
Formation 3: Diamond
R
深海ソロモン派遣 空母任務部隊
Air Battle Node
Pattern 1 Standard Carrier Wo-Class flagshipStandard Carrier Wo-Class flagshipBattleship Ta-Class eliteBattleship Ta-Class eliteLight Cruiser He-Class flagshipLight Cruiser Tsu-Class
Formation 4: Echelon
AP:138
AS:309
AS+:618
Pattern 2 Standard Carrier Wo-Class flagshipLight Carrier Nu-Class eliteLight Carrier Nu-Class eliteBattleship Ta-Class eliteLight Cruiser He-Class flagshipLight Cruiser Tsu-Class
Formation 4: Echelon
AP:161
AS:362
AS+:723
Pattern 3 Standard Carrier Wo-Class flagshipLight Carrier Nu-Class flagshipBattleship Ta-Class eliteBattleship Ta-Class eliteLight Cruiser He-Class flagshipLight Cruiser Tsu-Class
Formation 4: Echelon
AP:120
AS:270
AS+:540
T
深海ソロモン派遣 空母任務部隊
Pattern 1 Standard Carrier Wo-Class flagshipStandard Carrier Wo-Class flagshipBattleship Ta-Class eliteBattleship Ta-Class eliteLight Cruiser He-Class flagshipLight Cruiser Tsu-Class
Formation 4: Echelon
AP:138
AS:309
AS+:618
Pattern 2 Standard Carrier Wo-Class flagshipLight Carrier Nu-Class eliteLight Carrier Nu-Class eliteBattleship Ta-Class eliteLight Cruiser He-Class flagshipLight Cruiser Tsu-Class
Formation 4: Echelon
AP:161
AS:362
AS+:723
Pattern 3 Standard Carrier Wo-Class flagshipLight Carrier Nu-Class flagshipBattleship Ta-Class eliteBattleship Ta-Class eliteLight Cruiser He-Class flagshipLight Cruiser Tsu-Class
Formation 4: Echelon
AP:120
AS:270
AS+:540
U
深海任務部隊 上陸支援打撃群
Pattern 1 Battleship Re-ClassBattleship Re-ClassHeavy Cruiser Ne-ClassLight Cruiser Tsu-ClassDestroyer Ni-Class Kai Late ModelDestroyer Ni-Class Kai Late Model
Formation 1: Line Ahead
Formation 3: Diamond
AP:126
AS:282
AS+:564
Pattern 2 Battleship Re-ClassHeavy Cruiser Ne-ClassLight Cruiser Tsu-ClassDestroyer Ni-Class Kai Late ModelDestroyer Ni-Class KaiDestroyer Ni-Class Kai
Formation 1: Line Ahead
Formation 3: Diamond
AP:63
AS:141
AS+:282
V
リコリス飛行場 基地航空隊
Air Battle Node
Pattern 1 Airfield Princess
Formation 5: Line Abreast
AP:32
AS:72
AS+:144
Pattern 2 Lycoris Princess
Formation 4: Echelon
AP:80
AS:179
AS+:357
Pattern 3 Lycoris PrincessAirfield PrincessAirfield Princess
Formation 4: Echelon
AP:125
AS:281
AS+:561
Pattern 4 Lycoris PrincessAirfield PrincessAirfield Princess
Formation 4: Echelon
AP:148
AS:333
AS+:666
Pattern 5 Lycoris PrincessAirfield Princess
Formation 4: Echelon
AP:102
AS:230
AS+:459
Pattern 6 Airfield PrincessAirfield Princess
Formation 3: Diamond
AP:46
AS:102
AS+:204
W
深海ブイン攻略任務群 上陸船団
Pattern 1 Transport Ship Wa-Class flagshipTransport Ship Wa-ClassTransport Ship Wa-ClassLight Cruiser Tsu-Class eliteDestroyer Ni-Class KaiDestroyer Ni-Class Kai
Formation 1: Line Ahead
Formation 4: Echelon
Formation 6: Vanguard
X
Battle Avoided
Pattern 1"Must be my imagination" (battle avoided)

Show/Hide Nodes and Enemy Encounters
Nodes and Enemy Encounters
NodePatternXpNode InfoFormAir
A
リコリス飛行場 基地航空隊
Air Battle Node
Pattern 1 Airfield Princess
Formation 3: Diamond
AP:23
AS:51
AS+:102
Pattern 2 Airfield Princess
Formation 5: Line Abreast
AP:32
AS:72
AS+:144
Pattern 3 Airfield Princess
Formation 3: Diamond
AP:46
AS:102
AS+:204
Pattern 4 Lycoris Princess
Formation 4: Echelon
AP:80
AS:179
AS+:357
Pattern 5 Lycoris Princess
Formation 4: Echelon
AP:103
AS:231
AS+:462
B
深海潜水艦隊 ラバウル警戒隊
Pattern 1 Submarine So-Class
Formation 3: Diamond
Pattern 2 Submarine So-ClassSubmarine So-ClassSubmarine So-Class
Formation 3: Diamond
Pattern 3 Submarine So-Class eliteSubmarine So-ClassSubmarine So-Class
Formation 5: Line Abreast
Pattern 4 Submarine So-ClassSubmarine So-Class
Formation 5: Line Abreast
C
深海待ち伏せ展開部隊 前衛戦隊
Ambush Node
Pattern 1 Heavy Cruiser Ne-ClassDestroyer Ni-Class KaiDestroyer Ni-Class KaiDestroyer I-Class
Formation 3: Diamond
Pattern 2 Heavy Cruiser Ne-ClassDestroyer Ni-Class KaiDestroyer Ni-Class KaiDestroyer Ni-Class Kai
Formation 3: Diamond
Pattern 3 Heavy Cruiser Ne-ClassDestroyer Ni-Class KaiDestroyer I-ClassDestroyer I-Class
Formation 3: Diamond
Pattern 4 Heavy Cruiser Ne-ClassDestroyer Ni-Class Kai Late ModelDestroyer Ni-Class KaiDestroyer Ni-Class Kai
Formation 3: Diamond
D
深海水雷戦隊 前衛警戒隊
Pattern 1 Light Cruiser Tsu-ClassDestroyer I-Class Late ModelDestroyer I-ClassDestroyer I-ClassDestroyer I-Class
Formation 1: Line Ahead
Formation 2: Double Line
Formation 3: Diamond
Pattern 2 Light Cruiser He-Class flagshipLight Cruiser Tsu-ClassDestroyer I-Class Late ModelDestroyer I-ClassDestroyer I-Class
Formation 2: Double Line
Formation 3: Diamond
E
Maelstrom Node
Pattern 1Fuel - ?
F
深海水雷戦隊 重雷装隊
Pattern 1 Light Cruiser Ho-Class flagshipTorpedo Cruiser Chi-Class eliteTorpedo Cruiser Chi-Class eliteDestroyer I-Class Late ModelDestroyer I-ClassDestroyer I-Class
Formation 1: Line Ahead
Formation 2: Double Line
Formation 3: Diamond
Pattern 2 Light Cruiser Ho-Class flagshipTorpedo Cruiser Chi-Class flagshipTorpedo Cruiser Chi-Class flagshipDestroyer I-Class Late ModelDestroyer I-ClassDestroyer I-Class
Formation 2: Double Line
Formation 3: Diamond
G
Battle Avoided
Pattern 1"Must be my imagination" (battle avoided)
H
Battle Avoided
Pattern 1"Must be my imagination" (battle avoided)
I
深海戦艦部隊 前衛集団
Pattern 1 Battleship Ru-Class flagshipBattleship Ru-Class eliteDestroyer Ni-Class KaiDestroyer Ni-Class KaiDestroyer I-ClassDestroyer I-Class
Formation 1: Line Ahead
Formation 2: Double Line
Pattern 2 Battleship Ru-Class flagshipBattleship Ru-Class flagshipDestroyer Ni-Class Kai Late ModelDestroyer Ni-Class Kai Late ModelDestroyer Ni-Class KaiDestroyer Ni-Class Kai
Formation 2: Double Line
Formation 3: Diamond
J
深海ソロモン艦隊 重巡戦隊 前衛
Pattern 1 Heavy Cruiser Ri-Class flagshipHeavy Cruiser Ri-Class eliteHeavy Cruiser Ri-Class eliteDestroyer I-Class Late ModelDestroyer I-ClassDestroyer I-Class
Formation 1: Line Ahead
Formation 2: Double Line
Formation 3: Diamond
Pattern 2 Heavy Cruiser Ri-Class flagshipHeavy Cruiser Ri-Class flagshipHeavy Cruiser Ri-Class flagshipDestroyer I-Class Late ModelDestroyer I-Class Late ModelDestroyer I-Class
Formation 2: Double Line
Formation 3: Diamond
K
深海ソロモン艦隊 重巡戦隊 旗艦
Pattern 1 Heavy Cruiser PrincessHeavy Cruiser Ne-ClassHeavy Cruiser Ne-ClassLight Cruiser Tsu-ClassDestroyer I-ClassDestroyer I-Class
Formation 1: Line Ahead
Pattern 2 Heavy Cruiser Princess Final FormHeavy Cruiser Ne-ClassHeavy Cruiser Ne-ClassLight Cruiser Tsu-ClassDestroyer I-Class Late ModelDestroyer I-Class Late Model
Formation 1: Line Ahead
L
リコリス飛行場 基地航空隊
Air Battle Node
Pattern 1 Airfield Princess
Formation 3: Diamond
AP:23
AS:51
AS+:102
Pattern 2 Airfield Princess
Formation 5: Line Abreast
AP:32
AS:72
AS+:144
Pattern 3 Airfield Princess
Formation 3: Diamond
AP:46
AS:102
AS+:204
Pattern 4 Lycoris Princess
Formation 4: Echelon
AP:80
AS:179
AS+:357
Pattern 5 Lycoris Princess
Formation 4: Echelon
AP:103
AS:231
AS+:462
M
深海戦艦部隊 水上打撃集団
Pattern 1 Battleship PrincessDestroyer Ni-Class KaiDestroyer Ni-Class KaiDestroyer Ni-Class KaiDestroyer I-ClassDestroyer I-Class
Formation 1: Line Ahead
Formation 2: Double Line
Formation 3: Diamond
Pattern 2 Battleship PrincessBattleship PrincessLight Cruiser Tsu-ClassDestroyer Ni-Class Kai Late ModelDestroyer I-ClassDestroyer I-Class
Formation 2: Double Line
Formation 3: Diamond
N
リコリス飛行場 基地航空隊
Air Battle Node
Pattern 1 Airfield Princess
Formation 3: Diamond
AP:23
AS:51
AS+:102
Pattern 2 Airfield Princess
Formation 5: Line Abreast
AP:32
AS:72
AS+:144
Pattern 3 Lycoris Princess
Formation 4: Echelon
AP:80
AS:179
AS+:357
Pattern 4 Lycoris PrincessAirfield Princess
Formation 4: Echelon
AP:102
AS:230
AS+:459
Pattern 5 Airfield PrincessAirfield Princess
Formation 3: Diamond
AP:46
AS:102
AS+:204
O
Battle Avoided
Pattern 1"Must be my imagination" (battle avoided)
P
深海ソロモン艦隊 旗艦展開泊地
Enemy Combined Fleet
Pattern 1 Southern DemonBattleship Ru-Class eliteBattleship Ru-Class eliteLight Carrier Nu-Class eliteLight Carrier Nu-Class eliteLight Cruiser Tsu-Class
Destroyer Na-Class Late ModelDestroyer Na-Class Late ModelTransport Ship Wa-ClassTransport Ship Wa-ClassTransport Ship Wa-ClassPT Imp Group
Cruising Formation 4: Battle Formation
AP:192
AS:431
AS+:861
Pattern 2 Southern DemonBattleship Ru-Class flagshipBattleship Ru-Class flagshipLight Carrier Nu-Class eliteLight Carrier Nu-Class eliteLight Cruiser Tsu-Class
Light Cruiser Ho-Class flagshipDestroyer Na-Class Late ModelTransport Ship Wa-ClassTransport Ship Wa-ClassPT Imp GroupPT Imp Group
Cruising Formation 4: Battle Formation
AP:192
AS:431
AS+:861
Q
深海ソロモン配備 魚雷艇集団
Pattern 1 PT Imp GroupPT Imp GroupPT Imp GroupPT Imp GroupPT Imp Group
Formation 3: Diamond
Pattern 2 PT Imp GroupPT Imp GroupPT Imp GroupPT Imp GroupPT Imp Group
Formation 3: Diamond
Pattern 3 PT Imp GroupPT Imp GroupPT Imp GroupPT Imp Group
Formation 3: Diamond
Pattern 4 PT Imp GroupPT Imp GroupPT Imp GroupPT Imp GroupPT Imp Group
Formation 3: Diamond
Pattern 5 PT Imp GroupPT Imp GroupPT Imp GroupPT Imp GroupPT Imp Group
Formation 3: Diamond
R
深海ソロモン派遣 空母任務部隊
Air Battle Node
Pattern 1 Standard Carrier Wo-Class flagshipLight Carrier Nu-Class eliteBattleship Ta-Class eliteBattleship Ta-ClassLight Cruiser He-Class flagshipLight Cruiser Tsu-Class
Formation 4: Echelon
AP:85
AS:191
AS+:381
Pattern 2 Standard Carrier Wo-Class flagshipStandard Carrier Wo-Class eliteBattleship Ta-Class eliteBattleship Ta-ClassLight Cruiser He-Class flagshipLight Cruiser Tsu-Class
Formation 4: Echelon
AP:87
AS:195
AS+:390
Pattern 3 Standard Carrier Wo-Class flagshipLight Carrier Nu-Class eliteLight Carrier Nu-Class eliteBattleship Ta-ClassBattleship Ta-ClassLight Cruiser Tsu-Class
Formation 4: Echelon
AP:101
AS:227
AS+:453
Pattern 4 Standard Carrier Wo-Class flagshipLight Carrier Nu-Class eliteLight Carrier Nu-Class eliteBattleship Ta-Class eliteLight Cruiser He-Class flagshipLight Cruiser Tsu-Class
Formation 4: Echelon
AP:161
AS:362
AS+:723
T
深海ソロモン派遣 空母任務部隊
Pattern 1 Standard Carrier Wo-Class flagshipLight Carrier Nu-Class eliteBattleship Ta-Class eliteBattleship Ta-ClassLight Cruiser He-Class flagshipLight Cruiser Tsu-Class
Formation 4: Echelon
AP:85
AS:191
AS+:381
Pattern 2 Standard Carrier Wo-Class flagshipStandard Carrier Wo-Class eliteBattleship Ta-Class eliteBattleship Ta-ClassLight Cruiser He-Class flagshipLight Cruiser Tsu-Class
Formation 4: Echelon
AP:87
AS:195
AS+:390
Pattern 3 Standard Carrier Wo-Class flagshipLight Carrier Nu-Class eliteLight Carrier Nu-Class eliteBattleship Ta-Class eliteLight Cruiser He-Class flagshipLight Cruiser Tsu-Class
Formation 4: Echelon
AP:161
AS:362
AS+:723
Pattern 4 Standard Carrier Wo-Class flagshipLight Carrier Nu-Class eliteLight Carrier Nu-Class eliteBattleship Ta-ClassBattleship Ta-ClassLight Cruiser Tsu-Class
Formation 4: Echelon
AP:101
AS:227
AS+:453
U
深海任務部隊 上陸支援打撃群
Pattern 1 Battleship Re-ClassHeavy Cruiser Ne-ClassLight Cruiser Tsu-ClassDestroyer Ni-Class Kai Late ModelDestroyer Ni-Class KaiDestroyer Ni-Class Kai
Formation 1: Line Ahead
Formation 3: Diamond
AP:63
AS:141
AS+:282
Pattern 2 Battleship Re-ClassHeavy Cruiser Ne-ClassDestroyer Ni-Class KaiDestroyer Ni-Class KaiDestroyer I-ClassDestroyer I-Class
Formation 3: Diamond
AP:63
AS:141
AS+:282
V
リコリス飛行場 基地航空隊
Air Battle Node
Pattern 1 Airfield Princess
Formation 3: Diamond
AP:23
AS:51
AS+:102
Pattern 2 Airfield Princess
Formation 5: Line Abreast
AP:32
AS:72
AS+:144
Pattern 3 Lycoris Princess
Formation 4: Echelon
AP:80
AS:179
AS+:357
Pattern 4 Airfield PrincessAirfield Princess
Formation 3: Diamond
AP:46
AS:102
AS+:204
Pattern 5 Lycoris PrincessAirfield Princess
Formation 4: Echelon
AP:102
AS:230
AS+:459
W
深海ブイン攻略任務群 上陸船団
Pattern 1 Transport Ship Wa-Class eliteTransport Ship Wa-ClassTransport Ship Wa-ClassLight Cruiser Tsu-ClassDestroyer Ni-Class KaiDestroyer Ni-Class Kai
Formation 1: Line Ahead
Formation 4: Echelon
Formation 6: Vanguard
Pattern 2 Transport Ship Wa-Class flagshipTransport Ship Wa-ClassTransport Ship Wa-ClassLight Cruiser Tsu-Class eliteDestroyer Ni-Class KaiDestroyer Ni-Class Kai
Formation 1: Line Ahead
Formation 6: Vanguard
X
Battle Avoided
Pattern 1"Must be my imagination" (battle avoided)

Show/Hide Nodes and Enemy Encounters
Nodes and Enemy Encounters
NodePatternXpNode InfoFormAir
A
リコリス飛行場 基地航空隊
Air Battle Node
Pattern 1 Airfield Princess
Formation 3: Diamond
AP:23
AS:51
AS+:102
Pattern 2 Airfield Princess
Formation 5: Line Abreast
AP:32
AS:72
AS+:144
Pattern 3 Airfield Princess
Formation 3: Diamond
AP:46
AS:102
AS+:204
B
深海潜水艦隊 ラバウル警戒隊
Pattern 1 Submarine So-Class
Formation 3: Diamond
Pattern 2 Submarine So-ClassSubmarine So-Class
Formation 5: Line Abreast
Pattern 3 Submarine So-ClassSubmarine So-ClassSubmarine So-Class
Formation 3: Diamond
D
深海水雷戦隊 前衛警戒隊
Pattern 1 Light Cruiser Tsu-ClassDestroyer I-Class Late ModelDestroyer I-ClassDestroyer I-ClassDestroyer I-Class
Formation 1: Line Ahead
Formation 2: Double Line
Formation 3: Diamond
E
Maelstrom Node
Pattern 1Fuel - ?
F
深海水雷戦隊 重雷装隊
Pattern 1 Light Cruiser Ho-Class flagshipTorpedo Cruiser Chi-Class eliteTorpedo Cruiser Chi-Class eliteDestroyer I-Class Late ModelDestroyer I-ClassDestroyer I-Class
Formation 1: Line Ahead
Formation 2: Double Line
Formation 3: Diamond
G
Battle Avoided
Pattern 1"Must be my imagination" (battle avoided)
H
Battle Avoided
Pattern 1"Must be my imagination" (battle avoided)
I
深海戦艦部隊 前衛集団
Pattern 1 Battleship Ru-Class flagshipBattleship Ru-Class eliteDestroyer Ni-Class KaiDestroyer Ni-Class KaiDestroyer I-ClassDestroyer I-Class
Formation 1: Line Ahead
Formation 2: Double Line
Formation 3: Diamond
J
深海ソロモン艦隊 重巡戦隊 前衛
Pattern 1 Heavy Cruiser Ri-Class flagshipHeavy Cruiser Ri-Class eliteHeavy Cruiser Ri-Class eliteDestroyer I-Class Late ModelDestroyer I-ClassDestroyer I-Class
Formation 1: Line Ahead
Formation 2: Double Line
Formation 3: Diamond
K
深海ソロモン艦隊 重巡戦隊 旗艦
Pattern 1 Heavy Cruiser PrincessHeavy Cruiser Ne-ClassDestroyer I-Class Late ModelDestroyer I-ClassDestroyer I-Class
Formation 1: Line Ahead
Pattern 2 Heavy Cruiser PrincessHeavy Cruiser Ne-ClassDestroyer I-Class Late ModelDestroyer I-ClassDestroyer I-ClassDestroyer I-Class
Formation 1: Line Ahead
Pattern 3 Heavy Cruiser Princess Final FormHeavy Cruiser Ne-ClassDestroyer I-Class Late ModelDestroyer I-ClassDestroyer I-ClassDestroyer I-Class
Formation 1: Line Ahead
L
リコリス飛行場 基地航空隊
Air Battle Node
Pattern 1 Airfield Princess
Formation 3: Diamond
AP:23
AS:51
AS+:102
Pattern 2 Airfield Princess
Formation 5: Line Abreast
AP:32
AS:72
AS+:144
Pattern 3 Airfield Princess
Formation 3: Diamond
AP:46
AS:102
AS+:204
M
深海戦艦部隊 水上打撃集団
Pattern 1 Battleship PrincessDestroyer Ni-Class KaiDestroyer Ni-Class KaiDestroyer Ni-Class KaiDestroyer I-ClassDestroyer I-Class
Formation 1: Line Ahead
Formation 2: Double Line
Formation 3: Diamond
N
リコリス飛行場 基地航空隊
Air Battle Node
Pattern 1 Airfield Princess
Formation 3: Diamond
AP:23
AS:51
AS+:102
Pattern 2 Airfield Princess
Formation 5: Line Abreast
AP:32
AS:72
AS+:144
Pattern 3 Airfield PrincessAirfield Princess
Formation 3: Diamond
AP:46
AS:102
AS+:204
O
Battle Avoided
Pattern 1"Must be my imagination" (battle avoided)
P
深海ソロモン艦隊 旗艦展開泊地
Enemy Combined Fleet
Pattern 1 Southern DemonBattleship Ru-Class eliteBattleship Ru-Class eliteLight Carrier Nu-Class eliteLight Carrier Nu-Class eliteLight Cruiser Tsu-Class
Destroyer Na-Class Late ModelDestroyer I-ClassTransport Ship Wa-ClassTransport Ship Wa-ClassTransport Ship Wa-ClassPT Imp Group
Cruising Formation 4: Battle Formation
AP:56
AS:125
AS+:249
Pattern 2 Southern DemonBattleship Ru-Class eliteBattleship Ru-Class eliteLight Carrier Nu-Class eliteLight Carrier Nu-Class eliteLight Cruiser Tsu-Class
Destroyer Na-Class Late ModelDestroyer Na-Class Late ModelTransport Ship Wa-ClassTransport Ship Wa-ClassPT Imp GroupPT Imp Group
Cruising Formation 4: Battle Formation
AP:124
AS:278
AS+:555
Q
深海ソロモン配備 魚雷艇集団
Pattern 1 PT Imp GroupPT Imp GroupPT Imp GroupPT Imp Group
Formation 3: Diamond
Pattern 2 PT Imp GroupPT Imp GroupPT Imp GroupPT Imp GroupPT Imp Group
Formation 3: Diamond
Pattern 3 PT Imp GroupPT Imp GroupPT Imp GroupPT Imp GroupPT Imp Group
Formation 3: Diamond
R
深海ソロモン派遣 空母任務部隊
Air Battle Node
Pattern 1 Standard Carrier Wo-Class flagshipLight Carrier Nu-Class eliteLight Carrier Nu-Class eliteBattleship Ta-ClassBattleship Ta-ClassLight Cruiser Tsu-Class
Formation 4: Echelon
AP:101
AS:227
AS+:453
Pattern 2 Standard Carrier Wo-Class flagshipLight Carrier Nu-Class eliteBattleship Ta-Class eliteBattleship Ta-ClassLight Cruiser He-Class flagshipLight Cruiser Tsu-Class
Formation 4: Echelon
AP:85
AS:191
AS+:381
Pattern 3 Standard Carrier Wo-Class flagshipStandard Carrier Wo-Class eliteBattleship Ta-Class eliteBattleship Ta-ClassLight Cruiser He-Class flagshipLight Cruiser Tsu-Class
Formation 4: Echelon
AP:87
AS:195
AS+:390
T
深海ソロモン派遣 空母任務部隊
Pattern 1 Standard Carrier Wo-Class flagshipLight Carrier Nu-Class eliteLight Carrier Nu-Class eliteBattleship Ta-ClassBattleship Ta-ClassLight Cruiser Tsu-Class
Formation 4: Echelon
AP:101
AS:227
AS+:453
Pattern 2 Standard Carrier Wo-Class flagshipLight Carrier Nu-Class eliteBattleship Ta-Class eliteBattleship Ta-ClassLight Cruiser He-Class flagshipLight Cruiser Tsu-Class
Formation 4: Echelon
AP:85
AS:191
AS+:381
Pattern 3 Standard Carrier Wo-Class flagshipStandard Carrier Wo-Class eliteBattleship Ta-Class eliteBattleship Ta-ClassLight Cruiser He-Class flagshipLight Cruiser Tsu-Class
Formation 4: Echelon
AP:87
AS:195
AS+:390
U
深海任務部隊 上陸支援打撃群
Pattern 1 Battleship Re-ClassHeavy Cruiser Ne-ClassLight Cruiser Tsu-ClassDestroyer Ni-Class Kai Late ModelDestroyer Ni-Class KaiDestroyer Ni-Class Kai
Formation 1: Line Ahead
Formation 3: Diamond
AP:63
AS:141
AS+:282
Pattern 2 Battleship Re-ClassHeavy Cruiser Ne-ClassDestroyer Ni-Class KaiDestroyer Ni-Class KaiDestroyer I-ClassDestroyer I-Class
Formation 3: Diamond
AP:63
AS:141
AS+:282
V
リコリス飛行場 基地航空隊
Air Battle Node
Pattern 1 Airfield Princess
Formation 3: Diamond
AP:23
AS:51
AS+:102
Pattern 2 Airfield Princess
Formation 5: Line Abreast
AP:32
AS:72
AS+:144
Pattern 3 Airfield PrincessAirfield Princess
Formation 3: Diamond
AP:46
AS:102
AS+:204
W
深海ブイン攻略任務群 上陸船団
Pattern 1 Transport Ship Wa-Class eliteTransport Ship Wa-ClassTransport Ship Wa-ClassLight Cruiser Tsu-ClassDestroyer Ni-Class KaiDestroyer Ni-Class Kai
Formation 1: Line Ahead
Formation 4: Echelon
Formation 6: Vanguard
X
Battle Avoided
Pattern 1"Must be my imagination" (battle avoided)

Ship drops

NodeShip List
ADestroyers
Light Cruisers
EDestroyers
Light Cruisers
Light Aircraft Carriers
Seaplane Tenders
FDestroyer Escorts
Destroyers
Light Cruisers
Light Aircraft Carriers
Seaplane Tenders
Auxiliary Ships
GDestroyers
Light Cruisers
IDestroyers
Light Cruisers
Heavy Cruisers
Battleships
Light Aircraft Carriers
Seaplane Tenders
Submarines


E-3

OoyodoE-3Winter2019.png

Southern Seas 4th Garrison Reinforcement Operation
No map name yet

Information

  • Event Tag: YellowTagWinter2019.png

Boss:

  • Hard ():
  • Medium ():
  • Easy ():
  • Casual ():

Key Rewards:

Winter 2019 Event E-3 Banner.png
Winter2019E-3Map.png

Branching rules

E-3 Branching Rules
Nodes Rules
A
C
  • Active branching
F
C
D
  • Do not meet the requirements to go to either F or G.
F
  • Single Fleet
G
  • Meet ALL of the following requirements:
    • Combined Fleet
    • Player is on Casual or Easy difficulty.
E
B
  • Do not meet the requirements to go to either H or I.
H
  • Meet ALL of the following requirements:
    • Amount of ships with Surface Radars equipped ≥ 0/3/4/5 on Casual/Easy/Medium/Hard
    • Amount of DD ≥ 2 (Easy+)
    • Amount of (F)BB(V)+CV(L/B) ≤ 3
    • Do not meet the requirements to go to I.
I
  • Meet ALL of the following requirements:
    • Amount of ships with Surface Radars equipped ≥ 0/3/4/5 on Casual/Easy/Medium/Hard
    • Fleet must contain a CL.
    • Amount of DD ≥ 2
    • Amount of CV(L/B) ≤ 2
G
J
  • Active branching
K
K
N
  • Meet ALL of the following requirements:
    • Single Fleet
    • No SS(V)
O
  • Do not meet the requirements to go to N.
O
N
  • Do not meet the requirements to go to T.
T
  • Meet ALL of the following requirements:
    • Node T is unlocked.
    • Carrier/Surface Task Force
Q
P
  • Amount of ships with Surface Radars equipped ≥ 0/1/3? on Casual/Easy/Medium+
R
  • Do not meet the requirements to go to P.
P
M
  • Fail the LoS check.
S
  • Pass the LoS check.
T
U
  • Meet ALL of the following requirements to go to ZZ:
    • Node ZZ is unlocked.
    • Flagship of the Main Fleet has a Surface Radar equipped.
    • Amount of (F)BB(V)+CV(L/B) ≤ 3
    • Amount of ships with Surface Radars equipped ≥ 6
  • Else, random routing between ZZ, U or V.
    • Having less Surface Radars equipped increases your chance of going to U if you fail to go to ZZ.
V
ZZ
V
X
  • Fail the LoS check.
Z
  • Pass the LoS check.
W
Y
  • Fail the LoS check.
Z
  • Pass the LoS check.

Branching compositions were reported over the course of the event.

Tips
The following guide is an early version of the guide. Please use at your own discretion until it is further updated.

In this map, you will be taking a large number of tasks in order to complete this operation. Depending on the difficulty, different things will be required in order to complete the map. Below are the following main conditions you'll need to complete in order to successfully complete this operation:

  1. Complete the Transport Operation
  2. Unlocking ZZ Node and improving the Buffing the Abyssal Sun Princess weakness debuff
    • Complete the Air Node requirements
    • Gain Perfect Defense Twice
    • Defeat the Southern War Princess Fleet with an S rank
  3. Defeat the Abyssal Sun Princess

In addition to this,there are also a sizeable team of historical ships that are tied to the area which are strong at both nodes boss nodes Which includes the following:

E-3 (Pre ZZ/Post ZZ Unlock)

Phase 1 - Complete the Transport Operation

Recommended Fleet

  • 1CAV, 1CL, 4DD (0/3/4/5 Surface Radar)
  • 2CA(V), 1 CL, 3DD (0/3/4/5 Surface Radar)
  • 1CV, 1CL, 4DD (0/3/4/5 Surface Radar)

Path: A-F-E-I-L-S-P

Recommended LBAS

Node E and/or L (LBAS 1)

  • 4 Torpedo Bombers/4 Land Base Bombers (Distance of 3 or 5 Required)

Node S Boss Node (LBAS 2+3)

  • 1 Fighter + 3 Torpedo Bombers/3 Land Base Bombers (LBAS 2) (Distance of 7 required)
  • 4 Torpedo Bombers/4 Land Base Bombers (LBAS 3) (Distance of 7 required)

During the Transport Operation, your fleet will have to go through several air node battles where AACI will be needed. In addition to this, your fleet will engage against a few surface battles where you face several Destroyers, Light Cruisers, and Heavy Cruisers. Depending on the fleet you go either line ahead or vanguard formation.

As long as you bring the required surface radars (0/3/4/5) to you should be able to avoid the ambush node.

Most of the comp as long as you bring 1CL and 3 DD should reach the boss fleet but otherwise depending on what other ships you bring may affect how much TP you gain from the map.

A general recommendation is to bring at least 2-3 ships that can carry drums and Daihatsu while keeping the other ships with a suitable amount of combat and LoS gear.

You will need a considerable amount of LoS gear (2 seaplane scouts + 5 radars noted in hard) to be able to route to the boss.

The boss node will consist of a Southern Princess along with some Tsu-class CL, and some DDs. Bringing at least 1 fighter plane in your LBAS should help net an easy AS if you bring a ship that can bring a single fighter into battle. All other LBAS planes can focus on bombing and should be able to wipe out most of the enemy ships in the fleet.

A good strong historical bonus ship team or Torpedo Cut in should be effective in taking down the boss without minimal effort. With enough TP it should be possible to clear the first part in several runs.

Once the TP gauge is depleted the path to the next boss will be open.

Phase 2 - Unlocking the Path to ZZ

In this segment, you will be mainly using your fleet to complete a large series of tasks which will require you to change your fleet across sections along with your LBAS to meet specific requirements so you can meet the following conditions:

    • Complete the Air Node requirements
    • Gain Perfect Defense at your Land Base Once/Twice
    • Defeat the Southern War Princess Fleet with an S rank

Each of these conditions will vary upon difficulty and will ask you to successfully complete them if you wish to unlock the shortcuts.

Part 1 - Scoring an S rank against the Southern War Princess in Node S


Fleet and LBAS Recommendations

Same as Phase 1

Path: A-F-E-I-L-S-P

For defeating the Southern War Princess in this segment, all process is done the same way as you would do in the transport segment except you won't need drums or Daihatsu as you are past this segment. All process be the same and bringing boss node support may help complete the process faster.

Part 2 - Complete the Air Node requirements

In this segment, you will be taking your fleet to various air nodes and depending on the difficulty you will need to complete the following conditions:

Score Air Supremacy on the following nodes:

  • Casual: Nodes F and K
  • Easy: Nodes D,F,I,K, and T
  • Normal: Nodes D,F,I,K,N and T
  • Hard: Nodes D,F,I,K,N,T, and *U

*Node U only need Air Superiority

Submarine Approach (for nodes D, F, I, K, N, and T)

Recommended Fleet

  • 5-6 SS(V) (4 SSV recommended)

Recommended LBAS

LBAS 1-3

  • 4 Fighters (Up to a Range of 5 needed)


Path:

  • A-F-E-B-H-I
  • A-C-D-G-K-O-N
  • A-C-D-G-J-T

This method is recommended for players who own a large number of seaplane fighters (about 7-8 for Hard) and want to successfully complete most of the requirements without having to blow through a large number of resources doing so.

Most of the nodes should be reachable with submarines and for hard mode can cover almost all major node points with the except for Node U.

This method will require multiple runs with all your LBAS concentrating on one point per run to successfully score AS+. If done correctly, your subs should easily gain AS+ with the 7-8 Seaplane fighters. Once done, retreat and repeat at each node until all conditions are met in set locations

Additional Notes to be taken are:

Be warned that an all submarine fleet has the risk of going to Node B from Node E While the enemy DDs will show animations of them shelling your subs, the damage they will do to your fleet will be the same as an ASW attack. It's highly recommended to not take your submarines past node E if they are critically damaged, as they will be at risk of sinking!

All other nodes (Besides U) can be reachable by subs and can get there without the risk of sinking (besides Node I's path which is the only one that presents the risk of possible sinking.)

Single Fleet Air Control Approach (Node F and I)

Recommended Fleet

  • 1CV, 1CAV 1CL, 3DD (0/3/4/5 Surface Radar)

Path:

  • A-F-E-I

Recommended LBAS

LBAS 1-3

  • 4 Fighters (Up to a Range of 5 needed)

This will have your fleet take the very same path as you took in the prior path during the transport phase, the only main difference is you'll be using a fighter mule fleet to gain AS on the nodes F and I. By bringing enough fighter planes, this should be easily achieved once you get past node E.

Carrier Task Force Air Control Approach (Node D, K, T, and U)

Recommended Fleet

  • Carrier Task Force
    • 4CV(B), 2BB + 1 CL, 2DD, 3XX

Path:

  • A-C-D-G-K
  • A-C-D-G-J-T-U

Recommended LBAS

LBAS 1-3

  • 4 Fighters (Up to a Range of 6 needed)

With this method, using a fleet of standard carriers or armored carriers will allow your fleet to bring a significant amount of air power without having to resort to organizing a set of carriers as fighter mules. If you use them along with an LBAS or 2, you can gain AS from almost all the nodes along the path.

Your two major threats will be the New Submarine Princess and the Surface Fleet on Node J. So if necessary, bring in some pre-ASW capable ships to help make your way through node C and hope the enemy fleet you engage in node J is not present in a line ahead formation and the likely hood you'll survive the route to reach all the major node points will be easily achieved.

Transport Combined Fleet Air Control Approach (Node N)

Recommended Fleet

  • Transport Combined Fleet
    • (2BBV/2CAV/1AV,CVL), 4DD + 1 CL, 3DD, 2XX

Path:

  • A-C-D-G-K-O-N

Recommended LBAS

LBAS 1-3

  • 4 Fighters (Up to a Range of 5 needed)

Arguably the most difficult path you will need to face in the map. The main threats of this map will be Nodes C and O. Which will have a New Submarine Princess (Node C) and Battleship Princess (Node O)

Your (2BBV/2CAV/1AV,CVL) will need to be full fighter mules and bringing a team of per-emptive ASW DD/DEs can help you survive the trip along the ways. However, the battleship princess node will present the biggest issue as their fleet will likely be able to land hits on your ships and the risk of possible critical damage is strong, especially for the main fleet. Hope you get by with moderate damage or use damage control as a form of insurance on some ships to take the move to Node N.

Bringing In route support can be recommended to help reduce the likely hood that the enemy DDs in the fleet will present a risk.

If you brought all your fighter planes and LBAS fighters to this node, gaining AS+ should make this an easily done.


Part 3 - Scoring Perfect Defense on the Land Base Air Strike

Recommended Fleet

  • 5-6 XX (submarines preferred)


Recommended LBAS

LBAS 1-3

  • 4 Interceptors/Fighters

In this segment, you will simply need to get a Successful Perfect Defense on the Land Base Air Raid (Once on Easy or lower/ Twice on Normal or Higher) Just take your fleet out until the air raid siren play which will cue the LBAS air raid, hope your interceptors and fighters wipe out or eliminate all incoming planes and you get a White Text indicating you successfully defended your base. Repeat if necessary until conditions are met.

Once all conditions are met, the path to ZZ is open and most of the ships with historical buffs will become much stronger following the unlocking.


Phase 3 - Killing the Abyssal Sun Princess]

Recommended Fleet'

  • Surface Task Force
    • 2-3 BB,0-1CV,2-3 CAV,0-1 AV, 0-1 LAH + 1 CL, 2CA, 0-1 CLT, 2-3 DD (3/4/5/6 Surface Radars)
    • 2-3 BB,0-1CV,1-2 CAV,0-1 AV,,0-1 CVL, 0-1 LAH + 1 CL, 2CA, 0-1 CLT, 2-3 DD (6/7/8/9 Surface Radars)

Path:
A-C-D-G-J-T-ZZ-Z

  • Carrier Task Force
    • 2 BB, 4CV + 1 CL, 2-3 XX, 2-3 DD

Path:
A-C-D-G-J-T-U-W-Z

Recommended LBAS

ASW LBAS (Node C and ZZ) (Optional, but recommended)

  • LBAS 1
    • 3-4 Toukai/3 ASW Bombers + 1 Flying Boat (Range 7 Required)

Boss Node LBAS

  • LBAS 1-3
  • LBAS #1 and #2
    • 2 Fighters + 1 Land Base Bomber + 1 Flying boat / Land Base Recon Plane (Range 8 Required)


  • LBAS #3
    • 1 Fighters + 2 Land Base Bomber + 1 Flying boat / Land Base Recon Plane (Range 8 Required)

Regarding Surface Task Force Method

In this final phase of the operation, the path to the boss to relatively simple, but your fleet will face some difficult confrontations along the way, namely the New Sub Princess who will appear in Node C and ZZ.

Depending on the difficulty, she may be easier to bypass on lower difficulties, but on higher difficulties will be very difficult to pass without the assistance of ASW support in the form of an ASW LBAS, ASW support fleet and Pre-ASW capable ships.

Your main goal if you choose to use an ASW LBAS and support is to incapacitate the New Sub Princess so you can minimize the damage she can cause to your fleet. It may be more possible to pass through node C, but Node ZZ may present difficulty as you will have less fuel to evade so you may choose to use your ASW supports there.

If you use a surface Task force fleet, also prepare to use ships like CAVs, AVs, or Akitsumaru as fighter mules (with possible a Surface radar on some). As you will need to sufficient air power along with your LBAS to overtake the boss fleet. During the chipping phase, you'll likely need 1-2 Fighter mules depending on the difficulty but will need to have up to 3 fighter mules on Hard on the final kill if you wish to aim for AS.

An alternative, you can consider bringing in a CV like Intrepid or Kaga in place of one BB to also fill the fighter power requirements without having to resort to additional surface radars.

But if you really need the BBs and you will then have to resort to bringing a CVL which will then force you to bring an additional 3 radars (Totally to 9!) which might handicap your fleet. Carefully consider your options before using this method.

Also, the most recommended BBs to bring with you on this map is Nagato Kai Ni and Mutsu along with another strong BB (Like Musashi or an equivalent) to help out.

Nagato and Mutsu should be placed in the 1st and 2nd slot of your fleet as they are recommended to use Cruising Formation 2 (Combined Fleet Double Line) at the boss in Node Z.

The most likely way you'll set you fleet up from 1st - 6th from each fleet will likely be along the lines of:

In addition, due to the requirements needed to reach node ZZ you will need to arm Nagato in a radar meaning she will need the following set up:

  • 2 guns + 1 AP Shell + 1 Surface Radar

While this will prevent her from double attacking this will be needed for when you use Nagato's Broadside Special Attack which along with Mutsu choosing Cruising Formation 2 will allow for both Nagato and Mutsu to do a very high amount of damage against the Princess Type Abyssals (Possibly instant killing Battleship Princesses and severely damaging the Abyssal Sun Princess) due to the significant buff the attack gets when using these two specific ships along with an AP shell equipped to both of them.

In addition to this, bring important historical ships like Isokaze, Hagikaze, Arashi and Kawakaze if you have them will allow them even more highly damage attacks to the escorts or to the Abyssal Sun Princess in night battle. If you lack in those, you can also resort to other ships like Sendai with a double attack, or Shigure and Yukikaze with a torpedo cut in which can deliver also an effective amount of damage.

During the final kill, the Abyssal Sun Princess will get a buff to her armor, while her fleet will get an air power buff which will require you to buff up your air power and may possibly resort to more fighter mules for the final segment. Otherwise, most processes to taking her down will be the same as before.

If necessary, bring all 3 LBAS to the boss, but be prepared for possible complications from Node C and ZZ.

Regarding Carrier Task Force Method

For this method, your fleet will be taking a more brute force approach which in return will also have arrived at the boss with less fuel and ammo, but will need to only worry about LoS and less about radar requirements

Outside of Node C, your fleet's biggest concern will be Node W where you'll be pitted against a strong fleet consisting of Battleship Princesses, and some strong carriers which can include as possible Aircraft Carrier Princess on higher difficulties.

This node does present some difficulty passing through but if feel you can take on several princesses and survive only to fight more at the boss, then be well prepared for this route.

Gaining air power should be easy to do through this path and having Nagato and Mutsu taking the first and 2nd slots respectively can while using Cruising formation 2 will still allow you to use Nagato's Broadside Special Attack which will still have effective results on the boss. Most other processes are the same here, but please weigh your decision before taking on this route due to the dangers you may face.

What to do if you lack Nagato's Broadside Special

In situations where you don't have Nagato Kai Ni or used her early on in another map, you will need to resort to using a Surface Task Force and use Nelson in flagship and 2 other BB in position 3 and 5 in the main fleet and resort to Nelson Touch which while is no where nearly as strong as Nagato's Broadside special can still work to a degree knocking out or somewhat damaging Princess type Abyssal and other units. Otherwise, you will need to hope you land solid hits on the enemies or resort to Friend Fleets to clear out some of the threats for the final kill.

If you lack in either, you will have to just use line ahead and hope all conditions are met as you will need to hope you land and kill some princesses and other abyssal to hopefully have a shot to kill the Abyssal Sun Princess.

Remember that in the end, a strong Friend Fleet and strong historical ships can also lead you to victory.

Regarding Friend Fleets

Notice: As of this moment, there are only 2 Friend Fleets which are available at this time. Additional Friend Fleets are to arrive so this section will be updated once the new fleets are reviewed

Overall, there are a total of 2 fleet that can appear in Node Z which include:

The ASW Fleet is completely useless outside of chipping damage and cannot be replaced even if you put in the ships in said fleet.

Meanwhile, the 10th Destroyer Division all have buffs on this map which allow them to do a highly considerable amount of damage. So it's recommended to avoid placing in Kazagumo, Akigumo, Yuugumo, and Makigumoto allow this fleet to appear and hope they arrive undamaged to get the best possible results from thier support.

The event guides are to be constructed through the respective Event map page guide and reviewed by editor staff / collaboration committee before being approved here. Do not under any circumstance update the guides through this page or attempt to fix them through this page. Please only update guides through their respective sandbox pages.

Show/Hide Nodes and Enemy Encounters
Nodes and Enemy Encounters
NodePatternXpNode InfoFormAir
A
Pattern 1
B
Pattern 1
C
Pattern 1
D
Pattern 1
E
Pattern 1
F
Pattern 1
Pattern 2
Pattern 3
Pattern 4
G
Pattern 1
H
Pattern 1
I
Pattern 1
Pattern 2
Pattern 3

Show/Hide Nodes and Enemy Encounters
Nodes and Enemy Encounters
NodePatternXpNode InfoFormAir
A
Pattern 1
B
Pattern 1
C
Pattern 1
D
Pattern 1
E
Pattern 1
F
Pattern 1
Pattern 2
Pattern 3
Pattern 4
G
Pattern 1
H
Pattern 1
I
Pattern 1
Pattern 2
Pattern 3

Show/Hide Nodes and Enemy Encounters
Nodes and Enemy Encounters
NodePatternXpNode InfoFormAir
A
Pattern 1
B
Pattern 1
C
Pattern 1
D
Pattern 1
E
Pattern 1
F
Pattern 1
Pattern 2
Pattern 3
Pattern 4
G
Pattern 1
H
Pattern 1
I
Pattern 1
Pattern 2
Pattern 3

Show/Hide Nodes and Enemy Encounters
Nodes and Enemy Encounters
NodePatternXpNode InfoFormAir
A
Pattern 1
B
Pattern 1
C
Pattern 1
D
Pattern 1
E
Pattern 1
F
Pattern 1
Pattern 2
Pattern 3
Pattern 4
G
Pattern 1
H
Pattern 1
I
Pattern 1
Pattern 2
Pattern 3

Ship drops

NodeShip List
ADestroyers
Light Cruisers
EDestroyers
Light Cruisers
Light Aircraft Carriers
Seaplane Tenders
FDestroyer Escorts
Destroyers
Light Cruisers
Light Aircraft Carriers
Seaplane Tenders
Auxiliary Ships
GDestroyers
Light Cruisers
IDestroyers
Light Cruisers
Heavy Cruisers
Battleships
Light Aircraft Carriers
Seaplane Tenders
Submarines