Difference between revisions of "Accuracy, Evasion and Criticals"
(→Combat) |
Jigaraphale (talk | contribs) m |
||
| (33 intermediate revisions by 3 users not shown) | |||
| Line 12: | Line 12: | ||
| | | | ||
{|style="padding:10px; margin:20px; border:1px solid orange; border-radius:10px" | {|style="padding:10px; margin:20px; border:1px solid orange; border-radius:10px" | ||
| − | |valign="center"| | + | |valign="center"| <math>\text{Hit %} = \bigl\lfloor \text{Hit}_\text{cap} \bigr\rfloor + \text{Acc}_\text{proficiency} +1</math> |
|} | |} | ||
Where, the Capped Hit Rate <math>\left( \text{Hit}_\text{cap} \right)</math> is: | Where, the Capped Hit Rate <math>\left( \text{Hit}_\text{cap} \right)</math> is: | ||
{|style="padding:10px; margin:20px; border:1px solid orange; border-radius:10px" | {|style="padding:10px; margin:20px; border:1px solid orange; border-radius:10px" | ||
| − | |valign="center"| | + | |valign="center"| <math>\text{Hit}_\text{cap} = MIN \Big[ \big( MAX \big[ ( \text{Accuracy}_\text{atk} - \text{Evasion}_\text{post-cap} ) ; {\color{tomato} \text{10}} \big] \times \text{Morale}_\text{defender} \big) ; {\color{DeepSkyBlue} \text{96}} \Big]</math> |
|} | |} | ||
;With | ;With | ||
| − | * <math>\text{Accuracy}_\text{atk}</math> | + | * <math>\text{Accuracy}_\text{atk}</math> the calculated accuracy of the attack. Please see [[#Accuracy|below]] for the various accuracy formulas. |
| − | * <math>\text{Evasion}_\text{post-cap}</math> | + | * <math>\text{Evasion}_\text{post-cap}</math> the calculated evasion of the defending ship. Please see [[#Evasion|below]] for the evasion formula. |
** If negative, it is still applied the same way, increasing the hit rate. | ** If negative, it is still applied the same way, increasing the hit rate. | ||
| − | * <math>\text{Morale}_\text{defender}</math> | + | * <math>\text{Morale}_\text{defender}</math> the morale state modifier of the defending ship. Morale is referring to the value of attacking timing, not the value before entering battle. Please see [[Morale_and_Fatigue#Morale Effects|Morale and Fatigue]] for more details. |
** Sparkled is '''0.7''', | ** Sparkled is '''0.7''', | ||
** Normal is '''1.0''', | ** Normal is '''1.0''', | ||
** Orange is '''1.2''', | ** Orange is '''1.2''', | ||
** Red is '''1.4'''. | ** Red is '''1.4'''. | ||
| − | * <math>\text{Acc}_\text{proficiency}</math> | + | * <math>\text{Acc}_\text{proficiency}</math> the '''average''' plane proficiency accuracy bonus. Please see [[Plane Proficiency]] for more details. |
** The average is calculated only from dive bombers, torpedo bombers, seaplane bombers and large flying boats. | ** The average is calculated only from dive bombers, torpedo bombers, seaplane bombers and large flying boats. | ||
** The value is '''12''' for {{Double Chevron}} planes. | ** The value is '''12''' for {{Double Chevron}} planes. | ||
| Line 87: | Line 87: | ||
{{!}}- | {{!}}- | ||
{{!}}2{{!}}{{!}}0.14 | {{!}}2{{!}}{{!}}0.14 | ||
| + | {{!}}- | ||
| + | {{!}}3{{!}}{{!}}0.21 | ||
{{!}}} | {{!}}} | ||
* <math>\text{Hit}_\text{cap}</math> the Hit Rate Cap defined [[#Hit Rate|above]], | * <math>\text{Hit}_\text{cap}</math> the Hit Rate Cap defined [[#Hit Rate|above]], | ||
| − | * <math>\text{Acc}_\text{proficiency}</math> | + | * <math>\text{Acc}_\text{proficiency}</math> the '''average''' plane proficiency accuracy bonus. Please see [[Plane Proficiency]] for more details. |
** The average is calculated only from dive bombers, torpedo bombers, seaplane bombers and large flying boats. | ** The average is calculated only from dive bombers, torpedo bombers, seaplane bombers and large flying boats. | ||
** The value is '''12''' for {{Double Chevron}} planes. | ** The value is '''12''' for {{Double Chevron}} planes. | ||
| Line 207: | Line 209: | ||
!Colspan=5|Combined Fleet<ref>https://twitter.com/Divinity_123/status/1470001784009773057</ref> | !Colspan=5|Combined Fleet<ref>https://twitter.com/Divinity_123/status/1470001784009773057</ref> | ||
|- | |- | ||
| − | |Combined Fleet Cruising Formation 1|| | + | |Combined Fleet Cruising Formation 1||0.9||?||1.25||? |
|- | |- | ||
|Combined Fleet Cruising Formation 2||1.0||1.0||?||0.9 | |Combined Fleet Cruising Formation 2||1.0||1.0||?||0.9 | ||
| Line 229: | Line 231: | ||
|- | |- | ||
|Red||0.5 | |Red||0.5 | ||
| + | |} | ||
| + | |||
| + | *<math>\text{Mod}_\text{smoke}</math> is an accuracy malus when {{Smoke}} [[Smoke Generator]]s are used. | ||
| + | **{{Color|red|Please note that these are initial estimations and are subject to change.}} | ||
| + | ** It is currently unknown if the airstrike accuracy is affected by the smoke. | ||
| + | ** Some modifiers are impossible to determine because the fleet hit the lower bound hit rate (11% hard cap). | ||
| + | ** There are some inconsistencies between "old" and "new" enemies. | ||
| + | ** Having a ([[Surface Radar|surface ?]]) [[radar]] equipped reduces the smoke effect for both fleets, but only for the shelling phase. | ||
| + | {|class="wikitable mw-collapsible mw-collapsed" style="text-align:center" | ||
| + | !colspan=5|<math>\text{Mod}_\text{smoke}</math><ref>https://twitter.com/Divinity_123/status/1707331554228195746</ref> | ||
| + | |- | ||
| + | !colspan=5|Day Shelling | ||
| + | |- | ||
| + | !Fleet!!Radar Equipped!!Type 1!!Type 2!!Type 3 | ||
| + | |- | ||
| + | |rowspan=2|Allied | ||
| + | |No||< 0.3||<0.33||<0.37 | ||
| + | |- | ||
| + | |Yes||0.35||0.25||< 0.37 | ||
| + | |- | ||
| + | |rowspan=2|Enemy | ||
| + | |No||< 0.69||< 0.7||<0.7 | ||
| + | |- | ||
| + | |Yes||0.91||0.83||0.75 | ||
| + | |- | ||
| + | !colspan=5|Torpedo Phase | ||
| + | |- | ||
| + | !colspan=2|Fleet!!Type 1!!Type 2!!Type 3 | ||
| + | |- | ||
| + | |colspan=2|Allied||0.45||0.42||0.42 | ||
| + | |- | ||
| + | |colspan=2|Enemy||0.7||0.6||0.5 | ||
| + | |- | ||
| + | !colspan=5|ASW | ||
| + | |- | ||
| + | |colspan=2|Allied||colspan=3|0.25 | ||
| + | |- | ||
| + | |colspan=2|Enemy||colspan=3|~1.0?<ref>https://twitter.com/about6833/status/1658101370430574592</ref> | ||
|} | |} | ||
| Line 243: | Line 283: | ||
This formula applies to both surface shelling and carrier attacks during daytime combat. It does not apply to carrier airstrikes. | This formula applies to both surface shelling and carrier attacks during daytime combat. It does not apply to carrier airstrikes. | ||
{|style="padding:10px; margin:20px; border:1px solid orange; border-radius:10px" | {|style="padding:10px; margin:20px; border:1px solid orange; border-radius:10px" | ||
| − | |valign="center"| <math>\text{Accuracy}_\text{shelling} = \bigg\lfloor \bigg( \Big( \text{Acc}_\text{base} + 2 \times \sqrt{\text{Level}} + 1.5 \times \sqrt{\text{Luck}} + \sum_{\text{All Equips}} \text{Acc}_\text{equip} \Big) \times \text{Mod}_\text{vanguard} \times \text{Mod}_\text{formation} \times \text{Mod}_\text{morale} + \text{Mod}_\text{fit} \bigg) \times \text{Mod}_\text{spotting} \times \text{Mod}_\text{AP} \bigg\rfloor </math> | + | |valign="center"| <math>\text{Accuracy}_\text{shelling} = \bigg\lfloor \bigg( \Big( \text{Acc}_\text{base} + 2 \times \sqrt{\text{Level}} + 1.5 \times \sqrt{\text{Luck}} + \sum_{\text{All Equips}} \text{Acc}_\text{equip} + \text{Mod}_\text{Amagiri} \Big) \times \text{Mod}_\text{vanguard} \times \text{Mod}_\text{formation} \times \text{Mod}_\text{morale} + \text{Mod}_\text{fit} \bigg) \times \text{Mod}_\text{spotting} \times \text{Mod}_\text{AP} \times \text{Mod}_\text{smoke} \bigg\rfloor </math> |
|} | |} | ||
| Line 292: | Line 332: | ||
| '''Combined Escort'''|| 75|| 75 | | '''Combined Escort'''|| 75|| 75 | ||
|} | |} | ||
| + | |||
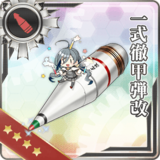
| + | * <math>\text{Mod}_\text{Amagiri}</math>is a bonus against [[PT boat]]: | ||
| + | ** '''65''' for {{Ship/Link|Amagiri/Kai Ni|Amagiri/Kai Ni D|text=Amagiri Kai Ni/D}} | ||
| + | ** '''35?''' for [[DD]] and [[DE]] adjacent to Amagiri Kai Ni/D. | ||
| + | ** '''0''' otherwise. | ||
* <math>\text{Mod}_\text{spotting}</math> the artillery spotting / CVCI bonus if applicable. See ''[[Combat/Artillery Spotting#Setups and Attack Types|here]]'' for more details. | * <math>\text{Mod}_\text{spotting}</math> the artillery spotting / CVCI bonus if applicable. See ''[[Combat/Artillery Spotting#Setups and Attack Types|here]]'' for more details. | ||
| Line 308: | Line 353: | ||
|- | |- | ||
!style="background-color:#ff7f50" |{{color|black|Main Zuiun Cut-in<br>(Zuiun CI)}} | !style="background-color:#ff7f50" |{{color|black|Main Zuiun Cut-in<br>(Zuiun CI)}} | ||
| − | |{{ | + | |{{Large Gun}}{{ZuiunPlane}}{{ZuiunPlane}} |
|1.35||?||1 | |1.35||?||1 | ||
|rowspan=2|{{Ship/Link|Ise/Kai Ni|Hyuuga/Kai Ni|text=''Ise''-class Kai Ni|link_class=Ise}} only | |rowspan=2|{{Ship/Link|Ise/Kai Ni|Hyuuga/Kai Ni|text=''Ise''-class Kai Ni|link_class=Ise}} only | ||
|- | |- | ||
!style="background-color:#ff7f50" |{{color|black|Main Suisei Cut-in<br>(Suisei CI)}} | !style="background-color:#ff7f50" |{{color|black|Main Suisei Cut-in<br>(Suisei CI)}} | ||
| − | |{{ | + | |{{Large Gun}}{{Dive Bomber}}{{Dive Bomber}} |
|1.3||?||1 | |1.3||?||1 | ||
|- | |- | ||
!style="background-color:#81c784" |{{color|black|Main AP Shell Cut-in<br>(APCI)}} | !style="background-color:#81c784" |{{color|black|Main AP Shell Cut-in<br>(APCI)}} | ||
| − | |{{ | + | |{{Large Gun}}{{Large Gun}}{{Seaplane}}{{AP Shell}} |
|1.5||1.2||1 | |1.5||1.2||1 | ||
| | | | ||
|- | |- | ||
!style="background-color:gold"|{{color|black|Secondary AP Shell Cut-in<br>(Sec APCI)}} | !style="background-color:gold"|{{color|black|Secondary AP Shell Cut-in<br>(Sec APCI)}} | ||
| − | |{{ | + | |{{Large Gun}}{{Sec Gun}}{{Seaplane}}{{AP Shell}} |
|1.3||1.3||1 | |1.3||1.3||1 | ||
| | | | ||
|- | |- | ||
!style="background-color:gold"|{{color|black|Secondary Radar Cut-in<br>(Radar CI)}} | !style="background-color:gold"|{{color|black|Secondary Radar Cut-in<br>(Radar CI)}} | ||
| − | |{{ | + | |{{Large Gun}}{{Sec Gun}}{{Seaplane}}{{Radar}} |
|1.2||1.5||1 | |1.2||1.5||1 | ||
| | | | ||
|- | |- | ||
!style="background-color:gold"|{{color|black|Secondary Cut-in<br>(Sec CI)}} | !style="background-color:gold"|{{color|black|Secondary Cut-in<br>(Sec CI)}} | ||
| − | |{{ | + | |{{Large Gun}}{{Sec Gun}}{{Seaplane}} |
|1.1||1.3||1 | |1.1||1.3||1 | ||
| | | | ||
|- | |- | ||
!style="background-color:#59f"|{{color|black|Double Attack<br>(DA)}} | !style="background-color:#59f"|{{color|black|Double Attack<br>(DA)}} | ||
| − | |{{ | + | |{{Large Gun}}{{Large Gun}}{{Seaplane}} |
|1.2||1.1||2 | |1.2||1.1||2 | ||
| | | | ||
| Line 351: | Line 396: | ||
|- | |- | ||
!style="background-color:#81c784" |{{color|black|Fighter-Bomber-Attacker<br>(FBA)}} | !style="background-color:#81c784" |{{color|black|Fighter-Bomber-Attacker<br>(FBA)}} | ||
| − | |nowrap|{{ | + | |nowrap|{{Fighter}}{{Dive Bomber}}{{Torpedo Bomber}} |
|1.25||1.2~1.3?||1|| | |1.25||1.2~1.3?||1|| | ||
|- | |- | ||
!style="background-color:#81c784" |{{color|black|Bomber-Bomber-Attacker<br>(BBA)}} | !style="background-color:#81c784" |{{color|black|Bomber-Bomber-Attacker<br>(BBA)}} | ||
| − | |nowrap|{{ | + | |nowrap|{{Dive Bomber}}{{Dive Bomber}}{{Torpedo Bomber}} |
|1.2||1.2~1.3?||1|| | |1.2||1.2~1.3?||1|| | ||
|- | |- | ||
!style="background-color:#81c784" |{{color|black|Bomber-Attacker<br>(BA)}} | !style="background-color:#81c784" |{{color|black|Bomber-Attacker<br>(BA)}} | ||
| − | |nowrap|{{ | + | |nowrap|{{Dive Bomber}}{{Torpedo Bomber}} |
|1.15||1.2~1.3?||1|| | |1.15||1.2~1.3?||1|| | ||
|} | |} | ||
| − | * <math>\text{Mod}_\text{AP}</math> the {{ | + | * <math>\text{Mod}_\text{AP}</math> the {{AP Shell}} {{Equipment/Link|Type 91 Armor Piercing Shell|Type 1 Armor Piercing Shell|Type 1 Armor Piercing Shell Kai|text=AP Shells|link_category=Armour-Piercing Shells}} accuracy modifier: |
{|class="wikitable mw-collapsible mw-collapsed" style="text-align:center; margin:auto" | {|class="wikitable mw-collapsible mw-collapsed" style="text-align:center; margin:auto" | ||
!colspan=2|<math>\text{Mod}_\text{AP}</math> | !colspan=2|<math>\text{Mod}_\text{AP}</math> | ||
| Line 369: | Line 414: | ||
!Type!!Modifier | !Type!!Modifier | ||
|- | |- | ||
| − | |{{ | + | |{{AP Shell}}{{Large Gun}}||1.1 |
|- | |- | ||
| − | |{{ | + | |{{AP Shell}}{{Large Gun}}{{Sec Gun}}||1.2 |
|- | |- | ||
| − | |{{ | + | |{{AP Shell}}{{Large Gun}}{{Radar}}||1.25 |
|- | |- | ||
| − | |{{ | + | |{{AP Shell}}{{Large Gun}}{{Sec Gun}}{{Radar}}||1.3 |
|} | |} | ||
|- | |- | ||
| Line 408: | Line 453: | ||
This formula only applies to opening and closing torpedo attacks during day battles. | This formula only applies to opening and closing torpedo attacks during day battles. | ||
{|style="padding:10px; margin:20px; border:1px solid orange; border-radius:10px" | {|style="padding:10px; margin:20px; border:1px solid orange; border-radius:10px" | ||
| − | |valign="center"| <math>\text{Accuracy}_\text{torpedo} = \bigg\lfloor \left( \text{Acc}_\text{base} + 2 \times \sqrt{\text{Level}} + 1.5 \times \sqrt{\text{Luck}} + \sum_{\text{All Equips}} \text{Acc}_\text{equip} + \left \lfloor{\frac{\text{Attack}_\text{torp}}{5}} \right \rfloor + \text{Mod}_\text{ship} \right) \times \text{Mod}_\text{vanguard} \times \text{Mod}_\text{formation} \times \text{Mod}_\text{morale} \bigg\rfloor</math> | + | |valign="center"| <math>\text{Accuracy}_\text{torpedo} = \bigg\lfloor \left( \text{Acc}_\text{base} + 2 \times \sqrt{\text{Level}} + 1.5 \times \sqrt{\text{Luck}} + \sum_{\text{All Equips}} \text{Acc}_\text{equip} + \left \lfloor{\frac{\text{Attack}_\text{torp}}{5}} \right \rfloor + \text{Mod}_\text{ship} \right) \times \text{Mod}_\text{vanguard} \times \text{Mod}_\text{formation} \times \text{Mod}_\text{morale} \times \text{Mod}_\text{smoke} \bigg\rfloor</math> |
|} | |} | ||
| Line 451: | Line 496: | ||
This formula applies to the airstrikes performed during the aerial combat phase and support. Although ASW support functions like an airstrike for damage, it '''does not''' use this formula. | This formula applies to the airstrikes performed during the aerial combat phase and support. Although ASW support functions like an airstrike for damage, it '''does not''' use this formula. | ||
{|style="padding:10px; margin:20px; border:1px solid orange; border-radius:10px" | {|style="padding:10px; margin:20px; border:1px solid orange; border-radius:10px" | ||
| − | |valign="center"| <math>\text{Accuracy}_\text{airstrike} = \text{Acc}_\text{base}</math> | + | |valign="center"| <math>\text{Accuracy}_\text{airstrike} = \text{Acc}_\text{base} + \text{Mod}_\text{skip bombing}</math> |
|} | |} | ||
| Line 484: | Line 529: | ||
|- | |- | ||
|Player Escort||75||70<ref name="*"/> | |Player Escort||75||70<ref name="*"/> | ||
| + | |} | ||
| + | |||
| + | * <math>\text{Mod}_\text{skip bombing}</math> is a bonus for plane using skip bombing: | ||
| + | {|class="wikitable mw-collapsible mw-collapsed" style="text-align:center; margin:auto" | ||
| + | !colspan=7|<math>\text{Mod}_\text{skip bombing}</math>[https://x.com/Divinity_123/status/1843665369762087318] | ||
| + | |- | ||
| + | !vs DD!!vs CL(T) / AV?!!vs CA(V)!!vs (F)BB(V) / CV(L/B)!!other | ||
| + | |- | ||
| + | |{{Color|green|+13}}||{{Color|green|+17}}||{{Color|green|+22}}||{{Color|green|+30}}||? | ||
|} | |} | ||
|- | |- | ||
| Line 498: | Line 552: | ||
This formula applies to all ASW attacks in the combat phase and support. | This formula applies to all ASW attacks in the combat phase and support. | ||
{|style="padding:10px; margin:20px; border:1px solid orange; border-radius:10px" | {|style="padding:10px; margin:20px; border:1px solid orange; border-radius:10px" | ||
| − | |valign="center"| <math>\text{Accuracy}_\text{ASW} = \bigg\lfloor \left( 80 + 2 \times \sqrt{\text{Level}} + 1.5 \times \sqrt{\text{Luck}} + \sum_{\text{All Equips}} \text{Acc}_\bigstar + 2 \times \sum \text{ASW}_\text{sonar} \right) \times \text{Mod}_\text{vanguard}? \times \text{Mod}_\text{formation} \times \text{Mod}_\text{morale} \times \text{Mod}_\text{synergy} \bigg\rfloor</math> | + | |valign="center"| <math>\text{Accuracy}_\text{ASW} = \bigg\lfloor \left( 80 + 2 \times \sqrt{\text{Level}} + 1.5 \times \sqrt{\text{Luck}} + \sum_{\text{All Equips}} \text{Acc}_\bigstar + 2 \times \sum \text{ASW}_\text{sonar} \right) \times \text{Mod}_\text{vanguard}? \times \text{Mod}_\text{formation} \times \text{Mod}_\text{morale} \times \text{Mod}_\text{synergy} \times \text{Mod}_\text{smoke} \bigg\rfloor</math> |
|} | |} | ||
| Line 537: | Line 591: | ||
|- | |- | ||
|2||1.15 | |2||1.15 | ||
| + | |- | ||
| + | |3||1.2 | ||
|} | |} | ||
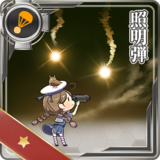
| − | * <math>\text{Mod}_\text{star shell}</math> being '''5.0''' if a {{ | + | * <math>\text{Mod}_\text{star shell}</math> being '''5.0''' if a {{Star Shell}} {{EquipmentLink|Star Shell}} or a [[Combat/Night_Battle#"New_Type"_Cut-ins|Night Zuiun CI]] is triggered, '''0''' otherwise. |
| − | **The effects of the {{ | + | **The effects of the {{Star Shell}} {{EquipmentLink|Star Shell}} and the [[Combat/Night_Battle#"New_Type"_Cut-ins|Night Zuiun CI]] '''do NOT''' stack. |
**Effects apply only after the [[Combat/Night_Battle#"New_Type"_Cut-ins|Night Zuiun CI]] triggered. | **Effects apply only after the [[Combat/Night_Battle#"New_Type"_Cut-ins|Night Zuiun CI]] triggered. | ||
| Line 556: | Line 612: | ||
|- | |- | ||
!style="background-color:#ff7f50; color:black" rowspan=4|Destroyer Cut-ins | !style="background-color:#ff7f50; color:black" rowspan=4|Destroyer Cut-ins | ||
| − | |{{ | + | |{{Torpedo Weapon}}{{Light Gun}}{{Surface Radar}} |
|1.1 | |1.1 | ||
|- | |- | ||
| − | |{{ | + | |{{Torpedo Weapon}}{{Surface Radar}}{{Lookout}} |
|1.2~? | |1.2~? | ||
|- | |- | ||
| − | |{{ | + | |{{Torpedo Weapon}}{{Torpedo Weapon}}{{Equipment/Card|Torpedo Squadron Skilled Lookouts|size=40px}} |
|1.37~? | |1.37~? | ||
|- | |- | ||
| − | |{{ | + | |{{Torpedo Weapon}}{{Drum}}{{Equipment/Card|Torpedo Squadron Skilled Lookouts|size=40px}} |
|? | |? | ||
|- | |- | ||
!style="background-color:#9370db; color:black" rowspan=4|Night Zuiun Cut-ins | !style="background-color:#9370db; color:black" rowspan=4|Night Zuiun Cut-ins | ||
| − | |{{ | + | |{{Large Gun}}{{Large Gun}}{{Night SPB}}{{Night SPB}}{{Surface Radar}} |
|rowspan=4|1.02~1.11 | |rowspan=4|1.02~1.11 | ||
|- | |- | ||
| − | |{{ | + | |{{Large Gun}}{{Large Gun}}{{Night SPB}}{{Night SPB}} |
|- | |- | ||
| − | |{{ | + | |{{Large Gun}}{{Large Gun}}{{Night SPB}}{{Surface Radar}} |
|- | |- | ||
| − | |{{ | + | |{{Large Gun}}{{Large Gun}}{{Night SPB}} |
|- | |- | ||
!colspan=3|"Old" Cut-ins | !colspan=3|"Old" Cut-ins | ||
| Line 585: | Line 641: | ||
|- | |- | ||
!style="background-color:#ff7f50; color:black"|Gun Cut-in | !style="background-color:#ff7f50; color:black"|Gun Cut-in | ||
| − | |nowrap|{{ | + | |nowrap|{{Large Gun}}{{Large Gun}}{{Large Gun}} |
|2<ref name="vita">From vita version, may have changed</ref> | |2<ref name="vita">From vita version, may have changed</ref> | ||
|- | |- | ||
!style="background-color:#ff7f50; color:black"|Mixed Gun Cut-in | !style="background-color:#ff7f50; color:black"|Mixed Gun Cut-in | ||
| − | |{{ | + | |{{Large Gun}}{{Large Gun}}{{Sec Gun}} |
|1.5<ref name="vita"/> | |1.5<ref name="vita"/> | ||
|- | |- | ||
!style="background-color:#59f; color:black" rowspan=2|Submarine Cut-ins | !style="background-color:#59f; color:black" rowspan=2|Submarine Cut-ins | ||
| − | |{{LM Sub Torpedo}} {{ | + | |{{LM Sub Torpedo}} {{Submarine Radar}} |
|rowspan=2|? | |rowspan=2|? | ||
|- | |- | ||
| Line 599: | Line 655: | ||
|- | |- | ||
!style="background-color:#59f; color:black"|Torpedo Cut-in | !style="background-color:#59f; color:black"|Torpedo Cut-in | ||
| − | |{{ | + | |{{Torpedo Weapon}}{{Torpedo Weapon}} |
|1.5 | |1.5 | ||
|- | |- | ||
!style="background-color:#59f; color:black"|Mixed Torpedo Cut-in | !style="background-color:#59f; color:black"|Mixed Torpedo Cut-in | ||
| − | |{{ | + | |{{Torpedo Weapon}}{{Large Gun}} |
|1.5<ref name="vita"/> | |1.5<ref name="vita"/> | ||
|- | |- | ||
!style="background-color:gold; color:black" rowspan=3|Double Attack | !style="background-color:gold; color:black" rowspan=3|Double Attack | ||
| − | |{{ | + | |{{Large Gun}}{{Large Gun}} |
|rowspan=3|1.1 | |rowspan=3|1.1 | ||
|- | |- | ||
| − | |{{ | + | |{{Large Gun}}{{Sec Gun}} |
|- | |- | ||
| − | |{{ | + | |{{Sec Gun}}{{Sec Gun}} |
|} | |} | ||
<references/> | <references/> | ||
| Line 619: | Line 675: | ||
==Land-Based Air Squadron== | ==Land-Based Air Squadron== | ||
This formula applies to attacks made by [[Land-Based Air Squadron]]s. The accuracy is calculated '''independently''' per squadron. | This formula applies to attacks made by [[Land-Based Air Squadron]]s. The accuracy is calculated '''independently''' per squadron. | ||
| − | |||
{|class="wikitable mw-collapsible mw-collapsed" width="100%" | {|class="wikitable mw-collapsible mw-collapsed" width="100%" | ||
!LBAS | !LBAS | ||
| + | |- | ||
| + | |{{Color|red|Formula for [[Land-Based_Air_Squadron#Morale|normal moral]] only}} | ||
| + | {|style="padding:10px; margin:20px; border:1px solid orange; border-radius:10px" | ||
| + | |valign="center"| <math>\text{Accuracy}_\text{LBAS} = ( 90 + 7 \times \text{Acc}_\text{equip}) \times \text{Mod}_\text{Boss} + \text{Acc}_\text{Sp}</math> | ||
| + | |} | ||
| + | * <math>\text{Acc}_\text{equip}</math> the accuracy stat of the plane, | ||
| + | * <math>\text{Acc}_\text{Sp}</math> accuracy bonus for some [[Land-Based Air Squadron#LBAS Special Bombers|LBAS Special Bombers]] on some targets, | ||
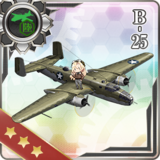
| + | ** Unlike other plane the {{Equipment/Link|B-25}} use special modifier against PT Imp and [[Installation]]. | ||
| + | {|class="wikitable mw-collapsible mw-collapsed" style="text-align:center; margin:auto" | ||
| + | !colspan=7|<math>\text{Acc}_\text{Sp}</math>[https://x.com/Divinity_123/status/1843665369762087318] | ||
| + | |- | ||
| + | !Plane!!vs DD!!vs CL(T) / AV?!!vs CA(V)!!vs (F)BB(V) / CV(L/B)!!PT Imp!!Installation | ||
| + | |- | ||
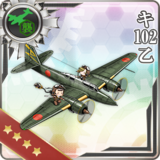
| + | |{{Equipment/Link|Ki-102 B}}||{{Color|red|-7?}} | ||
| + | |colspan=3|? | ||
| + | !rowspan=4 colspan=2| Use ship type | ||
| + | |- | ||
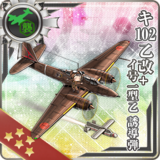
| + | |{{Equipment/Link|Ki-102 B Kai + No.1 Model 1B Guided Missile}}||{{Color|red|-17}}||{{Color|green|+7}}||{{Color|green|+5?}}||{{Color|green|+5?}} | ||
| + | |- | ||
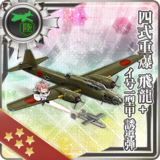
| + | |{{Equipment/Link|Type 4 Heavy Bomber Hiryuu + No.1 Model 1A Guided Missile}}||{{Color|red|-7}}||{{Color|green|+7}}||0||{{Color|green|+7}} | ||
| + | |- | ||
| + | |{{Equipment/Link|Type 4 Heavy Bomber Hiryuu (Skilled) + No.1 Model 1A Guided Missile}}||{{Color|red|-5}}||{{Color|green|+5}}||{{Color|green|+5}}||{{Color|green|+5}} | ||
| + | |- | ||
| + | |{{Equipment/Link|B-25}}||{{Color|green|+13}}||{{Color|green|+17}}||{{Color|green|+22}}||{{Color|green|+30}}||0||{{Color|red|-11?}} | ||
| + | |} | ||
| + | |||
| + | * <math>\text{Mod}_\text{Boss}</math> being a bonus against some Boss and Imp enemy: | ||
| + | {|class="wikitable mw-collapsible mw-collapsed" style="text-align:center; margin:auto" | ||
| + | !colspan=7|<math>\text{Mod}_\text{Boss}</math>[https://x.com/Divinity_123/status/1843665369762087318] | ||
| + | |- | ||
| + | !Boss (ID)!!modifier | ||
| + | |- | ||
| + | |{{Enemy/Link|Battleship Princess|text=BB Hime (1557)}}<br>{{Enemy/Link|Battleship Summer Princess|text= Summer BB Hime (1696-1698)}}<br>{{Enemy/Link|Aircraft Carrier Princess|text=CV Hime (1586)}} | ||
| + | |1.1 | ||
| + | |- | ||
| + | |{{Enemy/Link|Artillery Imp|text=Artillery Imp (1665-1667)}}||1.05~1.08 | ||
| + | |- | ||
| + | |{{Enemy/Link|Pillbox Imp|text=Pillbox Imp (2178-2179,2196-2197)}}||1.04~1.08 | ||
| + | |- | ||
| + | |{{Enemy/Link|Anti-Air Guns Imp|text=Anti-Air Guns Imp (2180-2181)}}||1.12~1.25 | ||
| + | |- | ||
| + | |{{Enemy/Link|PT Imp Pack|link=PT Imp Pack|text=PT Imp (1637-1640)}}||0.95<br>(0.85 for {{Equipment/Link|B-25}}) | ||
| + | |} | ||
|- | |- | ||
| | | | ||
| − | + | ;Note | |
| − | + | *There are strong evidence that abyssal skip bombers behave the same as the {{Equipment/Link|B-25}}. | |
| − | + | *Because the LB moral during waves cannot be knowed this formula is only for normal morale. | |
| − | |||
| − | |||
| − | * | ||
| − | |||
| − | |||
| − | |||
| − | * | ||
| − | |||
| − | |||
| − | |||
| − | |||
| − | |||
|} | |} | ||
;Notes | ;Notes | ||
| − | * For {{ | + | * For {{LB Fighter 1}}/{{LB Fighter 2}} [[Interceptor]]s, the {{Anti-Bomber}} and {{Interception}} stats are respectively "Anti-Bomber" and "Interception" and not {{Hit}} Accuracy and {{Evasion}} Evasion. |
='''Evasion'''= | ='''Evasion'''= | ||
| Line 651: | Line 737: | ||
!colspan=2|Evasion | !colspan=2|Evasion | ||
|- | |- | ||
| − | !width=20px|<div style= | + | !width=20px|<div style=writing-mode:vertical-rl;transform:rotate(180deg); text-align:left;>Pre-cap</div> |
| | | | ||
| − | <math>\text{Evasion}_\text{pre-cap} = \ | + | {|style="padding:10px; margin:20px; border:1px solid orange; border-radius:10px" |
| + | |valign="center"| <math>\text{Evasion}_\text{pre-cap} = \Big\lfloor \left( \text{Evasion}_\text{ship} + \sqrt{2\text{Luck}} \right) \times \text{Mod}_\text{formation} \Big\rfloor</math> | ||
| + | |} | ||
| − | With | + | ;With |
* <math>\text{Evasion}_\text{ship}</math> the displayed evasion {{Evasion}} of the ship, '''including''' any equipment stats and [[Visible Bonus]]es. | * <math>\text{Evasion}_\text{ship}</math> the displayed evasion {{Evasion}} of the ship, '''including''' any equipment stats and [[Visible Bonus]]es. | ||
* <math>\text{Mod}_\text{formation}</math> the formation modifier. It varies based on the attack being received. Please see [[Combat#Formation Selection|Combat]] for more details. | * <math>\text{Mod}_\text{formation}</math> the formation modifier. It varies based on the attack being received. Please see [[Combat#Formation Selection|Combat]] for more details. | ||
| Line 686: | Line 774: | ||
|- | |- | ||
|Echelon (vs combined)||1.2||1.3||1.3||1.1 | |Echelon (vs combined)||1.2||1.3||1.3||1.1 | ||
| + | |- | ||
| + | |All formation vs [[LBAS]] [https://x.com/Divinity_123/status/1843665369762087318] | ||
| + | |colspan=4 style="text-align:center"|1.0 | ||
|- | |- | ||
!Colspan=5|Combined Fleet | !Colspan=5|Combined Fleet | ||
| Line 698: | Line 789: | ||
|} | |} | ||
|- | |- | ||
| − | !<div style= | + | !width=20px|<div style=writing-mode:vertical-rl;transform:rotate(180deg); text-align:left;>Cap</div> |
| | | | ||
The evasion is then capped as follows: | The evasion is then capped as follows: | ||
| Line 712: | Line 803: | ||
|} | |} | ||
|- | |- | ||
| − | !<div style= | + | !width=20px|<div style=writing-mode:vertical-rl;transform:rotate(180deg); text-align:left;>Post-cap</div> |
| | | | ||
Capped evasion is then modified by post-cap modifiers: | Capped evasion is then modified by post-cap modifiers: | ||
| + | {|style="padding:10px; margin:20px; border:1px solid orange; border-radius:10px" | ||
| + | |valign="center"| <math>\text{Evasion}_\text{post-cap} = \Bigg\lfloor \Bigg\lfloor \text{Mod}_\text{searchlight} \times \bigg( \text{Evasion}_\text{cap} + \sum_{\text{Sonar/Engine}} \Big( 1.5 \times \sqrt{\bigstar} \Big) + \text{Mod}_\text{CA} + \text{Mod}_\text{DD} - \text{Mod}_\text{fuel} \bigg) \Bigg\rfloor \times \text{Mod}_\text{LBAS} \Bigg\rfloor</math> | ||
| + | |} | ||
| − | + | ;With | |
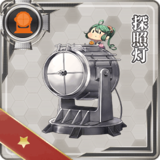
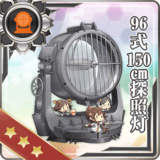
| − | + | * <math>\text{Mod}_\text{searchlight}</math> a {{Searchlight}} {{EquipmentLink|Searchlight|Type 96 150cm Searchlight|text=Searchlights|link_category=Searchlights}} evasion penalty, being: | |
| − | With | + | **'''0.2''' for any ship equipped with a searchlight in night battle (even if not triggered), |
| − | * <math>\text{Mod}_\text{searchlight}</math> | + | **'''1.0''' otherwise. |
| − | * <math>\ | + | * <math>\bigstar</math> the [[improvement]] level of: |
| − | ** | + | **{{Engine}} [[Engine Improvement]]s in all cases, |
| + | **{{Sonar}} [[Sonar]]s in opening and closing torpedo attacks only, | ||
| + | **'''0''' otherwise, | ||
| + | ** ''It is +4.7 {{Evasion}} per equipment at {{MaxStar}}. | ||
* <math>\text{Mod}_\text{CA}</math> the [[CA]]/[[CAV]] night battle evasion bonus. It is '''5''' for CA(V) during [[Night Battle]]s and '''0''' otherwise. | * <math>\text{Mod}_\text{CA}</math> the [[CA]]/[[CAV]] night battle evasion bonus. It is '''5''' for CA(V) during [[Night Battle]]s and '''0''' otherwise. | ||
| − | * <math>\text{Mod}_\text{DD}</math> the [[DD]] night battle evasion bonus. If the DD is equipped with a {{Surface Radar}} [[Surface Radar]] '''AND''' a {{ | + | * <math>\text{Mod}_\text{DD}</math> the [[DD]] night battle evasion bonus. If the DD is equipped with a {{Surface Radar}} [[Surface Radar]] '''AND''' a {{Lookout}} {{EquipmentLink|Skilled Lookouts|Torpedo Squadron Skilled Lookouts|text=Skilled Lookout|link_category=Surface Ship Personnel}}, then it is '''10'''. |
* <math>\text{Mod}_\text{fuel}</math> the remaining fuel penalty: | * <math>\text{Mod}_\text{fuel}</math> the remaining fuel penalty: | ||
** <math>\text{Mod}_\text{fuel} = 75 - \text{Fuel}</math> | ** <math>\text{Mod}_\text{fuel} = 75 - \text{Fuel}</math> | ||
| Line 732: | Line 829: | ||
|+ Remaining Fuel Penalty | |+ Remaining Fuel Penalty | ||
|- | |- | ||
| − | !Battle #<ref>This only takes into account normal day battles. [[ | + | !Battle #<ref>This only takes into account normal day battles. [[Node|Special nodes]] have different resource consumption.</ref> |
!Remaining Fuel!!Penalty | !Remaining Fuel!!Penalty | ||
|- | |- | ||
| Line 744: | Line 841: | ||
|- | |- | ||
|6th+ Battle||0%||75 | |6th+ Battle||0%||75 | ||
| + | |} | ||
| + | * <math>\text{Mod}_\text{LBAS}</math> is applied when the attacker is a [[LBAS]] and '''1''' otherwise: | ||
| + | {|class="wikitable" | ||
| + | !colspan=2|<math>\text{Mod}_\text{LBAS}</math>[https://x.com/Divinity_123/status/1843665369762087318] | ||
| + | |- | ||
| + | !Fleet!!Modifier | ||
| + | |- | ||
| + | |Single Fleet||0.86 | ||
| + | |- | ||
| + | |Combined Fleet||0.68 | ||
| + | |- | ||
| + | |CF vs {{Equipment/Link|B-25}}||0.7 (0.68 in event) | ||
|} | |} | ||
<references/> | <references/> | ||
| Line 755: | Line 864: | ||
* Because of the evasion cap, trying to increase evasion above 65 has negligible effects, | * Because of the evasion cap, trying to increase evasion above 65 has negligible effects, | ||
* As most ships are capable of reaching 65 {{Evasion}}, trying to increase evasion using pre-cap means has little to no effect, this includes: | * As most ships are capable of reaching 65 {{Evasion}}, trying to increase evasion using pre-cap means has little to no effect, this includes: | ||
| − | ** Increasing the {{Evasion}} (e.g. with boilers, | + | ** Increasing the {{Evasion}} (e.g. with boilers, if unimproved), |
| − | ** [[ | + | ** [[Luckmod]]ding {{Luck}}, |
** Choosing a weaker formation with an evasion bonus (except for [[Vanguard]]). | ** Choosing a weaker formation with an evasion bonus (except for [[Vanguard]]). | ||
| − | * | + | * [[Events]] often have "historical evasion bonuses" alongside other historical bonuses, but are not always measured due to their limited-time nature. |
='''Special Cases'''= | ='''Special Cases'''= | ||
| Line 832: | Line 941: | ||
==Arctic Map Bonuses== | ==Arctic Map Bonuses== | ||
| − | On all "arctic maps", namely all [[World 3]] maps, as well as some [[Event]] maps, the {{ | + | On all "arctic maps", namely all [[World 3]] maps, as well as some [[Event]] maps, the {{Extra Armor}} {{Equipment/Link|Arctic Camouflage (+ Arctic Equipment)}} gives: |
*3 Armor {{Armor}} (non-stacking), | *3 Armor {{Armor}} (non-stacking), | ||
*Some Evasion {{Evasion}}. | *Some Evasion {{Evasion}}. | ||
| Line 843: | Line 952: | ||
*This idea comes from a misinterpretation of an ambiguous tweet by the devs [https://twitter.com/kancolle_staff/status/380238803090145280]. | *This idea comes from a misinterpretation of an ambiguous tweet by the devs [https://twitter.com/kancolle_staff/status/380238803090145280]. | ||
| − | ==PT | + | ==[[PT boat]]s== |
{{Anti-PT Imp Setups|uncollapsed=true}} | {{Anti-PT Imp Setups|uncollapsed=true}} | ||
Latest revision as of 22:53, 3 March 2025
Accuracy, Evasion, and Criticals are three mechanics intertwined together, representing the ability of a ship to hit another one. The formulas presented on this page are still subject to change as more testing is done.
- Please note that all formulas between [math]\displaystyle{ \lfloor \ \rfloor }[/math] are rounded down.
Hit Rate
The hit rate is the probability of an attack hitting the target. It's the same for all attacks as well as abyssals. It stems from the difference between the Accuracy of the attack and the evasion of the target.
| Hit Rate | ||
|---|---|---|
Where, the Capped Hit Rate [math]\displaystyle{ \left( \text{Hit}_\text{cap} \right) }[/math] is:
By following this formula, the hit rate is:
|
- Notes
- Hit rate has an effective minimum of 11% and a maximum of 97%.
- Plane proficiency is the only factor that allows a ship to go beyond 100% hit rate.
- The effect of sparkle is reduced the closer Hit rate is to the caps.
Critical Hit Rate
Critical Hits are hits that do more damage than normal. The critical hit rate stems directly from hit rate with different proportion depending on the attack type.
| Critical Rate | ||||||||||||||||||||||||||||
|---|---|---|---|---|---|---|---|---|---|---|---|---|---|---|---|---|---|---|---|---|---|---|---|---|---|---|---|---|
| ||||||||||||||||||||||||||||
Hit Rate & Critical Roll
There is a single roll for both normal and critical hits.
For example, for a hit rate of 50% on a shelling attack, the crit rate is then 10%. The roll can be represented as followed:
| Roll Example | ||
|---|---|---|
| Critical Hit 10% | Hit 40% | Miss 50% |
The normal hit rate is 40% and the remaining 10% is the critical hit rate.
- Notes
- The effect of accuracy and sparkling on crit rate is limited
- Because it stems directly from hit rate, it is also affected by the caps.
- With low accuracy, a disproportionately high amount of successful hits will be "criticals".
- With proficiency bonus it's possible to have a crititical rate above the hit rate, in this case the critical rate override the hit rate.[1]
Damage Animations
When a ship takes a hit, the game will display the damage animation following in 3 possible outcomes (e.g. with 25 damage):
- miss (no damage),
- 25 (normal damage)
- 25 Critical hit! (critical damage).
However, the damage status displayed is mostly defined by the amount of damage dealt, and not the real damage status happening in the game.
- Due to this, displayed critical hits and misses are rarely true critical hits or misses.
The displayed damage status is as follows:
| Display Behavior | |
|---|---|
| Damage Dealt | Damage Displayed |
| Miss | Miss displayed normally |
| 0 | Always displayed as a miss |
| ≤14 | Never displayed as Critical hit! |
| [15;39] | Criticals displayed normally |
| ≥40 | Always displayed as Critical hit! |
- Notes
- A patch exists to fix this misleading behavior and display the real damage status, see here.
Accuracy
Below are the common variables used in all accuracy formulas:
- [math]\displaystyle{ \text{Level} }[/math] is the level of the attacking ship.
- [math]\displaystyle{ \text{Luck} }[/math] is the luck
 of the attacking ship.
 - [math]\displaystyle{ \text{Acc}_\text{equip} = \text{Acc}_\text{equip base} + \text{Acc}_\text{equip bonus} + \text{Acc}_\bigstar }[/math] is the total accuracy
 provided by an equipment, with:
- [math]\displaystyle{ \text{Acc}_\text{equip base} }[/math] is the base accuracy of the equipment,
- [math]\displaystyle{ \text{Acc}_\text{equip bonus} }[/math] is the visible accuracy bonuses,
- [math]\displaystyle{ \text{Acc}_\bigstar }[/math] is the equipment's accuracy gained from Improvement,
- [math]\displaystyle{ \text{Acc}_\text{equip base} }[/math] is the base accuracy
- [math]\displaystyle{ \text{Mod}_\text{fit} }[/math] is the Hidden Fit Bonuses bonuses or penalties when applicable.
- [math]\displaystyle{ \text{Mod}_\text{formation} }[/math] is the formation modifier for the applicable attack. See Combat for more details.
- Modifiers for single fleet against combined fleet are unknown.
| [math]\displaystyle{ \text{Mod}_\text{formation} }[/math] | ||||
|---|---|---|---|---|
| Formation | Day Shelling & Carrier Attacks |
Torpedo Attacks | ASW [1] | Night Battles[2] |
| Line Ahead | 1.0 | 1.0 | 1.0 | 1.0 |
| Double Line | 1.2 | 0.8 | 1.2 | 0.9 |
| Diamond | 1.0 | 0.4 | 1.0 | 0.7 |
| Echelon | 1.2 | 0.75 | 1.2 | 0.9 |
| Line Abreast | 1.2 | 0.3 | 1.2 | 0.8 |
| Vanguard (Top) | 0.8 | 0.7 | 1.0 | 0.8 |
| Vanguard (Bottom) | 1.2 | 0.9 | 1.1 | 1.2 |
| Exception | ||||
| Vanguard (Top) vs DD | 0.880.8 * 1.1 | 0.840.7 * 1.2 | N/A | 0.880.8 * 1.1 |
| Vanguard (Bottom) vs DD | 1.321.2 * 1.1 | 1.080.9 * 1.2 | N/A | 1.321.2 * 1.1 |
| Double Line vs Line Abreast | 1.0 | - | 1.0 | - |
| Echelon vs Line Ahead | ||||
| Line Abreast vs Echelon | ||||
| Echelon vs Combined Fleet | - | 0.6 | - | 0.8? |
| Combined Fleet[3] | ||||
| Combined Fleet Cruising Formation 1 | 0.9 | ? | 1.25 | ? |
| Combined Fleet Cruising Formation 2 | 1.0 | 1.0 | ? | 0.9 |
| Combined Fleet Cruising Formation 3 | 0.8 | 0.4? | ? | 0.7 |
| Combined Fleet Cruising Formation 4 | 1.1 | 1.2 | ? | 1.0 |
- [math]\displaystyle{ \text{Mod}_\text{vanguard} }[/math] is an accuracy malus when the opposite fleet is in Vanguard formation. See below for more details.
- It is still unknown if this affects night battles, airstrikes, ASW, or LBAS.
- [math]\displaystyle{ \text{Mod}_\text{morale} }[/math] is the morale modifier of the attacking ship. Morale is referring to the value of attacking timing, not the value before entering battle. See Morale and Fatigue for more details.
| [math]\displaystyle{ \text{Mod}_\text{morale} }[/math] | |
|---|---|
| Sparkled | 1.2 |
| Normal | 1.0 |
| Orange | 0.8 |
| Red | 0.5 |
- [math]\displaystyle{ \text{Mod}_\text{smoke} }[/math] is an accuracy malus when
 Smoke Generators are used.
- Please note that these are initial estimations and are subject to change.
- It is currently unknown if the airstrike accuracy is affected by the smoke.
- Some modifiers are impossible to determine because the fleet hit the lower bound hit rate (11% hard cap).
- There are some inconsistencies between "old" and "new" enemies.
- Having a (surface ?) radar equipped reduces the smoke effect for both fleets, but only for the shelling phase.
| [math]\displaystyle{ \text{Mod}_\text{smoke} }[/math][4] | ||||
|---|---|---|---|---|
| Day Shelling | ||||
| Fleet | Radar Equipped | Type 1 | Type 2 | Type 3 |
| Allied | No | < 0.3 | <0.33 | <0.37 |
| Yes | 0.35 | 0.25 | < 0.37 | |
| Enemy | No | < 0.69 | < 0.7 | <0.7 |
| Yes | 0.91 | 0.83 | 0.75 | |
| Torpedo Phase | ||||
| Fleet | Type 1 | Type 2 | Type 3 | |
| Allied | 0.45 | 0.42 | 0.42 | |
| Enemy | 0.7 | 0.6 | 0.5 | |
| ASW | ||||
| Allied | 0.25 | |||
| Enemy | ~1.0?[5] | |||
- Notes
- Because of the number of modifiers to accuracy in-game, it is not trivial to increase accuracy. Therefore it is more important to prioritize attack power (firepower, torpedo, ASW, airstrike, LBAS, ...).
- ↑ https://twitter.com/Divinity_123/status/1453371971446743045
- ↑ https://twitter.com/Divinity_123/status/1680199577989685251
- ↑ https://twitter.com/Divinity_123/status/1470001784009773057
- ↑ https://twitter.com/Divinity_123/status/1707331554228195746
- ↑ https://twitter.com/about6833/status/1658101370430574592
Combat
In no particular order.
| Daytime Shelling | ||||||||||||||||||||||||||||||||||||||||||||||||||||||||||||||||||||||||||||||||||||||||||||||||||||||||||||||||||||||||||||||||||||||||||||||||||||||||||||
|---|---|---|---|---|---|---|---|---|---|---|---|---|---|---|---|---|---|---|---|---|---|---|---|---|---|---|---|---|---|---|---|---|---|---|---|---|---|---|---|---|---|---|---|---|---|---|---|---|---|---|---|---|---|---|---|---|---|---|---|---|---|---|---|---|---|---|---|---|---|---|---|---|---|---|---|---|---|---|---|---|---|---|---|---|---|---|---|---|---|---|---|---|---|---|---|---|---|---|---|---|---|---|---|---|---|---|---|---|---|---|---|---|---|---|---|---|---|---|---|---|---|---|---|---|---|---|---|---|---|---|---|---|---|---|---|---|---|---|---|---|---|---|---|---|---|---|---|---|---|---|---|---|---|---|---|---|
|
This formula applies to both surface shelling and carrier attacks during daytime combat. It does not apply to carrier airstrikes.
| ||||||||||||||||||||||||||||||||||||||||||||||||||||||||||||||||||||||||||||||||||||||||||||||||||||||||||||||||||||||||||||||||||||||||||||||||||||||||||||
| ||||||||||||||||||||||||||||||||||||||||||||||||||||||||||||||||||||||||||||||||||||||||||||||||||||||||||||||||||||||||||||||||||||||||||||||||||||||||||||


| Shelling Support | |
|---|---|
|
This formula applies to surface shelling and carrier attacks during shelling support.
|
| Torpedo Attacks | ||||||||||||||||||||||||||||||||||
|---|---|---|---|---|---|---|---|---|---|---|---|---|---|---|---|---|---|---|---|---|---|---|---|---|---|---|---|---|---|---|---|---|---|---|
|
This formula only applies to opening and closing torpedo attacks during day battles.
| ||||||||||||||||||||||||||||||||||
| Aerial Combat | |||||||||||||||||||||||||||||||||||||||||||||||||||||||||
|---|---|---|---|---|---|---|---|---|---|---|---|---|---|---|---|---|---|---|---|---|---|---|---|---|---|---|---|---|---|---|---|---|---|---|---|---|---|---|---|---|---|---|---|---|---|---|---|---|---|---|---|---|---|---|---|---|---|
|
This formula applies to the airstrikes performed during the aerial combat phase and support. Although ASW support functions like an airstrike for damage, it does not use this formula.
| |||||||||||||||||||||||||||||||||||||||||||||||||||||||||
| |||||||||||||||||||||||||||||||||||||||||||||||||||||||||
| Anti-Submarine Warfare | |
|---|---|
|
This formula applies to all ASW attacks in the combat phase and support.
| |
|

| Night Battles | ||||||||||||||||||||||||||||||||||||||||||||||||||||||||||||||
|---|---|---|---|---|---|---|---|---|---|---|---|---|---|---|---|---|---|---|---|---|---|---|---|---|---|---|---|---|---|---|---|---|---|---|---|---|---|---|---|---|---|---|---|---|---|---|---|---|---|---|---|---|---|---|---|---|---|---|---|---|---|---|
|
This formula applies to all night battle attacks.
| ||||||||||||||||||||||||||||||||||||||||||||||||||||||||||||||
Land-Based Air Squadron
This formula applies to attacks made by Land-Based Air Squadrons. The accuracy is calculated independently per squadron.
| LBAS | |||||||||||||||||||||||||||||||||||||||||||||||||||||||||||||||
|---|---|---|---|---|---|---|---|---|---|---|---|---|---|---|---|---|---|---|---|---|---|---|---|---|---|---|---|---|---|---|---|---|---|---|---|---|---|---|---|---|---|---|---|---|---|---|---|---|---|---|---|---|---|---|---|---|---|---|---|---|---|---|---|
Formula for normal moral only
| |||||||||||||||||||||||||||||||||||||||||||||||||||||||||||||||
| |||||||||||||||||||||||||||||||||||||||||||||||||||||||||||||||


- Notes
- For
 /
/ Interceptors, the and
  stats are respectively "Anti-Bomber" and "Interception" and not Accuracy and
  Evasion.
Evasion
Evasion has two caps depending on the calculated base evasion of the ship. Base evasion is calculated as follows:
| Evasion | |||||||||||||||||||||||||||||||||||||||||||||||||||||||||||||||||||||||||||||||||||||||
|---|---|---|---|---|---|---|---|---|---|---|---|---|---|---|---|---|---|---|---|---|---|---|---|---|---|---|---|---|---|---|---|---|---|---|---|---|---|---|---|---|---|---|---|---|---|---|---|---|---|---|---|---|---|---|---|---|---|---|---|---|---|---|---|---|---|---|---|---|---|---|---|---|---|---|---|---|---|---|---|---|---|---|---|---|---|---|---|
Pre-cap
|
| ||||||||||||||||||||||||||||||||||||||||||||||||||||||||||||||||||||||||||||||||||||||
Cap
|
The evasion is then capped as follows:
| ||||||||||||||||||||||||||||||||||||||||||||||||||||||||||||||||||||||||||||||||||||||
Post-cap
|
Capped evasion is then modified by post-cap modifiers:
| ||||||||||||||||||||||||||||||||||||||||||||||||||||||||||||||||||||||||||||||||||||||


- Notes
- Evasion term can be negative with the fuel penalty.
- The speed of the fleet is supposed to play a role in evasion. Currently, said increase is either nonexistent or too small to test,
- Using
 Underway Replenishment
 is a way to mitigate fuel penalties,
 - Because of the evasion cap, trying to increase evasion above 65 has negligible effects,
- As most ships are capable of reaching 65 , trying to increase evasion using pre-cap means has little to no effect, this includes:
- Increasing the (e.g. with boilers, if unimproved),
- Luckmodding ,
- Choosing a weaker formation with an evasion bonus (except for Vanguard).
- Increasing the
- Events often have "historical evasion bonuses" alongside other historical bonuses, but are not always measured due to their limited-time nature.
Special Cases
Vanguard Formation
This mechanic's effects are still under evaluation, so values are subject to change.
When a fleet is in Vanguard Formation it gives an accuracy malus to the opposite fleet. This malus is determined by 4 factors:
- Ship position in the fleet,
- Ship type,
- Normal or event map,
- Combat phase,
It is the same for the Abyssals.
It is called [math]\displaystyle{ \text{Mod}_\text{vanguard} }[/math] in the accuracy formulas above.
| [math]\displaystyle{ \text{Mod}_\text{vanguard} }[/math][1] | |||
|---|---|---|---|
| Shelling Phase and Night Battle | |||
| Fleet Position | Non-DD | DD (normal map) | DD (event) |
| 1 | 0.95 | 0.95 | 0.95 |
| 2 | |||
| 3 | 0.8 | 0.6 | |
| 4 | |||
| 5 | 0.86 | 0.69 | 0.52 |
| 6 | 0.8 | 0.64 | 0.48 |
| 7 | 0.7 | - | <0.4 |
| Torpedo Phase | |||
| 1 | 0.9 | 0.9 | 0.9 |
| 2 | |||
| 3 | 0.77 | 0.65 | 0.55 |
| 4 | 0.67 | 0.58 | 0.475 |
| 5 | 0.64 | 0.5 | 0.4? |
| 6 | 0.55 | 0.42 | 0.35? |
| 7 | 0.51 | - | ? |
| ASW | |||
| ? | |||
Debuffs
During Events, some Debuffs have been measured to give some additional bonuses of Accuracy ![]() and Evasion
and Evasion ![]() .
.
- Please, refer to the current Event page for up to date information.
Arctic Map Bonuses
On all "arctic maps", namely all World 3 maps, as well as some Event maps, the ![]() Arctic Camouflage (+ Arctic Equipment)
Arctic Camouflage (+ Arctic Equipment) gives:
- 3 Armor
 (non-stacking),
 - Some Evasion .
20.3cm Japanese Guns
So far, no hidden evasion bonus has been observed from equipping any gun on any ship.
- This idea comes from a misinterpretation of an ambiguous tweet by the devs [10].
PT boats
| Anti-PT boat | |||||||||||||||||||||||||||||||||||||||||||||||||||||||||||||||||||||||||||||||||||||||||||||||||||||||||||||||||||||||||||||||||||||||||||
|---|---|---|---|---|---|---|---|---|---|---|---|---|---|---|---|---|---|---|---|---|---|---|---|---|---|---|---|---|---|---|---|---|---|---|---|---|---|---|---|---|---|---|---|---|---|---|---|---|---|---|---|---|---|---|---|---|---|---|---|---|---|---|---|---|---|---|---|---|---|---|---|---|---|---|---|---|---|---|---|---|---|---|---|---|---|---|---|---|---|---|---|---|---|---|---|---|---|---|---|---|---|---|---|---|---|---|---|---|---|---|---|---|---|---|---|---|---|---|---|---|---|---|---|---|---|---|---|---|---|---|---|---|---|---|---|---|---|---|---|
Unlike most standard Abyssals, "PT boats" (PT Imp Pack & Schnellboot Imp Pack & Schnellboot Imp Pack ) are "very small and fast". ) are "very small and fast".
During Events, some special bonuses may be added, with "historical" ships and equipment gaining some accuracy bonuses[10].
| |||||||||||||||||||||||||||||||||||||||||||||||||||||||||||||||||||||||||||||||||||||||||||||||||||||||||||||||||||||||||||||||||||||||||||
| [edit] | |||||||||||||||||||||||||||||||||||||||||||||||||||||||||||||||||||||||||||||||||||||||||||||||||||||||||||||||||||||||||||||||||||||||||||


