- Welcome to the Kancolle Wiki!
- If you have any questions regarding site content, account registration, etc., please visit the KanColle Wiki Discord
Difference between revisions of "World 6/6-4"
< World 6
Jump to navigation
Jump to search
m |
m (→Tips) |
||
| Line 98: | Line 98: | ||
**Using {{AntiGroundArtillery}}{{EquipmentLink|WG42 (Wurfgerät 42)|Shipborne Model Type 4 20cm Anti-ground Rocket Launcher|Type 4 20cm Anti-ground Rocket Launcher (Concentrated Deployment)|text=Rocket Launchers}}, {{LandingCraft}}'''Landing Crafts''' ({{EquipmentLink|Daihatsu Landing Craft (Type 89 Medium Tank & Landing Force)|Daihatsu Landing Craft (Panzer II/North African Specification)|M4A1 DD|Toku Daihatsu Landing Craft + Type 1 Gun Tank|size=125px|text=landing tanks}}, {{EquipmentLink|Armed Daihatsu|Soukoutei (Armored Boat Class)|text=armed boat}}), and {{Amphibious Tank}}{{EquipmentLink|Special Type 2 Amphibious Tank|text=Tanks}} will do decent damage to them, especially if arranged in Nuke set-ups, where stacking them can do a lot of damage to [[Supply Depot Princess]] and [[Artillery Imp]]. | **Using {{AntiGroundArtillery}}{{EquipmentLink|WG42 (Wurfgerät 42)|Shipborne Model Type 4 20cm Anti-ground Rocket Launcher|Type 4 20cm Anti-ground Rocket Launcher (Concentrated Deployment)|text=Rocket Launchers}}, {{LandingCraft}}'''Landing Crafts''' ({{EquipmentLink|Daihatsu Landing Craft (Type 89 Medium Tank & Landing Force)|Daihatsu Landing Craft (Panzer II/North African Specification)|M4A1 DD|Toku Daihatsu Landing Craft + Type 1 Gun Tank|size=125px|text=landing tanks}}, {{EquipmentLink|Armed Daihatsu|Soukoutei (Armored Boat Class)|text=armed boat}}), and {{Amphibious Tank}}{{EquipmentLink|Special Type 2 Amphibious Tank|text=Tanks}} will do decent damage to them, especially if arranged in Nuke set-ups, where stacking them can do a lot of damage to [[Supply Depot Princess]] and [[Artillery Imp]]. | ||
**If you have enough '''Rocket Launchers''', you can optionally use a ''4 slots CL'' and equip her with 2 of them. | **If you have enough '''Rocket Launchers''', you can optionally use a ''4 slots CL'' and equip her with 2 of them. | ||
| − | **The use of {{GreenAmmo}}{{EquipmentLink|Type 3 Shell|Type 3 Shell Kai|text=AA Shells}} is debated | + | **The use of {{GreenAmmo}}{{EquipmentLink|Type 3 Shell|Type 3 Shell Kai|text=AA Shells}} is debated. |
**Aircraft carriers '''CANNOT''' attack installations if they have a {{RedPlane}} equipped '''UNLESS''' it's one of the dive-bombers from the following list: | **Aircraft carriers '''CANNOT''' attack installations if they have a {{RedPlane}} equipped '''UNLESS''' it's one of the dive-bombers from the following list: | ||
{{Category:Anti-Installation Dive Bombers}} | {{Category:Anti-Installation Dive Bombers}} | ||
Revision as of 06:03, 3 May 2022
World 6-4: 中部北海域ピーコック島沖 Central Northern Offshore Sea of Peacock Island
| Strategy Name | 離島再攻略作戦 (Island Recapture Operation)
| ||
| Difficulty | ☆ ☆ ☆ ☆ ☆ ☆ ☆ ☆ ☆
| ||
| Item | -
| ||
| Strategy Content | 水雷戦隊を旗艦とした攻略部隊または空母最大2隻を擁する機動部隊による中部海域離島攻略作戦を発動!艦隊、出撃せよ!
Organize a unit to undertake an operation to capture the Island. Form a fleet consisting of a maximum of 2 Aircraft Carrier or a torpedo squadron flagship! Fleet, set sail! | ||
| 6-4 West Fast fleet | ||
| Fleet | 1CL(flagship), 1(F)BB(V), 3DD, 1CAV | |
| Route | B D C F N | |
| Other Notes | Fast | |
| AP | AS | AS+ |
| 75 | 168 | 336 |
| 6-4 West "Touch fleet" | ||
| Fleet | Nagato Kai Ni , Mutsu Kai Ni , Mutsu Kai Ni , 1CL/CAV, 2DD, Akitsushima , 1CL/CAV, 2DD, Akitsushima
| |
| Route | A D C F N | |
| Other Notes | Named ships are mandatory. | |
| AP | AS | AS+ |
| 75 | 168 | 336 |
Stage Guide
| 6-4 Branching Rules | ||
|---|---|---|
| Nodes | Rules | |
| Start | A |
|
B | ||
M | ||
A |
D |
|
E | ||
D |
C |
|
E |
D |
|
G |
| |
J |
I |
|
L | ||
N | ||
K |
H |
|
J | ||
Tips
Requires destroying the Isolated Island Princess 5 times to clear.
This map features multiple starting zone positions.
- Fleet consisting of a Torpedo Squadron (i.e. mostly CLs and DDs) will start on the West side of the map.
- Existence of any carrier, 2BB, or 3CA(V)s will start on the East (Nagato Kai Ni + Mutsu Kai Ni is the exception)
- Not having 2DDs will also start on the West
- You cannot bring more than 2(F)BB(V)s or 2CV(L)s.
Regarding Boss fleet
- Boss Fleet is heavily affected by your HQ level.
- Admirals below HQ level 103 will not feature a 6-enemy composition in the boss composition outside of the last kill, but will have a chance of appearing if your HQ level is 103 or higher.
- Admirals below HQ level 113 have a chance of rolling a 5-enemy composition with the Late Model DDs (This is the easiest comp). But once your HQ is 113 or higher, this composition will disappear completely and can no longer be rolled.
- Boss fleet's flagship is Isolated Island Princess, a Hard-skinned Installation.
- Artillery Imps and Supply Depot Princess are escorting her.
- Using
 Rocket Launchers
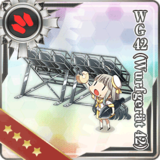
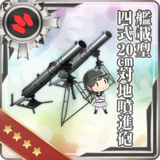
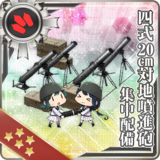 ,
,  Landing Crafts (landing tanks
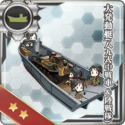
 , armed boat
 ), and
  Tanks
Tanks will do decent damage to them, especially if arranged in Nuke set-ups, where stacking them can do a lot of damage to Supply Depot Princess and Artillery Imp.
 - If you have enough Rocket Launchers, you can optionally use a 4 slots CL and equip her with 2 of them.
- The use of
 AA Shells
 is debated.
 - Aircraft carriers CANNOT attack installations if they have a
 equipped UNLESS it's one of the dive-bombers from the following list:
| This is a segment from a bigger article. See Combat/Anti-Installation for details on Installation mechanics.
Carriers will only attack installations in the shelling phase if equipped with Torpedo Bombers or Anti-Installation Dive Bombers.
| |||
 Ju 87C Kai  Prototype Nanzan  F4U-1D  FM-2  Ju 87C Kai Ni (w/ KMX)  Ju 87C Kai Ni (w/ KMX/Skilled)  Suisei Model 12 (634 Air Group w/ Type 3 Cluster Bombs)  Suisei Model 12 (w/ Type 31 Photoelectric Fuze Bombs)  Type 99 Dive Bomber Model 22  Type 99 Dive Bomber Model 22 (Skilled)  SB2C-3  SB2C-5  F4U-4 | |||
Regarding Land-Based Air Squadrons
See the unlocking steps here: LBAS Unlocking
- You are permitted to use 1 Land-Based Air Squadron.
- There is no air raid on this map.
- Upon completing the quest F43, you will gain access to an LBAS, which is highly recommended to help simplify the battle on the boss node for this map.
- It's recommended to bring 2 Land Based Bombers and 2 Fighters if you have access to your LBAS.
- 3 Land-Based Bombers and 1 Fighter is a viable alternative if you want to damage more the installations, but it may result in more plane losses.
- Another alternative is to bring 4 Land Based Bombers and focus them on Node C instead of the boss. Plane losses here are minimal. This can significantly improve the pass rate of an Akitsushima fleet which emphasizes anti-installation over anti-ship performance.
- The Distance your Land-Based Planes can travel on this map is calculated from Start Point 1 and heading eastward each node.
- Bring planes with a distance of 5 or more in order to reach the boss.
- If your Land-Based planes focus on targeting the Artillery Imps and Supply Depot Princess, the battle will be easier.
- This map can also train your Land-Based attack planes if you haven't unlocked 7-4 LBAS yet. Bring only Land-Based bombers with a range of 8 or more on Node M, and sortie a single SS.
Recommended Fleets
Regular fleets (must be fast):
- 1CL (flagship), 1(F)BB(V), 3DD, 1CA(V)
- 1(F)BB(V), 4DD, 1CA(V)
- Nagato Kai Ni, Mutsu Kai Ni, 4DD
- 1CL (flagship), Nagato Kai Ni, Mutsu Kai Ni, 3DD
- Route = B D C F N
- Gives the shortest and easiest route to the boss, but requires a Fast fleet, this means that using slow BB implies the use of
 Speed modifiers
 .
. - Fleet has the best chance of reaching the boss node while maintaining fuel and ammo to allow for a better outcome in the boss fight.
- It's highly recommended to have an SPF to help maintain AS/AP over the fights on your way to the boss. However, Ise Kai Ni or Hyuuga Kai Ni can guarantee AS, and even give a good chance for air supremacy at the boss when combined with the aforementioned (and still have two free slots after making fast, if given the RE slot).
- Gives the shortest and easiest route to the boss, but requires a Fast fleet, this means that using slow BB implies the use of
- 1BB(V), 1CAV, 1CL, 2DD, Akitsushima
- Nagato Kai Ni, Mutsu Kai Ni, 1CAV, 2DD, Akitsushima
- Nagato Kai Ni, Mutsu Kai Ni, 1CL, 2DD, Akitsushima
- Route = A D C F N
- Akitsushima allows for the shortest possible path on the west entrance.
- Here, Akitsushima should be armed with at least 2 SPF, as her role will be to serve as a distraction and to achieve a degree of air superiority at the boss node, depending on the formation.
- 1CV(L) (Flagship), 1BB(V), 1CA(V), 1CL, 2DD
- Route = M K J I N
- NOT RECOMMENDED for normal clear, only use this comp for this particular quests like By10, due to the nature of 6-4 East route pre-boss having a lot of dangerous enemies that can potentially wreck your ships.
- Node M is full of So-Class SSs, while node K and J each have Wo Kai Flagship CV, accompanied by either Ta-Class flagship BB or Ru-Class Kai Flagship BB. A particularly dangerous enemy, Aircraft Carrier Princess, is found at Node J when the boss is her final form. She may also appear in same node after clearing this area. With all these highly dangerous enemies awaiting in pre-boss, a proper fleet with strong ships and equipment is required if you wish to pass all these nodes safely.
- LBAS can be used on preboss pass them more easily, but you may suffer on the boss fight if you lack good anti-installation equipment.
- Keep in mind that Artillery Imp at the boss node has high AA that can easily wipe out the bombers aboard your CVs. Do consider the bombers that have AA resistance so that your CV can at least perform shelling and take out some of the escort enemies.
- The CAV can be replaced with an LHA to skip node I, which is an air raid node, but LHA may have some issue surviving the pre-boss.
- LHA can be anti-installation focused, with Nukes.
- NOT RECOMMENDED for normal clear, only use this comp for this particular quests like By10, due to the nature of 6-4 East route pre-boss having a lot of dangerous enemies that can potentially wreck your ships.
Nodes And Enemy Encounters
| Nodes and Enemy Encounters | |||||
|---|---|---|---|---|---|
| Node | Pattern | Xp | Node Info | Form | Air |
| A 中部海域哨戒水雷戦隊 A群 | Pattern 1 | ||||
| Pattern 2 | |||||
| Pattern 3 | |||||
| Pattern 4 | |||||
| Pattern 5 | |||||
| B 中部海域哨戒水雷戦隊 B群 | Pattern 1 | ||||
| Pattern 2 | |||||
| Pattern 3 | |||||
| Pattern 4 | |||||
| Pattern 5 | |||||
| C 離島防衛低速戦艦部隊 | Pattern 1 | AP:16 AS:36 AS+:72 | |||
| Pattern 2 | AP:6 AS:12 AS+:24 | ||||
| Pattern 3 | AP:16 AS:36 AS+:72 | ||||
| Pattern 4 | AP:16 AS:36 AS+:72 | ||||
| Pattern 5 | AP:6 AS:12 AS+:24 | ||||
| D 離島陸上航空隊 Air Battle Node | Pattern 1 | AP:40 AS:89 AS+:177 | |||
| Pattern 2 | AP:55 AS:123 AS+:246 | ||||
| E 中部海域哨戒遊撃部隊 | Pattern 1 | ||||
| Pattern 2 | |||||
| Pattern 3 | |||||
| Pattern 4 | |||||
| Pattern 5 | |||||
| F 離島陸上航空隊 Air Battle Node | Pattern 1 | AP:55 AS:123 AS+:246 | |||
| Pattern 2 | AP:52 AS:117 AS+:234 | ||||
| G 離島陸上航空隊 Air Battle Node | Pattern 1 | AP:55 AS:123 AS+:246 | |||
| H 離島防衛低速戦艦部隊 | Pattern 1 | AP:16 AS:35 AS+:69 | |||
| Pattern 2 | AP:16 AS:36 AS+:72 | ||||
| Pattern 3 | AP:16 AS:36 AS+:72 | ||||
| I 離島混成航空隊 Air Battle Node | Pattern 1 | AP:68 AS:152 AS+:303 | |||
| Pattern 2 | AP:70 AS:158 AS+:315 | ||||
| J 任務部隊 I群 | Pattern 1 | AP:72 AS:162 AS+:324 | |||
| Pattern 2 | AP:88 AS:198 AS+:396 | ||||
| Pattern 3 | AP:84 AS:189 AS+:378 | ||||
| Pattern 4 | AP:86 AS:194 AS+:387 | ||||
| Pattern 5 | AP:72 AS:162 AS+:324 | ||||
| Pattern 6 | AP:86 AS:194 AS+:387 | ||||
| K 任務部隊 II群 | Pattern 1 | AP:72 AS:162 AS+:324 | |||
| Pattern 2 | AP:69 AS:155 AS+:309 | ||||
| Pattern 3 | AP:67 AS:150 AS+:300 | ||||
| Pattern 4 | AP:84 AS:189 AS+:378 | ||||
| Pattern 5 | AP:88 AS:198 AS+:396 | ||||
| Pattern 6 | AP:67 AS:150 AS+:300 | ||||
| L 増援護衛空母部隊 | Pattern 1 | AP:31 AS:69 AS+:138 | |||
| M 中部海域潜水哨戒線 | Pattern 1 | ||||
| Pattern 2 | |||||
| Pattern 3 | |||||
| N 離島守備隊 | Pattern 1 | AP:75 AS:168 AS+:336 | |||
| Pattern 2 | AP:32 AS:72 AS+:144 | ||||
| Pattern 3 | AP:23 AS:51 AS+:102 | ||||
| Pattern 4 | AP:32 AS:72 AS+:144 | ||||
| Pattern 5 | AP:32 AS:72 AS+:144 | ||||
| Pattern 6 | AP:52 AS:117 AS+:234 | ||||