- Welcome to the Kancolle Wiki!
- If you have any questions regarding site content, account registration, etc., please visit the KanColle Wiki Discord
Difference between revisions of "Tutorial:Leveling"
>Eririri m (→General Tips) |
Jigaraphale (talk | contribs) |
||
| (74 intermediate revisions by 23 users not shown) | |||
| Line 1: | Line 1: | ||
| − | + | ==Overview== | |
| + | This article aims to provide you with a list of the most efficient places to quickly level your ship girls. '''It will only cover sorties'''. Generally [[Exercises]] are the most efficient way to level but are severely limited. | ||
| − | + | [[Level|Experience (XP)]] increases the level of ships, being crucial to many mechanics (''see [[Level|here]]''). It also increases the Admiral HQ to some extent. | |
| + | {| class="wikitable" style="text-align:center" | ||
| + | ! Map | ||
| + | ! Bucket Usage | ||
| + | ! Low Morale? | ||
| + | ! Subtank? | ||
| + | ! Target Types | ||
| + | ! Notes | ||
| + | |- | ||
| + | ![[1-5]] | ||
| + | | Low | ||
| + | | No | ||
| + | | No | ||
| + | | CL, DD, DE, CVL, BBV | ||
| + | | style="text-align: left"| Enemy SS only | ||
| + | |- | ||
| + | ![[2-1]] | ||
| + | | Low | ||
| + | | No | ||
| + | | Yes | ||
| + | | CV(L), (F)BB(V), CA(V), CL(T) | ||
| + | | | ||
| + | |- | ||
| + | ![[2-2]] | ||
| + | | Low | ||
| + | | Yes | ||
| + | | Yes | ||
| + | | CV(L), DD, SS(V) | ||
| + | | style="text-align: left"| Bauxite farm | ||
| + | |- | ||
| + | ![[3-4]] | ||
| + | | High | ||
| + | | No | ||
| + | | No | ||
| + | | CV(L) | ||
| + | | style="text-align: left"| Ranking map | ||
| + | |- | ||
| + | ![[3-5]] | ||
| + | | Low | ||
| + | | Yes | ||
| + | | Yes | ||
| + | | Any + CV(L) | ||
| + | | style="text-align: left"| | ||
| + | |- | ||
| + | ![[7-1]] | ||
| + | | Medium | ||
| + | | No | ||
| + | | No | ||
| + | | CL, DD | ||
| + | | style="text-align: left"| Ranking map | ||
| + | |- | ||
| + | ![[7-2|7-2 p1]] | ||
| + | | Low | ||
| + | | No | ||
| + | | No | ||
| + | | CVL, DE | ||
| + | | style="text-align: left"| Majority Submarines | ||
| + | |- | ||
| + | ![[7-2|7-2 p2]] | ||
| + | | High | ||
| + | | No | ||
| + | | No | ||
| + | | FBB, CV(L), CA | ||
| + | | style="text-align: left"| Ranking map. | ||
| + | |- | ||
| + | ![[7-4]] | ||
| + | | Very low | ||
| + | | Yes | ||
| + | | N/A | ||
| + | | SS(V) | ||
| + | | style="text-align: left"| | ||
| + | *Resource farming, | ||
| + | *LBAS proficiency farming. | ||
| + | |- | ||
| + | ![[7-5]] | ||
| + | | None | ||
| + | | Yes | ||
| + | | N/A | ||
| + | | SS(V), CAV, BBV, CV(L), AV | ||
| + | | style="text-align: left"| {{EquipmentLink|12cm 30-tube Rocket Launcher Kai Ni|text=RLK2}} required | ||
| + | |- | ||
| + | ![[4-4]] | ||
| + | | Medium | ||
| + | | No | ||
| + | | No | ||
| + | | (F)BB(V), CV(L), CA | ||
| + | | style="text-align: left"| Ranking map | ||
| + | |- | ||
| + | ![[4-5]] | ||
| + | | Low | ||
| + | | No | ||
| + | | No | ||
| + | | Any | ||
| + | | style="text-align: left"| Enemy SS only | ||
| + | |- | ||
| + | ![[5-2]] | ||
| + | | None | ||
| + | | Yes | ||
| + | | N/A | ||
| + | | SS(V), CAV, BBV, CV(L), AV | ||
| + | | style="text-align: left"| {{EquipmentLink|12cm 30-tube Rocket Launcher Kai Ni|text=RLK2}} required | ||
| + | |- | ||
| + | ![[5-3]] | ||
| + | | High | ||
| + | | No | ||
| + | | No | ||
| + | | Any (except BBV and CV(L)) | ||
| + | | style="text-align: left"| Night battle map | ||
| + | |- | ||
| + | ![[5-5]] | ||
| + | | Low | ||
| + | | No | ||
| + | | No | ||
| + | | Any | ||
| + | | style="text-align: left"| Enemy SS only | ||
| + | |- | ||
| + | ![[6-5]] | ||
| + | | Low | ||
| + | | No | ||
| + | | No | ||
| + | | Any (except CV(L) and CLT) | ||
| + | | style="text-align: left"| Enemy SS only | ||
| + | |- | ||
| + | ! Map | ||
| + | ! Bucket Usage | ||
| + | ! Low Morale? | ||
| + | ! Subtank? | ||
| + | ! Target Types | ||
| + | ! Notes | ||
| + | |} | ||
| + | Alternatively, [[Expeditions#Expedition 32 Experience Formula|Expedition 32]] can be used for leveling, but this method is unadvised, as it takes away one expedition for resource farming. | ||
| − | == | + | =Leveling Locations= |
| + | <tabber> | ||
| + | |-|1-5= | ||
| + | This map is a good starting point for leveling DD, DE, and CL. [[OASW]] is required to get the most out of this map. At higher HQ levels, the boss node contains a flagship submarine that can be difficult to sink in just 1 round of shelling. Furthermore, the submarines present will have opening torpedoes in the later nodes. Not having OASW means higher bucket usage. | ||
| − | + | BBV and CVL also have some use in this map. BBVs allow a 2nd round of shelling that can help weaker ASW ships secure S rank. CVLs can carry a [[Saiun]] to prevent RedT engagements from hampering your fleet's combat ability. | |
| − | |||
| − | + | ''This map can be used for [[Ranking]].'' | |
| − | |||
| − | |||
| − | |||
| − | |||
| − | |||
| − | |||
| − | + | '''Recommended Fleets''' | |
| + | * 4DD/DE | ||
| + | * 2CL 2DD/DE | ||
| + | * 1BBV 3DD/DE | ||
| + | * 1BBV 2CL 1DD/DE | ||
| + | * 1CVL 3DD/DE | ||
| + | * 1CVL 2CL 1DD/DE | ||
| + | * 1BBV 1CVL 2DD/DE | ||
| − | + | '''Equipment Setups''' | |
| − | ''' | ||
| − | + | ''Reaching OASW for DD, DE, and CL overrides all equipment setup suggestions listed below.'' | |
| − | + | {|class="wikitable" width="100%" | |
| − | + | !width="50px"| Ship Type | |
| − | + | !width="170px"| Equipment | |
| + | ! Notes | ||
| + | |- | ||
| + | ! DD | ||
| + | | {{Sonar}}{{Sonar}}{{DepthCharge}}'''/'''{{Sonar}} | ||
| + | | This balances accuracy and damage for DDs. The SONARS add accuracy and the [[Type 94 Depth Charge]] or [[Type 3 Depth Charge]] provides them with ASW synergy damage. An extra SONAR can be added for [[Tashkent]]. | ||
| + | |- | ||
| + | ! DE | ||
| + | | {{Sonar}}{{DepthCharge}}{{DepthCharge}} | ||
| + | | Similar to the DD setup with one SONAR swapped out for a [[Type 95 Depth Charge]] or [[Type 2 Depth Charge]]. These DCs have extra armor penetration when equipped on DEs. The extra ASW synergy damage also helps overcome their low base ASW. | ||
| + | |- | ||
| + | ! CL | ||
| + | | {{Sonar}}{{Sonar}}{{DepthCharge}}'''/'''{{Sonar}} | ||
| + | | Similar to the DD setup, it aims to balance accuracy and damage. | ||
| + | |- | ||
| + | ! BBV | ||
| + | | {{Autogyro}}{{ASWPlane}}{{Seaplane}} | ||
| + | | A BBV isn't going to be contributing much to combat aside from enabling a 2nd shelling phase. [[Hyuuga|Hyuuga Kai Ni]] is an exception since she has respectable ASW and is capable of OASW. Just equip the BBV with the best ASW equipment she can carry. | ||
| + | |- | ||
| + | ! CVL | ||
| + | | {{BluePlane}}{{Autogyro}}{{ASWPlane}}{{YellowPlane}} | ||
| + | | Aside from the [[Saiun]], CVLs should just have whatever your best ASW planes are. Ideally you should take one of the CVLs that are capable of OASW. | ||
| + | |} | ||
| − | + | |-|2-1= | |
| + | This map is not all that fantastic for experience, but it is the earliest map that is efficient for leveling heavier ships like BB, CA, CV, and CVL. Air power is nearly nonexistent which allows your fleet to have a powerful opening strike that reduces your bucket cost. | ||
| − | + | '''Recommended Fleets''' | |
| − | * | + | * 2CV(L) 1-2BB/CA 0-1CL/T 2DD |
| − | |||
| − | |||
| − | + | '''Equipment Setups''' | |
| − | + | {|class="wikitable" width="100%" | |
| − | + | !width="50px"| Ship Type | |
| − | + | !width="170px"| Equipment | |
| − | + | ! Notes | |
| − | + | |- | |
| + | ! DD | ||
| + | | {{GreenGunDP}}{{GreenGunDP}}{{WildCard}} | ||
| + | | Fairly standard setup for DDs. They won't be contributing much to the battle beyond providing AA support. They are primarily here to reduce costs. Else, putting more CL and CA in the fleet would still work. | ||
| + | |- | ||
| + | ! CL | ||
| + | | {{RedGunMedium}}{{RedGunMedium}}{{Seaplane}} | ||
| + | | Setup for CLs that are capable of [[Artillery Spotting]]. For those that are not, simply replace the seaplane with a radar or anti-air gun. | ||
| + | |- | ||
| + | ! CLT | ||
| + | | {{RedGunMedium}}{{RedGunMedium}}{{TorpedoWeapon}} | ||
| + | | CLTs are useful for increasing the pass rate for this map. The addition of a midget sub for opening torpedo strikes can reduce the number of threats even further. | ||
| + | |- | ||
| + | ! CA | ||
| + | | {{RedGunMedium}}{{RedGunMedium}}{{Seaplane}}{{WildCard}} | ||
| + | | Just a standard artillery spotting setup. The wildcard can be anything that doesn't interfere with the double attack. | ||
| + | |- | ||
| + | ! BB | ||
| + | | {{RedGunHeavy}}{{RedGunHeavy}}{{RedAmmo}}{{Seaplane}} | ||
| + | | Just a standard artillery spotting setup. | ||
| + | |- | ||
| + | ! CV(L) | ||
| + | | {{BluePlane}}{{BluePlane}}{{RedPlane}}{{GreenPlane}} | ||
| + | | You may need to shuffle around some planes in order to hit the 162 fighter power required for AS+. One of your carriers should also have a [[Saiun]] if you can manage it. | ||
| + | |} | ||
| − | + | |-|2-2= | |
| + | This map requires a minimum of 3 CV(L), allowing you to leech up to 3 other girls. The objective of this leveling method is to '''only hit node B and the bauxite node'''. It doesn't give a lot of experience but it provides safe leveling. The resource cost is very low and it is even possible to get a refund on the bauxite cost. While it is possible to run this map at low morale, you will want to have more carriers to increase the chances the airstrike sinks all the enemy ships. This will reduce the bucket cost. | ||
| − | + | ''This map can also be used for farming bauxite. See [[Help:Resource Farming#2-2|Resource Farming]] for more details.'' | |
| − | + | '''Recommended Fleets''' | |
| − | + | * 3CV(L) 3XX | |
| − | |||
| − | |||
| − | |||
| − | + | '''Equipment Setups''' | |
| − | |||
| − | |||
| − | ''' | ||
| − | + | ''The equipment of the other ships do not matter. Taking barrels and Daihatsu along will increase your bauxite gain.'' | |
| − | |||
| − | + | {|class="wikitable" width="100%" | |
| − | + | !width="50px"| Ship Type | |
| − | + | !width="170px"| Equipment | |
| − | + | ! Notes | |
| + | |- | ||
| + | ! CV(L) | ||
| + | | {{BluePlane}}{{BluePlane}}{{BluePlane}}{{RedPlane}} | ||
| + | | Your carriers will want to maximize their airstrike power to increase the chances they sink a majority of the enemy fleet before shelling begins. At least one carrier should have the [[Type 2 Recon Aircraft]] in order to maximize airstrike damage. The dive bomber enables the carriers to perform CVCI to clean up any stragglers. | ||
| + | |} | ||
| − | + | |-|3-4= | |
| − | + | This map is primarily for CV(L). The strategy is to load up on your best torpedo bombers and attempt to wipe the nodes before they send your fleet back to port. Be warned that this map costs an exorbitant amount of bauxite. Attempting to reduce the bauxite cost will increase the bucket cost. | |
| − | |||
| − | |||
| − | |||
| − | |||
| − | + | ''This map can also be used for [[Ranking]].'' | |
| − | |||
| − | |||
| − | |||
| − | |||
| − | + | '''Recommended Fleets''' | |
| − | + | * 2CV 2CVL 1CL 1AV | |
| − | |||
| − | |||
| − | + | '''Equipment Setups''' | |
| + | {|class="wikitable" width="100%" | ||
| + | !width="50px"| Ship Type | ||
| + | !width="170px"| Equipment | ||
| + | ! Notes | ||
| + | |- | ||
| + | ! rowspan=2| CL | ||
| + | | {{RedGunMedium}}{{RedGunMedium}}{{Seaplane}} | ||
| + | | A basic artillery spotting setup. Keep in mind that not taking a CL capable of performing opening torpedoes will reduce your success rate. | ||
| + | |- | ||
| + | | {{TorpedoWeapon}}{{TorpedoWeapon}}{{TorpedoWeapon}} | ||
| + | | This is for either [[Abukuma|Abukuma Kai Ni]] or [[Yura|Yura Kai Ni]]. The extra torpedoes will make their opening strike a lot more powerful, allowing it to hopefully take out heavier targets. | ||
| + | |- | ||
| + | ! CV(L) | ||
| + | | {{BluePlane}}{{BluePlane}}{{RedPlane}}{{GreenPlane}} | ||
| + | | You will need to reach a total of 168 fighter power in order to minimize your bauxite losses. At least 1 carrier should have a [[Type 2 Recon Aircraft]] in order to maximize the power of the airstrike. | ||
| + | |- | ||
| + | ! AV | ||
| + | | {{TorpedoWeapon}}{{TorpedoWeapon}}{{TorpedoWeapon}} | ||
| + | | Similar to the CL, the AV should aim to maximize torpedo power. In this case, all three should be midget submarines. | ||
| + | |} | ||
| − | + | |-|3-5= | |
| + | This map allows you to level any ship type as the flagship. '''You should retreat after node B'''. 3-4 enemies in the node will be forced to attack a submarine, allowing you to mitigate some damage taken. Note that those enemies have ASW equipment so the sub is unlikely to survive more than one battle. Because the airstrike will do most of the heavy lifting, it is possible to run this map with low morale ships. Beware that this will increase your bucket cost when the airstrike fails to take out enough enemy ships. | ||
| − | + | '''Recommended Fleets''' | |
| − | * | + | * 1XX 4CV(L) 1SS/V |
| − | |||
| − | |||
| − | + | '''Equipment Setups''' | |
| − | |||
| − | + | ''The flagship and submarine can be equipped with anything. You may use any of the standard [[Help:Equipment Setup|Equipment Setups]] for the flagship.'' | |
| − | + | {|class="wikitable" width="100%" | |
| + | !width="50px"| Ship Type | ||
| + | !width="170px"| Equipment | ||
| + | ! Notes | ||
| + | |- | ||
| + | ! CV(L) | ||
| + | | {{BluePlane}}{{BluePlane}}{{BluePlane}}{{RedPlane}} | ||
| + | | Your carriers will want to maximize their airstrike power to increase the chances they sink a majority of the enemy fleet before shelling begins. At least one carrier should have the [[Type 2 Recon Aircraft]] in order to maximize airstrike damage. The dive bomber enables the carriers to perform CVCI to clean up any stragglers. | ||
| + | |} | ||
| − | + | |-|7-1= | |
| + | This map is great for leveling CLs and DDs but the requirements are tight if you want to reduce bucket costs. At least 3-4 girls in the fleet must be capable of [[OASW]]. The fewer girls that are capable, the higher the bucket cost will be. Having a CL capable of opening strikes will help by increasing the pass rate at G. | ||
| − | + | ''This map can be used for [[Ranking]].'' | |
| − | |||
| − | |||
| − | |||
| − | |||
| − | |||
| − | |||
| − | |||
| − | |||
| − | |||
| − | + | '''Recommended Fleets''' | |
| − | + | * 1CL 4DD | |
| − | * | ||
| − | + | '''Equipment Setups''' | |
| − | |||
| − | |||
| − | |||
| − | |||
| − | ''' | ||
| − | + | ''Reaching OASW for DD and CL overrides all equipment setup suggestions listed below.'' | |
| − | + | {|class="wikitable" width="100%" | |
| − | + | !width="50px"| Ship Type | |
| − | '''[[ | + | !width="170px"| Equipment |
| + | ! Notes | ||
| + | |- | ||
| + | ! DD | ||
| + | | {{Sonar}}{{DepthCharge}}{{RedGunLight}} | ||
| + | | The SONAR and the [[Type 94 Depth Charge]] or [[Type 3 Depth Charge]] provide decent ASW damage against any sub that you will encounter on the map. The gun adds much needed daytime shelling power to reduce retreats at G. An extra SONAR or gun can be added for [[Tashkent]]. | ||
| + | |- | ||
| + | ! rowspan=3| CL | ||
| + | | {{RedGunMedium}}{{Sonar}}{{DepthCharge}} | ||
| + | | This setup is for CLs without an opening attack. The reasoning behind it is similar to the DD setup. | ||
| + | |- | ||
| + | | {{Seaplane}}{{Seaplane}}{{Sonar}}'''/'''{{DepthCharge}} | ||
| + | | This setup is for [[:Category:Agano Class|Agano-class]], [[Tama|Tama Kai Ni]] or [[Gotland|Gotland Kai]]. The seaplanes should be seaplane bombers. Good SPB like the [[Prototype Seiran]] are important to increase the pass rate. The [[Zuiun]] is not strong enough to reliably sink or disable enemies at G before closing torpedoes. | ||
| + | |- | ||
| + | | {{TorpedoWeapon}}{{Sonar}}{{DepthCharge}} | ||
| + | | This setup is limited to [[Abukuma|Abukuma Kai Ni]] and [[Yura|Yura Kai Ni]]. They are the best choice for CLs on this map. The opening torpedo is nearly guaranteed to kill at least one enemy at G which drastically increases your pass rate. | ||
| + | |} | ||
| − | + | |-|7-2p1= | |
| − | |||
| − | + | This section is for 7-2 phase 1 that terminates at node G. It is a decent map for leveling DE and CVL. The exp is lower than 1-5, but you can level 1 more girl. Ideally, you will want all your girls to be capable of [[OASW]]. This will allow them to eliminate the submarine threats and take no damage in return. Note that the boss node contains a mix of sub and surface ships. | |
| − | |||
| + | '''Recommended Fleets | ||
| + | * 3DE, 2CVL | ||
| − | + | '''Equipment Setups | |
| − | + | {|class="wikitable" width="100%" | |
| + | !width="50px"| Ship Type | ||
| + | !width="170px"| Equipment | ||
| + | ! Notes | ||
| + | |- | ||
| + | ! DE | ||
| + | | {{Sonar}}{{DepthCharge}}{{DepthCharge}} | ||
| + | | Similar to the DD setup with one SONAR swapped out for a [[Type 95 Depth Charge]] or [[Type 2 Depth Charge]]. These DCs have extra armor penetration when equipped on DEs. The extra ASW synergy damage also helps overcome their low base ASW. | ||
| + | |- | ||
| + | ! CVL | ||
| + | | {{BluePlane}}{{BluePlane}}{{BluePlane}}{{RedPlane}} | ||
| + | | Because the boss contains surface ships, you will want to maximize your airstrike along with ASW. The surface ships at the boss are just DD and CL so taking your highest ASW torpedo bombers should be sufficient. One CVL should have a [[Saiun]] to prevent Red T. | ||
| + | |} | ||
| − | + | |-|7-2p2= | |
| + | This section is for 7-2 phase 2 that terminates at node M. It provides slightly more experience than 4-4 in exchange for harder fights. It is primarily for leveling BB, CV(L), and CA. It also has a very steep fighter power requirement, which limits the effectiveness of the airstrike. Overall, it costs a lot more resources to run compared to 4-4. | ||
| − | + | ''This map can also be used for [[Ranking]].'' | |
| − | |||
| − | |||
| − | |||
| − | |||
| − | |||
| − | |||
| − | |||
| − | |||
| − | |||
| − | |||
| + | '''Recommended Fleets | ||
| + | * 1FBB, 2CV(L), 1CA/CL, 2DD | ||
| + | * 1AV, 2CLT, 3DD | ||
| + | '''Equipment Setups''' | ||
| + | {|class="wikitable" width="100%" | ||
| + | !width="50px"| Ship Type | ||
| + | !width="170px"| Equipment | ||
| + | !Notes | ||
| + | |- | ||
| + | ! DD | ||
| + | | {{GreenGunDP}}{{GreenGunDP}}{{WildCard}} | ||
| + | | Fairly standard setup for DDs. They won't be contributing much to the battle beyond providing AA support. The wildcard can be a radar for AACI (if using the right guns) or SONARs to help with passing node C. | ||
| + | |- | ||
| + | ! CL | ||
| + | | {{RedGunMedium}}{{RedGunMedium}}{{Seaplane}} | ||
| + | | Setup for CLs that are capable of [[Artillery Spotting]]. For those that are not, simply replace the seaplane with a radar or anti-air gun. For [[Abukuma|Abukuma Kai Ni]] or [[Yura|Yura Kai Ni]], the seaplane can be replaced with a midget submarine. | ||
| + | |- | ||
| + | ! CLT | ||
| + | | {{RedGunMedium}}{{RedGunMedium}}{{TorpedoWeapon}} | ||
| + | | CLTs are useful for increasing the pass rate for this map. The addition of a midget sub for opening torpedo strikes can reduce the number of threats even further. | ||
| + | |- | ||
| + | ! CA | ||
| + | | {{RedGunMedium}}{{RedGunMedium}}{{Seaplane}}{{WildCard}} | ||
| + | | Just a standard artillery spotting setup. The wildcard can be anything that doesn't interfere with the double attack. | ||
| + | |- | ||
| + | ! BB | ||
| + | | {{RedGunHeavy}}{{RedGunHeavy}}{{RedAmmo}}{{Seaplane}} | ||
| + | | Just a standard artillery spotting setup. | ||
| + | |- | ||
| + | ! CV(L) | ||
| + | | {{BluePlane}}{{RedPlane}}{{GreenPlane}}{{GreenPlane}} | ||
| + | | You will need to hit 359 fighter power for AS. Attempting to hit AS+ is futile and will cripple your carrier's combat effectiveness. | ||
| + | |} | ||
| − | + | |-|7-4= | |
| − | + | On [[7-4]], it is possible to use a submarine fleet to route to the Port Node O instead of the Boss, farming fuel and bauxite at the same time. It is also possible to send one LBAS to level up LBAS planes' proficiency at the same time. | |
| + | *See [[World 7/7-4#Resources_and_LBAS_Farming|here]] for more detail. | ||
| − | + | '''Recommended Fleets: | |
| − | + | * 1-6SS(V) | |
| + | * Route = {{MapRoute|C|red|D|pink|F|blue|J|red|K|red|M|pink|O|green}} | ||
| + | ** LoS required: '''≥ 32''' (Cn3) | ||
| − | + | |-|4-4= | |
| + | This map is primarily for leveling BB, CV(L), CA, or CL. Unlike 7-1p2, it has no speed routing so a wider variety of girls can be used. It can get fairly costly depending on the setup used. It is not recommended to bring more than 1 leech for this map. The pre-boss nodes are fairly dangerous with the flagship Ri that will cause you to retreat. The boss herself has flagship Ta as escorts that will cost you buckets if you do not bring powerful enough girls. | ||
| + | *''This map can also be used for [[Ranking]]. | ||
| − | + | '''Recommended fleets: | |
| − | * | + | * 1BB, 2CV(L), 1CA/CL, 2DD |
| − | + | '''Equipment Setups''' | |
| − | + | {|class="wikitable" width="100%" | |
| − | + | !width="50px"| Ship Type | |
| − | + | !width="170px"| Equipment | |
| − | + | ! Notes | |
| − | + | |- | |
| − | + | ! DD | |
| − | + | | {{GreenGunDP}}{{Sonar}}{{DepthCharge}} | |
| − | + | | The main role of the DD will be to help increase the pass rate at E. [[OASW]] is highly recommended. | |
| − | + | |- | |
| − | + | ! CL | |
| − | + | | {{RedGunMedium}}{{RedGunMedium}}{{Seaplane}} | |
| − | + | | Setup for CLs that are capable of [[Artillery Spotting]]. For those that are not, simply replace the seaplane with a radar or anti-air gun. For [[Abukuma|Abukuma Kai Ni]] or [[Yura|Yura Kai Ni]], the seaplane can be replaced with a midget submarine. | |
| − | + | |- | |
| − | + | ! CLT | |
| + | | {{RedGunMedium}}{{RedGunMedium}}{{TorpedoWeapon}} | ||
| + | | CLTs are useful for increasing the pass rate for this map. The addition of a midget sub for opening torpedo strikes can reduce the number of threats even further. | ||
| + | |- | ||
| + | ! CA | ||
| + | | {{RedGunMedium}}{{RedGunMedium}}{{Seaplane}}{{WildCard}} | ||
| + | | Just a standard artillery spotting setup. The wildcard can be anything that doesn't interfere with the double attack. | ||
| + | |- | ||
| + | ! BB | ||
| + | | {{RedGunHeavy}}{{RedGunHeavy}}{{RedAmmo}}{{Seaplane}} | ||
| + | | Just a standard artillery spotting setup. | ||
| + | |- | ||
| + | ! CV(L) | ||
| + | | {{BluePlane}}{{BluePlane}}{{RedPlane}}{{GreenPlane}} | ||
| + | | The fighter power requirement is very low at 144 for AS+. This allows your carriers to bring a powerful airstrike that will increase your chances of reaching the boss. | ||
| + | |} | ||
| − | + | |-|4-5= | |
| + | Out of the 3 "1st node submarine" maps, 4-5 is the 2nd best in terms of experience. It also has the added advantage of not being limited by fleet composition. The objective is to '''retreat after node B or D'''. You will require some girls capable of [[OASW]] to reduce the bucket cost. Because your fleet only fights one node, morale can quickly become an issue. | ||
| − | + | '''Recommended Fleets''' | |
| + | * 3-4OASW 2-3XX | ||
| − | + | '''Equipment Setups''' | |
| − | + | ''Any girl not capable of ASW can just be equipped with anything. Bulges will help reduce the chances that opening torpedoes will damage them.'' | |
| − | + | {|class="wikitable" width="100%" | |
| + | !width="50px"| Ship Type | ||
| + | !width="170px"| Equipment | ||
| + | ! Notes | ||
| + | |- | ||
| + | ! DD | ||
| + | | {{Sonar}}{{Sonar}}{{DepthCharge}}'''/'''{{Sonar}} | ||
| + | | This balances accuracy and damage for DDs. The SONARS add accuracy and the [[Type 94 Depth Charge]] or [[Type 3 Depth Charge]] provides them with ASW synergy damage. An extra SONAR can be added for [[Tashkent]]. | ||
| + | |- | ||
| + | ! DE | ||
| + | | {{Sonar}}{{DepthCharge}}{{DepthCharge}} | ||
| + | | Similar to the DD setup with one SONAR swapped out for a [[Type 95 Depth Charge]] or [[Type 2 Depth Charge]]. These DCs have extra armor penetration when equipped on DEs. The extra ASW synergy damage also helps overcome their low base ASW. | ||
| + | |- | ||
| + | ! CL | ||
| + | | {{Sonar}}{{Sonar}}{{DepthCharge}}'''/'''{{Sonar}} | ||
| + | | Similar to the DD setup, it aims to balance accuracy and damage. | ||
| + | |- | ||
| + | ! BBV/CAV | ||
| + | | {{Autogyro}}{{ASWPlane}}{{Seaplane}} | ||
| + | | A BBV isn't going to be contributing much to combat aside from enabling a 2nd shelling phase. [[Hyuuga Kai Ni]] is an exception since she has respectable ASW and is capable of OASW. Just equip the BBV with the best ASW equipment she can carry. | ||
| + | |- | ||
| + | ! CVL | ||
| + | | {{BluePlane}}{{Autogyro}}{{ASWPlane}}{{YellowPlane}} | ||
| + | | Aside from the [[Saiun]], CVLs should just have whatever your best ASW planes are. Ideally you should take one of the CVLs that are capable of OASW. | ||
| + | |} | ||
| − | CV | + | |-|7-5 & 5-2= |
| + | This is the cheapest and fastest way to level any aviation ship (BBV, CAV, CV(L), and AV) as well as SS/SSV. The objective is to '''retreat after the air node'''. The [[12cm 30 Tube Rocket Launcher Kai 2]] is mandatory to get the most out of this map. This map is a waste of time and resources if you do not have the RLK2. How many girls you can field at once is determined by how many rockets you have. Because it is highly unlikely your girls will take damage, this map can be run non-stop with the flagship guaranteed MVP. | ||
| − | + | '''Recommended Fleets''' | |
| + | * 1-6XX | ||
| − | + | '''Equipment Setups''' | |
| − | + | {|class="wikitable" width="100%" | |
| − | + | !width="50px"| Ship Type | |
| − | + | !width="170px"| Equipment | |
| − | + | ! Notes | |
| − | + | |- | |
| − | + | ! All | |
| − | + | | {{Equipment/Card|12cm 30-tube Rocket Launcher Kai Ni|size=40px}} ( {{GreenGunMG}}{{GreenGunMG}}{{GreenGunMG}} ) | |
| − | + | | You only need the [[12cm 30 Tube Rocket Launcher Kai 2]] equipped on your girls to do this map. The aim is to abuse the [[Aerial_Combat#Anti-Air Rocket Barrage|Rocket Barrage]] ability to take no damage from the airstrike. Most girls should be able to reach 100% trigger rate with just 2 RLK2, or with 1 RLK2 and AA guns. | |
| + | |} | ||
| − | + | An alternative solution for surface ships unable to trigger the AARB, is to set such a ship as flagship, followed by at least 4 ships with AARB, and by using either [[Diamond]] or [[Vanguard]] formations. | |
| − | + | *The flagship will take advantage of the flagship protection mechanic, with this method being more risky than the standard AARB one. | |
| − | |||
| − | |||
| − | |||
| − | |||
| − | |||
| − | * | ||
| − | |||
| − | |||
| − | |||
| + | |-|5-3= | ||
| + | This map is the fastest way to level F/BB, CA/V, CL/T, DD and DE. Take note that BBV and CV(L) cannot be brought. The objective of this map is to '''target node P'''. This map is very costly bucket-wise. The two night battle nodes are more than capable of heavily damaging any ship girl in your fleet if they get lucky. | ||
| − | + | '''Recommended Fleets''' | |
| − | + | * 1XX 0-1CL 4-5DD | |
| − | |||
| − | |||
| − | |||
| − | |||
| − | Equipment | + | {|class="wikitable" width="100%" |
| + | !width="50px"| Ship Type | ||
| + | !width="170px"| Equipment | ||
| + | ! Notes | ||
| + | |- | ||
| + | ! rowspan=2| DD | ||
| + | | {{RedGunLight}}{{RedGunLight}}{{WildCard}} | ||
| + | | This setup is only for the '''DD that is flagship'''. The red guns are interchangeable with {{GreenGunDP}}, just use whatever has the best total night battle power. The wildcard can by anything that does not interfere with her double attack setup. This should enable her to take MVP most of the time. | ||
| + | |- | ||
| + | | {{TorpedoWeapon}}{{Radar}}{{SurfaceShipPersonnel}} | ||
| + | | This setup is for the '''escorting DDs'''. The cut-in that it triggers is low power, has a decent trigger rate even on low luck ships and the setup provides bonus evasion. It provides some much needed survivability and is still good enough to sink the enemies you'll encounter without outshining the flagship. | ||
| + | |- | ||
| + | ! CL | ||
| + | | {{RedGunMedium}}{{StarShell}}{{Night Recon}} | ||
| + | | The CL should be powerful enough to take out enemy ships with a single attack. She should not have a double attack so that she doesn't steal MVP from the flagship. The [[Star Shell]] increases the chances that the escort DDs will perform their cut-ins. The seaplane must be a night scout. | ||
| + | |- | ||
| + | ! CA/V | ||
| + | | {{RedGunMedium}}{{RedGunMedium}}{{Night Recon}}{{WildCard}} | ||
| + | | Like the CL, the seaplane must be a night scout. The wildcard can be anything that does not interfere with her double attack setup. She can even equip a star shell to increase the activation chance. | ||
| + | |- | ||
| + | ! (F)BB | ||
| + | | {{RedGunHeavy}}{{RedGunHeavy}}{{Night Recon}}{{RedAmmo}} | ||
| + | | Like the CL, the seaplane must be a night scout. This is a fairly standard setup for the BB otherwise. | ||
| + | |} | ||
| − | + | |-|5-5= | |
| − | + | Out of the 3 "1st node submarine" maps, 5-5 is the best in terms of experience. It's drawbacks are that you are limited to only 3DD and the enemy submarines are stronger, necessitating [[OASW]]. The objective is to '''retreat after node B'''. Like 4-5, morale quickly becomes an issue. | |
| − | |||
| − | |||
| − | + | '''Recommended Fleets''' | |
| − | * | + | * 4-5OASW 1-2XX |
| − | |||
| − | |||
| − | |||
| − | |||
| − | + | '''Equipment Setups''' | |
| − | |||
| − | |||
| − | |||
| − | |||
| − | |||
| − | |||
| − | |||
| − | |||
| − | |||
| − | + | ''Any girl not capable of ASW can just be equipped with anything. Bulges will help reduce the chances that opening torpedoes will damage them.'' | |
| − | + | {|class="wikitable" width="100%" | |
| − | + | !width="50px"| Ship Type | |
| − | + | !width="170px"| Equipment | |
| − | + | ! Notes | |
| − | + | |- | |
| − | + | ! DD | |
| + | | {{Sonar}}{{Sonar}}{{DepthCharge}}'''/'''{{Sonar}} | ||
| + | | This balances accuracy and damage for DDs. The SONARS add accuracy and the [[Type 94 Depth Charge]] or [[Type 3 Depth Charge]] provides them with ASW synergy damage. An extra SONAR can be added for [[Tashkent]]. | ||
| + | |- | ||
| + | ! DE | ||
| + | | {{Sonar}}{{DepthCharge}}{{DepthCharge}} | ||
| + | | Similar to the DD setup with one SONAR swapped out for a [[Type 95 Depth Charge]] or [[Type 2 Depth Charge]]. These DCs have extra armour penetration when equipped on DEs. The extra ASW synergy damage also helps overcome their low base ASW. | ||
| + | |- | ||
| + | ! CL | ||
| + | | {{Sonar}}{{Sonar}}{{DepthCharge}}'''/'''{{Sonar}} | ||
| + | | Similar to the DD setup, it aims to balance accuracy and damage. | ||
| + | |- | ||
| + | ! BBV | ||
| + | | {{Autogyro}}{{ASWPlane}}{{Seaplane}} | ||
| + | | A BBV isn't going to be contributing much to combat aside from enabling a 2nd shelling phase. [[Hyuuga|Hyuuga Kai Ni]] is an exception since she has respectable ASW and is capable of OASW. Just equip the BBV with the best ASW equipment she can carry. | ||
| + | |- | ||
| + | ! CVL | ||
| + | | {{BluePlane}}{{Autogyro}}{{ASWPlane}}{{YellowPlane}} | ||
| + | | Aside from the [[Saiun]], CVLs should just have whatever your best ASW planes are. Ideally you should take one of the CVLs that are capable of OASW. | ||
| + | |} | ||
| − | + | |-|6-5= | |
| − | + | Out of the 3 "1st node submarine" maps, 6-5 is the worst in terms of experience. Unlike 4-5 and 5-5, you are also unable to bring BB, CV, or CLT. The only reason to run this map for experience is to rank your LBAS alongside. [[OASW]] is mandatory due to the strength of the enemy submarines. You can reduce the number of OASW girls in the fleet if you are running ASW planes in the LBAS. | |
| − | + | ''This map can be used for ranking [[LBAS]].'' | |
| − | + | '''Recommended Fleets''' | |
| − | + | * 5OASW 1CL | |
| − | === | + | '''Equipment Setups''' |
| − | + | {|class="wikitable" width="100%" | |
| − | + | !width="50px"| Ship Type | |
| − | + | !width="170px"| Equipment | |
| − | + | ! Notes | |
| − | + | |- | |
| − | + | ! DD | |
| − | + | | {{Sonar}}{{Sonar}}{{DepthCharge}}'''/'''{{Sonar}} | |
| − | + | | This balances accuracy and damage for DDs. The SONARS add accuracy and the [[Type 94 Depth Charge]] or [[Type 3 Depth Charge]] provides them with ASW synergy damage. An extra SONAR can be added for [[Tashkent]]. | |
| − | + | |- | |
| − | + | ! DE | |
| − | + | | {{Sonar}}{{DepthCharge}}{{DepthCharge}} | |
| − | + | | Similar to the DD setup with one SONAR swapped out for a [[Type 95 Depth Charge]] or [[Type 2 Depth Charge]]. These DCs have extra armour penetration when equipped on DEs. The extra ASW synergy damage also helps overcome their low base ASW. | |
| − | + | |- | |
| + | ! CL | ||
| + | | {{Sonar}}{{Sonar}}{{DepthCharge}}'''/'''{{Sonar}} | ||
| + | | Similar to the DD setup, it aims to balance accuracy and damage. | ||
| + | |} | ||
| + | </tabber> | ||
| − | == | + | =General Tips= |
| − | |||
| − | |||
| − | + | * Maps heavily reward clearing them in full with the boss node being worth a significant portion of the map's exp. Unless otherwise noted, '''always clear the map'''. | |
| + | * For details on how exp works, see [[Experience and Rank]]. | ||
| + | ** The flagship receives a 50% exp bonus. Have the girl to level the fastest in that slot. | ||
| + | ** MVP gives double XP. Can be set as flagship for a total of 3x bonus. | ||
| + | ** S-ranks give 20% more exp. Losses have an exp penalty. | ||
| + | ** It is good to proceed into night battle for boss nodes to attempt to turn a loss into a victory or A/B rank into S-rank. | ||
| + | *** Do not bother fighting SS in NB. | ||
| + | * Certain maps like [[5-3]] allow some control over who gets the MVP. Take full advantage of that to maximize efficiency by manipulating the flagship to get MVP. | ||
| + | * Unless otherwise noted, girls' morale must be watched. Low morale will affect their combat ability and lower the pass rate. | ||
| + | * Leveling speed can be increased slightly by sortieing with full ship and/or equipment slots. This saves precious time not waiting for the drop animation to play out. | ||
| + | * Be sure to check the [[#Event|Event]] section when there is an event running for the latest leveling spot. Events generally allow to level using a combined fleet. | ||
| + | * Do not be afraid to sortie girls at {{color|orange|'''moderate damage (中破)'''}}. Unless they are severely underleveled and not modernized, they should be able to last a few runs before heavy damage. | ||
| + | ** A general rule of thumb is to leave a buffer of 10% max HP from {{color|red|'''heavy damage (大破)'''}}. | ||
| + | *Submarine, PT Imp, Airstrike, and Night Battle nodes consume considerably less fuel and ammo than regular surface battle nodes | ||
| + | *[[Modernization]]: Improves the primary four stats of ships. AA tends to be difficult to modernize but is generally the least important for farming XP. Firepower and armor can help the most. Stats gained during modernization are lost upon remodel, so typically modernization is used after the first remodel. | ||
| − | + | ===Using Fodder Ships=== | |
| + | If maps require passing a dangerous node (like 5-3 I) first to get to the leveling spot, it is possible to exploit disposable escort ships that can be sunk during the sortie to save on buckets and time. Be aware that sinking Ships intentionally can generate quite a bit of hostility from other admirals. It is generally not recommended to utilize these strategies, but are included here for sake of completion of the guide. Be aware of the following: | ||
| + | *Equipment from sunk ships is permanently lost, do not use anything but the most basic equipment on them | ||
| + | *Losing Ships can affect Battle Ranks | ||
| + | *Unmodernized Level 1 ships with disposable equipment will struggle to make any meaningful contribution to the battle, which will also affect Battle Ranks | ||
| + | *Sinking Ships can also lead to failure to fulfill certain branching rules later on in the same map | ||
| − | + | ===Submarine Tanks=== | |
| − | + | Also known as "Sub Tanks". This strategy is using SS(V) to draw fire from enemy DD, CL, CVL, and, BBV. This can help preserve the rest of the fleet as they will be taking less fire. SS(V) have low sortie costs and are quick to repair when under level 40 and unremodeled. Do note that any enemy with ASW gears will make short work of low level SS(V). | |
| − | |||
| − | === | + | ===Range=== |
| − | + | It may be interesting to control which girl strikes first to better manage who gets the MVP. | |
| − | |||
| − | + | {{Template:Range Extension}} | |
| − | |||
| − | = | + | =Event= |
| − | + | On some event maps, it may be possible to farm for resources or for leveling, please refer to the current [[Event]] page for up-to-date data. | |
| − | + | *''This section may be updated for relevant events. | |
| − | * This | + | <!-- |
| + | --> | ||
| − | = | + | =See Also= |
* (Japanese) http://kankoreshuukai.blog.jp/archives/1410107.html | * (Japanese) http://kankoreshuukai.blog.jp/archives/1410107.html | ||
| − | + | {{Help}} | |
| − | + | [[Category:Tutorial]] | |
| − | |||
| − | |||
| − | |||
| − | |||
| − | |||
| − | |||
| − | |||
| − | |||
Latest revision as of 21:04, 9 December 2023
Overview
This article aims to provide you with a list of the most efficient places to quickly level your ship girls. It will only cover sorties. Generally Exercises are the most efficient way to level but are severely limited.
Experience (XP) increases the level of ships, being crucial to many mechanics (see here). It also increases the Admiral HQ to some extent.
| Map | Bucket Usage | Low Morale? | Subtank? | Target Types | Notes |
|---|---|---|---|---|---|
| 1-5 | Low | No | No | CL, DD, DE, CVL, BBV | Enemy SS only |
| 2-1 | Low | No | Yes | CV(L), (F)BB(V), CA(V), CL(T) | |
| 2-2 | Low | Yes | Yes | CV(L), DD, SS(V) | Bauxite farm |
| 3-4 | High | No | No | CV(L) | Ranking map |
| 3-5 | Low | Yes | Yes | Any + CV(L) | |
| 7-1 | Medium | No | No | CL, DD | Ranking map |
| 7-2 p1 | Low | No | No | CVL, DE | Majority Submarines |
| 7-2 p2 | High | No | No | FBB, CV(L), CA | Ranking map. |
| 7-4 | Very low | Yes | N/A | SS(V) |
|
| 7-5 | None | Yes | N/A | SS(V), CAV, BBV, CV(L), AV | RLK2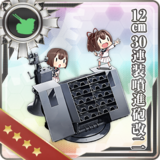 required required
|
| 4-4 | Medium | No | No | (F)BB(V), CV(L), CA | Ranking map |
| 4-5 | Low | No | No | Any | Enemy SS only |
| 5-2 | None | Yes | N/A | SS(V), CAV, BBV, CV(L), AV | RLK2 required
|
| 5-3 | High | No | No | Any (except BBV and CV(L)) | Night battle map |
| 5-5 | Low | No | No | Any | Enemy SS only |
| 6-5 | Low | No | No | Any (except CV(L) and CLT) | Enemy SS only |
| Map | Bucket Usage | Low Morale? | Subtank? | Target Types | Notes |
Alternatively, Expedition 32 can be used for leveling, but this method is unadvised, as it takes away one expedition for resource farming.
Leveling Locations
This map is a good starting point for leveling DD, DE, and CL. OASW is required to get the most out of this map. At higher HQ levels, the boss node contains a flagship submarine that can be difficult to sink in just 1 round of shelling. Furthermore, the submarines present will have opening torpedoes in the later nodes. Not having OASW means higher bucket usage. BBV and CVL also have some use in this map. BBVs allow a 2nd round of shelling that can help weaker ASW ships secure S rank. CVLs can carry a Saiun to prevent RedT engagements from hampering your fleet's combat ability. This map can be used for Ranking. Recommended Fleets
- 4DD/DE
- 2CL 2DD/DE
- 1BBV 3DD/DE
- 1BBV 2CL 1DD/DE
- 1CVL 3DD/DE
- 1CVL 2CL 1DD/DE
- 1BBV 1CVL 2DD/DE
| Ship Type | Equipment | Notes |
|---|---|---|
| DD | This balances accuracy and damage for DDs. The SONARS add accuracy and the Type 94 Depth Charge or Type 3 Depth Charge provides them with ASW synergy damage. An extra SONAR can be added for Tashkent. | |
| DE | Similar to the DD setup with one SONAR swapped out for a Type 95 Depth Charge or Type 2 Depth Charge. These DCs have extra armor penetration when equipped on DEs. The extra ASW synergy damage also helps overcome their low base ASW. | |
| CL | Similar to the DD setup, it aims to balance accuracy and damage. | |
| BBV | A BBV isn't going to be contributing much to combat aside from enabling a 2nd shelling phase. Hyuuga Kai Ni is an exception since she has respectable ASW and is capable of OASW. Just equip the BBV with the best ASW equipment she can carry. | |
| CVL | Aside from the Saiun, CVLs should just have whatever your best ASW planes are. Ideally you should take one of the CVLs that are capable of OASW. |
This map is not all that fantastic for experience, but it is the earliest map that is efficient for leveling heavier ships like BB, CA, CV, and CVL. Air power is nearly nonexistent which allows your fleet to have a powerful opening strike that reduces your bucket cost. Recommended Fleets
- 2CV(L) 1-2BB/CA 0-1CL/T 2DD
| Ship Type | Equipment | Notes |
|---|---|---|
| DD | Fairly standard setup for DDs. They won't be contributing much to the battle beyond providing AA support. They are primarily here to reduce costs. Else, putting more CL and CA in the fleet would still work. | |
| CL | Setup for CLs that are capable of Artillery Spotting. For those that are not, simply replace the seaplane with a radar or anti-air gun. | |
| CLT | CLTs are useful for increasing the pass rate for this map. The addition of a midget sub for opening torpedo strikes can reduce the number of threats even further. | |
| CA | Just a standard artillery spotting setup. The wildcard can be anything that doesn't interfere with the double attack. | |
| BB | Just a standard artillery spotting setup. | |
| CV(L) | You may need to shuffle around some planes in order to hit the 162 fighter power required for AS+. One of your carriers should also have a Saiun if you can manage it. |
This map requires a minimum of 3 CV(L), allowing you to leech up to 3 other girls. The objective of this leveling method is to only hit node B and the bauxite node. It doesn't give a lot of experience but it provides safe leveling. The resource cost is very low and it is even possible to get a refund on the bauxite cost. While it is possible to run this map at low morale, you will want to have more carriers to increase the chances the airstrike sinks all the enemy ships. This will reduce the bucket cost. This map can also be used for farming bauxite. See Resource Farming for more details. Recommended Fleets
- 3CV(L) 3XX
| Ship Type | Equipment | Notes |
|---|---|---|
| CV(L) | Your carriers will want to maximize their airstrike power to increase the chances they sink a majority of the enemy fleet before shelling begins. At least one carrier should have the Type 2 Recon Aircraft in order to maximize airstrike damage. The dive bomber enables the carriers to perform CVCI to clean up any stragglers. |
This map is primarily for CV(L). The strategy is to load up on your best torpedo bombers and attempt to wipe the nodes before they send your fleet back to port. Be warned that this map costs an exorbitant amount of bauxite. Attempting to reduce the bauxite cost will increase the bucket cost. This map can also be used for Ranking. Recommended Fleets
- 2CV 2CVL 1CL 1AV
| Ship Type | Equipment | Notes |
|---|---|---|
| CL | A basic artillery spotting setup. Keep in mind that not taking a CL capable of performing opening torpedoes will reduce your success rate. | |
| This is for either Abukuma Kai Ni or Yura Kai Ni. The extra torpedoes will make their opening strike a lot more powerful, allowing it to hopefully take out heavier targets. | ||
| CV(L) | You will need to reach a total of 168 fighter power in order to minimize your bauxite losses. At least 1 carrier should have a Type 2 Recon Aircraft in order to maximize the power of the airstrike. | |
| AV | Similar to the CL, the AV should aim to maximize torpedo power. In this case, all three should be midget submarines. |
This map allows you to level any ship type as the flagship. You should retreat after node B. 3-4 enemies in the node will be forced to attack a submarine, allowing you to mitigate some damage taken. Note that those enemies have ASW equipment so the sub is unlikely to survive more than one battle. Because the airstrike will do most of the heavy lifting, it is possible to run this map with low morale ships. Beware that this will increase your bucket cost when the airstrike fails to take out enough enemy ships. Recommended Fleets
- 1XX 4CV(L) 1SS/V
| Ship Type | Equipment | Notes |
|---|---|---|
| CV(L) | Your carriers will want to maximize their airstrike power to increase the chances they sink a majority of the enemy fleet before shelling begins. At least one carrier should have the Type 2 Recon Aircraft in order to maximize airstrike damage. The dive bomber enables the carriers to perform CVCI to clean up any stragglers. |
This map is great for leveling CLs and DDs but the requirements are tight if you want to reduce bucket costs. At least 3-4 girls in the fleet must be capable of OASW. The fewer girls that are capable, the higher the bucket cost will be. Having a CL capable of opening strikes will help by increasing the pass rate at G. This map can be used for Ranking. Recommended Fleets
- 1CL 4DD
| Ship Type | Equipment | Notes |
|---|---|---|
| DD | The SONAR and the Type 94 Depth Charge or Type 3 Depth Charge provide decent ASW damage against any sub that you will encounter on the map. The gun adds much needed daytime shelling power to reduce retreats at G. An extra SONAR or gun can be added for Tashkent. | |
| CL | This setup is for CLs without an opening attack. The reasoning behind it is similar to the DD setup. | |
| This setup is for Agano-class, Tama Kai Ni or Gotland Kai. The seaplanes should be seaplane bombers. Good SPB like the Prototype Seiran are important to increase the pass rate. The Zuiun is not strong enough to reliably sink or disable enemies at G before closing torpedoes. | ||
| This setup is limited to Abukuma Kai Ni and Yura Kai Ni. They are the best choice for CLs on this map. The opening torpedo is nearly guaranteed to kill at least one enemy at G which drastically increases your pass rate. |
This section is for 7-2 phase 1 that terminates at node G. It is a decent map for leveling DE and CVL. The exp is lower than 1-5, but you can level 1 more girl. Ideally, you will want all your girls to be capable of OASW. This will allow them to eliminate the submarine threats and take no damage in return. Note that the boss node contains a mix of sub and surface ships. Recommended Fleets
- 3DE, 2CVL
| Ship Type | Equipment | Notes |
|---|---|---|
| DE | Similar to the DD setup with one SONAR swapped out for a Type 95 Depth Charge or Type 2 Depth Charge. These DCs have extra armor penetration when equipped on DEs. The extra ASW synergy damage also helps overcome their low base ASW. | |
| CVL | Because the boss contains surface ships, you will want to maximize your airstrike along with ASW. The surface ships at the boss are just DD and CL so taking your highest ASW torpedo bombers should be sufficient. One CVL should have a Saiun to prevent Red T. |
This section is for 7-2 phase 2 that terminates at node M. It provides slightly more experience than 4-4 in exchange for harder fights. It is primarily for leveling BB, CV(L), and CA. It also has a very steep fighter power requirement, which limits the effectiveness of the airstrike. Overall, it costs a lot more resources to run compared to 4-4. This map can also be used for Ranking. Recommended Fleets
- 1FBB, 2CV(L), 1CA/CL, 2DD
- 1AV, 2CLT, 3DD
| Ship Type | Equipment | Notes |
|---|---|---|
| DD | Fairly standard setup for DDs. They won't be contributing much to the battle beyond providing AA support. The wildcard can be a radar for AACI (if using the right guns) or SONARs to help with passing node C. | |
| CL | Setup for CLs that are capable of Artillery Spotting. For those that are not, simply replace the seaplane with a radar or anti-air gun. For Abukuma Kai Ni or Yura Kai Ni, the seaplane can be replaced with a midget submarine. | |
| CLT | CLTs are useful for increasing the pass rate for this map. The addition of a midget sub for opening torpedo strikes can reduce the number of threats even further. | |
| CA | Just a standard artillery spotting setup. The wildcard can be anything that doesn't interfere with the double attack. | |
| BB | Just a standard artillery spotting setup. | |
| CV(L) | You will need to hit 359 fighter power for AS. Attempting to hit AS+ is futile and will cripple your carrier's combat effectiveness. |
On 7-4, it is possible to use a submarine fleet to route to the Port Node O instead of the Boss, farming fuel and bauxite at the same time. It is also possible to send one LBAS to level up LBAS planes' proficiency at the same time.
- See here for more detail.
- 1-6SS(V)
- Route = C D F J K M O
- LoS required: ≥ 32 (Cn3)
This map is primarily for leveling BB, CV(L), CA, or CL. Unlike 7-1p2, it has no speed routing so a wider variety of girls can be used. It can get fairly costly depending on the setup used. It is not recommended to bring more than 1 leech for this map. The pre-boss nodes are fairly dangerous with the flagship Ri that will cause you to retreat. The boss herself has flagship Ta as escorts that will cost you buckets if you do not bring powerful enough girls.
- This map can also be used for Ranking.
- 1BB, 2CV(L), 1CA/CL, 2DD
| Ship Type | Equipment | Notes |
|---|---|---|
| DD | The main role of the DD will be to help increase the pass rate at E. OASW is highly recommended. | |
| CL | Setup for CLs that are capable of Artillery Spotting. For those that are not, simply replace the seaplane with a radar or anti-air gun. For Abukuma Kai Ni or Yura Kai Ni, the seaplane can be replaced with a midget submarine. | |
| CLT | CLTs are useful for increasing the pass rate for this map. The addition of a midget sub for opening torpedo strikes can reduce the number of threats even further. | |
| CA | Just a standard artillery spotting setup. The wildcard can be anything that doesn't interfere with the double attack. | |
| BB | Just a standard artillery spotting setup. | |
| CV(L) | The fighter power requirement is very low at 144 for AS+. This allows your carriers to bring a powerful airstrike that will increase your chances of reaching the boss. |
Out of the 3 "1st node submarine" maps, 4-5 is the 2nd best in terms of experience. It also has the added advantage of not being limited by fleet composition. The objective is to retreat after node B or D. You will require some girls capable of OASW to reduce the bucket cost. Because your fleet only fights one node, morale can quickly become an issue. Recommended Fleets
- 3-4OASW 2-3XX
| Ship Type | Equipment | Notes |
|---|---|---|
| DD | This balances accuracy and damage for DDs. The SONARS add accuracy and the Type 94 Depth Charge or Type 3 Depth Charge provides them with ASW synergy damage. An extra SONAR can be added for Tashkent. | |
| DE | Similar to the DD setup with one SONAR swapped out for a Type 95 Depth Charge or Type 2 Depth Charge. These DCs have extra armor penetration when equipped on DEs. The extra ASW synergy damage also helps overcome their low base ASW. | |
| CL | Similar to the DD setup, it aims to balance accuracy and damage. | |
| BBV/CAV | A BBV isn't going to be contributing much to combat aside from enabling a 2nd shelling phase. Hyuuga Kai Ni is an exception since she has respectable ASW and is capable of OASW. Just equip the BBV with the best ASW equipment she can carry. | |
| CVL | Aside from the Saiun, CVLs should just have whatever your best ASW planes are. Ideally you should take one of the CVLs that are capable of OASW. |
This is the cheapest and fastest way to level any aviation ship (BBV, CAV, CV(L), and AV) as well as SS/SSV. The objective is to retreat after the air node. The 12cm 30 Tube Rocket Launcher Kai 2 is mandatory to get the most out of this map. This map is a waste of time and resources if you do not have the RLK2. How many girls you can field at once is determined by how many rockets you have. Because it is highly unlikely your girls will take damage, this map can be run non-stop with the flagship guaranteed MVP. Recommended Fleets
- 1-6XX
| Ship Type | Equipment | Notes |
|---|---|---|
| All | You only need the 12cm 30 Tube Rocket Launcher Kai 2 equipped on your girls to do this map. The aim is to abuse the Rocket Barrage ability to take no damage from the airstrike. Most girls should be able to reach 100% trigger rate with just 2 RLK2, or with 1 RLK2 and AA guns. |
An alternative solution for surface ships unable to trigger the AARB, is to set such a ship as flagship, followed by at least 4 ships with AARB, and by using either Diamond or Vanguard formations.
- The flagship will take advantage of the flagship protection mechanic, with this method being more risky than the standard AARB one.
This map is the fastest way to level F/BB, CA/V, CL/T, DD and DE. Take note that BBV and CV(L) cannot be brought. The objective of this map is to target node P. This map is very costly bucket-wise. The two night battle nodes are more than capable of heavily damaging any ship girl in your fleet if they get lucky. Recommended Fleets
- 1XX 0-1CL 4-5DD
| Ship Type | Equipment | Notes |
|---|---|---|
| DD | This setup is only for the DD that is flagship. The red guns are interchangeable with | |
| This setup is for the escorting DDs. The cut-in that it triggers is low power, has a decent trigger rate even on low luck ships and the setup provides bonus evasion. It provides some much needed survivability and is still good enough to sink the enemies you'll encounter without outshining the flagship. | ||
| CL | The CL should be powerful enough to take out enemy ships with a single attack. She should not have a double attack so that she doesn't steal MVP from the flagship. The Star Shell increases the chances that the escort DDs will perform their cut-ins. The seaplane must be a night scout. | |
| CA/V | Like the CL, the seaplane must be a night scout. The wildcard can be anything that does not interfere with her double attack setup. She can even equip a star shell to increase the activation chance. | |
| (F)BB | Like the CL, the seaplane must be a night scout. This is a fairly standard setup for the BB otherwise. |
Out of the 3 "1st node submarine" maps, 5-5 is the best in terms of experience. It's drawbacks are that you are limited to only 3DD and the enemy submarines are stronger, necessitating OASW. The objective is to retreat after node B. Like 4-5, morale quickly becomes an issue. Recommended Fleets
- 4-5OASW 1-2XX
| Ship Type | Equipment | Notes |
|---|---|---|
| DD | This balances accuracy and damage for DDs. The SONARS add accuracy and the Type 94 Depth Charge or Type 3 Depth Charge provides them with ASW synergy damage. An extra SONAR can be added for Tashkent. | |
| DE | Similar to the DD setup with one SONAR swapped out for a Type 95 Depth Charge or Type 2 Depth Charge. These DCs have extra armour penetration when equipped on DEs. The extra ASW synergy damage also helps overcome their low base ASW. | |
| CL | Similar to the DD setup, it aims to balance accuracy and damage. | |
| BBV | A BBV isn't going to be contributing much to combat aside from enabling a 2nd shelling phase. Hyuuga Kai Ni is an exception since she has respectable ASW and is capable of OASW. Just equip the BBV with the best ASW equipment she can carry. | |
| CVL | Aside from the Saiun, CVLs should just have whatever your best ASW planes are. Ideally you should take one of the CVLs that are capable of OASW. |
Out of the 3 "1st node submarine" maps, 6-5 is the worst in terms of experience. Unlike 4-5 and 5-5, you are also unable to bring BB, CV, or CLT. The only reason to run this map for experience is to rank your LBAS alongside. OASW is mandatory due to the strength of the enemy submarines. You can reduce the number of OASW girls in the fleet if you are running ASW planes in the LBAS. This map can be used for ranking LBAS. Recommended Fleets
- 5OASW 1CL
| Ship Type | Equipment | Notes |
|---|---|---|
| DD | This balances accuracy and damage for DDs. The SONARS add accuracy and the Type 94 Depth Charge or Type 3 Depth Charge provides them with ASW synergy damage. An extra SONAR can be added for Tashkent. | |
| DE | Similar to the DD setup with one SONAR swapped out for a Type 95 Depth Charge or Type 2 Depth Charge. These DCs have extra armour penetration when equipped on DEs. The extra ASW synergy damage also helps overcome their low base ASW. | |
| CL | Similar to the DD setup, it aims to balance accuracy and damage. |
General Tips
- Maps heavily reward clearing them in full with the boss node being worth a significant portion of the map's exp. Unless otherwise noted, always clear the map.
- For details on how exp works, see Experience and Rank.
- The flagship receives a 50% exp bonus. Have the girl to level the fastest in that slot.
- MVP gives double XP. Can be set as flagship for a total of 3x bonus.
- S-ranks give 20% more exp. Losses have an exp penalty.
- It is good to proceed into night battle for boss nodes to attempt to turn a loss into a victory or A/B rank into S-rank.
- Do not bother fighting SS in NB.
- Certain maps like 5-3 allow some control over who gets the MVP. Take full advantage of that to maximize efficiency by manipulating the flagship to get MVP.
- Unless otherwise noted, girls' morale must be watched. Low morale will affect their combat ability and lower the pass rate.
- Leveling speed can be increased slightly by sortieing with full ship and/or equipment slots. This saves precious time not waiting for the drop animation to play out.
- Be sure to check the Event section when there is an event running for the latest leveling spot. Events generally allow to level using a combined fleet.
- Do not be afraid to sortie girls at moderate damage (中破). Unless they are severely underleveled and not modernized, they should be able to last a few runs before heavy damage.
- A general rule of thumb is to leave a buffer of 10% max HP from heavy damage (大破).
- Submarine, PT Imp, Airstrike, and Night Battle nodes consume considerably less fuel and ammo than regular surface battle nodes
- Modernization: Improves the primary four stats of ships. AA tends to be difficult to modernize but is generally the least important for farming XP. Firepower and armor can help the most. Stats gained during modernization are lost upon remodel, so typically modernization is used after the first remodel.
Using Fodder Ships
If maps require passing a dangerous node (like 5-3 I) first to get to the leveling spot, it is possible to exploit disposable escort ships that can be sunk during the sortie to save on buckets and time. Be aware that sinking Ships intentionally can generate quite a bit of hostility from other admirals. It is generally not recommended to utilize these strategies, but are included here for sake of completion of the guide. Be aware of the following:
- Equipment from sunk ships is permanently lost, do not use anything but the most basic equipment on them
- Losing Ships can affect Battle Ranks
- Unmodernized Level 1 ships with disposable equipment will struggle to make any meaningful contribution to the battle, which will also affect Battle Ranks
- Sinking Ships can also lead to failure to fulfill certain branching rules later on in the same map
Submarine Tanks
Also known as "Sub Tanks". This strategy is using SS(V) to draw fire from enemy DD, CL, CVL, and, BBV. This can help preserve the rest of the fleet as they will be taking less fire. SS(V) have low sortie costs and are quick to repair when under level 40 and unremodeled. Do note that any enemy with ASW gears will make short work of low level SS(V).
Range
It may be interesting to control which girl strikes first to better manage who gets the MVP.
It is impossible to reduce the base Range of a ship, but certain equipment can extend it.
- Not to be confused with LBAS Range Extension.


Event
On some event maps, it may be possible to farm for resources or for leveling, please refer to the current Event page for up-to-date data.
- This section may be updated for relevant events.
See Also
| |||||||||||||||||