- Welcome to the Kancolle Wiki!
- If you have any questions regarding site content, account registration, etc., please visit the KanColle Wiki Discord
Difference between revisions of "Early Spring 2023 Event/E-3/Sandbox"
| (81 intermediate revisions by 4 users not shown) | |||
| Line 28: | Line 28: | ||
|id = 56-3a | |id = 56-3a | ||
|0 -> 1 = * Single Fleet/Striking Force Fleet | |0 -> 1 = * Single Fleet/Striking Force Fleet | ||
| − | * 2nd Torpedo Squadron ('''Normal/Hard''') | + | * 2nd Torpedo Squadron tag [[File:{{ROOTPAGENAME}} Tag 2.png|30px]] only ('''Normal/Hard''') |
|0 -> 2 = * Combined Fleet | |0 -> 2 = * Combined Fleet | ||
| − | * For Phase 3, | + | * For Phase 3, STF and TCF? only |
| − | * Combined Fleet tag only ('''Normal/Hard''') | + | * Combined Fleet tag [[File:{{ROOTPAGENAME}} Tag 4.png|30px]] only ('''Normal/Hard''') |
|0 -> 3 = * CTF | |0 -> 3 = * CTF | ||
| − | * Fleet contains at least 1 Carrier Task Force tag or un-tagged ship ('''Casual/Easy''') | + | * Fleet contains at least 1 Carrier Task Force tag [[File:{{ROOTPAGENAME}} Tag 5.png|30px]] or un-tagged ship ('''Casual/Easy''') |
| − | * Carrier Task Force tag only ('''Normal/Hard''') | + | * Carrier Task Force tag [[File:{{ROOTPAGENAME}} Tag 5.png|30px]] only ('''Normal/Hard''') |
}} | }} | ||
{{MapBranchingTable | {{MapBranchingTable | ||
| − | |title = E-3 Branching Rules | + | |title = E-3 Branching Rules (Single / Striking Force Fleet) |
|id = 56-3b | |id = 56-3b | ||
| − | |order = A,B,B1,D,G,H,H1,J | + | |order = A,B,B1,D,G,H,H1,J,N,O,O2,R,S,S1,S2,T |
|A/empty -> B,F/pink = Active Branching | |A/empty -> B,F/pink = Active Branching | ||
| − | |B -> B1 = * Single Fleet | + | |B -> B1 = Does not meet the requirements to go to C or F |
| − | * | + | |B -> C = * Meet '''ALL''' of the following requirements: |
| − | + | ** Single Fleet | |
| − | |B -> F/pink = Striking Force Fleet | + | ** Fleet is at least Fast+ |
| − | |B1/pink -> B2 = | + | ** Amount of (F)BB(V) = 0 |
| + | ** Amount of SS(V) = 0 | ||
| + | ** ??? | ||
| + | |B -> F/pink = * Striking Force Fleet | ||
| + | |B1/pink -> B2 = Does not meet the requirements to go to C | ||
|B1/pink -> C = * Meet '''ALL''' of the following requirements: | |B1/pink -> C = * Meet '''ALL''' of the following requirements: | ||
** Amount of CL + DD ≥ 5 | ** Amount of CL + DD ≥ 5 | ||
| − | ** If slow | + | ** If slow: |
| + | *** Amount of (F)BB(V) = 0 | ||
| + | *** Amount of DD ≥ 5 | ||
|D/resource -> E/empty = * Fail the LoS check | |D/resource -> E/empty = * Fail the LoS check | ||
| − | |D/resource -> K = * Pass the LoS check | + | |D/resource -> K = * Pass the LoS check (Cn4=74~76 '''Hard''') |
|G/empty -> H,J = Active Branching | |G/empty -> H,J = Active Branching | ||
| − | |H -> H1 = | + | |H -> H1 = Does not meet the requirements to go to I |
|H -> I = * Meet '''ALL''' of the following requirements: | |H -> I = * Meet '''ALL''' of the following requirements: | ||
** Fast Fleet | ** Fast Fleet | ||
** Amount of CL ≥ 1 | ** Amount of CL ≥ 1 | ||
** Amount of DD ≥ 4 | ** Amount of DD ≥ 4 | ||
| + | ** Pass the LoS check (Cn4=69~75 '''Hard''') | ||
| + | |H1 -> H2/empty = * Fail the LoS check | ||
| + | |H1 -> I = * Pass the LoS check | ||
| + | |J/red/darkorange -> N = * Meet '''ALL''' of the following requirements: | ||
| + | ** Amount of (F)BB(V)+CV(B)+CA(V) ≤ 1 (?) | ||
| + | ** ??? | ||
| + | |J/red/darkorange -> O = * Meet '''ALL''' of the following requirements: | ||
| + | ** Path to O is unlocked | ||
| + | ** Does not meet the requirements to go to N | ||
| + | ** ??? | ||
| + | |J/red/darkorange -> O1 = No path | ||
| + | |J/red/darkorange -> O2 = Does not meet the requirements to go to N or O | ||
| + | |N -> O2 = Does not meet the requirements to go to P | ||
| + | |N -> P = * Meet '''ALL''' of the following requirements: | ||
| + | ** Fast Fleet | ||
| + | ** Amount of DD ≥ 4 | ||
| + | ** Pass the LoS check (Cn4=82~90 '''Hard''') | ||
| + | |O2 -> Q/empty = * Fail the LoS check | ||
| + | |O2 -> P = * Pass the LoS check | ||
| + | |R/empty -> S = ??? | ||
| + | |R/empty -> S1/pink = Does not meet the requirements to go to S | ||
| + | |R/empty -> V2 = No path(?) | ||
| + | |S -> S2/pink = * Meet '''ALL''' of the following requirements: | ||
** Pass the LoS check | ** Pass the LoS check | ||
| − | + | ** Does not meet the requirements to go to T | |
| − | |||
| − | |||
| − | |||
| − | |||
** ??? | ** ??? | ||
| − | | | + | |S -> T = * Meet '''ALL''' of the following requirements: |
| − | ** | + | ** Pass the LoS check |
| − | ** Amount of CV(B) | + | ** Amount of (F)BB(V) + CV(L/B) ≤ 4 |
** ??? | ** ??? | ||
| + | |S -> Q/empty = * Fail the LoS check | ||
| + | }} | ||
| + | |||
| + | {{MapBranchingTable | ||
| + | |title = E-3 Branching Rules (Combined Fleet) | ||
| + | |id = 56-3c | ||
| + | |order = J,M,N,O1,O2,R,S,U,U2,V,V1,V2 | ||
| + | |J/red/darkorange -> N = * Does not meet the requirements to go to O or O1 | ||
| + | |J/red/darkorange -> O1 = * Route to O is locked: | ||
| + | ** Meet '''ANY''' of the following requirements: | ||
| + | *** Amount of (F)BB(V) ≥ 3 | ||
| + | *** Amount of CV(B) ≥ 2 | ||
| + | *** If Slow, amount of CV(B) ≥ 1 | ||
| + | *** If CL ≥ 2, amount of CV(B) ≥ 1 | ||
| + | * Route to O is unlocked: | ||
| + | ** Does not meet the requirements to go to O | ||
| + | ** Meet '''ANY''' of the following requirements: | ||
| + | *** Amount of (F)BB(V) ≥ 3 | ||
| + | *** Amount of CV(B) ≥ 1 | ||
|J/red/darkorange -> O/pink = * Meet '''ALL''' of the following requirements: | |J/red/darkorange -> O/pink = * Meet '''ALL''' of the following requirements: | ||
| − | ** | + | ** Route to O is unlocked |
| − | ** | + | ** Amount of CV(B) ≥ 1 |
| + | ** Amount of DD ≥ 4 | ||
| + | |M -> J/red/darkorange = Does not meet the requirements to go to O | ||
|M -> O/pink = * Meet '''ALL''' of the following requirements: | |M -> O/pink = * Meet '''ALL''' of the following requirements: | ||
** Fast Fleet | ** Fast Fleet | ||
| − | ** Amount of | + | ** Amount of CV(B) ≥ 1 |
** Amount of CL ≥ 2 | ** Amount of CL ≥ 2 | ||
** Amount of DD ≥ 5 | ** Amount of DD ≥ 5 | ||
| − | + | |N -> O2 = * Fixed Routing ? | |
| − | |N -> O2 = * | + | |O1 -> O/pink = * Amount of CV(B) ≥ 1 |
| − | |||
| − | |||
| − | |||
| − | |||
| − | |O1 -> O/pink = * Amount of ( | ||
| − | |||
|O1 -> O2 = Does not meet the requirements to go to O | |O1 -> O2 = Does not meet the requirements to go to O | ||
| − | |O2 -> Q/empty = * Fail the LoS check | + | |O2 -> Q/empty = * Fail the LoS check |
| − | |O2 -> P = * Pass the LoS check | + | |O2 -> P = * Pass the LoS check |
| − | |R/empty -> S1/pink = Does not meet the requirements to go to S | + | |R/empty -> S1/pink = Does not meet the requirements to go to S or V2 |
|R/empty -> S = * Meet '''ALL''' of the following requirements: | |R/empty -> S = * Meet '''ALL''' of the following requirements: | ||
| − | ** Amount of CV(B) ≤ 3 | + | ** Does not meet requirements to go to V2 |
| − | ** Amount of | + | ** Amount of (F)BB(V) + CV(B/L) ≤ 4 |
| − | |R -> V2 = * Node V2 is unlocked | + | ** Amount of CV(B/L) ≤ 3 |
| − | * | + | ** Amount of DD ≥ 4 |
| + | |R -> V2 = * Meet '''ALL''' of the following requirements: | ||
| + | ** Node V2 is unlocked | ||
| + | ** Amount of CV(B) ≥ 2 | ||
|S -> S2 = * Pass the LoS check | |S -> S2 = * Pass the LoS check | ||
| − | * | + | * Does not meet the requirements to go to T |
| − | |S -> T = * Pass the LoS check | + | |S -> T = Meet '''ALL''' of the following requirements: |
| − | + | * Amount of (F)BB(V) + CV(B/L) ≤ 6(?) | |
| + | ** If slow, amount of (F)BB(V) + CV(B/L) ≤ 5 | ||
| + | * Pass the LoS check | ||
|S -> Q = * Fail the LoS check | |S -> Q = * Fail the LoS check | ||
| − | + | |U/red/darkorange -> U1/red/darkorange = * Does not meet the requirements to go to V | |
| − | |U/red/darkorange -> U1/red/darkorange = * | + | |U/red/darkorange -> U2 = * Meet '''ALL''' of the following requirements: |
| − | |U/red/darkorange -> U2 = * Amount of DD | + | ** Amount of CL ≥ 2 |
| − | |U/red/darkorange -> V = * Amount of (F)BB(V) ≤ 3 | + | ** Amount of DD ≥ 4 |
| − | * Amount of DD ≤ | + | ** ??? |
| + | |U/red/darkorange -> V = * Meet '''ALL''' of the following requirements: | ||
| + | ** Amount of LHA = 0 | ||
| + | ** Amount of (F)BB(V) ≤ 2? | ||
| + | ** Amount of CV(B/L) ≤ 3 | ||
| + | ** Amount of CL ≤ 1 or amount of DD ≤ 3 | ||
|U2 -> U3 = ??? | |U2 -> U3 = ??? | ||
|U2 -> V1/pink = ??? | |U2 -> V1/pink = ??? | ||
|V -> V2 = * Meet '''ALL''' of the following requirements: | |V -> V2 = * Meet '''ALL''' of the following requirements: | ||
| − | ** Amount of (F)BB(V) ≤ | + | ** Amount of (F)BB(V) + CV(B) ≤ 5 |
| − | ** If amount of CL | + | ** If amount of CL ≤ 1, amount of (F)BB(V) + CV(B) ≤ 4 |
| + | ** Amount of CV(B/L) ≤ 3 | ||
|V -> V1/pink = Does not meet the requirements to go to V2 | |V -> V1/pink = Does not meet the requirements to go to V2 | ||
|V1/pink -> U2 = ??? | |V1/pink -> U2 = ??? | ||
|V1/pink -> V2 = ??? | |V1/pink -> V2 = ??? | ||
| − | |V2 -> W/empty = * Fail the LoS check | + | |V2 -> W/empty = * Fail the LoS check |
| − | |V2 -> X = * Pass the LoS check | + | |V2 -> X = * Pass the LoS check |
}} | }} | ||
| Line 119: | Line 170: | ||
==Map Overview== | ==Map Overview== | ||
E-3 consists of 3 main phases and requires the use of Single Fleets, Striking Forces, and Combined Fleets. | E-3 consists of 3 main phases and requires the use of Single Fleets, Striking Forces, and Combined Fleets. | ||
| + | |||
| + | '''{{color|red|Ship locks affect routing on ALL difficulties}}''', see ''[[#Branching Table|here]]''. | ||
* This map uses 3 locks: | * This map uses 3 locks: | ||
** [[File:{{ROOTPAGENAME}} Tag 2.png]] '''2nd Torpedo Squadron''' (from E-2), 1st starting point, | ** [[File:{{ROOTPAGENAME}} Tag 2.png]] '''2nd Torpedo Squadron''' (from E-2), 1st starting point, | ||
| − | ** [[File:{{ROOTPAGENAME}} Tag 4.png]] '''Combined Fleet''', 2nd starting point, | + | ** [[File:{{ROOTPAGENAME}} Tag 4.png]] '''Combined Fleet''', 2nd starting point, in theory optional, but highly recommended, |
** [[File:{{ROOTPAGENAME}} Tag 5.png]] '''Carrier Task Force''', 3rd starting point. | ** [[File:{{ROOTPAGENAME}} Tag 5.png]] '''Carrier Task Force''', 3rd starting point. | ||
| − | * 2 [[LBAS]] | + | * 2 [[LBAS]] are available to sortie into this map. |
| − | ** After phase 1 | + | ** After phase 1.7, the LBAS is relocated closer to the final boss. |
* '''[[Early Spring 2023 Event#New Mechanics|"Airstrike Supported Battle" nodes]]''' are present on {{MapRoute|J|darkorange|U|darkorange|U1|darkorange}} | * '''[[Early Spring 2023 Event#New Mechanics|"Airstrike Supported Battle" nodes]]''' are present on {{MapRoute|J|darkorange|U|darkorange|U1|darkorange}} | ||
==Phase 1 - TP== | ==Phase 1 - TP== | ||
| − | Phase 1 is a [[Transport Operation]]: | + | Phase 1 is a '''"[[Transport Operation]]"''': |
| − | * Single Fleet: '''1CL, 5DD''' [[File:{{ROOTPAGENAME}} Tag 2.png|30px]] | + | * Single Fleet: '''0-1CAV/CL(T)/AV, 1CL, 4-5DD''' (Fast) [[File:{{ROOTPAGENAME}} Tag 2.png|30px]] |
* Route: {{MapRoute|1||A|blue|B|red|B1|pink|C|red|D|green|K|red}} | * Route: {{MapRoute|1||A|blue|B|red|B1|pink|C|red|D|green|K|red}} | ||
**LoS check: 55 Cn3 ? | **LoS check: 55 Cn3 ? | ||
| + | **AP/AS: '''332/746''' (Hard) | ||
| + | **LBAS range: '''7''', then '''9''' after phase 1.7 | ||
| + | **Using a '''Fast+''' fleet will skip node {{MapRoute|B1|pink}}. | ||
| + | |||
| + | ==Phase 1.3 - Gimmick 1== | ||
| + | The following steps have to be performed to unlock the 2nd start point: | ||
| + | {|class="wikitable" | ||
| + | ! !! I!! J | ||
| + | |- | ||
| + | |Hard || S x2|| A+ x2 | ||
| + | |- | ||
| + | |Medium|| S x2|| - | ||
| + | |- | ||
| + | |Easy || A+? x2|| - | ||
| + | |- | ||
| + | |Casual|| A+? x2|| - | ||
| + | |} | ||
| − | ==Phase 1. | + | <tabber> |
| + | |-|Node J= | ||
| + | * Single Fleet // Striking Force: '''"any fleet"''' [[File:{{ROOTPAGENAME}} Tag 2.png|30px]] | ||
| + | * Route: {{MapRoute|1||A|blue|F|ping|G|blue|J|darkorange}} | ||
| + | ** The route only takes "Active Branching" nodes, and so any fleet can route to {{MapRoute|J|darkorange}} | ||
| + | *** It is recommended to only used already locked ships. | ||
| + | ** [[ASW]] Is needed for node {{MapRoute|J|darkorange}}. | ||
| + | ** Bringing an [[AACI]] capable ship is recommended to pass through the air node. | ||
| + | **AP/AS: '''85/189''' (Hard) | ||
| + | **LBAS range: '''3''', then '''6''' after phase 1.7 | ||
| + | |||
| + | |-|Node I= | ||
| + | * Single Fleet // Striking Force: '''"0-1FBB/CV(L)/CAV, 1-2CL, 4-5DD"''' [[File:{{ROOTPAGENAME}} Tag 2.png|30px]] | ||
| + | * Route: {{MapRoute|1||A|blue|F|ping|G|blue|H|red|I|red}} | ||
| + | ** Bringing an [[AACI]] capable ship is recommended to pass through the air node. | ||
| + | **LoS check: 69~75 Cn4 (Hard) | ||
| + | **AP/AS: '''349/785''' (Hard) | ||
| + | **LBAS range: '''6''', then '''8''' after phase 1.7 | ||
| + | </tabber> | ||
| + | |||
| + | ==Phase 1.7 - Gimmick 2== | ||
The following steps have to be performed to unlock the 2nd boss: | The following steps have to be performed to unlock the 2nd boss: | ||
{|class="wikitable" | {|class="wikitable" | ||
| − | ! !! | + | ! !! P !! R |
|- | |- | ||
| − | |Hard || | + | |Hard || S x3|| Reach |
|- | |- | ||
| − | |Medium|| ? | + | |Medium|| A+? x3|| Reach |
|- | |- | ||
| − | |Easy || | + | |Easy || A+ x2|| Reach |
|- | |- | ||
| − | |Casual|| ? | + | |Casual|| A+? || Reach |
|} | |} | ||
| + | |||
| + | <tabber> | ||
| + | |-|Node P - CTF= | ||
| + | * CTF: '''"1-2FBB, 2CV(L), 1-2CA(V), 0-1CL, 0-AV + 1CL, 0-2CLT, 3-5DD"''' [[File:{{ROOTPAGENAME}} Tag 4.png|30px]] | ||
| + | * Route: {{MapRoute|2||L|blue|M|red|J|darkorange|N|red|O2|red|P|red}} | ||
| + | |||
| + | |-|Node P - STF= | ||
| + | * STF: '''"2FBB, 1CV(L), 1-2CA(V), 0-1CL + 1CL, 0-2CLT, 3-5DD"''' [[File:{{ROOTPAGENAME}} Tag 4.png|30px]] | ||
| + | * Route: {{MapRoute|2||L|blue|M|red|J|darkorange|N|red|O2|red|P|red}} | ||
| + | |||
| + | |-|Node P - SF= | ||
| + | * Striking Force: '''"0-1FBB/CVL/CAV, 1-2CL(T), 4-5DD"''' [[File:{{ROOTPAGENAME}} Tag 2.png|30px]] | ||
| + | * Route: {{MapRoute|1||A|blue|F|ping|G|blue|J|darkorange|N|red|P|red}} | ||
| + | |||
| + | |-|Node R= | ||
| + | *Use [[#Phase 2]]'s fleet | ||
| + | ** Bringing an [[AACI]] capable ship is recommended to pass through the air node. | ||
| + | </tabber> | ||
| + | |||
| + | Node P: | ||
| + | *AP/AS: '''349/785''' (Hard) | ||
| + | *LBAS range: '''5''', then '''7''' after phase 1.7 | ||
| + | *Bringing an [[AACI]] capable ship is recommended to reach and defeat the node. | ||
==Phase 2== | ==Phase 2== | ||
| − | |||
<tabber> | <tabber> | ||
|-|CTF= | |-|CTF= | ||
| − | * CTF: ''' | + | * CTF: '''0-2FBB, 2-4CV, 1CA, 1CL + 1CL, 0-1CLT, 4-5DD''' [[File:{{ROOTPAGENAME}} Tag 4.png|30px]] |
* Route: {{MapRoute|2||M|blue|O|pink|R|blue|S|red|T|red}} | * Route: {{MapRoute|2||M|blue|O|pink|R|blue|S|red|T|red}} | ||
| + | ** One of the escorting DD can be replaced by an [[SS]]/[[SSV]]. | ||
| + | *** The {{Ship/Link|I-201|I-203|text=''I-201''-class|link_category=I-201 Class}} have outstanding historical bonuses in this situtaion. | ||
|-|STF= | |-|STF= | ||
* STF: '''3(F)BB, 1CV, 1CAV, 1CL + 1CL, 5DD''' (Fast) [[File:{{ROOTPAGENAME}} Tag 4.png|30px]] | * STF: '''3(F)BB, 1CV, 1CAV, 1CL + 1CL, 5DD''' (Fast) [[File:{{ROOTPAGENAME}} Tag 4.png|30px]] | ||
* Route: {{MapRoute|2||M|blue|O|pink|R|blue|S|red|T|red}} | * Route: {{MapRoute|2||M|blue|O|pink|R|blue|S|red|T|red}} | ||
| + | |||
| + | |-|Striking Force= | ||
| + | * Striking Force: '''1FBB, 1CV, 1CL, 3DD, 1SS''' [[File:{{ROOTPAGENAME}} Tag 2.png|30px]] | ||
| + | * Route: {{MapRoute|1||A|blue|F|ping|G|blue|J|darkorange|O|pink|R|blue|S|red|T|red}} | ||
| + | ** A weak fleet skipping the [[File:{{ROOTPAGENAME}} Tag 4.png|30px]] lock entirely. | ||
| + | ** Using {{Surface Radar}} [[Surface Radar]]s affect routing: | ||
| + | *** Using zero Surface Radar will guaranty routing to {{MapRoute|O|pink}}, and each additional one increases the chances of off-routing to {{MapRoute|N|red}}. | ||
| + | ** This comp is not recommended. | ||
| + | ** The {{Ship/Link|I-201|I-203|text=''I-201''-class|link_category=I-201 Class}} have outstanding historical bonuses in this situtaion. | ||
| + | |||
</tabber> | </tabber> | ||
| − | |||
| − | + | *LoS check: ?? Cn? (Hard) | |
| − | + | *AP/AS: '''371/833 | |
| − | + | *LBAS range: '''5 | |
| − | + | * Bringing an [[AACI]] capable ship is recommended to pass through the air node and against the boss. | |
| − | + | * Bringing an [[OASW]] capable ship is recommended to pass through the submarine node. | |
| − | |||
| − | |||
| − | |||
| − | |||
| − | |||
| − | |||
| − | |||
| − | |||
==Phase 3== | ==Phase 3== | ||
* CTF: '''2(F)BB, 2-3CV, 0-1CVL, 1CA, 0-1CL, 0-1AV + 0-1CA, 1CL, 1-2CLT, 2-4DD''' [[File:{{ROOTPAGENAME}} Tag 5.png|30px]] | * CTF: '''2(F)BB, 2-3CV, 0-1CVL, 1CA, 0-1CL, 0-1AV + 0-1CA, 1CL, 1-2CLT, 2-4DD''' [[File:{{ROOTPAGENAME}} Tag 5.png|30px]] | ||
* Route: {{MapRoute|3||U|darkorange|V|red|V2|red|X|red}} | * Route: {{MapRoute|3||U|darkorange|V|red|V2|red|X|red}} | ||
| − | **LoS check: ?? | + | **LoS check: ?? Cn? (Hard) |
| + | **AP/AS: '''516/1160''' (Hard) (''numbers may be different due to the presence of unknown elements'') | ||
| + | **LBAS range: '''4 | ||
| + | * Bringing an [[AACI]] capable ship is recommended against the boss. | ||
| + | * Bringing an [[OASW]] capable ship is recommended to reach the boss. | ||
==Debuff== | ==Debuff== | ||
| Line 184: | Line 303: | ||
{|class="wikitable" | {|class="wikitable" | ||
| − | ! !! | + | ! !! K !! I!! P!! T !! S2!! V1!! LBAS |
|- | |- | ||
| − | |Hard || | + | |Hard || S || S|| S|| A+|| AS|| AS|| AS x2 |
|- | |- | ||
| − | |Medium|| | + | |Medium|| A+|| -|| -|| A+|| AS|| AS|| AS |
|- | |- | ||
| − | |Easy || | + | |Easy || A+|| -|| -|| A+|| - || AS|| AS |
|- | |- | ||
| − | |Casual|| ??|| | + | |Casual|| ? || -|| -|| ? || - || ? || ? |
|} | |} | ||
| − | |||
| − | |||
| − | |||
| − | |||
| − | |||
| − | |||
| − | |||
| − | |||
| − | |||
| − | |||
| − | |||
| − | |||
| − | |||
| − | |||
| − | |||
| − | |||
<tabber> | <tabber> | ||
|-|Node K= | |-|Node K= | ||
| − | |||
*Use [[#Phase 1 - TP]]'s fleet | *Use [[#Phase 1 - TP]]'s fleet | ||
| − | |||
| − | |||
| − | |||
| − | |||
| − | |||
| − | |||
| − | |||
| − | |||
| − | |||
|-|Node I= | |-|Node I= | ||
| − | * | + | *Use [[#Phase 1.3 - Gimmick 1]]'s fleet |
| − | |||
|-|Node P= | |-|Node P= | ||
| − | * | + | *Use [[#Phase 1.7 - Gimmick 2]]'s fleet |
| + | |-|Node T= | ||
| + | *Use [[#Phase 2]]'s fleet | ||
| − | |-|Node | + | |-|Node S2= |
| − | * | + | *Use a '''Slow''' and/or "heavier" (more BB/CV) variation of [[#Phase 2]]'s fleet |
| + | {|class="wikitable" | ||
| + | ! !! AP!! AS | ||
| + | |- | ||
| + | |Hard || 349|| 785 | ||
| + | |- | ||
| + | |Medium|| ?|| ? | ||
| + | |} | ||
| + | |-|Node V1= | ||
| + | *Use a '''Slow''' and/or "heavier" (more BB/CV) variation of [[#Phase 3]]'s fleet | ||
| − | |-| | + | {|class="wikitable" |
| − | + | ! !! AP!! AS | |
| − | + | |- | |
| + | |Hard || 531|| 1193 | ||
| + | |- | ||
| + | |Medium|| 469|| 1055 | ||
| + | |- | ||
| + | |Easy || 443|| 995 | ||
| + | |- | ||
| + | |Casual|| ?|| ? | ||
| + | |} | ||
|-|LBAS AS= | |-|LBAS AS= | ||
| − | + | *This step can be accomplished by sending 1 SS(V) until the Air Raid is triggered. | |
| + | *''Numbers may be different due to the presence of unknown elements'' | ||
| + | {|class="wikitable" | ||
| + | ! !! AP!! AS | ||
| + | |- | ||
| + | |Hard || 212~350|| 476~786 | ||
| + | |- | ||
| + | |Medium|| 171~300|| 383~674 | ||
| + | |- | ||
| + | |Easy || 192~283|| 383~635 | ||
| + | |- | ||
| + | |Casual|| 159~192|| 357~431 | ||
| + | |} | ||
| + | </tabber> | ||
| + | |||
| − | </ | + | Once Debuff is complete the CG will change to the following: |
| + | {|class="wikitable" | ||
| + | ![[Remodeled Wartime Cargo Princess]] | ||
| + | |- | ||
| + | |<gallery> | ||
| + | Enemy Full Remodeled Wartime Cargo Princess.png|Regular | ||
| + | Enemy Full Remodeled Wartime Cargo Princess Damaged.png|Last Dance | ||
| + | Enemy Full Remodeled Wartime Cargo Princess Damaged Debuffed.png|Last Dance Debuffed | ||
| + | Enemy Full Remodeled Wartime Cargo Princess Debuffed.png|Post Clear | ||
| + | </gallery> | ||
| + | |} | ||
=YY's Guide= | =YY's Guide= | ||
| Line 251: | Line 386: | ||
{{color|red|'''DISCLAIMER:''' ''This information is based on user-submitted data and is subject to revisions as more data is gathered. Any version of the ship receives the bonus regardless of remodel.''}} | {{color|red|'''DISCLAIMER:''' ''This information is based on user-submitted data and is subject to revisions as more data is gathered. Any version of the ship receives the bonus regardless of remodel.''}} | ||
| − | ==Ship Bonuses== | + | ===Ship Bonuses=== |
{|class="wikitable" style="text-align:center" | {|class="wikitable" style="text-align:center" | ||
! colspan=3|Ships | ! colspan=3|Ships | ||
| Line 261: | Line 396: | ||
! X | ! X | ||
|- | |- | ||
| − | ! colspan=3|All [[CA]], [[CAV]], [[CL]], [[CLT]], [[DD]] | + | ! colspan=3|All [[CA]], [[CAV]], [[CL]], [[CLT]], [[DD]] (stacks with below) |
| 1.03x | | 1.03x | ||
| - | | - | ||
| Line 269: | Line 404: | ||
| - | | - | ||
|- | |- | ||
| − | ! colspan=3|All [[DE]] | + | ! colspan=3|All [[DE]] (stacks with below) |
| 1.12x | | 1.12x | ||
| - | | - | ||
| Line 306: | Line 441: | ||
!{{Ship/Banner|Isokaze/B Kai|small=true}}!!{{Ship/Banner|Hamakaze/B Kai|small=true}}!!{{Ship/Banner|Asashimo/Kai Ni|small=true}} | !{{Ship/Banner|Isokaze/B Kai|small=true}}!!{{Ship/Banner|Hamakaze/B Kai|small=true}}!!{{Ship/Banner|Asashimo/Kai Ni|small=true}} | ||
|- | |- | ||
| − | !{{Ship/Banner|Suzutsuki/Kai|small=true}} | + | ! colspan=3|{{Ship/Banner|Suzutsuki/Kai|small=true}} |
|- | |- | ||
! colspan=3|{{Ship/Banner|Fuyutsuki/Kai|small=true}} | ! colspan=3|{{Ship/Banner|Fuyutsuki/Kai|small=true}} | ||
| Line 312: | Line 447: | ||
| 1.15x | | 1.15x | ||
| 1.45x | | 1.45x | ||
| + | |- | ||
| + | !{{Ship/Banner|I-201/Kai|small=true}}!!{{Ship/Banner|I-203/Kai|small=true}}!! | ||
| + | | - | ||
| + | | - | ||
| + | | 2.83~2.87x | ||
| + | | 1.15x | ||
| + | | - | ||
| + | | - | ||
|- | |- | ||
!{{Ship/Banner|Haruna/Kai Ni|small=true}}!!{{Ship/Banner|Yamato/Kai Ni Juu|small=true}}!!{{Ship/Banner|Amagi/Kai|small=true}} | !{{Ship/Banner|Haruna/Kai Ni|small=true}}!!{{Ship/Banner|Yamato/Kai Ni Juu|small=true}}!!{{Ship/Banner|Amagi/Kai|small=true}} | ||
| − | |rowspan= | + | |rowspan=5| - |
| − | |rowspan= | + | |rowspan=5| - |
| − | |rowspan= | + | |rowspan=9| 1.14x |
| − | |rowspan= | + | |rowspan=9| 1.15x |
| − | |rowspan= | + | |rowspan=5| - |
| − | |rowspan= | + | |rowspan=5| - |
| + | |- | ||
| + | !{{Ship/Banner|Katsuragi/Kai|small=true}}!!{{Ship/Banner|Junyou/Kai Ni|small=true}}!!{{Ship/Banner|Aoba/Kai|small=true}} | ||
| + | |- | ||
| + | !{{Ship/Banner|Ooyodo/Kai|small=true}}!!{{Ship/Banner|I-400/Kai|small=true}}!!{{Ship/Banner|I-401/Kai|small=true}} | ||
| + | |- | ||
| + | !{{Ship/Banner|I-13/Kai|small=true}}!!{{Ship/Banner|I-14/Kai|small=true}}!!{{Ship/Banner|I-47/Kai|small=true}} | ||
|- | |- | ||
| − | ! | + | ! colspan=3|{{Ship/Banner|Jingei/Kai|small=true}} |
|- | |- | ||
| − | !{{Ship/Banner|Ise/Kai Ni|small=true}} | + | !{{Ship/Banner|Ise/Kai Ni|small=true}}!!{{Ship/Banner|Hyuuga/Kai Ni|small=true}}!!{{Ship/Banner|Houshou/Kai Ni|small=true}} |
|rowspan=4| - | |rowspan=4| - | ||
|rowspan=4| - | |rowspan=4| - | ||
| Line 329: | Line 478: | ||
|rowspan=10| 1.45x | |rowspan=10| 1.45x | ||
|- | |- | ||
| − | !{{Ship/Banner|Ryuuhou/Kai Ni|small=true}} | + | !{{Ship/Banner|Ryuuhou/Kai Ni|small=true}}!!{{Ship/Banner|Tone/Kai Ni|small=true}}!!{{Ship/Banner|Sakawa/Kai|small=true}} |
|- | |- | ||
| − | !{{Ship/Banner| | + | !{{Ship/Banner|Kitakami/Kai Ni|small=true}}!!{{Ship/Banner|Matsu/Kai|small=true}}!!{{Ship/Banner|Take/Kai|small=true}} |
|- | |- | ||
| − | !{{Ship/Banner| | + | !{{Ship/Banner|Ume/Kai|small=true}}!!{{Ship/Banner|Momo/Kai|small=true}}!! |
|- | |- | ||
| − | !!{{Ship/Banner|Mutsu/Kai Ni|small=true}}!!{{Ship/Banner|Akagi/Kai Ni|small=true}} | + | !!{{Ship/Banner|Mutsu/Kai Ni|small=true}}!!{{Ship/Banner|Akagi/Kai Ni|small=true}}!!{{Ship/Banner|Kaga/Kai Ni|small=true}} |
|rowspan=6| - | |rowspan=6| - | ||
|rowspan=6| - | |rowspan=6| - | ||
| Line 341: | Line 490: | ||
|rowspan=6| - | |rowspan=6| - | ||
|- | |- | ||
| − | !{{Ship/Banner| | + | !{{Ship/Banner|Souryuu/Kai Ni|small=true}}!!{{Ship/Banner|Hiryuu/Kai Ni|small=true}}!!{{Ship/Banner|Shoukaku/Kai Ni|small=true}} |
|- | |- | ||
| − | !{{Ship/Banner| | + | !{{Ship/Banner|Zuikaku/Kai Ni|small=true}}!!{{Ship/Banner|Chikuma/Kai Ni|small=true}}!!{{Ship/Banner|Tama/Kai Ni|small=true}} |
|- | |- | ||
| − | !{{Ship/Banner| | + | !{{Ship/Banner|Nagara/Kai|small=true}}!!{{Ship/Banner|Ooi/Kai Ni|small=true}}!!{{Ship/Banner|Kiso/Kai Ni|small=true}} |
|- | |- | ||
| − | !{{Ship/Banner| | + | !{{Ship/Banner|Hatakaze/Kai|small=true}}!!{{Ship/Banner|Satsuki/Kai Ni|small=true}}!!{{Ship/Banner|Hatsuharu/Kai Ni|small=true}} |
|- | |- | ||
| − | !{{Ship/Banner|Kiyoshimo/Kai|small=true}}!!{{Ship/Banner|Kaiboukan No.4/Kai|small=true}} | + | !{{Ship/Banner|Wakaba/Kai|small=true}}!!{{Ship/Banner|Kiyoshimo/Kai|small=true}}!!{{Ship/Banner|Kaiboukan No.4/Kai|small=true}} |
|- | |- | ||
! colspan=3|{{Ship/Banner|Nagato/Kai Ni|small=true}} | ! colspan=3|{{Ship/Banner|Nagato/Kai Ni|small=true}} | ||
| Line 360: | Line 509: | ||
|} | |} | ||
| − | ==Equipment Bonuses== | + | ===Equipment Bonuses=== |
| − | {|class="wikitable" style="text-align:center | + | {|class="wikitable" style="text-align:center" |
!Equipment | !Equipment | ||
| − | !Map-wide | + | !LBAS (Map-wide) |
| + | |- | ||
| + | !{{Carrier Recon}} {{Equipment/Link|Saiun (4th Recon Squad)}} | ||
| + | |rowspan=3| 1.14x each | ||
| + | |- | ||
| + | !{{LB Fighter 1}} Shiden Kai (343) {{Equipment/Link|Shiden Kai (343 Air Group) 301st Fighter Squadron|text=301st}}{{·}}{{Equipment/Link|Shiden Kai (343 Air Group) 701st Fighter Squadron|text=701st}}{{·}}{{Equipment/Link|Shiden Kai (343 Air Group) 407th Fighter Squadron|text=407th}} | ||
| + | |- | ||
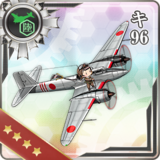
| + | !{{LB Fighter 2}} {{Equipment/Link|Ki-96}} | ||
| + | |- | ||
| + | !{{Torpedo Bomber}} Ryuusei Kai {{Equipment/Link|Ryuusei Kai (CarDiv 1/Skilled)|text=(CD1/Sk)}}{{·}}{{Equipment/Link|Ryuusei Kai (Skilled)|text=(Sk)}} | ||
| + | |rowspan=3| 1.11x each | ||
|- | |- | ||
| − | !{{ | + | !{{LB Attacker}} {{Equipment/Link|Type 1 Land-based Attack Aircraft (Nonaka Squadron)|text=T1 Attacker (Nonaka)}}{{·}}{{Equipment/Link|Ginga (Egusa Squadron)|text=Ginga (Egusa)}} |
| − | |||
| − | |||
| − | |||
|- | |- | ||
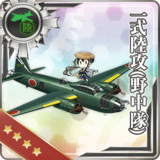
| − | ! | + | !{{LB Assault}} {{Equipment/Link|Ki-102 B|text=Ki-102}}{{·}}{{Equipment/Link|Ki-102 B Kai + No.1 Model 1B Guided Missile|text=+ Missile}} |
| − | {{LB | ||
| − | |||
|} | |} | ||
| − | ==[[Debuff]]== | + | Those bonuses only apply to planes in LBAS. |
| + | *All 4 planes in the base will gain the bonus provided by any bonus plane, | ||
| + | *Bonuses will stack between each other. | ||
| + | |||
| + | ===[[Debuff]]=== | ||
{|class="wikitable" style="text-align:center" | {|class="wikitable" style="text-align:center" | ||
! Ships | ! Ships | ||
! Node X | ! Node X | ||
|- | |- | ||
| − | !{{Enemy/Banner|Remodeled Wartime Cargo Princess Damaged Debuffed|small=true}}<br>{{Enemy/Banner|Aircraft Carrier Princess B|small=true}}<br>{{Enemy/Banner|Battleship Princess|small=true}} | + | !{{Enemy/Banner|Remodeled Wartime Cargo Princess Debuffed|small=true}}<br>{{Enemy/Banner|Remodeled Wartime Cargo Princess Damaged Debuffed|small=true}}<br>{{Enemy/Banner|Aircraft Carrier Princess B|small=true}}<br>{{Enemy/Banner|Battleship Princess|small=true}} |
| − | | - | + | | -49 {{Armor}} |
|- | |- | ||
!{{Enemy/Banner|Light Cruiser He-Class Kai Flagship|small=true}}<br>{{Enemy/Banner|Destroyer Na-Class Late Model II Elite|small=true}} | !{{Enemy/Banner|Light Cruiser He-Class Kai Flagship|small=true}}<br>{{Enemy/Banner|Destroyer Na-Class Late Model II Elite|small=true}} | ||
| -19 {{Armor}} | | -19 {{Armor}} | ||
| − | |} | + | |}<noinclude> |
| + | |||
| + | ===Sources=== | ||
| + | [https://twitter.com/JBNzWBRxp0EgJfv/status/1631942744523550720][https://twitter.com/iceber_1225_kan/status/1631756345467887617][https://twitter.com/hiei_curry_love/status/1631930887968542722][https://twitter.com/JBNzWBRxp0EgJfv/status/1632363181074165761][https://twitter.com/JBNzWBRxp0EgJfv/status/1631709278569635842][https://twitter.com/JBNzWBRxp0EgJfv/status/1632001216732602371][https://tsunkit.net/api/routing/battles/3137284/replay][https://tsunkit.net/api/routing/battles/3175356/replay][https://twitter.com/JBNzWBRxp0EgJfv/status/1633709660397248512][https://tsunkit.net/api/routing/battles/3178994/replay][https://twitter.com/JBNzWBRxp0EgJfv/status/1633709657712902144][https://twitter.com/JBNzWBRxp0EgJfv/status/1633836340210200582][https://twitter.com/panmodoki10/status/1633869344248827904][https://twitter.com/Divinity_123/status/1634525972312600578?s=20]</noinclude> | ||
Latest revision as of 09:11, 16 March 2023
Sandbox Rules
This sandbox is to be used to construct an event guide for the above-mentioned event map. These guides are to all of the following requirements:
- An overview of the map, including ship/equipment bonuses, Ship Locks, and special mechanics,
- List of branching unlocking requirements (if there are multiple requirements, compositions for each path along with the below requirements will be needed to discuss the unlocking requirements in question),
- A list of working compositions that work: (T=these must have possible alternatives for players who may or may not have all ships needed for a specific path),
- The Paths said compositions will take (to explain each path the composition will/can take),
- A summary or description of what kind of obstacles a composition will face.
- A description of the boss node: what it consists of, and a descriptive guide on what the player should consider for a course of action to successfully win the battle,
- Optional: Tips/guides to farm certain ships and/or resources (this can also require compositions, paths, and possible descriptions).
Editors are to construct their own version of the guide/part of the guide, and complete it in a timely fashion.
No editor is allowed to edit over other editors' work without the consent of the editor and his approval to do so.
Several versions will be constructed through this page and will be reviewed and approved by the staff/collaboration committee before being moved for the Early Spring 2023 Event, being reviewed and updated once more before it can be released.
Overall there should be 3 versions of the guide that have to be constructed, including: Preliminary > Polished > Finalized Guides
With each approval of each version of the guide, the said guide will be updated to the main page, and construction of the next version will begin.
All guides outside of the approved version will be removed and work will begin from the approved version to make it better for the next version until the finalized version is made.
Branch Rules
Branching Table
| E-3 Branching Rules (Start Points) | ||
|---|---|---|
| Nodes | Rules | |
| Start | 1 |
|
2 |
| |
3 |
| |
| E-3 Branching Rules (Single / Striking Force Fleet) | ||
|---|---|---|
| Nodes | Rules | |
A |
B |
Active Branching |
F | ||
B |
B1 |
Does not meet the requirements to go to C or F |
C |
| |
F |
| |
B1 |
B2 |
Does not meet the requirements to go to C |
C |
| |
D |
E |
|
K |
| |
G |
H |
Active Branching |
J | ||
H |
H1 |
Does not meet the requirements to go to I |
I |
| |
H1 |
H2 |
|
I |
| |
J |
N |
|
O |
| |
O1 |
No path | |
O2 |
Does not meet the requirements to go to N or O | |
N |
O2 |
Does not meet the requirements to go to P |
P |
| |
O2 |
P |
|
Q |
| |
R |
S |
??? |
S1 |
Does not meet the requirements to go to S | |
V2 |
No path(?) | |
S |
Q |
|
S2 |
| |
T |
| |
| E-3 Branching Rules (Combined Fleet) | ||
|---|---|---|
| Nodes | Rules | |
J |
N |
|
O |
| |
O1 |
| |
M |
J |
Does not meet the requirements to go to O |
O |
| |
N |
O2 |
|
O1 |
O |
|
O2 |
Does not meet the requirements to go to O | |
O2 |
P |
|
Q |
| |
R |
S |
|
S1 |
Does not meet the requirements to go to S or V2 | |
V2 |
| |
S |
Q |
|
S2 |
| |
T |
Meet ALL of the following requirements:
| |
U |
U1 |
|
U2 |
| |
V |
| |
U2 |
U3 |
??? |
V1 |
??? | |
V |
V1 |
Does not meet the requirements to go to V2 |
V2 |
| |
V1 |
U2 |
??? |
V2 |
??? | |
V2 |
W |
|
X |
| |
Jiga's Initial Guide
Map Overview
E-3 consists of 3 main phases and requires the use of Single Fleets, Striking Forces, and Combined Fleets.
Ship locks affect routing on ALL difficulties, see here.
- This map uses 3 locks:
 2nd Torpedo Squadron (from E-2), 1st starting point,
 Combined Fleet, 2nd starting point, in theory optional, but highly recommended,
 Carrier Task Force, 3rd starting point.
- 2 LBAS are available to sortie into this map.
- After phase 1.7, the LBAS is relocated closer to the final boss.
- "Airstrike Supported Battle" nodes are present on J U U1

Phase 1 - TP
Phase 1 is a "Transport Operation":
- Single Fleet: 0-1CAV/CL(T)/AV, 1CL, 4-5DD (Fast)

- Route: 1 A B B1 C D K
- LoS check: 55 Cn3 ?
- AP/AS: 332/746 (Hard)
- LBAS range: 7, then 9 after phase 1.7
- Using a Fast+ fleet will skip node B1.
Phase 1.3 - Gimmick 1
The following steps have to be performed to unlock the 2nd start point:
| I | J | |
|---|---|---|
| Hard | S x2 | A+ x2 |
| Medium | S x2 | - |
| Easy | A+? x2 | - |
| Casual | A+? x2 | - |
- Single Fleet // Striking Force: "any fleet"
- Route: 1 A F G J
- Single Fleet // Striking Force: "0-1FBB/CV(L)/CAV, 1-2CL, 4-5DD"
- Route: 1 A F G H I
- Bringing an AACI capable ship is recommended to pass through the air node.
- LoS check: 69~75 Cn4 (Hard)
- AP/AS: 349/785 (Hard)
- LBAS range: 6, then 8 after phase 1.7
Phase 1.7 - Gimmick 2
The following steps have to be performed to unlock the 2nd boss:
| P | R | |
|---|---|---|
| Hard | S x3 | Reach |
| Medium | A+? x3 | Reach |
| Easy | A+ x2 | Reach |
| Casual | A+? | Reach |
- CTF: "1-2FBB, 2CV(L), 1-2CA(V), 0-1CL, 0-AV + 1CL, 0-2CLT, 3-5DD"

- Route: 2 L M J N O2 P
- STF: "2FBB, 1CV(L), 1-2CA(V), 0-1CL + 1CL, 0-2CLT, 3-5DD"
- Route: 2 L M J N O2 P
- Striking Force: "0-1FBB/CVL/CAV, 1-2CL(T), 4-5DD"
- Route: 1 A F G J N P
Node P:
- AP/AS: 349/785 (Hard)
- LBAS range: 5, then 7 after phase 1.7
- Bringing an AACI capable ship is recommended to reach and defeat the node.
Phase 2
- CTF: 0-2FBB, 2-4CV, 1CA, 1CL + 1CL, 0-1CLT, 4-5DD
- Route: 2 M O R S T
- One of the escorting DD can be replaced by an SS/SSV.
- The I-201-class

 have outstanding historical bonuses in this situtaion.
- The I-201-class
- One of the escorting DD can be replaced by an SS/SSV.
- STF: 3(F)BB, 1CV, 1CAV, 1CL + 1CL, 5DD (Fast)
- Route: 2 M O R S T
- Striking Force: 1FBB, 1CV, 1CL, 3DD, 1SS
- Route: 1 A F G J O R S T
- A weak fleet skipping the lock entirely.
- Using
 Surface Surface Radars affect routing:
- Using zero Surface Radar will guaranty routing to O, and each additional one increases the chances of off-routing to N.
- This comp is not recommended.
- The I-201-class have outstanding historical bonuses in this situtaion.
- A weak fleet skipping the
- LoS check: ?? Cn? (Hard)
- AP/AS: 371/833
- LBAS range: 5
- Bringing an AACI capable ship is recommended to pass through the air node and against the boss.
- Bringing an OASW capable ship is recommended to pass through the submarine node.
Phase 3
- CTF: 2(F)BB, 2-3CV, 0-1CVL, 1CA, 0-1CL, 0-1AV + 0-1CA, 1CL, 1-2CLT, 2-4DD

- Route: 3 U V V2 X
- LoS check: ?? Cn? (Hard)
- AP/AS: 516/1160 (Hard) (numbers may be different due to the presence of unknown elements)
- LBAS range: 4
- Bringing an AACI capable ship is recommended against the boss.
- Bringing an OASW capable ship is recommended to reach the boss.
Debuff
Once LD has been reached, the following steps have to be performed to debuff the boss
| K | I | P | T | S2 | V1 | LBAS | |
|---|---|---|---|---|---|---|---|
| Hard | S | S | S | A+ | AS | AS | AS x2 |
| Medium | A+ | - | - | A+ | AS | AS | AS |
| Easy | A+ | - | - | A+ | - | AS | AS |
| Casual | ? | - | - | ? | - | ? | ? |
- Use #Phase 1 - TP's fleet
- Use #Phase 1.3 - Gimmick 1's fleet
- Use #Phase 1.7 - Gimmick 2's fleet
- Use #Phase 2's fleet
- Use a Slow and/or "heavier" (more BB/CV) variation of #Phase 2's fleet
| AP | AS | |
|---|---|---|
| Hard | 349 | 785 |
| Medium | ? | ? |
- Use a Slow and/or "heavier" (more BB/CV) variation of #Phase 3's fleet
| AP | AS | |
|---|---|---|
| Hard | 531 | 1193 |
| Medium | 469 | 1055 |
| Easy | 443 | 995 |
| Casual | ? | ? |
- This step can be accomplished by sending 1 SS(V) until the Air Raid is triggered.
- Numbers may be different due to the presence of unknown elements
| AP | AS | |
|---|---|---|
| Hard | 212~350 | 476~786 |
| Medium | 171~300 | 383~674 |
| Easy | 192~283 | 383~635 |
| Casual | 159~192 | 357~431 |
Once Debuff is complete the CG will change to the following:
| Remodeled Wartime Cargo Princess |
|---|
|


YY's Guide
Historical Bonuses
DISCLAIMER: This information is based on user-submitted data and is subject to revisions as more data is gathered. Any version of the ship receives the bonus regardless of remodel.
Ship Bonuses
| Ships | Mapwide | B/B2/C/H/H1/K | J/M/N/O1/O2/S | I/P/T | U/U1?/U2/U3/V/V2 | X | ||
|---|---|---|---|---|---|---|---|---|
| All CA, CAV, CL, CLT, DD (stacks with below) | 1.03x | - | - | - | - | - | ||
| All DE (stacks with below) | 1.12x | - | - | - | - | - | ||
| 1.08x | 1.25x1.16x1.08 | 1.25x1.16x1.08 | 1.27x1.18x1.08 | 1.08x | 1.08x | |||
| 1.04x | 1.21x1.16x1.04 | 1.21x1.16x1.04 | 1.23x1.18x1.04 | 1.04x | 1.04x | |||
| - | 1.16x | 1.16x | 1.18x | - | - | |||
| - | 1.15x | 1.45x | ||||||
| - | - | 2.83~2.87x | 1.15x | - | - | |||
| - | - | 1.14x | 1.15x | - | - | |||
| - | - | 1.15x | 1.45x | |||||
| ! |
- | - | - | - | ||||
| - | - | - | - | 1.24x1.15x1.08 | 1.67x1.45x1.15 | |||
Equipment Bonuses
| Equipment | LBAS (Map-wide) |
|---|---|
|
1.14x each |
 · 701st · 701st · 407th · 407th
| |
| |
 · (Sk) · (Sk)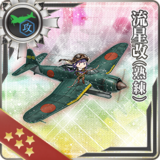
|
1.11x each |
 · Ginga (Egusa) · Ginga (Egusa)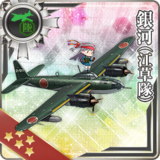
| |
 · + Missile · + Missile
|
Those bonuses only apply to planes in LBAS.
- All 4 planes in the base will gain the bonus provided by any bonus plane,
- Bonuses will stack between each other.
Debuff
| Ships | Node X |
|---|---|
| -49 | |
| -19 |