- Welcome to the Kancolle Wiki!
- If you have any questions regarding site content, account registration, etc., please visit the KanColle Wiki Discord
Difference between revisions of "Fall 2021 Event/Info"
(Created page with "'''The Fall 2021 Event''' also known under the title of '''The Return of the Saury Festival''' is a special event that will be taking place along with the Naval District Sau...") |
Jigaraphale (talk | contribs) m (→Friend Fleet) |
||
| (43 intermediate revisions by 5 users not shown) | |||
| Line 1: | Line 1: | ||
| − | '''The Fall 2021 Event''' also known under the title of '''The Return of the Saury Festival''' is a special event that will be taking place along with the [[Naval District Saury Festival]]. Unlike previous events, this will be the first event map to use the Saury Festival as part of it's theme. | + | '''The Fall 2021 Event''' also known under the title of '''The Return of the Saury Festival''' is a special event <s>that will be taking place along with the [[Naval District Saury Festival]]</s> (concluded on the 19th of November). Unlike previous events, this will be the first event map to use the Saury Festival as part of it's theme. |
| − | The exact scale | + | The exact scale of this event is 1 Main Operation and 2 Extra Operations. |
| − | There will also be new ships | + | There will also be 2 new ships this Event. |
| − | + | The main operation will take place in Hokkaido and there will be saury that will drop in the area. Completing this map will reward you with powerful ASW gear depending on the difficulty you choose. | |
| + | |||
| + | The Extra Operation segment is called '''"Maritime Escort! Defend the Seas of the Mainland"''' and will involve you fleet defending against a submarine invasion near the Japanese mainland as the conduct '''"Operation Nangou'''. Expect to being ASW gear, and while at it, also deal with Air defense against carrier fleets and do transport operations. | ||
| + | |||
| + | For additional information regarding event-related subjects and content, please refer to the following links:<br> | ||
| + | *[[Combined Fleet]] | ||
| + | *[[Armor Reduction]] | ||
| + | *[[Land-Based Air Squadron]] | ||
| + | *[[Transport Operation]] | ||
| + | *[[Aerial_Combat#Anti-Air_Cut-In|Anti-Air Cut-In]] | ||
| + | *[[Line of Sight]] | ||
| + | *[[Improving Ship Speed]] (May become a part of event map requirements) | ||
| + | *[[Vanguard Formation]] | ||
| + | *[[Striking Force Fleet]] | ||
| + | *[[Repairs#Emergency_Anchorage_Repair|Emergency Anchorage Repair]] | ||
| + | |||
| + | |||
| + | ==Historical Background== | ||
| + | |||
| + | '''Disclaimer: The following information is based upon a summary of World War II history and may not have any bearing on in-game mechanics. This is for historical reference only.''' | ||
| + | |||
| + | === Related Historical Campaigns=== | ||
| + | |||
| + | ==Information== | ||
| + | |||
| + | ===Quick Info Table=== | ||
| + | {| class="wikitable" | ||
| + | ! |Classification | ||
| + | ! |Map | ||
| + | ! |Name | ||
| + | ! |Fleet Type | ||
| + | ! |#{{Tooltip|LBAS|Land-Based Air Squadron}} available | ||
| + | ! |Friendly Fleet | ||
| + | ! colspan="2" |Fleet Tag | ||
| + | ! |Notes | ||
| + | |- | ||
| + | | rowspan="1" style="text-align:center;"|'''[[Fall 2021_Event/Main Operation|Main Operation]]''' | ||
| + | ! rowspan="1" |[[Fall_2021_Event/Main Operation#E-1|E-1]] | ||
| + | | rowspan="1" style="text-align:center;"|<s>'''Saury Fishing Support Off Houkaidou'''</s> <br> '''Northern Inshore Patrols''' | ||
| + | | rowspan="1" style="text-align:center;"|'''Single''' | ||
| + | | rowspan="1" style="text-align:center;"|'''0''' | ||
| + | | rowspan="1" style="text-align:center;"| | ||
| + | | style="text-align:center; max-width: 8em; border:none;"| '''None from 10/29 - 11/19''' | ||
| + | | style="text-align:center; max-width: 8em; border:none;"| '''After 11/19''' <br> [[File:Fall2021EventTag1.png]] <br> '''104th Squadron | ||
| + | | rowspan="1" style="text-align:center;"| | ||
| + | |- | ||
| + | | rowspan="4" style="text-align:center;"|'''[[Fall 2021_Event/Extra Operation|Extra Operation]]''' | ||
| + | ! rowspan="2" |[[Fall_2021_Event/Extra Operation#E-2|E-2]] | ||
| + | | rowspan="2" style="text-align:center;"|'''Operation Nangou''' | ||
| + | | rowspan="2" style="text-align:center;"|'''Single''' | ||
| + | | rowspan="2" style="text-align:center;"| '''{{Tooltip|1|Available for Sortie}}/{{Tooltip|2|Available for Use on Event Map}}''' | ||
| + | | rowspan="2" style="text-align:center;"| '''TBD''' | ||
| + | | style="text-align:center; max-width: 8em; border-right: none; border-left: none; border-bottom: none;"| [[File:Fall2021EventTag2.png]] | ||
| + | | style="text-align:center; max-width: 8em; border-right: none; border-left: none; border-bottom: none;"| | ||
| + | | rowspan="2" | | ||
| + | |- | ||
| + | | style="text-align:center; max-width: 8em; border:none;"| '''Hi Convoy''' | ||
| + | | style="text-align:center; max-width: 8em; border:none;"| | ||
| + | |- | ||
| + | ! rowspan="2" |[[Fall_2021_Event/Extra Operation#E-3|E-3]] | ||
| + | | rowspan="2" style="text-align:center;"|'''Decisive Patrol Line outside Hachijou-Jima''' | ||
| + | | rowspan="2" style="text-align:center;"|'''Single / Striking Force/<br> Combined Fleet''' | ||
| + | | rowspan="2" style="text-align:center;"| '''{{Tooltip|2|Available for Sortie}}/{{Tooltip|3|Available for Use on Event Map}}''' | ||
| + | | rowspan="2" style="text-align:center;"|'''TBD''' | ||
| + | | style="text-align:center; max-width: 8em; border-right: none; border-left: none; border-bottom: none;"| [[File:Fall2021EventTag3.png]] | ||
| + | | style="text-align:center; max-width: 8em; border-right: none; border-left: none; border-bottom: none;"| [[File:Fall2021EventTag4.png]] | ||
| + | | rowspan="2" | | ||
| + | |- | ||
| + | | style="text-align:center; max-width: 8em; border:none;"| '''Yokosuka Defense Force''' | ||
| + | | style="text-align:center; max-width: 8em; border:none;"| '''Combined Fleet''' | ||
| + | |} | ||
| + | <!--- | ||
| + | '''Fleet Locking Table:''' | ||
| + | {| class="wikitable" border="0" cellpadding="1" cellspacing="1" style="width: 650px;" | ||
| + | |- | ||
| + | | style="width: 180px;" | | ||
| + | !style="width: 100px; scope="col"|[[Summer_2021_Event/Main Operation#E-1|E-1]] | ||
| + | !style="width: 100px; scope="col"|[[Summer_2021_Event/Main Operation#E-2|E-2]] | ||
| + | !style="width: 100px; scope="col"|[[Summer_2021_Event/Extra Operation#E-3|E-3]]<br>(Hard Only) | ||
| + | |- | ||
| + | ! scope="col" |[[File:Summer2021EventTag1.png]]<br /> ''1st Special Squadron'' | ||
| + | | style="background:Gold" span | | ||
| + | | | ||
| + | | | ||
| + | |- | ||
| + | ! scope="col" |[[File:Summer2021EventTag2.png]]<br />''Mediterranean Fleet'' | ||
| + | | style="background:grey" span | | ||
| + | | | ||
| + | | | ||
| + | |- | ||
| + | ! scope="col" |[[File:Summer2021EventTag3.png]]<br />''2nd Special Squadron'' | ||
| + | | | ||
| + | | style="background:DodgerBlue" span | | ||
| + | | | ||
| + | |- | ||
| + | ! scope="col" |[[File:Summer2021EventTag4.png]]<br />''Force H'' | ||
| + | | | ||
| + | | style="background:YellowGreen" span | | ||
| + | | style="background:YellowGreen" span | | ||
| + | |- | ||
| + | ! scope="col" |[[File:Summer2021EventTag5.png]]<br />''The 10th Submarine Squadron'' | ||
| + | | | ||
| + | | | ||
| + | | style="background:Blue" span | | ||
| + | |- | ||
| + | ! scope="col" |[[File:Summer2021EventTag6.png]]<br />''Force Z'' | ||
| + | | | ||
| + | | | ||
| + | | style="background:Silver" span | | ||
| + | |- | ||
| + | ! scope="col" |[[File:Summer2021EventTag7.png]]<br />''Force X'' | ||
| + | | | ||
| + | | | ||
| + | | style="background:Yellow" span | | ||
| + | |||
| + | | style="background:Crimson" span | | ||
| + | | style="background:green" span | | ||
| + | | style="background:MediumPurple" span | | ||
| + | | style="background:orange" span | | ||
| + | | style="background:Teal" span | | ||
| + | |} | ||
| + | ---> | ||
| + | <!--===Event Quests=== | ||
| + | In this event, you will be participating in various quests needed to unlock the Striking Force fleet along with earning some other important prizes. The following quests are for E1 and E3 only. | ||
| + | |||
| + | {{ProtoQuestsHeader}} | ||
| + | {{ProtoQuests | ||
| + | | type = Sortie | ||
| + | | listnum = 2108 LB1 | ||
| + | | reqQuest = C2 | ||
| + | | namejp = 【地中海作戦】特務艦隊、遊撃部隊編成 | ||
| + | | nameen = {{color|black|[Mediterranean Special Fleet] Special Mission Fleet, Tactical Force Formation}} | ||
| + | | req = [Mediterranean Squadron Formation] Attack the Enemy frontline logisitic Supply Depots in Point F and L in the first operation area! In addition, intercept the enemy battleship squadron aiming for the transport unit to Malta from the direction of Tarant and destroy it! | ||
| + | |||
| + | * Get an A rank on nodes F, L, and O of E-1 | ||
| + | | fuel = 500 | ||
| + | | ammo = 500 | ||
| + | | steel = 0 | ||
| + | | bauxite = 0 | ||
| + | | other = [[File:Striking force fleet reward.png|Striking force fleet]]<br> '''[[Striking_Force_Fleet|Access to Striking Force Fleet]]''' <br> '''Choose between:'''<br/>{{QuestRewardEquip|Type 3 Shell}}{{QuestRewardEquip|Shipborne Model Type 4 20cm Anti-ground Rocket Launcher}}{{QuestRewardItem|Instant Repair Material|qty=4}} <br> | ||
| + | | notes = *For more info on how to clear F, L and O, check out Quest 1's guide | ||
| + | }} | ||
| + | {{ProtoQuests | ||
| + | | type = Sortie | ||
| + | | listnum = 2108 LB2 | ||
| + | | reqQuest = 2108 LB1 | ||
| + | | reqQuest2 = B171 | ||
| + | | namejp = 【地中海作戦】地中海配備の敵戦力を叩け! | ||
| + | | nameen = {{color|black|[Mediterranean Mission] Strike the enemy forces deploy within the Mediterranean!}} | ||
| + | | req = Defeat the enemy torpedo boats (at Point [H] and [S])deployed in the Mediterranean Sea in the first operation area! Furthermore, assault the Talent military port occupied by the enemy, and try to gradually destroy the enemy's abyssal forces deployed in the Eastern Mediterranean Sea! | ||
| + | |||
| + | * Get an A rank on nodes P, H and S of E-1 | ||
| + | | fuel = 0 | ||
| + | | ammo = 600 | ||
| + | | steel = 0 | ||
| + | | bauxite = 600 | ||
| + | | other = '''Choose between:'''<br/>{{QuestRewardItem|Development Material|qty=6}}{{QuestRewardItem|Instant Repair Material|qty=5}}{{QuestRewardItem|Improvement Material|qty=3}} <br> '''Then choose between:'''<br/>{{QuestRewardEquip|Type 3 Depth Charge Projector}}{{QuestRewardItem|Furniture Fairy|}}{{QuestRewardItem|Medal|}} | ||
| + | | notes = *For more info on how to clear P, H and S, check out Quest 2's guide | ||
| + | }} | ||
| + | {{ProtoQuests | ||
| + | | type = Sortie | ||
| + | | listnum = 2108 LB3 | ||
| + | | reqQuest = 2108 LB2 | ||
| + | | namejp = 【地中海拡張作戦】第10潜水戦隊作戦 | ||
| + | | nameen = {{color|black|10th Submarine Squadron Operation}} | ||
| + | | req = Get an A Rank on nodes T1 and T4 of E-3 twice each. | ||
| + | |||
| + | | fuel = 0 | ||
| + | | ammo = 0 | ||
| + | | steel = 0 | ||
| + | | bauxite = 700 | ||
| + | | other = '''Choose between:'''<br/>{{QuestRewardEquip|Type 3 Depth Charge Projector|qty=3}}{{QuestRewardEquip|Type 2 Depth Charge|qty=3}}{{QuestRewardEquip|Type124 ASDIC|qty=2}} <br> '''Then choose between:'''<br/>{{QuestRewardItem|Action Report|qty=2}}{{QuestRewardItem|Remodel Blueprint|}} | ||
| + | | notes = | ||
| + | * This quest is <span style="color:red;">'''not'''</span> available if E-3 is done on '''Casual''' difficulty. | ||
| + | * The 3rd starting point of E-3 must be unlocked first. | ||
| + | * For more info on how to clear T1 and T4, check out Phase 2.5B | ||
| + | * <span style="color:red;">'''Warning:'''</span> Changing the difficulty of E-3 will reset the progress of this quest! | ||
| + | }} | ||
| + | {{ProtoQuests | ||
| + | | type = Sortie | ||
| + | | listnum = 2108 LB4 | ||
| + | | reqQuest = 2108 LB3 | ||
| + | | namejp = 【地中海拡張作戦】北アフリカ作戦 | ||
| + | | nameen = {{color|black|North Africa Operation}} | ||
| + | | req = Get an S Rank on nodes F and W of E-3 twice each. | ||
| + | |||
| + | | fuel = 1000 | ||
| + | | ammo = 0 | ||
| + | | steel = 0 | ||
| + | | bauxite = 0 | ||
| + | | other = {{QuestRewardEquip|Daihatsu Landing Craft (Panzer II/North African Specification)|}} <br> '''Then choose between:'''<br/>{{QuestRewardEquip|25mm Single Autocannon Mount|qty=4}}{{QuestRewardItem|Improvement Material|qty=4}}{{QuestRewardItem|Development Material|qty=10}} | ||
| + | | notes = | ||
| + | * This quest is <span style="color:red;">'''not'''</span> available if E-3 is done on either '''Casual''' or '''Easy''' difficulty. | ||
| + | * For more info on how to clear F and W, check out the following sections: | ||
| + | ** For node F, check out Phase 2.5A | ||
| + | ** For node W, check out Phase 2.5B | ||
| + | * <span style="color:red;">'''Warning:'''</span> Changing the difficulty of E-3 will reset the progress of this quest! | ||
| + | }} | ||
| + | |} | ||
| + | --> | ||
| + | |||
| + | ===New Mechanics=== | ||
| + | |||
| + | ===New Ships=== | ||
| + | |||
| + | * [[Shounan|Hiburi-Class DE Shounan]] | ||
| + | * [[Scamp|Gato-Class SS USS Scamp]] | ||
| + | |||
| + | ===Returning Ships=== | ||
| + | Please refer to drop databases for the most updated lists of event drops, such as TsunDB or Poi-Statistics (or via Discord). | ||
| + | *One notable returning ship is [[Intrepid]] on E3. | ||
| + | |||
| + | ===New Equipment=== | ||
| + | *[[Hedgehog (Initial Model)]] | ||
| + | *[[21inch 6-tube Bow Torpedo Launcher (Initial Model)]] | ||
| + | *[[Submarine 4-tube Stern Torpedo Launcher (Initial Model)]] | ||
| + | *[[21inch 6-tube Bow Torpedo Launcher (Late Model)]] | ||
| + | *[[Submarine 4-tube Stern Torpedo Launcher (Late Model)]] | ||
| + | |||
| + | ===New Enemy Vessels=== | ||
| + | [[Submarine Shark Water Demon]] | ||
| + | |||
| + | ===New Enemy Equipment=== | ||
| + | |||
| + | ==Friendly Fleet== | ||
| + | No friendly fleet was released. | ||
| + | |||
| + | ==Voice Lines== | ||
| + | {{:{{BASEPAGENAME}}/Voice Lines}} | ||
| + | |||
| + | ==Mechanics== | ||
| + | ===Participation requirements=== | ||
| + | *Must have a 75% sortie win ratio. | ||
| + | *Must have 5 empty ship slots for new ships. | ||
| + | *Must have 20 free equipment slots. | ||
| + | |||
| + | ===Special Mechanics=== | ||
| + | |||
| + | <tabber> | ||
| + | |-|Difficulties= | ||
| + | *The difficulty system first used in [[Spring 2015 Event]] returns: you can choose between Operation A ({{lang|ja|甲}}, Hard), Operation B ({{lang|ja|乙}}, Medium), Operation C ({{lang|ja|丙}}, Easy) or Operation D ({{lang|ja|丁}}, Casual) . | ||
| + | **Choosing Hard or Normal requires a certain HQ Level (HQ Lv 35 for B / 80 for A in Spring 2015 Event). | ||
| + | **When switching from any '''"lower"''' difficulty to any '''"higher"''' difficulty, the map will fully be reset. | ||
| + | **When switching from any '''"higher"''' difficulty to any '''"lower"''' difficulty, the map will stay in the very same state it was previously, with only +25% of TP/HP being reset on the current phase's TP/HP bar. | ||
| + | |||
| + | *Beginning with the second map, '''difficulty progression rules''' apply. | ||
| + | ** In order to play a map on Hard difficulty, the prior map must have been completed on either Normal or Hard. | ||
| + | ** e.g., to do E-2 on hard, you must have completed E-1 on normal or hard. | ||
| + | |||
| + | *To simulate simultaneity of battles in different locations, '''[[Ship Locking|Fleet Tags]]''' conditions & deployment restrictions are employed. | ||
| + | ** Ships not already color-tagged will be tagged with the color associated with a map or map's phase when deployed. This tag will be applied regardless of the difficulty and can't be removed by any measure before the end of the event. | ||
| + | ** One map can use multiple tags, usually separated by phases or fleets. | ||
| + | ** Several maps can share one or more tags. | ||
| + | ** On Normal or Hard difficulty, ships must have either the same-colored tag as the map/phase being deployed to, or no tag at all. | ||
| + | *** This requirement is sometimes waived on certain maps, mostly on the last map of the event where tags only matter on Hard, or on post-clear. | ||
| + | |||
| + | |-|Fleets= | ||
| + | *The '''[[Combined Fleet]]''' (CF), a fleet assembling both your 1st and 2nd fleets, may come back. | ||
| + | ** The CF is only available for your 1st and 2nd fleets, where the 2nd fleet can be merged with the 1st one in the Fleet menu. | ||
| + | ** The CF '''cannot''' be used in anything outside of event sorties. | ||
| + | ** 3 different types of CF are available, depending on the map requirements and your current fleet setup. | ||
| + | ** CF with a flagship that carries a the '''{{EquipmentLink|Fleet Command Facility}}''', will be able to make use of the '''Ship Evacuation''' mechanic. | ||
| + | *** The evacuation requires an escort destroyer. | ||
| + | *** The evacuation consumes the ships' entire fuel & ammo reserves. | ||
| + | *** Only one ship can be evacuated per battle. | ||
| + | |||
| + | *The '''[[Striking Force Fleet]]''' (SF), a fleet with '''seven''' ships, may come back. | ||
| + | ** The SF is only available for your 3rd fleet, where an extra 7th ship can be added in the Fleet menu. | ||
| + | ** The SF '''cannot''' be used in anything outside of event sorties. | ||
| + | ** A SF with a flagship that carries a the '''{{EquipmentLink|Striking Force Fleet Command Facility}}''', will be able to make use of the '''Single Ship Evacuation''' mechanic. | ||
| + | *** The new Striking Force Fleet Command Facility will become obtainable and useable via [[Quests#F64|quest F64]]. | ||
| + | **** Note that the quest will consume the Fleet Command Facility and 2 [[Action Report]] in order to convert it into the new Striking Force Fleet Command Facility. | ||
| + | **** The evacuation does not require an escort destroyer. | ||
| + | **** The evacuation consumes the ship's entire fuel & ammo reserves. | ||
| + | **** Only one ship can be evacuated per battle. | ||
| + | **** '''The damage the ship suffered may become worse during the evacuation, but she will never sink.''' | ||
| + | |||
| + | *Returning this event, the '''[[Vanguard Formation]]''' can be used. | ||
| + | ** This formation will organize the fleet such that the 2 to 3 last ships protect the 2 to 4 firsts ships of the Fleet. | ||
| + | ** This formation is available for single and strike force fleets made of [https://twitter.com/KanColle_STAFF/status/930623111862435841 4 to 7] ships. | ||
| + | *** The formation makes ships more evasive in combat, especially with well-trained Destroyers. | ||
| + | *** This formation is available '''only during the duration of the event''', on the event's maps as well as on the regular maps. | ||
| + | |||
| + | |-|Friendly Fleets= | ||
| + | *'''NPC Friendly Fleets''' (FF) may be introduced to the event. | ||
| + | ** FFs act as another unit that appears in particular battles to help aid your fleet when attacking the enemy. | ||
| + | ** If you want help from a FF, you may activate them via the "Friendly Fleet" button in the main menu | ||
| + | *** If activated, one FF is randomly selected from a preset list of fleets to help your fleet. | ||
| + | *** Depending on who is in your fleet influence which FF can help you, excluding the FFs containing ships you also have in your main fleet. | ||
| + | *** The FF will appear at the start of either day or night battle, depending on the node. | ||
| + | ** FFs are usually available sometime after the start of the event, to help Admirals facing difficulties clearing the maps. | ||
| + | |||
| + | |-|Gimmicks= | ||
| + | *'''Completion Gimmicks''' are returning, asking you to accomplish certain requirements on a given map to unlock several things : | ||
| + | ** Boss debuff, from [[Summer 2015 Event]]'s final map, where once you reach the "Last Dance" of the final boss of a given map, you can unlock its debuffed form. | ||
| + | ** Map phases, where some map areas need to be unlocked, like on [[7-2]] and [[7-3]]. | ||
| + | *** Map areas can either be a path to the next boss, an intermediate path asking for new gimmicks, or a shortcut. | ||
| + | |||
| + | *'''Enemy Radar Ambush Nodes''' have been introduced into the game. | ||
| + | ** Entering this node will result in your fleet facing off against an enemy fleet that will ambush and attack your fleet | ||
| + | *** Your Fleet will not be able to fight against the enemy Fleet. | ||
| + | *** By meeting certain conditions, you can evade these nodes. | ||
| + | |||
| + | *[[Repairs#Emergency_Anchorage_Repair|'''Emergency Anchorage Maintenance/Repairs''']] 緊急泊地修理】 | ||
| + | ** Both [[Akashi|Akashi Kai]] and [[Akitsushima|Akitsushima Kai]] will be capable of conducting emergency repairs; however, Akitsushima has more limited capabilities compared to Akashi. | ||
| + | ** See under [[Repairs#Emergency_Anchorage_Repairs|Emergency Anchorage Repairs]] for details. | ||
| + | |||
| + | *[[Land-Based_Air_Squadron#High_Altitude_Air_Raid|'''High-Altitude Abyssal Bombers''']] that are resistant to all types of interceptors other than the {{EquipmentLink|Me 163B|Prototype Shuusui|Shuusui|text=Land-based rocket interceptors}} may also return this event. | ||
| + | |||
| + | *{{EquipmentLink|Arctic Gear & Deck Personnel}} were introduced during the [[Fall 2020 Event]], and need to be equipped on CV(L) to sortie them on "arctic" maps. | ||
| + | </tabber> | ||
Latest revision as of 11:09, 11 February 2024
The Fall 2021 Event also known under the title of The Return of the Saury Festival is a special event that will be taking place along with the Naval District Saury Festival (concluded on the 19th of November). Unlike previous events, this will be the first event map to use the Saury Festival as part of it's theme.
The exact scale of this event is 1 Main Operation and 2 Extra Operations.
There will also be 2 new ships this Event.
The main operation will take place in Hokkaido and there will be saury that will drop in the area. Completing this map will reward you with powerful ASW gear depending on the difficulty you choose.
The Extra Operation segment is called "Maritime Escort! Defend the Seas of the Mainland" and will involve you fleet defending against a submarine invasion near the Japanese mainland as the conduct "Operation Nangou. Expect to being ASW gear, and while at it, also deal with Air defense against carrier fleets and do transport operations.
For additional information regarding event-related subjects and content, please refer to the following links:
- Combined Fleet
- Armor Reduction
- Land-Based Air Squadron
- Transport Operation
- Anti-Air Cut-In
- Line of Sight
- Improving Ship Speed (May become a part of event map requirements)
- Vanguard Formation
- Striking Force Fleet
- Emergency Anchorage Repair
Historical Background
Disclaimer: The following information is based upon a summary of World War II history and may not have any bearing on in-game mechanics. This is for historical reference only.
Related Historical Campaigns
Information
Quick Info Table
| Classification | Map | Name | Fleet Type | #LBAS available | Friendly Fleet | Fleet Tag | Notes | |
|---|---|---|---|---|---|---|---|---|
| Main Operation | E-1 | Northern Inshore Patrols |
Single | 0 | None from 10/29 - 11/19 | After 11/19 104th Squadron |
||
| Extra Operation | E-2 | Operation Nangou | Single | 1/2 | TBD | |||
| Hi Convoy | ||||||||
| E-3 | Decisive Patrol Line outside Hachijou-Jima | Single / Striking Force/ Combined Fleet |
2/3 | TBD | ||||
| Yokosuka Defense Force | Combined Fleet | |||||||
New Mechanics
New Ships
Returning Ships
Please refer to drop databases for the most updated lists of event drops, such as TsunDB or Poi-Statistics (or via Discord).
- One notable returning ship is Intrepid on E3.
New Equipment
- Hedgehog (Initial Model)
- 21inch 6-tube Bow Torpedo Launcher (Initial Model)
- Submarine 4-tube Stern Torpedo Launcher (Initial Model)
- 21inch 6-tube Bow Torpedo Launcher (Late Model)
- Submarine 4-tube Stern Torpedo Launcher (Late Model)
New Enemy Vessels
New Enemy Equipment
Friendly Fleet
No friendly fleet was released.
Voice Lines
Mechanics
Participation requirements
- Must have a 75% sortie win ratio.
- Must have 5 empty ship slots for new ships.
- Must have 20 free equipment slots.
Special Mechanics
- The difficulty system first used in Spring 2015 Event returns: you can choose between Operation A (甲, Hard), Operation B (乙, Medium), Operation C (丙, Easy) or Operation D (丁, Casual) .
- Choosing Hard or Normal requires a certain HQ Level (HQ Lv 35 for B / 80 for A in Spring 2015 Event).
- When switching from any "lower" difficulty to any "higher" difficulty, the map will fully be reset.
- When switching from any "higher" difficulty to any "lower" difficulty, the map will stay in the very same state it was previously, with only +25% of TP/HP being reset on the current phase's TP/HP bar.
- Beginning with the second map, difficulty progression rules apply.
- In order to play a map on Hard difficulty, the prior map must have been completed on either Normal or Hard.
- e.g., to do E-2 on hard, you must have completed E-1 on normal or hard.
- To simulate simultaneity of battles in different locations, Fleet Tags conditions & deployment restrictions are employed.
- Ships not already color-tagged will be tagged with the color associated with a map or map's phase when deployed. This tag will be applied regardless of the difficulty and can't be removed by any measure before the end of the event.
- One map can use multiple tags, usually separated by phases or fleets.
- Several maps can share one or more tags.
- On Normal or Hard difficulty, ships must have either the same-colored tag as the map/phase being deployed to, or no tag at all.
- This requirement is sometimes waived on certain maps, mostly on the last map of the event where tags only matter on Hard, or on post-clear.
- The Combined Fleet (CF), a fleet assembling both your 1st and 2nd fleets, may come back.
- The CF is only available for your 1st and 2nd fleets, where the 2nd fleet can be merged with the 1st one in the Fleet menu.
- The CF cannot be used in anything outside of event sorties.
- 3 different types of CF are available, depending on the map requirements and your current fleet setup.
- CF with a flagship that carries a the Fleet Command Facility
 , will be able to make use of the Ship Evacuation mechanic.
- The evacuation requires an escort destroyer.
- The evacuation consumes the ships' entire fuel & ammo reserves.
- Only one ship can be evacuated per battle.
- The Striking Force Fleet (SF), a fleet with seven ships, may come back.
- The SF is only available for your 3rd fleet, where an extra 7th ship can be added in the Fleet menu.
- The SF cannot be used in anything outside of event sorties.
- A SF with a flagship that carries a the Striking Force Fleet Command Facility
 , will be able to make use of the Single Ship Evacuation mechanic.
- The new Striking Force Fleet Command Facility will become obtainable and useable via quest F64.
- Note that the quest will consume the Fleet Command Facility and 2 Action Report in order to convert it into the new Striking Force Fleet Command Facility.
- The evacuation does not require an escort destroyer.
- The evacuation consumes the ship's entire fuel & ammo reserves.
- Only one ship can be evacuated per battle.
- The damage the ship suffered may become worse during the evacuation, but she will never sink.
- The new Striking Force Fleet Command Facility will become obtainable and useable via quest F64.
- Returning this event, the Vanguard Formation can be used.
- This formation will organize the fleet such that the 2 to 3 last ships protect the 2 to 4 firsts ships of the Fleet.
- This formation is available for single and strike force fleets made of 4 to 7 ships.
- The formation makes ships more evasive in combat, especially with well-trained Destroyers.
- This formation is available only during the duration of the event, on the event's maps as well as on the regular maps.
- NPC Friendly Fleets (FF) may be introduced to the event.
- FFs act as another unit that appears in particular battles to help aid your fleet when attacking the enemy.
- If you want help from a FF, you may activate them via the "Friendly Fleet" button in the main menu
- If activated, one FF is randomly selected from a preset list of fleets to help your fleet.
- Depending on who is in your fleet influence which FF can help you, excluding the FFs containing ships you also have in your main fleet.
- The FF will appear at the start of either day or night battle, depending on the node.
- FFs are usually available sometime after the start of the event, to help Admirals facing difficulties clearing the maps.
- Completion Gimmicks are returning, asking you to accomplish certain requirements on a given map to unlock several things :
- Boss debuff, from Summer 2015 Event's final map, where once you reach the "Last Dance" of the final boss of a given map, you can unlock its debuffed form.
- Map phases, where some map areas need to be unlocked, like on 7-2 and 7-3.
- Map areas can either be a path to the next boss, an intermediate path asking for new gimmicks, or a shortcut.
- Enemy Radar Ambush Nodes have been introduced into the game.
- Entering this node will result in your fleet facing off against an enemy fleet that will ambush and attack your fleet
- Your Fleet will not be able to fight against the enemy Fleet.
- By meeting certain conditions, you can evade these nodes.
- Entering this node will result in your fleet facing off against an enemy fleet that will ambush and attack your fleet
- Emergency Anchorage Maintenance/Repairs 緊急泊地修理】
- Both Akashi Kai and Akitsushima Kai will be capable of conducting emergency repairs; however, Akitsushima has more limited capabilities compared to Akashi.
- See under Emergency Anchorage Repairs for details.
- High-Altitude Abyssal Bombers that are resistant to all types of interceptors other than the Land-based rocket interceptors
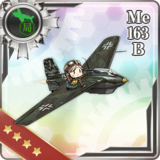
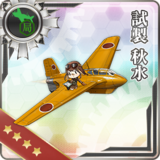
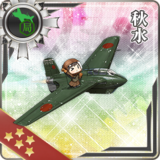 may also return this event.
- Arctic Gear & Deck Personnel
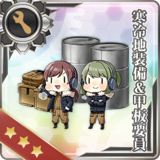 were introduced during the Fall 2020 Event, and need to be equipped on CV(L) to sortie them on "arctic" maps.