- Welcome to the Kancolle Wiki!
- If you have any questions regarding site content, account registration, etc., please visit the KanColle Wiki Discord
Difference between revisions of "Spring 2014 Event"
Jump to navigation
Jump to search
>Taihou (→Drops) |
(→Tips) |
||
| Line 143: | Line 143: | ||
* Expedition 117 can be use for extra damage during sortie. | * Expedition 117 can be use for extra damage during sortie. | ||
* If pre-boss night battle is too hard, bring in a submarine with <span style="color:rgb(0,0,0);">Emergency Repair + Turbine/Boiler, you must reach night battle before your SS sustains heavy damage (red hp). Do not set SS as flagship. Or you could use a searchlight.</span> | * If pre-boss night battle is too hard, bring in a submarine with <span style="color:rgb(0,0,0);">Emergency Repair + Turbine/Boiler, you must reach night battle before your SS sustains heavy damage (red hp). Do not set SS as flagship. Or you could use a searchlight.</span> | ||
| − | * Using line abreast in the night battle node may help to lower damage from enemy attacks. | + | * Using line abreast in the night battle node ''may'' help to lower damage from enemy attacks. (even though formation in night battle does not show up on screen / affect it technically) |
===Drops=== | ===Drops=== | ||
Revision as of 00:15, 27 April 2014
The Spring 2014 event started on April 23th and will last until May 6th (TBC).
Official Twitter
Information from the official Twitter:
- Event Name "Recon planes, launching!"
- High LOS will be the key to increase the chances of reaching the boss nodes.
- To achieve a high value, use of seaplanes, recon aircraft and ships with high LOS is strongly recommended
- A special animation plays showing your planes attempting to find the node when approaching. If there is a positive reaction from your fleet's leader, you will then proceed to fight the boss.
- Event lasts 2 weeks from April 23rd.
- Boss health in this event does not regenerate so stay calm and don't rush. Take it easy.
- Requires at least 75% sortie win ratio to participate.
- At least 5 free ship slots for new girls to join your fleet before sortie.
- At least 20 free equipment slots before sortie.
- 4 new ships added: DD Amatsukaze, DD Tanikaze, repair ship Akashi, and CL Sakawa.
- Amatsukaze is an E-3 Reward (Port Darwin Area).
- Tanikaze can be obtained from drops (E2, E3, E4 boss nodes are confirmed to drop her).
- Akashi is an E-2 Reward (Battle of Sunda Strait), she can repair ships mid sortie (down to moderate damage). A new item, Ship Repair Facility, allows her to repair 2 ships at the same time. The times where she is allowed to repair are limited, however, she will get more functionality in the future.
- Sakawa is an E-5 reward.
- Tone, Chikuma and Bismarck received a second remodel, with Tone-class being reclassified as CAVs. This can be unlocked by using a special Blueprint item, obtainable by trading Extra Operation and Event maps badges.
- New BGM added.
- New Recon Plane functionality:
- Increased effectiveness in the aerial combat phase from successful scouting with carrier-based scouts and seaplane scouts
- Effect depends on whether air superiority or air supremacy is obtained
- Special bonus in shelling phase from seaplane scouts
- Achieving Air Superiority / Air Supremacy allows ships with Recon Planes to do Double Attacks and Cut-Ins during Day Battle
- Increased effectiveness in the aerial combat phase from successful scouting with carrier-based scouts and seaplane scouts
- Reward for clearing event maps:
- E-1: Medal, Reppuu Kai, Contruction Fairy, Damecon.
- E-2: Medal, Akashi.
- E-3: Medal x2, Amatsukaze.
- E-4: Medal x1, New High-pressure, High-temperature Steam Boiler, Ship Repair Facility
- E-5: Medal x3, Sakawa.
Map details
E-1 - Southwest of Samewani Sea - Battle of Samewani Sea
File:6-1.jpg
E-1 Map
- 100 exp
- Node B contains 1 flagship and 1 elite Ka-class submarines
- Rewards Furniture Fairy, Emergency Repair, Reppu Kai, and a Medal upon clear
- Killing the boss 6 times will empty its HP gauge. Not being able to kill it by the end of boss battle will still do some damage to the gauge.
- Boss is CA Ri-Class flagship Kai
Branching rules
- CLT-CLT-CAV-BB-CV-CV seems to be the best fleet composition so far, with reported LoS of 298 to 408.
- Some compositions have been reported to reach boss node with LoS of 226
- Recon aircraft are required to get to the boss node. Bomber seaplanes such as the Zuiun and Seiran are not considered recon planes.
Tips
- Use expedition 117 if you think you need more damage during sortie.
- BBV with Recon aircraft get critical frequently.
Drops
| Destroyer | Light Cruiser | Heavy Cruiser | Seaplane Tender | Aircraft Carrier | Submarine | Battleship | |
|---|---|---|---|---|---|---|---|
| A | Samidare, Michishio, Yuudachi, Ooshio, Akebono | Naka | Haguro, Nachi | Ryuujou | |||
| B | Yuudachi, Arashio | Haguro, Nachi, Ashigara | |||||
| C | Nothing | ||||||
| D | Uzuki, Yukikaze | Naka | Haguro, Myoukou, Ashigara | ||||
| E | |||||||
| F | Nothing | ||||||
| G | Steel | ||||||
| H | Hatsukaze, Yukikaze | Atago, Tone, Chikuma, Maya, Myoukou, Nachi, Haguro, Furutaka | Chiyoda, Chitose | I-168, Maruyu | Fusou, Ise, Yamashiro, Kongou, Hiei, Haruna, Kirishima | ||
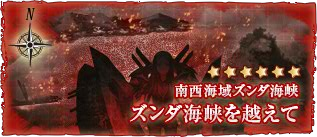
E-2 - Southwest of Zunda Strait - Across The Zunda Strait

E-2

- Rewards a Medal and Construction Ship Akashi upon clear
- 150 exp
- Map gauge has 6 hp
- Node H is night battle
- Boss is BB Ru-Class Flagship Kai
Branching rules
- 2 BB, 1 CLT, 1 CAV, 2 CV with BB and CAV equiped with Type 0 is really likely to reach boss node
- 2 BB, 2 CV, 2 BBv with 300+ LOS and Type 0 will 85% getting to boss node (so far).
Tips
- Expedition 117 can be use for extra damage during sortie.
- If pre-boss night battle is too hard, bring in a submarine with Emergency Repair + Turbine/Boiler, you must reach night battle before your SS sustains heavy damage (red hp). Do not set SS as flagship. Or you could use a searchlight.
- Using line abreast in the night battle node may help to lower damage from enemy attacks. (even though formation in night battle does not show up on screen / affect it technically)
Drops
| Destroyer | Light Cruiser | Heavy Cruiser | Seaplane Tender | Aircraft Carrier | Submarine | Battleship | |
|---|---|---|---|---|---|---|---|
| A | Fubuki, Fumizuki, Hatsuyuki, Shiratsuyu, Murakumo, Shirayuki, Yuudachi, Shikinami, Samidare, Nagatsuki | Naka, Sendai, Natori | Mogami, Ashigara | I-58, I-168 | |||
| B | Murakumo, Hatsuyuki | Naka | |||||
| C | |||||||
| D | Shiratsuyu, Shirayuki, Murakumo, Fubuki, Hatsuyuki | Mogami, Ashigara | |||||
| E | Bauxite | ||||||
| F | Maelstrom | ||||||
| G | Nothing | ||||||
| H | Fubuki, Shirayuki, Fumizuki | Natori, Abukuma | Akagi | ||||
| I | Nothing | ||||||
| J | Fubuki, Shirayuki, Hatsukaze, Maikaze, Tanikaze, Hamakaze, Shikinami, Nagatsuki | Kitakami, Naka, Agano, Ooi | Mikuma, Kako, Aoba, Tone, Maya, Atago, Mogami | Chiyoda | Kaga, Hiryuu, Souryuu, Zuihou, Hiyou, Ryuujou | I-168 | Haruna, Kirishima, Mutsu, Nagato |
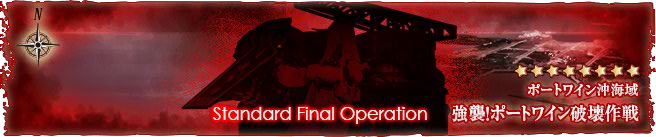
E-3 - Port Darwin Area - Assault! Destroy Port Darwin Operation

E-3
File:6-3.jpg
E-3 Map
- Rewards Amatsukaze and two Medals upon clear
- 200 exp
- Killing the boss 7 times will empty its HP gauge. Not being able to kill it by the end of boss battle will still do some damage to the gauge.
- Node-A contains 2 Ka-class Submarines
- Boss is Harbour Princess
Branching rules
- Using 4 BB + 2 CV with 352+ LOS seems to give a 100% chance to reach the Boss node
- Using 3 BB + CLT + 2 CV/L (all fast ships) will often result in route C-F-I. There are no air battles here, but I node is a night battle. Surviving night battle routes you to Boss node.
Tips
- Using Sanshiki gives you a damage bonus against the Boss.
- Use expedition 118 if you think you need more damage in the boss node.
Drops
| Destroyer | Light Cruiser | Heavy Cruiser | Seaplane Tender | Aircraft Carrier | Submarine | Battleship | |
|---|---|---|---|---|---|---|---|
| A | Fumizuki, Arare, Shigure, Kasumi, Shikinami, Akebono, Michishio | Natori | |||||
| B | |||||||
| C | |||||||
| D | |||||||
| E | Shiratsuyu, Shigure, Yuudachi, Arare, Arashio, Nagatsuki, Ooshio, Fumizuki | Jintsuu, Natori | Myoukou, Tone, Chikuma | ||||
| F | |||||||
| G | |||||||
| H | Hamakaze, Murasame, Shiratsuyu, Yuudachi, Kasumi, Samidare, Shigure, Hatsuyuki | Abukuma | Haguro, Ashigara, Tone, Nachi | Akagi, Kaga, Ryuujou, Hiryuu | |||
| I | |||||||
| J | |||||||
| K | |||||||
| L | Naganami, Maikaze, Tanikaze, Hamakaze, Hatsuyuki, Makigumo | Agano, Isuzu, Ooi, Kitakami, Yuubari | Kinugasa, Suzuya, Tone, Chikuma, Takao, Mogami | Zuikaku, Shoukaku, Zuihou, Souryuu, Hiryuu, Akagi, Kaga, Junyou, Hiyou | I-58, Maruyu, I-168 | Kongou, Haruna, Hyuuga, Ise, Nagato, Mutsu, Fusou, Yamashiro |
E-4 - Central Pacific Sea - Sweep Against Subs in the Frontline

E-4
File:6-4.jpg
E-4 Map
- Rewards New High-pressure, High-temperature Steam Boiler, Repair Goddess , Ship Repair Facility and one Medal upon clear
- Node C has no battle.
- Imuya, Goya, and Hachi drop on all nodes of this map.
- Boss is Submarine So-Class Elite
Branching rules
- From C to D : Fleet with 5 DD or 4DD + 1CL . The sixth ship can be any battleship or carrier. Fleet with less than 4 DD or have 2 BB/CV will always send to E
- E to D or G is random.
- An alternative is using 2DD, 2CL, 1 BB, 1 CV. This is a high risk high reward setup and only works if you have high leveled DDs or CLs (Recommended Verniy, the Kai 2s, Yukikaze or Shimakaze followed with Izusu and Yuubari). This setup is not a 100% chance to get to the Boss node but the chances are still high, and you may find yourself retreating often. However, If you manage to survive to the Boss node, it can be easily defeated and get a S score.
- You can also use 1CV with 5DD (or 4DD 1CL) to ensure A C D H route and won't lose air superiority to the enemy in the pre boss node, you will take much less crit in this way. The downside is you may fail to kill the boss if your ASW gears are bad, no BB means no second attack for your ships. If you want a battleship , fill your BBV with your best seaplanes to enable ASW.
- Having a CLT instead of a CL will not send you from C to D with a fleet of 4DD + 1CLT + any battleship or carrier; you will be sent to node E
Tips
- Use diamond formation for pre-boss node, line-abreast for the rest.
- Pre-boss node is very tough if you have no carrier and let the enemy get air superiority, your DD will get crit to red very frequently.
- Equip your ships with AA guns (10cm HA), it helps with lowering the damage done by Flagship Wo kai during Air Strike phrase.
- A recommended composition is 4 DD, 1 CL and 1 CV. Equip your CV with anti-air fighters and the rest of your fleet with ASW. Do not equip your fleet with recon planes. If you're feeling lazy, equip your DDs with damage control.
Drops
| Destroyer | Light Cruiser | Heavy Cruiser | Seaplane Tender | Aircraft Carrier | Submarine | Battleship | |
|---|---|---|---|---|---|---|---|
| A | Kitakami, Kuma, Yuubari, Sendai | Myoukou, Nachi, Mogami, Kako | I-168, I-58, I-8 | Hyuuga, Ise | |||
| B | |||||||
| C | Nothing | ||||||
| D | Atago | ||||||
| E | Tatsuta | I-168 , I-19 | |||||
| F | |||||||
| G | Kuroshio | ||||||
| H | Makigumo, Naganami, Tanikaze, Shimakaze | Ooi, Noshiro | Mogami, Mikuma, Kumano, Takao | Zuihou | I-8, I-58, I-19, I-168, Maruyu | Ise, Kongou, Haruna, Kirishima |
E-5 - North Pacific Sea - Capture Wake Island Operation

E-5

- Rewards Sakawa and three Medals upon clear.
- Boss is Isolated Island Demon
Branching rules
- Starting point to A : Fleet with submarine(s).
- B → C : Fleet with fast ship only.
- B → D : Fleet with slow ship(s).
- From F or G to J (boss node) : With a certain LOS, otherwise, send you to dead end (H or I)
Tips
- Use at least one slow BB to avoid the fuel maelstrom at node C.
- 4 BB and 2 CV. Fill your Carriers with Reppu (or better), put your best fighter in your carrier's largest slot, with this you can win air superiority in the boss node.
- This composition will always send you to the southern preboss node.
- 3 BB and 3 CV. Equip at least 6 Reppu and 1 Reppu Kai.
- In contrast to the previous composition, you have room to equip bombers that allow your carriers to attack.
- This composition gets an arguably easier preboss node (north) as well.
- 5 Reppu, 1 Reppu Kai, and a Type 62 Zero Fighter-bomber is also sufficient for air superiority at the boss (assuming the Reppu Kai is in Kaga's large slot), and provides slightly more firepower.
- Equipment for battleships : Two 46cm, recon plane, Type 3 Shell (you will need type 3 to deal with the boss).
- Choose line ahead in boss node to for the highest firepower.
- Both support expeditions are recommended to increase damage output at all nodes.
- 2 DD 2 CVL is a cost-efficient fleet.
- 2 DD 2 CV/CVL 2 BB gives maximum firepower.
- Some (real life) luck is required to sink the boss Isolated Island Demon, since her node also contains a Battleship Princess that is hard to sink.
Drops
| Destroyer | Light Cruiser | Heavy Cruiser | Seaplane Tender | Aircraft Carrier | Submarine | Battleship | |
|---|---|---|---|---|---|---|---|
| A | |||||||
| B | Mutsuki, Kisaragi, Yayoi | Nagara | Kinugasa | ||||
| C | |||||||
| D | Nothing | ||||||
| E | Kisaragi | Yuubari | |||||
| F | |||||||
| G | |||||||
| H | |||||||
| I | |||||||
| J | Tanikaze | Yuubari | Hiryuu | I-58 | |||