• Welcome to the Kancolle Wiki!
  • If you have any questions regarding site content, account registration, etc., please visit the KanColle Wiki Discord

Difference between revisions of "Spring 2025 Event/E-5/Sandbox"

From Kancolle Wiki
Jump to navigation Jump to search
(23 intermediate revisions by the same user not shown)
Line 45: Line 45:
  
  
=XX's Guide=
+
=Jiga's Guide=
 
==Map Overview==
 
==Map Overview==
 
E5 is a single and combined fleet, three-phase map consisting of one transport and two boss phases.  
 
E5 is a single and combined fleet, three-phase map consisting of one transport and two boss phases.  
 
* 3 [[LBAS]] are available on this map:
 
* 3 [[LBAS]] are available on this map:
** Initially, only 1 can be set on '''Sortie''', the other being limited to '''Defense''',
+
**Initially, only 1 can be set on '''Sortie''', the other being useless as no enemy air raid will happen,
**After phase 1, ?????
+
**After phase 2, all 3 LBAS can be set on '''Sortie'''.
 
**Thi LBAS is supposed to be a "seaplane base", and so will be nerferd unless using the proper planes (''see above'')
 
**Thi LBAS is supposed to be a "seaplane base", and so will be nerferd unless using the proper planes (''see above'')
  
Line 66: Line 66:
 
! !! B1!! B2!! D2!! F2
 
! !! B1!! B2!! D2!! F2
 
|-
 
|-
| Hard|| S?|| S?|| S?|| S? x2
+
| Hard|| S|| S|| S|| S x2
 
|-
 
|-
| Medium|| ?|| ?|| ?|| ?
+
| Medium|| S|| S|| S|| S
 
|-
 
|-
| Easy|| ?|| ?|| ?|| ?
+
| Easy|| S|| S|| S|| S
 
|-
 
|-
| Casual|| ?|| ?|| ?|| ?
+
| Casual|| S|| S|| S|| S
 
|}
 
|}
  
 
{{FleetGuide
 
{{FleetGuide
| Map = Node B1
+
| Map = Node B1 & B2
| Fleet = '''?
+
| Fleet = '''Striking: refer to [[#Phase 1 - TP]]'s fleet [[File:{{ROOTPAGENAME}} Tag 7.png|30px]]
| Route = {{MapRoute|?|red}}  
+
| Route = {{MapRoute|1||A|blue|B|blue|B1|red}}
 +
{{MapRoute|1||A|blue|B|blue|B2|red}}
 +
| ASC = 0
 +
| ASE = 0
 +
| ASM = 0
 
| AS = 0
 
| AS = 0
| Note = ?
+
| Note = Both nodes are basic surface nodes
| Range = ?
+
| Range = Nodes {{MapRoute|B1|red|B2|red}}: 4
| LBASS = ?
+
| LBASS = 0 / 0 / 0 / 0
| NoteLBAS = ?
+
| LBASD = 0 / 0 / 0 / 0
 +
| NoteLBAS = All LBAS should be sent on the nodes.
 
}}
 
}}
  
 
{{FleetGuide
 
{{FleetGuide
| Map = Node B2
+
| Map = Nodes D2 & F2
| Fleet = '''?
+
| Fleet = '''Striking: 1 FBB, 1 CV(B/L), 0-1 CLT, 2-4 DD [[File:{{ROOTPAGENAME}} Tag 8.png|30px]]
| Route = {{MapRoute|?|red}}
+
| Route = {{MapRoute|1||C|blue|D|blue|D1|pink|D2|red}}
| AS = 0
+
{{MapRoute|1||C|blue|D|blue|E|red|E2|red|F|pink|F2|red}}
| Note = ?
+
| ASC = 84
| Range = ?
+
| ASE = 189
| LBASS = ?
+
| ASM = 159
| NoteLBAS = ?
+
| AS = 198
}}
+
| Note = Bringing an [[AACI]] is recommended.
 
+
*For F2, using a {{Smoke}} [[Smoke]] on {{MapRoute|E|red}} and ASW dor {{MapRoute|E2|red}} can help reach the node.
{{FleetGuide
+
| Range = Nodes {{MapRoute|D2|red|F2|red}}: 6
| Map = Node D2
+
| LBASS = 89 / 195 / 165 / 204
| Fleet = '''?
+
| LBASD = 0 / 0 / 0 / 0
| Route = {{MapRoute|?|red}}  
+
| NoteLBAS = All LBAS should be sent on the nodes.
| AS = 0
 
| Note = ?
 
| Range = ?
 
| LBASS = ?
 
| NoteLBAS = ?
 
}}


{{FleetGuide
 
| Map = Node F2
 
| Fleet = '''?
 
| Route = {{MapRoute|?|red}}  
 
| AS = 0
 
| Note = ?
 
| Range = ?
 
| LBASS = ?
 
| NoteLBAS = ?
 
 
}}
 
}}
  
Line 241: Line 230:
  
 
{{FleetGuide
 
{{FleetGuide
| Map = ?
+
| Map = Heavy Fleet
| Fleet = '''?
+
| Fleet = '''Striking: 3-6 (F)BB(V), 0-1 CV, 0-2 DD, 0-1 AV [[File:{{ROOTPAGENAME}} Tag 7.png|30px]]
| Route = {{MapRoute|?|red}}  
+
| Route = {{MapRoute|1||A|blue|B|blue|B1|red|H|red|I|red|J1|pink|J|green|K|red}}
 +
| LOS = Cn3: ? / ? / ? / ? (C/E/M/H)
 +
| Speed = '''Slow
 +
| ASC = 0
 +
| ASE = 0
 +
| ASM = 0
 
| AS = 0
 
| AS = 0
| Note = ?
+
| Note = A strong fleet able to reliably defeat the boss node, but with a lower TP potential.
| Range = ?
+
| Range = Boss {{MapRoute|K|red}}: 2
| LBASS = ?
+
| LBASS = 0 / 0 / 0 / 0
| NoteLBAS = ?
+
| LBASD = 0 / 0 / 0 / 0
 +
| NoteLBAS = All LBAS should be sent on the boss.
 
}}
 
}}
 +
 +
{{FleetGuide
 +
| Map = Light Fleet
 +
| Fleet = '''Striking: 0-2 (F)BB(V), 0-1 CL 3-4 DD, 2-3 AV/AO/LHA [[File:{{ROOTPAGENAME}} Tag 7.png|30px]]
 +
| Route = {{MapRoute|1||A|blue|B|blue|B1|red|H|red|I|red|J|green|K|red}}
 +
| LOS = Cn3: ? / ? / ? / ? (C/E/M/H)
 +
| ASC = 0
 +
| ASE = 0
 +
| ASM = 0
 +
| AS = 0
 +
| Note = A light fleet with a greater TP potential, but may struggle to score A+ ranks.
 +
| Range = Boss {{MapRoute|K|red}}: 2
 +
| LBASS = 0 / 0 / 0 / 0
 +
| LBASD = 0 / 0 / 0 / 0
 +
| NoteLBAS = All LBAS should be sent on the boss.
 +
}}
 +
 +
The use of a [[Special Attack]] is highly recommended, preferably the [[Yamato]] Touch.
  
 
==Phase 2 - Boss==
 
==Phase 2 - Boss==
 
{{FleetGuide
 
{{FleetGuide
| Map = ?
+
| Map = Short Route
| Main = '''? [[File:{{ROOTPAGENAME}} Tag 6.png|30px]]
+
| Main = '''2 (F)BB(V), 1-2 CA(V), 1 CL, 1-2 DD [[File:{{ROOTPAGENAME}} Tag 6.png|30px]]
| Escort = '''? [[File:{{ROOTPAGENAME}} Tag 6.png|30px]]
+
| Escort = '''1 CL, 0-1 CLT, 4-5 DD [[File:{{ROOTPAGENAME}} Tag 6.png|30px]]
| Route = {{MapRoute|?|red}}  
+
| Route = {{MapRoute|2||L|blue|M|red|N|red|P|pink|P2|blue|R|red|T|red}}  
 +
| LOS = Cn3: ? / ? / ? / ? (C/E/M/H)
 
| ASC = 0
 
| ASC = 0
 
| ASE = 0
 
| ASE = 0
 
| ASM = 0
 
| ASM = 0
 
| AS = 0
 
| AS = 0
| Note = ?
+
| Note = 3 to 5 historical ships are required to route there depending on the difficulty, else, it will pass through extra node {{MapRoute|O|pink}}.
| Range = ?
+
*The use of {{Smoke}} [[Smoke]]s is recommended on node {{MapRoute|R|red}} or {{MapRoute|N|red}}.
| LBASS = 0 / 0 / 0 / 0
+
*Bringing some ASW can help
 +
| Range = Boss {{MapRoute|T|red}}: 5
 +
| LBASS = 2 / 2 / 2 / 44
 
| LBASD = 0 / 0 / 0 / 0
 
| LBASD = 0 / 0 / 0 / 0
| NoteLBAS = ?
+
| NoteLBAS = All LBAS should be sent on the boss.
 
}}
 
}}
 +
 +
The use of a [[Special Attack]] is highly recommended, preferably a {{Class|Nelson}} one.
 +
 +
[[PT Imp Pack]]s are on the boss, it is therefore advised to bring some anti-PT setups:
 +
{{Anti-PT Imp Setups}}
  
 
Once on LD, the CG will change to the following:
 
Once on LD, the CG will change to the following:
Line 280: Line 301:
 
==Phase 3 - Boss==
 
==Phase 3 - Boss==
 
{{FleetGuide
 
{{FleetGuide
| Map = ?
+
| Map = North Route
| Main = '''? [[File:{{ROOTPAGENAME}} Tag 6.png|30px]]
+
| Main = '''0-1 (F)BB(V), 2 CVL/CAV, 0-2 CL, 0-1 DD, 1-2 AV/LHA [[File:{{ROOTPAGENAME}} Tag 6.png|30px]]
| Escort = '''? [[File:{{ROOTPAGENAME}} Tag 6.png|30px]]
+
| Escort = '''0-1 CA(V)/AV, 1 CL, 4-5 DD [[File:{{ROOTPAGENAME}} Tag 6.png|30px]]
| Route = {{MapRoute|?|red}}  
+
| Route = {{MapRoute|2||L|blue|M|red|U|red|U3|pink|X|red|P2|blue|R|red|T|red}}
 +
| LOS = Cn3: ? / ? / ? / ? (C/E/M/H)
 +
| Speed = '''Fast
 
| ASC = 0
 
| ASC = 0
| ASE = 0
+
| ASE = 275
| ASM = 0
+
| ASM = 318
| AS = 0
+
| AS = 366
| Note = ?
+
| Note = A slightly shorter route that has 1 less air node at the cost of more fleet restrictions.
| Range = ?
+
| Range = Boss {{MapRoute|Z|red}}: 4
 +
| LBASS = 12 / 282 / 326 / 425
 +
| LBASD = 0 / 0 / 0 / 0
 +
| NoteLBAS = All LBAS should be sent on the boss.
 +
}}
 +
 
 +
{{FleetGuide
 +
| Map = South Route
 +
| Main = '''1 (F)BB(V), 0-1 CV(B), 0-2 CA(V), 0-2 CL, 0-1 DD, 1 AV, 1 LHA [[File:{{ROOTPAGENAME}} Tag 6.png|30px]]
 +
| Escort = '''0-1 CA(V)/AV, 1 CL, 4-5 DD [[File:{{ROOTPAGENAME}} Tag 6.png|30px]]
 +
| Route = {{MapRoute|2||L|blue|M|red|U1|pink|U2|red|U3|pink|X|red|P2|blue|R|red|T|red}}
 +
| LOS = Cn3: ? / ? / ? / ? (C/E/M/H)
 +
| ASC = 0
 +
| ASE = 275
 +
| ASM = 318
 +
| AS = 366
 +
| Note = A slightly longer route that has less fleet restrictions at the cost of 1 more air node.
 +
| Range = Boss {{MapRoute|Z|red}}: 4
 
| LBASS = 0 / 0 / 0 / 0
 
| LBASS = 0 / 0 / 0 / 0
 
| LBASD = 0 / 0 / 0 / 0
 
| LBASD = 0 / 0 / 0 / 0
| NoteLBAS = ?
+
| NoteLBAS = All LBAS should be sent on the boss.
 
}}
 
}}
 +
The boss is an '''[[Installation]]''' and requires appropriate gear to be defeated,
 +
* She is especially weak to [[Nuke|{{TextGlow|"'''Nuke'''"|black|text-colour=#A9F377|glow-size=2px}}]] setups.
 +
 +
The use of a [[Special Attack]] is highly recommended, preferably a {{Class|Nelson}} one.
 +
*Bringing an [[AACI]] is recomannded.
 +
*The use of {{Smoke}} [[Smoke]]s is recommended on node {{MapRoute|U|red|U2|red}} or {{MapRoute|R|red}}.
 +
 +
[[PT Imp Pack]]s are on the boss, it is therefore advised to bring some anti-PT setups:
 +
{{Anti-PT Imp Setups}}
  
 
==Gimmick 2 - Debuff==
 
==Gimmick 2 - Debuff==

Revision as of 08:07, 30 March 2025

Sandbox Rules

This sandbox is to be used to construct an event guide for the above-mentioned event map. These guides are to all of the following requirements:

  • An overview of the map, including ship/equipment bonuses, Ship Locks, and special mechanics,
  • List of branching unlocking requirements (if there are multiple requirements, compositions for each path along with the below requirements will be needed to discuss the unlocking requirements in question),
  • A list of working compositions that work: (T=these must have possible alternatives for players who may or may not have all ships needed for a specific path),
    • The Paths said compositions will take (to explain each path the composition will/can take),
    • A summary or description of what kind of obstacles a composition will face.
  • A description of the boss node: what it consists of, and a descriptive guide on what the player should consider for a course of action to successfully win the battle,
  • Optional: Tips/guides to farm certain ships and/or resources (this can also require compositions, paths, and possible descriptions).

Editors are to construct their own version of the guide/part of the guide, and complete it in a timely fashion.

No editor is allowed to edit over other editors' work without the consent of the editor and his approval to do so.

Several versions will be constructed through this page and will be reviewed and approved by the staff/collaboration committee before being moved for the Spring 2025 Event, being reviewed and updated once more before it can be released.

Overall there should be 3 versions of the guide that have to be constructed, including: Preliminary > Polished > Finalized Guides

With each approval of each version of the guide, the said guide will be updated to the main page, and construction of the next version will begin.

All guides outside of the approved version will be removed and work will begin from the approved version to make it better for the next version until the finalized version is made.

Branching Table

E-5 Branching Rules (Start Points) ▼/▲
Nodes Rules

* = Rule under review

? = Ship type/amount under review

Historical Bonuses

DISCLAIMER: This information is based on user-submitted data and is subject to revisions as more data is gathered. Any version of the ship receives the bonus regardless of remodel.

Ship Bonuses

??

Equipment Bonuses

??

Debuff

??


Jiga's Guide

Map Overview

E5 is a single and combined fleet, three-phase map consisting of one transport and two boss phases.

  • 3 LBAS are available on this map:
    • Initially, only 1 can be set on Sortie, the other being useless as no enemy air raid will happen,
    • After phase 2, all 3 LBAS can be set on Sortie.
    • Thi LBAS is supposed to be a "seaplane base", and so will be nerferd unless using the proper planes (see above)
  • This map uses 3 locks:
    • Spring 2025 Event Tag 6.png Operation Rei-go Unit, Starting point 2 (reused from E-4 and in E-6)
    • Spring 2025 Event Tag 7.png Cavite Reinforcement Unit, Starting point 1
    • Spring 2025 Event Tag 8.png 31st Squadron, Starting point 1

Gimmick 1 - Unlock

To unlock the 1st boss, the following steps have to be performed:

B1 B2 D2 F2
Hard S S S S x2
Medium S S S S
Easy S S S S
Casual S S S S
Node B1 & B2
Fleet Info
Single Striking: refer to #Phase 1 - TP's fleet Spring 2025 Event Tag 7.png
LoS Any
Speed Any
RouteNode Types:
RED: Battle
PURPLE: Night Battle
PINK: Air Raid/Battle
ORANGE: Enemy Ambush/ASS
BLUE: Empty/Choice
Light Blue: Emergency Anchorage Repair
GREEN: Resource/TP
VIOLET: Maelstrom
1 A B B1

1 A B B2

Air State (C / E / M / H)
AD AP AS AS+
0 / 0 / 0 / 0 0 / 0 / 0 / 0 0 / 0 / 0 / 0 0 / 0 / 0 / 0
LBAS
Range AS Sortie AS Defense
Nodes B1 B2: 4 0 / 0 / 0 / 0 0 / 0 / 0 / 0
Fleet Notes
Both nodes are basic surface nodes
LBAS Notes
All LBAS should be sent on the nodes.
Nodes D2 & F2
Fleet Info
Single Striking: 1 FBB, 1 CV(B/L), 0-1 CLT, 2-4 DD Spring 2025 Event Tag 8.png
LoS Any
Speed Any
RouteNode Types:
RED: Battle
PURPLE: Night Battle
PINK: Air Raid/Battle
ORANGE: Enemy Ambush/ASS
BLUE: Empty/Choice
Light Blue: Emergency Anchorage Repair
GREEN: Resource/TP
VIOLET: Maelstrom
1 C D D1 D2

1 C D E E2 F F2

Air State (C / E / M / H)
AD AP AS AS+
25 / 56 / 48 / 59 38 / 84 / 71 / 88 84 / 189 / 159 / 198 168 / 378 / 318 / 396
LBAS
Range AS Sortie AS Defense
Nodes D2 F2: 6 89 / 195 / 165 / 204 0 / 0 / 0 / 0
Fleet Notes
Bringing an AACI is recommended.
  • For F2, using a Smoke Generator Smoke on E and ASW dor E2 can help reach the node.
LBAS Notes
All LBAS should be sent on the nodes.

Phase 1 - TP

Phase 1 is a new kind of Transport Operation, where "tanks" do work better:

Landing Operation - Equipment [1]
Type Equipment S-Rank A-Rank
Landing Craft Daihatsu Landing CraftDaihatsu Landing Craft
Toku Daihatsu Landing CraftToku Daihatsu Landing Craft
Armed DaihatsuArmed Daihatsu
SoukouteiSoukoutei (Armored Boat Class)
5.2 3.64
DLC + T89 TankDaihatsu Landing Craft (Type 89 Medium Tank & Landing Force) 14.2 9.94
DLC + Panzer IIDaihatsu Landing Craft (Panzer II/North African Specification) 21.2 14.84
Toku DLC + Ho-Ni TankToku Daihatsu Landing Craft + Type 1 Gun Tank 40.2 28.14
Toku DLC + 11th RegToku Daihatsu Landing Craft + 11th Tank Regiment 46.2 32.34
M4A1 DDM4A1 DD 24.2 16.94
Toku DLC + Panzer IIIToku Daihatsu Landing Craft + Panzer III (North African Specification) 27.2 19.04
Toku DLC + Chi-HaToku Daihatsu Landing Craft + Chi-Ha 22.2 15.54
Toku DLC + Chi-Ha KaiToku Daihatsu Landing Craft + Chi-Ha Kai 28.2 19.74
Toku DLC + Panzer III JToku Daihatsu Landing Craft + Panzer III Ausf J 32.2 22.54
Amphibious Vehicle Ka-Mi tankSpecial Type 2 Amphibious Tank 9.3 6.51
Ka-Tsu tankSpecial Type 4 Amphibious Tank 6.3 4.41
Ka-Tsu tank KaiSpecial Type 4 Amphibious Tank Kai 8.3 5.81
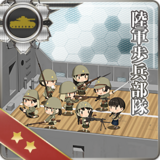
Landing Forces Army Infantry CorpsArmy Infantry Corps 15.0 10.50
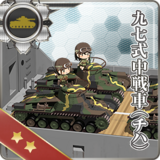
Chi-HaType 97 Medium Tank (Chi-Ha) 17.0 11.90
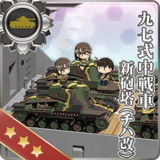
Chi-Ha KaiType 97 Medium Tank New Turret (Chi-Ha Kai) 23.0 16.10
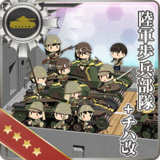
Infantry + Chi-Ha KaiArmy Infantry Corps + Chi-Ha Kai 38.0 26.60
Drum Canister Drum CanistersDrum Canister (Transport Use) 3.25 2.275
Ration RationsCombat Ration
Combat Ration (Special Onigiri)
Canned Saury
0.65 0.455
Landing Operation - Ship [2]
Ship Type S-Rank A-Rank
AO Fleet Oiler 9.75 6.825
LHA Amphibious Assault Ship 7.8 5.46
Kinu Kai NiKinu Kai Ni 8 5.6
AV Seaplane Tender 5.85 4.095
BBV Aviation Battleship 4.55 3.185
AS Submarine Tender
CT Training Cruiser 3.90 2.730
DD Destroyer 3.25 2.275
CAV Aviation Cruiser 2.60 1.820
CL Light Cruiser 1.30 0.910
SSV Aircraft Carrying Submarine 0.65 0.455
BB Battleship 0.0 0.0
FBB Fast Battleship
CV Standard Carrier
CVB Armored Carrier
CVL Light Carrier
CA Heavy Cruiser
CLT Torpedo Cruiser
DE Coastal Defense Ships
SS Submarine
Notes
  • The total amount of TP is computed separately for each fleet in a combined fleet, with a rounding down on each.
Heavy Fleet
Fleet Info
Single Striking: 3-6 (F)BB(V), 0-1 CV, 0-2 DD, 0-1 AV Spring 2025 Event Tag 7.png
LoS Cn3: ? / ? / ? / ? (C/E/M/H)
Speed Slow
RouteNode Types:
RED: Battle
PURPLE: Night Battle
PINK: Air Raid/Battle
ORANGE: Enemy Ambush/ASS
BLUE: Empty/Choice
Light Blue: Emergency Anchorage Repair
GREEN: Resource/TP
VIOLET: Maelstrom
1 A B B1 H I J1 J K
Air State (C / E / M / H)
AD AP AS AS+
0 / 0 / 0 / 0 0 / 0 / 0 / 0 0 / 0 / 0 / 0 0 / 0 / 0 / 0
LBAS
Range AS Sortie AS Defense
Boss K: 2 0 / 0 / 0 / 0 0 / 0 / 0 / 0
Fleet Notes
A strong fleet able to reliably defeat the boss node, but with a lower TP potential.
LBAS Notes
All LBAS should be sent on the boss.
Light Fleet
Fleet Info
Single Striking: 0-2 (F)BB(V), 0-1 CL 3-4 DD, 2-3 AV/AO/LHA Spring 2025 Event Tag 7.png
LoS Cn3: ? / ? / ? / ? (C/E/M/H)
Speed Any
RouteNode Types:
RED: Battle
PURPLE: Night Battle
PINK: Air Raid/Battle
ORANGE: Enemy Ambush/ASS
BLUE: Empty/Choice
Light Blue: Emergency Anchorage Repair
GREEN: Resource/TP
VIOLET: Maelstrom
1 A B B1 H I J K
Air State (C / E / M / H)
AD AP AS AS+
0 / 0 / 0 / 0 0 / 0 / 0 / 0 0 / 0 / 0 / 0 0 / 0 / 0 / 0
LBAS
Range AS Sortie AS Defense
Boss K: 2 0 / 0 / 0 / 0 0 / 0 / 0 / 0
Fleet Notes
A light fleet with a greater TP potential, but may struggle to score A+ ranks.
LBAS Notes
All LBAS should be sent on the boss.

The use of a Special Attack is highly recommended, preferably the Yamato Touch.

Phase 2 - Boss

Short Route
Fleet Info
Main 2 (F)BB(V), 1-2 CA(V), 1 CL, 1-2 DD Spring 2025 Event Tag 6.png
Escort 1 CL, 0-1 CLT, 4-5 DD Spring 2025 Event Tag 6.png
LoS Cn3: ? / ? / ? / ? (C/E/M/H)
Speed Any
RouteNode Types:
RED: Battle
PURPLE: Night Battle
PINK: Air Raid/Battle
ORANGE: Enemy Ambush/ASS
BLUE: Empty/Choice
Light Blue: Emergency Anchorage Repair
GREEN: Resource/TP
VIOLET: Maelstrom
2 L M N P P2 R T
Air State (C / E / M / H)
AD AP AS AS+
0 / 0 / 0 / 0 0 / 0 / 0 / 0 0 / 0 / 0 / 0 0 / 0 / 0 / 0
LBAS
Range AS Sortie AS Defense
Boss T: 5 2 / 2 / 2 / 44 0 / 0 / 0 / 0
Fleet Notes
3 to 5 historical ships are required to route there depending on the difficulty, else, it will pass through extra node O.
  • The use of Smoke Generator Smokes is recommended on node R or N.
  • Bringing some ASW can help
LBAS Notes
All LBAS should be sent on the boss.

The use of a Special Attack is highly recommended, preferably a Nelson-class one.

PT Imp Packs are on the boss, it is therefore advised to bring some anti-PT setups:

Anti-PT boat
Unlike most standard Abyssals, "PT boats" (PT Imp PackPT Imp Pack & Schnellboot Imp PackSchnellboot Imp Pack) are "very small and fast".
  • All ship types suffer a severe Accuracy accuracy and Firepower firepower penalty against PT boats.
  • Attacking them with larger guns is not very effective, smaller guns being recommended instead.
  • Support Expeditions are not affect by any of the following[1].
Attack formula against PT boats
The Attack formula against PT boats:[2][3]
Jet Assault & Airstrike
  • [math]\displaystyle{ \text{Damage}_\text{PT}= \text{Atk}_\text{post-cap} \times \text{Rand} [0.5 ; 0.8] }[/math]


LBAS[4]
  • [math]\displaystyle{ \text{Damage}_\text{PT}= \text{Atk}_\text{post-cap} \times \text{Rand} [0.4 ; 0.7] }[/math]


Shelling
  • [math]\displaystyle{ \text{Damage}_\text{PT}= ( 0.3 \times \text{Atk}_\text{post-cap} + \sqrt{\text{Atk}_\text{post-cap}} + 10 ) \times \prod^{All Equipment}{\text{Mod}_\text{EquipmentAtk}} }[/math]


Opening & Closing Torpedo Salvos
  • [math]\displaystyle{ \text{Damage}_\text{PT}= 0.3 \times \text{Atk}_\text{post-cap} + \sqrt{\text{Atk}_\text{post-cap}} + 10 }[/math]


Night Battle
  • Night Battle data are unclear yet.


With
  • [math]\displaystyle{ \text{Atk}_\text{post-cap} }[/math] the post cap attack power defined here,
  • [math]\displaystyle{ \text{Mod}_\text{EquipmentAtk} }[/math] the bonuses given by equipment, described below.
Accuracy formula against PT boats
The Accuracy formula against PT boats:[5][6][7][8]
[math]\displaystyle{ \text{Hit Rate}_\text{vs.PT} \text{%} = \Big\lfloor ( 0.3 \times \text{Accuracy}_\text{Atk} + \sqrt{\text{Accuracy}_\text{Atk}} + 15 ) \times 1.2 \times \text{Mod}_\text{Ship} \times \Big( \prod^{All Equipment}{\text{Mod}_\text{EquipmentAcc}} \Big) \times \text{Mod}_\text{Night} \Big\rfloor - \text{EVA}_\text{PT} + 1 }[/math]
With
  • [math]\displaystyle{ \text{Acc}_\text{Atk} }[/math] the standard accuracy described here
    • PT boats are "DDs" in the game, so the [math]\displaystyle{ \text{Mod}_\text{formation} }[/math] for vanguard is 1.1 during shelling, and 1.2 during the torpedo phase.
    • Historical accuracy bonuses during Events are included in the Standard Accuracy Term, i.e. it is affected by the [math]\displaystyle{ \text{Mod}_\text{PT} }[/math] modifier.
  • [math]\displaystyle{ \text{EVA}_\text{PT} }[/math] the PT estimated evasion Evasion described bellow,
PT boats stats
Type Luck Luck Eva Evasion [math]\displaystyle{ \text{EVA}_\text{PT} }[/math]
Line AheadLineAhead.png EchelonEchelon.png Line AbreastLineAbreast.png
PT Imp PackPT Imp Pack ? ? 81? 87? ?
PT Imp Pack IIPT Imp Pack II 60 220 80 87 85
PT Imp Pack IIIPT Imp Pack III 60 250 82 89 88
PT Imp Pack IVPT Imp Pack IV ? ? ? 84? ?
Schnellboot Imp PackSchnellboot Imp Pack ? ? ? ? ?
Schnellboot Imp Pack IISchnellboot Imp Pack II ? ? ? ? ?
Schnellboot Imp Pack EliteSchnellboot Imp Pack Elite ? ? ? ? ?


The main Accuracy modifiers are
  • [math]\displaystyle{ \text{Mod}_\text{Amagiri} }[/math] being include in [math]\displaystyle{ \text{Acc}_\text{Atk} }[/math]:
  • [math]\displaystyle{ \text{Mod}_\text{Ship} }[/math] the bonus given by ship types, described below,
  • [math]\displaystyle{ \text{Mod}_\text{EquipmentAcc} }[/math] the bonuses given by equipment, described below,
  • [math]\displaystyle{ \text{Mod}_\text{Night} }[/math] being 0.7 during night battle, 1 during day battle.


Amagiri Kai Ni/DAmagiri Kai Ni
Amagiri Kai Ni D
has the ability to prioritize focusing on attacking PT imps with significantly increased accuracy if any are present.

  • DD placed in the composition slots above and below her will gain a noticeable accuracy boost and will prioritize attacking PT boats if any are present.
  • The PT boat targeting rate is 100% for all affected ships [9].

During Events, some special bonuses may be added, with "historical" ships and equipment gaining some accuracy bonuses[10].

Ship Type [math]\displaystyle{ \text{Mod}_\text{Ship} }[/math]
DD & DE 1.0
CL, CLT, & CT 0.82
All other types 0.7
Equipment [math]\displaystyle{ \text{Mod}_\text{EquipmentAcc} }[/math] [math]\displaystyle{ \text{Mod}_\text{EquipmentAtk} }[/math]
1st equipped 2nd equipped 1st equipped 2nd equipped
Small Caliber Main GunSmall Caliber Main High-angle GunSmall Small Caliber Main Guns[11] 1.3 1.15 1.5 2.11.5×1.4
Secondary GunSecondary High-angle GunSec Secondary Guns[12] 1.55 1 1.3
Anti-Aircraft Gun Anti-Aircraft Guns 1.45 1.35 1.2 1.441.2×1.2
Lookout Skilled LookoutsSkilled Lookouts
Torpedo Squadron Skilled Lookouts
1.75 1 1.1
Landing CraftArmed Soukoutei (Armored Boat Class)Soukoutei (Armored Boat Class) 1.45 1.3 1.2 1.1
Armed DaihatsuArmed Daihatsu 1.45 1.3 1.2 1.1
Amphibious Vehicle Ka-Tsu TanksSpecial Type 4 Amphibious Tank
Special Type 4 Amphibious Tank Kai
[13][14]
1 1.3 1 1.1
Seaplane BomberBomberSeaplane Fighter Seaplane Bombers & Seaplane Fighters 1.5 1 1.2
Dive BomberJetFighterBomber1.pngJetFighterBomber2.png Dive Bombers & JetsKikka Kai
Jet Keiun Kai
1.375 1.2 1.4 1.821.4×1.3
All other equipment 1 1
Notes
  • It is recommended to use anti-PT setups on DDs only, such setups compromising overall combat effectiveness.
  • Having a Reinforcement Expansion is important because it can save a ship slot by containing a machine gun or skilled lookouts.
  • Combining equipment is recommended to see significant boosts to accuracy.
  • The Amphibious Vehicle Ka-Tsu TanksSpecial Type 4 Amphibious Tank
    Special Type 4 Amphibious Tank Kai
    bonus does not stack with the Landing Craft Armed BoatsSoukoutei (Armored Boat Class)
    Armed Daihatsu
    ones.
  • Using other setups improving accuracy is also advisable:
References:
[edit]

Once on LD, the CG will change to the following:

Destroyer Ra-Class ζ

Phase 3 - Boss

North Route
Fleet Info
Main 0-1 (F)BB(V), 2 CVL/CAV, 0-2 CL, 0-1 DD, 1-2 AV/LHA Spring 2025 Event Tag 6.png
Escort 0-1 CA(V)/AV, 1 CL, 4-5 DD Spring 2025 Event Tag 6.png
LoS Cn3: ? / ? / ? / ? (C/E/M/H)
Speed Fast
RouteNode Types:
RED: Battle
PURPLE: Night Battle
PINK: Air Raid/Battle
ORANGE: Enemy Ambush/ASS
BLUE: Empty/Choice
Light Blue: Emergency Anchorage Repair
GREEN: Resource/TP
VIOLET: Maelstrom
2 L M U U3 X P2 R T
Air State (C / E / M / H)
AD AP AS AS+
0 / 82 / 95 / 109 0 / 123 / 142 / 163 0 / 275 / 318 / 366 0 / 550 / 636 / 732
LBAS
Range AS Sortie AS Defense
Boss Z: 4 12 / 282 / 326 / 425 0 / 0 / 0 / 0
Fleet Notes
A slightly shorter route that has 1 less air node at the cost of more fleet restrictions.
LBAS Notes
All LBAS should be sent on the boss.
South Route
Fleet Info
Main 1 (F)BB(V), 0-1 CV(B), 0-2 CA(V), 0-2 CL, 0-1 DD, 1 AV, 1 LHA Spring 2025 Event Tag 6.png
Escort 0-1 CA(V)/AV, 1 CL, 4-5 DD Spring 2025 Event Tag 6.png
LoS Cn3: ? / ? / ? / ? (C/E/M/H)
Speed Any
RouteNode Types:
RED: Battle
PURPLE: Night Battle
PINK: Air Raid/Battle
ORANGE: Enemy Ambush/ASS
BLUE: Empty/Choice
Light Blue: Emergency Anchorage Repair
GREEN: Resource/TP
VIOLET: Maelstrom
2 L M U1 U2 U3 X P2 R T
Air State (C / E / M / H)
AD AP AS AS+
0 / 82 / 95 / 109 0 / 123 / 142 / 163 0 / 275 / 318 / 366 0 / 550 / 636 / 732
LBAS
Range AS Sortie AS Defense
Boss Z: 4 0 / 0 / 0 / 0 0 / 0 / 0 / 0
Fleet Notes
A slightly longer route that has less fleet restrictions at the cost of 1 more air node.
LBAS Notes
All LBAS should be sent on the boss.

The boss is an Installation and requires appropriate gear to be defeated,

  • She is especially weak to "Nuke" setups.

The use of a Special Attack is highly recommended, preferably a Nelson-class one.

  • Bringing an AACI is recomannded.
  • The use of Smoke Generator Smokes is recommended on node U U2 or R.

PT Imp Packs are on the boss, it is therefore advised to bring some anti-PT setups:

Anti-PT boat
Unlike most standard Abyssals, "PT boats" (PT Imp PackPT Imp Pack & Schnellboot Imp PackSchnellboot Imp Pack) are "very small and fast".
  • All ship types suffer a severe Accuracy accuracy and Firepower firepower penalty against PT boats.
  • Attacking them with larger guns is not very effective, smaller guns being recommended instead.
  • Support Expeditions are not affect by any of the following[1].
Attack formula against PT boats
The Attack formula against PT boats:[2][3]
Jet Assault & Airstrike
  • [math]\displaystyle{ \text{Damage}_\text{PT}= \text{Atk}_\text{post-cap} \times \text{Rand} [0.5 ; 0.8] }[/math]


LBAS[4]
  • [math]\displaystyle{ \text{Damage}_\text{PT}= \text{Atk}_\text{post-cap} \times \text{Rand} [0.4 ; 0.7] }[/math]


Shelling
  • [math]\displaystyle{ \text{Damage}_\text{PT}= ( 0.3 \times \text{Atk}_\text{post-cap} + \sqrt{\text{Atk}_\text{post-cap}} + 10 ) \times \prod^{All Equipment}{\text{Mod}_\text{EquipmentAtk}} }[/math]


Opening & Closing Torpedo Salvos
  • [math]\displaystyle{ \text{Damage}_\text{PT}= 0.3 \times \text{Atk}_\text{post-cap} + \sqrt{\text{Atk}_\text{post-cap}} + 10 }[/math]


Night Battle
  • Night Battle data are unclear yet.


With
  • [math]\displaystyle{ \text{Atk}_\text{post-cap} }[/math] the post cap attack power defined here,
  • [math]\displaystyle{ \text{Mod}_\text{EquipmentAtk} }[/math] the bonuses given by equipment, described below.
Accuracy formula against PT boats
The Accuracy formula against PT boats:[5][6][7][8]
[math]\displaystyle{ \text{Hit Rate}_\text{vs.PT} \text{%} = \Big\lfloor ( 0.3 \times \text{Accuracy}_\text{Atk} + \sqrt{\text{Accuracy}_\text{Atk}} + 15 ) \times 1.2 \times \text{Mod}_\text{Ship} \times \Big( \prod^{All Equipment}{\text{Mod}_\text{EquipmentAcc}} \Big) \times \text{Mod}_\text{Night} \Big\rfloor - \text{EVA}_\text{PT} + 1 }[/math]
With
  • [math]\displaystyle{ \text{Acc}_\text{Atk} }[/math] the standard accuracy described here
    • PT boats are "DDs" in the game, so the [math]\displaystyle{ \text{Mod}_\text{formation} }[/math] for vanguard is 1.1 during shelling, and 1.2 during the torpedo phase.
    • Historical accuracy bonuses during Events are included in the Standard Accuracy Term, i.e. it is affected by the [math]\displaystyle{ \text{Mod}_\text{PT} }[/math] modifier.
  • [math]\displaystyle{ \text{EVA}_\text{PT} }[/math] the PT estimated evasion Evasion described bellow,
PT boats stats
Type Luck Luck Eva Evasion [math]\displaystyle{ \text{EVA}_\text{PT} }[/math]
Line AheadLineAhead.png EchelonEchelon.png Line AbreastLineAbreast.png
PT Imp PackPT Imp Pack ? ? 81? 87? ?
PT Imp Pack IIPT Imp Pack II 60 220 80 87 85
PT Imp Pack IIIPT Imp Pack III 60 250 82 89 88
PT Imp Pack IVPT Imp Pack IV ? ? ? 84? ?
Schnellboot Imp PackSchnellboot Imp Pack ? ? ? ? ?
Schnellboot Imp Pack IISchnellboot Imp Pack II ? ? ? ? ?
Schnellboot Imp Pack EliteSchnellboot Imp Pack Elite ? ? ? ? ?


The main Accuracy modifiers are
  • [math]\displaystyle{ \text{Mod}_\text{Amagiri} }[/math] being include in [math]\displaystyle{ \text{Acc}_\text{Atk} }[/math]:
  • [math]\displaystyle{ \text{Mod}_\text{Ship} }[/math] the bonus given by ship types, described below,
  • [math]\displaystyle{ \text{Mod}_\text{EquipmentAcc} }[/math] the bonuses given by equipment, described below,
  • [math]\displaystyle{ \text{Mod}_\text{Night} }[/math] being 0.7 during night battle, 1 during day battle.


Amagiri Kai Ni/DAmagiri Kai Ni
Amagiri Kai Ni D
has the ability to prioritize focusing on attacking PT imps with significantly increased accuracy if any are present.

  • DD placed in the composition slots above and below her will gain a noticeable accuracy boost and will prioritize attacking PT boats if any are present.
  • The PT boat targeting rate is 100% for all affected ships [9].

During Events, some special bonuses may be added, with "historical" ships and equipment gaining some accuracy bonuses[10].

Ship Type [math]\displaystyle{ \text{Mod}_\text{Ship} }[/math]
DD & DE 1.0
CL, CLT, & CT 0.82
All other types 0.7
Equipment [math]\displaystyle{ \text{Mod}_\text{EquipmentAcc} }[/math] [math]\displaystyle{ \text{Mod}_\text{EquipmentAtk} }[/math]
1st equipped 2nd equipped 1st equipped 2nd equipped
Small Caliber Main GunSmall Caliber Main High-angle GunSmall Small Caliber Main Guns[11] 1.3 1.15 1.5 2.11.5×1.4
Secondary GunSecondary High-angle GunSec Secondary Guns[12] 1.55 1 1.3
Anti-Aircraft Gun Anti-Aircraft Guns 1.45 1.35 1.2 1.441.2×1.2
Lookout Skilled LookoutsSkilled Lookouts
Torpedo Squadron Skilled Lookouts
1.75 1 1.1
Landing CraftArmed Soukoutei (Armored Boat Class)Soukoutei (Armored Boat Class) 1.45 1.3 1.2 1.1
Armed DaihatsuArmed Daihatsu 1.45 1.3 1.2 1.1
Amphibious Vehicle Ka-Tsu TanksSpecial Type 4 Amphibious Tank
Special Type 4 Amphibious Tank Kai
[13][14]
1 1.3 1 1.1
Seaplane BomberBomberSeaplane Fighter Seaplane Bombers & Seaplane Fighters 1.5 1 1.2
Dive BomberJetFighterBomber1.pngJetFighterBomber2.png Dive Bombers & JetsKikka Kai
Jet Keiun Kai
1.375 1.2 1.4 1.821.4×1.3
All other equipment 1 1
Notes
  • It is recommended to use anti-PT setups on DDs only, such setups compromising overall combat effectiveness.
  • Having a Reinforcement Expansion is important because it can save a ship slot by containing a machine gun or skilled lookouts.
  • Combining equipment is recommended to see significant boosts to accuracy.
  • The Amphibious Vehicle Ka-Tsu TanksSpecial Type 4 Amphibious Tank
    Special Type 4 Amphibious Tank Kai
    bonus does not stack with the Landing Craft Armed BoatsSoukoutei (Armored Boat Class)
    Armed Daihatsu
    ones.
  • Using other setups improving accuracy is also advisable:
References:
[edit]

Gimmick 2 - Debuff

Once LD has been reached, the following steps have to be performed to debuff the boss.

? ? ?
Hard ? ? ?
Medium ? ? ?
Easy ? ? ?
Casual ? ? ?


Once on LD, the CG will change to the following:

Supply Depot Princess Kai

YY's Guide