- Welcome to the Kancolle Wiki!
- If you have any questions regarding site content, account registration, etc., please visit the KanColle Wiki Discord
Difference between revisions of "User:Ninnin/Sandbox/1"
Jump to navigation
Jump to search
| Line 1: | Line 1: | ||
| − | + | Anti-Submarine Warfare | |
| − | + | *Submarine are immune by air and torpedo attack. | |
| − | * | + | *They cannot be targeted by normal shellign attack |
| − | * | + | *They can only be damaged by ASW attacks |
| + | *They cannot be sink at night in single fleet, only a combine fleet can. | ||
| + | ** Friendly Fleet can sink submarine (at night) | ||
| + | ** wikiwiki mention that "開幕夜戦マス" can sink sub at night | ||
| + | *ASW attacks is the only to have a damage modifier above 1 with some formation(Diamond, Echelon, Line-Abreast) | ||
| − | { | + | LBAS |
| − | + | *LBAS plane with 7 or more {{ASW}} ASW can attack submarine durinth this phase | |
| − | + | Support | |
| − | + | * If a CVL is present, plane with {{ASW}} ASW will attack submarine | |
| − | + | OASW | |
| − | + | *Ever ship that can attack submarine can under some condition perform an Opening ASW attack | |
| − | + | **this is very important for multiple reason: | |
| − | + | ***this add an ASW attack | |
| − | + | *** this allow to sink Submarien before they do O-torp | |
| − | + | *** this allow to kill the sub before other ship not equiped with ASw set-up target it | |
| − | + | Shelling | |
| − | + | *Ship that can target submarine will prioritize the submarine | |
| − | + | ** Kumano and Suzuya being the exception | |
| − | |||
| − | |||
| − | |||
| − | |||
| − | |||
| − | |||
| − | |||
| − | |||
{|class="wikitable" | {|class="wikitable" | ||
| − | ! | + | !Ship type |
| − | ! | + | !Specific ship |
| − | + | !Condition | |
| − | + | !Day Battle | |
| − | + | !Night Battle | |
| − | |||
| − | |||
| − | |||
|- | |- | ||
| − | | | + | |DE DD CL(T) CT AO? |
| − | | | + | |All |
| − | + | |at least 1 base {{ASW}} ASW | |
| − | + | |colspan=2|prioritize SS | |
| − | |||
| − | |||
|- | |- | ||
| − | | | + | |AV CAV BBV LHA |
| − | | | + | |All |
| − | + | |SPB RotorCraft Flying Boat Carrier bomber with ASW | |
| − | + | |prioritize SS | |
| − | + | |Don't attack SS | |
| − | |||
| − | | | ||
| − | |||
| − | |||
| − | |||
| − | |||
| − | |||
|- | |- | ||
| − | | | + | |rowspan=3|CVL |
| − | | | + | |All |
| − | + | |rowspan=3|?? | |
| − | + | |prioritize SS | |
| − | + | |rowspan=2|Nigth Air Attack cannot target SS | |
| − | |||
|- | |- | ||
| − | | | + | |[[Suzuya Carrier Kai Ni]] [[Kumano Carrier Kai Ni]] |
| − | + | |prioritize surface target | |
| − | |||
| − | | | ||
| − | |||
| − | |||
| − | |||
| − | |||
| − | |||
| − | |||
| − | |||
| − | |||
| − | |||
| − | |||
| − | |||
| − | |||
| − | |||
| − | |||
| − | |||
| − | |||
| − | |||
| − | |||
| − | |||
| − | |||
| − | |||
| − | |||
| − | |||
| − | |||
| − | |||
| − | |||
| − | |||
| − | |||
| − | |||
| − | |||
| − | |||
| − | |||
| − | |||
| − | |||
| − | |||
| − | |||
| − | |||
| − | |||
| − | |||
| − | |||
| − | |||
| − | |||
| − | |||
| − | |||
| − | |||
| − | |||
| − | |||
| − | |||
| − | |||
| − | |||
| − | |||
| − | |||
| − | |||
| − | |||
| − | |||
| − | |||
| − | |||
| − | |||
| − | |||
| − | |||
| − | |||
| − | |||
| − | |||
| − | |||
| − | |||
| − | |||
| − | |||
| − | |||
| − | |||
| − | |||
| − | |||
| − | |||
| − | |||
| − | |||
| − | |||
| − | |||
| − | |||
| − | |||
| − | |||
| − | |||
| − | |||
| − | |||
| − | |||
| − | |||
| − | |||
| − | |||
| − | |||
| − | |||
| − | |||
| − | |||
| − | |||
| − | |||
| − | |||
| − | |||
| − | |||
|- | |- | ||
| − | + | |[[Kaga Kai Ni Go]] | |
| − | |[[ | + | |prioritize SS |
| + | |prioritize SS with night shelling | ||
|- | |- | ||
| − | + | |colspan=3|Other ship type | |
| − | | | + | |colspan=2|Cannot attack SS |
|} | |} | ||
| − | === | + | ==Damage calculation== |
| − | + | ===Anti-Submarine Warfare=== | |
| − | + | <math>\text{ASW Power} = \left( 2\sqrt{\text{ASW}_\text{ship}} + 1.5\text{ASW}_\text{equip} + \bigstar + \text{Type}_\text{ship} \right) \times \text{Mod}_\text{synergy}</math> | |
| − | |||
| − | |||
| − | |||
| − | |||
| − | |||
| − | |||
| − | |||
| − | |||
| − | |||
| − | |||
| − | |||
| − | |||
| − | |||
| − | |||
| − | |||
| − | |||
| − | |||
| − | |||
| − | |||
| − | |||
| − | |||
| − | |||
| − | |||
| − | |||
| − | |||
| − | |||
| − | |||
| − | |||
| − | |||
| − | |||
| − | |||
| − | |||
| − | |||
| − | |||
| − | |||
| − | |||
| − | |||
| − | |||
| − | |||
| − | |||
| − | |||
| − | |||
| − | |||
| − | |||
| − | |||
| − | |||
| − | |||
| − | |||
| − | |||
| − | |||
| − | |||
| − | |||
| − | |||
| − | |||
| − | |||
| − | |||
| − | |||
| − | |||
| − | |||
| − | |||
| − | |||
| − | |||
| − | |||
| − | |||
| − | |||
| − | |||
| − | |||
| − | |||
| − | |||
| − | |||
| − | |||
| − | |||
| − | |||
| − | |||
| − | |||
| − | |||
| − | |||
| − | |||
| − | |||
| − | |||
| − | |||
| − | |||
| − | |||
| − | |||
| − | |||
| − | |||
| − | |||
| − | |||
| − | |||
| − | |||
| − | |||
| − | |||
| − | |||
| − | |||
| − | |||
| − | |||
| − | |||
| − | |||
| − | |||
| − | |||
| − | |||
| − | |||
| − | |||
| − | |||
| − | |||
| − | |||
| − | |||
| − | |||
| − | |||
| − | |||
| − | |||
| − | |||
| − | |||
| − | |||
| − | |||
| − | |||
| − | |||
| − | |||
| − | |||
| − | |||
| − | |||
| − | |||
| − | |||
| − | |||
| − | |||
| − | |||
| − | |||
| − | |||
| − | |||
| − | |||
| − | |||
| − | |||
| − | |||
| − | |||
| − | |||
| − | |||
| − | |||
| − | |||
| − | |||
| − | |||
| − | |||
| − | |||
| − | |||
| − | |||
| − | |||
| − | |||
| − | |||
| − | |||
| − | < | ||
| − | + | * <math>\text{Type}_\text{ship}</math> is a constant depending on the type of the ship performing the attack. See below for details. | |
| − | |||
| − | {|class="wikitable | + | {|class="wikitable mw-collapsible mw-collapsed" style="text-align:center; margin: auto" |
| − | + | !colspan=2| Ship Type Constant | |
| − | |||
| − | |||
| − | |||
| − | |||
| − | |||
| − | |||
| − | |||
| − | |||
| − | |||
| − | |||
| − | |||
| − | |||
| − | |||
| − | |||
| − | |||
| − | |||
| − | |||
| − | |||
| − | |||
| − | |||
| − | |||
| − | |||
| − | |||
| − | |||
| − | |||
| − | |||
| − | |||
| − | |||
| − | |||
| − | |||
| − | |||
| − | |||
| − | |||
| − | |||
| − | |||
| − | |||
| − | |||
| − | |||
| − | |||
| − | |||
| − | |||
| − | |||
| − | |||
| − | |||
| − | |||
| − | |||
| − | |||
| − | |||
| − | |||
| − | |||
| − | |||
| − | |||
| − | |||
| − | |||
| − | |||
| − | |||
| − | |||
| − | |||
| − | |||
| − | |||
| − | |||
| − | |||
| − | |||
| − | |||
| − | |||
| − | |||
| − | |||
| − | |||
| − | |||
| − | |||
| − | |||
| − | |||
| − | |||
| − | |||
| − | |||
| − | |||
| − | |||
| − | |||
| − | |||
| − | |||
| − | |||
| − | |||
| − | |||
| − | |||
| − | |||
| − | |||
| − | |||
| − | |||
| − | |||
| − | |||
| − | |||
| − | |||
| − | |||
| − | ! colspan=2| | ||
| − | |||
| − | |||
| − | |||
| − | |||
| − | |||
| − | |||
| − | |||
| − | |||
| − | |||
| − | |||
| − | |||
| − | |||
| − | |||
| − | |||
| − | |||
| − | |||
| − | |||
| − | |||
| − | |||
| − | |||
| − | |||
| − | |||
| − | |||
| − | |||
| − | |||
| − | |||
| − | |||
| − | |||
| − | |||
| − | |||
| − | |||
| − | |||
| − | |||
| − | |||
| − | |||
| − | |||
| − | |||
| − | |||
| − | |||
| − | |||
| − | |||
| − | |||
| − | |||
| − | |||
| − | |||
| − | |||
| − | |||
| − | |||
| − | |||
| − | |||
| − | |||
| − | |||
| − | |||
| − | |||
| − | |||
| − | |||
| − | |||
| − | |||
| − | |||
| − | |||
| − | |||
| − | |||
| − | |||
| − | |||
| − | |||
| − | |||
| − | |||
| − | |||
| − | |||
| − | |||
| − | |||
| − | |||
| − | |||
| − | |||
| − | |||
| − | |||
| − | |||
| − | |||
| − | |||
| − | |||
| − | |||
| − | |||
| − | |||
| − | |||
| − | |||
| − | |||
| − | |||
| − | |||
| − | |||
| − | |||
| − | |||
| − | |||
| − | |||
| − | |||
| − | |||
| − | |||
| − | |||
| − | |||
| − | |||
| − | |||
| − | |||
| − | |||
| − | |||
| − | |||
| − | |||
| − | |||
| − | |||
| − | |||
| − | |||
| − | |||
| − | |||
| − | |||
| − | |||
| − | |||
| − | |||
| − | |||
| − | |||
| − | |||
| − | |||
| − | |||
| − | |||
| − | |||
| − | |||
| − | |||
| − | |||
| − | |||
| − | |||
| − | |||
| − | |||
| − | |||
| − | |||
| − | |||
| − | |||
| − | |||
| − | |||
| − | |||
| − | |||
| − | |||
| − | |||
| − | |||
| − | |||
| − | |||
| − | |||
| − | |||
| − | |||
| − | |||
| − | |||
| − | |||
| − | |||
| − | |||
| − | |||
| − | |||
| − | |||
| − | |||
| − | |||
| − | |||
| − | |||
| − | |||
| − | |||
| − | |||
| − | |||
| − | |||
| − | |||
| − | |||
| − | |||
| − | |||
| − | |||
| − | |||
| − | |||
| − | |||
| − | |||
| − | |||
| − | |||
| − | |||
| − | |||
| − | |||
| − | |||
| − | |||
| − | |||
| − | |||
|- | |- | ||
| − | + | ! Constant | |
| − | + | ! Ship Types | |
| − | |||
|- | |- | ||
| − | + | | 13 | |
| − | + | | Coastal Defence Ships ([[DE]])<br>Destroyers ([[DD]])<br>Light Cruisers ([[CL]]/[[CT]])<br>Oilers ([[AO]]) (without aircraft equipped) | |
| − | |||
| − | |||
| − | |||
|- | |- | ||
| − | + | | 8 | |
| − | + | | Aviation Cruisers ([[CAV]])<br>Aviation Battleships ([[BBV]])<br>Seaplane Tenders ([[AV]])<br>Light Carriers ([[CVL]])<br>Landing Ships ([[LHA]])<br>Oilers ([[AO]]) (with aircraft equipped) | |
| − | |||
| − | |||
| − | |||
| − | |||
| − | |||
| − | |||
| − | |||
| − | |||
|} | |} | ||
| − | + | * <math>\text{Mod}_\text{synergy}</math> is the synergy multiplier bonus from using certain combinations of ASW equips. See below for details. | |
| − | + | {{Template:Equipment/ASW_Synergy}} | |
| − | {{ | ||
| − | |||
| − | |||
| − | |||
| + | * The bonuses do not stack, meaning only the highest possible bonus applies. | ||
| + | ** The exception is when using the special depth charge projectors detailed above. | ||
| + | * Multiple equipment of the same type still only apply the bonus '''once'''. | ||
| + | * There is an accuracy bonus as well but it is small. Stacking sonars will give a bigger accuracy bonus. | ||
| − | * | + | '''Notes:''' |
| − | * | + | * When contributing to ASW power, Base ASW is '''square rooted''', while equipment ASW is '''multiplied by 1.5''' |
| − | + | ** ASW equipment is therefore the primary source of ASW damage, with base ASW playing a very minor role. | |
| + | ** However, base ASW is the primary determinant of whether a ship can reach 100 total ASW to perform opening ASW attacks. | ||
| + | * Submarines cannot take more than scratch damage at night (and therefore cannot be sunk). | ||
| + | ** The exception to this rule is when a battle starts at night, or when in a combined fleet | ||
| + | * It is possible to perform opening ASW attacks when certain conditions are achieved. For more details, please see [[Opening Anti-Submarine Warfare]] (OASW). | ||
| + | ** As performing an opening attack effectively doubles the damage output, reaching this OASW threshold is in general more important than tacking on additional synergy. | ||
| + | ===Synergy=== | ||
| + | {{Template:Equipment/ASW_Synergy}} | ||
| − | + | ==LBAS== | |
| − | + | See [[LBAS]] page | |
| − | |||
| − | |||
| − | = | + | ==OASW== |
| − | + | See [[OASW]] | |
Revision as of 08:31, 4 August 2022
Anti-Submarine Warfare
- Submarine are immune by air and torpedo attack.
- They cannot be targeted by normal shellign attack
- They can only be damaged by ASW attacks
- They cannot be sink at night in single fleet, only a combine fleet can.
- Friendly Fleet can sink submarine (at night)
- wikiwiki mention that "開幕夜戦マス" can sink sub at night
- ASW attacks is the only to have a damage modifier above 1 with some formation(Diamond, Echelon, Line-Abreast)
LBAS
- LBAS plane with 7 or more
 ASW can attack submarine durinth this phase
Support
- If a CVL is present, plane with ASW will attack submarine
OASW
- Ever ship that can attack submarine can under some condition perform an Opening ASW attack
- this is very important for multiple reason:
- this add an ASW attack
- this allow to sink Submarien before they do O-torp
- this allow to kill the sub before other ship not equiped with ASw set-up target it
- this is very important for multiple reason:
Shelling
- Ship that can target submarine will prioritize the submarine
- Kumano and Suzuya being the exception
| Ship type | Specific ship | Condition | Day Battle | Night Battle |
|---|---|---|---|---|
| DE DD CL(T) CT AO? | All | at least 1 base |
prioritize SS | |
| AV CAV BBV LHA | All | SPB RotorCraft Flying Boat Carrier bomber with ASW | prioritize SS | Don't attack SS |
| CVL | All | ?? | prioritize SS | Nigth Air Attack cannot target SS |
| Suzuya Carrier Kai Ni Kumano Carrier Kai Ni | prioritize surface target | |||
| Kaga Kai Ni Go | prioritize SS | prioritize SS with night shelling | ||
| Other ship type | Cannot attack SS | |||
Damage calculation
Anti-Submarine Warfare
[math]\displaystyle{ \text{ASW Power} = \left( 2\sqrt{\text{ASW}_\text{ship}} + 1.5\text{ASW}_\text{equip} + \bigstar + \text{Type}_\text{ship} \right) \times \text{Mod}_\text{synergy} }[/math]
- [math]\displaystyle{ \text{Type}_\text{ship} }[/math] is a constant depending on the type of the ship performing the attack. See below for details.
| Ship Type Constant | |
|---|---|
| Constant | Ship Types |
| 13 | Coastal Defence Ships (DE) Destroyers (DD) Light Cruisers (CL/CT) Oilers (AO) (without aircraft equipped) |
| 8 | Aviation Cruisers (CAV) Aviation Battleships (BBV) Seaplane Tenders (AV) Light Carriers (CVL) Landing Ships (LHA) Oilers (AO) (with aircraft equipped) |
- [math]\displaystyle{ \text{Mod}_\text{synergy} }[/math] is the synergy multiplier bonus from using certain combinations of ASW equips. See below for details.
| ASW Damage Synergy | |||
|---|---|---|---|
 Type 93 Passive Sonar  Type 4 Passive Sonar  Type 3 Active Sonar  Type 3 Active Sonar Kai  Type124 ASDIC  Type144/147 ASDIC  HF/DF + Type144/147 ASDIC | |||
 Type 0 Passive Sonar | |||
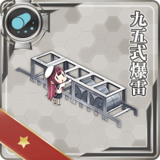
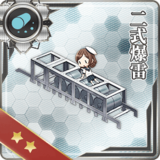
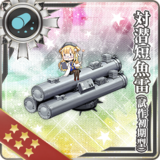
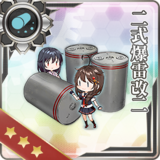
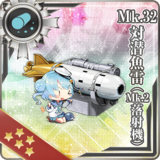
 Type 94 Depth Charge Projector  Type 3 Depth Charge Projector  Type 3 Depth Charge Projector (Concentrated Deployment)  Prototype 15cm 9-tube ASW Rocket Launcher  RUR-4A Weapon Alpha Kai  Mk.32 ASW Torpedo (Mk.2 Thrower) | |||
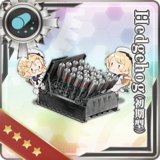
 Type 95 Depth Charge  Type 2 Depth Charge  Lightweight ASW Torpedo (Initial Test Model)  Hedgehog (Initial Model)  Type 2 Depth Charge Kai Ni | |||
 Type 2 12cm Mortar Kai  Type 2 12cm Mortar Kai (Concentrated Deployment) | |||
| ASW Damage Modifiers: [math]\displaystyle{ \text{Mod}_\text{synergy} = {Mod}_\text{1} \times {Mod}_\text{2} }[/math] | |||
| [math]\displaystyle{ {Mod}_\text{1} }[/math] | (Any Sonar + Any Depth Charge) |
1.15 | |
| [math]\displaystyle{ {Mod}_\text{2} }[/math] | 1.1 | ||
| 1.25 | |||
| Examples | |||
| [math]\displaystyle{ \text{Mod}_\text{synergy} }[/math] | 1.4375[math]\displaystyle{ 1.15 \times 1.25 }[/math] | ||
| 1.265[math]\displaystyle{ 1.15 \times 1.1 }[/math] | |||
| Armor Penetration | |||
Indepentant of synergies, some equipment provides additional armor penetration to ASW attacks.
The flat armor penetration value is calculated as follows:
| |||

- The bonuses do not stack, meaning only the highest possible bonus applies.
- The exception is when using the special depth charge projectors detailed above.
- Multiple equipment of the same type still only apply the bonus once.
- There is an accuracy bonus as well but it is small. Stacking sonars will give a bigger accuracy bonus.
Notes:
- When contributing to ASW power, Base ASW is square rooted, while equipment ASW is multiplied by 1.5
- ASW equipment is therefore the primary source of ASW damage, with base ASW playing a very minor role.
- However, base ASW is the primary determinant of whether a ship can reach 100 total ASW to perform opening ASW attacks.
- Submarines cannot take more than scratch damage at night (and therefore cannot be sunk).
- The exception to this rule is when a battle starts at night, or when in a combined fleet
- It is possible to perform opening ASW attacks when certain conditions are achieved. For more details, please see Opening Anti-Submarine Warfare (OASW).
- As performing an opening attack effectively doubles the damage output, reaching this OASW threshold is in general more important than tacking on additional synergy.
Synergy
| ASW Damage Synergy | |||
|---|---|---|---|
Type 93 Passive Sonar Type 4 Passive Sonar Type 3 Active Sonar Type 3 Active Sonar Kai Type124 ASDIC Type144/147 ASDIC HF/DF + Type144/147 ASDIC | |||
Type 0 Passive Sonar | |||
|
Type 94 Depth Charge Projector Type 3 Depth Charge Projector Type 3 Depth Charge Projector (Concentrated Deployment) Prototype 15cm 9-tube ASW Rocket Launcher RUR-4A Weapon Alpha Kai Mk.32 ASW Torpedo (Mk.2 Thrower) | |||
|
Type 95 Depth Charge Type 2 Depth Charge Lightweight ASW Torpedo (Initial Test Model) Hedgehog (Initial Model) Type 2 Depth Charge Kai Ni | |||
Type 2 12cm Mortar Kai Type 2 12cm Mortar Kai (Concentrated Deployment) | |||
| ASW Damage Modifiers: [math]\displaystyle{ \text{Mod}_\text{synergy} = {Mod}_\text{1} \times {Mod}_\text{2} }[/math] | |||
| [math]\displaystyle{ {Mod}_\text{1} }[/math] | (Any Sonar + Any Depth Charge) |
1.15 | |
| [math]\displaystyle{ {Mod}_\text{2} }[/math] | 1.1 | ||
| 1.25 | |||
| Examples | |||
| [math]\displaystyle{ \text{Mod}_\text{synergy} }[/math] | 1.4375[math]\displaystyle{ 1.15 \times 1.25 }[/math] | ||
| 1.265[math]\displaystyle{ 1.15 \times 1.1 }[/math] | |||
| Armor Penetration | |||
Indepentant of synergies, some equipment provides additional armor penetration to ASW attacks.
The flat armor penetration value is calculated as follows:
| |||
LBAS
See LBAS page
OASW
See OASW