- Welcome to the Kancolle Wiki!
- If you have any questions regarding site content, account registration, etc., please visit the KanColle Wiki Discord
Difference between revisions of "Early Spring 2023 Event/E-5/Historical Ships"
Jump to navigation
Jump to search
Jigaraphale (talk | contribs) |
m (→Ship Bonuses: quick fix awful formatting) |
||
| (4 intermediate revisions by 3 users not shown) | |||
| Line 3: | Line 3: | ||
===Ship Bonuses=== | ===Ship Bonuses=== | ||
{|class="wikitable" style="text-align:center" | {|class="wikitable" style="text-align:center" | ||
| − | ! | + | !rowspan=2|Ships |
!colspan=2|{{ToolTip|Damage|Class bonuses stack with named ships}} | !colspan=2|{{ToolTip|Damage|Class bonuses stack with named ships}} | ||
!colspan=2|{{ToolTip|Acc/Eva|Does not stack}} | !colspan=2|{{ToolTip|Acc/Eva|Does not stack}} | ||
| Line 12: | Line 12: | ||
!Eva | !Eva | ||
|- | |- | ||
| − | ! | + | ! All [[DD]] |
| 1.04x | | 1.04x | ||
| {{ToolTip|1.09x| 1.05 x Mapwide Bonus}} | | {{ToolTip|1.09x| 1.05 x Mapwide Bonus}} | ||
| Line 18: | Line 18: | ||
| rowspan=3| 1.1x | | rowspan=3| 1.1x | ||
|- | |- | ||
| − | ! | + | ! All [[CL]], [[CLT]], [[CT]] |
| 1.03x | | 1.03x | ||
| {{ToolTip|1.07x| 1.04 x Mapwide Bonus}} | | {{ToolTip|1.07x| 1.04 x Mapwide Bonus}} | ||
|- | |- | ||
| − | ! | + | ! All [[CA]], [[CAV]] |
| 1.02x | | 1.02x | ||
| {{ToolTip|1.05x| 1.03 x Mapwide Bonus}} | | {{ToolTip|1.05x| 1.03 x Mapwide Bonus}} | ||
|- | |- | ||
| − | ! | + | ! All [[AV]] |
! - | ! - | ||
! - | ! - | ||
| Line 32: | Line 32: | ||
| 1.35x (?) | | 1.35x (?) | ||
|- | |- | ||
| − | ! | + | ! All [[AS]] |
| + | |1.15x | ||
| + | ! -!! -!! - | ||
| + | |- | ||
| + | ! {{Ship/Banner|Yukikaze/Kai Ni|small=true}} | ||
| {{ToolTip|1.07x|1.03 x DD Bonus}} | | {{ToolTip|1.07x|1.03 x DD Bonus}} | ||
| {{ToolTip|1.125x|1.03 x DD Bonuses}} | | {{ToolTip|1.125x|1.03 x DD Bonuses}} | ||
|colspan=2 rowspan=2| 1.1x | |colspan=2 rowspan=2| 1.1x | ||
|- | |- | ||
| − | ! | + | ! {{Ship/Banner|Shigure/Kai Ni|small=true}} |
| {{ToolTip|1.12x|1.08 x DD Bonus}} | | {{ToolTip|1.12x|1.08 x DD Bonus}} | ||
| {{ToolTip|1.18x|1.08 x DD Bonuses}} | | {{ToolTip|1.18x|1.08 x DD Bonuses}} | ||
|- | |- | ||
| − | !{{Ship/Banner|Nagato/Kai Ni|small=true}} | + | !{{Ship/Banner|Nagato/Kai Ni|small=true}}{{Ship/Banner|Zuihou/Kai Ni B|small=true}}{{Ship/Banner|Kaiboukan No.4/Kai|small=true}}<br>{{Ship/Banner|Souya (AGB)|small=true}} |
|1.13x | |1.13x | ||
! - | ! - | ||
| − | |rowspan= | + | |rowspan=3|1.2x |
| − | |rowspan= | + | |rowspan=3|1.1x |
|- | |- | ||
| − | !{{Ship/Banner|Nagara/Kai|small=true}} | + | !{{Ship/Banner|Nagara/Kai|small=true}}{{Ship/Banner|Tama/Kai Ni|small=true}}{{Ship/Banner|Kiso/Kai Ni|small=true}} |
|{{ToolTip|1.16x|1.13 x CL(T) Bonus}} | |{{ToolTip|1.16x|1.13 x CL(T) Bonus}} | ||
|{{ToolTip|1.21x|1.13 x CL(T) Bonuses}} | |{{ToolTip|1.21x|1.13 x CL(T) Bonuses}} | ||
|- | |- | ||
| − | !{{Ship/Banner|Satsuki/Kai Ni|small=true}} | + | !{{Ship/Banner|Satsuki/Kai Ni|small=true}}{{Ship/Banner|Fuyutsuki/Kai|small=true}}{{Ship/Banner|Hatsuharu/Kai Ni|small=true}}<br>{{Ship/Banner|Ume/Kai|small=true}}{{Ship/Banner|Momo/Kai|small=true}}{{Ship/Banner|Take/Kai|small=true}}<br>{{Ship/Banner|Matsu/Kai|small=true}}{{Ship/Banner|Wakaba/Kai|small=true}}{{Ship/Banner|Hatakaze/Kai|small=true}} |
| − | | | + | |{{ToolTip|1.175x|1.13 x DD Bonus}} |
| − | + | |{{ToolTip|1.234x|1.13 x DD Bonuses}} | |
|- | |- | ||
| − | !{{Ship/Banner| | + | !{{Ship/Banner|South Dakota/Kai|small=true}}{{Ship/Banner|Intrepid/Kai|small=true}}{{Ship/Banner|Hornet/Kai|small=true}}<br>{{Ship/Banner|Saratoga/Mk.II Mod.2|small=true}}{{Ship/Banner|Langley/Kai|small=true}} |
| − | + | |1.11x | |
| − | + | ! - | |
| − | + | |colspan=2 |1.1x | |
| − | |||
| − | |||
| − | ! | ||
| − | |colspan | ||
| − | |||
| − | |||
|- | |- | ||
| − | ! | + | !{{Ship/Banner|Tuscaloosa/Kai|small=true}} |
| {{ToolTip|1.13x| 1.11 x CA(V) Bonus}} | | {{ToolTip|1.13x| 1.11 x CA(V) Bonus}} | ||
| {{ToolTip|1.166x| 1.11 x CA(V) Bonuses}} | | {{ToolTip|1.166x| 1.11 x CA(V) Bonuses}} | ||
| − | + | | 1.04x | |
| − | + | | 1.1x | |
|- | |- | ||
| − | ! | + | !{{Ship/Banner|Heywood L. Edwards/Kai|small=true}} |
| {{ToolTip|1.15x| 1.11 x DD Bonus}} | | {{ToolTip|1.15x| 1.11 x DD Bonus}} | ||
| {{ToolTip|1.21x| 1.11 x DD Bonuses}} | | {{ToolTip|1.21x| 1.11 x DD Bonuses}} | ||
|colspan=2| 1.1x | |colspan=2| 1.1x | ||
| + | |- | ||
| + | !{{Ship/Banner|I-201/Kai|small=true}}{{Ship/Banner|I-203/Kai|small=true}} | ||
| + | |2.85x | ||
| + | !colspan=3| - | ||
|} | |} | ||
| Line 90: | Line 92: | ||
|- | |- | ||
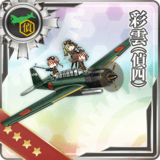
!{{Carrier Recon}} {{Equipment/Link|Saiun (4th Recon Squad)}} | !{{Carrier Recon}} {{Equipment/Link|Saiun (4th Recon Squad)}} | ||
| − | |rowspan= | + | |rowspan=5| 1.05x each |
|- | |- | ||
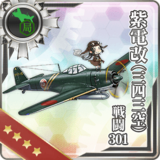
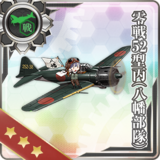
!{{LB Fighter 1}} Shiden Kai (343) {{Equipment/Link|Shiden Kai (343 Air Group) 301st Fighter Squadron|text=301st}}{{·}}{{Equipment/Link|Shiden Kai (343 Air Group) 701st Fighter Squadron|text=701st}}{{·}}{{Equipment/Link|Shiden Kai (343 Air Group) 407th Fighter Squadron|text=407th}} | !{{LB Fighter 1}} Shiden Kai (343) {{Equipment/Link|Shiden Kai (343 Air Group) 301st Fighter Squadron|text=301st}}{{·}}{{Equipment/Link|Shiden Kai (343 Air Group) 701st Fighter Squadron|text=701st}}{{·}}{{Equipment/Link|Shiden Kai (343 Air Group) 407th Fighter Squadron|text=407th}} | ||
|- | |- | ||
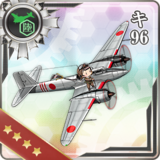
| − | !{{LB Fighter 2}} {{Equipment/Link|Ki-96}} | + | !{{LB Fighter 2}} {{Equipment/Link|Ki-96}}{{·}}{{Equipment/Link|Type 3 Fighter Hien (244th Air Combat Group)|text=Hien (244th)}} |
|- | |- | ||
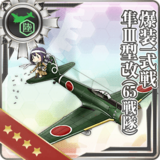
| − | !{{ | + | !{{IconText|{{Interceptor Fighter2}}|bomber}} {{Equipment/Link|Bomb-carrying Type 1 Fighter Hayabusa Model III Kai (65th Squadron)|text=Hayabusa Bomber (65th)}} |
|- | |- | ||
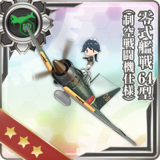
| − | !{{ | + | !{{Fighter}} {{Equipment/Link|Type 0 Fighter Model 64 (Air Superiority Fighter Specification)|text=Zero Mod64 (AS Spec)}} |
|- | |- | ||
| − | + | |colspan=2| | |
|- | |- | ||
!{{Torpedo Bomber}} Ryuusei Kai {{Equipment/Link|Ryuusei Kai (CarDiv 1/Skilled)|text=(CD1/Sk)}}{{·}}{{Equipment/Link|Ryuusei Kai (Skilled)|text=(Sk)}} | !{{Torpedo Bomber}} Ryuusei Kai {{Equipment/Link|Ryuusei Kai (CarDiv 1/Skilled)|text=(CD1/Sk)}}{{·}}{{Equipment/Link|Ryuusei Kai (Skilled)|text=(Sk)}} | ||
| Line 108: | Line 110: | ||
|- | |- | ||
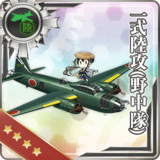
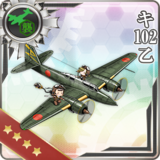
!{{LB Assault}} {{Equipment/Link|Ki-102 B|text=Ki-102}}{{·}}{{Equipment/Link|Ki-102 B Kai + No.1 Model 1B Guided Missile|text=Ki-102 + Missile}} | !{{LB Assault}} {{Equipment/Link|Ki-102 B|text=Ki-102}}{{·}}{{Equipment/Link|Ki-102 B Kai + No.1 Model 1B Guided Missile|text=Ki-102 + Missile}} | ||
| + | |- | ||
| + | |colspan=2| | ||
|- | |- | ||
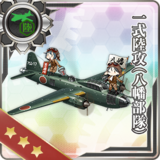
!{{LB Attacker}} {{Equipment/Link|Type 1 Land-based Attack Aircraft (Hachiman Force)|text=T1 Attacker (Hachiman)}} | !{{LB Attacker}} {{Equipment/Link|Type 1 Land-based Attack Aircraft (Hachiman Force)|text=T1 Attacker (Hachiman)}} | ||
Revision as of 11:35, 13 April 2023
DISCLAIMER: This information is based on user-submitted data and is subject to revisions as more data is gathered. Any version of the ship receives the bonus regardless of remodel.
Ship Bonuses
| Ships | DamageClass bonuses stack with named ships | Acc/EvaDoes not stack | ||
|---|---|---|---|---|
| Mapwide | Node ZStacks with Mapwide | Acc | Eva | |
| All DD | 1.04x | 1.09x 1.05 x Mapwide Bonus | 1.04x | 1.1x |
| All CL, CLT, CT | 1.03x | 1.07x 1.04 x Mapwide Bonus | ||
| All CA, CAV | 1.02x | 1.05x 1.03 x Mapwide Bonus | ||
| All AV | - | - | - | 1.35x (?) |
| All AS | 1.15x | - | - | - |
| 1.07x1.03 x DD Bonus | 1.125x1.03 x DD Bonuses | 1.1x | ||
| 1.12x1.08 x DD Bonus | 1.18x1.08 x DD Bonuses | |||
| 1.13x | - | 1.2x | 1.1x | |
| 1.16x1.13 x CL(T) Bonus | 1.21x1.13 x CL(T) Bonuses | |||
| 1.175x1.13 x DD Bonus | 1.234x1.13 x DD Bonuses | |||
| 1.11x | - | 1.1x | ||
| 1.13x 1.11 x CA(V) Bonus | 1.166x 1.11 x CA(V) Bonuses | 1.04x | 1.1x | |
| 1.15x 1.11 x DD Bonus | 1.21x 1.11 x DD Bonuses | 1.1x | ||
| 2.85x | - | |||
- Notes
- Damage bonuses given by types stack with named ships.
- Accuracy or Evasion bonuses given by types do not stack with named ships.
- Evasion bonus is only roughly checked as it is hard to estimate. The info will be updated if an inconsistency is found (@Divinity_123).
Equipment Bonuses
| Equipment | LBAS (Map-wide) |
|---|---|
|
1.05x each |
 · 701st · 701st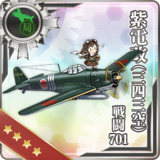 · 407th · 407th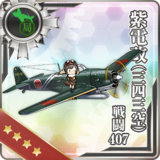
| |
 · Hien (244th) · Hien (244th)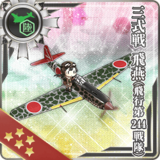
| |
| |
| |
 · (Sk) · (Sk)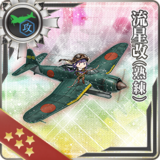
|
1.11x each |
 · Ginga (Egusa) · Ginga (Egusa)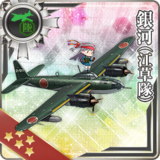 · Hiryuu (Sk) · Hiryuu (Sk)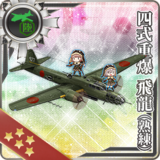
| |
 · Ki-102 + Missile · Ki-102 + Missile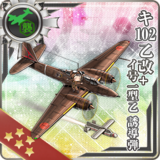
| |
|
1.175x each |
| |
Those bonuses only apply to planes in LBAS.
- All 4 planes in the base will gain the bonus provided by any bonus plane within their base
- Bonuses will stack with each other (within the same base)
Debuff
| Ships | Node X |
|---|---|
| -38 | |
| -16 |