- Welcome to the Kancolle Wiki!
- If you have any questions regarding site content, account registration, etc., please visit the KanColle Wiki Discord
Difference between revisions of "World 4/4-5"
< World 4
Jump to navigation
Jump to search
Jigaraphale (talk | contribs) |
m (spelling) |
||
| Line 111: | Line 111: | ||
**Please beware that Node K has a chance to Heavily Damage your ships due to the presence of 1 or 2 Battleship Ru-Class Kai Flagship | **Please beware that Node K has a chance to Heavily Damage your ships due to the presence of 1 or 2 Battleship Ru-Class Kai Flagship | ||
**LoS required for the boss is '''71''' (Cn2) | **LoS required for the boss is '''71''' (Cn2) | ||
| − | **CVB are preferred against regular CV for their ability to still being able to attack when ''Chuuha'', which is very | + | **CVB are preferred against regular CV for their ability to still being able to attack when ''Chuuha'', which is very helpful after passing through Node {{MapRoute|K|red}}. |
|-|Fast+ Fleet route= | |-|Fast+ Fleet route= | ||
Revision as of 00:55, 26 May 2022
World 4-5: 深海東洋艦隊漸減作戦 Abyssal Eastern Ocean Fleet Reduction Operation
| Strategy Name | 深海東洋艦隊漸減作戦 (Reduction of Abyssal Eastern Ocean Fleet)
| ||
| Difficulty | ☆ ☆ ☆ ☆ ☆ ☆ ☆ ☆ ☆
| ||
| Item | -
| ||
| Strategy Content | 我が艦隊により大打撃を受けた敵東洋艦隊がリランカ島の港湾に再集結しつつある。遊撃部隊を編成し、敵増援を撃滅せよ!
Enemy Eastern Fleet which we have inflicted losses on is gathering at the harbor of Ri Lanka Island again. Form a strike team and eliminate the enemy reinforcements! | ||
| 4-5 Fast+ | ||
| Fleet | 1-2(F)BB(V), 2-3CV(B), 2XX (XX can't be (F)BB(V) or CV(L)) Fast+ | |
| Route | Random. A D H T C D H T | |
| Other Notes | Final form requires 167/333 for AS/AS+ | |
| AP | AS | AS+ |
| 92 | 207 | 414 |
| 4-5 via K node | ||
| Fleet | 3CV/(F)BB(V), 3CA(V) | |
| Route | Random. A D H K T C D H K T | |
| Other Notes | ||
| AP | AS | AS+ |
| 112 | 252 | 504 |
Stage Guide
| 4-5 Branching Rules | ||
|---|---|---|
| Nodes | Rules | |
| Start | A |
|
C | ||
D |
H |
|
E |
M |
|
K | ||
G |
D |
|
H | ||
H |
K |
|
T | ||
I |
J |
|
G | ||
K |
L |
|
M |
| |
T |
| |
M |
N |
|
R | ||
O |
N |
|
T | ||
Q |
N |
|
O | ||
P | ||
R |
N |
|
S |
| |
Tips
Unlocked by clearing both 4-4 and 5-1. To complete the map, you need to defeat the boss flagship 5 times.
- The boss comp will revert back to its initial Form after clearing.
- Clearing this map rewards 180 Ranking points and a medal.
- The map will reset at midnight JST at the beginning of every month.
- The boss is a Soft-Skinned Installation type enemy. It is Strongly Recommended to equip
 Type 3 Shell
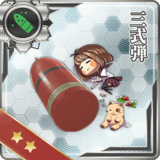
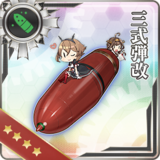 on BB/CA(V) or
  Anti-ground Rocket Launchers
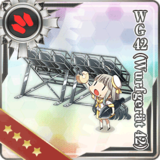
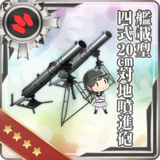
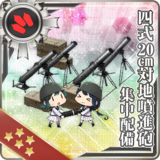 on CL/DD if applicable.
- Specific
 Landing tanks
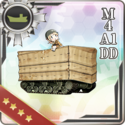
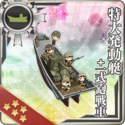 also work, including Daihatsu(+T89 Tank)
 if
if  .
. - Aircraft carriers CANNOT attack installations if they have a
 equipped UNLESS it's one of the dive-bombers from the following list:
- Specific
| This is a segment from a bigger article. See Combat/Anti-Installation for details on Installation mechanics.
Carriers will only attack installations in the shelling phase if equipped with Torpedo Bombers or Anti-Installation Dive Bombers.
| |||
 Ju 87C Kai  Prototype Nanzan  F4U-1D  FM-2  Ju 87C Kai Ni (w/ KMX)  Ju 87C Kai Ni (w/ KMX/Skilled)  Suisei Model 12 (634 Air Group w/ Type 3 Cluster Bombs)  Suisei Model 12 (w/ Type 31 Photoelectric Fuze Bombs)  Type 99 Dive Bomber Model 22  Type 99 Dive Bomber Model 22 (Skilled)  SB2C-3  SB2C-5  F4U-4 | |||
- Node D is a submarine node, but it's advised to ignore it so you can focus on killing the boss.
Recommended Fleet
- 3CV/(F)BB(V), 3CA(V)
- 2BB, 1CV(B), 2CA, 1CAV
- 1BB, 2CV(B), 1CVL, 2CA(V)
- Route = Random:
- A D H K T
- C D H K T
- Please beware that Node K has a chance to Heavily Damage your ships due to the presence of 1 or 2 Battleship Ru-Class Kai Flagship
- LoS required for the boss is 71 (Cn2)
- CVB are preferred against regular CV for their ability to still being able to attack when Chuuha, which is very helpful after passing through Node K.
- 1-2(F)BB(V), 2-3CV(B), 2CA(V) (Fast+)
- 3CA(V), 3CV(B) (Fast+)
- Route = Random:
- A D H T
- C D H T
- Skips Node K over the standard route.
- Will only go through the SS Node D and a Light Enemy Fleet in node H before going straight into the Boss Node.
- All Ships are highly recommended to have been fitted with a Reinforcement Expansion to be equipped with enough Speed modifiers
 to reach Fast+ speed.
 - The exchange is that your BB(V)/CA(V) won't be able to do Artillery Spotting due to being unable to equip seaplane, though as they will still be outfitted with 2 Main Guns, they will still be able to do Double Attack during Night Battle.
- It is highly recommended that the CV(B)s are all outfitted with CVCI to be able to deal with non-Installation Escort Ships quickly and efficiently.
Like Fast+ routing, you will also skip node K which contains dangerous enemies but it can be difficult to defeat Harbour Princess at the boss, especially in her Final Form.
- 2(F)BB(V)/CV(L/B), 1CL, 3DD
- Route = Random:
- A D H T
- C D H T
- 1FBB, 2CVL, 1CL, 2DD (Fast)
- Route = Random:
- A B E M N T
- C F I J H T
- Four-slot DD or CLs are useful in this situation as they can carry double Anti-ground Rocket Launchers to deal significant damage to Harbour Princess.
- Only useful to do the quests that require you to take CLs/DDs into 4-5 Boss, or to attempt to save cost from supplying and repairing ships.
Nodes and Enemy Encounters
| Nodes and Enemy Encounters | |||||
|---|---|---|---|---|---|
| Node | Pattern | Xp | Node Info | Form | Air |
| A | Pattern 1 | Choose your route | |||
| B 東洋方面潜水艦隊 哨戒線Cライン | Pattern 1 | ||||
| Pattern 2 | |||||
| Pattern 3 | |||||
| C | Pattern 1 | Choose your route | |||
| D 東洋方面潜水艦隊 哨戒線Bライン | Pattern 1 | ||||
| Pattern 2 | |||||
| Pattern 3 | |||||
| E 東洋方面艦隊 威力偵察部隊 | Pattern 1 | ||||
| Pattern 2 | |||||
| Pattern 3 | |||||
| F 東洋方面潜水艦隊 哨戒線Aライン | Pattern 1 | ||||
| Pattern 2 | |||||
| Pattern 3 | |||||
| G 東洋方面艦隊 威力偵察部隊 | Pattern 1 | ||||
| Pattern 2 | |||||
| Pattern 3 | |||||
| H 東洋方面艦隊 新編水上打撃部隊 | Pattern 1 | ||||
| Pattern 2 | |||||
| Pattern 3 | |||||
| I | Pattern 1 | Choose your route | |||
| J 東洋方面艦隊 突撃水雷戦隊 | Pattern 1 | ||||
| Pattern 2 | |||||
| Pattern 3 | |||||
| K 深海東洋艦隊 機動部隊 | Pattern 1 | AP:19 AS:42 AS+:84 | |||
| Pattern 2 | AP:75 AS:168 AS+:336 | ||||
| Pattern 3 | AP:112 AS:252 AS+:504 | ||||
| Pattern 4 | AP:75 AS:168 AS+:336 | ||||
| Pattern 5 | AP:75 AS:168 AS+:336 | ||||
| L Battle Avoided | Pattern 1 | "Must be my imagination" (battle avoided) | |||
| M Battle Avoided | Pattern 1 | "Must be my imagination" (battle avoided) | |||
| N 東洋方面艦隊 後方兵站部隊 | Pattern 1 | ||||
| Pattern 2 | |||||
| Pattern 3 | |||||
| O 深海東洋方面増援潜水艦隊 | Pattern 1 | ||||
| Pattern 2 | |||||
| Pattern 3 | |||||
| P Battle Avoided | Pattern 1 | "Must be my imagination" (battle avoided) | |||
| Q Battle Avoided | Pattern 1 | "Must be my imagination" (battle avoided) | |||
| R Maelstrom Node | Pattern 1 | ||||
| S 深海東洋方面増援艦隊 | Pattern 1 | AP:16 AS:35 AS+:69 | |||
| Pattern 2 | AP:16 AS:35 AS+:69 | ||||
| Pattern 3 | AP:16 AS:35 AS+:69 | ||||
| T リランカ島港湾守備隊 | Pattern 1 | AP:92 AS:207 AS+:414 | |||
| Pattern 2 | AP:92 AS:207 AS+:414 | ||||
| Pattern 3 | AP:74 AS:167 AS+:333 | ||||
| Pattern 4 | AP:92 AS:207 AS+:414 | ||||
| Pattern 5 | AP:55 AS:123 AS+:246 | ||||
| Pattern 6 | AP:55 AS:123 AS+:246 | ||||