- Welcome to the Kancolle Wiki!
- If you have any questions regarding site content, account registration, etc., please visit the KanColle Wiki Discord
Spring 2025 Event/E-2/Sandbox
Sandbox Rules
This sandbox is to be used to construct an event guide for the above-mentioned event map. These guides are to all of the following requirements:
- An overview of the map, including ship/equipment bonuses, Ship Locks, and special mechanics,
- List of branching unlocking requirements (if there are multiple requirements, compositions for each path along with the below requirements will be needed to discuss the unlocking requirements in question),
- A list of working compositions that work: (T=these must have possible alternatives for players who may or may not have all ships needed for a specific path),
- The Paths said compositions will take (to explain each path the composition will/can take),
- A summary or description of what kind of obstacles a composition will face.
- A description of the boss node: what it consists of, and a descriptive guide on what the player should consider for a course of action to successfully win the battle,
- Optional: Tips/guides to farm certain ships and/or resources (this can also require compositions, paths, and possible descriptions).
Editors are to construct their own version of the guide/part of the guide, and complete it in a timely fashion.
No editor is allowed to edit over other editors' work without the consent of the editor and his approval to do so.
Several versions will be constructed through this page and will be reviewed and approved by the staff/collaboration committee before being moved for the Spring 2025 Event, being reviewed and updated once more before it can be released.
Overall there should be 3 versions of the guide that have to be constructed, including: Preliminary > Polished > Finalized Guides
With each approval of each version of the guide, the said guide will be updated to the main page, and construction of the next version will begin.
All guides outside of the approved version will be removed and work will begin from the approved version to make it better for the next version until the finalized version is made.
Branching Table
| E-2 Branching Rules (Start Points) ▼/▲ | ||
|---|---|---|
| Nodes | Rules | |
| Start | 1 |
|
2 |
| |
| E-2 Branching Rules ▼/▲ | ||
|---|---|---|
| Nodes | Rules | |
2 |
H |
|
L |
| |
A |
A1 |
|
A2 |
| |
B |
C |
Active Branching |
D | ||
C |
G |
|
H |
| |
E |
F |
Active Branching |
F1 | ||
F |
F2 |
|
R |
| |
H |
I |
|
L |
| |
M |
| |
I |
J |
|
K |
| |
M |
D |
|
N |
| |
N |
O |
Active Branching |
P | ||
P |
F |
|
R |
| |
Q |
S |
|
V |
| |
V1 |
V2 |
|
W |
| |
* = Rule under review
? = Ship type/amount under review
Historical Bonuses
DISCLAIMER: This information is based on user-submitted data and is subject to revisions as more data is gathered. Any version of the ship receives the bonus regardless of remodel.
Ship Bonuses
??
Equipment Bonuses
??
Debuff
??
XX's Guide
Map Overview
E2 is a single and combined fleet, two-phase map consisting of one transport and one boss phase.
- 2 LBAS is available to sortie on this map
- This map uses 2 locks:
The use of ![]() AGDP AGDP
AGDP AGDP on CV(B/L), Ise-class Kai Ni, Akitsu Maru Kai, Kumano Maru, and Yamashio Maru, is required to sortie these ships on the map.
 Barrage Balloons can be deployed on node W
Gimmick 1 - Unlock
To unlock the next part of the map, the following steps have to be performed:
| F1 | F2 | C | |
|---|---|---|---|
| Hard | A+ x2 | A+ x2 | S x2 |
| Medium | A+ | A+ | S x2 |
| Easy | ? | ? | ? |
| Casual | ? | ? | ? |
| Nodes C, F1 & F2 | |||||||||||||||||||||||||
|---|---|---|---|---|---|---|---|---|---|---|---|---|---|---|---|---|---|---|---|---|---|---|---|---|---|
| |||||||||||||||||||||||||
| Fleet Notes | |||||||||||||||||||||||||
All relevant nodes are surface combat one.
| |||||||||||||||||||||||||
| LBAS Notes | |||||||||||||||||||||||||
| Sending all LBAS on the relevant nodes is advised. | |||||||||||||||||||||||||
Gimmick 2 - Unlock
To unlock the 1st phase, the following steps have to be performed:
| K | F | |
|---|---|---|
| Hard | A+ x3 | AS |
| Medium | A+ x3 | - |
| Easy | A+ x3 | - |
| Casual | A+ x3? | - |
| Node K | |||||||||||||||||||||||||
|---|---|---|---|---|---|---|---|---|---|---|---|---|---|---|---|---|---|---|---|---|---|---|---|---|---|
| |||||||||||||||||||||||||
| Fleet Notes | |||||||||||||||||||||||||
The node is surface combat.
| |||||||||||||||||||||||||
| LBAS Notes | |||||||||||||||||||||||||
| Sending half LBAS node I and the other on node K is advised to maxime the passing rate | |||||||||||||||||||||||||
- Nodes F
- Refer to #Gimmick 1 - Unlock's fleets for composition and routing (node F2's path).
Phase 1 - TP
Phase 1 is a new kind of Transport Operation, where "tanks" do work better:
| Landing Operation [1] | |||
|---|---|---|---|
| Type | Equipment | S-Rank | A-Rank |
Daihatsu Landing Craft Toku Daihatsu Landing Craft  Armed Daihatsu  Soukoutei 
|
6 | 4.2 | |
DLC + T89 Tank |
15 | 10.5 | |
DLC + Panzer II |
22 | 15.4 | |
Toku DLC + Ho-Ni Tank |
41 | 28.7 | |
Toku DLC + 11th Reg |
47 | 32.9 | |
M4A1 DD |
25 | 17.5 | |
Toku DLC + Panzer III |
28 | 19.6 | |
Toku DLC + Chi-Ha |
23 | 16.1 | |
Toku DLC + Chi-Ha Kai |
29 | 20.3 | |
Toku DLC + Panzer III J |
33 | 23.1 | |
Ka-Mi tank |
10 | 7 | |
Ka-Tsu tank |
7 | 4.9 | |
Ka-Tsu tank Kai |
9 | 6.3 | |
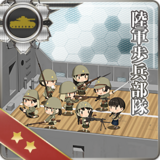
Army Infantry Corps |
15 | 10.5 | |
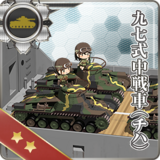
Chi-Ha |
17 | 11.9 | |
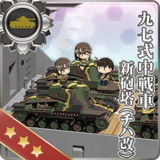
Chi-Ha Kai |
23 | 16.1 | |
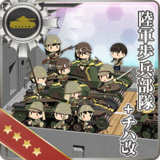
Infantry + Chi-Ha Kai |
38 | 26.6 | |
Drum Canisters |
0 | 0 | |
Rations   |
? | ? | |
| STF | |||||||||||||||||||||||||
|---|---|---|---|---|---|---|---|---|---|---|---|---|---|---|---|---|---|---|---|---|---|---|---|---|---|
| |||||||||||||||||||||||||
| Fleet Notes | |||||||||||||||||||||||||
| Bringing an AACI and some ASW is advised to reach the boss.
Having 1 or 2 good night cut-ins is recommended to farm for S rank. | |||||||||||||||||||||||||
| LBAS Notes | |||||||||||||||||||||||||
| All LBAS should be sent on the boss. | |||||||||||||||||||||||||
- It is recommended to field between 3-5 DD that can carry Daihatsu to drain the TP Gauge.
Phase 2 - Boss
| STF | |||||||||||||||||||||||||
|---|---|---|---|---|---|---|---|---|---|---|---|---|---|---|---|---|---|---|---|---|---|---|---|---|---|
| |||||||||||||||||||||||||
| Fleet Notes | |||||||||||||||||||||||||
The boss is a submarine, it is required to bring very strong ASW and OASW to kill it.
| |||||||||||||||||||||||||
| LBAS Notes | |||||||||||||||||||||||||
| ? | |||||||||||||||||||||||||
 Smokes are highly recommended for V to avoid taking damage.
- Using the
 FCF FCF
 can help increase the reach rate.
Gimmick 3 - Debuff
Once LD has been reached, the following steps have to be performed to debuff the boss.
| F1 | F2 | K | U | LBAS | |
|---|---|---|---|---|---|
| Hard | A+ x2 | A+ x2 | A+ x2 | A+ x2 | AS x2 |
| Medium | - | A+ x2 | A+ x2 | A+ x2 | AS |
| Easy | - | A+ x2 | A+ x2 | A+ x2 | AS |
| Casual | - | A+ x2 | A+ x2 | A+ x2 | AS |
Refer to #Gimmick 1 - Unlock's fleets for composition and routing.
- Refer to #Gimmick 2 - Unlock's fleet for composition and routing.
- Refer to #Phase 1 - TP's fleet for composition and routing.
| LBAS | AS |
|---|---|
| Hard | 281 |
| Medium | 230 |
| Easy | 209 |
| Casual | 158 |
Once on LD, the CG will change to the following:
| Submarine Seerfish Water Demon |
|---|


