|
|
| (80 intermediate revisions by the same user not shown) |
| Line 1: |
Line 1: |
| − | This page is to provide an in-depth look into the hit rate mechanics in-game for '''single/combined fleets and land-based air squadrons'''. The formulas presented in this page are still subject to change as more testing is done.
| + | '''Quest Reward Guide''' |
| − | *'''Please note that all formulas between <math>\lfloor \ \rfloor</math> are rounded down.'''
| |
| | | | |
| − | =Hit Rate=
| + | A guide on what reward(s) to choose in choice quests. |
| − | The hit rate is used by all attacks.
| |
| | | | |
| − | <math>\text{Hit %} = \bigl\lfloor \text{Hit}_\text{cap} \bigr\rfloor + \text{Acc}_\text{proficiency} +1</math>
| |
| | | | |
| − | Where, the Capped Hit Rate <math>\left( \text{Hit}_\text{cap} \right)</math> is:
| + | =General choosing rules= |
| | + | Some very broad guidelines on what reward to choose for any given quest. |
| | + | This put an absolute priority on Quest exclusive rewards, with then useful and rare equipment, followed by "valuable" items such as "shop items" (e.g. RE), as well are rare items like ProtoPult, the rest being ordered in rarity/usefulness. |
| | | | |
| − | <math>\text{Hit}_\text{cap} = \text{cap}_\text{max}\left( \text{cap}_\text{min} \left(\text{Accuracy}_\text{atk} - \text{Evasion}_\text{def}\right) \times \text{Morale}_\text{defender} \right)</math>
| + | This is not an absolute solution to every choice, with quantities, improvements, and relative usefulness affecting a lot such ordering. |
| | | | |
| − | * <math>\text{Accuracy}_\text{atk}</math> is the calculated accuracy of the attack. Please see [[#Accuracy_Formulas|below]] for the various accuracy formulas.
| + | {|class="wikitable width="50%" style="text-align:center; margin:auto" |
| − | * <math>\text{Evasion}_\text{def}</math> is the calculated evasion of the defending ship. Please see [[#Evasion_Formulas|below]] for the various evasion formulas.
| + | !Rank |
| − | * <math>\text{Morale}_\text{defender}</math> is the morale state modifier of the defending ship. Morale is referring to the value of attacking timing, not the value before entering battle. Please see [[Morale_and_Fatigue#Morale Effects|Morale and Fatigue]] for more details.
| + | !Reward |
| − | ** Sparkled is '''0.7''',
| + | |- |
| − | ** Normal is '''1.0''',
| + | !1 |
| − | ** Orange is '''1.2''',
| + | |Any "[[#Quest trap advices|Quest Exclusive]]" limited equipment |
| − | ** Red is '''1.4'''.
| + | |- |
| − | * <math>\text{Acc}_\text{proficiency}</math> is the '''average''' plane proficiency accuracy bonus. Please see [[Plane Proficiency]] for more details.
| + | !2 |
| − | ** The average is calculated only from dive bombers, torpedo bombers, seaplane bombers and large flying boats.
| + | |Furniture |
| − | ** The value is '''12''' for [[Plane Proficiency|{{TextGlow|'''❱❱'''|black|text-colour=gold|glow-size=2px}}]] ranked planes.
| |
| − | | |
| − | '''Hit Rate Caps'''
| |
| − | | |
| − | There is a minimum and maximum hit rate in the game.
| |
| − | * The minimum of <math>\text{cap}_\text{min}\left(x\right)</math> '''is 10'''.
| |
| − | * The maximum of <math>\text{cap}_\text{max}\left(x\right)</math> '''is 96'''.
| |
| − | | |
| − | '''Notes:'''
| |
| − | * Hit rate has an effective '''minimum of 11%''' and a '''maximum of 97%'''.
| |
| − | * Plane proficiency is the only factor that allows a ship to go beyond 100% hit rate.
| |
| − | | |
| − | =Critical Hit Rate= | |
| − | | |
| − | The following are the various formulas for determining critical hits for attacks.
| |
| − | | |
| − | * Shelling/ASW (including carriers): <math>\lfloor 1.3 \times \sqrt{\text{Hit}_\text{cap}} \rfloor + \text{Crit}_\text{proficiency} + 1</math>
| |
| − | * Torpedo: <math>\lfloor 1.5 \times \sqrt{\text{Hit}_\text{cap}} \rfloor + 1</math>
| |
| − | * Airstrike: <math>\lfloor 0.2 \times \sqrt{\text{Hit}_\text{cap}} \rfloor + \text{Crit}_\text{proficiency} + 1</math>
| |
| − | * Night Battle (including carriers): <math>\lfloor \left(1.5 + \text{Const}_\text{contact} \right) \sqrt{\text{Hit}_\text{cap}} \rfloor + 1</math>
| |
| − | * Shelling Support: <math>\lfloor 1.0 \times \sqrt{\text{Hit}_\text{cap}} \rfloor + 1</math>
| |
| − | * Airstrike Support: <math>\lfloor 0.2 \times \sqrt{\text{Hit}_\text{cap}} \rfloor + 1</math>
| |
| − | | |
| − | * <math>\text{Crit}_\text{proficiency}</math> is the plane proficiency critical bonus. Please see [[Plane Proficiency]] for more details.
| |
| − | * <math>\text{Const}_\text{contact}</math> is the night contact constant from {{Night Recon}} {{Equipment/Link|Type 98 Reconnaissance Seaplane (Night Recon)|Type 0 Reconnaissance Seaplane Model 11B Kai (Night Recon)|text=Night Recons|link_category=Night Recon}}. It is '''0.07''' if night contact is triggered, '''0''' otherwise.
| |
| − | | |
| − | =Accuracy Formulas=
| |
| − | Below are the common variables used in all accuracy formulas:
| |
| − | * <math>\text{Level}</math> is the level of the attacking ship.
| |
| − | * <math>\text{Luck}</math> is the luck {{Luck}} of the attacking ship.
| |
| − | * <math>\text{Acc}_\text{equip}</math> is the total accuracy {{Hit}} provided by the equipment calculated as <math>\text{Acc}_\text{equip base} + \text{Mod}_\text{Impr} \times \sqrt{\bigstar}</math>
| |
| − | ** <math>\text{Acc}_\text{equip base}</math> is the base accuracy {{Hit}} displayed on the equipment.
| |
| − | ** <math>\text{Mod}_\text{Impr}</math> is the equipment's [[Improvement]] modifier for the applicable attack.
| |
| − | ** <math>\bigstar</math> is the equipment's improvement level.
| |
| − | * <math>\text{Mod}_\text{formation}</math> is the formation modifier for the applicable attack. Please see [[Combat#Formation Selection|Combat]] for more details.
| |
| − | * <math>\text{Mod}_\text{morale}</math> is the morale modifier of the attacking ship. Morale is referring to the value of attacking timing, not the value before entering battle. Please see [[Morale_and_Fatigue#Morale Effects|Morale and Fatigue]] for more details.
| |
| − | ** Sparkled is '''1.2''',
| |
| − | ** Normal is '''1.0''',
| |
| − | ** Orange is '''0.8''',
| |
| − | ** Red is '''0.5'''.
| |
| − | | |
| − | '''Notes:'''
| |
| − | * Because of the number of modifiers to accuracy in-game, it is trivial to increase accuracy. Therefore it is '''more important''' to prioritize firepower.
| |
| − | | |
| − | ==Daytime Shelling==
| |
| − | This formula applies to both surface shelling and carrier attacks during daytime combat. It does not apply to carrier airstrikes.
| |
| − | | |
| − | <math>\text{Accuracy}_\text{shelling} = \biggl\lfloor \left( \left( \text{Acc}_\text{base} + 2\sqrt{\text{Level}} + 1.5\sqrt{\text{Luck}} + \sum_{\text{All Equips}} \text{Acc}_\text{equip} \right) \times \text{Mod}_\text{formation} \times \text{Mod}_\text{morale} + \text{Mod}_\text{fit} \right) \times \text{Mod}_\text{spotting} \times \text{Mod}_\text{AP} \biggr\rfloor </math>
| |
| − | | |
| − | * <math>\text{Acc}_\text{base}</math> is the base accuracy value of the attack.
| |
| − | ** These values apply for Player as attacker and Enemy as targets. Values for Enemy attacker vs Player target are unclear/unknown, except single vs single = 90.
| |
| − | | |
| − | {|class="wikitable"
| |
| − | |+ Fleet type base accuracy values for Player side<ref>https://twitter.com/Xe_UCH/status/1172380690207215616</ref><ref>https://twitter.com/Divinity__123/status/1447941755182227458</ref> | |
| | |- | | |- |
| − | !rowspan=2 colspan=2|'''<big>vs.</big>'''!!colspan=2|Enemy | + | !3 |
| | + | |Limited / expensive "Akashi only" equipment |
| | |- | | |- |
| − | | '''Single Fleet'''|| '''Combined Fleet''' | + | !4 |
| | + | |Rare stock equipment |
| | |- | | |- |
| − | !rowspan=7|Player | + | !5 |
| − | | '''Single Fleet'''|| 90|| 80 | + | |{{ItemStack|item={{QuestRewardItem|Construction Corps}}|text-position=bottom:-48px;right:15px|font-size=13px|text=$$$|glow-size=5px|text-color=fff|glow-color=000}} {{ItemStack|item={{QuestRewardItem|Reinforcement Expansion}}|text-position=bottom:-48px;right:15px|font-size=13px|text=$$$|glow-size=5px|text-color=fff|glow-color=000}} {{QuestRewardItem|Prototype Flight Deck Catapult}} |
| | |- | | |- |
| − | | '''CTF Main'''|| 78|| 77 | + | !6 |
| | + | |{{QuestRewardItem|Remodel Blueprint}} {{QuestRewardItem|Skilled Crew Member}} |
| | |- | | |- |
| − | | '''CTF Escort'''|| 45|| 67 | + | !7 |
| | + | |{{QuestRewardItem|Action Report}} {{QuestRewardItem|Medal}} |
| | |- | | |- |
| − | | '''STF Main'''|| 45|| 77 | + | !8 |
| | + | |{{ItemStack|item={{QuestRewardItem|Furniture Fairy}}|text-position=bottom:-48px;right:15px|font-size=13px|text=$|glow-size=5px|text-color=fff|glow-color=000}} {{QuestRewardItem|New Model Armament Material}} {{QuestRewardItem|New Model Gun Mount Improvement Material}} {{QuestRewardItem|New Model Aerial Armament Material}} |
| | |- | | |- |
| − | | '''STF Escort'''|| 67|| 67 | + | !9 |
| | + | |{{ItemStack|item={{QuestRewardItem|Improvement Material}}|text-position=bottom:-48px;right:15px|font-size=13px|text=$|glow-size=5px|text-color=fff|glow-color=000}} {{ItemStack|item={{QuestRewardItem|Underway Replenishment}}|text-position=bottom:-48px;right:15px|font-size=13px|text=$|glow-size=5px|text-color=fff|glow-color=000}} {{ItemStack|item={{QuestRewardItem|Emergency Repair Material}}|text-position=bottom:-48px;right:15px|font-size=13px|text=$$|glow-size=5px|text-color=fff|glow-color=000}} {{ItemStack|item={{QuestRewardItem|Food Supply Ship Mamiya}}|text-position=bottom:-48px;right:15px|font-size=13px|text=$$|glow-size=5px|text-color=fff|glow-color=000}} |
| | |- | | |- |
| − | | '''TCF Main'''|| 54|| 54 | + | !10 |
| | + | |{{ItemStack|item={{QuestRewardItem|Food Supply Ship Irako}}|text-position=bottom:-48px;right:15px|font-size=13px|text=$|glow-size=5px|text-color=fff|glow-color=000}} {{QuestRewardItem|New Model Rocket Development Material}} |
| | |- | | |- |
| − | | '''TCF Escort'''|| 45|| 67
| + | !11 |
| − | |} | + | |Expensive craftable/stock equipment |
| − | <references/>
| |
| − | | |
| − | * <math>\text{Mod}_\text{formation}</math> for '''shelling and carrier attacks''' is as follows:
| |
| − | ** Line Ahead/Diamond: '''1.0'''
| |
| − | ** Double Line/Echelon/Line Abreast/Vanguard (Bottom): '''1.2'''
| |
| − | *** Exception, certain combinations reduce this to '''1.0'''
| |
| − | **** Double Line attacking Line Abreast
| |
| − | **** Echelon attacking Line Ahead
| |
| − | **** Line Abreast attacking Echelon
| |
| − | ** Vanguard (Top): '''0.8'''
| |
| − | ** Combined Fleet Cruising Formation 1: '''?''',
| |
| − | ** Combined Fleet Cruising Formation 2: '''1.0''',
| |
| − | ** Combined Fleet Cruising Formation 3: '''?''',
| |
| − | ** Combined Fleet Cruising Formation 4: '''1.1'''.
| |
| − | * <math>\text{Mod}_\text{fit}</math> is the fit bonus or penalty that is applicable. Please see [[Gun Fit Bonuses]] for more details.
| |
| − | * <math>\text{Mod}_\text{spotting}</math> is the artillery spotting bonus if applicable. Please see [[Artillery_Spotting#Setups and Attack Types|Artillery Spotting]] for more details.
| |
| − | ** Main/Main: '''1.2''',
| |
| − | ** Main/AP: '''1.3''',
| |
| − | ** Main/RADAR: '''1.5''',
| |
| − | ** Main/Secondary: '''1.3''',
| |
| − | ** Double Attack: '''1.1''',
| |
| − | ** Other multipliers are unknown.
| |
| − | * <math>\text{Mod}_\text{AP}</math> is the {{RedAmmo}} {{Equipment/Link|Type 91 Armor Piercing Shell|Type 1 Armor Piercing Shell|Type 1 Armor Piercing Shell Kai|text=AP Shells|link_category=Armour-Piercing Shells}} accuracy modifier:
| |
| − | | |
| − | {|class="wikitable"
| |
| − | !Type!!Modifier
| |
| | |- | | |- |
| − | |{{RedAmmo}}{{RedGunHeavy}}||1.1 | + | !12 |
| | + | |{{ItemStack|item={{QuestRewardItem|Instant Repair Material}}|text-position=bottom:-48px;right:15px|font-size=13px|text=$|glow-size=5px|text-color=fff|glow-color=000}} |
| | |- | | |- |
| − | |{{RedAmmo}}{{RedGunHeavy}}{{YellowGun}}||1.2 | + | !13 |
| | + | |{{ItemStack|item={{QuestRewardItem|Development Material}}|text-position=bottom:-48px;right:15px|font-size=13px|text=$|glow-size=5px|text-color=fff|glow-color=000}} |
| | |- | | |- |
| − | |{{RedAmmo}}{{RedGunHeavy}}{{Radar}}||1.25 | + | !14 |
| | + | |{{ItemStack|item={{QuestRewardItem|Instant Construction Material}}|text-position=bottom:-48px;right:15px|font-size=13px|text=$|glow-size=5px|text-color=fff|glow-color=000}} |
| | |- | | |- |
| − | |{{RedAmmo}}{{RedGunHeavy}}{{YellowGun}}{{Radar}}||1.3 | + | !15 |
| | + | |Any cheap craftable equipment |
| | |} | | |} |
| | | | |
| − | '''Notes:''' | + | ='''Gallery completion guide'''= |
| − | * It is '''inadvisable''' to run any of the other setups beyond the most basic Gun+AP. This is because the other setups will interfere with artillery spotting and cost you better attack bonuses.
| + | A guide not to have the best gears nor the best fleet, but just to complete your "kancodex" (Gallery) of equipment. Here are listed all obtainable equipment and how to obtain them in the current state of the game: |
| − | * Unlike when calculating damage, the bonus applies to all targets. | + | *List of craftable equipment: [[Development#Buildable_Equipment|Buildable Equipment]] |
| | | | |
| − | ==Shelling Support==
| + | *List of equipment only available via [[Quests]], [[Akashi's Improvement Arsenal]] or as Stock equipment: [[Equipment#Unbuildable_Equipment|Unbuildable Equipment]] |
| | | | |
| − | This formula applies to surface shelling and carrier attacks during shelling support.
| + | ===Quest trap advices=== |
| − | | + | Some quests will ask to choose between several rewards, and sometimes the choice can lock unique equipment. This list gives reward picking advice in order to maximize the Gallery completion (assuming the following equipment are not already possessed): |
| − | <math>\text{Accuracy}_\text{shelling support} = \biggl\lfloor \left( 64 + 2\sqrt{\text{Level}} + 1.5\sqrt{\text{Luck}} + \sum_{\text{All Equips}} \text{Acc}_\text{equip base} \right) \times \text{Mod}_\text{formation}? \times \text{Mod}_\text{morale} \biggr\rfloor </math>
| + | {|class="wikitable" style="margin:auto" |
| − | | + | !Quest |
| − | * <math>\text{Acc}_\text{equip base}</math> does not include accuracy from improvement level.
| + | !Good choice |
| − | * <math>\text{Mod}_\text{formation}</math> exists in KanColle Kai, but unclear if it applies to browser KanColle using the Daytime Shelling formation modifier of the main fleet.
| + | !Notes |
| − | | + | |- |
| − | ==Torpedo Attacks== | + | |{{Q|B88}} |
| − | | + | |{{Equipment/Link|PBY-5A Catalina}} |
| − | This formula only applies to opening and closing torpedo attacks in day.
| + | |- |
| − | | + | |{{Q|B106}} |
| − | <math>\text{Accuracy}_\text{torpedo} = \left( 85 + 2\sqrt{\text{Level}} + 1.5\sqrt{\text{Luck}} + \sum_{\text{All Equips}} \text{Acc}_\text{equip} + \left \lfloor{\frac{\text{Attack}_\text{torp}}{5}} \right \rfloor + \text{Mod}_\text{ship} \right) \times \text{Mod}_\text{formation} \times \text{Mod}_\text{morale}</math>
| + | |{{Equipment/Link|Night Operation Aviation Personnel + Skilled Deckhands|text=NOAP Skilled}} |
| − | | + | |- |
| − | * <math>\text{Mod}_\text{formation}</math> for '''torpedo attacks''' is as follows:
| + | |{{Q|B124}} |
| − | ** Line Ahead: '''1.0''',
| + | |{{Equipment/Link|Type 0 Passive Sonar}} |
| − | ** Double Line: '''0.8''',
| + | |- |
| − | ** Diamond: '''0.4''',
| + | |{{Q|B129}} |
| − | ** Echelon: '''0.6''',
| + | |{{Equipment/Link|Prototype Nanzan}} |
| − | ** Line Abreast: '''0.3''',
| + | |According the {{Equipment/Link|Prototype 46cm Twin Gun Mount|text=Prototype 46cm}} is chosen in {{Q|B130}} |
| − | ** Vanguard (Top & Bottom): '''?''',
| + | |- |
| − | ** Accuracy modifiers for Combined Fleets is still unknown.
| + | |{{Q|B130}} |
| − | * <math>\text{Attack}_\text{torp}</math> is the final basic torpedo attack power of the ship. Please see [[Damage_Calculations#Torpedo_Attacks|Damage Calculations]] for details.
| + | |{{Equipment/Link|Prototype 46cm Twin Gun Mount|text=Prototype 46cm}} |
| − | ** The figure incorporates any pre-cap and post-cap modifiers and takes into account the attack cap.
| + | |According the {{Equipment/Link|Prototype Nanzan}} is choosed in {{Q|B129}} |
| − | ** This means that engagement and damage state play a role in torpedo accuracy.
| + | |- |
| − | * <math>\text{Mod}_\text{ship}</math> is the innate torpedo accuracy of the ship. Currently, only Abyssal ships have values above <math>0</math>.
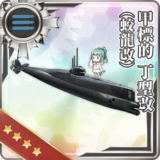
| + | |{{Q|B141}} |
| − | | + | |{{Equipment/Link|Type D Kouhyouteki Kai (Kouryuu Kai)|text=Type D Kouhyouteki}} |
| − | ==Aerial Combat==
| + | |- |
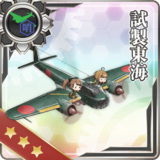
| − | | + | |{{Q|B143}} |
| − | This formula applies to the airstrikes performed during the aerial combat phase and support. Although ASW support functions like an airstrike for damage, it '''does not''' use this formula.
| + | |{{Equipment/Link|Prototype Toukai}} |
| − | | + | |According the {{Equipment/Link|Raiden}} is chosen in {{Q|F81}} |
| − | <math>\text{Accuracy}_\text{airstrike} = 95</math>
| + | |- |
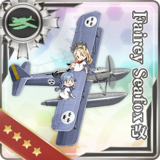
| − | | + | |{{Q|B146}} |
| − | '''Important Notes'''
| + | |{{Equipment/Link|Fairey Seafox Kai}} |
| − | * Airstrike accuracy is a constant and '''not affected''' by any outside factors.
| + | |- |
| − | | + | |{{Q|B150}} |
| − | ==Anti-Submarine Warfare==
| + | |{{Equipment/Link|Lightweight ASW Torpedo (Initial Test Model)|text=Lightweight ASW Torpedo}} |
| − | This formula applies to all ASW attacks in the combat phase and support.
| + | |- |
| − | | + | |{{Q|B153}} |
| − | <math>\text{Accuracy}_\text{ASW} = \left( 80 + 2\sqrt{\text{Level}} + 1.5\sqrt{\text{Luck}} + \sum_{\text{All Equips}} \text{Acc}_\text{Impr} + 2\sum \text{ASW}_\text{sonar} \right) \times \text{Mod}_\text{formation} \times \text{Mod}_\text{morale} \times \text{Mod}_\text{synergy}</math>
| + | |{{Equipment/Link|Prototype Shuusui}} |
| − | | + | |- |
| − | * <math>\text{Mod}_\text{formation}</math> for '''ASW''' is as follows:
| + | |{{Q|B158}} |
| − | ** Line Ahead/Diamond: '''1.0''',
| + | |{{Equipment/Link|Canned Saury}} |
| − | ** Double Line/Echelon/Line Abreast: '''1.2'''.
| + | |In the case all future Saury events are missed |
| − | *** Exception, certain combinations reduce this to '''1.0''':
| + | |- |
| − | **** Double Line attacking Line Abreast
| + | |{{Q|B165}} |
| − | **** Echelon attacking Line Ahead
| + | |{{Equipment/Link|Bomb-carrying Type 1 Fighter Hayabusa Model III Kai (65th Squadron)|text=Hayabusa bomber}} |
| − | **** Line Abreast attacking Echelon
| + | |- |
| − | ** Vanguard (Top & Bottom): '''?'''
| + | |{{Q|B170}} |
| − | ** Accuracy modifiers for Combined Fleets is still unknown.
| + | |{{Equipment/Link|FR-1 Fireball}} |
| − | * <math>\text{Acc}_\text{Impr}</math> does '''not''' include {{Hit}} accuracy stat of the equipment, only the amount from improvement related to ASW accuracy
| + | |- |
| − | * <math>\text{ASW}_\text{sonar}</math> is the '''base''' ASW stat of any sonars equipped.
| + | |{{Q|B175}} |
| − | * <math>\text{Mod}_\text{synergy}</math> is the synergy bonus from equipping certain combinations of ASW equipment.
| + | |{{Equipment/Link|Type 3 Fighter Hien}} |
| − | ** Synergy bonus is either currently bugged or so small it cannot be tested.
| + | |Also unlocks the {{Equipment/Link|Type 3 Fighter Hien Model 1D|text= Hien Mod D}} & {{Equipment/Link|Type 3 Fighter Hien (244th Air Combat Group)|text=Hien 244th}} |
| − | | + | |- |
| − | '''Notes:'''
| + | |{{Q|B181}} |
| − | * Equipping more sonars is the best way to boost ASW accuracy.
| + | |{{Equipment/Link|10cm Twin High-angle Gun Mount Battery Concentrated Deployment|text=10cm Twin HA CD}} |
| − | ** Large sonars are not counted for this bonus.
| + | |If not taken from {{Q|B182}} nor {{Q|B183}} |
| − | | + | |- |
| − | ==Night Battles==
| + | |{{Q|B182}} |
| − | | + | |{{Equipment/Link|10cm Twin High-angle Gun Mount Battery Concentrated Deployment|text=10cm Twin HA CD}} |
| − | This formula applies to '''all''' night battle attacks.
| + | |- |
| − | | + | |{{Q|B183}} |
| − | <math>\text{Accuracy}_\text{NB} = \bigl( \text{Mod}_\text{contact} \left( 69 + \text{Mod}_\text{star shell} \right) + 2\sqrt{\text{Level}} + 1.5\sqrt{\text{Luck}} + \sum_{\text{All Equips}} \text{Acc}_\text{equip} \bigr) \times \text{Mod}_\text{formation} \times \text{Mod}_\text{morale} \times \text{Mod}_\text{special} + \text{Mod}_\text{searchlight} + \text{Mod}_\text{20.3cm} + \text{Mod}_\text{fit}</math>
| + | |{{Equipment/Link|Prototype 51cm Triple Gun Mount|text=51cm Triple}} |
| − | | + | |According the {{Equipment/Link|10cm Twin High-angle Gun Mount Battery Concentrated Deployment|text=10cm Twin HA CD}} is chosen in {{Q|B181}} or {{Q|B182}} |
| − | * <math>\text{Mod}_\text{contact}</math> is the night contact modifier of '''1.1''' if triggered, '''1.0''' otherwise.
| + | |- |
| − | * <math>\text{Mod}_\text{star shell}</math> is the star shell modifier of of '''5''' if triggered, '''0''' otherwise.
| + | |{{Q|B185}} |
| − | * <math>\text{Mod}_\text{formation}</math> for night battle is as follows:
| + | |{{Equipment/Link|GFCS Mk.37}} |
| − | ** Line Ahead: '''1.0''',
| + | |Also unlocks the {{Equipment/Link|5inch Single Gun Mount Mk.30 Kai + GFCS Mk.37|text=5" + GFCS}} |
| − | ** Double Line/Echelon: '''0.9''',
| + | |- |
| − | ** Diamond: '''0.7''',
| + | |{{Q|B194}} |
| − | ** Line Abreast: '''0.8''',
| + | |{{Equipment/Link|Torpedo Squadron Skilled Lookouts|text=SSLO}} |
| − | ** Vanguard (Top & Bottom): '''?''',
| + | |If not taken from {{Q|B206}} |
| − | ** Accuracy modifiers for Combined Fleets is still unknown.
| + | |- |
| − | * <math>\text{Mod}_\text{special}</math> is the night battle special attack modifier. Please see [[Night Battle]] for more details.
| + | |{{Q|B195}} |
| − | ** Torpedo Cut-in: '''1.65''',
| + | |{{Equipment/Link|SJ Radar + Submarine Conning Tower Equipment|text=SJ Radar}} |
| − | ** Gun Cut-in: '''2.0''',
| |
| − | ** Mixed Cut-in: '''1.5''',
| |
| − | ** Secondary Cut-in: '''1.5''',
| |
| − | ** Double Attack: '''1.1''',
| |
| − | ** Other multipliers are unknown.
| |
| − | * <math>\text{Mod}_\text{searchlight}</math> is the {{Searchlight}} {{EquipmentLink|Searchlight|Type 96 150cm Searchlight|text=Searchlights|link_category=Searchlight}} modifier of '''7''' if triggered, '''0''' otherwise.
| |
| − | * <math>\text{Mod}_\text{20.3cm}</math> is the heavy cruiser bonus for equipping {{Equipment/Link|20.3cm Twin Gun Mount|20.3cm (No.2) Twin Gun Mount|20.3cm (No.3) Twin Gun Mount|text=IJN 20.3 cm guns}} variants.
| |
| − | ** One gun: '''10'''
| |
| − | ** Two guns: '''15'''
| |
| − | ** Bonuses for more than two guns have not been tested.
| |
| − | * <math>\text{Mod}_\text{fit}</math> is the fit bonus or penalty that is applicable. Please see [[Gun Fit Bonuses]] for more details.
| |
| − | | |
| − | ==Land-Based Air Squadron== | |
| − | | |
| − | This formula applies to attacks made by [[Land-Based Air Squadron]]s. The accuracy is calculated '''independently''' per squadron.
| |
| − | | |
| − | <math>\text{Accuracy}_\text{LBAS} = \left( 95 + ( 7 \times {\text{Acc}_\text{equip}}) \right) \times \text{Mod}_\text{morale} + \text{Mod}_\text{proficiency}</math> <ref>https://twitter.com/yukicacoon/status/1432364331694374914</ref>
| |
| − | | |
| − | * <math>\text{Acc}_\text{equip}</math> is the accuracy stat of the plane.
| |
| − | * <math>\text{Mod}_\text{morale}</math> is the morale modifier of the plane.
| |
| − | ** Normal/Orange morale: '''1.0'''
| |
| − | ** Red morale: '''0.8'''
| |
| − | * <math>\text{Mod}_\text{proficiency}</math> is the plane proficiency accuracy bonus. Please see [[Plane Proficiency]] for more details.
| |
| − | ** The value is '''12''' for [[Plane Proficiency|{{TextGlow|'''❱❱'''|black|text-colour=gold|glow-size=2px}}]] ranked planes.
| |
| − | <references/>
| |
| − | | |
| − | =Evasion Formulas=
| |
| − | Evasion has several caps depending on the calculated base evasion of the ship. Base evasion is calculated as follows:
| |
| − | | |
| − | <math>\text{Evasion}_\text{base} = \bigl\lfloor \left( \text{Evasion}_\text{ship} + \sqrt{2\text{Luck}} \right) \times \text{Mod}_\text{formation} \bigr\rfloor</math>
| |
| − | | |
| − | * <math>\text{Evasion}_\text{ship}</math> is the evasion of the ship '''including''' any visible equipment bonuses.
| |
| − | * <math>\text{Mod}_\text{formation}</math> is the formation modifier. It varies based on the attack being received. Please see [[Combat#Formation Selection|Combat]] for more details.
| |
| − | ** Currently modifiers for Vanguard are unknown.
| |
| − | | |
| − | | |
| − | The various capped evasion formulas to calculate the final evasion rate is as follows:
| |
| − | | |
| − | * <math>\text{Evasion}_\text{base} < 40: \text{Evasion}_\text{cap} = \text{Evasion}_\text{base}</math>
| |
| − | * <math>40 < \text{Evasion}_\text{base} < 65: \text{Evasion}_\text{cap} = \lfloor 40 + 3\sqrt{\text{Evasion}_\text{base} - 40} \rfloor</math>
| |
| − | * <math>\text{Evasion}_\text{base} > 65: \text{Evasion}_\text{cap} = \lfloor55 + 2\sqrt{\text{Evasion}_\text{base} - 65}\rfloor</math>
| |
| − | | |
| − | Capped evasion is then modified by post-cap modifiers:
| |
| − | | |
| − | <math>\text{Evasion %} = \biggl\lfloor \text{Mod}_\text{searchlight} \times \left( \text{Evasion}_\text{cap} + \text{Mod}_\text{sonar} + \text{Mod}_\text{CA} + \text{Mod}_\text{vanguard} - \text{Mod}_\text{fuel} \right) \biggr\rfloor</math>
| |
| − | | |
| − | * <math>\text{Mod}_\text{searchlight}</math> is the searchlight evasion penalty. It is '''0.2''' for any ship equipped with a searchlight (even if not triggered) and '''1.0''' otherwise.
| |
| − | * <math>\text{Mod}_\text{sonar}</math> is the sonar improvement modifier that '''only applies to''' opening and closing torpedo attacks. It is '''0''' otherwise.
| |
| − | ** <math>\text{Mod}_\text{sonar} = \sum_{\text{All Sonars}} 1.5\sqrt{\bigstar}</math>
| |
| − | * <math>\text{Mod}_\text{CA}</math> is the heavy/aviation cruiser night battle evasion bonus. It is '''5''' for heavy/aviation cruisers and '''0''' otherwise.
| |
| − | * <math>\text{Mod}_\text{vanguard}</math> is the Vanguard evasion bonus. This is different from the formation modifier that gets taken into account for base evasion. Bonuses are:
| |
| − | ** For ships at the top (slots 1-2 or 1-3): Non-destroyers get a 5% bonus. Destroyers get a 20% bonus.
| |
| − | ** For the rest of the ships at the bottom (slots 3-5 or 4-7): Non-destroyers get a 20% bonus. Destroyers get a 40% bonus.
| |
| − | * <math>\text{Mod}_\text{fuel}</math> is the remaining fuel penalty.
| |
| − | ** <math>\text{Mod}_\text{fuel} = 75 - \text{Fuel}</math>
| |
| − | ** If fuel is above 75%, the penalty is 0.
| |
| − | ** The penalty is an integer and not a percentage.
| |
| − | | |
| − | {|class="wikitable" style="text-align:center"
| |
| − | |+ Remaining Fuel Penalty
| |
| | |- | | |- |
| − | !Battle #<ref>This only takes into account normal day battles. Special nodes have different resource consumption.</ref>
| + | |{{Q|B196}} |
| − | !Remaining Fuel!!Penalty
| + | |{{Equipment/Link|Shiun}} |
| | + | |If not taken from {{Q|D29}} |
| | |- | | |- |
| − | |2nd Battle||80%||0 | + | |{{Q|B206}} |
| | + | |{{Equipment/Link|Torpedo Squadron Skilled Lookouts|text=SSLO}} |
| | + | |If not taken from {{Q|B194}} |
| | |- | | |- |
| − | |3rd Battle||60%||15 | + | |{{Q|D29}} |
| | + | |{{Equipment/Link|Shiun}} |
| | + | |If not taken from {{Q|B195}} |
| | |- | | |- |
| − | |4th Battle||40%||35 | + | |{{Q|D39}} |
| | + | |{{Equipment/Link|Do 17 Z-2}} |
| | + | |Also unlocks the {{Equipment/Link|Do 217 E-5 + Hs293 Initial Model|text=Do 217 + Missile}} |
| | |- | | |- |
| − | |5th Battle||20%||55 | + | |{{Q|F80}} |
| | + | |{{Equipment/Link|Reppuu Model 11}} |
| | + | |According the {{Equipment/Link|Type 3 Fighter Hien}} is chosen in {{Q|B175}} |
| | |- | | |- |
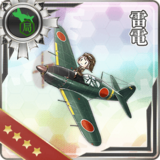
| − | |6th+ Battle||0%||75 | + | |{{Q|F81}} |
| | + | |{{Equipment/Link|Raiden}} |
| | + | |According the {{Equipment/Link|Prototype Toukai}} is chosen in {{Q|B143}} |
| | |} | | |} |
| − | <references/>
| + | [[Category:Help]] |
| − | {{clear}}
| |
| − | | |
| − | '''Notes:'''
| |
| − | * The speed of the fleet is supposed to play a role in evasion. Currently, said increase is either nonexistent or too small to test.
| |
| − | * Using [[AO]] equipped with {{Supplies}} {{EquipmentLink|Underway Replenishment}} is a way to medigate fuel penalties.
| |
| − | | |
| − | =Special Cases=
| |
| − | ==PT Imps==
| |
| − | [[PT Imp Group|PT Imps]] were introduced during the [[Summer 2017 Event]].
| |
| − | | |
| − | {{Anti-PT Imp Setups|uncollapsed=true}}
| |
| − | | |
| − | {{Mechanics}}
| |