- Welcome to the Kancolle Wiki!
- If you have any questions regarding site content, account registration, etc., please visit the KanColle Wiki Discord
Difference between revisions of "User:Jigaraphale/Sandbox/5"
Jigaraphale (talk | contribs) |
Jigaraphale (talk | contribs) |
||
| (81 intermediate revisions by the same user not shown) | |||
| Line 1: | Line 1: | ||
| − | + | '''Quest Reward Guide''' | |
| − | |||
| − | + | A guide on what reward(s) to choose in choice quests. | |
| − | |||
| − | |||
| − | |||
| − | |||
| − | {|class="wikitable" | + | =General choosing rules= |
| − | ! | + | Some very broad guidelines on what reward to choose for any given quest. |
| − | ! | + | This put an absolute priority on Quest exclusive rewards, with then useful and rare equipment, followed by "valuable" items such as "shop items" (e.g. RE), as well are rare items like ProtoPult, the rest being ordered in rarity/usefulness. |
| − | |- | + | |
| − | ! | + | This is not an absolute solution to every choice, with quantities, improvements, and relative usefulness affecting a lot such ordering. |
| + | |||
| + | {|class="wikitable width="50%" style="text-align:center; margin:auto" | ||
| + | !Rank | ||
| + | !Reward | ||
| + | |- | ||
| + | !1 | ||
| + | |Any "[[#Quest trap advices|Quest Exclusive]]" limited equipment | ||
| + | |- | ||
| + | !2 | ||
| + | |Furniture | ||
| + | |- | ||
| + | !3 | ||
| + | |Limited / expensive "Akashi only" equipment | ||
| + | |- | ||
| + | !4 | ||
| + | |Rare stock equipment | ||
| + | |- | ||
| + | !5 | ||
| + | |{{ItemStack|item={{QuestRewardItem|Construction Corps}}|text-position=bottom:-48px;right:15px|font-size=13px|text=$$$|glow-size=5px|text-color=fff|glow-color=000}} {{ItemStack|item={{QuestRewardItem|Reinforcement Expansion}}|text-position=bottom:-48px;right:15px|font-size=13px|text=$$$|glow-size=5px|text-color=fff|glow-color=000}} {{QuestRewardItem|Prototype Flight Deck Catapult}} | ||
| + | |- | ||
| + | !6 | ||
| + | |{{QuestRewardItem|Remodel Blueprint}} {{QuestRewardItem|Skilled Crew Member}} | ||
| + | |- | ||
| + | !7 | ||
| + | |{{QuestRewardItem|Action Report}} {{QuestRewardItem|Medal}} | ||
| + | |- | ||
| + | !8 | ||
| + | |{{ItemStack|item={{QuestRewardItem|Furniture Fairy}}|text-position=bottom:-48px;right:15px|font-size=13px|text=$|glow-size=5px|text-color=fff|glow-color=000}} {{QuestRewardItem|New Model Armament Material}} {{QuestRewardItem|New Model Gun Mount Improvement Material}} {{QuestRewardItem|New Model Aerial Armament Material}} | ||
| + | |- | ||
| + | !9 | ||
| + | |{{ItemStack|item={{QuestRewardItem|Improvement Material}}|text-position=bottom:-48px;right:15px|font-size=13px|text=$|glow-size=5px|text-color=fff|glow-color=000}} {{ItemStack|item={{QuestRewardItem|Underway Replenishment}}|text-position=bottom:-48px;right:15px|font-size=13px|text=$|glow-size=5px|text-color=fff|glow-color=000}} {{ItemStack|item={{QuestRewardItem|Emergency Repair Material}}|text-position=bottom:-48px;right:15px|font-size=13px|text=$$|glow-size=5px|text-color=fff|glow-color=000}} {{ItemStack|item={{QuestRewardItem|Food Supply Ship Mamiya}}|text-position=bottom:-48px;right:15px|font-size=13px|text=$$|glow-size=5px|text-color=fff|glow-color=000}} | ||
| + | |- | ||
| + | !10 | ||
| + | |{{ItemStack|item={{QuestRewardItem|Food Supply Ship Irako}}|text-position=bottom:-48px;right:15px|font-size=13px|text=$|glow-size=5px|text-color=fff|glow-color=000}} {{QuestRewardItem|New Model Rocket Development Material}} | ||
| + | |- | ||
| + | !11 | ||
| + | |Expensive craftable/stock equipment | ||
| + | |- | ||
| + | !12 | ||
| + | |{{ItemStack|item={{QuestRewardItem|Instant Repair Material}}|text-position=bottom:-48px;right:15px|font-size=13px|text=$|glow-size=5px|text-color=fff|glow-color=000}} | ||
| + | |- | ||
| + | !13 | ||
| + | |{{ItemStack|item={{QuestRewardItem|Development Material}}|text-position=bottom:-48px;right:15px|font-size=13px|text=$|glow-size=5px|text-color=fff|glow-color=000}} | ||
| + | |- | ||
| + | !14 | ||
| + | |{{ItemStack|item={{QuestRewardItem|Instant Construction Material}}|text-position=bottom:-48px;right:15px|font-size=13px|text=$|glow-size=5px|text-color=fff|glow-color=000}} | ||
| + | |- | ||
| + | !15 | ||
| + | |Any cheap craftable equipment | ||
| + | |} | ||
| + | |||
| + | ='''Gallery completion guide'''= | ||
| + | A guide not to have the best gears nor the best fleet, but just to complete your "kancodex" (Gallery) of equipment. Here are listed all obtainable equipment and how to obtain them in the current state of the game: | ||
| + | *List of craftable equipment: [[Development#Buildable_Equipment|Buildable Equipment]] | ||
| + | |||
| + | *List of equipment only available via [[Quests]], [[Akashi's Improvement Arsenal]] or as Stock equipment: [[Equipment#Unbuildable_Equipment|Unbuildable Equipment]] | ||
| + | |||
| + | ===Quest trap advices=== | ||
| + | Some quests will ask to choose between several rewards, and sometimes the choice can lock unique equipment. This list gives reward picking advice in order to maximize the Gallery completion (assuming the following equipment are not already possessed): | ||
| + | {|class="wikitable" style="margin:auto" | ||
| + | !Quest | ||
| + | !Good choice | ||
| + | !Notes | ||
| + | |- | ||
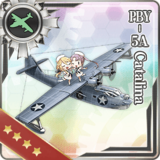
| + | |{{Q|B88}} | ||
| + | |{{Equipment/Link|PBY-5A Catalina}} | ||
| + | |- | ||
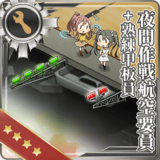
| + | |{{Q|B106}} | ||
| + | |{{Equipment/Link|Night Operation Aviation Personnel + Skilled Deckhands|text=NOAP Skilled}} | ||
| + | |- | ||
| + | |{{Q|B124}} | ||
| + | |{{Equipment/Link|Type 0 Passive Sonar}} | ||
| + | |- | ||
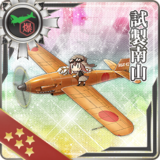
| + | |{{Q|B129}} | ||
| + | |{{Equipment/Link|Prototype Nanzan}} | ||
| + | |According the {{Equipment/Link|Prototype 46cm Twin Gun Mount|text=Prototype 46cm}} is chosen in {{Q|B130}} | ||
| + | |- | ||
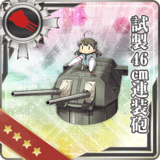
| + | |{{Q|B130}} | ||
| + | |{{Equipment/Link|Prototype 46cm Twin Gun Mount|text=Prototype 46cm}} | ||
| + | |According the {{Equipment/Link|Prototype Nanzan}} is choosed in {{Q|B129}} | ||
| + | |- | ||
| + | |{{Q|B141}} | ||
| + | |{{Equipment/Link|Type D Kouhyouteki Kai (Kouryuu Kai)|text=Type D Kouhyouteki}} | ||
| + | |- | ||
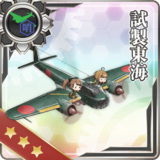
| + | |{{Q|B143}} | ||
| + | |{{Equipment/Link|Prototype Toukai}} | ||
| + | |According the {{Equipment/Link|Raiden}} is chosen in {{Q|F81}} | ||
|- | |- | ||
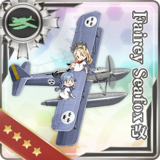
| − | |{{ | + | |{{Q|B146}} |
| − | + | |{{Equipment/Link|Fairey Seafox Kai}} | |
|- | |- | ||
| − | |{{ | + | |{{Q|B150}} |
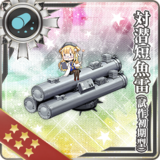
| − | + | |{{Equipment/Link|Lightweight ASW Torpedo (Initial Test Model)|text=Lightweight ASW Torpedo}} | |
|- | |- | ||
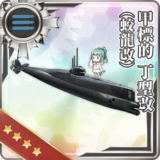
| − | |{{ | + | |{{Q|B153}} |
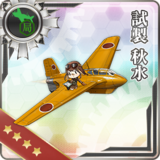
| − | + | |{{Equipment/Link|Prototype Shuusui}} | |
| − | |||
|- | |- | ||
| − | |{{ | + | |{{Q|B158}} |
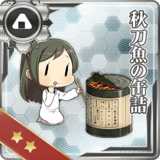
| − | | | + | |{{Equipment/Link|Canned Saury}} |
| − | + | |In the case all future Saury events are missed | |
|- | |- | ||
| − | |{{ | + | |{{Q|B165}} |
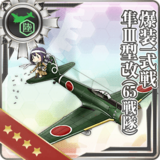
| − | | | + | |{{Equipment/Link|Bomb-carrying Type 1 Fighter Hayabusa Model III Kai (65th Squadron)|text=Hayabusa bomber}} |
| − | |||
|- | |- | ||
| − | + | |{{Q|B170}} | |
| − | + | |{{Equipment/Link|FR-1 Fireball}} | |
| − | |{{ | ||
| − | |||
|- | |- | ||
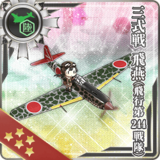
| − | |{{ | + | |{{Q|B175}} |
| − | + | |{{Equipment/Link|Type 3 Fighter Hien}} | |
| + | |Also unlocks the {{Equipment/Link|Type 3 Fighter Hien Model 1D|text= Hien Mod D}} & {{Equipment/Link|Type 3 Fighter Hien (244th Air Combat Group)|text=Hien 244th}} | ||
|- | |- | ||
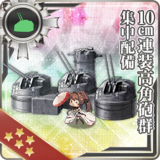
| − | |{{ | + | |{{Q|B181}} |
| − | | | + | |{{Equipment/Link|10cm Twin High-angle Gun Mount Battery Concentrated Deployment|text=10cm Twin HA CD}} |
| − | + | |If not taken from {{Q|B182}} nor {{Q|B183}} | |
|- | |- | ||
| − | + | |{{Q|B182}} | |
| − | + | |{{Equipment/Link|10cm Twin High-angle Gun Mount Battery Concentrated Deployment|text=10cm Twin HA CD}} | |
| − | |{{ | ||
| − | | | ||
|- | |- | ||
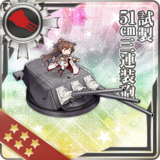
| − | |{{ | + | |{{Q|B183}} |
| − | | | + | |{{Equipment/Link|Prototype 51cm Triple Gun Mount|text=51cm Triple}} |
| + | |According the {{Equipment/Link|10cm Twin High-angle Gun Mount Battery Concentrated Deployment|text=10cm Twin HA CD}} is chosen in {{Q|B181}} or {{Q|B182}} | ||
|- | |- | ||
| − | + | |{{Q|B185}} | |
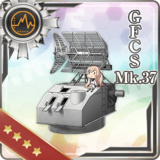
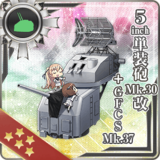
| − | + | |{{Equipment/Link|GFCS Mk.37}} | |
| − | |{{ | + | |Also unlocks the {{Equipment/Link|5inch Single Gun Mount Mk.30 Kai + GFCS Mk.37|text=5" + GFCS}} |
| − | | | ||
|- | |- | ||
| − | |{{ | + | |{{Q|B194}} |
| − | | | + | |{{Equipment/Link|Torpedo Squadron Skilled Lookouts|text=SSLO}} |
| − | + | |If not taken from {{Q|B206}} | |
|- | |- | ||
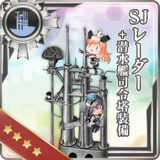
| − | |{{ | + | |{{Q|B195}} |
| − | + | |{{Equipment/Link|SJ Radar + Submarine Conning Tower Equipment|text=SJ Radar}} | |
|- | |- | ||
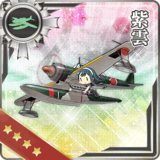
| − | |{{ | + | |{{Q|B196}} |
| − | + | |{{Equipment/Link|Shiun}} | |
| − | + | |If not taken from {{Q|D29}} | |
|- | |- | ||
| − | + | |{{Q|B206}} | |
| − | + | |{{Equipment/Link|Torpedo Squadron Skilled Lookouts|text=SSLO}} | |
| − | |{{ | + | |If not taken from {{Q|B194}} |
| − | |||
|- | |- | ||
| − | |{{ | + | |{{Q|D29}} |
| − | + | |{{Equipment/Link|Shiun}} | |
| + | |If not taken from {{Q|B195}} | ||
|- | |- | ||
| − | |{{ | + | |{{Q|D39}} |
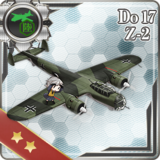
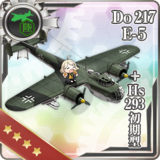
| − | + | |{{Equipment/Link|Do 17 Z-2}} | |
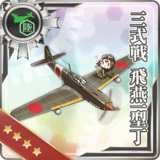
| − | + | |Also unlocks the {{Equipment/Link|Do 217 E-5 + Hs293 Initial Model|text=Do 217 + Missile}} | |
|- | |- | ||
| − | + | |{{Q|F80}} | |
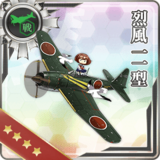
| − | + | |{{Equipment/Link|Reppuu Model 11}} | |
| − | |{{ | + | |According the {{Equipment/Link|Type 3 Fighter Hien}} is chosen in {{Q|B175}} |
| − | |||
| − | |||
|- | |- | ||
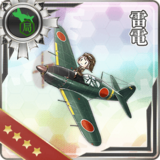
| − | + | |{{Q|F81}} | |
| − | + | |{{Equipment/Link|Raiden}} | |
| − | |{{ | + | |According the {{Equipment/Link|Prototype Toukai}} is chosen in {{Q|B143}} |
| − | | | ||
| − | |||
| − | |||
| − | |||
| − | |||
| − | |||
|} | |} | ||
| + | [[Category:Help]] | ||
Latest revision as of 22:34, 18 October 2024
Quest Reward Guide
A guide on what reward(s) to choose in choice quests.
General choosing rules
Some very broad guidelines on what reward to choose for any given quest. This put an absolute priority on Quest exclusive rewards, with then useful and rare equipment, followed by "valuable" items such as "shop items" (e.g. RE), as well are rare items like ProtoPult, the rest being ordered in rarity/usefulness.
This is not an absolute solution to every choice, with quantities, improvements, and relative usefulness affecting a lot such ordering.
| Rank | Reward |
|---|---|
| 1 | Any "Quest Exclusive" limited equipment |
| 2 | Furniture |
| 3 | Limited / expensive "Akashi only" equipment |
| 4 | Rare stock equipment |
| 5 | Construction Corps Reinforcement Expansion Prototype Flight Deck Catapult |
| 6 | Remodel Blueprint Skilled Crew Member |
| 7 | Action Report Medal |
| 8 | Furniture Fairy New Model Armament Material New Model Gun Mount Improvement Material New Model Aerial Armament Material |
| 9 | Improvement Material Underway Replenishment Emergency Repair Material Food Supply Ship Mamiya |
| 10 | Food Supply Ship Irako New Model Rocket Development Material |
| 11 | Expensive craftable/stock equipment |
| 12 | Instant Repair Material |
| 13 | Development Material |
| 14 | Instant Construction Material |
| 15 | Any cheap craftable equipment |
Gallery completion guide
A guide not to have the best gears nor the best fleet, but just to complete your "kancodex" (Gallery) of equipment. Here are listed all obtainable equipment and how to obtain them in the current state of the game:
- List of craftable equipment: Buildable Equipment
- List of equipment only available via Quests, Akashi's Improvement Arsenal or as Stock equipment: Unbuildable Equipment
Quest trap advices
Some quests will ask to choose between several rewards, and sometimes the choice can lock unique equipment. This list gives reward picking advice in order to maximize the Gallery completion (assuming the following equipment are not already possessed):