|
|
| (143 intermediate revisions by the same user not shown) |
| Line 1: |
Line 1: |
| − | =Exped=
| + | '''Quest Reward Guide''' |
| − | ===Legends===
| |
| − | {| class="wikitable mw-collapsible mw-collapsed" width="100%"
| |
| − | ! colspan="2" style="font-size:120%"| About Total Yield
| |
| − | |-
| |
| − | ! width="20%" | HQ
| |
| − | |Admiral exp gain from the expedition
| |
| − | |-
| |
| − | !Ship
| |
| − | |Ship exp gain from the expedition
| |
| − | |-
| |
| − | ![[File:Fuel.png|30px]][[File:Ammunition.png|30px]][[File:Steel.png|30px]][[File:Bauxite.png|30px]]
| |
| − | |Base resources gain from expedition (at 100% ratio).
| |
| − | |-
| |
| − | !Rewards
| |
| − | |The item on the right side is always given upon great success. The one on the left has a 50 % chance to be rewarded. The quantities in the table denote only the maximum, it's possible to get fewer.
| |
| − | |}
| |
| − | | |
| − | {| class="wikitable mw-collapsible mw-collapsed" width="100%"
| |
| − | ! colspan="2" style="font-size:120%"| About Requirements
| |
| − | |-
| |
| − | ! width="20%" |Σ(Lv)
| |
| − | |Minimum total level of fleet
| |
| − | |-
| |
| − | ![[File:Flagship icon.png]]
| |
| − | |Minimum level of flagship
| |
| − | |-
| |
| − | !Minimum Fleet Size
| |
| − | |Required number of ships per type. XX denotes the minimum number of wild cards (any ship) necessary in addition to the specified ship types to reach a minimum number of ships in the fleet. For expeditions requiring less than 6 ships, extras may be added (e.g. to hit fleet-level requirements). See [[Glossary]] for more ship-type abbreviations.
| |
| − | |-
| |
| − | ![[File:Drum.png|30px]]
| |
| − | |Drums are required.
| |
| − | |-
| |
| − | ![[File:Ammunition.png|30px]][[File:Fuel.png|30px]]
| |
| − | |Ammo and fuel consumption per ship is given in supply bars. Each ship has 10 bars when fully resupplied. The value for each bar varies from one ship class to another.
| |
| − | |}
| |
| − | | |
| − | ===General Notes===
| |
| − | | |
| − | Unless precised otherwise, a ship type cannot be used as a substitute for another one.
| |
| − | | |
| − | [[:Category:Escort Carriers|Escort Carriers]] (CVE) are CVL specialized in ASW. All CVE count as CVL.
| |
| − | | |
| − | {{Firepower}}, {{AA}}, {{ASW}}, and/or {{LOS}} [[Stats]] required can be lower depending on the improvements level of each equipment.
| |
| − | | |
| − | {{ASW}} and/or {{LOS}} [[Stats]] required can be higher if aircraft are equipped. Aircraft get penalty value depending on slot size.
| |
| − | | |
| − | | |
| − | {| class="wikitable mw-collapsible mw-collapsed" width="50%" style="text-align: center"
| |
| − | ! colspan=6 style="font-size:120%"| Rates markers
| |
| − | |-
| |
| − | !colspan=2|Resource
| |
| − | |[[File:Fuel.png|30px]]||[[File:Ammunition.png|30px]]||[[File:Steel.png|30px]]||[[File:Bauxite.png|30px]]
| |
| − | |-
| |
| − | !rowspan=3|Total
| |
| − | !Average
| |
| − | | 116.3|| 73|| 115.3|| 89.8
| |
| − | |-
| |
| − | !{{TextGlow|"Great"|lightgray|text-colour=blue|glow-size=1px}}
| |
| − | | 200~399|| 100~299|| 200~299|| 150~249
| |
| − | |-
| |
| − | !{{color|red|'''"Outstanding"'''}}
| |
| − | | 400+|| 300+|| 300+|| 250+
| |
| − | |-
| |
| − | !rowspan=3|Hourly
| |
| − | !Average
| |
| − | | 31.1|| 32.5|| 21.0|| 15.8
| |
| − | |-
| |
| − | !{{TextGlow|"Great"|lightgray|text-colour=blue|glow-size=1px}}
| |
| − | | 62.2~99|| 65~99|| 30~59|| 25~49
| |
| − | |-
| |
| − | !{{color|red|'''"Outstanding"'''}}
| |
| − | | 100+|| 100+|| 60+|| 50+
| |
| − | |}
| |
| − | *Calculated without counting the monthlies.
| |
| | | | |
| − | ===World 1===
| + | A guide on what reward(s) to choose in choice quests. |
| − | <tabber>
| |
| − | |-|Total yield=
| |
| − | {|width=100%
| |
| − | |style="width:50px"|[[File:IcoArea1.png]]
| |
| − | |<div style="width:100%;background:lightgray;padding-left:10px;border-top-right-radius:10px;color:black">'''鎮守府海域 - Naval Base Waters'''</div>
| |
| − | |}
| |
| − | | |
| − | {|class="wikitable" width="100%" style="text-align:center"
| |
| − | !#
| |
| − | !width="25%"|Name
| |
| − | !Time
| |
| − | !width="1%"|
| |
| − | !HQ
| |
| − | !Ship
| |
| − | !width="1%"|
| |
| − | !{{Fuel}}
| |
| − | !{{Ammo}}
| |
| − | !{{Steel}}
| |
| − | !{{Bauxite}}
| |
| − | !width="1%"|
| |
| − | !colspan=2|Rewards
| |
| − | |-
| |
| − | |colspan=14 style="background:lightgray"|
| |
| − | |-
| |
| − | !01
| |
| − | |練習航海<br>Navigation Practice
| |
| − | |00:15
| |
| − | |rowspan=27 style="background:lightgray"|
| |
| − | |10
| |
| − | |10
| |
| − | |rowspan=27 style="background:lightgray"|
| |
| − | |
| |
| − | |30
| |
| − | |
| |
| − | |
| |
| − | |rowspan=27 style="background:lightgray"|
| |
| − | |
| |
| − | |
| |
| − | |-
| |
| − | |colspan=14 style="background:lightgray"|
| |
| − | |-
| |
| − | !02
| |
| − | |長距離練習航海<br>Long Distance Navigation Practice
| |
| − | |00:30
| |
| − | |20
| |
| − | |15
| |
| − | |
| |
| − | |{{TextGlow|'''100'''|lightgray|text-colour=blue|glow-size=1px}}
| |
| − | |30
| |
| − | |
| |
| − | |[[File:Item Icon Instant Repair Material.png|35px]]x1
| |
| − | |
| |
| − | |-
| |
| − | |colspan=14 style="background:lightgray"|
| |
| − | |-
| |
| − | !03
| |
| − | |警備任務<br>Defense Mission
| |
| − | |00:20
| |
| − | |30
| |
| − | |30
| |
| − | |30
| |
| − | |30
| |
| − | |40
| |
| − | |
| |
| − | |
| |
| − | |
| |
| − | |-
| |
| − | |colspan=14 style="background:lightgray"|
| |
| − | |-
| |
| − | !04
| |
| − | |対潜警戒任務<br>Anti-Submarine Mission
| |
| − | |00:50
| |
| − | |30
| |
| − | |40
| |
| − | |
| |
| − | |70
| |
| − | |
| |
| − | |
| |
| − | |[[File:Item Icon Instant Repair Material.png|35px]]x1
| |
| − | |[[File:Item Icon Furniture Box (Small).png|35px]]x1
| |
| − | |-
| |
| − | |colspan=14 style="background:lightgray"|
| |
| − | |-
| |
| − | !05
| |
| − | |海上護衛任務<br>Maritime Escort Mission
| |
| − | |01:30
| |
| − | |40
| |
| − | |40
| |
| − | |{{TextGlow|'''200'''|lightgray|text-colour=blue|glow-size=1px}}
| |
| − | |{{TextGlow|'''200'''|lightgray|text-colour=blue|glow-size=1px}}
| |
| − | |20
| |
| − | |20
| |
| − | |
| |
| − | |
| |
| − | |-
| |
| − | |colspan=14 style="background:lightgray"|
| |
| − | |-
| |
| − | !06
| |
| − | |防空射撃演習<br>Air Defense Shooting Practice
| |
| − | |00:40
| |
| − | |30
| |
| − | |50
| |
| − | |
| |
| − | |
| |
| − | |
| |
| − | |80
| |
| − | |[[File:Item Icon Furniture Box (Small).png|35px]]x1
| |
| − | |
| |
| − | |-
| |
| − | |colspan=14 style="background:lightgray"|
| |
| − | |-
| |
| − | !07
| |
| − | |観艦式予行<br>Naval Review Rehearsal
| |
| − | |01:00
| |
| − | |60
| |
| − | |120
| |
| − | |
| |
| − | |
| |
| − | |50
| |
| − | |30
| |
| − | |[[File:Item Icon Instant Construction Material.png|35px]]x1
| |
| − | |
| |
| − | |-
| |
| − | |colspan=14 style="background:lightgray"|
| |
| − | |-
| |
| − | !08
| |
| − | |観艦式<br>Naval Review
| |
| − | |03:00
| |
| − | |120
| |
| − | |140
| |
| − | |50
| |
| − | |{{TextGlow|'''100'''|lightgray|text-colour=blue|glow-size=1px}}
| |
| − | |50
| |
| − | |50
| |
| − | |[[File:Item Icon Instant Construction Material.png|35px]]x2
| |
| − | |[[File:Item Icon Development Material.png|35px]]x1
| |
| − | |-
| |
| − | |colspan=14 style="background:lightgray"|
| |
| − | |-
| |
| − | !A1
| |
| − | |兵站強化任務<br>Supply Line Strengthening Mission
| |
| − | |00:25
| |
| − | |15
| |
| − | |10
| |
| − | |45
| |
| − | |45
| |
| − | |
| |
| − | |
| |
| − | |
| |
| − | |
| |
| − | |-
| |
| − | |colspan=14 style="background:lightgray"|
| |
| − | |-
| |
| − | !A2
| |
| − | |海峡警備行動<br>Strait Defense Line
| |
| − | |00:55
| |
| − | |40
| |
| − | |45
| |
| − | |70
| |
| − | |40
| |
| − | |
| |
| − | |10
| |
| − | |[[File:Item Icon Development Material.png|35px]]x1
| |
| − | |[[File:Item Icon Instant Repair Material.png|35px]]x1
| |
| − | |-
| |
| − | |colspan=14 style="background:lightgray"|
| |
| − | |-
| |
| − | !A3
| |
| − | |長時間対潜警戒<br>Long Term Anti-Submarine Mission
| |
| − | |02:15
| |
| − | |55
| |
| − | |70
| |
| − | |120
| |
| − | |
| |
| − | |60
| |
| − | |60
| |
| − | |[[File:Item Icon Instant Repair Material.png|35px]]x1
| |
| − | |[[File:Item Icon Development Material.png|35px]]x2
| |
| − | |-
| |
| − | |colspan=14 style="background:lightgray"|
| |
| − | |-
| |
| − | !{{TextGlow|A4|lightgray|text-colour=blue|glow-size=1px}}
| |
| − | |南西方面連絡線哨戒<br>SouthWestern Connection Line Patrol
| |
| − | |01:50
| |
| − | |45
| |
| − | |55
| |
| − | |80
| |
| − | |120
| |
| − | |
| |
| − | |100
| |
| − | |[[File:Item Icon Development Material.png|35px]]x2
| |
| − | |[[File:Item Icon Instant Construction Material.png|35px]]x2
| |
| − | |-
| |
| − | |colspan=14 style="background:lightgray"|
| |
| − | |-
| |
| − | !style="color:red"|A5
| |
| − | |小笠原沖哨戒線<br>Ogasawara Coastal Patrol Line
| |
| − | |03:00
| |
| − | |55
| |
| − | |60
| |
| − | |
| |
| − | |300
| |
| − | |
| |
| − | |100
| |
| − | |[[File:Item Icon Development Material.png|35px]]x4
| |
| − | |[[File:Item Icon Instant Repair Material.png|35px]]x3
| |
| − | |-
| |
| − | |colspan=14 style="background:lightgray"|
| |
| − | |-
| |
| − | !style="color:red"|A6
| |
| − | |小笠原沖戦闘哨戒<br>Ogasawara Coastal Combat Patrol
| |
| − | |03:30
| |
| − | |90
| |
| − | |100
| |
| − | |100
| |
| − | |500
| |
| − | |100
| |
| − | |200
| |
| − | |[[File:Item Icon Development Material.png|35px]]x5
| |
| − | |[[File:Item Icon Improvement Material.png|35px]]x1
| |
| − | |}
| |
| | | | |
| − | |-|Hourly Yield=
| |
| | | | |
| − | {|width=100%
| + | =General choosing rules= |
| − | |style="width:50px"|[[File:IcoArea1.png]]
| + | Some very broad guidelines on what reward to choose for any given quest. |
| − | |<div style="width:100%;background:lightgray;padding-left:10px;border-top-right-radius:10px;color:black">'''鎮守府海域''' ''' - Naval Base Waters'''</div>
| + | This put an absolute priority on Quest exclusive rewards, with then useful and rare equipment, followed by "valuable" items such as "shop items" (e.g. RE), as well are rare items like ProtoPult, the rest being ordered in rarity/usefulness. |
| − | |}
| |
| | | | |
| − | {|class="wikitable" width="100%" style="text-align:center"
| + | This is not an absolute solution to every choice, with quantities, improvements, and relative usefulness affecting a lot such ordering. |
| − | !#
| |
| − | !width="25%"|Name
| |
| − | !Time
| |
| − | !width="1%"|
| |
| − | !HQ
| |
| − | !Ship
| |
| − | !width="1%"|
| |
| − | !{{Fuel}}
| |
| − | !{{Ammo}}
| |
| − | !{{Steel}}
| |
| − | !{{Bauxite}}
| |
| − | !width="1%"|
| |
| − | !colspan=2|Rewards
| |
| − | |-
| |
| − | |colspan=14 style="background:lightgray"|
| |
| − | |-
| |
| − | !01
| |
| − | |練習航海<br>Navigation Practice
| |
| − | |00:15
| |
| − | |rowspan=27 style="background:lightgray"|
| |
| − | |40
| |
| − | |40
| |
| − | |rowspan=27 style="background:lightgray"|
| |
| − | |
| |
| − | |style="color:red"|'''120'''
| |
| − | |
| |
| − | |
| |
| − | |rowspan=27 style="background:lightgray"|
| |
| − | |
| |
| − | |
| |
| − | |-
| |
| − | |colspan=14 style="background:lightgray"|
| |
| − | |-
| |
| − | !02
| |
| − | |長距離練習航海<br>Long Distance Navigation Practice
| |
| − | |00:30
| |
| − | |40
| |
| − | |30
| |
| − | |
| |
| − | |style="color:red"|'''200'''
| |
| − | |style="color:red"|'''60'''
| |
| − | |
| |
| − | |[[File:Item Icon Instant Repair Material.png|35px]]x1
| |
| − | |
| |
| − | |-
| |
| − | |colspan=14 style="background:lightgray"|
| |
| − | |-
| |
| − | !03
| |
| − | |警備任務<br>Defense Mission
| |
| − | |00:20
| |
| − | |90
| |
| − | |{{TextGlow|'''90'''|lightgray|text-colour=blue|glow-size=1px}}
| |
| − | |{{TextGlow|'''90'''|lightgray|text-colour=blue|glow-size=1px}}
| |
| − | |{{TextGlow|'''90'''|lightgray|text-colour=blue|glow-size=1px}}
| |
| − | |{{TextGlow|'''120'''|lightgray|text-colour=blue|glow-size=1px}}
| |
| − | |
| |
| − | |
| |
| − | |
| |
| − | |-
| |
| − | |colspan=14 style="background:lightgray"|
| |
| − | |-
| |
| − | !04
| |
| − | |対潜警戒任務<br>Anti-Submarine Mission
| |
| − | |00:50
| |
| − | |36
| |
| − | |48
| |
| − | |
| |
| − | |{{TextGlow|'''84'''|lightgray|text-colour=blue|glow-size=1px}}
| |
| − | |
| |
| − | |
| |
| − | |[[File:Item Icon Instant Repair Material.png|35px]]x1
| |
| − | |[[File:Item Icon Furniture Box (Small).png|35px]]x1
| |
| − | |-
| |
| − | |colspan=14 style="background:lightgray"|
| |
| − | |-
| |
| − | !05
| |
| − | |海上護衛任務<br>Maritime Escort Mission
| |
| − | |01:30
| |
| − | |26
| |
| − | |26
| |
| − | |style="color:red"|'''133'''
| |
| − | |style="color:red"|'''133'''
| |
| − | |13
| |
| − | |13
| |
| − | |
| |
| − | |
| |
| − | |-
| |
| − | |colspan=14 style="background:lightgray"|
| |
| − | |-
| |
| − | !06
| |
| − | |防空射撃演習<br>Air Defense Shooting Practice
| |
| − | |00:40
| |
| − | |45
| |
| − | |{{TextGlow|'''75'''|lightgray|text-colour=blue|glow-size=1px}}
| |
| − | |
| |
| − | |
| |
| − | |
| |
| − | |style="color:red"|'''120'''
| |
| − | |[[File:Item Icon Furniture Box (Small).png|35px]]x1
| |
| − | |
| |
| − | |-
| |
| − | |colspan=14 style="background:lightgray"|
| |
| − | |-
| |
| − | !07
| |
| − | |観艦式予行<br>Naval Review Rehearsal
| |
| − | |01:00
| |
| − | |60
| |
| − | |style="color:red"|'''120'''
| |
| − | |
| |
| − | |
| |
| − | |{{TextGlow|'''50'''|lightgray|text-colour=blue|glow-size=1px}}
| |
| − | |{{TextGlow|'''30'''|lightgray|text-colour=blue|glow-size=1px}}
| |
| − | |[[File:Item Icon Instant Construction Material.png|35px]]x1
| |
| − | |
| |
| − | |-
| |
| − | |colspan=14 style="background:lightgray"|
| |
| − | |-
| |
| − | !08
| |
| − | |観艦式<br>Naval Review
| |
| − | |03:00
| |
| − | |40
| |
| − | |46
| |
| − | |16
| |
| − | |33
| |
| − | |16
| |
| − | |16
| |
| − | |[[File:Item Icon Instant Construction Material.png|35px]]x2
| |
| − | |[[File:Item Icon Development Material.png|35px]]x1
| |
| − | |-
| |
| − | |colspan=14 style="background:lightgray"|
| |
| − | |-
| |
| − | !A1
| |
| − | |兵站強化任務<br>Supply Line Strengthening Mission
| |
| − | |00:25
| |
| − | |36
| |
| − | |24
| |
| − | |style="color:red"|'''108'''
| |
| − | |style="color:red"|'''108'''
| |
| − | |
| |
| − | |
| |
| − | |
| |
| − | |
| |
| − | |-
| |
| − | |colspan=14 style="background:lightgray"|
| |
| − | |-
| |
| − | !A2
| |
| − | |海峡警備行動<br>Strait Defense Line
| |
| − | |00:55
| |
| − | |44
| |
| − | |49
| |
| − | |{{TextGlow|'''76'''|lightgray|text-colour=blue|glow-size=1px}}
| |
| − | |44
| |
| − | |
| |
| − | |11
| |
| − | |[[File:Item Icon Development Material.png|35px]]x1
| |
| − | |[[File:Item Icon Instant Repair Material.png|35px]]x1
| |
| − | |-
| |
| − | |colspan=14 style="background:lightgray"|
| |
| − | |-
| |
| − | !'''A3
| |
| − | |長時間対潜警戒<br>Long Term Anti-Submarine Mission
| |
| − | |02:15
| |
| − | |24
| |
| − | |31
| |
| − | |53
| |
| − | |
| |
| − | |27
| |
| − | |{{TextGlow|'''27'''|lightgray|text-colour=blue|glow-size=1px}}
| |
| − | |[[File:Item Icon Instant Repair Material.png|35px]]x1
| |
| − | |[[File:Item Icon Development Material.png|35px]]x2
| |
| − | |-
| |
| − | |colspan=14 style="background:lightgray"|
| |
| − | |-
| |
| − | !{{TextGlow|A4|lightgray|text-colour=blue|glow-size=1px}}
| |
| − | |南西方面連絡線哨戒<br>SouthWestern Connection Line Patrol
| |
| − | |01:50
| |
| − | |25
| |
| − | |30
| |
| − | |44
| |
| − | |65
| |
| − | |
| |
| − | |55
| |
| − | |[[File:Item Icon Instant Repair Material.png|35px]]x2
| |
| − | |[[File:Item Icon Instant Construction Material.png|35px]]x2
| |
| − | |-
| |
| − | |colspan=14 style="background:lightgray"|
| |
| − | |-
| |
| − | !style="color:red"|A5
| |
| − | |小笠原沖哨戒線<br>Ogasawara Coastal Patrol Line
| |
| − | |03:00
| |
| − | |18
| |
| − | |20
| |
| − | |
| |
| − | |100
| |
| − | |
| |
| − | |33
| |
| − | |[[File:Item Icon Development Material.png|35px]]x4
| |
| − | |[[File:Item Icon Instant Repair Material.png|35px]]x3
| |
| − | |-
| |
| − | |colspan=14 style="background:lightgray"|
| |
| − | |-
| |
| − | !style="color:red"|A6
| |
| − | |小笠原沖戦闘哨戒<br>Ogasawara Coastal Combat Patrol
| |
| − | |03:30
| |
| − | |26
| |
| − | |29
| |
| − | |29
| |
| − | |143
| |
| − | |29
| |
| − | |57
| |
| − | |[[File:Item Icon Development Material.png|35px]]x5
| |
| − | |[[File:Item Icon Improvement Material.png|35px]]x1
| |
| − | |}
| |
| | | | |
| − | |-|Requirements=
| + | {|class="wikitable width="50%" style="text-align:center; margin:auto" |
| − | | + | !Rank |
| − | {|width=100%
| + | !Reward |
| − | |style="width:50px;"|[[File:IcoArea1.png]]
| |
| − | |<div style="width:100%;background:lightgray;padding-left:10px;border-top-right-radius:10px;color:black">'''鎮守府海域 - Naval Base Waters'''</div>
| |
| − | |}
| |
| − | | |
| − | {|class="wikitable" width="100%" style="text-align:center" | |
| − | !#
| |
| − | !width="25%"|Name
| |
| − | !Time
| |
| − | !width="1%"|
| |
| − | !Σ(Lv)
| |
| − | ![[File:Flagship icon.png]]
| |
| − | !width="1%"|
| |
| − | !Minimum Fleet
| |
| − | !width="10%"|Requirements
| |
| − | !width="1%"|
| |
| − | !{{Fuel}}
| |
| − | !{{Ammo}}
| |
| − | |-
| |
| − | |colspan=14 style="background:lightgray"|
| |
| − | |-
| |
| − | !01
| |
| − | |練習航海<br>Navigation Practice
| |
| − | |00:15
| |
| − | |rowspan=27 style="background:lightgray"|
| |
| − | |
| |
| − | |'''Lv''' 1
| |
| − | |rowspan=27 style="background:lightgray"|
| |
| − | |2XX
| |
| − | |
| |
| − | |rowspan=27 style="background:lightgray"|
| |
| − | | -3
| |
| − | |
| |
| − | |-
| |
| − | |colspan=14 style="background:lightgray"|
| |
| − | |-
| |
| − | !02
| |
| − | |長距離練習航海<br>Long Distance Navigation Practice
| |
| − | |00:30
| |
| − | |
| |
| − | |'''Lv''' 2
| |
| − | |4XX
| |
| − | |
| |
| − | | -5
| |
| − | |
| |
| − | |-
| |
| − | |colspan=14 style="background:lightgray"|
| |
| − | |-
| |
| − | !03
| |
| − | |警備任務<br>Defense Mission
| |
| − | |00:20
| |
| − | |
| |
| − | |'''Lv''' 3
| |
| − | |3XX
| |
| − | |
| |
| − | | -3
| |
| − | | -2
| |
| − | |-
| |
| − | |colspan=14 style="background:lightgray"|
| |
| − | |-
| |
| − | !04
| |
| − | |対潜警戒任務<br>Anti-Submarine Mission
| |
| − | |00:50
| |
| − | |
| |
| − | |'''Lv''' 3
| |
| − | |1CL 2DD/DE<br>'''or'''<br>1CVE 2DD/2DE<br>'''or'''<br>1DD 3DE<br>'''or'''<br>1CT 2DE
| |
| − | |
| |
| − | | -5
| |
| − | |
| |
| − | |-
| |
| − | |colspan=14 style="background:lightgray"|
| |
| − | |-
| |
| − | !05
| |
| − | |海上護衛任務<br>Maritime Escort Mission
| |
| − | |01:30
| |
| − | |
| |
| − | |'''Lv''' 3
| |
| − | |1CL 2DD/DE 1XX<br>'''or'''<br>1CVE 2DD/2DE 1XX<br>'''or'''<br>1DD 3DE<br>'''or'''<br>1CT 2DE 1XX
| |
| − | |
| |
| − | | -5
| |
| − | |
| |
| − | |-
| |
| − | |colspan=14 style="background:lightgray"|
| |
| − | |-
| |
| − | !06
| |
| − | |防空射撃演習<br>Air Defense Shooting Practice
| |
| − | |00:40
| |
| − | |
| |
| − | |'''Lv''' 4
| |
| − | |4XX
| |
| − | |
| |
| − | | -3
| |
| − | | -2
| |
| − | |-
| |
| − | |colspan=14 style="background:lightgray"|
| |
| − | |-
| |
| − | !07
| |
| − | |観艦式予行<br>Naval Review Rehearsal
| |
| − | |01:00
| |
| − | |
| |
| − | |'''Lv''' 5
| |
| − | |6XX
| |
| − | |
| |
| − | | -5
| |
| − | |
| |
| − | |-
| |
| − | |colspan=14 style="background:lightgray"|
| |
| − | |-
| |
| − | !08
| |
| − | |観艦式<br>Naval Review
| |
| − | |03:00
| |
| − | |
| |
| − | |'''Lv''' 6
| |
| − | |6XX
| |
| − | |
| |
| − | | -5
| |
| − | | -2
| |
| − | |-
| |
| − | |colspan=14 style="background:lightgray"|
| |
| − | |-
| |
| − | !A1
| |
| − | |兵站強化任務<br>Supply Line Strengthening Mission
| |
| − | |00:25
| |
| − | |'''Lv''' 10
| |
| − | |'''Lv''' 5
| |
| − | |3DD/DE 1XX
| |
| − | |
| |
| − | | -4
| |
| − | |
| |
| − | |-
| |
| − | |colspan=14 style="background:lightgray"|
| |
| − | |-
| |
| − | !A2
| |
| − | |海峡警備行動<br>Strait Defense Line
| |
| − | |00:55
| |
| − | |
| |
| − | |'''Lv''' 20
| |
| − | |4DD/DE
| |
| − | |50 {{Firepower}}<br>70 {{AA}}<br>180 {{ASW}}
| |
| − | | -5
| |
| − | | -2
| |
| − | |-
| |
| − | |colspan=14 style="background:lightgray"|
| |
| − | |-
| |
| − | !A3
| |
| − | |長時間対潜警戒<br>Long Term Anti-Submarine Mission
| |
| − | |02:15
| |
| − | |'''Lv''' 185
| |
| − | |'''Lv''' 35
| |
| − | |1CL 3DD/DE 1XX<br>'''or'''<br>1CVE 2DD/2DE 2XX<br>'''or'''<br>1DD 3DE 1XX<br>'''or'''<br>1CT/CL 2DE 2XX
| |
| − | |280 {{ASW}}<br>60 {{LOS}}
| |
| − | | -7
| |
| − | | -4
| |
| − | |-
| |
| − | |colspan=14 style="background:lightgray"|
| |
| − | |-
| |
| − | !{{TextGlow|A4|lightgray|text-colour=blue|glow-size=1px}}
| |
| − | |南西方面連絡線哨戒<br>SouthWestern Connection Line Patrol
| |
| − | |01:50
| |
| − | |'''Lv''' 200
| |
| − | |'''Lv''' 40
| |
| − | |'''Monthly Expedition'''<br>1CL 2DD 2XX<br>'''or'''<br>1CVE 2DD/2DE 2XX<br>'''or'''<br>1DD 3DE 1XX<br>'''or'''<br>1CT/CL 2DE 2XX
| |
| − | |300 {{Firepower}}<br>200 {{AA}}<br>200 {{ASW}}<br>120 {{LOS}}
| |
| − | | -7.5
| |
| − | | -6
| |
| − | |-
| |
| − | |colspan=14 style="background:lightgray"|
| |
| − | |-
| |
| − | !style="color:red"|A5
| |
| − | |小笠原沖哨戒線<br>Ogasawara Coastal Patrol Line
| |
| − | |03:00
| |
| − | |'''Lv''' 230
| |
| − | |'''Lv''' 45
| |
| − | |'''Monthly Expedition'''<br>'''{{color|red|Combat Expedition (I)}}'''<br>1CL 3DD 1XX<br>'''or'''<br>1CVE 2DD/2DE 2XX<br>'''or'''<br>1DD 3DE 1XX<br>'''or'''<br>1CT/CL 2DE 2XX
| |
| − | | 280 {{Firepower}}<br>220 {{AA}}<br>240 {{ASW}}<br>150 {{LOS}}
| |
| − | | -8
| |
| − | | -7.5
| |
| − | |-
| |
| − | |colspan=14 style="background:lightgray"|
| |
| − | |-
| |
| − | !style="color:red"|A6
| |
| − | |小笠原沖戦闘哨戒<br>Ogasawara Coastal Combat Patrol
| |
| − | |03:30
| |
| − | |'''Lv''' 290
| |
| − | |'''Lv''' 55
| |
| − | |'''Monthly Expedition'''<br>'''{{color|red|Combat Expedition (II)}}'''<br>1CL 3DD 2XX<br>'''or'''<br>1CVE 2DD/2DE 3XX<br>'''or'''<br>1DD 3DE 2XX<br>'''or'''<br>1CT/CL 2DE 3XX
| |
| − | |330 {{Firepower}}<br>300 {{AA}}<br>270 {{ASW}}<br>180 {{LOS}}
| |
| − | | -9
| |
| − | | -9.5
| |
| − | |}
| |
| − | </tabber>
| |
| − | | |
| − | ===World 2===
| |
| − | <tabber>
| |
| − | |-|Total yield=
| |
| − | {|width=100%
| |
| − | |style="width:50px"|[[File:IcoArea2.png]]
| |
| − | |<div style="width:100%;background:#cccc99;padding-left:10px;border-top-right-radius:10px;color:black">'''南西諸島海域 - Nansei Island Waters'''</div>
| |
| − | |}
| |
| − | | |
| − | {|class="wikitable" width="100%" style="text-align:center"
| |
| − | !#
| |
| − | !width="25%"|Name
| |
| − | !Time
| |
| − | !width="1%"|
| |
| − | !HQ
| |
| − | !Ship
| |
| − | !width="1%"|
| |
| − | !{{Fuel}}
| |
| − | !{{Ammo}}
| |
| − | !{{Steel}}
| |
| − | !{{Bauxite}}
| |
| − | !width="1%"|
| |
| − | !colspan=2|Rewards
| |
| − | |-
| |
| − | |colspan=14 style="background:#cccc99"|
| |
| − | |-
| |
| − | !09
| |
| − | |タンカー護衛任務<br>Tanker Escort Mission
| |
| − | |04:00
| |
| − | |rowspan=27 style="background:#cccc99"|
| |
| − | |60
| |
| − | |60
| |
| − | |rowspan=27 style="background:#cccc99"|
| |
| − | |{{TextGlow|'''350'''|lightgray|text-colour=blue|glow-size=1px}}
| |
| − | |
| |
| − | |
| |
| − | |
| |
| − | |rowspan=27 style="background:#cccc99"|
| |
| − | |[[File:Item Icon Furniture Box (Small).png|35px]]x1
| |
| − | |[[File:Item Icon Instant Repair Material.png|35px]]x2
| |
| − | |-
| |
| − | |colspan=14 style="background:#cccc99"|
| |
| − | |-
| |
| − | !10
| |
| − | |強行偵察任務<br>Enforced Reconnaissance Mission
| |
| − | |01:30
| |
| − | |40
| |
| − | |50
| |
| − | |
| |
| − | |50
| |
| − | |
| |
| − | |30
| |
| − | |[[File:Item Icon Instant Repair Material.png|35px]]x1
| |
| − | |[[File:Item Icon Instant Construction Material.png|35px]]x1
| |
| − | |-
| |
| − | |colspan=14 style="background:#cccc99"|
| |
| − | |-
| |
| − | !11
| |
| − | |ボーキサイト輸送任務<br>Bauxite Transport Mission
| |
| − | |05:00
| |
| − | |40
| |
| − | |40
| |
| − | |
| |
| − | |
| |
| − | |
| |
| − | |style="color:red"|'''250'''
| |
| − | ||[[File:Item Icon Furniture Box (Small).png|35px]]x1
| |
| − | ||[[File:Item Icon Instant Repair Material.png|35px]]x1
| |
| − | |-
| |
| − | |colspan=14 style="background:#cccc99"|
| |
| − | |-
| |
| − | !12
| |
| − | |資源輸送任務<br>Resource Transport Mission
| |
| − | |08:00
| |
| − | |60
| |
| − | |50
| |
| − | |50
| |
| − | |{{TextGlow|'''250'''|lightgray|text-colour=blue|glow-size=1px}}
| |
| − | |{{TextGlow|'''200'''|lightgray|text-colour=blue|glow-size=1px}}
| |
| − | |50
| |
| − | |[[File:Item Icon Furniture Box (Medium).png|35px]]x1
| |
| − | |[[File:Item Icon Development Material.png|35px]]x1
| |
| − | |-
| |
| − | |colspan=14 style="background:#cccc99"|
| |
| − | |-
| |
| − | !13
| |
| − | |鼠輸送作戦<br>Rat Transport Operation
| |
| − | |04:00
| |
| − | |70
| |
| − | |60
| |
| − | |{{TextGlow|'''240'''|lightgray|text-colour=blue|glow-size=1px}}
| |
| − | |style="olor:red"|'''300'''
| |
| − | |
| |
| − | |
| |
| − | |[[File:Item Icon Instant Repair Material.png|35px]]x2
| |
| − | |[[File:Item Icon Furniture Box (Small).png|35px]]x1
| |
| − | |-
| |
| − | |colspan=14 style="background:#cccc99"|
| |
| − | |-
| |
| − | !14
| |
| − | |包囲陸戦隊撤収作戦<br>Marine Siege Evacuation Operation
| |
| − | |06:00
| |
| − | |90
| |
| − | |100
| |
| − | |
| |
| − | |{{TextGlow|'''240'''|lightgray|text-colour=blue|glow-size=1px}}
| |
| − | |{{TextGlow|'''200'''|lightgray|text-colour=blue|glow-size=1px}}
| |
| − | ||30
| |
| − | | align="center" height="35px" |[[File:Item Icon Instant Repair Material.png|35px]]x1
| |
| − | | align="center" height="35px" |[[File:Item Icon Development Material.png|35px]]x1
| |
| − | |-
| |
| − | |colspan=14 style="background:#cccc99"|
| |
| − | |-
| |
| − | !15
| |
| − | |囮機動部隊支援作戦<br>Decoy Naval Task Force Support Operation
| |
| − | |12:00
| |
| − | |100
| |
| − | |160
| |
| − | |
| |
| − | |
| |
| − | |style="color:red"|'''300'''
| |
| − | |style="color:red"|'''400'''
| |
| − | |[[File:Item Icon Furniture Box (Large).png|35px]]x1
| |
| − | |[[File:Item Icon Development Material.png|35px]]x1
| |
| − | |-
| |
| − | |colspan=14 style="background:#cccc99"|
| |
| − | |-
| |
| − | !16
| |
| − | |艦隊決戦援護作戦<br>Decisive Battle Fleet Support Operation
| |
| − | |15:00
| |
| − | |120
| |
| − | |200
| |
| − | |style="color:red"|'''500'''
| |
| − | |style="color:red"|'''500'''
| |
| − | |{{TextGlow|'''200'''|lightgray|text-colour=blue|glow-size=1px}}
| |
| − | |{{TextGlow|'''200'''|lightgray|text-colour=blue|glow-size=1px}}
| |
| − | |[[File:Item Icon Instant Construction Material.png|35px]]x2
| |
| − | |[[File:Item Icon Development Material.png|35px]]x2
| |
| − | |-
| |
| − | |colspan=14 style="background:#cccc99"|
| |
| − | |-
| |
| − | !B1
| |
| − | |南西方面航空偵察作戦<br>South Western Air Reconnaissance Operation
| |
| − | |00:35
| |
| − | |35
| |
| − | |40
| |
| − | |
| |
| − | |
| |
| − | |10
| |
| − | |30
| |
| − | |[[File:Item Icon Furniture Box (Small).png|35px]]x1
| |
| − | |[[File:Item Icon Instant Repair Material.png|35px]]x1
| |
| − | |-
| |
| − | |colspan=14 style="background:#cccc99"|
| |
| − | |-
| |
| − | !{{TextGlow|B2|lightgray|text-colour=blue|glow-size=1px}}
| |
| − | |敵泊地強襲反撃作戦<br>Enemy Harbor Assault Counter Attack Operation
| |
| − | |08:40
| |
| − | |70
| |
| − | |130
| |
| − | |300
| |
| − | |200
| |
| − | |100
| |
| − | |
| |
| − | |[[File:Item Icon Development Material.png|35px]]x2
| |
| − | |[[File:Item Icon Instant Repair Material.png|35px]]x2
| |
| − | |-
| |
| − | |colspan=14 style="background:#cccc99"|
| |
| − | |-
| |
| − | !{{TextGlow|B3|lightgray|text-colour=blue|glow-size=1px}}
| |
| − | |南西諸島離島哨戒作戦<br>Nansei Island Remote Island Patrolling Operation
| |
| − | |02:50
| |
| − | |50
| |
| − | |70
| |
| − | |
| |
| − | |100
| |
| − | |100
| |
| − | |180
| |
| − | |[[File:Item Icon Furniture Box (Large).png|35px]]x1
| |
| − | |[[File:Item Icon Instant Repair Material.png|35px]]x2
| |
| − | |-
| |
| − | |colspan=14 style="background:#cccc99"|
| |
| − | |-
| |
| − | !style="color:red"|B4
| |
| − | |南西諸島離島防衛作戦<br>Nansei Island Remote Island Defense Operation
| |
| − | |07:30
| |
| − | |60
| |
| − | |100
| |
| − | |
| |
| − | |
| |
| − | |1200
| |
| − | |650
| |
| − | |[[File:Item Icon Development Material.png|35px]]x4
| |
| − | |[[File:Item Icon Improvement Material.png|35px]]x1
| |
| − | |-
| |
| − | |colspan=14 style="background:#cccc99"|
| |
| − | |-
| |
| − | !style="color:red"|B5
| |
| − | |南西諸島捜索撃滅戦<br>Nansei Island Search and Destroy Mission
| |
| − | |06:30
| |
| − | |100
| |
| − | |130
| |
| − | |500
| |
| − | |500
| |
| − | |1000
| |
| − | |750
| |
| − | |[[File:Item Icon Instant Repair Material.png|35px]]x4
| |
| − | |[[File:Item Icon Improvement Material.png|35px]]x1
| |
| − | |-
| |
| − | |colspan=14 style="background:#cccc99"|
| |
| − | |-
| |
| − | !style="color:red"|B6
| |
| − | |精鋭水雷戦隊夜襲<br>Elite Destroyer Squadron Night Raid
| |
| − | |05:50
| |
| − | |110
| |
| − | |140
| |
| − | |600
| |
| − | |1000
| |
| − | |600
| |
| − | |600
| |
| − | |[[File:Item Icon Development Material.png|35px]]x5
| |
| − | |[[File:Item Icon Improvement Material.png|35px]]x1
| |
| − | |}
| |
| − | | |
| − | |-|Hourly Yield=
| |
| − | | |
| − | {|width=100%
| |
| − | |style="width:50px"| [[File:IcoArea2.png]]
| |
| − | |<div style="width:100%;background:#cccc99;padding-left:10px;border-top-right-radius:10px;color:black">'''南西諸島海域 - Nansei Island Waters'''</div>
| |
| − | |}
| |
| − | | |
| − | {|class="wikitable" width="100%" style="text-align:center"
| |
| − | !#
| |
| − | !width="25%"|Name
| |
| − | !Time
| |
| − | !width="1%"|
| |
| − | !HQ
| |
| − | !Ship
| |
| − | !width="1%"|
| |
| − | !{{Fuel}}
| |
| − | !{{Ammo}}
| |
| − | !{{Steel}}
| |
| − | !{{Bauxite}}
| |
| − | !width="1%"|
| |
| − | !colspan=2|Rewards
| |
| − | |-
| |
| − | |colspan=14 style="background:#cccc99"|
| |
| − | |-
| |
| − | !09
| |
| − | |タンカー護衛任務<br>Tanker Escort Mission
| |
| − | |04:00
| |
| − | |rowspan=27 style="background:#cccc99"|
| |
| − | |15
| |
| − | |15
| |
| − | |rowspan=27 style="background:#cccc99"|
| |
| − | |{{TextGlow|'''88'''|lightgray|text-colour=blue|glow-size=1px}}
| |
| − | |
| |
| − | |
| |
| − | |
| |
| − | |rowspan=27 style="background:#cccc99"|
| |
| − | |[[File:Item Icon Furniture Box (Small).png|35px]]x1
| |
| − | |[[File:Item Icon Instant Repair Material.png|35px]]x2
| |
| − | |-
| |
| − | |colspan=14 style="background:#cccc99"|
| |
| − | |-
| |
| − | !10
| |
| − | |強行偵察任務<br>Enforced Reconnaissance Mission
| |
| − | |01:30
| |
| − | |26
| |
| − | |33
| |
| − | |
| |
| − | |33
| |
| − | |
| |
| − | |20
| |
| − | |[[File:Item Icon Instant Repair Material.png|35px]]x1
| |
| − | |[[File:Item Icon Instant Construction Material.png|35px]]x1
| |
| − | |-
| |
| − | |colspan=14 style="background:#cccc99"|
| |
| − | |-
| |
| − | !11
| |
| − | |ボーキサイト輸送任務<br>Bauxite Transport Mission
| |
| − | |05:00
| |
| − | |8
| |
| − | |8
| |
| − | |
| |
| − | |
| |
| − | |
| |
| − | |style="color:red"|'''50'''
| |
| − | |[[File:Item Icon Furniture Box (Small).png|35px]]x1
| |
| − | |[[File:Item Icon Instant Repair Material.png|35px]]x1
| |
| − | |-
| |
| − | |colspan=14 style="background:#cccc99"|
| |
| − | |-
| |
| − | !12
| |
| − | |資源輸送任務<br>Resource Transport Mission
| |
| − | |08:00
| |
| − | |7
| |
| − | |6
| |
| − | |6
| |
| − | |31
| |
| − | |25
| |
| − | |6
| |
| − | |[[File:Item Icon Furniture Box (Medium).png|35px]]x1
| |
| − | |[[File:Item Icon Development Material.png|35px]]x1
| |
| − | |-
| |
| − | |colspan=14 style="background:#cccc99"|
| |
| − | |-
| |
| − | !13 | |
| − | |鼠輸送作戦<br>Rat Transport Operation
| |
| − | |04:00
| |
| − | |17
| |
| − | |15
| |
| − | |60
| |
| − | |{{TextGlow|'''75'''|lightgray|text-colour=blue|glow-size=1px}}
| |
| − | |
| |
| − | |
| |
| − | |[[File:Item Icon Instant Repair Material.png|35px]]x2
| |
| − | |[[File:Item Icon Furniture Box (Small).png|35px]]x1
| |
| − | |-
| |
| − | |colspan=14 style="background:#cccc99"|
| |
| − | |-
| |
| − | !14 | |
| − | |包囲陸戦隊撤収作戦<br>Marine Siege Evacuation Operation
| |
| − | |06:00
| |
| − | |15
| |
| − | |16
| |
| − | |
| |
| − | |40
| |
| − | |{{TextGlow|'''33'''|lightgray|text-colour=blue|glow-size=1px}}
| |
| − | |
| |
| − | |[[File:Item Icon Instant Repair Material.png|35px]]x1
| |
| − | |[[File:Item Icon Development Material.png|35px]]x1
| |
| − | |-
| |
| − | |colspan=14 style="background:#cccc99"|
| |
| − | |-
| |
| − | !15
| |
| − | |囮機動部隊支援作戦<br>Decoy Naval Task Force Support Operation
| |
| − | |12:00
| |
| − | |8
| |
| − | |13
| |
| − | |
| |
| − | |
| |
| − | |25
| |
| − | |{{TextGlow|'''33'''|lightgray|text-colour=blue|glow-size=1px}}
| |
| − | |[[File:Item Icon Furniture Box (Large).png|35px]]x1
| |
| − | |[[File:Item Icon Development Material.png|35px]]x1
| |
| − | |-
| |
| − | |colspan=14 style="background:#cccc99"|
| |
| − | |-
| |
| − | !16
| |
| − | |艦隊決戦援護作戦<br>Decisive Battle Fleet Support Operation
| |
| − | |15:00
| |
| − | |8
| |
| − | |13
| |
| − | |33
| |
| − | |33
| |
| − | |13
| |
| − | |13
| |
| − | |[[File:Item Icon Instant Construction Material.png|35px]]x2
| |
| − | |[[File:Item Icon Development Material.png|35px]]x2
| |
| − | |-
| |
| − | |colspan=14 style="background:#cccc99"|
| |
| − | |-
| |
| − | !B1
| |
| − | |南西方面航空偵察作戦<br>South Western Air Reconnaissance Operation
| |
| − | |00:35
| |
| − | |60
| |
| − | |69
| |
| − | |
| |
| − | |
| |
| − | |17
| |
| − | |style="color:red"|'''51'''
| |
| − | |[[File:Item Icon Furniture Box (Small).png|35px]]x1
| |
| − | |[[File:Item Icon Instant Repair Material.png|35px]]x1
| |
| − | |-
| |
| − | |colspan=14 style="background:#cccc99"|
| |
| | |- | | |- |
| − | !{{TextGlow|B2|lightgray|text-colour=blue|glow-size=1px}} | + | !1 |
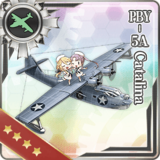
| − | |敵泊地強襲反撃作戦<br>Enemy Harbor Assault Counter Attack Operation
| + | |Any "[[#Quest trap advices|Quest Exclusive]]" limited equipment |
| − | |08:40
| |
| − | |8
| |
| − | |15
| |
| − | |34
| |
| − | |23
| |
| − | |11
| |
| − | |
| |
| − | |[[File:Item Icon Development Material.png|35px]]x2
| |
| − | |[[File:Item Icon Instant Repair Material.png|35px]]x2 | |
| | |- | | |- |
| − | |colspan=14 style="background:#cccc99"| | + | !2 |
| | + | |Furniture |
| | |- | | |- |
| − | !{{TextGlow|B3|lightgray|text-colour=blue|glow-size=1px}} | + | !3 |
| − | |南西諸島離島哨戒作戦<br>Nansei Island Remote Island Patrolling Operation
| + | |Limited / expensive "Akashi only" equipment |
| − | |02:50
| |
| − | |18
| |
| − | |25
| |
| − | |
| |
| − | |32
| |
| − | |32
| |
| − | |58
| |
| − | |[[File:Item Icon Furniture Box (Large).png|35px]]x1
| |
| − | |[[File:Item Icon Instant Repair Material.png|35px]]x2 | |
| | |- | | |- |
| − | |colspan=14 style="background:#cccc99"| | + | !4 |
| | + | |Rare stock equipment |
| | |- | | |- |
| − | !style="color:red"|B4 | + | !5 |
| − | |南西諸島離島防衛作戦<br>Nansei Island Remote Island Defense Operation | + | |{{ItemStack|item={{QuestRewardItem|Construction Corps}}|text-position=bottom:-48px;right:15px|font-size=13px|text=$$$|glow-size=5px|text-color=fff|glow-color=000}} {{ItemStack|item={{QuestRewardItem|Reinforcement Expansion}}|text-position=bottom:-48px;right:15px|font-size=13px|text=$$$|glow-size=5px|text-color=fff|glow-color=000}} {{QuestRewardItem|Prototype Flight Deck Catapult}} |
| − | |07:30 | |
| − | |8 | |
| − | |13 | |
| − | | | |
| − | | | |
| − | |160 | |
| − | |81 | |
| − | |[[File:Item Icon Development Material.png|35px]]x4 | |
| − | |[[File:Item Icon Improvement Material.png|35px]]x1 | |
| | |- | | |- |
| − | |colspan=14 style="background:#cccc99"| | + | !6 |
| | + | |{{QuestRewardItem|Remodel Blueprint}} {{QuestRewardItem|Skilled Crew Member}} |
| | |- | | |- |
| − | !style="color:red"|B5 | + | !7 |
| − | |南西諸島捜索撃滅戦<br>Nansei Island Search and Destroy Mission
| + | |{{QuestRewardItem|Action Report}} {{QuestRewardItem|Medal}} |
| − | |06:30
| |
| − | |15
| |
| − | |20 | |
| − | |77
| |
| − | |77
| |
| − | |154
| |
| − | |115
| |
| − | |[[File:Item Icon Instant Repair Material.png|35px]]x4
| |
| − | |[[File:Item Icon Improvement Material.png|35px]]x1 | |
| | |- | | |- |
| − | |colspan=14 style="background:#cccc99"|
| + | !8 |
| − | |-
| + | |{{ItemStack|item={{QuestRewardItem|Furniture Fairy}}|text-position=bottom:-48px;right:15px|font-size=13px|text=$|glow-size=5px|text-color=fff|glow-color=000}} {{QuestRewardItem|New Model Armament Material}} {{QuestRewardItem|New Model Gun Mount Improvement Material}} {{QuestRewardItem|New Model Aerial Armament Material}} |
| − | !style="color:red"|B6 | |
| − | |精鋭水雷戦隊夜襲<br>Elite Destroyer Squadron Night Raid | |
| − | |05:50 | |
| − | |19
| |
| − | |24
| |
| − | |116
| |
| − | |177
| |
| − | |116
| |
| − | |116
| |
| − | |[[File:Item Icon Development Material.png|35px]]x5
| |
| − | |[[File:Item Icon Improvement Material.png|35px]]x1
| |
| − | |} | |
| − | | |
| − | |-|Requirements= | |
| − | {| width=100%
| |
| − | |style="width:50px"| [[File:IcoArea2.png]]
| |
| − | |<div style="width:100%;background:#cccc99;padding-left:10px;border-top-right-radius:10px;color:black">'''南西諸島海域 - Nansei Island Waters'''</div>
| |
| − | |}
| |
| − | | |
| − | {|class="wikitable" width="100%" style="text-align:center"
| |
| − | !#
| |
| − | !width="25%"|Name
| |
| − | !Time
| |
| − | !width="1%"|
| |
| − | !Σ(Lv)
| |
| − | ![[File:Flagship icon.png]]
| |
| − | !width="1%"|
| |
| − | !Minimum Fleet
| |
| − | !width="10%"|Requirements
| |
| − | !width="1%"|
| |
| − | !{{Fuel}}
| |
| − | !{{Ammo}}
| |
| | |- | | |- |
| − | |colspan=14 style="background:#cccc99"| | + | !9 |
| − | |- | + | |{{ItemStack|item={{QuestRewardItem|Improvement Material}}|text-position=bottom:-48px;right:15px|font-size=13px|text=$|glow-size=5px|text-color=fff|glow-color=000}} {{ItemStack|item={{QuestRewardItem|Underway Replenishment}}|text-position=bottom:-48px;right:15px|font-size=13px|text=$|glow-size=5px|text-color=fff|glow-color=000}} {{ItemStack|item={{QuestRewardItem|Emergency Repair Material}}|text-position=bottom:-48px;right:15px|font-size=13px|text=$$|glow-size=5px|text-color=fff|glow-color=000}} {{ItemStack|item={{QuestRewardItem|Food Supply Ship Mamiya}}|text-position=bottom:-48px;right:15px|font-size=13px|text=$$|glow-size=5px|text-color=fff|glow-color=000}} |
| − | !09
| |
| − | |タンカー護衛任務<br>Tanker Escort Mission | |
| − | |04:00 | |
| − | |rowspan=27 style="background:#cccc99"| | |
| − | | | |
| − | |'''Lv''' 3 | |
| − | |rowspan=27 style="background:#cccc99"| | |
| − | |1CL 2DD 1XX | |
| − | | | |
| − | |rowspan=27 style="background:#cccc99"| | |
| − | | -5 | |
| − | | | |
| − | |- | |
| − | |colspan=14 style="background:#cccc99"| | |
| | |- | | |- |
| | !10 | | !10 |
| − | |強行偵察任務<br>Enforced Reconnaissance Mission | + | |{{ItemStack|item={{QuestRewardItem|Food Supply Ship Irako}}|text-position=bottom:-48px;right:15px|font-size=13px|text=$|glow-size=5px|text-color=fff|glow-color=000}} {{QuestRewardItem|New Model Rocket Development Material}} |
| − | |01:30 | |
| − | | | |
| − | |'''Lv''' 3 | |
| − | |2CL 1XX | |
| − | | | |
| − | | -3 | |
| − | | | |
| − | |- | |
| − | |colspan=14 style="background:#cccc99"|
| |
| | |- | | |- |
| | !11 | | !11 |
| − | |ボーキサイト輸送任務 | + | |Expensive craftable/stock equipment |
| − | |05:00
| |
| − | |
| |
| − | |'''Lv''' 6
| |
| − | |2DD 2XX
| |
| − | |
| |
| − | | -5
| |
| − | |
| |
| − | |-
| |
| − | |colspan=14 style="background:#cccc99"|
| |
| | |- | | |- |
| | !12 | | !12 |
| − | |資源輸送任務<br>Resource Transport Mission | + | |{{ItemStack|item={{QuestRewardItem|Instant Repair Material}}|text-position=bottom:-48px;right:15px|font-size=13px|text=$|glow-size=5px|text-color=fff|glow-color=000}} |
| − | |08:00 | |
| − | | | |
| − | |'''Lv''' 4 | |
| − | |2DD 2XX | |
| − | | | |
| − | | -5 | |
| − | | | |
| − | |- | |
| − | |colspan=14 style="background:#cccc99"|
| |
| | |- | | |- |
| | !13 | | !13 |
| − | |鼠輸送作戦<br>Rat Transport Operation | + | |{{ItemStack|item={{QuestRewardItem|Development Material}}|text-position=bottom:-48px;right:15px|font-size=13px|text=$|glow-size=5px|text-color=fff|glow-color=000}} |
| − | |04:00 | |
| − | | | |
| − | |'''Lv''' 5 | |
| − | |1CL 4DD 1XX | |
| − | | | |
| − | | -5 | |
| − | | -4 | |
| − | |- | |
| − | |colspan=14 style="background:#cccc99"|
| |
| | |- | | |- |
| | !14 | | !14 |
| − | |包囲陸戦隊撤収作戦<br>Marine Siege Evacuation Operation | + | |{{ItemStack|item={{QuestRewardItem|Instant Construction Material}}|text-position=bottom:-48px;right:15px|font-size=13px|text=$|glow-size=5px|text-color=fff|glow-color=000}} |
| − | |06:00 | |
| − | | | |
| − | |'''Lv''' 6 | |
| − | |1CL 3DD 2XX | |
| − | | | |
| − | | -5 | |
| − | | | |
| − | |- | |
| − | |colspan=14 style="background:#cccc99"|
| |
| | |- | | |- |
| | !15 | | !15 |
| − | |囮機動部隊支援作戦<br>Decoy Naval Task Force Support Operation | + | |Any cheap craftable equipment |
| − | |12:00
| |
| − | |
| |
| − | |'''Lv''' 9
| |
| − | |2CV(B) 2DD 2XX
| |
| − | |
| |
| − | | -5
| |
| − | | -4
| |
| − | |-
| |
| − | |colspan=14 style="background:#cccc99"|
| |
| − | |-
| |
| − | !16
| |
| − | |艦隊決戦援護作戦<br>Decisive Battle Fleet Support Operation
| |
| − | |15:00
| |
| − | |
| |
| − | |'''Lv''' 10
| |
| − | |1CL 2DD 3XX
| |
| − | |
| |
| − | | -5
| |
| − | | -4
| |
| − | |-
| |
| − | |colspan=14 style="background:#cccc99"|
| |
| − | |-
| |
| − | !B1
| |
| − | |南西方面航空偵察作戦<br>South Western Air Reconnaissance Operation
| |
| − | |00:35
| |
| − | |'''Lv''' 150
| |
| − | |'''Lv''' 40
| |
| − | |1AV 1CL 2DD/DE 2XX
| |
| − | |200 {{AA}}<br>200 {{ASW}}<br>140 {{LOS}}
| |
| − | | -5
| |
| − | | -2
| |
| − | |-
| |
| − | |colspan=14 style="background:#cccc99"|
| |
| − | |-
| |
| − | !{{TextGlow|B2|lightgray|text-colour=blue|glow-size=1px}}
| |
| − | |敵泊地強襲反撃作戦<br>Enemy Harbor Assault Counter Attack Operation
| |
| − | |08:40
| |
| − | |'''Lv''' 220
| |
| − | |'''Lv''' 45
| |
| − | |'''Monthly Expedition'''<br>1CA 1CL 3DD 1XX
| |
| − | |360 {{Firepower}}<br>160 {{AA}}<br>160 {{ASW}}<br>140 {{LOS}}
| |
| − | | -8
| |
| − | | -6
| |
| − | |-
| |
| − | |colspan=14 style="background:#cccc99"|
| |
| − | |-
| |
| − | !{{TextGlow|B3|lightgray|text-colour=blue|glow-size=1px}}
| |
| − | |南西諸島離島哨戒作戦<br>Nansei Island Remote Island Patrolling Operation
| |
| − | |02:50
| |
| − | |'''Lv''' 250
| |
| − | |'''Lv''' 50
| |
| − | |'''Monthly Expedition'''<br> 1AV 1CL 2DD 2DD/DE
| |
| − | |400 {{Firepower}}<br>220 {{AA}}<br>220 {{ASW}}<br>190 {{LOS}}
| |
| − | | -6.5
| |
| − | | -8
| |
| − | |-
| |
| − | |colspan=14 style="background:#cccc99"|
| |
| − | |-
| |
| − | !style="color:red"|B4
| |
| − | |南西諸島離島防衛作戦<br>Nansei Island Remote Island Defense Operation
| |
| − | |07:30
| |
| − | |300
| |
| − | |'''Lv''' 55
| |
| − | |'''Monthly Expedition'''<br>'''{{color|red|Combat Expedition (I)}}'''<br>2CA 1CL 2DD 1SS(V)
| |
| − | |500 {{Firepower}}<br>280 {{AA}}<br>280 {{ASW}}<br>170 {{LOS}}
| |
| − | | -8.5
| |
| − | | -8.5
| |
| − | |-
| |
| − | |colspan=14 style="background:#cccc99"|
| |
| − | |-
| |
| − | !style="color:red"|B5
| |
| − | |南西諸島捜索撃滅戦<br>Nansei Island Search and Destroy Mission
| |
| − | |06:30
| |
| − | |'''Lv''' 330
| |
| − | |'''Lv''' 60
| |
| − | |'''Monthly Expedition''' <br>'''{{color|red|Combat Expedition (II)}}'''<br>1AV 1CL 2DD 2XX
| |
| − | |510 {{Firepower}}<br>400 {{AA}}<br>285 {{ASW}}<br>385 {{LOS}}
| |
| − | | -9
| |
| − | | -9.5
| |
| − | |-
| |
| − | |colspan=14 style="background:#cccc99"|
| |
| − | |-
| |
| − | !style="color:red"|B6
| |
| − | |精鋭水雷戦隊夜襲}}<br>Elite Destroyer Squadron Night Raid
| |
| − | |05:50
| |
| − | |'''Lv''' 400
| |
| − | |'''Lv''' 75
| |
| − | |'''Monthly Expedition'''<br>'''{{color|red|Combat Expedition (II)}}'''<br>1CL<ref>Must be flagship.</ref> 5DD
| |
| − | |410 {{Firepower}}<br>390 {{AA}}<br>410 {{ASW}}<br>340 {{LOS}}
| |
| − | | -9.5
| |
| − | | -9.5
| |
| − | |}
| |
| − | | |
| − | <references/>
| |
| − | </tabber>
| |
| − | | |
| − | ===World 3===
| |
| − | <tabber>
| |
| − | |-|Total yield=
| |
| − | {|width=100%
| |
| − | |style="width:50px"|[[File:IcoArea3.png]]
| |
| − | |<div style="width:100%;background:#99cccc;padding-left:10px;border-top-right-radius:10px;color:black">'''北方海域 - Northern Waters'''</div>
| |
| − | |}
| |
| − | | |
| − | {|class="wikitable" width="100%" style="text-align:center"
| |
| − | !#
| |
| − | !width="25%"|Name
| |
| − | !Time
| |
| − | !width="1%"|
| |
| − | !HQ
| |
| − | !Ship
| |
| − | !width="1%"|
| |
| − | !{{Fuel}}
| |
| − | !{{Ammo}}
| |
| − | !{{Steel}}
| |
| − | !{{Bauxite}}
| |
| − | !width="1%"|
| |
| − | !colspan=2|Rewards
| |
| − | |-
| |
| − | |colspan=14 style="background:#99cccc"|
| |
| − | |-
| |
| − | !17
| |
| − | |敵地偵察作戦<br>Enemy Territory Reconnaissance Operation
| |
| − | |00:45
| |
| − | |rowspan=27 style="background:#99cccc"|
| |
| − | |30
| |
| − | |40
| |
| − | |rowspan=27 style="background:#99cccc"|
| |
| − | |70
| |
| − | |70
| |
| − | |50
| |
| − | |
| |
| − | |rowspan=27 style="background:#99cccc"|
| |
| − | |
| |
| − | |
| |
| − | |-
| |
| − | |colspan=14 style="background:#99cccc"|
| |
| − | |-
| |
| − | !18
| |
| − | |航空機輸送作戦<br>Aircraft Transport Operation
| |
| − | |05:00
| |
| − | |60
| |
| − | |60
| |
| − | |
| |
| − | |
| |
| − | |style="color:red"|'''300'''
| |
| − | |100
| |
| − | |[[File:Item Icon Instant Repair Material.png|35px]]x1
| |
| − | |
| |
| − | |-
| |
| − | |colspan=14 style="background:#99cccc"|
| |
| − | |-
| |
| − | !19
| |
| − | |北号作戦<br>Operation Kita
| |
| − | |06:00
| |
| − | |60
| |
| − | |70
| |
| − | |style="color:red"|'''400'''
| |
| − | |50
| |
| − | |50
| |
| − | |30
| |
| − | |[[File:Item Icon Furniture Box (Small).png|35px]]x1
| |
| − | |[[File:Item Icon Development Material.png|35px]]x1
| |
| − | |-
| |
| − | |colspan=14 style="background:#99cccc"|
| |
| − | |-
| |
| − | !20
| |
| − | |潜水艦哨戒任務<br>Submarine Patrol Operation
| |
| − | |02:00
| |
| − | |40
| |
| − | |50
| |
| − | |
| |
| − | |
| |
| − | |150
| |
| − | |
| |
| − | |[[File:Item Icon Development Material.png|35px]]x1
| |
| − | |[[File:Item Icon Furniture Box (Small).png|35px]]x1
| |
| − | |-
| |
| − | |colspan=14 style="background:#99cccc"|
| |
| − | |-
| |
| − | !21
| |
| − | |北方鼠輸送作戦<br>Northern Rat Transport Operation
| |
| − | |02:20
| |
| − | |45
| |
| − | |55
| |
| − | |style="color:blue"|'''320'''
| |
| − | |style="color:blue"|'''270'''
| |
| − | |
| |
| − | |
| |
| − | |[[File:Item Icon Furniture Box (Small).png|35px]]x1
| |
| − | |
| |
| − | |-
| |
| − | |colspan=14 style="background:#99cccc"|
| |
| − | |-
| |
| − | !22
| |
| − | |艦隊演習<br>Fleet Exercise
| |
| − | |03:00
| |
| − | |45
| |
| − | |style="color:red"|'''400'''
| |
| − | |
| |
| − | |10
| |
| − | |
| |
| − | |
| |
| − | |
| |
| − | |
| |
| − | |-
| |
| − | |colspan=14 style="background:#99cccc"|
| |
| − | |-
| |
| − | !23
| |
| − | |航空戦艦運用演習<br>Aviation Battleship Exercise Operation
| |
| − | |04:00
| |
| − | |70
| |
| − | |style="color:blue"|'''420'''
| |
| − | |
| |
| − | |20
| |
| − | |
| |
| − | |100
| |
| − | |
| |
| − | |
| |
| − | |-
| |
| − | |colspan=14 style="background:#99cccc"|
| |
| − | |-
| |
| − | !24
| |
| − | |北方航路海上護衛<br>Northern Maritime Sea Passage Escort
| |
| − | |08:20
| |
| − | |65
| |
| − | |80
| |
| − | |style="color:red"|'''500'''
| |
| − | |
| |
| − | |
| |
| − | |style="color:blue"|'''150'''
| |
| − | |[[File:Item Icon Development Material.png|35px]]x2
| |
| − | |[[File:Item Icon Instant Repair Material.png|35px]]x1
| |
| | |} | | |} |
| | | | |
| − | |-|Hourly Yield=
| + | ='''Gallery completion guide'''= |
| − | {| width=100%
| + | A guide not to have the best gears nor the best fleet, but just to complete your "kancodex" (Gallery) of equipment. Here are listed all obtainable equipment and how to obtain them in the current state of the game: |
| − | | style="width:50px"| [[File:IcoArea3.png]]
| + | *List of craftable equipment: [[Development#Buildable_Equipment|Buildable Equipment]] |
| − | | <div style="width:100%;background:#99cccc;padding-left:10px;border-top-right-radius:10px;color:black">'''北方海域 - Northern Waters'''</div>
| |
| − | |}
| |
| − | | |
| − | {|class="wikitable" width="100%" style="text-align:center"
| |
| − | !#
| |
| − | !width="25%"|Name
| |
| − | !Time
| |
| − | !width="1%"|
| |
| − | !HQ
| |
| − | !Ship
| |
| − | !width="1%"|
| |
| − | !{{Fuel}}
| |
| − | !{{Ammo}}
| |
| − | !{{Steel}}
| |
| − | !{{Bauxite}}
| |
| − | !width="1%"|
| |
| − | !colspan=2|Rewards
| |
| − | |-
| |
| − | |colspan=14 style="background:#99cccc"|
| |
| − | |-
| |
| − | !17
| |
| − | |敵地偵察作戦<br>Enemy Territory Reconnaissance Operation
| |
| − | |00:45
| |
| − | |rowspan=27 style="background:#99cccc"|
| |
| − | |40
| |
| − | |53
| |
| − | |rowspan=27 style="background:#99cccc"|
| |
| − | |style="color:blue"|'''93'''
| |
| − | |style="color:blue"|'''93'''
| |
| − | |style="color:red"|'''67'''
| |
| − | |
| |
| − | |rowspan=27 style="background:#99cccc"|
| |
| − | |
| |
| − | |
| |
| − | |-
| |
| − | |colspan=14 style="background:#99cccc"|
| |
| − | |-
| |
| − | !18
| |
| − | |航空機輸送作戦<br>Aircraft Transport Operation
| |
| − | |05:00
| |
| − | |12
| |
| − | |12
| |
| − | |
| |
| − | |
| |
| − | |style="color:red"|'''60'''
| |
| − | |20
| |
| − | |[[File:Item Icon Instant Repair Material.png|35px]]x1
| |
| − | |
| |
| − | |-
| |
| − | |colspan=14 style="background:#99cccc"|
| |
| − | |-
| |
| − | !19
| |
| − | |北号作戦<br>Operation Kita
| |
| − | |06:00
| |
| − | |10
| |
| − | |11
| |
| − | |style="color:blue"|'''67'''
| |
| − | |8
| |
| − | |8
| |
| − | |5
| |
| − | |[[File:Item Icon Furniture Box (Small).png|35px]]x1
| |
| − | |[[File:Item Icon Development Material.png|35px]]x1
| |
| − | |-
| |
| − | |colspan=14 style="background:#99cccc"|
| |
| − | |-
| |
| − | !20
| |
| − | |潜水艦哨戒任務<br>Submarine Patrol Operation
| |
| − | |02:00
| |
| − | |20
| |
| − | |25
| |
| − | |
| |
| − | |
| |
| − | |style="color:red"|'''75'''
| |
| − | |
| |
| − | |[[File:Item Icon Development Material.png|35px]]x1
| |
| − | |[[File:Item Icon Furniture Box (Small).png|35px]]x1
| |
| − | |-
| |
| − | |colspan=14 style="background:#99cccc"|
| |
| − | |-
| |
| − | !21
| |
| − | |北方鼠輸送作戦<br>Northern Rat Transport Operation
| |
| − | |02:20
| |
| − | |19
| |
| − | |23
| |
| − | |style="color:red"|'''137'''
| |
| − | |style="color:red"|'''116'''
| |
| − | |
| |
| − | |
| |
| − | |[[File:Item Icon Furniture Box (Small).png|35px]]x1
| |
| − | |
| |
| − | |-
| |
| − | |colspan=14 style="background:#99cccc"|
| |
| − | |-
| |
| − | !22
| |
| − | |艦隊演習<br>Fleet Exercise
| |
| − | |03:00
| |
| − | |15
| |
| − | |style="color:red"|'''133'''
| |
| − | |
| |
| − | |3
| |
| − | |
| |
| − | |
| |
| − | |
| |
| − | |
| |
| − | |-
| |
| − | |colspan=14 style="background:#99cccc"|
| |
| − | |-
| |
| − | !23
| |
| − | |航空戦艦運用演習<br>Aviation Battleship Exercise Operation
| |
| − | |04:00
| |
| − | |17
| |
| − | |style="color:blue"|'''105'''
| |
| − | |
| |
| − | |5
| |
| − | |
| |
| − | |style="color:blue"|'''25'''
| |
| − | |
| |
| − | |
| |
| − | |-
| |
| − | |colspan=14 style="background:#99cccc"|
| |
| − | |-
| |
| − | !24
| |
| − | |北方航路海上護衛<br>Northern Maritime Sea Passage Escort
| |
| − | |08:20
| |
| − | |8
| |
| − | |10
| |
| − | |60
| |
| − | |
| |
| − | |
| |
| − | |18
| |
| − | |[[File:Item Icon Development Material.png|35px]]x2
| |
| − | |[[File:Item Icon Instant Repair Material.png|35px]]x1
| |
| − | |}
| |
| | | | |
| − | |-|Requirements=
| + | *List of equipment only available via [[Quests]], [[Akashi's Improvement Arsenal]] or as Stock equipment: [[Equipment#Unbuildable_Equipment|Unbuildable Equipment]] |
| − | {| width=100%
| |
| − | | style="width:50px"| [[File:IcoArea3.png]]
| |
| − | | <div style="width:100%;background:#99cccc;padding-left:10px;border-top-right-radius:10px;color:black">'''北方海域 - Northern Waters'''</div>
| |
| − | |} | |
| | | | |
| − | {|class="wikitable" width="100%" style="text-align:center"
| + | ===Quest trap advices=== |
| − | !#
| + | Some quests will ask to choose between several rewards, and sometimes the choice can lock unique equipment. This list gives reward picking advice in order to maximize the Gallery completion (assuming the following equipment are not already possessed): |
| − | !width="25%"|Name
| + | {|class="wikitable" style="margin:auto" |
| − | !Time
| + | !Quest |
| − | !width="1%"|
| + | !Good choice |
| − | !Σ(Lv)
| + | !Notes |
| − | ![[File:Flagship icon.png]]
| |
| − | !width="1%"|
| |
| − | !Minimum Fleet
| |
| − | !width="10%"|Requirements
| |
| − | !width="1%"| | |
| − | !{{Fuel}} | |
| − | !{{Ammo}} | |
| − | |-
| |
| − | |colspan=14 style="background:#99cccc"|
| |
| | |- | | |- |
| − | !17
| + | |{{Q|B88}} |
| − | |敵地偵察作戦<br>Enemy Territory Reconnaissance Operation
| + | |{{Equipment/Link|PBY-5A Catalina}} |
| − | |00:45
| |
| − | |rowspan=27 style="background:#99cccc"| | |
| − | | | |
| − | |'''Lv''' 20
| |
| − | |rowspan=27 style="background:#99cccc"|
| |
| − | |1CL 3DD 2XX
| |
| − | |
| |
| − | |rowspan=27 style="background:#99cccc"|
| |
| − | | -3
| |
| − | | -4 | |
| | |- | | |- |
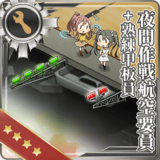
| − | |colspan=14 style="background:#99cccc"| | + | |{{Q|B106}} |
| | + | |{{Equipment/Link|Night Operation Aviation Personnel + Skilled Deckhands|text=NOAP Skilled}} |
| | |- | | |- |
| − | !18
| + | |{{Q|B124}} |
| − | |航空機輸送作戦<br>Aircraft Transport Operation
| + | |{{Equipment/Link|Type 0 Passive Sonar}} |
| − | |05:00
| |
| − | | | |
| − | |'''Lv''' 15 | |
| − | |3CV(B/L)/AV 2DD 1XX | |
| − | |
| |
| − | | -5
| |
| − | | -2 | |
| | |- | | |- |
| − | |colspan=14 style="background:#99cccc"| | + | |{{Q|B129}} |
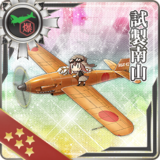
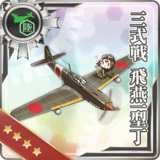
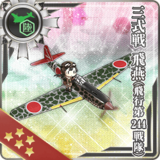
| | + | |{{Equipment/Link|Prototype Nanzan}} |
| | + | |According the {{Equipment/Link|Prototype 46cm Twin Gun Mount|text=Prototype 46cm}} is chosen in {{Q|B130}} |
| | |- | | |- |
| − | !19
| + | |{{Q|B130}} |
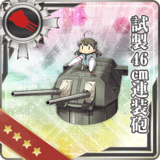
| − | |{北号作戦<br>Operation Kita | + | |{{Equipment/Link|Prototype 46cm Twin Gun Mount|text=Prototype 46cm}} |
| − | |06:00 | + | |According the {{Equipment/Link|Prototype Nanzan}} is choosed in {{Q|B129}} |
| − | | | |
| − | |'''Lv''' 20 | |
| − | |2BBV 2DD 2XX | |
| − | | | |
| − | | -5 | |
| − | | -4 | |
| | |- | | |- |
| − | |colspan=14 style="background:#99cccc"| | + | |{{Q|B141}} |
| | + | |{{Equipment/Link|Type D Kouhyouteki Kai (Kouryuu Kai)|text=Type D Kouhyouteki}} |
| | |- | | |- |
| − | !20
| + | |{{Q|B143}} |
| − | |潜水艦哨戒任務}}<br>Submarine Patrol Operation | + | |{{Equipment/Link|Prototype Toukai}} |
| − | |02:00 | + | |According the {{Equipment/Link|Raiden}} is chosen in {{Q|F81}} |
| − | | | |
| − | |'''Lv''' 1 | |
| − | |1SS(V) 1CL | |
| − | | | |
| − | | -5
| |
| − | | -4
| |
| | |- | | |- |
| − | |colspan=14 style="background:#99cccc"| | + | |{{Q|B146}} |
| | + | |{{Equipment/Link|Fairey Seafox Kai}} |
| | |- | | |- |
| − | !21
| + | |{{Q|B150}} |
| − | |北方鼠輸送作戦<br>Northern Rat Transport Operation | + | |{{Equipment/Link|Lightweight ASW Torpedo (Initial Test Model)|text=Lightweight ASW Torpedo}} |
| − | |02:20 | |
| − | |30 | |
| − | |'''Lv''' 15 | |
| − | |1CL 4DD
| |
| − | |3 (3<ref>Minimum of Drum carrying ships.</ref>) [[File:Drum.png|30px]]
| |
| − | | -8
| |
| − | | -7 | |
| | |- | | |- |
| − | |colspan=14 style="background:#99cccc"| | + | |{{Q|B153}} |
| | + | |{{Equipment/Link|Prototype Shuusui}} |
| | |- | | |- |
| − | !22
| + | |{{Q|B158}} |
| − | |艦隊演習<br>Fleet Exercise | + | |{{Equipment/Link|Canned Saury}} |
| − | |03:00 | + | |In the case all future Saury events are missed |
| − | |45 | |
| − | |'''Lv''' 30
| |
| − | |1CA 1CL 2DD 2XX
| |
| − | |
| |
| − | | -8 | |
| − | | -7 | |
| | |- | | |- |
| − | |colspan=14 style="background:#99cccc"| | + | |{{Q|B165}} |
| | + | |{{Equipment/Link|Bomb-carrying Type 1 Fighter Hayabusa Model III Kai (65th Squadron)|text=Hayabusa bomber}} |
| | |- | | |- |
| − | !23
| + | |{{Q|B170}} |
| − | |航空戦艦運用演習<br>Aviation Battleship Exercise Operation
| + | |{{Equipment/Link|FR-1 Fireball}} |
| − | |04:00
| |
| − | |200
| |
| − | |'''Lv''' 50
| |
| − | |2BBV 2DD 2XX | |
| − | | | |
| − | | -8 | |
| − | | -8 | |
| | |- | | |- |
| − | |colspan=14 style="background:#99cccc"| | + | |{{Q|B175}} |
| | + | |{{Equipment/Link|Type 3 Fighter Hien}} |
| | + | |Also unlocks the {{Equipment/Link|Type 3 Fighter Hien Model 1D|text= Hien Mod D}} & {{Equipment/Link|Type 3 Fighter Hien (244th Air Combat Group)|text=Hien 244th}} |
| | |- | | |- |
| − | !24
| + | |{{Q|B181}} |
| − | |北方航路海上護衛<br>Northern Maritime Sea Passage Escort
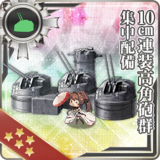
| + | |{{Equipment/Link|10cm Twin High-angle Gun Mount Battery Concentrated Deployment|text=10cm Twin HA CD}} |
| − | |08:20
| + | |If not taken from {{Q|B182}} nor {{Q|B183}} |
| − | |200
| |
| − | |'''Lv''' 50
| |
| − | |CL<ref>Must be flagship.</ref> 4DD 1XX
| |
| − | |None<ref>Affects great success rate.</ref> [[File:Drum.png|30px]]
| |
| − | | -8
| |
| − | | -6
| |
| − | |}
| |
| − | | |
| − | <references/>
| |
| − | </tabber>
| |
| − | | |
| − | ===World 7===
| |
| − | <tabber>Total yield=
| |
| − | <div style="max-width:1400px;width:90%;margin-left:20px">
| |
| − | {| width=100%
| |
| − | | style="width:50px"| [[File:IcoArea7.png]]
| |
| − | | <div style="width:100%;background:#ccff00;padding-left:10px;border-top-right-radius:10px;color:black">'''南西海域 - South Western Waters'''</div>
| |
| − | |}
| |
| − | </div>
| |
| − | <div style="position:relative;color:black;background:white;border:solid 1px lightgrey;max-width:1500px;width:95%;border-radius:10px;padding:10px;margin:10px;margin-top:0px">
| |
| − | {| style="radius:10px;cellpadding:10px;width:100%" align="center" height="35px" cellspacing=0
| |
| − | ! style="cellpadding:10px;width:4%"|#
| |
| − | ! style="cellpadding:10px;width:24%"|Name
| |
| − | ! style="cellpadding:10px"|Time
| |
| − | ! style="cellpadding:10px;width:1px"|
| |
| − | ! style="cellpadding:10px;width:7%"|HQ
| |
| − | ! style="cellpadding:10px;width:7%"|Ship
| |
| − | ! style="cellpadding:10px;width:1px"|
| |
| − | ! style="cellpadding:10px;width:7%"|[[File:Fuel.png|30px]]
| |
| − | ! style="cellpadding:10px;width:7%"|[[File:Ammunition.png|30px]]
| |
| − | ! style="cellpadding:10px;width:7%"|[[File:Steel.png|30px]]
| |
| − | ! style="cellpadding:10px;width:7%"|[[File:Bauxite.png|30px]]
| |
| − | ! style="cellpadding:10px;width:1px"|
| |
| − | ! style="cellpadding:10px;width:20%" colspan=2|Rewards
| |
| − | |-
| |
| − | | style="background:gray" colspan=16|
| |
| − | |-
| |
| − | | align="center" height="35px" style="background:#e8f0c8"|'''41
| |
| − | | align="center" height="35px" style="background:#e8f0c8"|ブルネイ泊地沖哨戒<br>Brunei Anchorage Patrol
| |
| − | | align="center" height="35px" style="background:#e8f0c8"|01:00
| |
| − | | style="background:#ccff00" rowspan=6|
| |
| − | | align="center" height="35px" style="background:#e8f0c8"|30
| |
| − | | align="center" height="35px" style="background:#e8f0c8"|100
| |
| − | | style="background:#ccff00" rowspan=6|
| |
| − | | align="center" height="35px" style="background:#e8f0c8"|100
| |
| − | | align="center" height="35px" style="background:#e8f0c8"|
| |
| − | | align="center" height="35px" style="background:#e8f0c8"|
| |
| − | | align="center" height="35px" style="background:#e8f0c8"|20
| |
| − | | style="background:#ccff00" rowspan=10|
| |
| − | | align="center" height="35px" style="background:#e8f0c8"|[[File:Item Icon Development Material.png|35px]]x1
| |
| − | | align="center" height="35px" style="background:#e8f0c8"|[[File:Item Icon Instant Repair Material.png|35px]]x1
| |
| − | |-
| |
| − | | align="center" height="35px" style="color:blue"|'''42
| |
| − | | align="center" height="35px" |ミ船団護衛(一号船団)<br>Mi Convoy Escort (Fleet No.1)
| |
| − | | align="center" height="35px" |08:00
| |
| − | | align="center" height="35px" |60
| |
| − | | align="center" height="35px" |97
| |
| − | | align="center" height="35px" |800
| |
| − | | align="center" height="35px" |
| |
| − | | align="center" height="35px" |
| |
| − | | align="center" height="35px" |200
| |
| − | | align="center" height="35px" |[[File:Item Icon Furniture Box (Large).png|35px]]x1
| |
| − | | align="center" height="35px" |[[File:Item Icon Instant Construction Material.png|35px]]x3
| |
| − | |-
| |
| − | | align="center" height="35px" style="background:#e8f0c8;color:red"|'''43
| |
| − | | align="center" height="35px" style="background:#e8f0c8"|ミ船団護衛(二号船団)<br>Mi Convoy Escort (Fleet No.2)
| |
| − | | align="center" height="35px" style="background:#e8f0c8"|12:00
| |
| − | | align="center" height="35px" style="background:#e8f0c8"|75
| |
| − | | align="center" height="35px" style="background:#e8f0c8"|270
| |
| − | | align="center" height="35px" style="background:#e8f0c8"|2000
| |
| − | | align="center" height="35px" style="background:#e8f0c8"|
| |
| − | | align="center" height="35px" style="background:#e8f0c8"|
| |
| − | | align="center" height="35px" style="background:#e8f0c8"|400
| |
| − | | align="center" height="35px" style="background:#e8f0c8"|[[File:Item Icon Development Material.png|35px]]x4
| |
| − | | align="center" height="35px" style="background:#e8f0c8"|[[File:Item Icon Improvement Material.png|35px]]x1
| |
| − | |-
| |
| − | | align="center" height="35px" style="color:blue"|'''44
| |
| − | | align="center" height="35px" |航空装備輸送任務<br>Aircraft Equipment Transport Mission
| |
| − | | align="center" height="35px" |10:00
| |
| − | | align="center" height="35px" |45
| |
| − | | align="center" height="35px" |110
| |
| − | | align="center" height="35px" |
| |
| − | | align="center" height="35px" |200
| |
| − | | align="center" height="35px" |
| |
| − | | align="center" height="35px" |800
| |
| − | | align="center" height="35px" |[[File:Item Icon Development Material.png|35px]]x4
| |
| − | | align="center" height="35px" |[[File:Item Icon Furniture Box (Large).png|35px]]x2
| |
| − | |-
| |
| − | | align="center" height="35px" style="background:#e8f0c8"|'''45
| |
| − | | align="center" height="35px" style="background:#e8f0c8"|ボーキサイト船団護衛<br>Bauxite Convoy Escort
| |
| − | | align="center" height="35px" style="background:#e8f0c8"|3:20
| |
| − | | align="center" height="35px" style="background:#e8f0c8"|35
| |
| − | | align="center" height="35px" style="background:#e8f0c8"|40
| |
| − | | align="center" height="35px" style="background:#e8f0c8"|40
| |
| − | | align="center" height="35px" style="background:#e8f0c8"|
| |
| − | | align="center" height="35px" style="background:#e8f0c8"|
| |
| − | | align="center" height="35px" style="background:#e8f0c8;color:blue"|'''220'''
| |
| − | | align="center" height="35px" style="background:#e8f0c8"|[[File:Item Icon Furniture Box (Medium).png|35px]]x1
| |
| − | | align="center" height="35px" style="background:#e8f0c8"|
| |
| − | |-
| |
| − | | align="center" height="35px" style="color:red"|'''46
| |
| − | | align="center" height="35px" |南西海域戦闘哨戒<br>Southwestern Sea Combat Patrols
| |
| − | | align="center" height="35px" |3:30
| |
| − | | align="center" height="35px" |80
| |
| − | | align="center" height="35px" |95
| |
| − | | align="center" height="35px" |300
| |
| − | | align="center" height="35px" |
| |
| − | | align="center" height="35px" |150
| |
| − | | align="center" height="35px" |380
| |
| − | | align="center" height="35px" |[[File:Item Icon Development Material.png|35px]]x3
| |
| − | | align="center" height="35px" |[[File:Item Icon Improvement Material.png|35px]]x1
| |
| − | |}</div>
| |
| − | |-|Hourly Yield=
| |
| − | <div style="max-width:1400px;width:90%;margin-left:20px">
| |
| − | {| width=100%
| |
| − | | style="width:50px"| [[File:IcoArea7.png]]
| |
| − | | <div style="width:100%;background:#ccff00;padding-left:10px;border-top-right-radius:10px;color:black">'''南西海域 - South Western Waters'''</div>
| |
| − | |}
| |
| − | </div>
| |
| − | <div style="position:relative;color:black;background:white;border:solid 1px lightgray;max-width:1500px;width:95%;border-radius:10px;padding:10px;margin:10px;margin-top:0px;">
| |
| − | {| style="radius:10px;cellpadding:10px;width:100%;" align="center" height="35px" cellspacing=0
| |
| − | ! style="cellpadding:10px;width:4%"|#
| |
| − | ! style="cellpadding:10px;width:24%"|Name
| |
| − | ! style="cellpadding:10px"|Time
| |
| − | ! style="cellpadding:10px;width:1px"|
| |
| − | ! style="cellpadding:10px;width:7%"|HQ
| |
| − | ! style="cellpadding:10px;width:7%"|Ship
| |
| − | ! style="cellpadding:10px;width:1px"|
| |
| − | ! style="cellpadding:10px;width:7%"|[[File:Fuel.png|30px]]
| |
| − | ! style="cellpadding:10px;width:7%"|[[File:Ammunition.png|30px]]
| |
| − | ! style="cellpadding:10px;width:7%"|[[File:Steel.png|30px]]
| |
| − | ! style="cellpadding:10px;width:7%"|[[File:Bauxite.png|30px]]
| |
| − | ! style="cellpadding:10px;width:1px"|
| |
| − | ! style="cellpadding:10px;width:20%" colspan=2|Rewards
| |
| − | |-
| |
| − | | style="background:gray" colspan=16|
| |
| − | |-
| |
| − | | align="center" height="35px" style="background:#e8f0c8"|'''41
| |
| − | | align="center" height="35px" style="background:#e8f0c8"|ブルネイ泊地沖哨戒<br> Brunei Anchorage Patrol
| |
| − | | align="center" height="35px" style="background:#e8f0c8"|01:00
| |
| − | | style="background:#ccff00" rowspan=6|
| |
| − | | align="center" height="35px" style="background:#e8f0c8"|30
| |
| − | | align="center" height="35px" style="background:#e8f0c8"|100
| |
| − | | style="background:#ccff00" rowspan=6|
| |
| − | | align="center" height="35px" style="background:#e8f0c8"|100
| |
| − | | align="center" height="35px" style="background:#e8f0c8"|
| |
| − | | align="center" height="35px" style="background:#e8f0c8"|
| |
| − | | align="center" height="35px" style="background:#e8f0c8"|20
| |
| − | | style="background:#ccff00" rowspan=10|
| |
| − | | align="center" height="35px" style="background:#e8f0c8"|[[File:Item Icon Development Material.png|35px]]x1
| |
| − | | align="center" height="35px" style="background:#e8f0c8"|[[File:Item Icon Instant Repair Material.png|35px]]x1
| |
| − | |- | |
| − | | align="center" height="35px" style="color:blue"|'''42
| |
| − | | align="center" height="35px" |ミ船団護衛(一号船団)<br>Mi Convoy Escort (Fleet No.1)
| |
| − | | align="center" height="35px" |08:00
| |
| − | | align="center" height="35px" |7.5
| |
| − | | align="center" height="35px" |9.7
| |
| − | | align="center" height="35px" |100
| |
| − | | align="center" height="35px" |
| |
| − | | align="center" height="35px" |
| |
| − | | align="center" height="35px" |25
| |
| − | | align="center" height="35px" |[[File:Item Icon Furniture Box (Large).png|35px]]x1
| |
| − | | align="center" height="35px" |[[File:Item Icon Instant Construction Material.png|35px]]x3
| |
| − | |-
| |
| − | | align="center" height="35px" style="background:#e8f0c8;color:red"|'''43
| |
| − | | align="center" height="35px" style="background:#e8f0c8"|ミ船団護衛(二号船団)<br>Mi Convoy Escort (Fleet No.2)
| |
| − | | align="center" height="35px" style="background:#e8f0c8"|12:00
| |
| − | | align="center" height="35px" style="background:#e8f0c8"|6.25
| |
| − | | align="center" height="35px" style="background:#e8f0c8"|22.5
| |
| − | | align="center" height="35px" style="background:#e8f0c8"|167
| |
| − | | align="center" height="35px" style="background:#e8f0c8"|
| |
| − | | align="center" height="35px" style="background:#e8f0c8"|
| |
| − | | align="center" height="35px" style="background:#e8f0c8"|33
| |
| − | | align="center" height="35px" style="background:#e8f0c8"|[[File:Item Icon Development Material.png|35px]]x4
| |
| − | | align="center" height="35px" style="background:#e8f0c8"|[[File:Item Icon Improvement Material.png|35px]]x1
| |
| − | |-
| |
| − | | align="center" height="35px" style="color:blue"|'''44
| |
| − | | align="center" height="35px" |航空装備輸送任務<br>Aircraft Equipment Transport Mission
| |
| − | | align="center" height="35px" |10:00
| |
| − | | align="center" height="35px" |4.5
| |
| − | | align="center" height="35px" |11
| |
| − | | align="center" height="35px" |
| |
| − | | align="center" height="35px" |20
| |
| − | | align="center" height="35px" |
| |
| − | | align="center" height="35px" |80
| |
| − | | align="center" height="35px" |[[File:Item Icon Development Material.png|35px]]x4
| |
| − | | align="center" height="35px" |[[File:Item Icon Furniture Box (Large).png|35px]]x2
| |
| − | |-
| |
| − | | align="center" height="35px" style="background:#e8f0c8"|'''45
| |
| − | | align="center" height="35px" style="background:#e8f0c8"|ボーキサイト船団護衛<br>Bauxite Convoy Escort
| |
| − | | align="center" height="35px" style="background:#e8f0c8"|3:20
| |
| − | | align="center" height="35px" style="background:#e8f0c8"|10
| |
| − | | align="center" height="35px" style="background:#e8f0c8"|12
| |
| − | | align="center" height="35px" style="background:#e8f0c8"|16
| |
| − | | align="center" height="35px" style="background:#e8f0c8"|
| |
| − | | align="center" height="35px" style="background:#e8f0c8"|
| |
| − | | align="center" height="35px" style="background:#e8f0c8;color:red"|'''65'''
| |
| − | | align="center" height="35px" style="background:#e8f0c8"|[[File:Item Icon Furniture Box (Medium).png|35px]]x1
| |
| − | | align="center" height="35px" style="background:#e8f0c8"|
| |
| − | |-
| |
| − | | align="center" height="35px" style="color:red"|'''46
| |
| − | | align="center" height="35px" |南西海域戦闘哨戒<br>Southwestern Sea Combat Patrols
| |
| − | | align="center" height="35px" |3:30
| |
| − | | align="center" height="35px" |22.8
| |
| − | | align="center" height="35px" |27.1
| |
| − | | align="center" height="35px" |87
| |
| − | | align="center" height="35px" |
| |
| − | | align="center" height="35px" |42
| |
| − | | align="center" height="35px" |105
| |
| − | | align="center" height="35px" |[[File:Item Icon Development Material.png|35px]]x3
| |
| − | | align="center" height="35px" |[[File:Item Icon Improvement Material.png|35px]]x1
| |
| − | |}</div>
| |
| − | |-|Requirements=
| |
| − | <div style="max-width:1400px;width:90%;margin-left:20px">
| |
| − | {| width=100%
| |
| − | | style="width:50px;"| [[File:IcoArea7.png]]
| |
| − | | <div style="width:100%;background:#ccff00;padding-left:10px;border-top-right-radius:10px;color:black">'''南西海域 - South Western Waters'''</div>
| |
| − | |}
| |
| − | </div>
| |
| − | <div style="position:relative;color:black;background:white;border:solid 1px lightgray;max-width:1500px;width:95%;border-radius:10px;padding:10px;margin:10px;margin-top:0px">
| |
| − | {| style="radius:10px;cellpadding:10px;width:100%" align="center" height="35px" cellspacing=0
| |
| − | ! style="cellpadding:10px;width:4%"|#
| |
| − | ! style="cellpadding:10px;width:24%"|Name
| |
| − | ! style="cellpadding:10px"|Time
| |
| − | ! style="cellpadding:10px;width:1px"|
| |
| − | ! style="cellpadding:10px;width:7%"|Σ(Lv)
| |
| − | ! style="cellpadding:10px;width:7%"|[[File:Flagship icon.png]]
| |
| − | ! style="cellpadding:10px;width:1px"|
| |
| − | ! style="cellpadding:10px;width:21%"|Minimum Fleet Size
| |
| − | ! style="cellpadding:10px;width:7%"|[[File:Drum.png|30px]]
| |
| − | ! style="cellpadding:10px;width:1px"|
| |
| − | ! style="cellpadding:10px;width:10%"|[[File:Fuel.png|30px]]
| |
| − | ! style="cellpadding:10px;width:10%"|[[File:Ammunition.png|30px]]
| |
| − | |-
| |
| − | | style="background:gray" colspan=15|
| |
| − | |-
| |
| − | | align="center" height="35px" style="background:#e8f0c8"|'''41
| |
| − | | align="center" height="35px" style="background:#e8f0c8"|ブルネイ泊地沖哨戒<br> Brunei Anchorage Patrol
| |
| − | | align="center" height="35px" style="background:#e8f0c8"|01:00
| |
| − | | style="background:#ccff00" rowspan=6|
| |
| − | | align="center" height="35px" style="background:#ccd2ae"|100 (115<ref>Only for an all DE Fleet.</ref>)
| |
| − | | align="center" height="35px" style="background:#e8f0c8"|'''Lv'''30
| |
| − | | style="background:#ccff00" rowspan=6|
| |
| − | | align="center" height="35px" style="background:#ccd2ae"|3 DD/DE
| |
| − | | align="center" height="35px" style="background:#e8f0c8"|60 {{Firepower}}<br>80 {{AA}}<br>210 {{ASW}}
| |
| − | | style="background:#ccff00" rowspan=6|
| |
| − | | align="center" height="35px" style="background:#e8f0c8"|-5
| |
| − | | align="center" height="35px" style="background:#e8f0c8"|-5
| |
| − | |-
| |
| − | | align="center" height="35px" style="color:blue"|'''42
| |
| − | | align="center" height="35px" |ミ船団護衛(一号船団)<br>Mi Convoy Escort (Fleet No.1)
| |
| − | | align="center" height="35px" |08:00
| |
| − | | align="center" height="35px" style="background:#e8E8E8"| 200
| |
| − | | align="center" height="35px" |'''Lv''' 45
| |
| − | | align="center" height="35px" style="background:#e8E8E8"|'''Monthly Expedition'''<br>1CVE/1CL 1DD 2DD/DE
| |
| − | | align="center" height="35px" |
| |
| − | | align="center" height="35px" |-8
| |
| − | | align="center" height="35px" |-6.5
| |
| − | |-
| |
| − | | align="center" height="35px" style="background:#e8f0c8;color:red"|'''43
| |
| − | | align="center" height="35px" style="background:#e8f0c8"|ミ船団護衛(二号船団)<br>Mi Convoy Escort (Fleet No.2)
| |
| − | | align="center" height="35px" style="background:#e8f0c8"|12:00
| |
| − | | align="center" height="35px" style="background:#ccd2ae"|300
| |
| − | | align="center" height="35px" style="background:#e8f0c8"|'''Lv''' 55
| |
| − | | align="center" height="35px" style="background:#ccd2ae"|'''Monthly Expedition'''<br>'''{{color|red|Combat Expedition (I)}}'''<br>1CVE<ref name="Flag">Must be flagship.</ref> 2DD/2DE'''<br>or<br>'''1CVL<ref name="Flag"/> 1CL 4DD'''
| |
| − | | align="center" height="35px" style="background:#e8f0c8"|500 {{Firepower}}<br>280 {{ASW}} | |
| − | | align="center" height="35px" style="background:#e8f0c8"|-8.5
| |
| − | | align="center" height="35px" style="background:#e8f0c8"|-9
| |
| − | |-
| |
| − | | align="center" height="35px" style="color:blue"|'''44
| |
| − | | align="center" height="35px" |航空装備輸送任務<br>Aircraft Equipment Transport Mission
| |
| − | | align="center" height="35px" |10:00
| |
| − | | align="center" height="35px" style="background:#e8E8E8"|210
| |
| − | | align="center" height="35px" |'''Lv''' 35
| |
| − | | align="center" height="35px" style="background:#e8E8E8"|'''Monthly Expedition'''<br>1CV/CVL/AV 1AV 1CL 2DD/DE 1XX
| |
| − | | align="center" height="35px" |6 (3<ref>Minimum of Drum carrying ships.</ref>) [[File:Drum.png|30px]]<br>200 {{ASW}}
| |
| − | | align="center" height="35px" |-8
| |
| − | | align="center" height="35px" |-4
| |
| − | |-
| |
| − | | align="center" height="35px" style="background:#e8f0c8"|'''45
| |
| − | | align="center" height="35px" style="background:#e8f0c8"|ボーキサイト船団護衛<br>Bauxite Convoy Escort
| |
| − | | align="center" height="35px" style="background:#e8f0c8"|03:20
| |
| − | | align="center" height="35px" style="background:#ccd2ae"|240
| |
| − | | align="center" height="35px" style="background:#e8f0c8"|'''Lv''' 50
| |
| − | | align="center" height="35px" style="background:#ccd2ae"|1CVL<ref name="Flag"/> 4DD/DE'''
| |
| − | | align="center" height="35px" style="background:#e8f0c8"|240 {{AA}}<br>300 {{ASW}}<br>180 {{LOS}}
| |
| − | | align="center" height="35px" style="background:#e8f0c8"|-6
| |
| − | | align="center" height="35px" style="background:#e8f0c8"|-4
| |
| − | |-
| |
| − | | align="center" height="35px" style="color:red"|'''46
| |
| − | | align="center" height="35px" |南西海域戦闘哨戒<br>Southwestern Sea Combat Patrols
| |
| − | | align="center" height="35px" |3:30
| |
| − | | align="center" height="35px" style="background:#e8E8E8"|300
| |
| − | | align="center" height="35px" |'''Lv''' 60
| |
| − | | align="center" height="35px" style="background:#e8E8E8"|'''Monthly Expedition'''<br>'''{{color|red|Combat Expedition (II)}}'''<br>2CA 1CL 2DD
| |
| − | | align="center" height="35px" |350 {{Firepower}}<br>250 {{AA}}<br>220 {{ASW}}<br>190 {{LOS}}
| |
| − | | align="center" height="35px" |-7.5
| |
| − | | align="center" height="35px" |-9.5
| |
| − | |}
| |
| − | </div>
| |
| − | <references/>
| |
| − | </tabber>
| |
| − | | |
| − | ===World 4===
| |
| − | <tabber>Total yield=
| |
| − | <div style="max-width:1400px;width:90%;margin-left:20px">
| |
| − | {| width=100%
| |
| − | | style="width:50px"| [[File:IcoArea4.png]]
| |
| − | | <div style="width:100%;background:#66cc99;padding-left:10px;border-top-right-radius:10px;color:black">'''西方海域 - Western Waters'''</div>
| |
| − | |}
| |
| − | </div>
| |
| − | <div style="position:relative;color:black;background:white;border:solid 1px lightgray;max-width:1500px;width:95%;border-radius:10px;padding:10px;margin:10px;margin-top:0px">
| |
| − | {| style="radius:10px;cellpadding:10px;width:100%" align="center" height="35px" cellspacing=0
| |
| − | ! style="cellpadding:10px;width:4%"|#
| |
| − | ! style="cellpadding:10px;width:24%"|Name
| |
| − | ! style="cellpadding:10px"|Time
| |
| − | ! style="cellpadding:10px;width:1px"|
| |
| − | ! style="cellpadding:10px;width:7%"|HQ
| |
| − | ! style="cellpadding:10px;width:7%"|Ship
| |
| − | ! style="cellpadding:10px;width:1px"|
| |
| − | ! style="cellpadding:10px;width:7%"|[[File:Fuel.png|30px]]
| |
| − | ! style="cellpadding:10px;width:7%"|[[File:Ammunition.png|30px]]
| |
| − | ! style="cellpadding:10px;width:7%"|[[File:Steel.png|30px]]
| |
| − | ! style="cellpadding:10px;width:7%"|[[File:Bauxite.png|30px]]
| |
| − | ! style="cellpadding:10px;width:1px"|
| |
| − | ! style="cellpadding:10px;width:20%" colspan=2|Rewards
| |
| − | |-
| |
| − | | style="background:gray" colspan=17|
| |
| − | |-
| |
| − | | align="center" height="35px" style="background:#C5E6D5"|'''25
| |
| − | | align="center" height="35px" style="background:#C5E6D5"|通商破壊作戦<br>Commerce Raid Operation
| |
| − | | align="center" height="35px" style="background:#C5E6D5"|40:00
| |
| − | | style="background:#66cc99" rowspan=11|
| |
| − | | align="center" height="35px" style="background:#C5E6D5"|80
| |
| − | | align="center" height="35px" style="background:#C5E6D5"|180
| |
| − | | style="background:#66cc99" rowspan=11|
| |
| − | | align="center" height="35px" style="background:#C5E6D5;color:red"|'''900'''
| |
| − | | align="center" height="35px" style="background:#C5E6D5"|
| |
| − | | align="center" height="35px" style="background:#C5E6D5;color:red"|'''500'''
| |
| − | | align="center" height="35px" style="background:#C5E6D5"|
| |
| − | | style="background:#66cc99" rowspan=11|
| |
| − | | align="center" height="35px" style="background:#C5E6D5"|
| |
| − | | align="center" height="35px" style="background:#C5E6D5"|
| |
| − | |-
| |
| − | | align="center" height="35px" |'''26
| |
| − | | align="center" height="35px" |敵母港空襲作戦<br>Enemy Homeport Air-Raid Operation
| |
| − | | align="center" height="35px" |80:00
| |
| − | | align="center" height="35px" |150
| |
| − | | align="center" height="35px" |200
| |
| − | | align="center" height="35px" |
| |
| − | | align="center" height="35px" |
| |
| − | | align="center" height="35px" |
| |
| − | | align="center" height="35px" style="color:red"|'''900'''
| |
| − | | align="center" height="35px" |[[File:Item Icon Instant Repair Material.png|35px]]x3
| |
| − | | align="center" height="35px" |
| |
| − | |-
| |
| − | | align="center" height="35px" style="background:#C5E6D5"|'''27
| |
| − | | align="center" height="35px" style="background:#C5E6D5"|潜水艦通商破壊作戦<br>Submarine Commerce Raid Operation
| |
| − | | align="center" height="35px" style="background:#C5E6D5"|20:00
| |
| − | | align="center" height="35px" style="background:#C5E6D5"|80
| |
| − | | align="center" height="35px" style="background:#C5E6D5"|60
| |
| − | | align="center" height="35px" style="background:#C5E6D5"|
| |
| − | | align="center" height="35px" style="background:#C5E6D5"|
| |
| − | | align="center" height="35px" style="background:#C5E6D5;color:red"|'''800'''
| |
| − | | align="center" height="35px" style="background:#C5E6D5"|
| |
| − | | align="center" height="35px" style="background:#C5E6D5"|[[File:Item Icon Development Material.png|35px]]x1
| |
| − | | align="center" height="35px" style="background:#C5E6D5"|[[File:Item Icon Furniture Box (Small).png|35px]]x2
| |
| − | |-
| |
| − | | align="center" height="35px" |'''28
| |
| − | | align="center" height="35px" |西方海域封鎖作戦<br> Western Waters Blockade Operation
| |
| − | | align="center" height="35px" |25:00
| |
| − | | align="center" height="35px" |100
| |
| − | | align="center" height="35px" |140
| |
| − | | align="center" height="35px" |
| |
| − | | align="center" height="35px" |
| |
| − | | align="center" height="35px" style="color:red"|'''900'''
| |
| − | | align="center" height="35px" style="color:red"|'''350'''
| |
| − | | align="center" height="35px" |[[File:Item Icon Development Material.png|35px]]x2
| |
| − | | align="center" height="35px" |[[File:Item Icon Furniture Box (Medium).png|35px]]x2
| |
| − | |-
| |
| − | | align="center" height="35px" style="background:#C5E6D5"|'''29
| |
| − | | align="center" height="35px" style="background:#C5E6D5"|潜水艦派遣演習<br>Submarine Dispatch Exercise
| |
| − | | align="center" height="35px" style="background:#C5E6D5"|24:00
| |
| − | | align="center" height="35px" style="background:#C5E6D5"|100
| |
| − | | align="center" height="35px" style="background:#C5E6D5"|100
| |
| − | | align="center" height="35px" style="background:#C5E6D5"|
| |
| − | | align="center" height="35px" style="background:#C5E6D5"|50
| |
| − | | align="center" height="35px" style="background:#C5E6D5"|
| |
| − | | align="center" height="35px" style="background:#C5E6D5"|100
| |
| − | | align="center" height="35px" style="background:#C5E6D5"|[[File:Item Icon Development Material.png|35px]]x1
| |
| − | | align="center" height="35px" style="background:#C5E6D5"|[[File:Item Icon Furniture Box (Small).png|35px]]x1
| |
| − | |-
| |
| − | | align="center" height="35px" |'''30
| |
| − | | align="center" height="35px" |潜水艦派遣作戦<br>Submarine Dispatch Operation
| |
| − | | align="center" height="35px" |48:00
| |
| − | | align="center" height="35px" |100
| |
| − | | align="center" height="35px" |150
| |
| − | | align="center" height="35px" |
| |
| − | | align="center" height="35px" |50
| |
| − | | align="center" height="35px" |
| |
| − | | align="center" height="35px" |100
| |
| − | | align="center" height="35px" |[[File:Item Icon Development Material.png|35px]]x3
| |
| − | | align="center" height="35px" |
| |
| − | |-
| |
| − | | align="center" height="35px" style="background:#C5E6D5"|'''31
| |
| − | | align="center" height="35px" style="background:#C5E6D5"|海外艦との接触<br>Contact with Foreign Ships
| |
| − | | align="center" height="35px" style="background:#C5E6D5"|02:00
| |
| − | | align="center" height="35px" style="background:#C5E6D5"|50 | |
| − | | align="center" height="35px" style="background:#C5E6D5"|50
| |
| − | | align="center" height="35px" style="background:#C5E6D5"|
| |
| − | | align="center" height="35px" style="background:#C5E6D5"|30
| |
| − | | align="center" height="35px" style="background:#C5E6D5"|
| |
| − | | align="center" height="35px" style="background:#C5E6D5"|
| |
| − | | align="center" height="35px" style="background:#C5E6D5"|[[File:Item Icon Furniture Box (Small).png|35px]]x1
| |
| − | | align="center" height="35px" style="background:#C5E6D5"|
| |
| − | |-
| |
| − | | align="center" height="35px" |'''32
| |
| − | | align="center" height="35px" |遠洋練習航海<br>High Seas Practice
| |
| − | | align="center" height="35px" |24:00
| |
| − | | align="center" height="35px" |300
| |
| − | | align="center" height="35px" style="color:red"|Var<ref>Varies due to several factors, including (but not limited to) CT's level and individual ship's level</ref>
| |
| − | | align="center" height="35px" |50
| |
| − | | align="center" height="35px" |50
| |
| − | | align="center" height="35px" |50
| |
| − | | align="center" height="35px" |50
| |
| − | | align="center" height="35px" |[[File:Item Icon Furniture Box (Large).png|35px]]x1
| |
| − | | align="center" height="35px" |[[File:Item Icon Development Material.png|35px]]x3
| |
| − | |-
| |
| − | | align="center" height="35px" style="background:#C5E6D5"|'''D1 | |
| − | | align="center" height="35px" style="background:#C5E6D5"|西方海域偵察作戦<br>Western Sea Reconnaissance Operation
| |
| − | | align="center" height="35px" style="background:#C5E6D5"|02:00
| |
| − | | align="center" height="35px" style="background:#C5E6D5"|35
| |
| − | | align="center" height="35px" style="background:#C5E6D5"|45
| |
| − | | align="center" height="35px" style="background:#C5E6D5"|
| |
| − | | align="center" height="35px" style="background:#C5E6D5"|20
| |
| − | | align="center" height="35px" style="background:#C5E6D5"|20
| |
| − | | align="center" height="35px" style="background:#C5E6D5"|100
| |
| − | | align="center" height="35px" style="background:#C5E6D5"|[[File:Item Icon Instant Repair Material.png|35px]]x1
| |
| − | | align="center" height="35px" style="background:#C5E6D5"|
| |
| − | |-
| |
| − | | align="center" height="35px" style="color:red"|'''D2
| |
| − | | align="center" height="35px" |西方潜水艦作戦<br>Western Submarine Operation
| |
| − | | align="center" height="35px" |10:00
| |
| − | | align="center" height="35px" |70
| |
| − | | align="center" height="35px" |90
| |
| − | | align="center" height="35px" |
| |
| − | | align="center" height="35px" |
| |
| − | | align="center" height="35px" |400
| |
| − | | align="center" height="35px" |800
| |
| − | | align="center" height="35px" |[[File:Item Icon Food Supply Ship Irako.png|35px]]x1
| |
| − | | align="center" height="35px" |[[File:Item Icon Furniture Box (Large).png|35px]]x1
| |
| − | |-
| |
| − | | align="center" height="35px" style="background:#C5E6D5;color:red"| '''D3
| |
| − | | align="center" height="35px" style="background:#C5E6D5"|欧州方面友軍との接触<br>Contact with Friendly European Forces
| |
| − | | align="center" height="35px" style="background:#C5E6D5"|12:00
| |
| − | | align="center" height="35px" style="background:#C5E6D5"|80
| |
| − | | align="center" height="35px" style="background:#C5E6D5"|100
| |
| − | | align="center" height="35px" style="background:#C5E6D5"|
| |
| − | | align="center" height="35px" style="background:#C5E6D5"|800
| |
| − | | align="center" height="35px" style="background:#C5E6D5"|500
| |
| − | | align="center" height="35px" style="background:#C5E6D5"|400
| |
| − | | align="center" height="35px" style="background:#C5E6D5"|[[File:Item Icon Instant Repair Material.png|35px]]x3
| |
| − | | align="center" height="35px" style="background:#C5E6D5"|[[File:Item Icon Improvement Material.png|35px]]x1
| |
| − | |}</div>
| |
| − | <references/>
| |
| − | |-|Hourly Yield=
| |
| − | <div style="max-width:1400px;width:90%;margin-left:20px">
| |
| − | {| width=100%
| |
| − | | style="width:50px"| [[File:IcoArea4.png]]
| |
| − | | <div style="width:100%;background:#66cc99;padding-left:10px;border-top-right-radius:10px;color:black">'''西方海域 - Western Waters'''</div>
| |
| − | |}
| |
| − | </div>
| |
| − | <div style="position:relative;color:black;background:white;border:solid 1px lightgray;max-width:1500px;width:95%;border-radius:10px;padding:10px;margin:10px;margin-top:0px">
| |
| − | {| style="radius:10px;cellpadding:10px;width:100%" align="center" height="35px" cellspacing=0
| |
| − | ! style="cellpadding:10px;width:4%"|#
| |
| − | ! style="cellpadding:10px;width:24%"|Name
| |
| − | ! style="cellpadding:10px"|Time
| |
| − | ! style="cellpadding:10px;width:1px"|
| |
| − | ! style="cellpadding:10px;width:7%"|HQ
| |
| − | ! style="cellpadding:10px;width:7%"|Ship
| |
| − | ! style="cellpadding:10px;width:1px"|
| |
| − | ! style="cellpadding:10px;width:7%"|[[File:Fuel.png|30px]]
| |
| − | ! style="cellpadding:10px;width:7%"|[[File:Ammunition.png|30px]]
| |
| − | ! style="cellpadding:10px;width:7%"|[[File:Steel.png|30px]]
| |
| − | ! style="cellpadding:10px;width:7%"|[[File:Bauxite.png|30px]]
| |
| − | ! style="cellpadding:10px;width:1px"|
| |
| − | ! style="cellpadding:10px;width:20%" colspan=2|Rewards
| |
| − | |-
| |
| − | | style="background:gray" colspan=17|
| |
| − | |-
| |
| − | | align="center" height="35px" style="background:#C5E6D5"|'''25
| |
| − | | align="center" height="35px" style="background:#C5E6D5"|通商破壊作戦<br>Commerce Raid Operation
| |
| − | | align="center" height="35px" style="background:#C5E6D5"|40:00
| |
| − | | style="background:#66cc99" rowspan=11|
| |
| − | | align="center" height="35px" style="background:#C5E6D5"|2
| |
| − | | align="center" height="35px" style="background:#C5E6D5"|4
| |
| − | | style="background:#66cc99" rowspan=11|
| |
| − | | align="center" height="35px" style="background:#C5E6D5"|23
| |
| − | | align="center" height="35px" style="background:#C5E6D5"|
| |
| − | | align="center" height="35px" style="background:#C5E6D5"|13
| |
| − | | align="center" height="35px" style="background:#C5E6D5"|
| |
| − | | style="background:#66cc99" rowspan=11|
| |
| − | | align="center" height="35px" style="background:#C5E6D5"|
| |
| − | | align="center" height="35px" style="background:#C5E6D5"|
| |
| − | |-
| |
| − | | align="center" height="35px" |'''26
| |
| − | | align="center" height="35px" |敵母港空襲作戦<br>Enemy Homeport Air-Raid Operation
| |
| − | | align="center" height="35px" |80:00
| |
| − | | align="center" height="35px" |1.875
| |
| − | | align="center" height="35px" |2.5
| |
| − | | align="center" height="35px" |
| |
| − | | align="center" height="35px" |
| |
| − | | align="center" height="35px" |
| |
| − | | align="center" height="35px" |11
| |
| − | | align="center" height="35px" |[[File:Item Icon Instant Repair Material.png|35px]]x3
| |
| − | | align="center" height="35px" |
| |
| − | |-
| |
| − | | align="center" height="35px" style="background:#C5E6D5"|'''27
| |
| − | | align="center" height="35px" style="background:#C5E6D5"|潜水艦通商破壊作戦<br>Submarine Commerce Raid Operation
| |
| − | | align="center" height="35px" style="background:#C5E6D5"|20:00
| |
| − | | align="center" height="35px" style="background:#C5E6D5"|4
| |
| − | | align="center" height="35px" style="background:#C5E6D5"|3
| |
| − | | align="center" height="35px" style="background:#C5E6D5"|
| |
| − | | align="center" height="35px" style="background:#C5E6D5"|
| |
| − | | align="center" height="35px" style="background:#C5E6D5;color:blue"|'''40'''
| |
| − | | align="center" height="35px" style="background:#C5E6D5"|
| |
| − | | align="center" height="35px" style="background:#C5E6D5"|[[File:Item Icon Development Material.png|35px]]x1
| |
| − | | align="center" height="35px" style="background:#C5E6D5"|[[File:Item Icon Furniture Box (Small).png|35px]]x2
| |
| − | |- | |
| − | | align="center" height="35px" |'''28
| |
| − | | align="center" height="35px" |西方海域封鎖作戦<br>Western Waters Blockade Operation
| |
| − | | align="center" height="35px" |25:00
| |
| − | | align="center" height="35px" |4
| |
| − | | align="center" height="35px" |5
| |
| − | | align="center" height="35px" |
| |
| − | | align="center" height="35px" |
| |
| − | | align="center" height="35px" style="color:blue"|'''36'''
| |
| − | | align="center" height="35px" |14
| |
| − | | align="center" height="35px" |[[File:Item Icon Development Material.png|35px]]x2
| |
| − | | align="center" height="35px" |[[File:Item Icon Furniture Box (Medium).png|35px]]x2
| |
| − | |-
| |
| − | | align="center" height="35px" style="background:#C5E6D5"|'''29
| |
| − | | align="center" height="35px" style="background:#C5E6D5"|潜水艦派遣演習<br>Submarine Dispatch Exercise
| |
| − | | align="center" height="35px" style="background:#C5E6D5"|24:00
| |
| − | | align="center" height="35px" style="background:#C5E6D5"|4
| |
| − | | align="center" height="35px" style="background:#C5E6D5"|4
| |
| − | | align="center" height="35px" style="background:#C5E6D5"|
| |
| − | | align="center" height="35px" style="background:#C5E6D5"|2
| |
| − | | align="center" height="35px" style="background:#C5E6D5"|
| |
| − | | align="center" height="35px" style="background:#C5E6D5"|4
| |
| − | | align="center" height="35px" style="background:#C5E6D5"|[[File:Item Icon Development Material.png|35px]]x1
| |
| − | | align="center" height="35px" style="background:#C5E6D5"|[[File:Item Icon Furniture Box (Small).png|35px]]x1
| |
| − | |-
| |
| − | | align="center" height="35px" |'''30
| |
| − | | align="center" height="35px" |潜水艦派遣作戦<br>Submarine Dispatch Operation
| |
| − | | align="center" height="35px" |48:00
| |
| − | | align="center" height="35px" |2
| |
| − | | align="center" height="35px" |3
| |
| − | | align="center" height="35px" |
| |
| − | | align="center" height="35px" |1
| |
| − | | align="center" height="35px" |
| |
| − | | align="center" height="35px" |2
| |
| − | | align="center" height="35px" |[[File:Item Icon Development Material.png|35px]]x3
| |
| − | | align="center" height="35px" |
| |
| − | |-
| |
| − | | align="center" height="35px" style="background:#C5E6D5"|'''31
| |
| − | | align="center" height="35px" style="background:#C5E6D5"|海外艦との接触<br>Contact with Foreign Ships
| |
| − | | align="center" height="35px" style="background:#C5E6D5"|02:00
| |
| − | | align="center" height="35px" style="background:#C5E6D5"|25
| |
| − | | align="center" height="35px" style="background:#C5E6D5"|25
| |
| − | | align="center" height="35px" style="background:#C5E6D5"|
| |
| − | | align="center" height="35px" style="background:#C5E6D5"|15
| |
| − | | align="center" height="35px" style="background:#C5E6D5"|
| |
| − | | align="center" height="35px" style="background:#C5E6D5"|
| |
| − | | align="center" height="35px" style="background:#C5E6D5"|[[File:Item Icon Furniture Box (Small).png|35px]]x1
| |
| − | | align="center" height="35px" style="background:#C5E6D5"|
| |
| − | |-
| |
| − | | align="center" height="35px" |'''32
| |
| − | | align="center" height="35px" |遠洋練習航海<br>High Seas Practice
| |
| − | | align="center" height="35px" |24:00
| |
| − | | align="center" height="35px" |12.5
| |
| − | | align="center" height="35px" style="color:red;"|Var<ref>Varies due to several factors, including (but not limited to) CT's level and individual ship's level</ref>
| |
| − | | align="center" height="35px" |2
| |
| − | | align="center" height="35px" |2
| |
| − | | align="center" height="35px" |2
| |
| − | | align="center" height="35px" |2
| |
| − | | align="center" height="35px" |[[File:Item Icon Furniture Box (Large).png|35px]]x1
| |
| − | | align="center" height="35px" |[[File:Item Icon Development Material.png|35px]]x3
| |
| − | |-
| |
| − | | align="center" height="35px" style="background:#C5E6D5"|'''D1
| |
| − | | align="center" height="35px" style="background:#C5E6D5"|西方海域偵察作戦<br>Western Sea Reconnaissance Operation
| |
| − | | align="center" height="35px" style="background:#C5E6D5"|02:00
| |
| − | | align="center" height="35px" style="background:#C5E6D5"|18
| |
| − | | align="center" height="35px" style="background:#C5E6D5"|23
| |
| − | | align="center" height="35px" style="background:#C5E6D5"|10
| |
| − | | align="center" height="35px" style="background:#C5E6D5"|10
| |
| − | | align="center" height="35px" style="background:#C5E6D5"|
| |
| − | | align="center" height="35px" style="background:#C5E6D5"|50
| |
| − | | align="center" height="35px" style="background:#C5E6D5"|[[File:Item Icon Instant Repair Material.png|35px]]x1
| |
| − | | align="center" height="35px" style="background:#C5E6D5"|
| |
| − | |-
| |
| − | | align="center" height="35px" style="color:red"|'''D2
| |
| − | | align="center" height="35px" |西方潜水艦作戦<br>Western Submarine Operation
| |
| − | | align="center" height="35px" |10:00
| |
| − | | align="center" height="35px" |7
| |
| − | | align="center" height="35px" |9
| |
| − | | align="center" height="35px" |
| |
| − | | align="center" height="35px" |
| |
| − | | align="center" height="35px" |40
| |
| − | | align="center" height="35px" |80
| |
| − | | align="center" height="35px" |[[File:Item Icon Food Supply Ship Irako.png|35px]]x1
| |
| − | | align="center" height="35px" |[[File:Item Icon Furniture Box (Large).png|35px]]x1
| |
| − | |-
| |
| − | | align="center" height="35px" style="background:#C5E6D5;color:red"|'''D3
| |
| − | | align="center" height="35px" style="background:#C5E6D5"|欧州方面友軍との接触<br>Contact with Friendly European Forces
| |
| − | | align="center" height="35px" style="background:#C5E6D5"|12:00
| |
| − | | align="center" height="35px" style="background:#C5E6D5"|7
| |
| − | | align="center" height="35px" style="background:#C5E6D5"|8
| |
| − | | align="center" height="35px" style="background:#C5E6D5"|
| |
| − | | align="center" height="35px" style="background:#C5E6D5"|67
| |
| − | | align="center" height="35px" style="background:#C5E6D5"|42
| |
| − | | align="center" height="35px" style="background:#C5E6D5"|33
| |
| − | | align="center" height="35px" style="background:#C5E6D5"|[[File:Item Icon Instant Repair Material.png|35px]]x3
| |
| − | | align="center" height="35px" style="background:#C5E6D5"|[[File:Item Icon Improvement Material.png|35px]]x1
| |
| − | |}</div>
| |
| − | <references/>
| |
| − | |-|Requirements=
| |
| − | <div style="max-width:1400px;width:90%;margin-left:20px">
| |
| − | {| width=100%
| |
| − | | style="width:50px"| [[File:IcoArea4.png]]
| |
| − | | <div style="width:100%;background:#66cc99;padding-left:10px;border-top-right-radius:10px;color:black">'''西方海域 - Western Waters'''</div>
| |
| − | |}
| |
| − | </div>
| |
| − | <div style="position:relative;color:black;background:white;border:solid 1px lightgray;max-width:1500px;width:95%;border-radius:10px;padding:10px;margin:10px;margin-top:0px">
| |
| − | {| style="radius:10px;cellpadding:10px;width:100%" align="center" height="35px" cellspacing=0
| |
| − | ! style="cellpadding:10px;width:4%"|#
| |
| − | ! style="cellpadding:10px;width:24%"|Name
| |
| − | ! style="cellpadding:10px"|Time
| |
| − | ! style="cellpadding:10px;width:1px"|
| |
| − | ! style="cellpadding:10px;width:7%"|Σ(Lv)
| |
| − | ! style="cellpadding:10px;width:7%"|[[File:Flagship icon.png]]
| |
| − | ! style="cellpadding:10px;width:1px"|
| |
| − | ! style="cellpadding:10px;width:21%"|Minimum Fleet Size
| |
| − | ! style="cellpadding:10px;width:7%"|Requirements Needed
| |
| − | ! style="cellpadding:10px;width:1px"|
| |
| − | ! style="cellpadding:10px;width:10%"|[[File:Fuel.png|30px]]
| |
| − | ! style="cellpadding:10px;width:10%"|[[File:Ammunition.png|30px]]
| |
| − | |-
| |
| − | | style="background:gray" colspan=16|
| |
| − | |-
| |
| − | | align="center" height="35px" style="background:#C5E6D5"|'''25
| |
| − | | align="center" height="35px" style="background:#C5E6D5"|通商破壊作戦<br>Commerce Raid Operation
| |
| − | | align="center" height="35px" style="background:#C5E6D5"|40:00
| |
| − | | style="background:#66cc99" rowspan=11|
| |
| − | | align="center" height="35px" style="background:#b3d1c2"|
| |
| − | | align="center" height="35px" style="background:#C5E6D5"|'''Lv''' 25
| |
| − | | style="background:#66cc99" rowspan=11|
| |
| − | | align="center" height="35px" style="background:#b3d1c2"|2CA 2DD
| |
| − | | align="center" height="35px" style="background:#C5E6D5"|
| |
| − | | style="background:#66cc99" rowspan=11|
| |
| − | | align="center" height="35px" style="background:#C5E6D5"|-5
| |
| − | | align="center" height="35px" style="background:#C5E6D5"|-8
| |
| − | |-
| |
| − | | align="center" height="35px" |'''26
| |
| − | | align="center" height="35px" |敵母港空襲作戦<br>Enemy Homeport Air-Raid Operation
| |
| − | | align="center" height="35px" |80:00
| |
| − | | align="center" height="35px" style="background:#e8E8E8;"|
| |
| − | | align="center" height="35px" |'''Lv''' 30
| |
| − | | align="center" height="35px" style="background:#e8E8E8;"|1CV(B) 1CL 2DD
| |
| − | | align="center" height="35px" |
| |
| − | | align="center" height="35px" |-8
| |
| − | | align="center" height="35px" |-8
| |
| − | |-
| |
| − | | align="center" height="35px" style="background:#C5E6D5"|'''27
| |
| − | | align="center" height="35px" style="background:#C5E6D5"|潜水艦通商破壊作戦<br>Submarine Commerce Raid Operation
| |
| − | | align="center" height="35px" style="background:#C5E6D5"|20:00
| |
| − | | align="center" height="35px" style="background:#b3d1c2"|
| |
| − | | align="center" height="35px" style="background:#C5E6D5"|'''Lv''' 1
| |
| − | | align="center" height="35px" style="background:#b3d1c2"|2SS(V)
| |
| − | | align="center" height="35px" style="background:#C5E6D5"|
| |
| − | | align="center" height="35px" style="background:#C5E6D5"|-8
| |
| − | | align="center" height="35px" style="background:#C5E6D5"|-8
| |
| − | |-
| |
| − | | align="center" height="35px" |'''28
| |
| − | | align="center" height="35px" |西方海域封鎖作戦<br>Western Waters Blockade Operation
| |
| − | | align="center" height="35px" |25:00
| |
| − | | align="center" height="35px" style="background:#e8E8E8"|
| |
| − | | align="center" height="35px" |'''Lv''' 30
| |
| − | | align="center" height="35px" style="background:#e8E8E8"|3SS(V)
| |
| − | | align="center" height="35px" |
| |
| − | | align="center" height="35px" |-8
| |
| − | | align="center" height="35px" |-8
| |
| − | |-
| |
| − | | align="center" height="35px" style="background:#C5E6D5"|'''29
| |
| − | | align="center" height="35px" style="background:#C5E6D5"|潜水艦派遣演習<br>Submarine Dispatch Exercise
| |
| − | | align="center" height="35px" style="background:#C5E6D5"|24:00
| |
| − | | align="center" height="35px" style="background:#b3d1c2"|
| |
| − | | align="center" height="35px" style="background:#C5E6D5"|'''Lv''' 50
| |
| − | | align="center" height="35px" style="background:#b3d1c2"|3SS(V)
| |
| − | | align="center" height="35px" style="background:#C5E6D5"|
| |
| − | | align="center" height="35px" style="background:#C5E6D5"|-9
| |
| − | | align="center" height="35px" style="background:#C5E6D5"|-4
| |
| − | |-
| |
| − | | align="center" height="35px" |'''30
| |
| − | | align="center" height="35px" |潜水艦派遣作戦<br>Submarine Dispatch Operation
| |
| − | | align="center" height="35px" |48:00
| |
| − | | align="center" height="35px" style="background:#e8E8E8"|
| |
| − | | align="center" height="35px" |'''Lv''' 55
| |
| − | | align="center" height="35px" style="background:#e8E8E8"|4SS(V)
| |
| − | | align="center" height="35px" |
| |
| − | | align="center" height="35px" |-9
| |
| − | | align="center" height="35px" |-7
| |
| − | |-
| |
| − | | align="center" height="35px" style="background:#C5E6D5"|'''31
| |
| − | | align="center" height="35px" style="background:#C5E6D5"|海外艦との接触<br>Contact with Foreign Ships
| |
| − | | align="center" height="35px" style="background:#C5E6D5"|02:00
| |
| − | | align="center" height="35px" style="background:#b3d1c2"|200
| |
| − | | align="center" height="35px" style="background:#C5E6D5"|'''Lv''' 60
| |
| − | | align="center" height="35px" style="background:#b3d1c2"|4SS(V)
| |
| − | | align="center" height="35px" style="background:#C5E6D5"|
| |
| − | | align="center" height="35px" style="background:#C5E6D5"|-5
| |
| − | | align="center" height="35px" style="background:#C5E6D5"|
| |
| − | |-
| |
| − | | align="center" height="35px" |'''32
| |
| − | | align="center" height="35px" |遠洋練習航海<br>High Seas Practice
| |
| − | | align="center" height="35px" |24:00
| |
| − | | align="center" height="35px" style="background:#e8E8E8"|
| |
| − | | align="center" height="35px" |'''Lv''' 5
| |
| − | | align="center" height="35px" style="background:#e8E8E8"|1CT<ref name="Flag">Must be flagship.</ref> 2DD
| |
| − | | align="center" height="35px" |
| |
| − | | align="center" height="35px" |-9
| |
| − | | align="center" height="35px" |-3
| |
| − | |-
| |
| − | | align="center" height="35px" style="background:#C5E6D5"|'''D1
| |
| − | | align="center" height="35px" style="background:#C5E6D5"|西方海域偵察作戦<br>Western Sea Reconnaissance Operation
| |
| − | | align="center" height="35px" style="background:#C5E6D5"|02:00
| |
| − | | align="center" height="35px" style="background:#b3d1c2"|200
| |
| − | | align="center" height="35px" style="background:#C5E6D5"|'''Lv''' 50
| |
| − | | align="center" height="35px" style="background:#b3d1c2"|AV<ref name="Flag"/> 4DD
| |
| − | | align="center" height="35px" style="background:#C5E6D5"|250 {{AA}}<br>240 {{ASW}}<br>300 {{LOS}}
| |
| − | | align="center" height="35px" style="background:#C5E6D5"|-7.5
| |
| − | | align="center" height="35px" style="background:#C5E6D5"|-5
| |
| − | |-
| |
| − | | align="center" height="35px" style="color:red"|'''D2
| |
| − | | align="center" height="35px" |西方潜水艦作戦<br>Western Submarine Operation
| |
| − | | align="center" height="35px" |10:00
| |
| − | | align="center" height="35px" style="background:#e8E8E8;"|270
| |
| − | | align="center" height="35px" |'''Lv''' 55
| |
| − | | align="center" height="35px" style="background:#e8E8E8;"|'''Monthly Expedition'''<br>'''{{color|red|Combat Expedition (I)}}'''<br>1AS<ref name="Flag"/> 3SS(V)
| |
| − | | align="center" height="35px" |60 {{Firepower}}<br>80 {{AA}}<br>50 {{ASW}}
| |
| − | | align="center" height="35px" |-9
| |
| − | | align="center" height="35px" |-9
| |
| − | |-
| |
| − | | align="center" height="35px" style="background:#C5E6D5;color:red"|'''D3
| |
| − | | align="center" height="35px" style="background:#C5E6D5"|欧州方面友軍との接触<br>Contact with Friendly European Forces
| |
| − | | align="center" height="35px" style="background:#C5E6D5"|12:00
| |
| − | | align="center" height="35px" style="background:#b3d1c2"|350
| |
| − | | align="center" height="35px" style="background:#C5E6D5"|'''Lv''' 65
| |
| − | | align="center" height="35px" style="background:#b3d1c2"|'''Monthly Expedition'''<br>'''{{color|red|Combat Expedition (II)}}'''<br>1AS<ref name="Flag"/> 3SS(V)
| |
| − | | align="center" height="35px" style="background:#C5E6D5"|115 {{Firepower}}<br>90 {{AA}}<br>70 {{ASW}}<br>95 {{LOS}}
| |
| − | | align="center" height="35px" style="background:#C5E6D5"|-9
| |
| − | | align="center" height="35px" style="background:#C5E6D5"|-9.5
| |
| − | |} | |
| − | </div>
| |
| − | <references/>
| |
| − | </tabber>
| |
| − | | |
| − | ===World 5===
| |
| − | <tabber>Total yield=
| |
| − | <div style="max-width:1400px;width:90%;margin-left:20px">
| |
| − | {| width=100%
| |
| − | | style="width:50px;"| [[File:IcoArea5.png]]
| |
| − | | <div style="width:100%;background:#9999cc;padding-left:10px;border-top-right-radius:10px;color:black">'''南方海域 - Southern Waters'''</div>
| |
| − | |}
| |
| − | </div>
| |
| − | <div style="position:relative;color:black;background:white;border:solid 1px lightgray;max-width:1500px;width:95%;border-radius:10px;padding:10px;margin:10px;margin-top:0px">
| |
| − | {| style="radius:10px;cellpadding:10px;width:100%" align="center" height="35px" cellspacing=0
| |
| − | ! style="cellpadding:10px;width:4%"|#
| |
| − | ! style="cellpadding:10px;width:24%"|Name
| |
| − | ! style="cellpadding:10px"|Time
| |
| − | ! style="cellpadding:10px;width:1px"|
| |
| − | ! style="cellpadding:10px;width:7%"|HQ
| |
| − | ! style="cellpadding:10px;width:7%"|Ship
| |
| − | ! style="cellpadding:10px;width:1px"|
| |
| − | ! style="cellpadding:10px;width:7%"|[[File:Fuel.png|30px]]
| |
| − | ! style="cellpadding:10px;width:7%"|[[File:Ammunition.png|30px]]
| |
| − | ! style="cellpadding:10px;width:7%"|[[File:Steel.png|30px]]
| |
| − | ! style="cellpadding:10px;width:7%"|[[File:Bauxite.png|30px]]
| |
| − | ! style="cellpadding:10px;width:1px"|
| |
| − | ! style="cellpadding:10px;width:20%" colspan=2|Rewards
| |
| − | |-
| |
| − | | style="background:gray" colspan=15|
| |
| − | |-
| |
| − | | align="center" height="35px" style="background:#D3D3EB"|'''33
| |
| − | | align="center" height="35px" style="background:#D3D3EB"|前衛支援任務<br>Vanguard Support Mission
| |
| − | | align="center" height="35px" style="background:#D3D3EB"|00:15
| |
| − | | style="background:#9999cc" rowspan=10|
| |
| − | | align="center" style="background:lightblue" colspan=10|Sortie [[Expedition#Support_Expeditions|support expedition]] (normal)
| |
| − | |-
| |
| − | | align="center" height="35px" |'''34
| |
| − | | align="center" height="35px" |艦隊決戦支援任務<br>Decisive Battle Fleet Support Mission
| |
| − | | align="center" height="35px" |00:30
| |
| − | | align="center" style="background:lightblue" colspan=11|Sortie [[Expedition#Support_Expeditions|support expedition]] (boss)
| |
| − | |-
| |
| − | | align="center" height="35px" style="background:#D3D3EB"|'''35
| |
| − | | align="center" height="35px" style="background:#D3D3EB"|MO作戦<br>Operation MO
| |
| − | | align="center" height="35px" style="background:#D3D3EB"|07:00
| |
| − | | align="center" height="35px" style="background:#D3D3EB"|100
| |
| − | | align="center" height="35px" style="background:#D3D3EB"|100
| |
| − | | style="background:#9999cc" rowspan=9|
| |
| − | | align="center" height="35px" style="background:#D3D3EB"|
| |
| − | | align="center" height="35px" style="background:#D3D3EB"|
| |
| − | | align="center" height="35px" style="background:#D3D3EB;color:blue"|'''240'''
| |
| − | | align="center" height="35px" style="background:#D3D3EB;color:red"|'''280'''
| |
| − | | style="background:#9999cc" rowspan=9|
| |
| − | | align="center" height="35px" style="background:#D3D3EB"|[[File:Item Icon Furniture Box (Small).png|35px]]x2
| |
| − | | align="center" height="35px" style="background:#D3D3EB"|[[File:Item Icon Development Material.png|35px]]x1
| |
| − | |-
| |
| − | | align="center" height="35px" |'''36
| |
| − | | align="center" height="35px" |水上機基地建設<br>Seaplane Base Construction
| |
| − | | align="center" height="35px" |09:00
| |
| − | | align="center" height="35px" |100
| |
| − | | align="center" height="35px" |100
| |
| − | | align="center" height="35px" style="color:red"|'''480'''
| |
| − | | align="center" height="35px" |
| |
| − | | align="center" height="35px" style="color:blue"|'''200'''
| |
| − | | align="center" height="35px" style="color:blue"|'''200'''
| |
| − | | align="center" height="35px" |[[File:Item Icon Furniture Box (Medium).png|35px]]x2
| |
| − | | align="center" height="35px" |[[File:Item Icon Instant Repair Material.png|35px]]x1
| |
| − | |-
| |
| − | | align="center" height="35px" style="background:#D3D3EB"|'''37
| |
| − | | align="center" height="35px" style="background:#D3D3EB"|東京急行<br>Tokyo Express
| |
| − | | align="center" height="35px" style="background:#D3D3EB"|02:45
| |
| − | | align="center" height="35px" style="background:#D3D3EB"|50
| |
| − | | align="center" height="35px" style="background:#D3D3EB"|65
| |
| − | | align="center" height="35px" style="background:#D3D3EB"|
| |
| − | | align="center" height="35px" style="background:#D3D3EB;color:red"|'''380'''
| |
| − | | align="center" height="35px" style="background:#D3D3EB;color:blue"|'''270'''
| |
| − | | align="center" height="35px" style="background:#D3D3EB"|
| |
| − | | align="center" height="35px" style="background:#D3D3EB"|[[File:Item Icon Furniture Box (Small).png|35px]]x2
| |
| − | | align="center" height="35px" style="background:#D3D3EB"|
| |
| − | |-
| |
| − | | align="center" height="35px" |'''38
| |
| − | | align="center" height="35px" |東京急行(弐)<br>Tokyo Express (2)
| |
| − | | align="center" height="35px" |02:55
| |
| − | | align="center" height="35px" |50
| |
| − | | align="center" height="35px" |70
| |
| − | | align="center" height="35px" style="color:red"|'''420'''
| |
| − | | align="center" height="35px" |
| |
| − | | align="center" height="35px" style="color:blue"|'''200'''
| |
| − | | align="center" height="35px" |
| |
| − | | align="center" height="35px" |[[File:Item Icon Furniture Box (Small).png|35px]]x1
| |
| − | | align="center" height="35px" |
| |
| − | |-
| |
| − | | align="center" height="35px" style="background:#D3D3EB;"|'''39
| |
| − | | align="center" height="35px" style="background:#D3D3EB"|遠洋潜水艦作戦<br>Deep Sea Submarine Operation
| |
| − | | align="center" height="35px" style="background:#D3D3EB"|30:00
| |
| − | | align="center" height="35px" style="background:#D3D3EB"|130
| |
| − | | align="center" height="35px" style="background:#D3D3EB"|160
| |
| − | | align="center" height="35px" style="background:#D3D3EB"|
| |
| − | | align="center" height="35px" style="background:#D3D3EB"|30
| |
| − | | align="center" height="35px" style="background:#D3D3EB;color:red"|'''300'''
| |
| − | | align="center" height="35px" style="background:#D3D3EB"|
| |
| − | | align="center" height="35px" style="background:#D3D3EB"|[[File:Item Icon Instant Repair Material.png|35px]]x2
| |
| − | | align="center" height="35px" style="background:#D3D3EB"|[[File:Item Icon Furniture Box (Medium).png|35px]]x1
| |
| − | |-
| |
| − | | align="center" height="35px" |'''40
| |
| − | | align="center" height="35px" |水上機前線輸送<br>Seaplane Front Line Transport
| |
| − | | align="center" height="35px" |06:50
| |
| − | | align="center" height="35px" |60
| |
| − | | align="center" height="35px" |70
| |
| − | | align="center" height="35px" style="color:blue"|'''300'''
| |
| − | | align="center" height="35px" style="color:red"|'''300'''
| |
| − | | align="center" height="35px" |
| |
| − | | align="center" height="35px" |100
| |
| − | | align="center" height="35px" |[[File:Item Icon Furniture Box (Small).png|35px]]x3
| |
| − | | align="center" height="35px" |[[File:Item Icon Instant Repair Material.png|35px]]x1
| |
| − | |-
| |
| − | | align="center" height="35px" style="background:#D3D3EB;color:red"|'''E1
| |
| − | | align="center" height="35px" style="background:#D3D3EB"|ラバウル方面艦隊進出<br>Rabaul District Fleet Advance
| |
| − | | align="center" height="35px" style="background:#D3D3EB"|07:30
| |
| − | | align="center" height="35px" style="background:#D3D3EB"|100
| |
| − | | align="center" height="35px" style="background:#D3D3EB"|120
| |
| − | | align="center" height="35px" style="background:#D3D3EB"|
| |
| − | | align="center" height="35px" style="background:#D3D3EB"|600
| |
| − | | align="center" height="35px" style="background:#D3D3EB"|600
| |
| − | | align="center" height="35px" style="background:#D3D3EB"|1000
| |
| − | | align="center" height="35px" style="background:#D3D3EB"|[[File:Item Icon Furniture Box (Large).png|35px]]x2
| |
| − | | align="center" height="35px" style="background:#D3D3EB"|[[File:Item Icon Improvement Material.png|35px]]x1
| |
| − | |-
| |
| − | | align="center" height="35px" style="color:red"|'''E2
| |
| − | | align="center" height="35px" |強行鼠輸送作戦<br>Enforced Rat Transport Operation
| |
| − | | align="center" height="35px" |03:05
| |
| − | | align="center" height="35px" |80
| |
| − | | align="center" height="35px" |90
| |
| − | | align="center" height="35px" |
| |
| − | | align="center" height="35px" |480
| |
| − | | align="center" height="35px" |
| |
| − | | align="center" height="35px" |
| |
| − | | align="center" height="35px" |[[File:Item Icon Instant Repair Material.png|35px]]x2
| |
| − | | align="center" height="35px" |[[File:Item Icon Improvement Material.png|35px]]x1
| |
| − | |}</div>
| |
| − | |-|Hourly Yield=
| |
| − | <div style="max-width:1400px;width:90%;margin-left:20px">
| |
| − | {| width=100%
| |
| − | | style="width:50px"| [[File:IcoArea5.png]]
| |
| − | | <div style="width:100%;background:#9999cc;padding-left:10px;border-top-right-radius:10px;color:black">'''南方海域 - Southern Waters'''</div>
| |
| − | |}
| |
| − | </div>
| |
| − | <div style="position:relative;color:black;background:white;border:solid 1px lightgray;max-width:1500px;width:95%;border-radius:10px;padding:10px;margin:10px;margin-top:0px">
| |
| − | {| style="radius:10px;cellpadding:10px;width:100%" align="center" height="35px" cellspacing=0
| |
| − | ! style="cellpadding:10px;width:4%"|#
| |
| − | ! style="cellpadding:10px;width:24%"|Name
| |
| − | ! style="cellpadding:10px"|Time
| |
| − | ! style="cellpadding:10px;width:1px"|
| |
| − | ! style="cellpadding:10px;width:7%"|HQ
| |
| − | ! style="cellpadding:10px;width:7%"|Ship
| |
| − | ! style="cellpadding:10px;width:1px"|
| |
| − | ! style="cellpadding:10px;width:7%"|[[File:Fuel.png|30px]]
| |
| − | ! style="cellpadding:10px;width:7%"|[[File:Ammunition.png|30px]]
| |
| − | ! style="cellpadding:10px;width:7%"|[[File:Steel.png|30px]]
| |
| − | ! style="cellpadding:10px;width:7%"|[[File:Bauxite.png|30px]]
| |
| − | ! style="cellpadding:10px;width:1px"|
| |
| − | ! style="cellpadding:10px;width:20%" colspan=2|Rewards
| |
| − | |-
| |
| − | | style="background:gray" colspan=15|
| |
| − | |-
| |
| − | | align="center" height="35px" style="background:#D3D3EB"|'''33
| |
| − | | align="center" height="35px" style="background:#D3D3EB"|前衛支援任務<br>Vanguard Support Mission
| |
| − | | align="center" height="35px" style="background:#D3D3EB"|00:15
| |
| − | | style="background:#9999cc" rowspan=10|
| |
| − | | align="center" style="background:lightblue" colspan=10|Sortie [[Expedition#Support_Expeditions|support expedition]] (normal)
| |
| − | |-
| |
| − | | align="center" height="35px" |'''34
| |
| − | | align="center" height="35px" |艦隊決戦支援任務<br>Decisive Battle Fleet Support Mission
| |
| − | | align="center" height="35px" |00:30
| |
| − | | align="center" style="background:lightblue" colspan=11|Sortie [[Expedition#Support_Expeditions|support expedition]] (boss)
| |
| − | |-
| |
| − | | align="center" height="35px" style="background:#D3D3EB"|'''35
| |
| − | | align="center" height="35px" style="background:#D3D3EB"|MO作戦<br>Operation MO
| |
| − | | align="center" height="35px" style="background:#D3D3EB"|07:00
| |
| − | | align="center" height="35px" style="background:#D3D3EB"|14
| |
| − | | align="center" height="35px" style="background:#D3D3EB"|14
| |
| − | | style="background:#9999cc" rowspan=9|
| |
| − | | align="center" height="35px" style="background:#D3D3EB"|
| |
| − | | align="center" height="35px" style="background:#D3D3EB"|
| |
| − | | align="center" height="35px" style="background:#D3D3EB;color:blue"|'''34'''
| |
| − | | align="center" height="35px" style="background:#D3D3EB;color:blue"|'''40'''
| |
| − | | style="background:#9999cc" rowspan=9|
| |
| − | | align="center" height="35px" style="background:#D3D3EB"|[[File:Item Icon Furniture Box (Small).png|35px]]x2
| |
| − | | align="center" height="35px" style="background:#D3D3EB"|[[File:Item Icon Development Material.png|35px]]x1
| |
| − | |-
| |
| − | | align="center" height="35px" |'''36
| |
| − | | align="center" height="35px" |水上機基地建設<br>Seaplane Base Construction
| |
| − | | align="center" height="35px" |09:00
| |
| − | | align="center" height="35px" |11
| |
| − | | align="center" height="35px" |11
| |
| − | | align="center" height="35px" |53
| |
| − | | align="center" height="35px" |
| |
| − | | align="center" height="35px" |22
| |
| − | | align="center" height="35px" |22
| |
| − | | align="center" height="35px" |[[File:Item Icon Furniture Box (Medium).png|35px]]x2
| |
| − | | align="center" height="35px" |[[File:Item Icon Instant Repair Material.png|35px]]x1
| |
| − | |-
| |
| − | | align="center" height="35px" style="background:#D3D3EB"|'''37
| |
| − | | align="center" height="35px" style="background:#D3D3EB"|東京急行<br>Tokyo Express
| |
| − | | align="center" height="35px" style="background:#D3D3EB"|02:45
| |
| − | | align="center" height="35px" style="background:#D3D3EB"|18
| |
| − | | align="center" height="35px" style="background:#D3D3EB"|23
| |
| − | | align="center" height="35px" style="background:#D3D3EB"|
| |
| − | | align="center" height="35px" style="background:#D3D3EB;color:red"|'''138'''
| |
| − | | align="center" height="35px" style="background:#D3D3EB;color:red"|'''98'''
| |
| − | | align="center" height="35px" style="background:#D3D3EB"|
| |
| − | | align="center" height="35px" style="background:#D3D3EB"|[[File:Item Icon Furniture Box (Small).png|35px]]x2
| |
| − | | align="center" height="35px" style="background:#D3D3EB"|
| |
| − | |-
| |
| − | | align="center" height="35px" |'''38
| |
| − | | align="center" height="35px" |東京急行(弐)<br>Tokyo Express (2)
| |
| − | | align="center" height="35px" |02:55
| |
| − | | align="center" height="35px" |17
| |
| − | | align="center" height="35px" |24
| |
| − | | align="center" height="35px" style="color:red"|'''144'''
| |
| − | | align="center" height="35px" |
| |
| − | | align="center" height="35px" style="color:red"|'''69'''
| |
| − | | align="center" height="35px" |
| |
| − | | align="center" height="35px" |[[File:Item Icon Furniture Box (Small).png|35px]]x1
| |
| − | | align="center" height="35px" |
| |
| − | |-
| |
| − | | align="center" height="35px" style="background:#D3D3EB"|'''39
| |
| − | | align="center" height="35px" style="background:#D3D3EB"|遠洋潜水艦作戦<br>Deep Sea Submarine Operation
| |
| − | | align="center" height="35px" style="background:#D3D3EB"|30:00
| |
| − | | align="center" height="35px" style="background:#D3D3EB"|4
| |
| − | | align="center" height="35px" style="background:#D3D3EB"|5
| |
| − | | align="center" height="35px" style="background:#D3D3EB"|
| |
| − | | align="center" height="35px" style="background:#D3D3EB"|
| |
| − | | align="center" height="35px" style="background:#D3D3EB"|10
| |
| − | | align="center" height="35px" style="background:#D3D3EB"|
| |
| − | | align="center" height="35px" style="background:#D3D3EB"|[[File:Item Icon Instant Repair Material.png|35px]]x2
| |
| − | | align="center" height="35px" style="background:#D3D3EB"|[[File:Item Icon Furniture Box (Medium).png|35px]]x1
| |
| − | |-
| |
| − | | align="center" height="35px" |'''40
| |
| − | | align="center" height="35px" |水上機前線輸送<br>Seaplane Front Line Transport
| |
| − | | align="center" height="35px" |06:50
| |
| − | | align="center" height="35px" |9
| |
| − | | align="center" height="35px" |10
| |
| − | | align="center" height="35px" |44
| |
| − | | align="center" height="35px" |44
| |
| − | | align="center" height="35px" |
| |
| − | | align="center" height="35px" |15
| |
| − | | align="center" height="35px" |[[File:Item Icon Furniture Box (Small).png|35px]]x3
| |
| − | | align="center" height="35px" |[[File:Item Icon Instant Repair Material.png|35px]]x1
| |
| − | |-
| |
| − | | align="center" height="35px" style="background:#D3D3EB;color:red"|'''E1
| |
| − | | align="center" height="35px" style="background:#D3D3EB"|ラバウル方面艦隊進出<br>Rabaul District Fleet Advance
| |
| − | | align="center" height="35px" style="background:#D3D3EB"|07:30
| |
| − | | align="center" height="35px" style="background:#D3D3EB"|13
| |
| − | | align="center" height="35px" style="background:#D3D3EB"|16
| |
| − | | align="center" height="35px" style="background:#D3D3EB"|
| |
| − | | align="center" height="35px" style="background:#D3D3EB"|80
| |
| − | | align="center" height="35px" style="background:#D3D3EB"|80
| |
| − | | align="center" height="35px" style="background:#D3D3EB"|133
| |
| − | | align="center" height="35px" style="background:#D3D3EB"|[[File:Item Icon Furniture Box (Large).png|35px]]x2
| |
| − | | align="center" height="35px" style="background:#D3D3EB"|[[File:Item Icon Improvement Material.png|35px]]x1
| |
| − | |-
| |
| − | | align="center" height="35px" style="color:red"|'''E2
| |
| − | | align="center" height="35px" |強行鼠輸送作戦<br>Enforced Rat Transport Operation
| |
| − | | align="center" height="35px" |03:05
| |
| − | | align="center" height="35px" |26
| |
| − | | align="center" height="35px" |29
| |
| − | | align="center" height="35px" |
| |
| − | | align="center" height="35px" |156
| |
| − | | align="center" height="35px" |
| |
| − | | align="center" height="35px" |
| |
| − | | align="center" height="35px" |[[File:Item Icon Instant Repair Material.png|35px]]x2
| |
| − | | align="center" height="35px" |[[File:Item Icon Improvement Material.png|35px]]x1
| |
| − | |}</div>
| |
| − | |-|Requirements=
| |
| − | <div style="max-width:1400px;width:90%;margin-left:20px">
| |
| − | {| width=100%
| |
| − | | style="width:50px"| [[File:IcoArea5.png]]
| |
| − | | <div style="width:100%;background:#9999cc;padding-left:10px;border-top-right-radius:10px;color:black">'''南方海域 - Southern Waters'''</div>
| |
| − | |}
| |
| − | </div>
| |
| − | <div style="position:relative;color:black;background:white;border:solid 1px lightgray;max-width:1500px;width:95%;border-radius:10px;padding:10px;margin:10px;margin-top:0px">
| |
| − | {| style="radius:10px;cellpadding:10px;width:100%" align="center" height="35px" cellspacing=0
| |
| − | ! style="cellpadding:10px;width:4%"|#
| |
| − | ! style="cellpadding:10px;width:24%"|Name
| |
| − | ! style="cellpadding:10px"|Time
| |
| − | ! style="cellpadding:10px;width:1px"|
| |
| − | ! style="cellpadding:10px;width:7%"|Σ(Lv)
| |
| − | ! style="cellpadding:10px;width:7%"|[[File:Flagship icon.png]]
| |
| − | ! style="cellpadding:10px;width:1px"|
| |
| − | ! style="cellpadding:10px;width:21%"|Minimum Fleet Size
| |
| − | ! style="cellpadding:10px;width:7%"|Requirements Needed
| |
| − | ! style="cellpadding:10px;width:1px"|
| |
| − | ! style="cellpadding:10px;width:10%"|[[File:Fuel.png|30px]]
| |
| − | ! style="cellpadding:10px;width:10%"|[[File:Ammunition.png|30px]]
| |
| | |- | | |- |
| − | | style="background:gray" colspan=13| | + | |{{Q|B182}} |
| | + | |{{Equipment/Link|10cm Twin High-angle Gun Mount Battery Concentrated Deployment|text=10cm Twin HA CD}} |
| | |- | | |- |
| − | | align="center" height="35px" style="background:#D3D3EB"|'''33 | + | |{{Q|B183}} |
| − | | align="center" height="35px" style="background:#D3D3EB"|前衛支援任務<br>Vanguard Support Mission | + | |{{Equipment/Link|Prototype 51cm Triple Gun Mount|text=51cm Triple}} |
| − | | align="center" height="35px" style="background:#D3D3EB"|00:15 | + | |According the {{Equipment/Link|10cm Twin High-angle Gun Mount Battery Concentrated Deployment|text=10cm Twin HA CD}} is chosen in {{Q|B181}} or {{Q|B182}} |
| − | | style="background:#9999cc" rowspan=11| | |
| − | | align="center" colspan=9 style="background:lightblue"|Sortie [[Expedition#Support_Expeditions|support expedition]] (normal) | |
| | |- | | |- |
| − | | align="center" height="35px" |'''34 | + | |{{Q|B185}} |
| − | | align="center" height="35px" |艦隊決戦支援任務<br>Decisive Battle Fleet Support Mission | + | |{{Equipment/Link|GFCS Mk.37}} |
| − | | align="center" height="35px" |00:30 | + | |Also unlocks the {{Equipment/Link|5inch Single Gun Mount Mk.30 Kai + GFCS Mk.37|text=5" + GFCS}} |
| − | | align="center" colspan="10" style="background:lightblue"|Sortie [[Expedition#Support_Expeditions|support expedition]] (boss) | |
| | |- | | |- |
| − | | align="center" height="35px" style="background:#D3D3EB"|'''35 | + | |{{Q|B194}} |
| − | | align="center" height="35px" style="background:#D3D3EB"|MO作戦<br>Operation MO
| + | |{{Equipment/Link|Torpedo Squadron Skilled Lookouts|text=SSLO}} |
| − | | align="center" height="35px" style="background:#D3D3EB"|07:00
| + | |If not taken from {{Q|B206}} |
| − | | align="center" height="35px" style="background:#c0c0d6"|
| |
| − | | align="center" height="35px" style="background:#D3D3EB"|'''Lv''' 40
| |
| − | | style="background:#9999cc" rowspan=9| | |
| − | | align="center" height="35px" style="background:#c0c0d6"|2CV(B/L)/AV 1CA 1DD 2XX
| |
| − | | align="center" height="35px" style="background:#D3D3EB"| | |
| − | | style="background:#9999cc" rowspan=9|
| |
| − | | align="center" height="35px" style="background:#D3D3EB"|-8 | |
| − | | align="center" height="35px" style="background:#D3D3EB"|-8
| |
| | |- | | |- |
| − | | align="center" height="35px" |'''36 | + | |{{Q|B195}} |
| − | | align="center" height="35px" |水上機基地建設<br>Seaplane Base Construction
| + | |{{Equipment/Link|SJ Radar + Submarine Conning Tower Equipment|text=SJ Radar}} |
| − | | align="center" height="35px" |09:00
| |
| − | | align="center" height="35px" style="background:#e8E8E8"| | |
| − | | align="center" height="35px" |'''Lv''' 30 | |
| − | | align="center" height="35px" style="background:#e8E8E8"|2AV 1CL 1DD 2XX
| |
| − | | align="center" height="35px" |
| |
| − | | align="center" height="35px" |-8
| |
| − | | align="center" height="35px" |-8
| |
| | |- | | |- |
| − | | align="center" height="35px" style="background:#D3D3EB"|'''37 | + | |{{Q|B196}} |
| − | | align="center" height="35px" style="background:#D3D3EB"|東京急行<br>Tokyo Express | + | |{{Equipment/Link|Shiun}} |
| − | | align="center" height="35px" style="background:#D3D3EB"|02:45
| + | |If not taken from {{Q|D29}} |
| − | | align="center" height="35px" style="background:#c0c0d6"|200
| |
| − | | align="center" height="35px" style="background:#D3D3EB"|'''Lv''' 50
| |
| − | | align="center" height="35px" style="background:#c0c0d6"|1CL 5DD
| |
| − | | align="center" height="35px" style="background:#D3D3EB"|4 (3<ref name="Drum">Minimum of Drum carrying ships.</ref>) [[File:Drum.png|30px]]
| |
| − | | align="center" height="35px" style="background:#D3D3EB"|-8
| |
| − | | align="center" height="35px" style="background:#D3D3EB"|-8 | |
| | |- | | |- |
| − | | align="center" height="35px" |'''38 | + | |{{Q|B206}} |
| − | | align="center" height="35px" |東京急行(弐)<br>Tokyo Express (2)
| + | |{{Equipment/Link|Torpedo Squadron Skilled Lookouts|text=SSLO}} |
| − | | align="center" height="35px" |02:55
| + | |If not taken from {{Q|B194}} |
| − | | align="center" height="35px" style="background:#e8E8E8"|240
| |
| − | | align="center" height="35px" |'''Lv''' 65
| |
| − | | align="center" height="35px" style="background:#e8E8E8"|5DD 1XX | |
| − | | align="center" height="35px" |8 (4<ref name="Drum"/>) [[File:Drum.png|30px]] | |
| − | | align="center" height="35px" |-8 | |
| − | | align="center" height="35px" |-8 | |
| | |- | | |- |
| − | | align="center" height="35px" style="background:#D3D3EB"|'''39 | + | |{{Q|D29}} |
| − | | align="center" height="35px" style="background:#D3D3EB"|遠洋潜水艦作戦<br>Deep Sea Submarine Operation | + | |{{Equipment/Link|Shiun}} |
| − | | align="center" height="35px" style="background:#D3D3EB"|30:00
| + | |If not taken from {{Q|B195}} |
| − | | align="center" height="35px" style="background:#c0c0d6"|180
| |
| − | | align="center" height="35px" style="background:#D3D3EB"|'''Lv''' 3
| |
| − | | align="center" height="35px" style="background:#c0c0d6"|1<span style="cursor:help" title="Taigei/Jingei-class">AS</span> 4SS(V)
| |
| − | | align="center" height="35px" style="background:#D3D3EB"|
| |
| − | | align="center" height="35px" style="background:#D3D3EB"|-9
| |
| − | | align="center" height="35px" style="background:#D3D3EB"|-9 | |
| | |- | | |- |
| − | | align="center" height="35px" |'''40 | + | |{{Q|D39}} |
| − | | align="center" height="35px" |水上機前線輸送<br>Seaplane Front Line Transport | + | |{{Equipment/Link|Do 17 Z-2}} |
| − | | align="center" height="35px" |06:50
| + | |Also unlocks the {{Equipment/Link|Do 217 E-5 + Hs293 Initial Model|text=Do 217 + Missile}} |
| − | | align="center" height="35px" style="background:#e8E8E8;"|150
| |
| − | | align="center" height="35px" |'''Lv''' 25
| |
| − | | align="center" height="35px" style="background:#e8E8E8;"|CL<ref name="Flag">Must be flagship.</ref> 2AV 2DD | |
| − | | align="center" height="35px" |None<ref>Affects great success rate.</ref> [[File:Drum.png|30px]]
| |
| − | | align="center" height="35px" |-8
| |
| − | | align="center" height="35px" |-7 | |
| | |- | | |- |
| − | | align="center" height="35px" style="background:#D3D3EB;color:red"|'''E1 | + | |{{Q|F80}} |
| − | | align="center" height="35px" style="background:#D3D3EB"|ラバウル方面艦隊進出<br>Rabaul District Fleet Advance
| + | |{{Equipment/Link|Reppuu Model 11}} |
| − | | align="center" height="35px" style="background:#D3D3EB"|07:30
| + | |According the {{Equipment/Link|Type 3 Fighter Hien}} is chosen in {{Q|B175}} |
| − | | align="center" height="35px" style="background:#c0c0d6"| 290
| |
| − | | align="center" height="35px" style="background:#D3D3EB"| '''Lv''' 55
| |
| − | | align="center" height="35px" style="background:#c0c0d6"|'''Monthly Expedition'''<br>'''{{color|red|Combat Expedition (II)}}'''<br>1CA<ref name="Flag"/> 1CL 3DD
| |
| − | | align="center" height="35px" style="background:#D3D3EB"|450 {{Firepower}}<br>350 {{AA}}<br>330 {{ASW}}<br>250 {{LOS}} | |
| − | | align="center" height="35px" style="background:#D3D3EB"|-9.5
| |
| − | | align="center" height="35px" style="background:#D3D3EB"|-8.5
| |
| | |- | | |- |
| − | | align="center" height="35px" style="color:red"|'''E2 | + | |{{Q|F81}} |
| − | | align="center" height="35px" |強行鼠輸送作戦<br>Enforced Rat Transport Operation
| + | |{{Equipment/Link|Raiden}} |
| − | | align="center" height="35px" |03:05
| + | |According the {{Equipment/Link|Prototype Toukai}} is chosen in {{Q|B143}} |
| − | | align="center" height="35px" style="background:#e8E8E8"|320
| |
| − | | align="center" height="35px" |'''Lv''' 70
| |
| − | | align="center" height="35px" style="background:#e8E8E8"|'''Monthly Expedition'''<br>'''{{color|red|Combat Expedition (II)}}'''<br>5DD
| |
| − | | align="center" height="35px" |4 (3<ref name="Drum"/>) [[File:Drum.png|30px]]<br>280 {{Firepower}}<br>240 {{AA}}<br>200 {{ASW}}<br>160 {{LOS}} | |
| − | | align="center" height="35px" |-9
| |
| − | | align="center" height="35px" |-9.5
| |
| | |} | | |} |
| − | </div>
| + | [[Category:Help]] |
| − | <references/>
| |
| − | </tabber>
| |