- Welcome to the Kancolle Wiki!
- If you have any questions regarding site content, account registration, etc., please visit the KanColle Wiki Discord
Difference between revisions of "World 4/4-3"
< World 4
Jump to navigation
Jump to search
Jigaraphale (talk | contribs) |
Jigaraphale (talk | contribs) |
||
| Line 26: | Line 26: | ||
{{MapBranchingTable | {{MapBranchingTable | ||
|title = 4-3 Branching Rules | |title = 4-3 Branching Rules | ||
| − | |||
|id = 4-3 | |id = 4-3 | ||
|0 -> A, C, D = | |0 -> A, C, D = | ||
Revision as of 12:22, 12 January 2022
World 4-3: リランカ島空襲 Bombing of Ri Lanka
| Strategy Name | リランカ島空襲 (Ri Lanka Air Raid)
| ||
| Difficulty | ☆ ☆ ☆ ☆ ☆ ☆
| ||
| Item | |||
| Strategy Content | 空母を伴った艦隊を編成し、リランカ島の敵母港に展開する敵艦隊を叩け!
Form an air fleet to destroy the enemy home port of Ri Lanka! | ||
| 4-3 Medium Fleet | ||
| Fleet | 2CV, 2CA(V), 2DD | |
| Route | Random. C D H N C F H N | |
| Other Notes | ||
| AP | AS | AS+ |
| 69 | 155 | 310 |
| 4-3 "Backdoor" Heavy Fleet | ||
| Fleet | 2CV, 3CA(V), 1DD | |
| Route | Random. C D H N C F H N C F K L N | |
| Other Notes | Node L has 100% routing to boss, while H has 90%. | |
| AP | AS | AS+ |
| 69 | 155 | 310 |
Stage Guide
| 4-3 Branching Rules | ||
|---|---|---|
| Nodes | Rules | |
| Start | A |
|
C | ||
D | ||
A |
B |
|
D | ||
B |
E |
|
G | ||
C |
D |
|
F | ||
F |
H |
|
K | ||
G |
H |
|
I | ||
J | ||
H |
I |
|
N | ||
K |
L |
|
N | ||
L |
M |
|
N | ||
Tips
This map will serve as your first introduction to Installation type Abyssal, which is different from all other abyssal types as they tend to have higher armor, stronger attack power and, can't be hit by torpedoes.
- Killing the installation is optional for this map so you don't need to necessarily clear the map by defeating her. However, having a fleet that is capable of killing an installation is encouraged especially for first-time users of anti-installation gear to get a feel for fighting these kinds of bosses.
- As such, the following equipment should be considered if you wish to fight the Harbor Princess, each of these gears are effective at penetrating the installation's armor:
- for beginner :
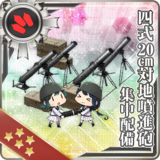
 AA Shells
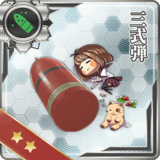
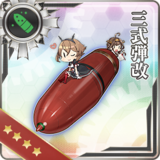 (for CAs/BBs)
 Landing Crafts

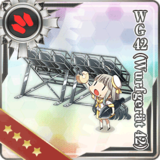
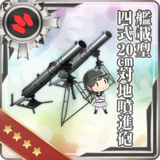
- for advance players: the "Nuke set-up", being the combination of the following 3 types of equipment on the same ship (CLs/DDs):
- for beginner :


Recommended Fleet
- 2CV, 2CA(V), 2DD
- Route = Random:
- C D H N
- C F H N
- A strong composition, but that will fight more pre-boss battle.
- Dealing with Harbor Princess is slightly easier as your CA(V) can carry AA Shells to damage her.
- 2CV, 3CA(V), 1DD
- Route = Random:
- C D H N
- C F H N
- C F K L N
- Node L has 100% routing to boss, while H has 90%.
- Dealing with Harbor Princess is slightly easier as your CA(V) can carry AA Shells to damage her.
- 3DD, 1CL, 2CVL
- Route = D H N
- A Light Fleet Composition which takes the shortest path to the boss. Since you'll be limited to light ships, you will need to depend on Nuke set-ups to effectively fight the installation boss. You can also opt to use CVLs equipped with anti-installation Bombers if you wish for additional assistance taking out the installation.
- Keep in mind though it is not entirely necessary to kill the boss for this map.
- A Light Fleet Composition which takes the shortest path to the boss. Since you'll be limited to light ships, you will need to depend on Nuke set-ups to effectively fight the installation boss. You can also opt to use CVLs equipped with anti-installation Bombers if you wish for additional assistance taking out the installation.
- 1CL, 1AV, 2CVL, 2DD (Fast)
- Route = A B G H N
- Goes through the resource node that yields fuel, but there is a chance of off-routing to Node I instead of going to H.
- 1(F)BB(V), 2CV(B), 1CA(V), 2DD
- Heaviest possible fleet, but has random routing across the map (You will always start at Node C though).
Fuel / Bauxite Farming
It is possible to use this map to farm both fuel and bauxite. However, you need to use either an AV or AO and face off against mixed SSs and a cruiser-based surface fleet before being able to get the said resources.
- 1AV/AO, 1CL, 2DD, 2CLT (Fast)
- Routes = A B G J
- Node A shouldn't present much difficulty, however, node G with its flagship CAs, CLs, and Late model DDs may present a possible challenge to survive.
- AV, CLTs, and CLs carrying Midget Submarine
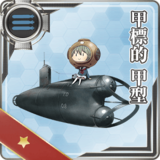

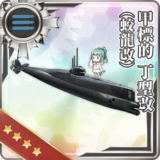 can be useful for taking out many of the ships in node G during the Otorp attack, to minimize damage taken.
 - Sow AV/AO needs Speed modifiers
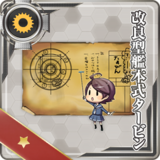
 to help with Improving Ship Speed so that the entire fleet is fast and avoid Node E to prevent additional ammo lost.
- Due to the danger this path has, bringing Landing Crafts to gain extra resource is optional, but not recommended.
Nodes And Enemy Encounters
| Nodes and Enemy Encounters | |||||
|---|---|---|---|---|---|
| Node | Pattern | Xp | Node Info | Form | Air |
| A 敵東方潜水艦隊 哨戒分遣集団 | Pattern 1 | ||||
| Pattern 2 | |||||
| Pattern 3 | |||||
| B Resource Node | Pattern 1 | ||||
| C 敵東方潜水艦隊 哨戒主力集団 | Pattern 1 | ||||
| Pattern 2 | |||||
| Pattern 3 | |||||
| D 敵東方哨戒艦隊 B群 | Pattern 1 | ||||
| Pattern 2 | |||||
| Pattern 3 | |||||
| E Maelstrom Node | Pattern 1 | ||||
| F 敵東方空母機動部隊 | Pattern 1 | AP:34 AS:77 AS+:153 | |||
| Pattern 2 | AP:35 AS:78 AS+:156 | ||||
| Pattern 3 | AP:35 AS:78 AS+:156 | ||||
| Pattern 4 | AP:32 AS:71 AS+:141 | ||||
| G 敵東方哨戒艦隊 A群 | Pattern 1 | ||||
| Pattern 2 | |||||
| Pattern 3 | |||||
| H 敵東方空母機動部隊 分遣群 | Pattern 1 | AP:16 AS:35 AS+:69 | |||
| Pattern 2 | AP:16 AS:35 AS+:69 | ||||
| Pattern 3 | AP:16 AS:36 AS+:72 | ||||
| Pattern 4 | AP:16 AS:35 AS+:69 | ||||
| Pattern 5 | AP:16 AS:35 AS+:69 | ||||
| I 敵東方艦隊 増援戦艦部隊 | Pattern 1 | AP:16 AS:36 AS+:72 | |||
| Pattern 2 | AP:16 AS:35 AS+:69 | ||||
| Pattern 3 | AP:16 AS:35 AS+:69 | ||||
| Pattern 4 | AP:16 AS:36 AS+:72 | ||||
| J Resource Node | Pattern 1 | ||||
| K Maelstrom Node | Pattern 1 | ||||
| L 敵哨戒艦隊 | Pattern 1 | ||||
| Pattern 2 | |||||
| Pattern 3 | |||||
| M Battle Avoided | Pattern 1 | "Must be my imagination" (battle avoided) | |||
| N 敵東方港湾基地 | Pattern 1 | AP:54 AS:120 AS+:240 | |||
| Pattern 2 | AP:54 AS:120 AS+:240 | ||||
| Pattern 3 | AP:54 AS:120 AS+:240 | ||||
| Pattern 4 | AP:69 AS:155 AS+:309 | ||||
| Pattern 5 | AP:54 AS:120 AS+:240 | ||||
| Pattern 6 | AP:54 AS:120 AS+:240 | ||||