- Welcome to the Kancolle Wiki!
- If you have any questions regarding site content, account registration, etc., please visit the KanColle Wiki Discord
Difference between revisions of "User:Ninnin/Sandbox/1"
Jigaraphale (talk | contribs) |
|||
| (54 intermediate revisions by 2 users not shown) | |||
| Line 1: | Line 1: | ||
| − | + | ==Calculation== | |
| + | Installations generally have a lot of HP and/or armor. But multiple different cumulative bonuses exist against them, allowing for massive damage when using the right set-ups. | ||
| + | These bonuses are divided into 5 groups and are calculated in the following order<ref>https://docs.google.com/document/d/1mXGyJ3yeNWeOmuGZQrXkcuGSuSEQYqmKhPelHMkzkGI/edit</ref>: | ||
| + | # [[#Ship Type Bonuses|Ship type bonuses]], | ||
| + | # [[#General Multiplicative Bonuses|General multiplicative bonuses]], | ||
| + | # [[#Landing Craft Specific Bonuses|Landing craft specific bonuses]], | ||
| + | # [[#Flat Damage Bonuses|Flat damage bonuses]], | ||
| + | # [[#Post-Cap Bonuses|Post-cap bonuses]], | ||
| + | # [[#Airstrike And Land-Base Bonus|Airstrike and land-base]] special cases, | ||
| + | # [[#Installation-Like Warships|"Installation-like warships"]] special cases. | ||
| + | *The bonuses' exact order is still under investigation and may be subject to changes. | ||
| − | + | {|class="wikitable mw-collapsible mw-collapsed" width="100%" | |
| − | + | !colspan=2|Damage Bonuses Calculations | |
| − | + | |- | |
| − | = | + | !width=20px|<div style="-webkit-writing-mode:vertical-rl;-webkit-transform:rotate(180deg); text-align:left;">Pre-cap</div> |
| − | == | + | | |
| − | + | '''Surface Shelling:''' | |
| − | + | {|style="padding:10px; margin:20px; border:1px solid orange; border-radius:10px" | |
| − | + | |valign="center"| <math>\text{Atk}_\text{pre-cap} = | |
| − | + | \Bigg[ \Bigg( \bigg[ \bigg( \Big[ \Big( \big[ \big( [ ( | |
| − | + | \text{Atk}_\text{base} {\color{tomato} \times \text{A0}} {\color{DeepSkyBlue} + \text{B0}} ) | |
| − | + | {\color{tomato} \times \text{A1}} {\color{DeepSkyBlue}} ] | |
| − | + | {\color{tomato} \times \text{A21}} {\color{DeepSkyBlue} + \text{B21}} \big) | |
| + | {\color{tomato} \times \text{A22}} {\color{DeepSkyBlue} + \text{B22}} \big] | ||
| + | {\color{tomato} \times \text{A23}} {\color{DeepSkyBlue} + \text{B23}} \Big) | ||
| + | {\color{tomato} \times \text{A24}} {\color{DeepSkyBlue} + \text{B24}} \Big] | ||
| + | {\color{tomato} \times \text{A25}} {\color{DeepSkyBlue} + \text{B25}} \bigg) | ||
| + | {\color{tomato} \times \text{A26}} {\color{DeepSkyBlue} + \text{B26}} \bigg] | ||
| + | {\color{tomato} \times \text{A27}} {\color{DeepSkyBlue} + \text{B27}} \Bigg) | ||
| + | {\color{tomato} \times \text{A28}} {\color{DeepSkyBlue} + \text{B28} + \text{B1}} \Bigg] | ||
| + | \times \text{Mod}_\text{others}</math> | ||
| + | |} | ||
| − | |||
| − | |||
| − | |||
| − | |||
| − | |||
| − | + | '''Carrier Shelling:''' | |
| − | + | {|style="padding:10px; margin:20px; border:1px solid orange; border-radius:10px" | |
| − | | | + | |valign="center"| <math>\text{Atk}_\text{pre-cap} = |
| + | \Bigg[ \Bigg( \bigg[ \bigg( \Big[ \Big( \big[ \big( [ ( \text{Atk}_\text{base} {\color{tomato} \times \text{A0} \times \text{A1}} ) | ||
| + | {\color{tomato} \times \text{A21}} {\color{DeepSkyBlue} + \text{B21}} ] | ||
| + | {\color{tomato} \times \text{A22}} {\color{DeepSkyBlue} + \text{B22}} \big) | ||
| + | {\color{tomato} \times \text{A23}} {\color{DeepSkyBlue} + \text{B23}} \big] | ||
| + | {\color{tomato} \times \text{A24}} {\color{DeepSkyBlue} + \text{B24}} \Big) | ||
| + | {\color{tomato} \times \text{A25}} {\color{DeepSkyBlue} + \text{B25}} \Big] | ||
| + | {\color{tomato} \times \text{A26}} {\color{DeepSkyBlue} + \text{B26}} \bigg) | ||
| + | {\color{tomato} \times \text{A27}} {\color{DeepSkyBlue} + \text{B27}} \bigg] | ||
| + | {\color{tomato} \times \text{A28}} {\color{DeepSkyBlue} + \text{B28} + \text{B1}} +(\text{DB} \times 1.3) + 15 \Bigg) | ||
| + | \times 1.5 +25 \Bigg] | ||
| + | \times \text{Mod}_\text{others}</math> | ||
|} | |} | ||
| − | |||
| − | |||
| − | |||
| − | |||
| − | |||
| − | |||
| − | |||
| − | |||
| − | |||
| − | |||
| − | |||
| − | |||
| − | |||
| − | |||
|- | |- | ||
| − | | | + | !width=20px|<div style="-webkit-writing-mode:vertical-rl;-webkit-transform:rotate(180deg); text-align:left;">Cap</div> |
| + | | | ||
| + | {|style="padding:10px; margin:20px; border:1px solid orange; border-radius:10px" | ||
| + | |valign="center"| <math>\text{Atk}_\text{cap} = \text{Cap} + \sqrt{\text{Atk}_\text{pre-cap} - \text{Cap}}</math> | ||
| + | |} | ||
|- | |- | ||
| − | ! | + | !width=20px|<div style="-webkit-writing-mode:vertical-rl;-webkit-transform:rotate(180deg); text-align:left;">Post-Cap</div> |
| − | | | ||
| − | |||
| − | |||
| − | |||
| − | |||
| − | |||
| − | |||
| | | | ||
| − | | | + | {|style="padding:10px; margin:20px; border:1px solid orange; border-radius:10px" |
| − | | | + | |valign="center"| <math>\text{Atk}_\text{post-cap} = \text{Atk}_\text{cap} \times \text{Mod}_\text{others} {\color{tomato} \times \text{C}} {\color{tomato} \times \text{C1} \times \text{Mod}_\text{Inst}} \times_\downarrow \text{Crit}</math> |
| − | | | + | |} |
|- | |- | ||
| − | |colspan= | + | |colspan=2| |
| − | + | ;With | |
| − | + | *<math>\text{Atk}_\text{base}</math> the base attack deffined [[Damage Calculations#Basic Attack Power Formulas|''here'']], | |
| − | + | * '''{{Color|tomato|A & C}}''' the Multiplicative bonuses, | |
| − | | | + | * '''{{Color|DeepSkyBlue|B}}''' the Flat bonuses, |
| − | | | + | * '''A & B''' being pre-cap bonuses, |
| − | + | * '''C''' being post-cap bonuses. | |
| − | + | * <math>\text{Mod}_\text{others}</math> being all other modifiers unrelated to installation (see [[Damage Calculations]] for more details) | |
| − | + | * <math>\text{DB}</math> being the {{Dive}} bombing stat of '''Anti-installation''' Dive Bomber only | |
| − | + | * <math>\text{Cap}</math> is: | |
| − | + | **'''220''' during day, | |
| − | + | **'''360''' during night. | |
| + | <references/> | ||
| + | |} | ||
| − | {| | + | ==Bonuses== |
| − | + | ===Ship Type Bonuses=== | |
| − | + | {|class="wikitable" style="font-weight:bold; | |
| + | ! | ||
| + | !Ship Type!!Target!!Bonuses | ||
| + | |- | ||
| + | !style="font-size:125%; color:tomato" rowspan=2|A0 | ||
| + | |[[DD]], [[CL]] | ||
| + | |{{Enemy/Link|Artillery Imp|Pillbox Imp|Anti-Air Guns Imp|Fortified Pillbox Princess|link=Pillbox|text=Pillboxes}} | ||
| + | | 1.4 | ||
| + | |- | ||
| + | |[[Akagi]], [[Hiryuu]], [[Souryuu]]<ref>Kaga has been tested and no bonus has been found against the [[Harbour Summer Princess]].</ref> | ||
| + | |{{Enemy/Banner|Harbour Summer Princess|small=true}} | ||
| + | | 1.25 | ||
| + | |- | ||
| + | !style="font-size:125%; color:DeepSkyBlue"|B0 | ||
| + | |[[SS]], [[SSV]] | ||
| + | |All installation | ||
| + | | 30 | ||
|} | |} | ||
| − | < | + | <references/> |
| − | {|class="wikitable | + | ===General Multiplicative Bonuses=== |
| − | ! | + | These bonuses depend on the enemy targeted, as well as the equipment used. |
| − | + | ||
| − | ! | + | {|class="wikitable" style="font-weight:bold; text-align:center" |
| − | !width=" | + | ! style="font-size:150%; color:tomato" colspan=10|A1<ref>Last time updated: 21/03/2024, source:https://bbs.nga.cn/read.php?tid=33769345&rand=868</ref> |
| − | + | |- | |
| − | + | ! rowspan=3 colspan=2| Installation Type | |
| − | !width=" | + | ! width="130px" rowspan=3 colspan=2| Soft-Skinned |
| − | + | ! width="130px" colspan=6| Hard-Skinned | |
| − | !width=" | + | |- |
| − | !width=" | + | ! width="130px" colspan=2| {{Enemy/Banner|Isolated Island Princess|small=true}} |
| − | + | ! width="130px" colspan=2| {{Enemy/Link|Artillery Imp|Pillbox Imp|Anti-Air Guns Imp|Fortified Pillbox Princess|link=Pillbox|text=Pillboxes|small=true}} | |
| − | !{{ | + | ! width="130px" colspan=2| {{Enemy/Banner|Harbour Summer Princess|small=true}} |
|- | |- | ||
| − | |colspan= | + | ! colspan=2| Isolated Island Princess |
| + | ! colspan=2| Pillboxes | ||
| + | ! colspan=2| Harbour Summer Princess | ||
|- | |- | ||
| − | ! | + | ! colspan=2| Number Equipped |
| − | | | + | ! Single!! Multiple |
| − | | | + | ! Single!! Multiple |
| − | | | + | ! Single!! Multiple |
| − | | - | + | ! Single!! Multiple |
| − | | | + | |- |
| − | |rowspan=3 | + | | width="80px"|{{AA Shell}} |
| − | | | + | | width="200px"|{{Equipment/Link|Type 3 Shell|Type 3 Shell Kai|Type 3 Shell Kai Ni|text=AA Shells|link_category=Anti-Aircraft Shells}} |
| − | | | + | |2.5 |
| − | |rowspan= | + | ! |
| − | | -5 | + | |1.75 |
| − | | -4< | + | ! |
| + | !colspan=2| | ||
| + | |1.75 | ||
| + | ! | ||
| + | |- | ||
| + | |{{AP Shell}} | ||
| + | |{{Equipment/Link|Type 91 Armor Piercing Shell|Type 1 Armor Piercing Shell|Type 1 Armor Piercing Shell Kai|text=AP Shells|link_category=Armour-Piercing Shells}} | ||
| + | !colspan=2| | ||
| + | !colspan=2| | ||
| + | |1.85 | ||
| + | ! | ||
| + | |1.3 | ||
| + | ! | ||
| + | |- | ||
| + | |rowspan=2|{{AntiGroundArtillery}} | ||
| + | |{{EquipmentLink|WG42 (Wurfgerät 42)}} | ||
| + | |1.3 | ||
| + | |1.4 | ||
| + | |1.4 | ||
| + | |1.5 | ||
| + | |1.6 | ||
| + | |1.7 | ||
| + | |1.4 | ||
| + | |1.2 | ||
| + | |- | ||
| + | |{{EquipmentLink|Shipborne Model Type 4 20cm Anti-ground Rocket Launcher|Type 4 20cm Anti-ground Rocket Launcher (Concentrated Deployment)|text=Type 4 Anti-Ground Rockets}} | ||
| + | |1.25 | ||
| + | |1.5 | ||
| + | |1.3 | ||
| + | |1.65 | ||
| + | |1.5 | ||
| + | |1.8 | ||
| + | |1.25 | ||
| + | |1.4 | ||
| + | |- | ||
| + | |{{DCother}} | ||
| + | |{{Equipment/Link|Type 2 12cm Mortar Kai|Type 2 12cm Mortar Kai (Concentrated Deployment)|text=ASW Mortars|link_category=ASW Mortars}} | ||
| + | |1.2 | ||
| + | |1.3 | ||
| + | |1.2 | ||
| + | |1.4 | ||
| + | |1.3 | ||
| + | |1.5 | ||
| + | |1.1 | ||
| + | |1.15 | ||
| + | |- | ||
| + | |{{Dive Bomber}} | ||
| + | |[[Dive Bomber]]s | ||
| + | !colspan=2| | ||
| + | |1.4 | ||
| + | |1.75 | ||
| + | |1.5 | ||
| + | |2 | ||
| + | |1.3 | ||
| + | |1.2 | ||
| + | |- | ||
| + | |{{SPB}}{{SPF}} | ||
| + | |Seaplane [[SPB|Bombers]]/[[SPF|Fighters]] | ||
| + | |1.2 | ||
| + | ! | ||
| + | !colspan=2| | ||
| + | |1.5 | ||
| + | ! | ||
| + | |1.3 | ||
| + | ! | ||
| + | |- | ||
| + | !colspan=10| | ||
| + | |- | ||
| + | |colspan=2|{{LandingCraft}} [[Landing Craft]] Type and<br>{{Amphibious Tank}} [[Ka-Tsu]] Type Multiplier | ||
| + | |colspan=2|1.4 | ||
| + | |colspan=2|1.8 | ||
| + | |colspan=2|1.8 | ||
| + | |colspan=2|1.7 | ||
| + | |- | ||
| + | |rowspan=7|{{LandingCraft}}<br>{{Amphibious Tank}} | ||
| + | |{{EquipmentLink|Toku Daihatsu Landing Craft|text=Toku Daihatsu}}<br>{{EquipmentLink|Toku Daihatsu Landing Craft + Panzer III (North African Specification)|text=Toku DLC + Panzer III}}<ref name="PanzerIII">https://twitter.com/Divinity_123/status/1695813425660661965</ref><br>{{EquipmentLink|Toku Daihatsu Landing Craft + Panzer III Ausf. J|text=Toku DLC + Panzer III J}} | ||
| + | |1.15 | ||
| + | ! | ||
| + | |1.15 | ||
| + | ! | ||
| + | |1.15 | ||
| + | ! | ||
| + | |1.2 | ||
| + | ! | ||
| + | |- | ||
| + | |{{EquipmentLink|Daihatsu Landing Craft (Type 89 Medium Tank & Landing Force)|text=DLC + T89 Tank}}<br>{{EquipmentLink|Toku Daihatsu Landing Craft + Type 1 Gun Tank|text=Toku DLC + Ho-Ni Tank}}<br>{{EquipmentLink|Toku Daihatsu Landing Craft + Panzer III (North African Specification)|text=Toku DLC + Panzer III}}<ref name="PanzerIII"/><br>{{EquipmentLink|Toku Daihatsu Landing Craft + Panzer III Ausf. J|text=Toku DLC + Panzer III J}} | ||
| + | |1.5 | ||
| + | |rowspan=2|1.3 | ||
| + | |1.2 | ||
| + | |rowspan=2|1.4 | ||
| + | |1.5 | ||
| + | |rowspan=2|1.4 | ||
| + | |1.6 | ||
| + | |rowspan=2|1.5 | ||
| + | |- | ||
| + | |{{EquipmentLink|Toku Daihatsu Landing Craft + Chi-Ha|text=Toku DLC + Chi-Ha}}<ref>For example: vs Soft-Skin, 1 {{EquipmentLink|Toku Daihatsu Landing Craft + Chi-Ha|text=Chi-Ha}} = '''no bonus''', 2 {{EquipmentLink|Toku Daihatsu Landing Craft + Chi-Ha|text=Chi-Ha}} = '''1.3''', 1 {{EquipmentLink|Daihatsu Landing Craft (Type 89 Medium Tank & Landing Force)|text=T89}} + 1 {{EquipmentLink|Toku Daihatsu Landing Craft + Chi-Ha|text=Chi-Ha}} = '''1.95''' (1.5x1.3)</ref><br>{{EquipmentLink|Toku Daihatsu Landing Craft + Chi-Ha Kai|text=Toku DLC + Chi-Ha Kai}}<ref name="chiha">https://docs.google.com/document/d/1y8kisQTFuAd57GFAQRpJzPOEk9kpUzoEf1sxmnywx3A/edit#heading=h.hycuzmt5tebu, TsunDB, confirmed except Harbour Summer Princess</ref> | ||
| + | ! !! !! !! | ||
| + | |- | ||
| + | |{{EquipmentLink|Daihatsu Landing Craft (Panzer II/North African Specification)|text=DLC + Panzer II}} | ||
| + | | 1.5 | ||
| + | | 1.3 | ||
| + | | 1.2 | ||
| + | | 1.4 | ||
| + | | 1.5 | ||
| + | | 1.4 | ||
| + | | 1.6 | ||
| + | | 1.5 | ||
| + | |- | ||
| + | |{{EquipmentLink|M4A1 DD}}<br>{{EquipmentLink|Toku Daihatsu Landing Craft + Chi-Ha Kai|text=Toku DLC + Chi-Ha Kai}}<ref name="chiha"></ref><br>{{EquipmentLink|Toku Daihatsu Landing Craft + Panzer III Ausf. J|text=Toku DLC + Panzer III J}} | ||
| + | |1.1 | ||
| + | ! | ||
| + | |1.8 | ||
| + | ! | ||
| + | |2.0 | ||
| + | ! | ||
| + | |2.0 | ||
| + | ! | ||
| + | |- | ||
| + | |☀ Day Only | ||
| + | {{EquipmentLink|Armed Daihatsu}}<br>{{EquipmentLink|Soukoutei (Armored Boat Class)|text=Soukoutei}} | ||
| + | | 1.1 | ||
| + | |rowspan=2| 1.1 | ||
| + | | 1.3 | ||
| + | |rowspan=2| 1.1 | ||
| + | | 1.3 | ||
| + | |rowspan=2| 1.2 | ||
| + | | 1.5 | ||
| + | |rowspan=2| 1.1 | ||
| + | |- | ||
| + | |☀ Day Only | ||
| + | {{EquipmentLink|Special Type 4 Amphibious Tank|text=Ka-Tsu Tank}}<br>{{EquipmentLink|Special Type 4 Amphibious Tank Kai|text=Ka-Tsu Tank Kai}} | ||
| + | ! !! !! !! | ||
| + | |- | ||
| + | |rowspan=2|{{Amphibious Tank}} | ||
| + | |{{EquipmentLink|Special Type 2 Amphibious Tank|text=Ka-Mi Tank}} | ||
| + | |1.5 | ||
| + | |rowspan=2|1.2 | ||
| + | |2.4 | ||
| + | |rowspan=2|1.35 | ||
| + | |2.4 | ||
| + | |rowspan=2|1.35 | ||
| + | |2.8 | ||
| + | |rowspan=2|1.5 | ||
| + | |- | ||
| + | |{{EquipmentLink|Special Type 4 Amphibious Tank Kai|text=Ka-Tsu Tank Kai}}<ref>In this case the Ka-Tsu Kai count as two, 1 Ka-Tsu Kai = 1.2</ref> | ||
| + | ! !! !! !! | ||
| + | |- | ||
| + | |{{Landing Forces}} | ||
| + | |'''[[Landing Force]]s | ||
| + | |colspan=8|''Unknown yet | ||
| + | |- | ||
| + | !colspan=10| | ||
| + | |- | ||
| + | |rowspan=3|{{IM2}} {{Star}}<br>[[Improvement]] | ||
| + | | {{LandingCraft}} [[Landing Craft]] &<br>{{Amphibious Tank}} {{Equipment/Link|Special Type 4 Amphibious Tank|Special Type 4 Amphibious Tank Kai|text=Ka-Tsu Tanks|link=Ka-Tsu}} | ||
| + | |colspan=8|1 + (Average DLC {{Star}} /50) + (Average Ka-Tsu {{Star}} /50) | ||
|- | |- | ||
| − | |colspan= | + | |{{Amphibious Tank}} {{Equipment/Link|Special Type 2 Amphibious Tank|text=Ka-Mi Tank}} |
| + | |colspan=8|1 + (Average {{Star}} /30) | ||
|- | |- | ||
| − | + | |{{Landing Forces}} '''[[Landing Force]]s | |
| − | | | + | |colspan=8|''Unknown yet |
| − | | | ||
| − | | | ||
| − | |||
| − | |||
| − | |||
| − | |||
| − | |||
|} | |} | ||
| − | |||
| − | |||
| − | |||
| − | |||
| − | |||
| − | |||
| − | |||
| − | |||
| − | |||
| − | |||
| − | |||
| − | |||
| − | |||
| − | |||
| − | |||
| − | |||
| − | |||
| − | |||
| − | |||
| − | |||
| − | |||
| − | |||
| − | |||
| − | |||
| − | |||
| − | |||
| − | |||
| − | |||
| − | |||
| − | |||
| − | |||
| − | |||
| − | |||
| − | |||
;Notes | ;Notes | ||
| − | * The | + | * The Improvement Bonus takes the average for all Landing Craft equipped on the ship. |
| − | + | * The Improvement Bonus takes the average for all Special Amphibious Tanks equipped on the ship. | |
| − | * The | + | <references/> |
| − | |||
| − | |||
| − | |||
| − | == | + | ===Landing Craft Specific Bonuses=== |
| − | The | + | The following multipliers are '''pre-cap'''. |
| − | |||
| − | |||
| − | |||
| − | + | {|class="wikitable" style="width:950px; font-weight:bold; text-align:center" | |
| − | { | + | !colspan=3|Equipment |
| − | + | !Multiplicative Bonuses | |
| − | + | !Flat Bonuses | |
| − | + | |- | |
| − | + | !colspan=3|Toku DLC Tank Bonus | |
| − | + | !style="font-size:125%; color:tomato"|A21 | |
| − | + | !style="font-size:125%; color:DeepSkyBlue"|B21 | |
| − | + | |- | |
| − | + | |colspan=3| | |
| − | + | {{Landing Craft}}{{EquipmentLink|Toku Daihatsu Landing Craft + 11th Tank Regiment|text=Toku DLC + 11th Reg}}<br> | |
| − | + | {{Landing Craft}}{{EquipmentLink|Toku Daihatsu Landing Craft + Type 1 Gun Tank|text=Toku DLC + Ho-Ni Tank}}<br> | |
| − | + | {{Landing Craft}}{{EquipmentLink|Toku Daihatsu Landing Craft + Panzer III (North African Specification)|text=Toku DLC + Panzer III}}<br> | |
| − | + | {{Landing Craft}}{{EquipmentLink|Toku Daihatsu Landing Craft + Panzer III Ausf. J|text=Toku DLC + Panzer III J}} | |
| − | === | + | | 1.8|| 25 |
| − | + | |- | |
| − | + | !colspan=3|Sherman Bonus | |
| − | + | !style="font-size:125%; color:tomato"|A22 | |
| − | + | !style="font-size:125%; color:DeepSkyBlue"|B22 | |
| − | |||
| − | |||
| − | |||
| − | = | ||
| − | |||
| − | |-| | ||
| − | |||
| − | |||
| − | |||
| − | |||
| − | |||
| − | |||
| − | |||
| − | |||
| − | |||
| − | |||
| − | | | ||
| − | |||
| − | |||
| − | |||
| − | |||
| − | |||
| − | |||
| − | |||
| − | |||
| − | |||
| − | |||
| − | |||
| − | |||
| − | |||
| − | |||
| − | |||
| − | |||
| − | |||
| − | |||
| − | |||
| − | |||
| − | |||
| − | < | ||
| − | |||
| − | |||
| − | |||
| − | |||
| − | | | ||
| − | |||
| − | |||
| − | |||
| − | |||
| − | |||
| − | |||
| − | |||
| − | |||
| − | |||
| − | |||
| − | |||
| − | |||
| − | |||
| − | |||
| − | |||
| − | |||
| − | |||
| − | |||
| − | |||
| − | |||
| − | |||
| − | |||
| − | = | ||
| − | |||
| − | |||
| − | |||
| − | |||
| − | ! | ||
| − | |||
|- | |- | ||
| − | !colspan=3| | + | |colspan=3|{{Landing Craft}}{{EquipmentLink|M4A1 DD}} |
| + | | 1.4|| 35 | ||
| + | |- | ||
| + | !colspan=3|Ho-Ni Tank Regiment Bonus | ||
| + | !style="font-size:125%; color:tomato"|A23 | ||
| + | !style="font-size:125%; color:DeepSkyBlue"|B23 | ||
| + | |- | ||
| + | |colspan=3|{{Landing Craft}}{{EquipmentLink|Toku Daihatsu Landing Craft + Type 1 Gun Tank|text=Toku DLC + Ho-Ni Tank}} | ||
| + | | 1.3|| 42 | ||
| + | |- | ||
| + | !colspan=3|Chi-Ha (non-Kai) Bonus | ||
| + | !style="font-size:125%; color:tomato"|A24 | ||
| + | !style="font-size:125%; color:DeepSkyBlue"|B24 | ||
| + | |- | ||
| + | |colspan=3|{{Landing Craft}}{{EquipmentLink|Toku Daihatsu Landing Craft + Chi-Ha|text=Toku DLC + Chi-Ha}} | ||
| + | | 1.4|| 28 | ||
| + | |- | ||
| + | !colspan=3|Chi-Ha Kai Bonus | ||
| + | !style="font-size:125%; color:tomato"|A25 | ||
| + | !style="font-size:125%; color:DeepSkyBlue"|B25 | ||
| + | |- | ||
| + | |colspan=3|{{Landing Craft}}{{EquipmentLink|Toku Daihatsu Landing Craft + Chi-Ha Kai|text=Toku DLC + Chi-Ha Kai}} | ||
| + | | 1.5|| 33 | ||
| + | |- | ||
| + | !colspan=3|Katsu Bonus | ||
| + | !style="font-size:125%; color:tomato"|A26 | ||
| + | !style="font-size:125%; color:DeepSkyBlue"|B26 | ||
| + | |- | ||
| + | |colspan=3|{{Amphibious Tank}}{{EquipmentLink|Special Type 4 Amphibious Tank|text=Ka-Tsu}}<br>{{Amphibious Tank}}{{EquipmentLink|Special Type 4 Amphibious Tank Kai|text=Ka-Tsu Kai}} | ||
| + | | 1.2|| 42 | ||
| + | |- | ||
| + | !colspan=3|Katsu Kai Bonus | ||
| + | !style="font-size:125%; color:tomato"|A27 | ||
| + | !style="font-size:125%; color:DeepSkyBlue"|B27 | ||
| + | |- | ||
| + | |colspan=3|{{Amphibious Tank}}{{EquipmentLink|Special Type 4 Amphibious Tank Kai|text=Ka-Tsu Kai}} | ||
| + | | 1.1|| 28 | ||
|- | |- | ||
| − | | | + | !colspan=3|Armored Boats Synergy Bonus<ref>https://twitter.com/oxke_admiral/status/1642326265364615168?cxt=HHwWgMDQxa7C28otAAAA</ref> |
| − | | | + | !rowspan=2 style="font-size:125%; color:tomato"|A28 |
| + | !rowspan=2 style="font-size:125%; color:DeepSkyBlue"|B28 | ||
|- | |- | ||
| − | + | !{{Landing Craft}}{{EquipmentLink|Armed Daihatsu}}<br>{{Landing Craft}}{{EquipmentLink|Soukoutei (Armored Boat Class)|text=Soukoutei}} | |
| − | | | + | !Group 1 |
| + | {|class="wikitable mw-collapsible mw-collapsed" style="text-align:center; margin:auto" | ||
| + | ! | ||
|- | |- | ||
| − | + | |{{QuestRewardEquip|Daihatsu Landing Craft}} {{QuestRewardEquip|Toku Daihatsu Landing Craft}}<br>{{QuestRewardEquip|Daihatsu Landing Craft (Type 89 Medium Tank & Landing Force)}} {{QuestRewardEquip|Toku Daihatsu Landing Craft + Type 1 Gun Tank}}<br>{{QuestRewardEquip|Daihatsu Landing Craft (Panzer II/North African Specification)}} {{QuestRewardEquip|Special Type 4 Amphibious Tank}}<br>{{QuestRewardEquip|Special Type 4 Amphibious Tank Kai}} | |
| − | | | + | |} |
| − | |{{ | + | !Group 2 |
| − | | | + | {|class="wikitable mw-collapsible mw-collapsed" style="text-align:center; margin:auto" |
| + | ! | ||
|- | |- | ||
| − | |{{ | + | |{{QuestRewardEquip|Toku Daihatsu Landing Craft + 11th Tank Regiment}} {{QuestRewardEquip|Toku Daihatsu Landing Craft + Panzer III (North African Specification)}}<br>{{QuestRewardEquip|Toku Daihatsu Landing Craft + Chi-Ha}} {{QuestRewardEquip|Toku Daihatsu Landing Craft + Chi-Ha Kai}}<br>{{QuestRewardEquip|Toku Daihatsu Landing Craft + Panzer III Ausf. J}} {{QuestRewardEquip|Special Type 2 Amphibious Tank}} |
| − | | | + | |} |
|- | |- | ||
| − | | | + | |Only one<ref>Due to some bug using 2 Soukoutei or 2 Armed Daihatsu cancel the bonuses</ref> |
| − | | | + | |colspan=2|1 of Any |
| + | | 1.2|| 10 | ||
|- | |- | ||
| − | | | + | |rowspan=3| Both |
| − | | | + | | 1|| 0|| 1.3|| 15 |
|- | |- | ||
| − | + | | 0|| 1|| 1.4|| 20 | |
| − | | | ||
| − | | | ||
| − | | | ||
|- | |- | ||
| − | | | + | |colspan=2| 2 of any |
| − | | | + | | 1.5|| 25 |
|} | |} | ||
| + | <references/> | ||
| + | {{clear}} | ||
| − | + | ===Flat Damage Bonuses=== | |
| − | + | {|class="wikitable" style="font-weight:bold; text-align:center" | |
| − | {|class="wikitable" | + | ! style="font-size:150%; color:deepskyblue" colspan=10|B1 |
| − | !width=" | + | |- |
| − | ! | + | !colspan=2| Amount Equipped |
| + | !width="50px"| 1 | ||
| + | !width="50px"| 2 | ||
| + | !width="50px"| 3 | ||
| + | !width="50px"| 4+ | ||
| + | |- | ||
| + | | width="120px" rowspan=3|{{AntiGroundArtillery}} | ||
| + | |{{EquipmentLink|WG42 (Wurfgerät 42)|text=WG42}} | ||
| + | |75||110||140||160 | ||
| + | |- | ||
| + | |{{EquipmentLink|Shipborne Model Type 4 20cm Anti-ground Rocket Launcher|text=Type 4 Anti-Ground Rockets}} | ||
| + | |55||115||160||190 | ||
| + | |- | ||
| + | |{{EquipmentLink|Type 4 20cm Anti-ground Rocket Launcher (Concentrated Deployment)|text=Type 4 Anti-Ground Rockets CD}} | ||
| + | |80||170||230||260 | ||
|- | |- | ||
| − | + | |rowspan=2|{{DCother}} | |
| − | | | + | |{{EquipmentLink|Type 2 12cm Mortar Kai|text=ASW Mortar}} |
| − | | | + | |30||55||75||90 |
| − | | | ||
|- | |- | ||
| − | + | |{{EquipmentLink|Type 2 12cm Mortar Kai (Concentrated Deployment)|text=ASW Mortar CD}} | |
| − | | | + | |60||110||150||180 |
| − | | | ||
| − | | | ||
|} | |} | ||
| − | |- | + | ===Post-Cap Bonuses=== |
| − | ''' | + | ====Supply Depot Princess==== |
| + | {{Enemy/Link|Supply Depot Princess}} and its variants are currently the only installations to have post-cap bonuses. | ||
| + | *These bonuses are applied after the damage soft-cap, and can reach the damage display cap of '''9999'''. | ||
| + | ** If the damage displayed is 9999, the actual damage can be higher. | ||
| + | *Supply Depot Princess is a '''soft-skinned''' installation for purposes of Pre-Cap Bonuses. | ||
| − | {|class="wikitable" | + | {|class="wikitable" style="font-weight:bold; text-align:center" |
| − | !width=" | + | !colspan=5 style="font-size:150%; color:tomato"|C |
| − | ! | + | |- |
| + | ! rowspan=2 colspan=2| Installation Type | ||
| + | ! width="130px" colspan=3| {{Enemy/Banner|Supply Depot Princess|small=true}} | ||
| + | |- | ||
| + | ! colspan=3| Supply Depot Princesses | ||
| + | |- | ||
| + | ! colspan=2| Number Equipped | ||
| + | ! Single | ||
| + | !colspan=2| Multiple | ||
| + | |- | ||
| + | |width="80px" rowspan=2|{{AntiGroundArtillery}} | ||
| + | |{{EquipmentLink|WG42 (Wurfgerät 42)|text=WG42}} | ||
| + | |1.25 | ||
| + | |colspan=2|1.3 | ||
| + | |- | ||
| + | |{{EquipmentLink|Shipborne Model Type 4 20cm Anti-ground Rocket Launcher|Type 4 20cm Anti-ground Rocket Launcher (Concentrated Deployment)|text=Type 4 Anti-Ground Rockets}} | ||
| + | |1.2 | ||
| + | |colspan=2|1.4 | ||
| + | |- | ||
| + | |{{DCother}} | ||
| + | |{{Equipment/Link|Type 2 12cm Mortar Kai|Type 2 12cm Mortar Kai (Concentrated Deployment)|text=ASW Mortars|link_category=ASW Mortars}} | ||
| + | |1.15 | ||
| + | |colspan=2|1.2 | ||
| + | |- | ||
| + | !colspan=5| | ||
| + | |- | ||
| + | |colspan=2|{{LandingCraft}} [[Landing Craft]] Type and<br>{{Amphibious Tank}} [[Ka-Tsu]] Type Multiplier | ||
| + | |colspan=3|1.7 | ||
| + | |- | ||
| + | |rowspan=6|{{LandingCraft}} | ||
| + | |{{EquipmentLink|Toku Daihatsu Landing Craft|text=Toku Daihatsu}}<br>{{EquipmentLink|Toku Daihatsu Landing Craft + Panzer III (North African Specification)|text=Toku DLC + Panzer III}}<ref name="PanzerIII">https://twitter.com/Divinity_123/status/1695813425660661965</ref><br>{{EquipmentLink|Toku Daihatsu Landing Craft + Panzer III Ausf. J|text=Toku DLC + Panzer III J}} | ||
| + | |1.2 | ||
| + | !colspan=2| | ||
| + | |- | ||
| + | |{{EquipmentLink|Daihatsu Landing Craft (Type 89 Medium Tank & Landing Force)|text=DLC + T89 Tank}}<br>{{EquipmentLink|Toku Daihatsu Landing Craft + Type 1 Gun Tank|text=Toku DLC + Ho-Ni Tank}}<br>{{EquipmentLink|Toku Daihatsu Landing Craft + Panzer III (North African Specification)|text=Toku DLC + Panzer III}}<ref name="PanzerIII"/><br>{{EquipmentLink|Toku Daihatsu Landing Craft + Panzer III Ausf. J|text=Toku DLC + Panzer III J}} | ||
| + | |1.3 | ||
| + | |rowspan=2 colspan=2|1.6 | ||
| + | |- | ||
| + | |{{EquipmentLink|Toku Daihatsu Landing Craft + Chi-Ha|text=Toku DLC + Chi-Ha}}<br>{{EquipmentLink|Toku Daihatsu Landing Craft + Chi-Ha Kai|text=Toku DLC + Chi-Ha Kai}}<ref>For example: 1 {{EquipmentLink|Toku Daihatsu Landing Craft + Chi-Ha|text=Chi-Ha}} = '''no bonus''', 2 {{EquipmentLink|Toku Daihatsu Landing Craft + Chi-Ha|text=Chi-Ha}} = '''1.6''', 1 {{EquipmentLink|Daihatsu Landing Craft (Type 89 Medium Tank & Landing Force)|text=T89}} + 1 {{EquipmentLink|Toku Daihatsu Landing Craft + Chi-Ha|text=Chi-Ha}} = '''2.08''' (1.3x1.6)</ref> | ||
| + | ! | ||
| + | |- | ||
| + | |{{EquipmentLink|Daihatsu Landing Craft (Panzer II/North African Specification)|text=DLC + Panzer II}} | ||
| + | | 1.3 | ||
| + | |colspan=2| 1.6 | ||
| + | |- | ||
| + | |{{EquipmentLink|M4A1 DD}}<br>{{EquipmentLink|Toku Daihatsu Landing Craft + Chi-Ha Kai|text=Toku DLC + Chi-Ha Kai}}<br>{{EquipmentLink|Toku Daihatsu Landing Craft + Panzer III Ausf. J|text=Toku DLC + Panzer III J}} | ||
| + | |1.2 | ||
| + | !colspan=2| | ||
| + | |- | ||
| + | |{{EquipmentLink|Armed Daihatsu}}<br>{{EquipmentLink|Soukoutei (Armored Boat Class)|text=Soukoutei}} | ||
| + | | 1.5 | ||
| + | |rowspan=2 colspan=2| 1.1 | ||
| + | |- | ||
| + | |rowspan=3|{{Amphibious Tank}} | ||
| + | |{{EquipmentLink|Special Type 4 Amphibious Tank|text=Ka-Tsu Tank}}<br>{{EquipmentLink|Special Type 4 Amphibious Tank Kai|text=Ka-Tsu Tank Kai}} | ||
| + | ! | ||
| + | |- | ||
| + | |{{EquipmentLink|Special Type 2 Amphibious Tank|text=Ka-Mi Tank}} | ||
| + | |1.7 | ||
| + | |rowspan=2 colspan=2|1.5 | ||
| + | |- | ||
| + | |{{EquipmentLink|Special Type 4 Amphibious Tank Kai|text=Ka-Tsu Tank Kai}}<ref>In this case the Ka-Tsu Kai count as two, 1 Ka-Tsu Kai = 1.2</ref> | ||
| + | ! | ||
| + | |- | ||
| + | !colspan=2| Number Equipped | ||
| + | ! 1 | ||
| + | ! 2 | ||
| + | ! 3 | ||
| + | |- | ||
| + | |colspan=2| {{Landing Forces}} [[Landing Force]]s Type Multiplier | ||
| + | |3.15||2.35||1.2 | ||
|- | |- | ||
| − | !colspan= | + | |rowspan=2|{{Landing Forces}} |
| − | |- | + | |{{EquipmentLink|Type 97 Medium Tank New Turret (Chi-Ha Kai)}}<br>{{EquipmentLink|Army Infantry Corps + Chi-Ha Kai}} |
| − | | | + | |1.2 |
| − | | | + | !colspan=2| |
| − | |- | + | |- |
| − | |{{ | + | |{{EquipmentLink|Army Infantry Corps}}<br>{{EquipmentLink|Army Infantry Corps + Chi-Ha Kai}} |
| − | | | + | |1.55 |
| + | !colspan=2| | ||
| + | |- | ||
| + | !colspan=8| | ||
| + | |- | ||
| + | |rowspan=5|{{IM2}} {{Star}}<br>[[Improvement]] | ||
| + | |- | ||
| + | |rowspan=2|{{LandingCraft}} [[Landing Craft]] &<br>{{Amphibious Tank}} {{Equipment/Link|Special Type 4 Amphibious Tank|Special Type 4 Amphibious Tank Kai|text=Ka-Tsu Tanks|link=Ka-Tsu}} | ||
| + | |colspan=3|[1 + (Average DLC {{Star}} /50) + (Average Ka-Tsu {{Star}} /50)]<sup>'''N'''</sup> | ||
| + | |- | ||
| + | |colspan=3 style="text-align:left"| | ||
| + | * N = 1 for any [[Landing Craft]]/[[Ka-Tsu]] | ||
| + | * +1 to N for each unique: | ||
| + | **{{EquipmentLink|Daihatsu Landing Craft (Type 89 Medium Tank & Landing Force)|text=DLC + T89 Tank}}<br>OR {{EquipmentLink|Toku Daihatsu Landing Craft + Type 1 Gun Tank|text=Toku DLC + Ho-Ni Tank}}<br>OR {{EquipmentLink|Toku Daihatsu Landing Craft + Panzer III (North African Specification)|text=Toku DLC + Panzer III}}<ref name="PanzerIII"/><br>OR {{EquipmentLink|Toku Daihatsu Landing Craft + Panzer III Ausf. J|text=Toku DLC + Panzer III J}} | ||
| + | **{{EquipmentLink|Daihatsu Landing Craft (Panzer II/North African Specification)|text=DLC + Panzer II}} | ||
| + | |- | ||
| + | |{{Amphibious Tank}} {{Equipment/Link|Special Type 2 Amphibious Tank|text=Ka-Mi Tank}} | ||
| + | |colspan=3|1 + (Average {{Star}} /30) | ||
|- | |- | ||
| − | + | |{{Landing Forces}} '''[[Landing Force]]s | |
| − | + | |colspan=3|''Unknown yet | |
| − | | | ||
| − | |||
| − | |||
|} | |} | ||
| − | </ | + | <references/> |
| + | ====Rations Bonuses==== | ||
| + | The developers have mentioned that {{Rations}} {{EquipmentLink|Combat Ration|Combat Ration (Special Onigiri)|Canned Saury|text=Rations|link_category=Ration}} consumed by a girl "affect landing craft's morale"<ref>https://twitter.com/KanColle_STAFF/status/715840109103484928</ref>. | ||
| − | == | + | {|class="wikitable" style="font-weight:bold; text-align:center" |
| − | + | !colspan=4 style="font-size:150%; color:tomato"|C1 | |
| + | |- | ||
| + | ! colspan=2| Installation Type | ||
| + | ! width="130px" colspan=2| All installations<ref>https://twitter.com/hedgehog_hasira/status/1566086797343412224</ref> | ||
| + | |- | ||
| + | ! colspan=2| Number Equipped | ||
| + | ! Single | ||
| + | ! Multiple | ||
| + | |- | ||
| + | |width="80px" rowspan=3|{{Rations}} | ||
| + | |{{EquipmentLink|Combat Ration}} | ||
| + | | 1.13 | ||
| + | | ?? | ||
| + | |- | ||
| + | |{{EquipmentLink|Combat Ration (Special Onigiri)}} | ||
| + | | ?? | ||
| + | | ?? | ||
| + | |- | ||
| + | |{{EquipmentLink|Canned Saury}} | ||
| + | | ?? | ||
| + | | ?? | ||
| + | |} | ||
| + | <references/> | ||
| + | ;Notes: | ||
| + | *A {{LandingCraft}} [[Landing Craft]] might be required to be equipped on the attacking ship for this bonus to be applied. | ||
| + | *As it is the only post-cap bonus common to all installations, it has a great potential. | ||
| + | *Due to the limited nature of Rations, this bonus is mostly "Pay To Win", and so is not recommended. | ||
| − | + | ===Airstrike And Land-Base Bonus=== | |
| − | + | For the damage formula, please refer to the [[Land-Based Air Squadron#Attack Power|LBAS]] and [[Damage_Calculations#Airstrike|airstrike]] page. The multiplier is chosen randomly between two values. The chance is roughly 50%. | |
| − | + | There are exceptions: | |
| − | * | + | *For {{BluePlane}} [[Torpedo Bomber]]: |
| + | ** The {{torpedo}} torpedo stat is counted as 0 in airstrike, | ||
| + | ** The behavior is unclear for LBAS (the damage are overestimated). | ||
| + | *For {{JetFighterBomber2}}{{JetFighterBomber1}} {{EquipmentLink|Kikka Kai|Jet Keiun Kai|text=Jets|link=Jets}}: | ||
| + | ** There are inconsistencies with the bonuses. | ||
| − | = | + | *For the {{Large Land-based Aircraft}} {{Equipment/Link|Shinzan|Shinzan Kai|text=Land-Based Heavy Bombers|link_category=Land-Based Heavy Bombers}}: |
| − | + | ** Could have a higher modifier than other planes. | |
| − | |||
| − | |||
| − | |||
| − | |||
| − | |||
| − | |||
| − | |||
| + | {|class="wikitable" style="font-weight:bold; text-align:center" | ||
| + | !colspan=9|<math>{\color{tomato}\text{Mod}_\text{Inst}}</math>[https://twitter.com/Divinity_123/status/1659942254671216642] | ||
| + | |- | ||
| + | !rowspan=2|Installation (ID) | ||
| + | !colspan=2|Airstrike | ||
| + | !colspan=2|LBAS | ||
| + | |- | ||
| + | |Low mod ||High mod ||Low mod ||High mod | ||
| + | |- | ||
| + | !width="130px"|{{Enemy/Banner|Isolated Island Princess|small=true}}<br>Isolated Island Princess (1671-1672) | ||
| + | !colspan=2| | ||
| + | |colspan=2| 2 | ||
| + | |- | ||
| + | !width="130px"|{{Enemy/Banner|Artillery Imp|small=true}}<br>Artillery Imp (1665-1667) | ||
| + | |1.3? ||1.7 ||1.6 ||2.5 | ||
| + | |- | ||
| + | !width="130px"|{{Enemy/Banner|Supply Depot Princess|small=true}}<br>"Old" Supply Depot Princesses (1653-1658) | ||
| + | |rowspan=2|1.5 | ||
| + | |rowspan=2|2.4 | ||
| + | |1.7 ||3.6? | ||
| + | |- | ||
| + | !width="130px"|{{Enemy/Banner|Supply Depot Princess D|small=true}}<br>"New" Supply Depot Princesses (B, C, D, ...) (ID>1658) | ||
| + | ! !! | ||
| + | |- | ||
| + | !width="130px"|{{Enemy/Banner|Harbour Summer Princess B|small=true}}<br>Harbour Summer Princess B (2023) | ||
| + | |? ||? ||? ||? | ||
| + | |} | ||
| − | ''' | + | ===Installation-Like Warships=== |
| + | This section is for special ships with installation-like behaviors, taking additional damage from anti-installation equipment. | ||
| + | *Those bonuses are '''post-cap only''', meaning none of the "anti-installation bonuses" previously mentioned are applied. | ||
| + | *Be aware that the sample is limited (event only) so the information may be inaccurate and/or old<ref>Updated the 08/09/2022 during the [[Summer 2022 Event]] [https://nga.178.com/read.php?tid=33769345&rand=329].</ref>. | ||
| − | + | {|class="wikitable mw-collapsible mw-collapsed" style="font-weight:bold; text-align:center" | |
| − | + | ! colspan=9|Installation-like warships | |
| − | + | |- | |
| − | + | ! style="font-size:150%; color:tomato" colspan=9|C | |
| − | + | |- | |
| − | + | ! colspan=2 rowspan=2| Installation Type | |
| − | + | ! width="130px" colspan=2| {{Enemy/Banner|Anchorage Water Demon Vacation Mode|small=true}} | |
| − | + | ! width="130px" colspan=2| {{Enemy/Banner|Dock Princess|small=true}} | |
| − | + | ! width="130px" colspan=3| {{ItemStack|item={{Enemy/Banner|Supply Depot Princess C Vacation Mode Damaged|small=true}}|text=Mod C}}{{ItemStack|item={{Enemy/Banner|Supply Depot Princess C Vacation Mode|small=true}}|text=Mod C}} | |
| − | + | |- | |
| − | + | ! colspan=2|Anchorage Water Demon Vacation Mode | |
| − | + | ! colspan=2| Dock Princess | |
| − | + | ! colspan=3| Supply Depot Princess C<br>Vacation Mode | |
| − | + | |- | |
| − | + | ! colspan=2| Number Equipped | |
| − | + | ! Single!! Multiple!! Single!! Multiple!! Single | |
| − | + | !colspan=2| Multiple | |
| − | + | |- | |
| − | + | |Ships | |
| − | + | |{{Class|Nagato}}<br>{{Class|Yamato}} | |
| − | + | |1.2 | |
| − | + | ! | |
| − | + | !colspan=2| | |
| − | + | !colspan=3| | |
| − | + | |- | |
| − | + | | width="80px"|{{AA Shell}} | |
| − | + | | width="200px"|{{Equipment/Link|Type 3 Shell|Type 3 Shell Kai|Type 3 Shell Kai Ni|text=AA Shells|link_category=Anti-Aircraft Shells}} | |
| − | + | |1.45 | |
| − | + | ! | |
| − | + | |1.3 | |
| − | + | ! | |
| − | + | !colspan=3| | |
| − | + | |- | |
| − | '' | + | |rowspan=2|{{AntiGroundArtillery}} |
| − | + | |{{EquipmentLink|WG42 (Wurfgerät 42)}} | |
| − | ''' | + | |1.2 |
| − | </ | + | |1.3 |
| − | + | |1.1 | |
| − | = | + | |1.2 |
| − | *[ | + | |1.25 |
| − | + | |colspan=2|1.3 | |
| − | {{ | + | |- |
| − | [[ | + | |{{EquipmentLink|Shipborne Model Type 4 20cm Anti-ground Rocket Launcher|Type 4 20cm Anti-ground Rocket Launcher (Concentrated Deployment)|text=Type 4 Anti-Ground Rockets}} |
| + | |1.15 | ||
| + | |1.4 | ||
| + | !colspan=2|? | ||
| + | |1.2 | ||
| + | |colspan=2|1.4 | ||
| + | |- | ||
| + | |{{DCother}} | ||
| + | |{{Equipment/Link|Type 2 12cm Mortar Kai|Type 2 12cm Mortar Kai (Concentrated Deployment)|text=ASW Mortars|link_category=ASW Mortars}} | ||
| + | |1.1 | ||
| + | |? | ||
| + | !colspan=2|? | ||
| + | |1.15 | ||
| + | |colspan=2|1.2 | ||
| + | |- | ||
| + | |{{Dive Bomber}} | ||
| + | |[[Dive Bomber]]s | ||
| + | |1.4 | ||
| + | |rowspan=2|1.75 | ||
| + | |rowspan=2|1.1 | ||
| + | |rowspan=2|1.1 | ||
| + | !colspan=3| | ||
| + | |- | ||
| + | |{{JetFighterBomber1}} | ||
| + | |[[Jets]] | ||
| + | |1.75 | ||
| + | !colspan=3| | ||
| + | |- | ||
| + | |{{SPB}}{{SPF}} | ||
| + | |Seaplane [[SPB|Bombers]]/[[SPF|Fighters]] | ||
| + | !colspan=2| | ||
| + | |colspan=2|1.1 | ||
| + | !colspan=3| | ||
| + | |- | ||
| + | ! colspan=9| | ||
| + | |- | ||
| + | |colspan=2|{{LandingCraft}} [[Landing Craft]] Type Multiplier | ||
| + | |colspan=2|1.4 | ||
| + | |colspan=2|1.1 | ||
| + | |colspan=3|1.7 | ||
| + | |- | ||
| + | |rowspan=6|{{LandingCraft}} | ||
| + | |{{EquipmentLink|Toku Daihatsu Landing Craft|text=Toku Daihatsu}} | ||
| + | |1.15 | ||
| + | ! | ||
| + | !colspan=2| | ||
| + | |1.2 | ||
| + | !colspan=2| | ||
| + | |- | ||
| + | |{{EquipmentLink|Daihatsu Landing Craft (Type 89 Medium Tank & Landing Force)|text=DLC + T89 Tank}}<br>{{EquipmentLink|Toku Daihatsu Landing Craft + Type 1 Gun Tank|text=Toku DLC + Ho-Ni Tank}} | ||
| + | |1.2 | ||
| + | |1.4 | ||
| + | |1.15 | ||
| + | |1.15 | ||
| + | |1.3 | ||
| + | |colspan=2|1.6 | ||
| + | |- | ||
| + | |{{EquipmentLink|Daihatsu Landing Craft (Panzer II/North African Specification)|text=DLC + Panzer II}} | ||
| + | |1.2 | ||
| + | |1.4 | ||
| + | |1.15 | ||
| + | |1.15 | ||
| + | |1.3 | ||
| + | |colspan=2|1.6 | ||
| + | |- | ||
| + | |{{EquipmentLink|M4A1 DD}} | ||
| + | |1.8 | ||
| + | ! | ||
| + | |1.1 | ||
| + | ! | ||
| + | |1.2 | ||
| + | !colspan=2| | ||
| + | |- | ||
| + | |{{EquipmentLink|Armed Daihatsu}}<br>{{EquipmentLink|Soukoutei (Armored Boat Class)|text=Soukoutei}} | ||
| + | |1.2 | ||
| + | ! | ||
| + | |1.1 | ||
| + | ! | ||
| + | | 1.5 | ||
| + | |colspan=2| 1.1 | ||
| + | |- | ||
| + | | | ||
| + | {{EquipmentLink|Toku Daihatsu Landing Craft + 11th Tank Regiment|text=Toku DLC + 11th Reg}}<br> | ||
| + | {{EquipmentLink|Toku Daihatsu Landing Craft + Type 1 Gun Tank|text=Toku DLC + Ho-Ni Tank}}<br> | ||
| + | {{EquipmentLink|Toku Daihatsu Landing Craft + Panzer III (North African Specification)|text=Toku DLC + Panzer III}} | ||
| + | !colspan=2| | ||
| + | |1.4 | ||
| + | ! | ||
| + | !colspan=3| | ||
| + | |- | ||
| + | |{{Amphibious Tank}} | ||
| + | |{{EquipmentLink|Special Type 2 Amphibious Tank|text=Ka-Mi Tank}} | ||
| + | |2.4 | ||
| + | |1.35 | ||
| + | |1.2 | ||
| + | |1.2 | ||
| + | |1.7 | ||
| + | |colspan=2|1.5 | ||
| + | |- | ||
| + | !colspan=2| Number Equipped | ||
| + | !colspan=4| | ||
| + | ! 1 | ||
| + | ! 2 | ||
| + | ! 3 | ||
| + | |- | ||
| + | |colspan=2| {{Landing Forces}} [[Landing Force]]s Type Multiplier | ||
| + | !colspan=4; rowspan=3| ''Unknown | ||
| + | |3.15||2.35||1.2 | ||
| + | |- | ||
| + | |rowspan=2|{{Landing Forces}} | ||
| + | |{{EquipmentLink|Type 97 Medium Tank New Turret (Chi-Ha Kai)}}<br>{{EquipmentLink|Army Infantry Corps + Chi-Ha Kai}} | ||
| + | |1.2 | ||
| + | !colspan=2| | ||
| + | |- | ||
| + | |{{EquipmentLink|Army Infantry Corps}}<br>{{EquipmentLink|Army Infantry Corps + Chi-Ha Kai}} | ||
| + | |1.55 | ||
| + | !colspan=2| | ||
| + | |- | ||
| + | ! colspan=9| | ||
| + | |- | ||
| + | |rowspan=4|{{IM2}} {{Star}}<br>[[Improvement]] | ||
| + | |rowspan=2| {{LandingCraft}} [[Landing Craft]] &<br>{{Amphibious Tank}} {{Equipment/Link|Special Type 4 Amphibious Tank|Special Type 4 Amphibious Tank Kai|text=Ka-Tsu Tanks|link=Ka-Tsu}} | ||
| + | |colspan=4 rowspan=2|1 + (Average DLC {{Star}} /50) + (Average Ka-Tsu {{Star}} /50) | ||
| + | |colspan=3|[1 + (Average DLC {{Star}} /50)<br>+ (Average Ka-Tsu {{Star}} /50)]<sup>'''N'''</sup> | ||
| + | |- | ||
| + | |colspan=3 style="text-align:left"| | ||
| + | * N = 1 for any [[Landing Craft]] | ||
| + | * +1 to N for each unique: | ||
| + | **{{EquipmentLink|Daihatsu Landing Craft (Type 89 Medium Tank & Landing Force)|text=DLC + T89 Tank}}<br>OR {{EquipmentLink|Toku Daihatsu Landing Craft + Type 1 Gun Tank|text=Toku DLC + Ho-Ni Tank}}<br>OR {{EquipmentLink|Toku Daihatsu Landing Craft + Panzer III (North African Specification)|text=Toku DLC + Panzer III}}<br>OR {{EquipmentLink|Toku Daihatsu Landing Craft + Panzer III Ausf. J|text=Toku DLC + Panzer III J}} | ||
| + | **{{EquipmentLink|Daihatsu Landing Craft (Panzer II/North African Specification)|text=DLC + Panzer II}} | ||
| + | |- | ||
| + | |{{Amphibious Tank}} {{Equipment/Link|Special Type 2 Amphibious Tank|text=Ka-Mi Tank}} | ||
| + | |colspan=7|1 + (Average {{Star}} /30) | ||
| + | |- | ||
| + | |{{Landing Forces}} '''[[Landing Force]]s | ||
| + | |colspan=7|''Unknown | ||
| + | |} | ||
| + | <references/> | ||
| + | *The missing bonuses from new equipment can be extrapolated from the other installation bonuses. | ||
Latest revision as of 16:35, 23 March 2024
Calculation
Installations generally have a lot of HP and/or armor. But multiple different cumulative bonuses exist against them, allowing for massive damage when using the right set-ups. These bonuses are divided into 5 groups and are calculated in the following order[1]:
- Ship type bonuses,
- General multiplicative bonuses,
- Landing craft specific bonuses,
- Flat damage bonuses,
- Post-cap bonuses,
- Airstrike and land-base special cases,
- "Installation-like warships" special cases.
- The bonuses' exact order is still under investigation and may be subject to changes.
| Damage Bonuses Calculations | |||
|---|---|---|---|
Pre-cap
|
Surface Shelling:
| ||
Cap
|
| ||
Post-Cap
|
| ||
| |||
Bonuses
Ship Type Bonuses
| Ship Type | Target | Bonuses | |
|---|---|---|---|
| A0 | DD, CL | Pillboxes   
|
1.4 |
| Akagi, Hiryuu, Souryuu[1] | 1.25 | ||
| B0 | SS, SSV | All installation | 30 |
- ↑ Kaga has been tested and no bonus has been found against the Harbour Summer Princess.
General Multiplicative Bonuses
These bonuses depend on the enemy targeted, as well as the equipment used.
| A1[1] | |||||||||
|---|---|---|---|---|---|---|---|---|---|
| Installation Type | Soft-Skinned | Hard-Skinned | |||||||
| Pillboxes
|
|||||||||
| Isolated Island Princess | Pillboxes | Harbour Summer Princess | |||||||
| Number Equipped | Single | Multiple | Single | Multiple | Single | Multiple | Single | Multiple | |
AA Shells  
|
2.5 | 1.75 | 1.75 | ||||||
AP Shells  
|
1.85 | 1.3 | |||||||
WG42 (Wurfgerät 42)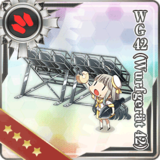
|
1.3 | 1.4 | 1.4 | 1.5 | 1.6 | 1.7 | 1.4 | 1.2 | |
Type 4 Anti-Ground Rockets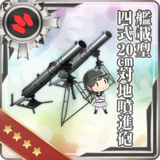 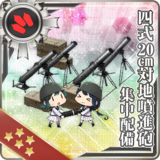
|
1.25 | 1.5 | 1.3 | 1.65 | 1.5 | 1.8 | 1.25 | 1.4 | |
ASW Mortars 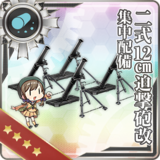
|
1.2 | 1.3 | 1.2 | 1.4 | 1.3 | 1.5 | 1.1 | 1.15 | |
| Dive Bombers | 1.4 | 1.75 | 1.5 | 2 | 1.3 | 1.2 | |||
| Seaplane Bombers/Fighters | 1.2 | 1.5 | 1.3 | ||||||
| 1.4 | 1.8 | 1.8 | 1.7 | ||||||
Toku Daihatsu Toku DLC + Panzer III  [2] [2]Toku DLC + Panzer III J 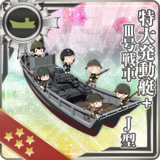
|
1.15 | 1.15 | 1.15 | 1.2 | |||||
DLC + T89 Tank Toku DLC + Ho-Ni Tank  Toku DLC + Panzer III [2]Toku DLC + Panzer III J
|
1.5 | 1.3 | 1.2 | 1.4 | 1.5 | 1.4 | 1.6 | 1.5 | |
Toku DLC + Chi-Ha [3] [3]Toku DLC + Chi-Ha Kai  [4] [4]
|
|||||||||
DLC + Panzer II
|
1.5 | 1.3 | 1.2 | 1.4 | 1.5 | 1.4 | 1.6 | 1.5 | |
M4A1 DD Toku DLC + Chi-Ha Kai [4]Toku DLC + Panzer III J
|
1.1 | 1.8 | 2.0 | 2.0 | |||||
| ☀ Day Only | 1.1 | 1.1 | 1.3 | 1.1 | 1.3 | 1.2 | 1.5 | 1.1 | |
| ☀ Day Only | |||||||||
Ka-Mi Tank
|
1.5 | 1.2 | 2.4 | 1.35 | 2.4 | 1.35 | 2.8 | 1.5 | |
Ka-Tsu Tank Kai [5] [5]
|
|||||||||
| Landing Forces | Unknown yet | ||||||||
Improvement |

|
1 + (Average DLC | |||||||
|
|
1 + (Average | ||||||||
| Unknown yet | |||||||||
- Notes
- The Improvement Bonus takes the average for all Landing Craft equipped on the ship.
- The Improvement Bonus takes the average for all Special Amphibious Tanks equipped on the ship.
- ↑ Last time updated: 21/03/2024, source:https://bbs.nga.cn/read.php?tid=33769345&rand=868
- ↑ 2.0 2.1 https://twitter.com/Divinity_123/status/1695813425660661965
- ↑ For example: vs Soft-Skin, 1 Chi-Ha = no bonus, 2 Chi-Ha = 1.3, 1 T89 + 1 Chi-Ha = 1.95 (1.5x1.3)
- ↑ 4.0 4.1 https://docs.google.com/document/d/1y8kisQTFuAd57GFAQRpJzPOEk9kpUzoEf1sxmnywx3A/edit#heading=h.hycuzmt5tebu, TsunDB, confirmed except Harbour Summer Princess
- ↑ In this case the Ka-Tsu Kai count as two, 1 Ka-Tsu Kai = 1.2
Landing Craft Specific Bonuses
The following multipliers are pre-cap.
| Equipment | Multiplicative Bonuses | Flat Bonuses | ||||
|---|---|---|---|---|---|---|
| Toku DLC Tank Bonus | A21 | B21 | ||||
|
|
1.8 | 25 | ||||
| Sherman Bonus | A22 | B22 | ||||
|
|
1.4 | 35 | ||||
| Ho-Ni Tank Regiment Bonus | A23 | B23 | ||||
|
|
1.3 | 42 | ||||
| Chi-Ha (non-Kai) Bonus | A24 | B24 | ||||
|
|
1.4 | 28 | ||||
| Chi-Ha Kai Bonus | A25 | B25 | ||||
|
|
1.5 | 33 | ||||
| Katsu Bonus | A26 | B26 | ||||
|
|
1.2 | 42 | ||||
| Katsu Kai Bonus | A27 | B27 | ||||
|
|
1.1 | 28 | ||||
| Armored Boats Synergy Bonus[1] | A28 | B28 | ||||
 
|
Group 1
|
Group 2
| ||||
| Only one[2] | 1 of Any | 1.2 | 10 | |||
| Both | 1 | 0 | 1.3 | 15 | ||
| 0 | 1 | 1.4 | 20 | |||
| 2 of any | 1.5 | 25 | ||||


- ↑ https://twitter.com/oxke_admiral/status/1642326265364615168?cxt=HHwWgMDQxa7C28otAAAA
- ↑ Due to some bug using 2 Soukoutei or 2 Armed Daihatsu cancel the bonuses
Flat Damage Bonuses
| B1 | |||||||||
|---|---|---|---|---|---|---|---|---|---|
| Amount Equipped | 1 | 2 | 3 | 4+ | |||||
| WG42
|
75 | 110 | 140 | 160 | |||||
| Type 4 Anti-Ground Rockets
|
55 | 115 | 160 | 190 | |||||
| Type 4 Anti-Ground Rockets CD
|
80 | 170 | 230 | 260 | |||||
| ASW Mortar
|
30 | 55 | 75 | 90 | |||||
| ASW Mortar CD
|
60 | 110 | 150 | 180 | |||||
Post-Cap Bonuses
Supply Depot Princess
Supply Depot Princess and its variants are currently the only installations to have post-cap bonuses.
- These bonuses are applied after the damage soft-cap, and can reach the damage display cap of 9999.
- If the damage displayed is 9999, the actual damage can be higher.
- Supply Depot Princess is a soft-skinned installation for purposes of Pre-Cap Bonuses.
| C | |||||||
|---|---|---|---|---|---|---|---|
| Installation Type | |||||||
| Supply Depot Princesses | |||||||
| Number Equipped | Single | Multiple | |||||
| WG42
|
1.25 | 1.3 | |||||
| Type 4 Anti-Ground Rockets
|
1.2 | 1.4 | |||||
| ASW Mortars
|
1.15 | 1.2 | |||||
| 1.7 | |||||||
| Toku Daihatsu Toku DLC + Panzer III [1]Toku DLC + Panzer III J
|
1.2 | ||||||
| DLC + T89 Tank Toku DLC + Ho-Ni Tank Toku DLC + Panzer III [1]Toku DLC + Panzer III J
|
1.3 | 1.6 | |||||
| Toku DLC + Chi-Ha Toku DLC + Chi-Ha Kai [2]
|
|||||||
| DLC + Panzer II
|
1.3 | 1.6 | |||||
| M4A1 DD Toku DLC + Chi-Ha Kai Toku DLC + Panzer III J
|
1.2 | ||||||
| Armed Daihatsu Soukoutei
|
1.5 | 1.1 | |||||
| Ka-Tsu Tank Ka-Tsu Tank Kai
|
|||||||
| Ka-Mi Tank
|
1.7 | 1.5 | |||||
| Ka-Tsu Tank Kai[3]
|
|||||||
| Number Equipped | 1 | 2 | 3 | ||||
| 3.15 | 2.35 | 1.2 | |||||
Type 97 Medium Tank New Turret (Chi-Ha Kai) Army Infantry Corps + Chi-Ha Kai 
|
1.2 | ||||||
Army Infantry Corps Army Infantry Corps + Chi-Ha Kai
|
1.55 | ||||||
Improvement | |||||||
|
|
[1 + (Average DLC | ||||||
| |||||||
|
|
1 + (Average | ||||||
| Unknown yet | |||||||
Rations Bonuses
The developers have mentioned that ![]() Rations
Rations

 consumed by a girl "affect landing craft's morale"[1].
| C1 | |||
|---|---|---|---|
| Installation Type | All installations[2] | ||
| Number Equipped | Single | Multiple | |
| Combat Ration
|
1.13 | ?? | |
| Combat Ration (Special Onigiri)
|
?? | ?? | |
| Canned Saury
|
?? | ?? | |
- Notes
- A
 Landing Craft might be required to be equipped on the attacking ship for this bonus to be applied.
 - As it is the only post-cap bonus common to all installations, it has a great potential.
- Due to the limited nature of Rations, this bonus is mostly "Pay To Win", and so is not recommended.
Airstrike And Land-Base Bonus
For the damage formula, please refer to the LBAS and airstrike page. The multiplier is chosen randomly between two values. The chance is roughly 50%.
There are exceptions:
- For
 Torpedo Bomber:
- The
 torpedo stat is counted as 0 in airstrike,
 - The behavior is unclear for LBAS (the damage are overestimated).
- The
- For

 Jets
Jets
 :
:
- There are inconsistencies with the bonuses.
- For the
 Land-Based Heavy Bombers
 :
:
- Could have a higher modifier than other planes.
| [math]\displaystyle{ {\color{tomato}\text{Mod}_\text{Inst}} }[/math][2] | ||||||||
|---|---|---|---|---|---|---|---|---|
| Installation (ID) | Airstrike | LBAS | ||||||
| Low mod | High mod | Low mod | High mod | |||||
Isolated Island Princess (1671-1672) |
2 | |||||||
Artillery Imp (1665-1667) |
1.3? | 1.7 | 1.6 | 2.5 | ||||
"Old" Supply Depot Princesses (1653-1658) |
1.5 | 2.4 | 1.7 | 3.6? | ||||
"New" Supply Depot Princesses (B, C, D, ...) (ID>1658) |
||||||||
Harbour Summer Princess B (2023) |
? | ? | ? | ? | ||||
Installation-Like Warships
This section is for special ships with installation-like behaviors, taking additional damage from anti-installation equipment.
- Those bonuses are post-cap only, meaning none of the "anti-installation bonuses" previously mentioned are applied.
- Be aware that the sample is limited (event only) so the information may be inaccurate and/or old[1].
| Installation-like warships | ||||||||
|---|---|---|---|---|---|---|---|---|
| C | ||||||||
| Installation Type | ||||||||
| Anchorage Water Demon Vacation Mode | Dock Princess | Supply Depot Princess C Vacation Mode | ||||||
| Number Equipped | Single | Multiple | Single | Multiple | Single | Multiple | ||
| Ships | Nagato-class Yamato-class |
1.2 | ||||||
| AA Shells
|
1.45 | 1.3 | ||||||
| WG42 (Wurfgerät 42)
|
1.2 | 1.3 | 1.1 | 1.2 | 1.25 | 1.3 | ||
| Type 4 Anti-Ground Rockets
|
1.15 | 1.4 | ? | 1.2 | 1.4 | |||
| ASW Mortars
|
1.1 | ? | ? | 1.15 | 1.2 | |||
| Dive Bombers | 1.4 | 1.75 | 1.1 | 1.1 | ||||
| Jets | 1.75 | |||||||
| Seaplane Bombers/Fighters | 1.1 | |||||||
| 1.4 | 1.1 | 1.7 | ||||||
| Toku Daihatsu
|
1.15 | 1.2 | ||||||
| DLC + T89 Tank Toku DLC + Ho-Ni Tank
|
1.2 | 1.4 | 1.15 | 1.15 | 1.3 | 1.6 | ||
| DLC + Panzer II
|
1.2 | 1.4 | 1.15 | 1.15 | 1.3 | 1.6 | ||
| M4A1 DD
|
1.8 | 1.1 | 1.2 | |||||
| Armed Daihatsu Soukoutei
|
1.2 | 1.1 | 1.5 | 1.1 | ||||
|
Toku DLC + 11th Reg |
1.4 | |||||||
| Ka-Mi Tank
|
2.4 | 1.35 | 1.2 | 1.2 | 1.7 | 1.5 | ||
| Number Equipped | 1 | 2 | 3 | |||||
| Unknown | 3.15 | 2.35 | 1.2 | |||||
| Type 97 Medium Tank New Turret (Chi-Ha Kai) Army Infantry Corps + Chi-Ha Kai
|
1.2 | |||||||
| Army Infantry Corps Army Infantry Corps + Chi-Ha Kai
|
1.55 | |||||||
Improvement |
|
1 + (Average DLC |
[1 + (Average DLC + (Average Ka-Tsu | |||||
| ||||||||
|
|
1 + (Average | |||||||
| Unknown | ||||||||
- ↑ Updated the 08/09/2022 during the Summer 2022 Event [1].
- The missing bonuses from new equipment can be extrapolated from the other installation bonuses.