- Welcome to the Kancolle Wiki!
- If you have any questions regarding site content, account registration, etc., please visit the KanColle Wiki Discord
Difference between revisions of "User:Chocolatecravinghobo/Sandbox/11/Template"
< User:Chocolatecravinghobo | Sandbox | 11
Jump to navigation
Jump to search
(Removing custom ItemStack) |
(New design testing) |
||
| Line 1: | Line 1: | ||
<includeonly><!--{{#vardefine:type|{{{Type|{{#sub:{{{Use_ID|{{{ID|}}}}}}|0|1}}}}}}}-->{{!}}- style="border-top:2px solid #808080;" {{#if:{{{Bad|}}}|{{Detail|target=lesser}}}} align=center id="{{{ID|}}}" <!--class="q{{#var:type}}"--> | <includeonly><!--{{#vardefine:type|{{{Type|{{#sub:{{{Use_ID|{{{ID|}}}}}}|0|1}}}}}}}-->{{!}}- style="border-top:2px solid #808080;" {{#if:{{{Bad|}}}|{{Detail|target=lesser}}}} align=center id="{{{ID|}}}" <!--class="q{{#var:type}}"--> | ||
| − | !rowspan="{{#if:{{{Warning|}}}|{{#if:{{{ | + | !rowspan="{{#expr: {{#if:{{{Warning|}}}|1|0}}+{{#if:{{{Choice_1_reward_3|}}}|3|2}}+{{#if:{{{Choice_2_reward_3|}}}|3|{{#if:{{{Choice_2_reward_2|}}}|2|0}}}}}}" align=center{{!}}[[Quests#{{{ID}}}|{{{ID}}}]] |
{{#if:{{{Warning|}}}|!align=center colspan=4{{!}}{{color|red|{{{Warning}}}}} | {{#if:{{{Warning|}}}|!align=center colspan=4{{!}}{{color|red|{{{Warning}}}}} | ||
{{!}}- {{#if:{{{Bad|}}}|{{Detail|target=lesser}}}} align=center|}} | {{!}}- {{#if:{{{Bad|}}}|{{Detail|target=lesser}}}} align=center|}} | ||
{{#if:{{{Choice_1_reward_1_color|}}}|{{!}}style="background:{{{Choice_1_reward_1_color}}}"}}{{!}}{{{Choice_1_reward_1|}}} | {{#if:{{{Choice_1_reward_1_color|}}}|{{!}}style="background:{{{Choice_1_reward_1_color}}}"}}{{!}}{{{Choice_1_reward_1|}}} | ||
| + | {{!}}{{{Choice_1_reward_1_value|}}} | ||
| + | {{!}}rowspan="{{#if:{{{Choice_1_reward_3|}}}|3|2}}"{{!}}{{{Choice_1_comment|}}} | ||
| + | {{!}}-{{#if:{{{Bad|}}}|{{Detail|target=lesser}}}} align=center | ||
{{#if:{{{Choice_1_reward_2_color|}}}|{{!}}style="background:{{{Choice_1_reward_2_color}}}"}}{{!}}{{{Choice_1_reward_2|}}} | {{#if:{{{Choice_1_reward_2_color|}}}|{{!}}style="background:{{{Choice_1_reward_2_color}}}"}}{{!}}{{{Choice_1_reward_2|}}} | ||
| − | {{#if:{{{Choice_1_reward_3|}}}|{{#if:{{{Choice_1_reward_3_color|}}}|{{!}}style="background:{{{Choice_1_reward_3_color}}}"}}{{!}}{{{Choice_1_reward_3|} | + | {{!}}{{{Choice_1_reward_2_value|}}} |
| − | {{!}} | + | {{!}}-{{#if:{{{Bad|}}}|{{Detail|target=lesser}}}} align=center |
| + | {{#if:{{{Choice_1_reward_3|}}}|{{#if:{{{Choice_1_reward_3_color|}}}|{{!}}style="background:{{{Choice_1_reward_3_color}}}"}}{{!}}{{{Choice_1_reward_3|}}} | ||
| + | {{!}}{{{Choice_1_reward_3_value|}}} |}} | ||
{{#if:{{{Choice_2_reward_1|}}}|{{!}}-{{#if:{{{Bad|}}}|{{Detail|target=lesser}}}} align=center | {{#if:{{{Choice_2_reward_1|}}}|{{!}}-{{#if:{{{Bad|}}}|{{Detail|target=lesser}}}} align=center | ||
{{#if:{{{Choice_2_reward_1_color|}}}|{{!}}style="background:{{{Choice_2_reward_1_color}}}"}}{{!}}{{{Choice_2_reward_1|}}} | {{#if:{{{Choice_2_reward_1_color|}}}|{{!}}style="background:{{{Choice_2_reward_1_color}}}"}}{{!}}{{{Choice_2_reward_1|}}} | ||
| + | {{!}}{{{Choice_2_reward_1_value|}}} | ||
| + | {{!}}rowspan="{{#if:{{{Choice_2_reward_3|}}}|3|2}}"{{!}}{{{Choice_2_comment|}}} | ||
| + | {{!}}-{{#if:{{{Bad|}}}|{{Detail|target=lesser}}}} align=center | ||
{{#if:{{{Choice_2_reward_2_color|}}}|{{!}}style="background:{{{Choice_2_reward_2_color}}}"}}{{!}}{{{Choice_2_reward_2|}}} | {{#if:{{{Choice_2_reward_2_color|}}}|{{!}}style="background:{{{Choice_2_reward_2_color}}}"}}{{!}}{{{Choice_2_reward_2|}}} | ||
| − | {{#if:{{{Choice_2_reward_3|}}}|{{#if:{{{ | + | {{!}}{{{Choice_2_reward_2_value|}}} |
| − | {{!}} | + | {{#if:{{{Choice_2_reward_3|}}}|{{!}}-{{#if:{{{Bad|}}}|{{Detail|target=lesser}}}} align=center |
| + | {{#if:{{{Choice_2_reward_3_color|}}}|{{!}}style="background:{{{Choice_2_reward_3_color}}}"}}{{!}}{{{Choice_2_reward_3|}}} | ||
| + | {{!}}{{{Choice_2_reward_3_value|}}} |}} | ||
}}</includeonly><noinclude> | }}</includeonly><noinclude> | ||
| − | {| border="1" cellpadding="1" cellspacing="1" class="article-table" | + | {| border="1" cellpadding="1" cellspacing="1" class="article-table" style="margin: auto; min-width: 800px; max-width: 1200px;" |
|- | |- | ||
!align=center colspan=7 style="background:Orange"|Testing Quests {{Detail|button=true|target=lesser|show_text=Showing less important quests|hide_text=Show less important quests|}} | !align=center colspan=7 style="background:Orange"|Testing Quests {{Detail|button=true|target=lesser|show_text=Showing less important quests|hide_text=Show less important quests|}} | ||
| + | |- | ||
| + | !ID | ||
| + | !Rewards | ||
| + | !Reward worth/value | ||
| + | !Notes/Explanation | ||
| + | |- | ||
{{:User:Chocolatecravinghobo/Sandbox/11/Template | {{:User:Chocolatecravinghobo/Sandbox/11/Template | ||
|ID=B132 | |ID=B132 | ||
|Choice_1_reward_1={{QuestRewardEquip|S-51J}} | |Choice_1_reward_1={{QuestRewardEquip|S-51J}} | ||
|Choice_1_reward_1_color=lime | |Choice_1_reward_1_color=lime | ||
| + | |Choice_1_reward_1_value={{IM}}x248<br>{{AvMat}}x7<br>{{Equipment/Card|Ka Type Observation Autogyro|size=30px}}x6 | ||
|Choice_1_reward_2={{QuestRewardItem|Medal|qty=2}} | |Choice_1_reward_2={{QuestRewardItem|Medal|qty=2}} | ||
|Choice_1_reward_2_color=red | |Choice_1_reward_2_color=red | ||
| − | |Choice_1_comment=''' | + | |Choice_1_reward_2_value={{IM}}x8 |
| + | |Choice_1_comment='''Tanaka invented stupid choices to allow a tiny percentage of players to screw themselves over''' | ||
}} | }} | ||
{{:User:Chocolatecravinghobo/Sandbox/11/Template | {{:User:Chocolatecravinghobo/Sandbox/11/Template | ||
| Line 93: | Line 111: | ||
{{:User:Chocolatecravinghobo/Sandbox/11/Template | {{:User:Chocolatecravinghobo/Sandbox/11/Template | ||
|ID=B140 | |ID=B140 | ||
| + | |Bad=a | ||
|Choice_1_reward_1={{QuestRewardEquip|Type 2 Depth Charge|qty=2}} | |Choice_1_reward_1={{QuestRewardEquip|Type 2 Depth Charge|qty=2}} | ||
| − | |Choice_1_reward_1_color= | + | |Choice_1_reward_1_color=khaki |
|Choice_1_reward_2={{QuestRewardEquip|Daihatsu Landing Craft|qty=2}} | |Choice_1_reward_2={{QuestRewardEquip|Daihatsu Landing Craft|qty=2}} | ||
|Choice_1_reward_2_color= | |Choice_1_reward_2_color= | ||
|Choice_1_reward_3={{QuestRewardItem|Furniture Fairy}} | |Choice_1_reward_3={{QuestRewardItem|Furniture Fairy}} | ||
| − | |Choice_1_reward_3_color= | + | |Choice_1_reward_3_color=khaki |
| − | |Choice_1_comment={{Equipment/Link|Type 2 Depth Charge}} are | + | |Choice_1_comment={{Equipment/Link|Type 2 Depth Charge}} are worth grabbing if you have less than 6, otherwise its an easy Furniture Fairy. |
}} | }} | ||
{{:User:Chocolatecravinghobo/Sandbox/11/Template | {{:User:Chocolatecravinghobo/Sandbox/11/Template | ||
| Line 107: | Line 126: | ||
|Choice_1_reward_2={{QuestRewardEquip|Type D Kouhyouteki Kai (Kouryuu Kai)}} | |Choice_1_reward_2={{QuestRewardEquip|Type D Kouhyouteki Kai (Kouryuu Kai)}} | ||
|Choice_1_reward_2_color=lime | |Choice_1_reward_2_color=lime | ||
| + | |Choice_1_reward_2_value=Priceless | ||
|Choice_1_reward_3={{QuestRewardItem|Improvement Material|qty=6}} | |Choice_1_reward_3={{QuestRewardItem|Improvement Material|qty=6}} | ||
|Choice_1_reward_3_color=red | |Choice_1_reward_3_color=red | ||
| Line 143: | Line 163: | ||
|Choice_2_reward_1={{QuestRewardEquip|Prototype Toukai}} | |Choice_2_reward_1={{QuestRewardEquip|Prototype Toukai}} | ||
|Choice_2_reward_1_color=lime | |Choice_2_reward_1_color=lime | ||
| + | |Choice_2_reward_1_value=Priceless<br>(if less than 4) | ||
|Choice_2_reward_2={{QuestRewardEquip|Prototype Keiun (Carrier-based Reconnaissance Model)}} | |Choice_2_reward_2={{QuestRewardEquip|Prototype Keiun (Carrier-based Reconnaissance Model)}} | ||
|Choice_2_reward_2_color=khaki | |Choice_2_reward_2_color=khaki | ||
| Line 157: | Line 178: | ||
|Choice_2_reward_1={{QuestRewardEquip|Type 0 Reconnaissance Seaplane Model 11B|stars=2}} | |Choice_2_reward_1={{QuestRewardEquip|Type 0 Reconnaissance Seaplane Model 11B|stars=2}} | ||
|Choice_2_reward_1_color=khaki | |Choice_2_reward_1_color=khaki | ||
| + | |Choice_2_reward_1_value={{BP}}x1<br>{{IM}}x8<br>343,400 XP | ||
|Choice_2_reward_2={{QuestRewardEquip|New Kanhon Design Anti-torpedo Bulge (Large)|stars=2}} | |Choice_2_reward_2={{QuestRewardEquip|New Kanhon Design Anti-torpedo Bulge (Large)|stars=2}} | ||
|Choice_2_reward_2_color=lime | |Choice_2_reward_2_color=lime | ||
| + | |Choice_2_reward_2_value={{IM}}x72 | ||
|Choice_2_reward_3={{QuestRewardItem|Action Report}} | |Choice_2_reward_3={{QuestRewardItem|Action Report}} | ||
|Choice_2_reward_3_color= | |Choice_2_reward_3_color= | ||
| Line 166: | Line 189: | ||
|ID=B145 | |ID=B145 | ||
|Choice_1_reward_1={{QuestRewardEquip|Swordfish (Seaplane Model)|qty=2}} | |Choice_1_reward_1={{QuestRewardEquip|Swordfish (Seaplane Model)|qty=2}} | ||
| − | |Choice_1_reward_1_color= | + | |Choice_1_reward_1_color=red |
| + | |Choice_1_reward_1_value={{colour|red|'''Negative value'''<br>{{IM}}x117-170<br>{{AvMat}}x4-6<br>{{SCM}}x3-4}} | ||
|Choice_1_reward_2={{QuestRewardEquip|S9 Osprey|qty=2}} | |Choice_1_reward_2={{QuestRewardEquip|S9 Osprey|qty=2}} | ||
|Choice_1_reward_2_color=red | |Choice_1_reward_2_color=red | ||
|Choice_1_reward_3={{QuestRewardEquip|Swordfish Mk.III Kai (Seaplane Model)}} | |Choice_1_reward_3={{QuestRewardEquip|Swordfish Mk.III Kai (Seaplane Model)}} | ||
|Choice_1_reward_3_color=lime | |Choice_1_reward_3_color=lime | ||
| − | |Choice_1_comment=Can be a very tough decision for you to evaluate.<br><br>Picking the single {{Equipment/Link|Swordfish Mk.III Kai (Seaplane Model)}} immediately gets you a good equip and doesn't cost any screws.<br><br>Picking the two {{Equipment/Link|Swordfish (Seaplane Model)}} allows you to eventually double the equipment worth you get, but requires a hefty screw investment.<br>You'll end up converting both to {{Equipment/Link|Swordfish Mk.II Kai (Reconnaissance Seaplane Model)}}, and from there use one or both to convert {{Equipment/Link|S9 Osprey}}(consumes the SwordfishMK.II) to {{Equipment/Link|Swordfish Mk.III Kai (Seaplane Model)}}.<br>Note: This quest is currently the only way to obtain {{Equipment/Link|Swordfish (Seaplane Model)}}. | + | |Choice_1_reward_3_value={{IM}}x85<br>{{AvMat}}x3<br>{{SCM}}x2 |
| + | |Choice_1_comment=Can be a very tough decision for you to evaluate.<br><br>Picking the single {{Equipment/Link|Swordfish Mk.III Kai (Seaplane Model)}} immediately gets you a good equip and doesn't cost any screws.<br><br>Picking the two {{Equipment/Link|Swordfish (Seaplane Model)}} allows you to eventually double the equipment worth you get, but requires a hefty screw investment.<br>You'll end up converting both to {{Equipment/Link|Swordfish Mk.II Kai (Reconnaissance Seaplane Model)}}, and from there use one or both to convert {{Equipment/Link|S9 Osprey}}(consumes the SwordfishMK.II) to {{Equipment/Link|Swordfish Mk.III Kai (Seaplane Model)}}.<br><br>Note: This quest is currently the only way to obtain {{Equipment/Link|Swordfish (Seaplane Model)}}, though in the future other ways may be added. | ||
|Choice_2_reward_1={{QuestRewardItem|Improvement Material|qty=4}} | |Choice_2_reward_1={{QuestRewardItem|Improvement Material|qty=4}} | ||
Revision as of 16:28, 6 November 2021
| Testing Quests ☑ Showing less important quests ☒ Show less important quests | ||||||
|---|---|---|---|---|---|---|
| ID | Rewards | Reward worth/value | Notes/Explanation | |||
| B132 | Tanaka invented stupid choices to allow a tiny percentage of players to screw themselves over | |||||
| B133 | ||||||
| B134 | Easy holepunch. | |||||
| B135 | ||||||
| B136 | Easy Furniture. | |||||
| B137 | ||||||
| B138 | Easy holepunch. | |||||
| B140 | Type 2 Depth Charge are worth grabbing if you have less than 6, otherwise its an easy Furniture Fairy. are worth grabbing if you have less than 6, otherwise its an easy Furniture Fairy.
| |||||
| B141 | SHOULD NOT BE A CHOICE QUEST | |||||
| Priceless | ||||||
| B142 | Free Underway Replenishment, grab buckets if you think you have far too many. | |||||
| Furniturecolle NewRocketMats for those who don't care for furniture. | ||||||
| B143 | If you have 4 or more Tokai, consider not completing this quest until a later date | |||||
| Free Underway Replenishment, grab buckets if you think you have far too many. | ||||||
| Priceless (if less than 4) |
Take Prototype Toukai if you have less than 4. If you have more than 4, I'd recommend leaving this quest for a later date to see if you need any or if one option suddenly becomes more useful. However if you've already completed the quest and need to turn it in, a 5th Toukai could be a niche option for LBAS regarding subs at preboss and one at boss. Prototype Keiun allows you to make a 3rd jet if you somehow have materials for it, though likely wouldn't be very useful. Or you could gamble that Prototype Keiun will be needed/useful for future jet equipment. | |||||
| B144 | SHOULD NOT BE A CHOICE QUEST | |||||
343,400 XP |
Note, this is the non-skilled 11B. YuraK2 also has it as stock. The bulge is the far better option here in sheer screw cost. If you want more 11B, dupe Yura. | |||||
| B145 | Negative value |
Can be a very tough decision for you to evaluate. Picking the single Swordfish Mk.III Kai (Seaplane Model)  immediately gets you a good equip and doesn't cost any screws. immediately gets you a good equip and doesn't cost any screws.Picking the two Swordfish (Seaplane Model)  allows you to eventually double the equipment worth you get, but requires a hefty screw investment. allows you to eventually double the equipment worth you get, but requires a hefty screw investment.You'll end up converting both to Swordfish Mk.II Kai (Reconnaissance Seaplane Model)  , and from there use one or both to convert S9 Osprey , and from there use one or both to convert S9 Osprey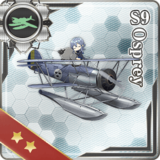 (consumes the SwordfishMK.II) to Swordfish Mk.III Kai (Seaplane Model) (consumes the SwordfishMK.II) to Swordfish Mk.III Kai (Seaplane Model) . .Note: This quest is currently the only way to obtain Swordfish (Seaplane Model)  , though in the future other ways may be added. , though in the future other ways may be added.
| ||||
| Easy holepunch. | ||||||


